3D Printed Neon Sign: How To Make One in 3 Easy Steps

Elevate your space with LEDs that show off style and creativity. Check out all you need to know about creating your own 3D printed neon sign!
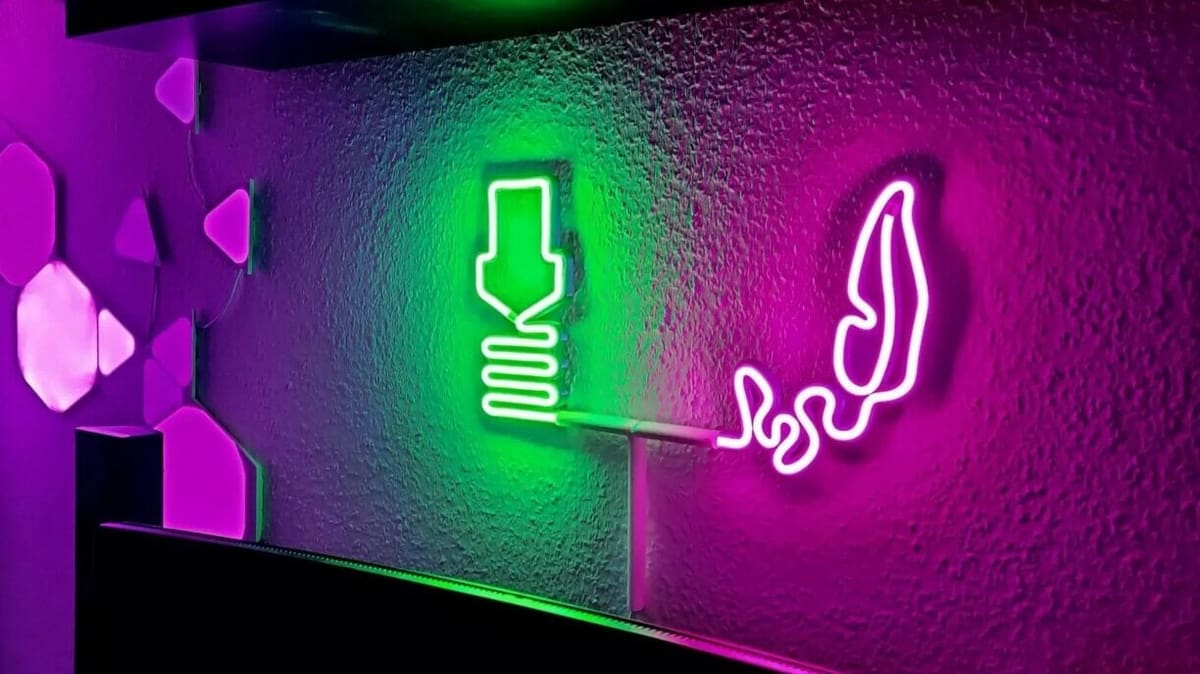
Neon signs are traditionally high-voltage lighting systems consisting of a glass tube with a gas that glows with electric current. These were extremely popular in the US from the 1920s to the 1950s but nowadays are better known for their cool retro aesthetic, which may have led you to this article.
Without going too far into it, the construction of a neon light involves high voltages, noble gases, mercury vapor, and phosphorous. You may be wondering how we could possibly safely 3D print a glass tube full of mercury vapors. The answer is, we couldn’t. Instead, we’re going to simulate the effect of a neon light using a bunch of LEDs and a special lens known as a “diffuser”.
A 3D printed “neon” light is much safer than traditional glass lights as it’s harder to break, doesn’t release mercury fumes if you do break it, and can run off significantly lower voltages. You also have the benefit of being able to reshape it into a new form to fit your evolving aesthetic.
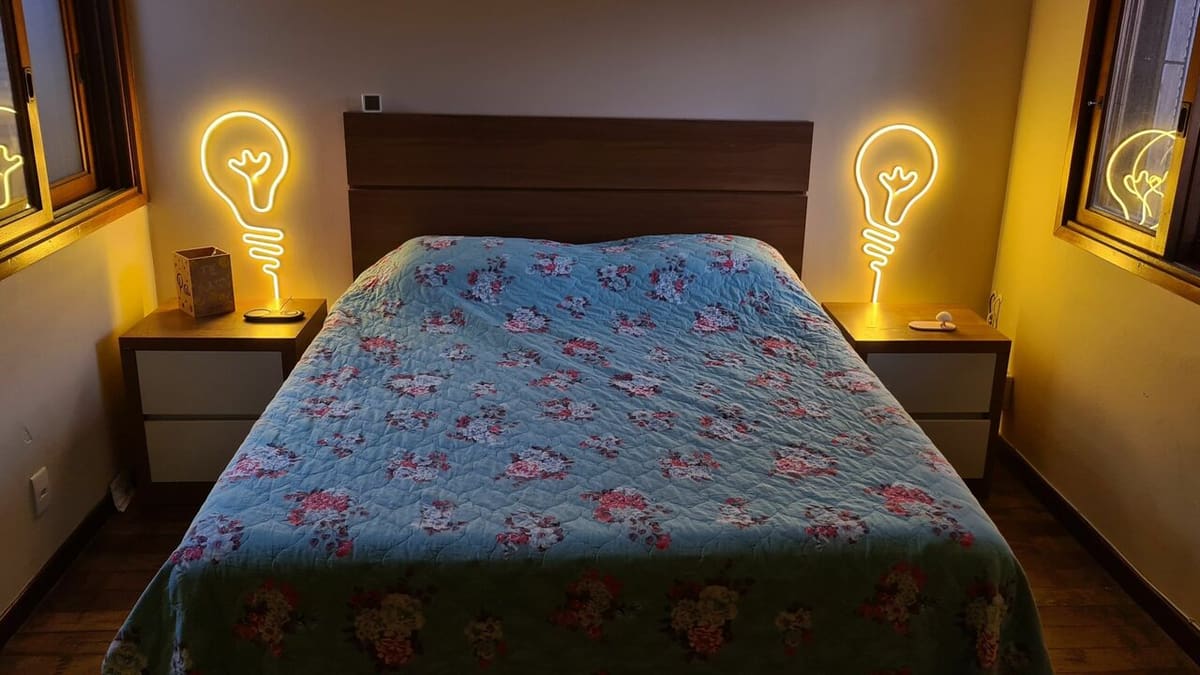
You might be drawn to the sign above the door to a store or bar, or the funky cursive sign at someone’s wedding, or maybe you just want a little interesting desk light. With 3D printing and some creativity, the possibilities are truly endless.
In this article, we aim to give you the basics of the design and construction of a neon-style LED sign. We’ll cover what you’ll need to make a lamp, the considerations you’ll need to make when designing one, and a brief overview of construction. There is a lot to unpack, so let’s get started with the necessities!

What You'll Need
There are two main components to this build: the lights (including the wiring and electronics) and the 3D printed parts. With both components, you have tons of options for customization and creativity!
The Lights
We’ll lay down three great options for lights, but if you’re looking for fancy flashing effects, you could opt for NeoPixels and a microcontroller. However, this is somewhat beyond the scope of this article. For a detailed tutorial on how to control lighting with a microcontroller, check out Adafruit’s NeoPixel tutorials or So Much Science on YouTube. Here are a few of the best options:
LED Strip and Diffuser
One of the most readily available, albeit more complicated, options is an LED strip, which is a flexible PCB with LEDs soldered on at intervals. These are usually in groups with a current limiting resistor per group (which is important when it comes time to cut the LED strips to size).
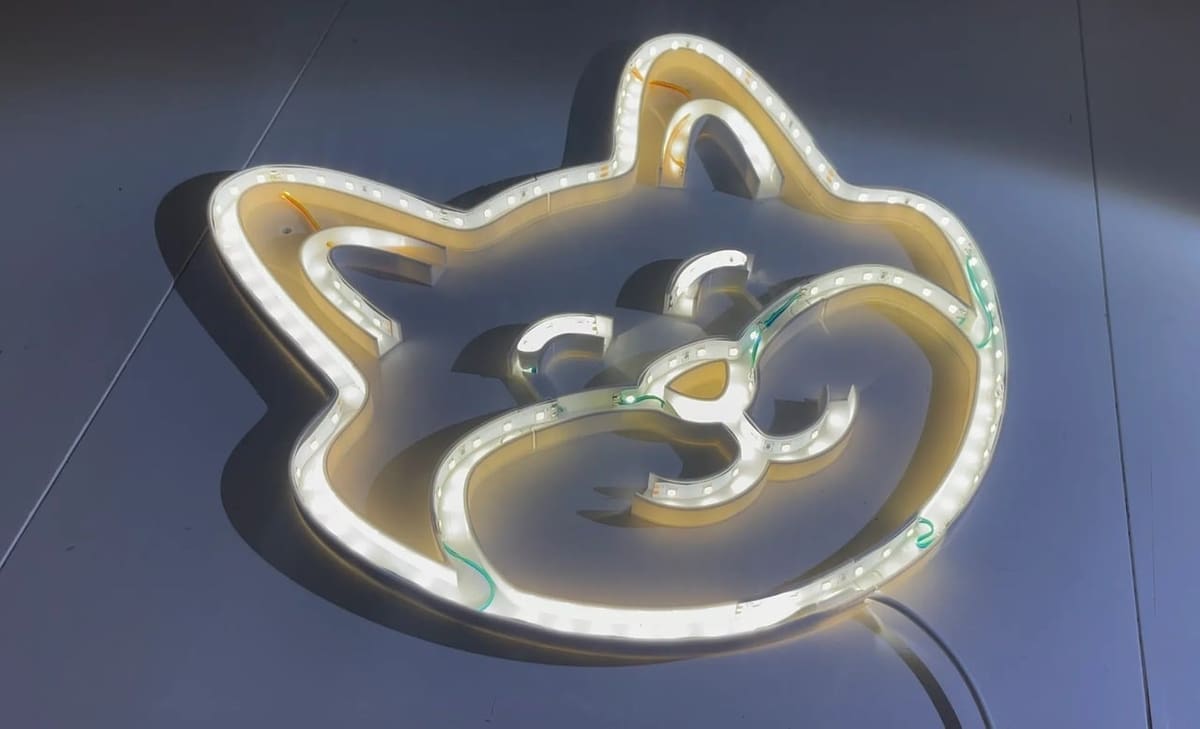
To turn the series of point lights in an LED string into a continuous soft glow, you’ll also need a diffuser. This can be a purchasable translucent plastic cover for LED strips or, depending on the design of your light, a printable cover. Check out the Ice Cream lamp from HammerTech for inspiration on the latter approach.
You may have to do some experimenting before you assemble the final light to ensure you get the glow you’re going for. A diffuser should be opaque enough to scatter the light, but not at a significant sacrifice to brightness. Light strips with a high LED count can counterbalance very opaque diffusers. The distance between the lights and the diffuser will play a big role in how “glowy” the light looks.
El-Wire
One of the easiest options is to use electroluminescent wire, also called “El-wire”, which is often sold as glowing accents for cosplay and Halloween costumes. These wires are limited to a maximum thickness of 5 mm and aren’t easily dimmable or connected to a microcontroller. El-Wire will be dimmer compared to LEDs, but it has continuous light along its length, so it doesn’t require a diffuser. You can also cut it to any length, as long as the end gets sealed with an end cap or glue to protect it from moisture.
Neon Rope
Finally, you can also opt for neon rope, which is essentially an LED strip and diffuser in one. This takes the hassle out of trying to figure out if your LEDs are dense enough for your diffuser. However, they’re bulkier and can be more of a hassle to patch together if you have such intentions. The Hook Up on YouTube has an excellent comparison of neon ropes that can help you get started.
3D Printed Parts
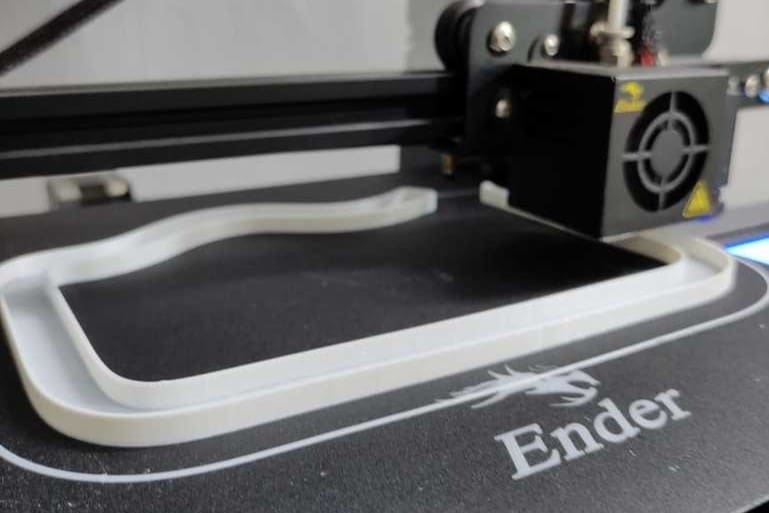
The last thing we need is something to hold our LED strip and diffuser combo in the sign shape we want. This can be as simple as tying the assembled “neon” light to a grid, but 3D printing can make this much easier. In the next section, we’ll design a casing to mount the LED strips into your ideal design. All you’ll need is a 3D printer, some filament, and a 3D modeling program.
For the filament, we recommend using PETG as it has good heat resistance. PLA might be suitable as long as you’re not running your lamps for long periods, but it could easily melt if the lights get warm to the touch. Darker colors are best for the base of the design as they can block light from coming through the sides.
Step 1. Creating the Model
Before designing your lamp, you’ll need to get familiar with the lighting option you choose. Here’s what you should be aware of before you sit down in front of a CAD program.
Design Considerations
Firstly, you’ll need to evaluate how much your light strips can bend without wrinkling or breaking. This is the minimum bend radius! Keep this in mind when designing the printable casing. For some bought diffuser or neon rope options, you can sharpen the bend radius in places by cutting a small wedge of diffuser out along the inside edge, taking care not to damage your light strip.
Secondly, measure the width and height of your light carefully! You may need to add a little clearance into your design to allow the lamp to sit in snugly without being crushed, particularly in the corners where the rubbery skin might bulge a little. We suggest printing a small curved section first and performing a test fit. This could save you hours of printing time and a lot of plastic! It will also tell you if your bend radius is correct.
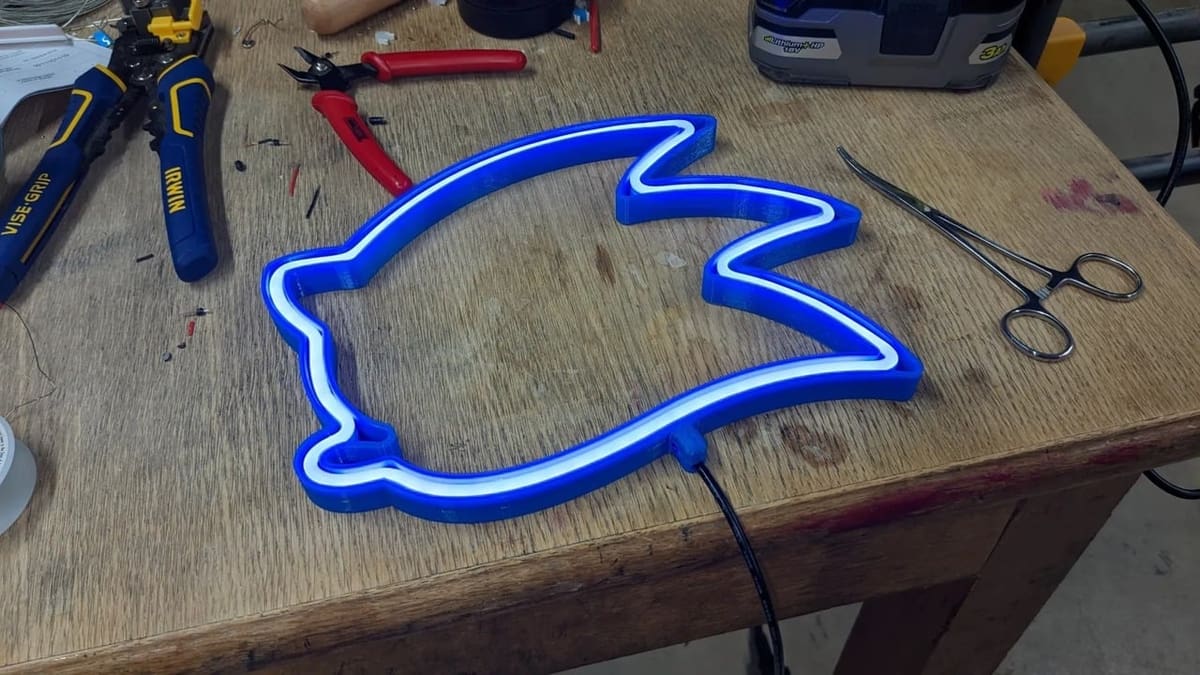
Lastly, the assembly will be much simpler if your design is completely continuous and requires one color of light. This is because each time there is a branch or a break in the continuous run of light, you’ll need to run wiring to that section, which may involve soldering. You may run into this issue with lettering, so go for a cursive style to minimize breaks.
3D Modeling
So, how do we go about designing our sign? You could just download someone else’s design, as there are already many cool options out there, such as a coffee mug by trutgers, a light bulb by Navoter, or a gear by Zombie Batman. Just be sure to check if your lights will fit into the channels of the design.
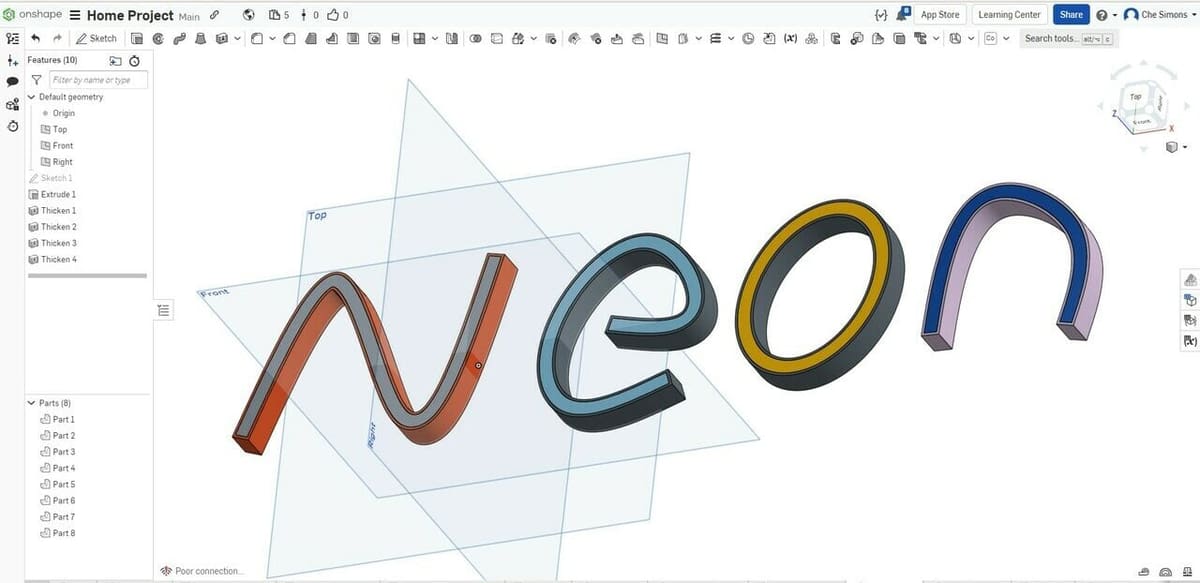
If you want to design your own custom sign, the process will be pretty straightforward if you’re already familiar with a CAD program. We’ll discuss the core steps using OnShape, but it would be similar in Fusion 360, Inventor, SolidWorks, or any other 3D CAD program. We chose OnShape because it has very low barriers to entry, requiring only an internet connection and a free account. If you’ve never used OnShape, we have a tutorial to get you up and running.
The 3D model is essentially a large channel to hold the LED strips. Unless you want to freehand the design, it’s recommended to trace an image as the starting point of the model. Here’s the general workflow:
- In the OnShape dashboard, import the image using the “Create” menu, select “Import files”, and choose your desired image.
- Create a new OnShape document from the “Create” menu and select the “Top” plane. In the Header bar, select “Sketch”. With the new Sketch selected, head over to the “Insert Image” option in the header bar and find your recently uploaded Image in the “Other Documents” tab.
- Place your image on the Sketch plane by clicking and dragging. Resize your image to your desired scale. You can do so by creating a reference line across the height or width of the design. Then press “D” on the keyboard and select the reference line to enter your desired dimensions. Teaching Tech has a great video on YouTube that demonstrates dimensioning for real objects in OnShape.
- Trace the elements of the sketch you want to recreate using splines and other sketch tools. Once you have a single line traced, use the “Offset” tool to duplicate the line at a defined distance away from the original shape. This distance should be the width of your lights plus two times your desired wall thickness, with some tolerance. A wall thickness of 1.2 mm (3 lines for a 0.4-mm nozzle) is a good starting point.
- Once we have our curved path, simply use the “Extrude” tool to create a 3D object that is the thickness of your lamp. You can then use the “Shell” tool to form the channel.
- Add holes in the walls to insert the lights. Do the same at any other location of discontinuity.
If you’re printing your diffuser, you’ll also need to draw the matching part. Thao Le on YouTube has an excellent tutorial on creating snap-fit parts for 3D printing that’s worth checking out if you’re going for this type of design. You’ll only want the diffuser layer to be one or two layers thick so ample light can still shine through.
Once you’re happy with the final design, save and export the model for transfer to your favorite slicer program!
Step 2. Assembly
The first thing you should do prior to printing is ensure that your LEDs don’t get warm to the touch when left running for a few hours. If they do, make sure none of the LEDs are faulty or consider alternative light options as you could run the risk of damaging your printed channel.
Once you’re happy with your 3D model and lighting choice, it’s time to print the parts! As long as your build plate is large enough, you can print the whole piece with the channel facing up (otherwise, you’ll have to break the design into a few pieces in the CAD software). To totally block light from coming out of the sides and backside, use at least four walls. For pieces that are meant to let light pass, go for two walls.
When you have your parts printed, join them all with glue into one single channel if needed. Now, place the light strips over the channel (no need to secure them into a final position yet) to gauge how long the strip needs to be. Be sure to orient the lights in a way in which you can hide the cables going to each section of the lamp.
If the LED strip is too long or you need an offshoot (e.g. for the crossbar of a “t”), find where one LED group and the next meet (usually this will look like a few exposed copper pads), and make a cut there being sure to leave enough copper on both pieces to solder wires to later, if necessary. For wiring that goes beyond cutting for length, check out the next section for a few tips!
Before the final assembly, it’s not a bad idea to let the lights run for a few hours after cutting to ensure they work as expected. Finally, slide your LED strip into the channel. Once you’re happy with the fit, you can glue your lamp into the light if it needs it. We recommend using minimal adhesive as this will make it easier to reuse the lights for a new design in the future.
Step 3. Wiring

When building any electrically operated item, you should pay careful attention to the power needs of the item. The wrong mix of electrical energy can have broad effects, from nothing at all happening to starting a fire!
To simplify things, we’re going to assume that you’re using a light strip with its own power supply that’s been designed to match the LEDs you’ve purchased. If you’re building a more advanced project, we recommend checking out this tutorial on LEDY and doing the math to ensure your power supply has enough grunt to power your LEDs without causing damage to them.
To connect cut strips of LEDs, you’ll need to solder wires between the exposed copper pads of each strip. Depending on the type of LED you purchased, you may need two or four connecting wires. Check out the video by Parts Express for a demonstration of this process.
Alternatively, for those not comfortable with soldering, you can purchase preassembled connector kits so you only need to clip the strips together. Just be sure to get a connector set with the same number of pins as your strip and keep in mind these connectors make the strips bulker.
Finally, connect the power supply, turn it on, and enjoy the lovely ambiance!
License: The text of "3D Printed Neon Sign: How To Make One in 3 Easy Steps" by All3DP is licensed under a Creative Commons Attribution 4.0 International License.