How to 3D Print Your WoW Character in 3 Easy Steps

Bring your WoW character into this world. Read on to see how to 3D print WoW characters, pauldrons and all!
Method
3D printing is turning fandom merchandising on its head. From D&D minis through anime figurines to outright toys, it seems you can print anything from your favorite franchise.
World of Warcraft (WoW) is no different. Regardless of the franchise, there are various methods to print favorite characters or player avatars. If you want to go that route, you can use Hero Forge models or contract freelancers to make a printable render from the ground up in ZBrush.
Yet, there’s another method that doesn’t rely on 3D art skills or make-your-own model sites, and best of all, it’s free! Using a program called WoW Model Viewer, you can extract character data, fix errors in 3D Builder or Meshmixer, run it through a slicer, and print. Simple? Yes. Easy? Mostly. That’s why we wrote this guide, to help you through every step on the way.
By the way, if you don’t have a printer but really want your character on your desk, check out Craftcloud. For the best price out there, professionals will be printing to your specifications and shipping to your door.
Otherwise, let’s get started!
What You'll Need

This workflow runs through multiple programs, but it’s quite simple. You’ll need the following programs ready to go:
- World of Warcraft: If you’ve let your account lapse, you’ll need to download, install, and run World of Warcraft. The linked website will install the Blizzard downloader, allowing you to choose which game you want to install. For our purposes, it’s World of Warcraft. (Accounts that have been dormant for a while need to be refreshed before WoW Model Viewer can load their assets. For whatever character you’re interested in, simply log in, then log back out.)
- WoW Model Viewer: Install the latest version (Shadowlands) of WoW Model Viewer, a free program that allows you to load character assets from the World of Warcraft folder on your hard drive.
- 3D Builder: Install Microsoft 3D Builder if it isn’t on your computer, which is a simple 3D file editor that can export to the OBJ file format. If you aren’t on a Windows computer, you can use a file converter to get an STL. There are lots of good options! If you need fixing of your model, there’s the aforementioned Meshmixer, too.
- 3D slicer: If you have an FDM printer, you’ll need a slicer that works with FDM machines. (We’ll be using Cura as the example in this article, though the process should be similar in other slicers). If you have a resin printer, you’ll need a slicer that supports your machine. (In this article, we’ll be using Lychee as an example.)
Once everything is installed, it’s time to open up Model Viewer!
Step 1: Importing to WoW Model Viewer
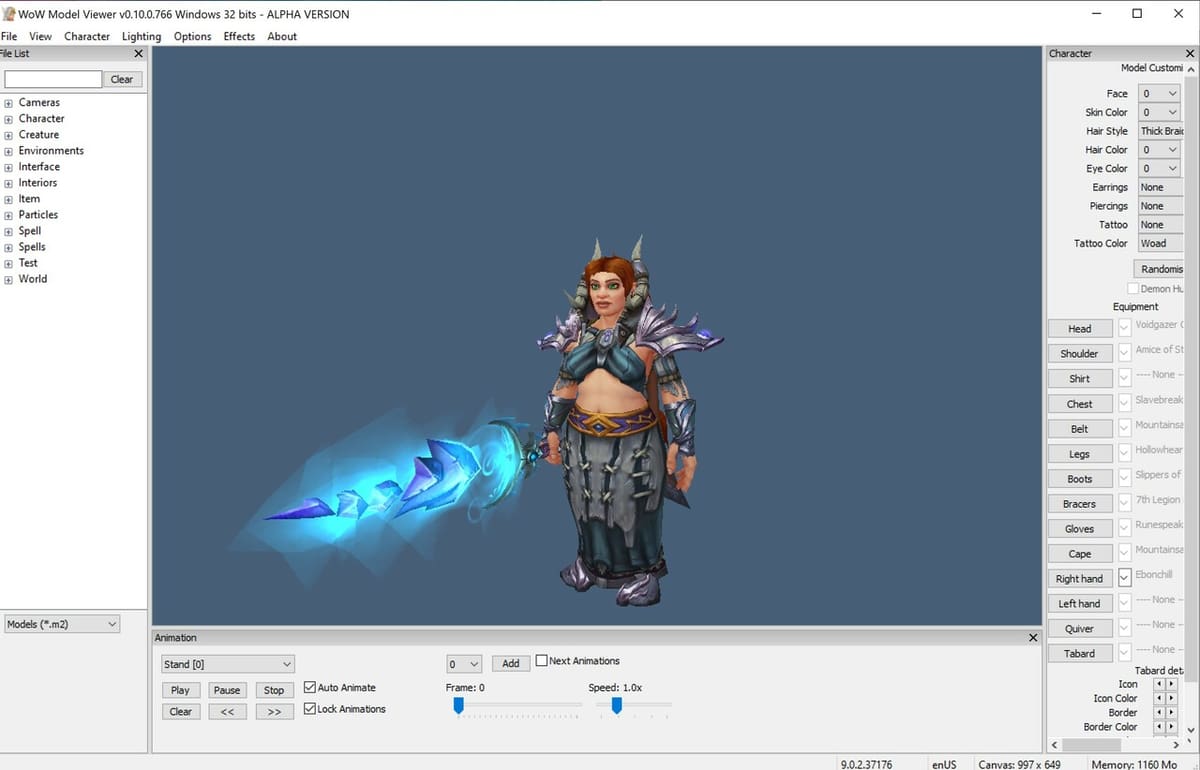
When running Model Viewer for the first time, you’ll be prompted to load your World of Warcraft data. Find the appropriate program folder on your computer, then find the “data” folder inside it. This will give you access to the library of character accessories (weapons, armors, items, mounts, even generic character models), allowing you to build a character and outfit them as you like, from the ground up.
However, we’re looking for the specific character model that we use to play the game. Here’s how to get it:
- Open a web browser and go to the World of Warcraft website. If you’re logged in, you should see one of your characters in the top right corner of the screen beside the “Subscribe” button.
- Click on your character to bring up that character’s Armory page (or select another character in the dropdown menu). The Armory lists every player character, their armor, weapons, and most importantly, their character model.
- Copy the URL of the Armory page.
- Back in the WoW Model Viewer, go to “Character” in the top left corner, select “Import Armory Character”, and paste the URL.
- Once your character loads, you can swap out armor and items, change their features, and even run them through various animations, pausing when you get to a pose you like. Keep in mind that some of these options are harder to print, but if you enjoy a challenge, go to it!
- When you’re satisfied, go to “File > Export” and select OBJ. (We’ll turn it into an STL file in the next step.)
Step 2: Cleaning Up in 3D Builder
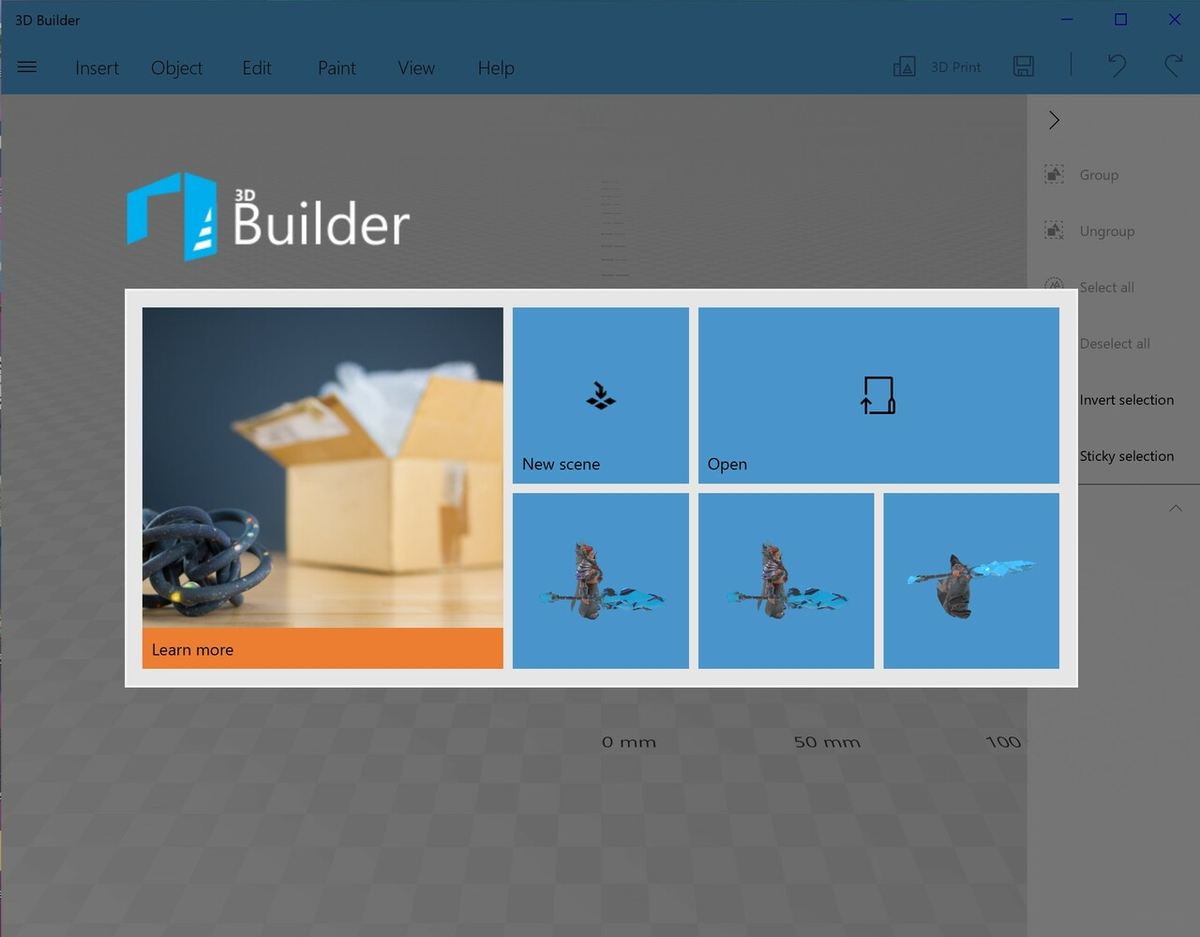
Model Viewer is a nifty program, but it’s not designed to create 3D printable files. As such, we need something to convert and clean up our OBJ file. As mentioned before, if you aren’t on a Windows computer, there are other options for obtaining an STL.
Sticking to the running them in this article, 3D Builder does exactly what it says: It allows you to make, edit, and export OBJ and STL files. While it lacks the powerful options of programs like Meshmixer, it’s the simplest to pick up and use, making it ideal for our purposes. On the welcome screen, click “Open Object” and select the file you just made.
Potential Issues & Fixes
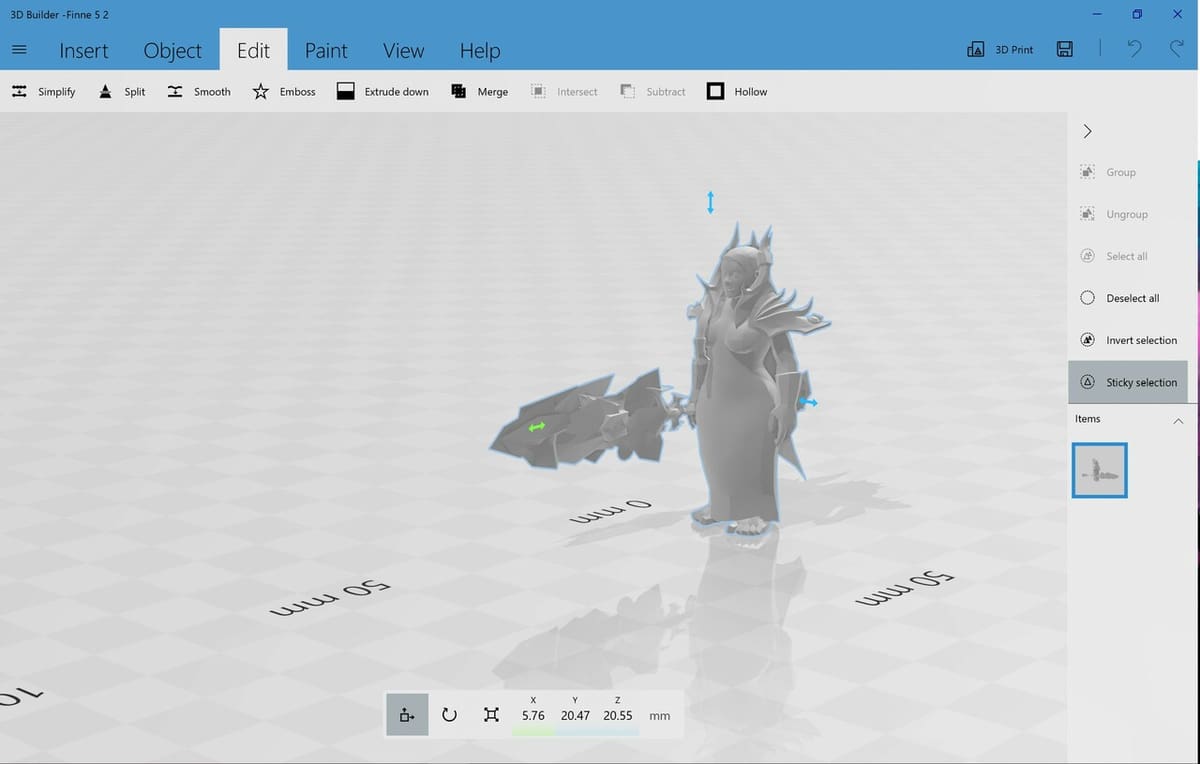
- The object is non-manifold (unprintable): This is shown by a red rectangle around the object. Click the repair button in the bottom right-hand corner of the screen and wait for it to finish.
- The object is tiny: The average Warcraft character is about 2.5 mm tall. To fix this, select the scale button below the object. There are two settings: one in mm and the other in %. Use these to increase the original’s size by 100% (achieving close to 25 mm).
- The object is cut off: Often the bottom half of the character is underneath the “floor” of the program. Select the movement button and drag it until the feet are resting on the floor.
Once you’ve fixed your file, “Save as” an STL file.
Step 3: Slicing & Printing
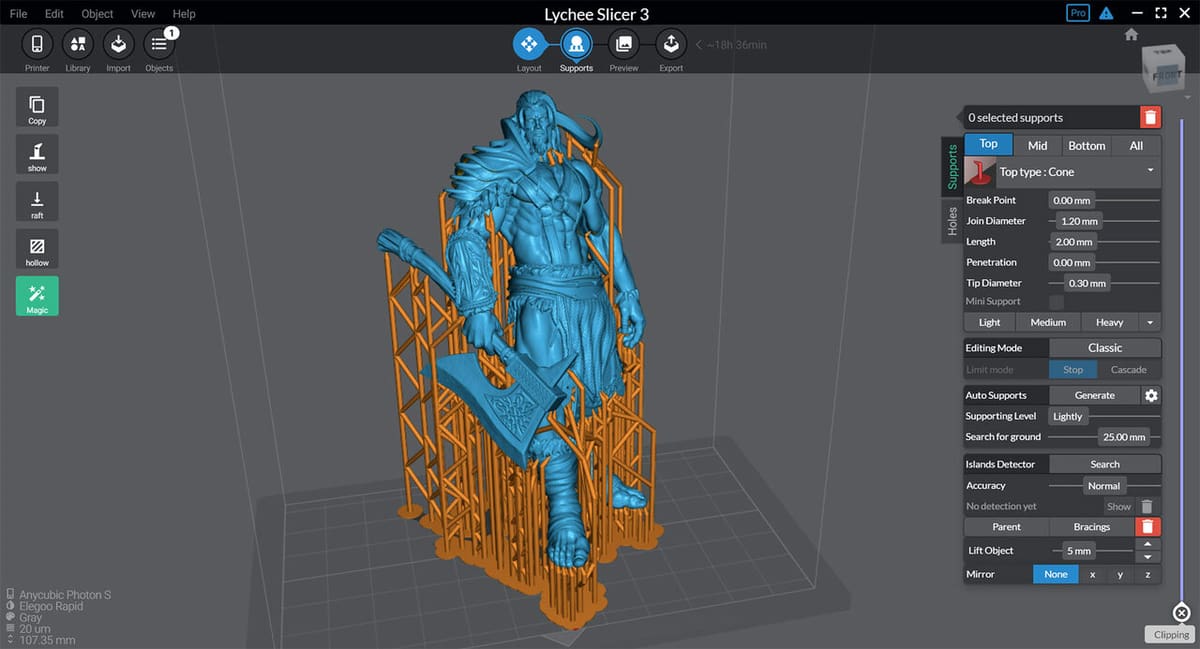
Slicer programs instruct the printer on how to print the STL file. As we’ve mentioned, for FDM printing, we’ll be running through some settings in Cura, though they should be similar if you’re using another slicer. For resin printers, we’ll be demonstrating how best to print your WoW character in Lychee slicer.
Printing with an FDM Printer
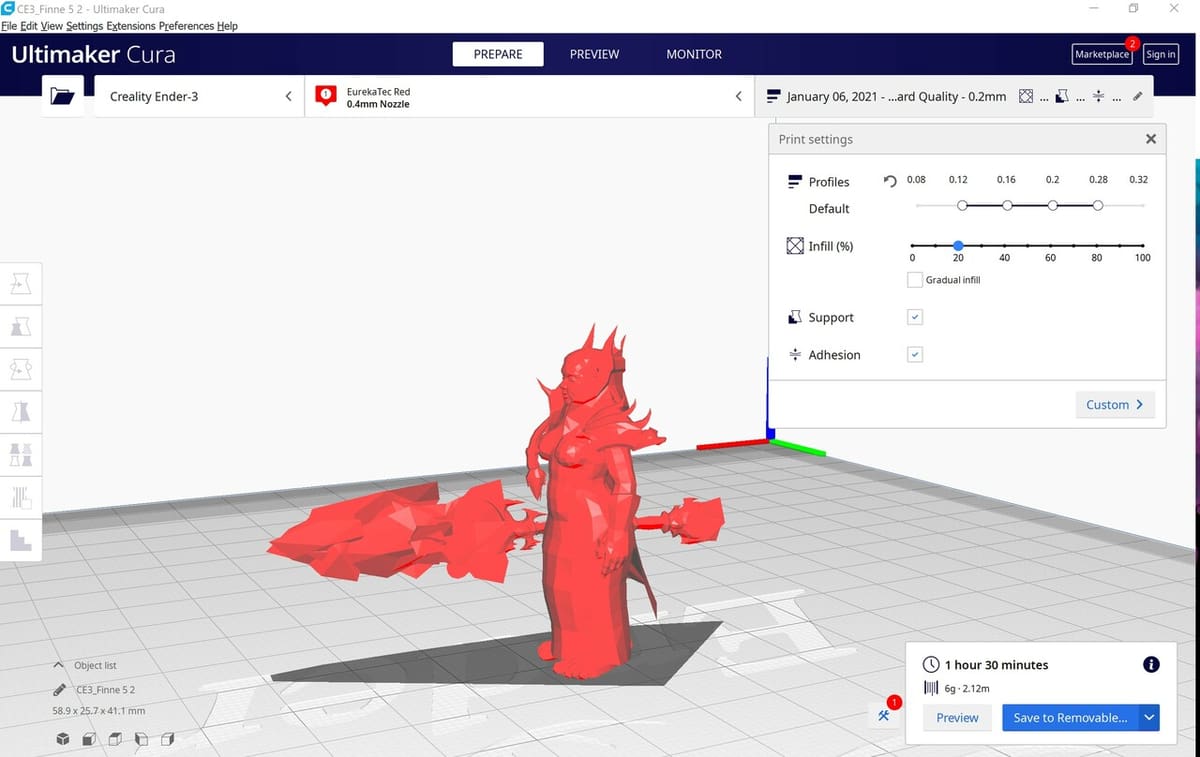
Cura is a popular choice for slicing on FDM printers, as it’s free, powerful, and beginner-friendly. If you’re new to Cura or need a refresher, here’s an excellent tutorial.
For this project, just keep a few points in mind:
- Walls: Complementing infill, these are the exterior of your model. Adjusting their settings from the default values shouldn’t be necessary unless you want to save on infill.
- Infill: Dealing with a small, non-functional part, you can probably get away with 15-20% infill. However, depending on the nature of the model and how your character is posed, you may want to fine-tune particular settings.
- Supports: It’s crucial to activate these if your model features any significant overhangs or unsupported parts, like an outward-facing weapon (which is likely comically large). Once activated, go with the default support settings unless you have some idea as to which adjustments might be necessary.
- Post-processing: Make your model look as good as possible by smoothing and painting it!
The above is just a crash course. Worth a read is our entire article on how to print high-quality mini figurines using an FDM printer.
Printing with an SLA Printer
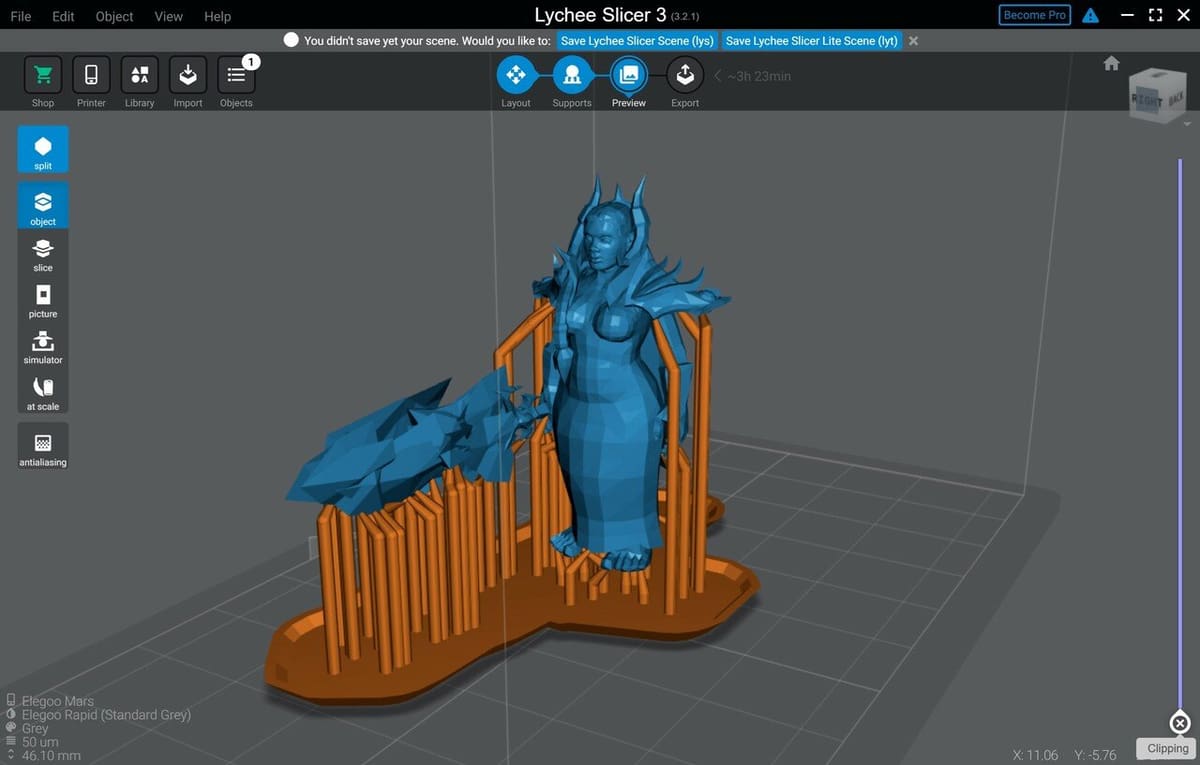
Like Cura, Lychee is a free and comprehensive slicer. Never used it? For that, we have an article on how to get started slicing in Lychee.
When working with resin prints, there are a few key points to be aware of:
- Orientation: Since your build plate is (likely) upside down, your print will be too. To accommodate your hanging model, Lychee should help you find the best orientation.
- Supports: While you might be able to get away with fewer to no supports with an FDM printer, they’re crucial to your success here. More supports are better to start with; you can clip away extra supports, but you can’t add them after an arm fails to print.
- Holes: Something unique to resin printing is the need to drain the print of excess resin. This is accomplished by putting holes in inconspicuous places on the figure, such as the underside of feet or coats. You’ll find the Holes sub-menu in the Supports section of Lychee.
- Post–processing: This is probably the most important step, as it will further solidify your model and make it safe to handle with bare hands, rather than latex gloves. Here are the best ways to go post-processing your resin print.
Community Support
If you’re looking for more guidance, here are some places that can help:
- WoW Model Viewer Discord
- Chuck Hellebuyck’s Cura tutorials (YouTube)
- Official Lychee tutorials (YouTube)
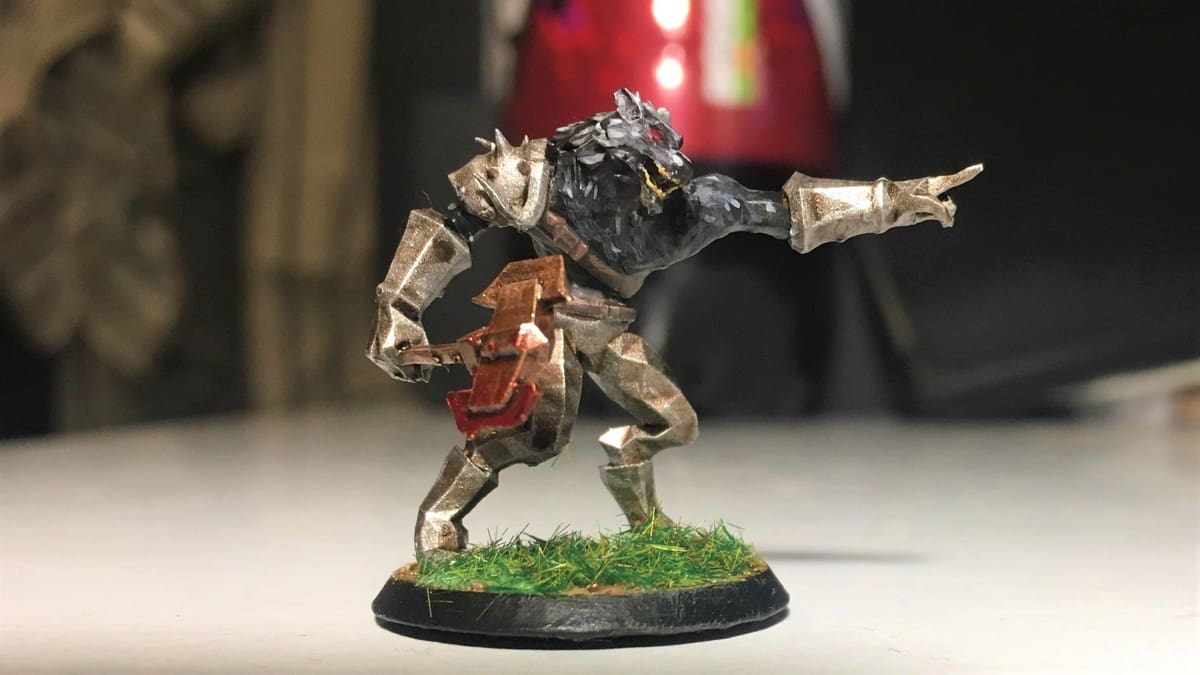
Lead image source: Karabungulus via Reddit
License: The text of "How to 3D Print Your WoW Character in 3 Easy Steps" by All3DP is licensed under a Creative Commons Attribution 4.0 International License.