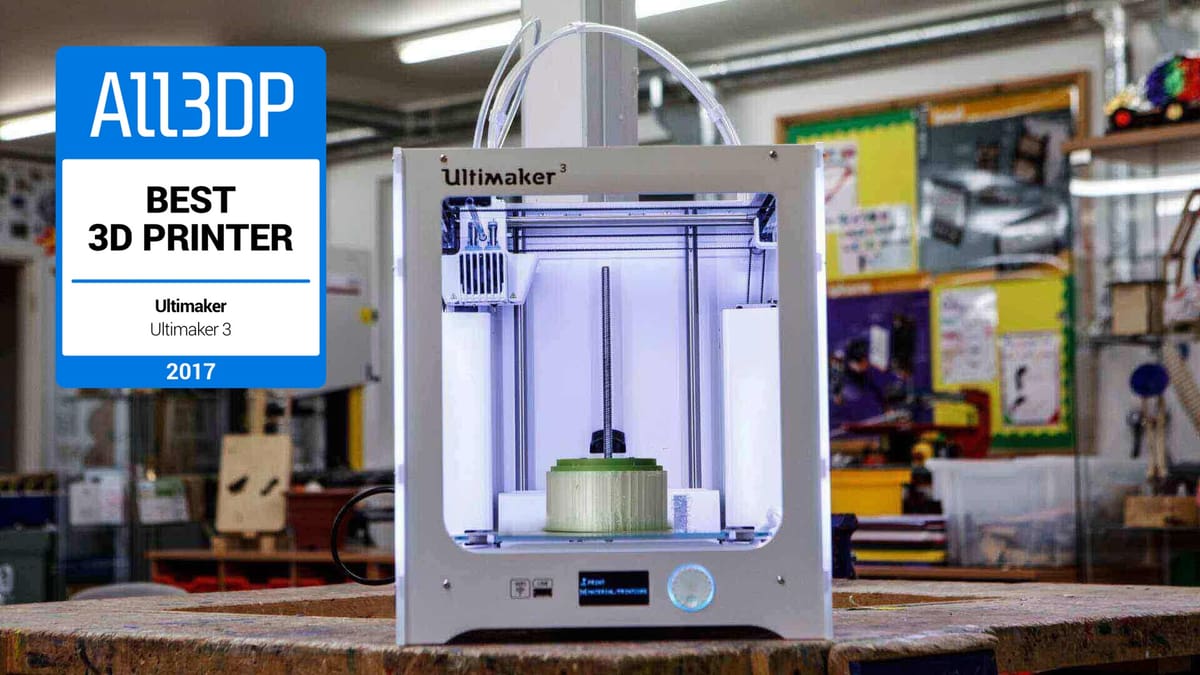
Ultimaker 3 Review: Still a Great 3D Printer
Rating

Even if the Ultimaker 3 has a top spot on our list of the best 3D printers. Check out our review to find out why the Ultimaker 3 might still be the right machine for you.
The Ultimaker 3 was one of the most hotly anticipated 3D printer releases of 2017. Boasting new dual extrusion capabilities over older generation machines, the Ultimaker 3 also features a host of new connectivity options that give it greater versatility.
For our recent recap of the Best 3D Printers, we found it to hold its own against the increasingly professional competition. A stellar printer in its own right, the Ultimaker 3 lost the top spot to the effortless ease of the Original Prusa i3 MK3S. But don’t take this for disparagement, the Ultimaker 3 is still the only printer you need for professional, multi-material prints.
Pros
- Dual Extrusion performs brilliantly
- Hot-swappable print cores
- WiFi connectivity
- NFC equipped reels simplify printing
Cons
- Open front
- Poorly positioned spool holders
- Glass plate release system is dated and fiddly
- Design is looking a bit tired
Verdict
The Ultimaker 3 is a formidable machine and the dual extrusion system capably lives up to the quality of its single extrusion predecessors. Build quality is solid, and performance and reliability are excellent.
However, dual extrusion on the Ultimaker 3 comes at the cost of speed; think double, triple, or even quadruple the print times.
In addtition, we find the Ultimaker 3 suffers from few small few issues that hold it back from a perfect 10; the new print head and cores are excellent but the reel holder, despite the settings-reading usefulness of NFC, is still hidden away around the back of the 3D printer making it a hassle to access. Additionally, new support materials such as PVA can spit while they’re being extruded. Without a front screen these filament flecks go everywhere.
Such niggles are small, however. And as dual extrusion systems go, the Ultimaker 3 blends quality and reliability well. If they could up the print speeds, then the Ultimaker 3 would truly be the ultimate all-round 3D-printer.
Features and Specs
On the surface the Ultimaker 3 shares many design beats of its predecessor. Obviously, capabilities wise the Ultimaker 3 is a dramatic upgrade over the Ultimaker 2+, but you will find that the build volume has reduced slightly from 223 x 223 x 205 mm (Ultimaker 2+) to 215 x 215 x 200 mm (Ultimaker 3).
Other great 3D printers: Best 3D Printers 2026: Our Top Picks in 25 Categories
The filament reel holder, guide and toggle wheel interface will also be familiar sights to existing users of the Dutch company’s 3D printers. But despite such similarities of design these two machines are very different.
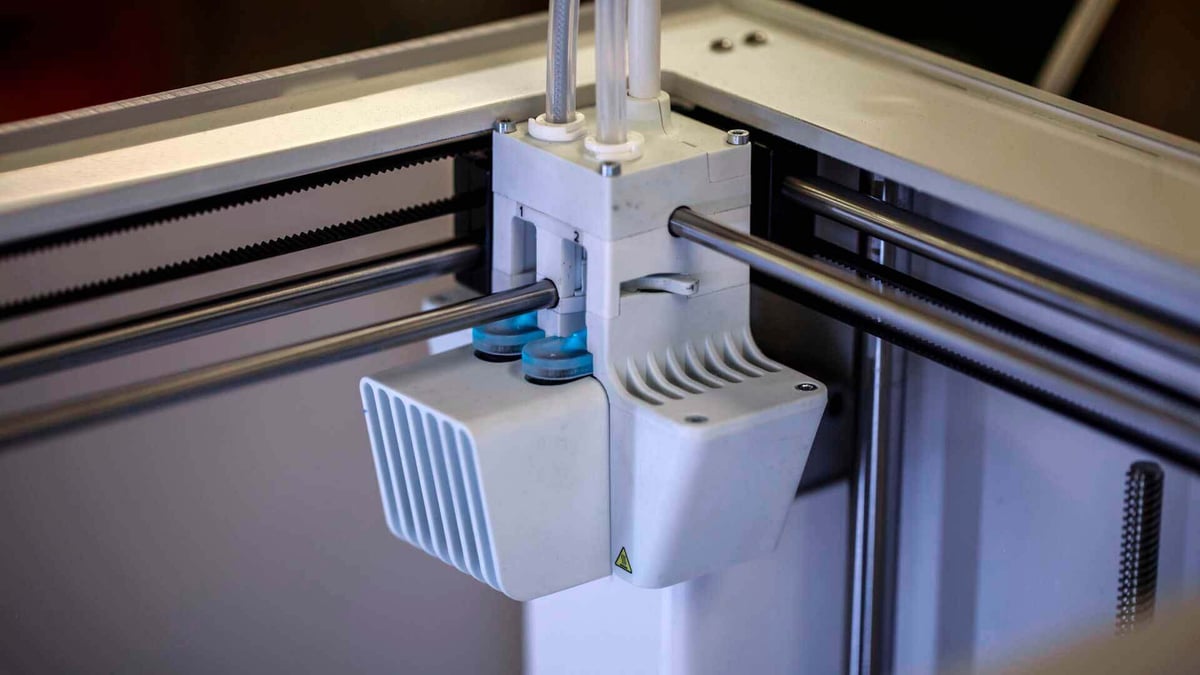
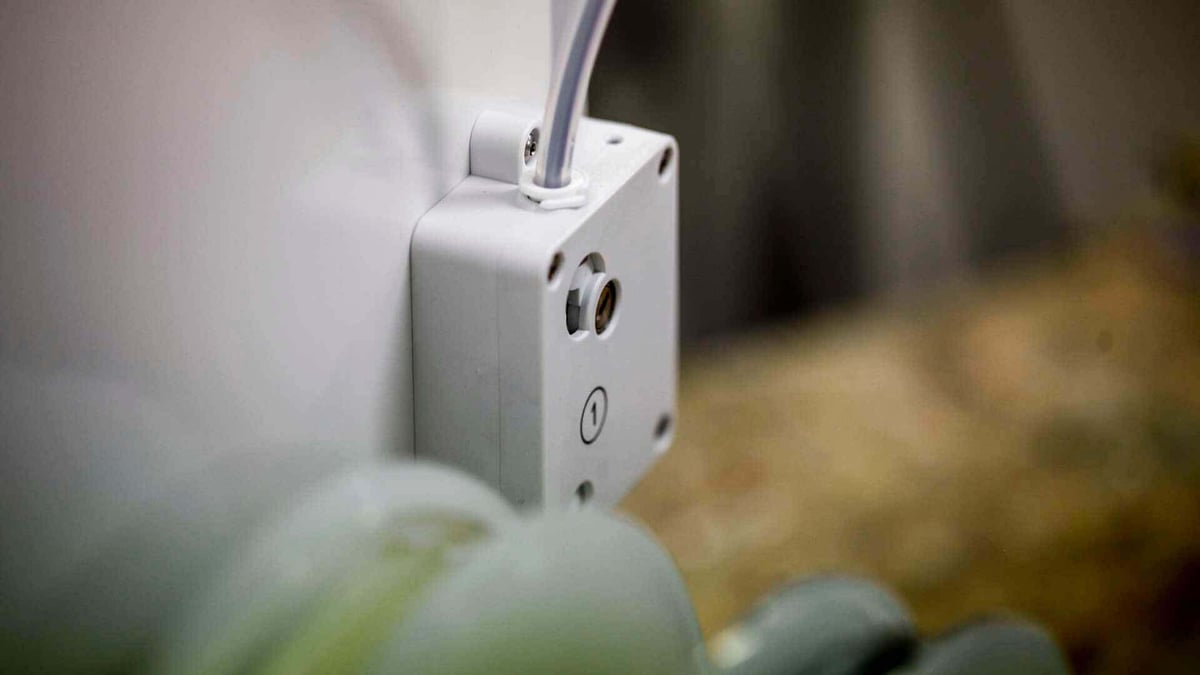
Most notable of the Ultimaker 3’s new features is the Dual Extrusion print head. Fed by two bowden style extruders positioned on the back of the machine, the Ultimaker 3 print head features two nozzles. When not actively printing, one will partially retract into the print core, taking it out of the active print zone and reducing the likelihood of contamination between materials.
For locomotion, the Ultimaker 3 print head sticks to the company’s tried-and-true system of positioning on a mechanical rotating linear guides that move through the X and Y axis. The print bed moves up to the print head through the Z-axis on a single lead screw.
The print head is of an all-new design and packs an impressive party trick in its innovative print cores. Instead of fixed nozzles the Ultimaker 3 utilizes hot swappable “print cores”, which each feature individual properties. Overall it presents an elegantly simple way to mix and match materials and nozzle sizes without getting your hands dirty.
Ultimaker 3 Print Cores
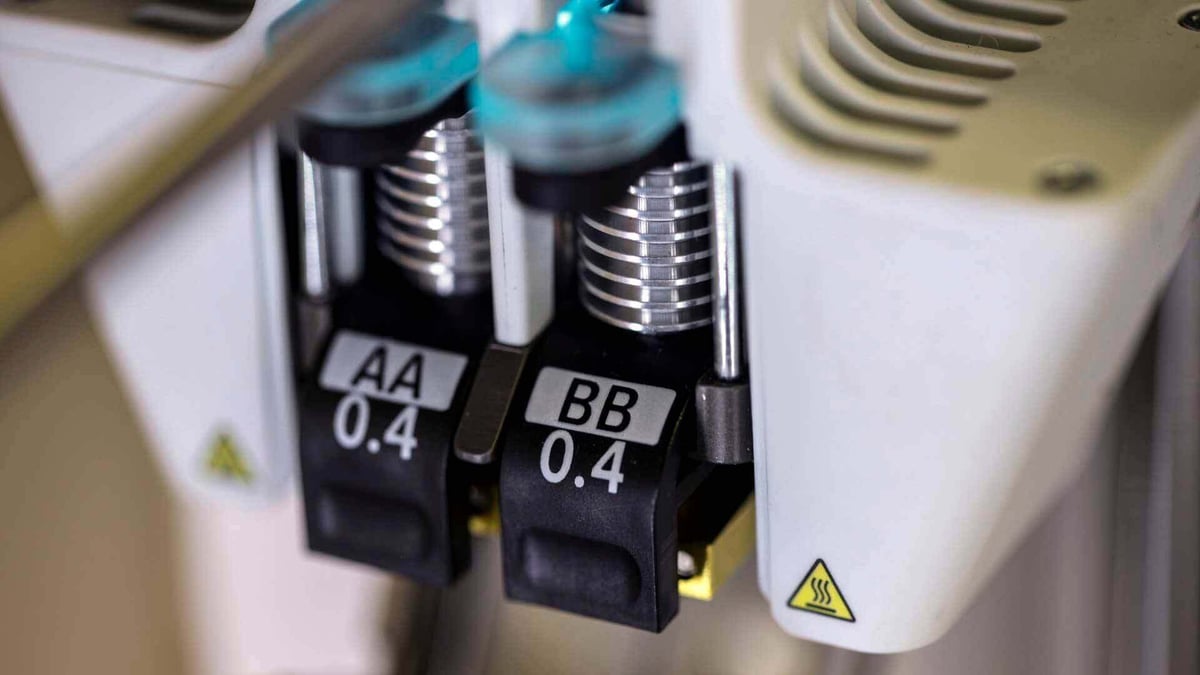
The Ultimaker 3 ships with three print cores; two AA and one BB. The AA cores are designed for standard materials such as PLA, ABS or Nylon, and come with a 0.4 mm nozzle built in. The nozzles on the print cores are not swappable or replaceable; if you want to outfit the Ultimaker 3 with a larger or smaller nozzle then you’ll need to buy the full print core.
Besides user choice, there is a specific use case in mind with the Ultimaker 3 print cores. BB cores are designed for the support materials such as PVA. And though the AA and BB print cores look identical, they boast subtly different designs, with the mechanics of the BB engineered to cope with the specific characteristics of support materials.
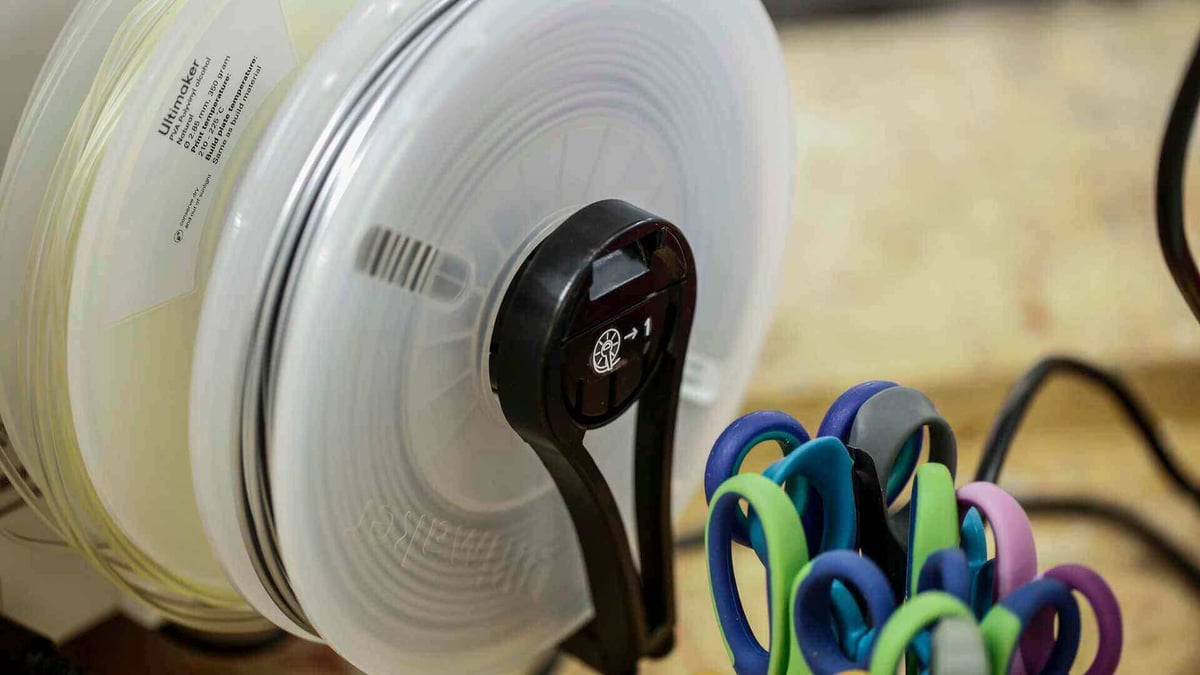
In normal use, the support material and core are assigned to the number two slot in the print head. The printing of “ordinary” structural material is assigned to core slot one. On the back of the Ultimaker 3 the filament reels are set out to reflect this, with the support material positioned as the inner reel and the build filament as the outer. This is a sensible move, as the build material is the more likely of the two to be changed at regular intervals. Of course you are not limited to this, but its a neat design choice.
The heated bed is of the vertical cantilever type connected to a lead screw. A nice new touch here is the smart auto bed adjustment. This isn’t full auto bed leveling, but uses a sensor to determine the bed level. The Ultimaker 3 can then compensate with small adjustments as needed, padding out the lower levels of the print to correct the upper build.
In addition the Ultimaker 3 3D printer will also automatically detect when either of the cores or print head require calibration. To aid in this, the printer features a new process with special charts and sheets for reference.
All in all the whole calibration process is far more refined than that of Ultimaker’s old system. The Ultimaker 3 3D printer takes approximately 30 minutes to set up from unboxing to calibration. It’s possible to make larger adjustments to the Ultimaker 3 print bed via old fashioned thumbscrews found on the bed’s underside.
Better Connectivity
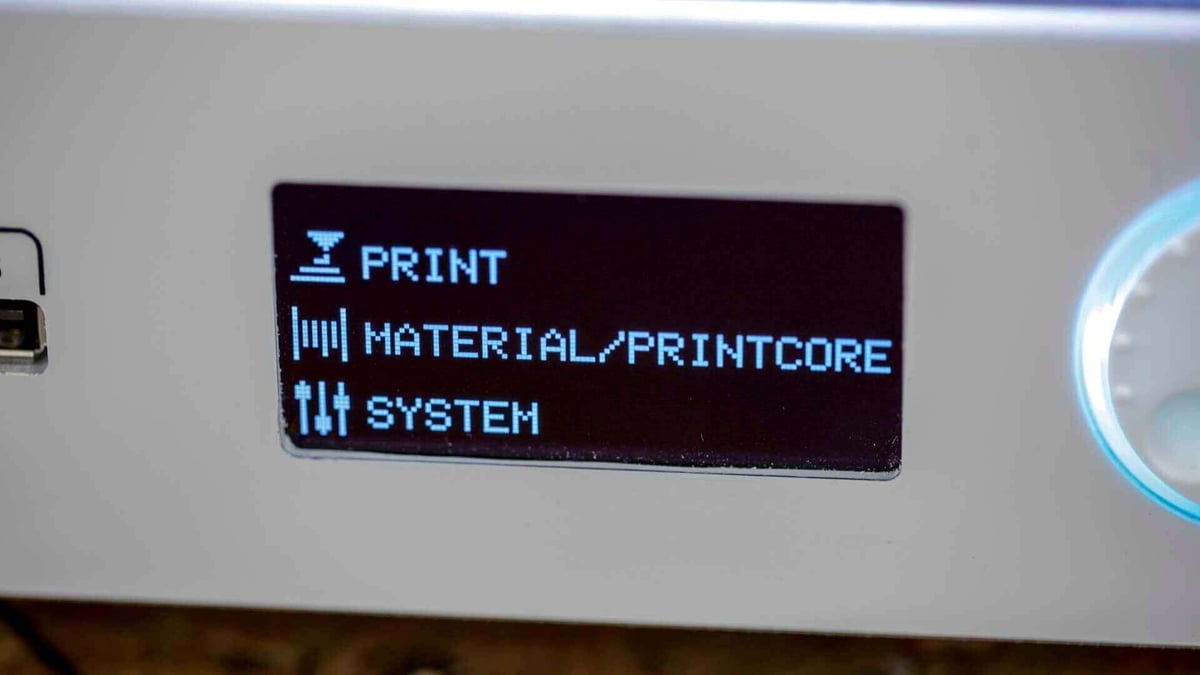
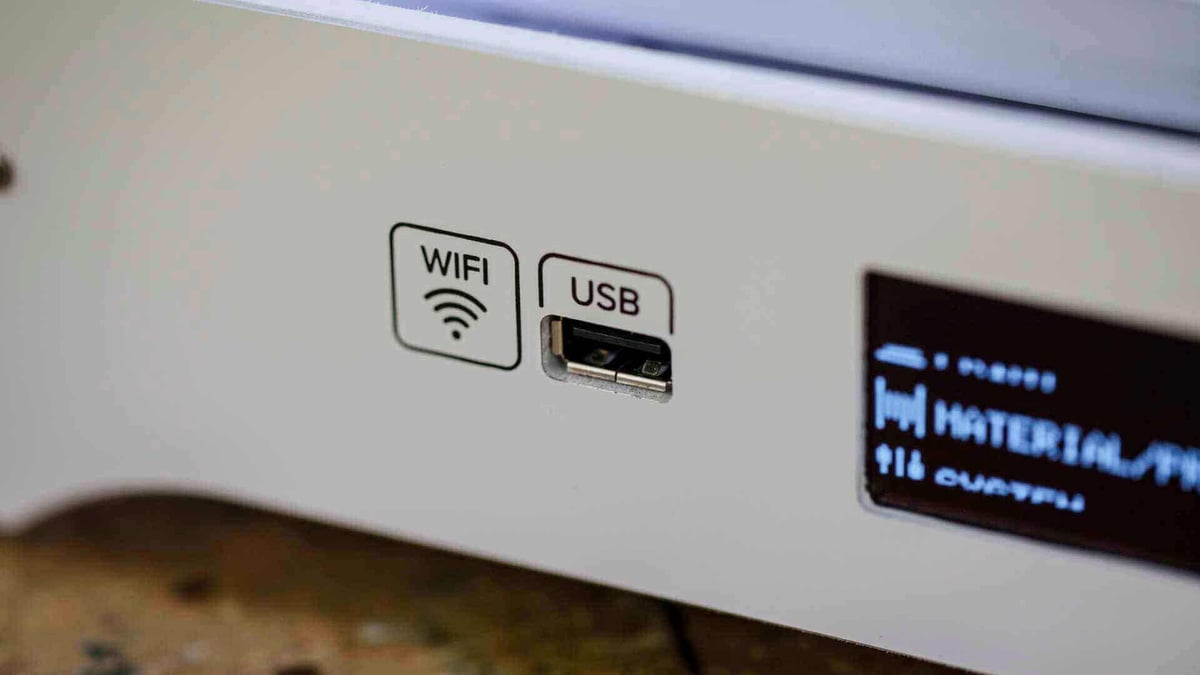
Connectivity is another of the big advancements for the Ultimaker 3. The SD card slot on the front is gone and in its place is a standard USB slot. Models can now be loaded onto a USB stick and fed directly into the front of the machine. Once the stick is installed, the process of finding the model that you want to print is a simple case of navigating the menu to the prepared prints gcode files.
Transferring files through hardware is all a bit old hat, especially as cloud enabled printing gains traction, so the Ultimaker 3 now features WiFi connectivity. This enables you to send prints directly from Cura, Ultimaker’s slicing engine, on your computer or through the Ultimaker app. This in itself is useful, but the whole Wifi system enables a great deal more.
For example the new filament reels designed for use with the Ultimaker 3 feature an NFC chip which feeds back data and information about the filament to the Cura software. Cura will then adjust the print options for you to get the best quality print. In addition this connectivity allows you to remotely monitor prints via the Ultimaker 3’s inbuilt print bed facing camera.
Unboxing and Setup
The box for the Ultimaker 3 is about double the size of the printer. Unpacking, the first thing you uncover is the welcome box. This features a decent guide to help you get started, along with two test reels of PLA and PVA.
Also present in the Ultimaker 3 welcome box is a calibration chart and the print cores. Once the printer is removed from the box, setup can take as little as ten minutes, but running through the calibration steps can add an extra 25 minutes to the process.
The first stage is to attach the NFC lead to the port on the underside of the Ultimaker 3. Running from the reel holder on the back of the machine, this simply clicks in place and enables any Smart reels the Ultimaker 3 recognizes to talk to the Cura software.
Next up in the process of setting the Ultimaker 3 up is removing all the packing materials, ties and tape. With this all removed, you’re then free to install the glass print platform which is held in place by two metal clips. For the initial setup that’s it — the printer can now be plugged into the power.
On first running, the Ultimaker 3 guides you through the initial setup and, including how to install the print cores and filament. On the front of the print head is a plastic door that can be flipped down, and the cores are then slotted directly in. You then feed the filament for both cores into the respective extruder, where it will drawn into the machine, feeding into the relevant print core and oozing out of the nozzle.
For the next stage, the Ultimaker 3 may alert you to calibrate the XY offset. This additional process takes about 20 minutes, printing a calibration chart on the glass plate in the process. You use this printed chart to reference against the provided paper chart, making the required adjustments on the Ultimaker 3’s front dial. The process is time consuming but pretty straightforward and seemed to do the job.
The final part of the setup process is to connect Cura software and Ultimaker app to the printer. Again the process is straightforward and once completed the printer will appear as a device on your home network. This means that you can browse the internet and connect to the Ultimaker 3 at the same time, rather than having to constantly switch wireless networks as you have to do with some other WiFi enabled printers.
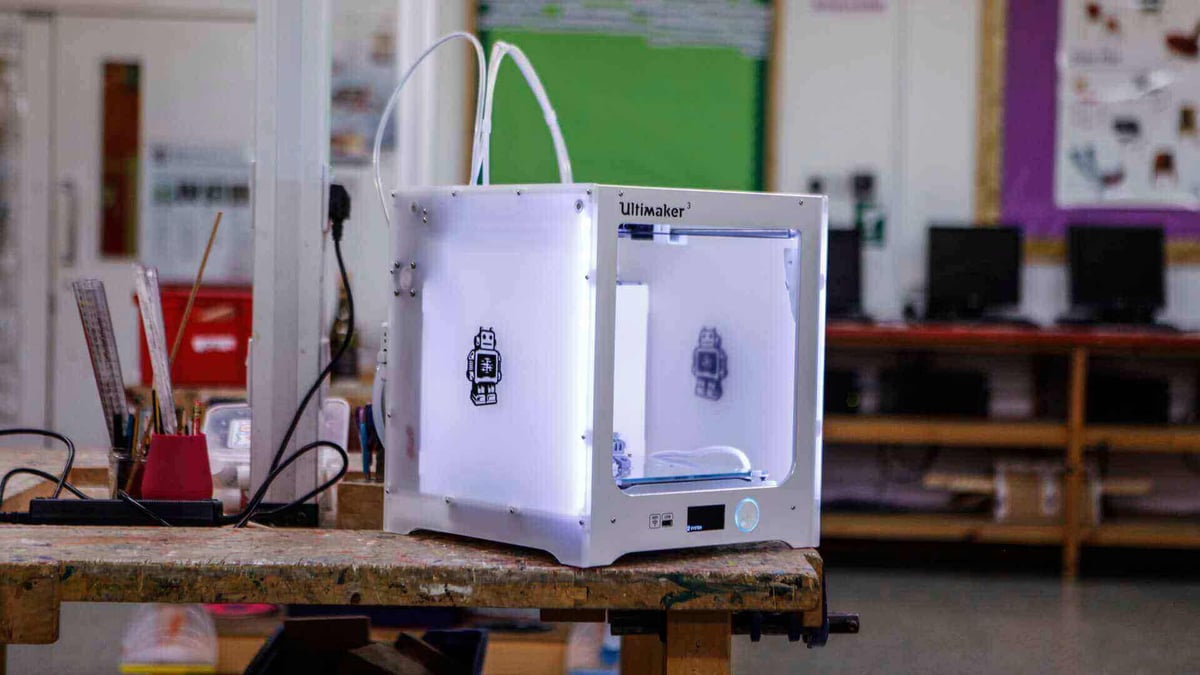
Build Quality and Design
Aesthetically speaking, Ultimakers are instantly recognizable. The general design and look of the Ultimaker line hasn’t changed a great deal since the original incarnation back in 2011. The Ultimaker 3 is no exception.
Today the laser cut plywood is gone from the company’s modern machines (though you can still buy original wood Ultimaker kits), but besides this material switch the visual changes are pretty superficial.
Size-wise, the Ultimaker 3 is a large machine. In all with bowden tubes and reels attached the printer measures out at 342 x 505 x 588 mm and weighs a whopping 10.6 Kg. It will fit on a desk but it will dominate the space. Overall the build quality is excellent; there’s nothing flimsy or loose about the entire printer.
Moreover, the weight and rigidity of the build shows that the main body of the Ultimaker 3 has been designed to last.
As with the previous printers, there’s a call back to the open source roots where everything can be dismantled for servicing (or just pure curiosity). The linear bars remain at 6mm and the main drive bar at 8mm. This combination manages to keep vibrations through the Ultimaker 3 to a minimum. When it comes to the cantilevered print platform, this uses a large lead screw for the vertical motion and is supported by two 10mm rods — again, keeping everything firm and steady.
The all-new print head really shows a shift in the quality of finish, and standing back from the Ultimaker 3 you can now see a mix old and new. On the one hand Ultimaker has advanced in leaps and bounds with a technology and system that works, but you could argue the design feels a little left behind.
Indeed the printhead and cartridge system shows where the Ultimaker should be when it comes to product design, but in use there are several elements that really could be improved.
Firstly the open front and top design. While fine for the maker community, this lack of enclosure doesn’t doesn’t inspire much confidence with printing high ambient temperature-reliant materials likely found in professional environments.
Additionally Ultimaker likes to push the education angle for their printers, but if the Ultimaker 3 is to be used in an educational environment then a closed front is needed. In testing, the PVA support material crystallizes and spits during the print process. Because of the open front, those small crystals of PVA have a tendency to get everywhere.
And then there are the reels at the back. While the extruders are excellent, the reel holder just feels a little makeshift compared with the quality of the rest of the machine. Also, it still sticks out a good distance from the back of the machine, contributing to a deceptively large footprint.
The glass plate is another area that could be improved. Specifically the two clips for releasing the print bed. They do their job but a small piece of rubber on the edge of the lever would help to prevent sore fingers when the plate is removed.
On the other side of design you have the new Smart Reels, Print Cores and software. The new print head is a big innovation. There is the issue that you can’t change the nozzles yourself, but those new print cores simply ensure that you get the best possible performance from the Ultimaker 3.
The ability to swap those print cores and change materials is incredibly well thought out, and during the test proved to work well. Once the filaments are loaded, then having the filament reel information readily available in the Cura software is a huge leap forward and it really does help to improve your print experience.
Filament
A maximum hot end temperature of 280 degree Celsius is achievable with the Ultimaker 3 print cores, which opens the machine up to the higher end of tough and engineering grade material.
Besides Ultimaker’s chipped NFC-enabled spools, the Ultimaker 3 can handle a variety of 3rd party filaments with ease. Loaded in the same manner as the brand’s own, the only difference lies in having to manually specify the material as you load it. If connected via WiFi, the Ultimaker 3 feeds this information back to Cura for ease of use.
Software
Cura is Ultimaker’s in-house slicing software. Much like the company’s printers, the program is open source, and sees regular updates that add new features derived from the community and inspired by the competition. The interface is clean and clear, and overall the software plays well with the Ultimaker 3.
Don’t miss:
- Ultimaker 3 Source Files Now Available to Download
- This Hack Turns Your Ultimaker 3 into an Ambient Light
Of special note when using Cura with the Ultimaker 3 is that the slicer now includes material profiles for Ultimaker filament. Testing these out produced superb results, and using these profiles over our own settings proved to be the best option.
Users seeking more control of their print settings can click through to the “Custom” tab, where they’ll see an extended range of options to tweak. Using Cura with the Ultimaker 3 also means you can access the printer’s inbuilt print monitoring camera. Note that it is rather basic with a low resolution image. Don’t expect high definition print streams from it.
At the moment the software (and for that matter the app) can only interact with the Ultimaker 3 wirelessly on the same WiFi network.
Single Extrusion Print Performance
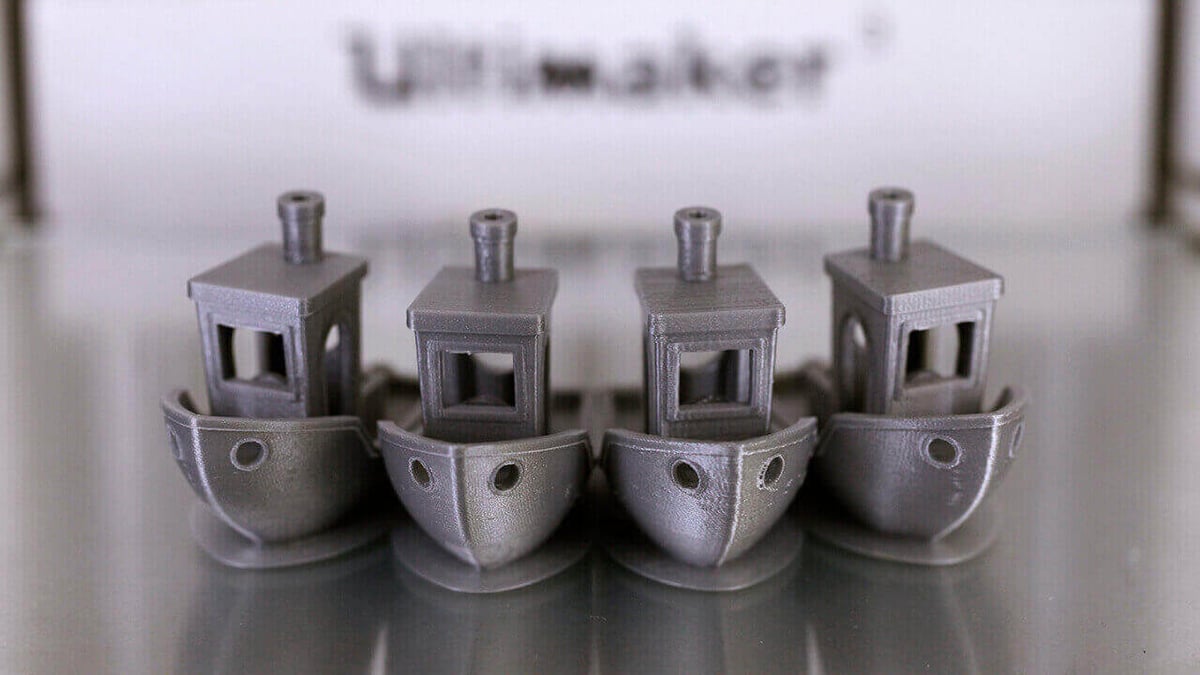
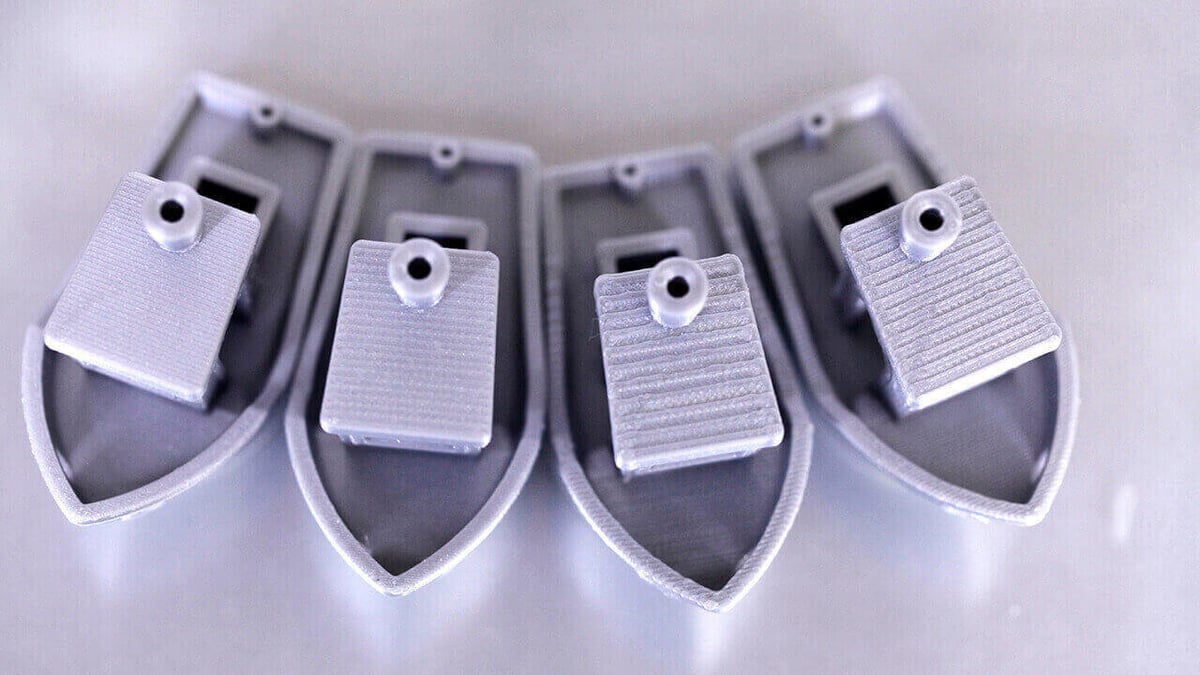
Taking our first few 3DBenchy prints from the Ultimaker 3 as a bench mark, the results are positive. Using the High-Quality setting in Cura (0.06mm layer height) produces a print with minimal signs of layering. Stepping down to Low Quality (0.15mm) still produces a decent print, albeit with some of those layers showing.
Dual Extrusion Print Performance
As we’ve well covered by this point, the Ultimaker 3 is a dual extrusion 3D printer. In practice it only takes a couple of prints to see the differences printing with a purpose made support material can have on the quality and complexity of prints you can produce.
Of course it is still possible to print the same parts using a single nozzle, with printing supports from the same structural material. However the interfacing between support and part can be messy, and objects with difficult to reach hollows can be impossible to clean without soluble supports.
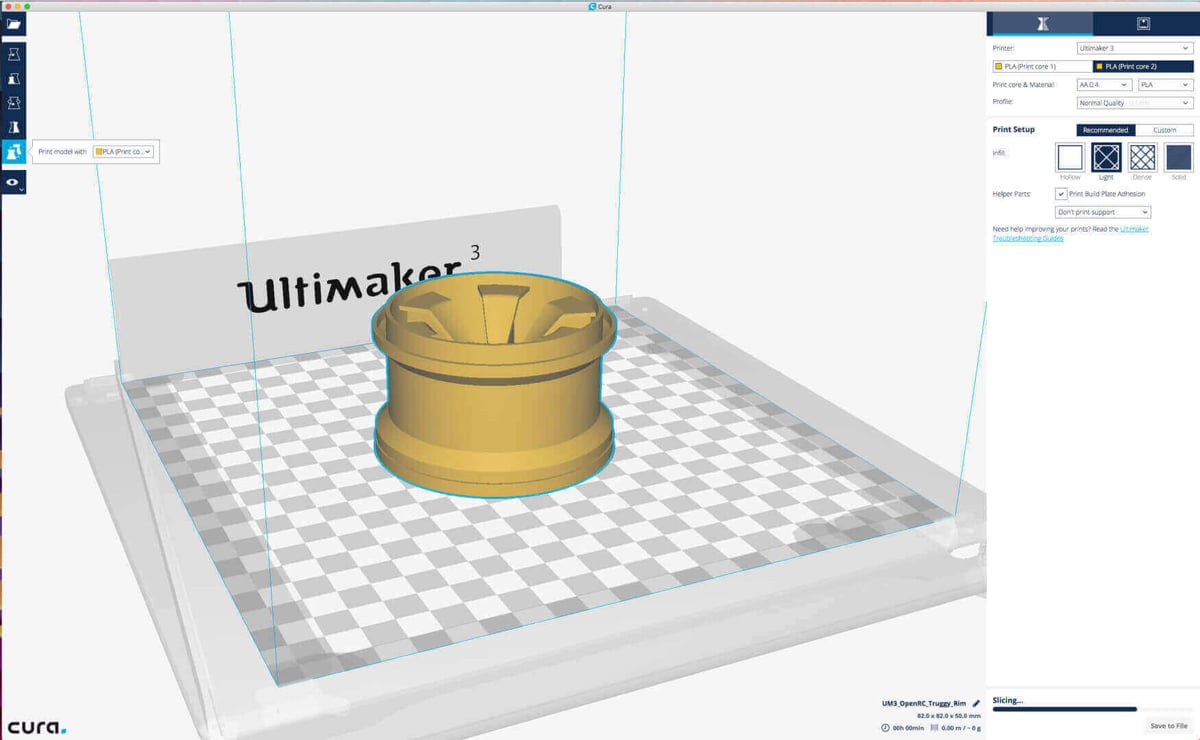
The Ultimaker 3 dual extrusion pretty much eliminates the issues of same-material supports. Using a secondary material such as PVA means supports can be dissolved without a trace in a matter of hours. The Cura sliciing software goes a long way to simplifying setting up dual extrusion support prints with its “Add Supports” option.

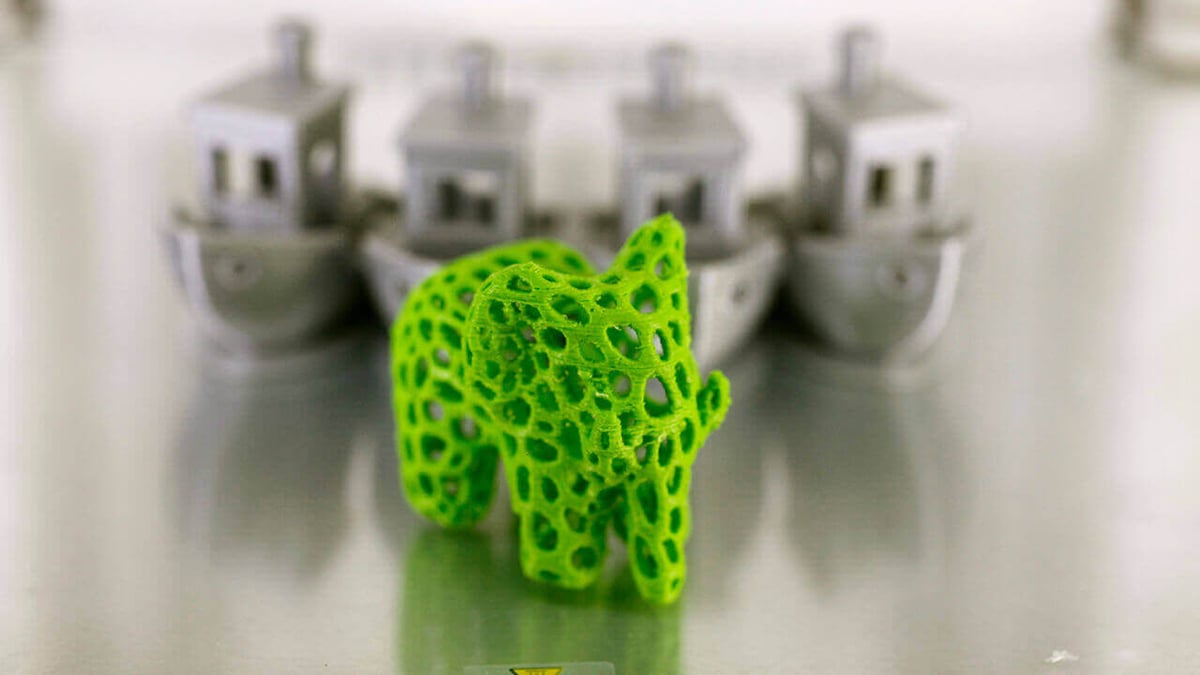
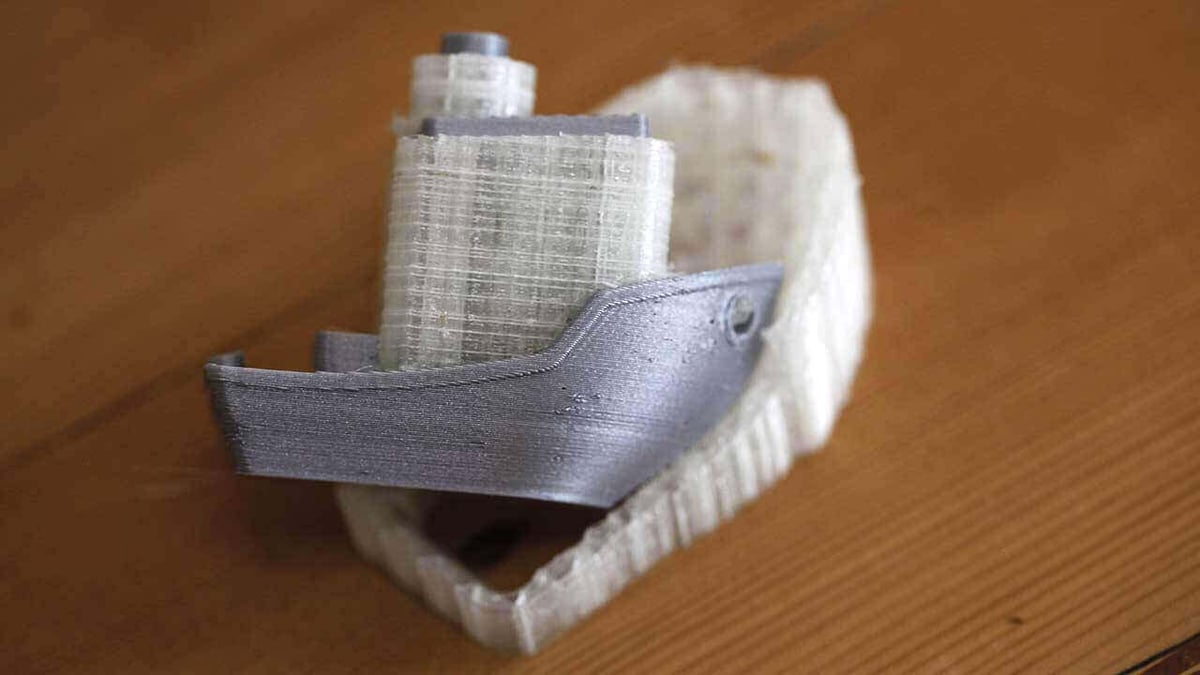
To test printing dual extrusion printing on the Ultimaker 3 we loaded up a Voronoi-style elephant model. With PVA supports attached, we placed the model into a bowl of water. After a few hours the PVA was starting to soften, but was still very much attached.
About eight hours later the PVA had finally melted around the model but was still attached and sticky. What was needed was for the print to be placed under running water, which cleared the PVA residue with little trouble.
Using a fish tank water pump in the bowl seemed to do the trick and speed up the process greatly. Once all PVA was removed and the print dried the difference between a supported dual extrusion print and non supported print was instantly apparent.
Experiencing the Ultimaker 3’s dual extrusion first hand, its easy to become a convert to the system. It really does make single extrusion systems start to look a little archaic. One of the greatest advantages of the Ultimaker 3 is that you can now finally design and print models as you want, without having to consider the effects of large overhangs and the trade-off with messy same-material supports.
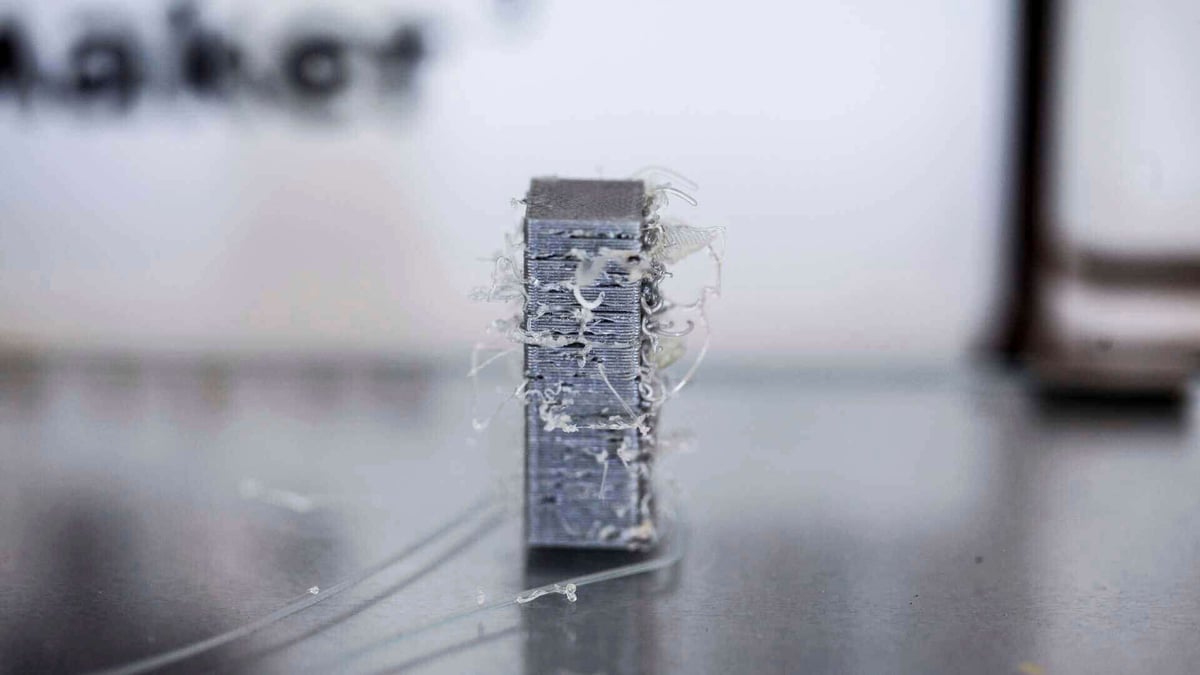
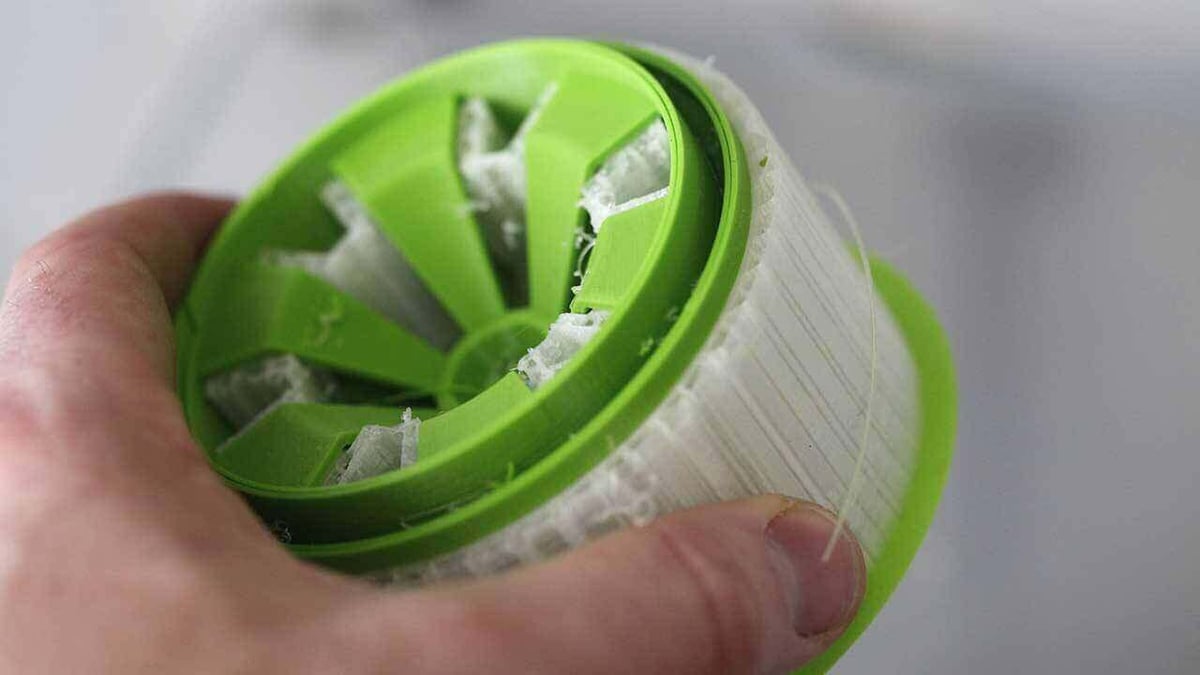
There is of course a drawback to this support and PVA. The material itself is expensive at just over double the price per gram compared with Ultimaker’s own PLA or ABS. The other issue is time. Depending on the models size and complexity you’re looking at double, triple or even quadruple the print time. Depending on the materials used, with each change between nozzles the print cores are heated and cooled. A priming tower is created throughout the print to ensure that the start of each new layer is fresh and free from loose strings of the previous material.
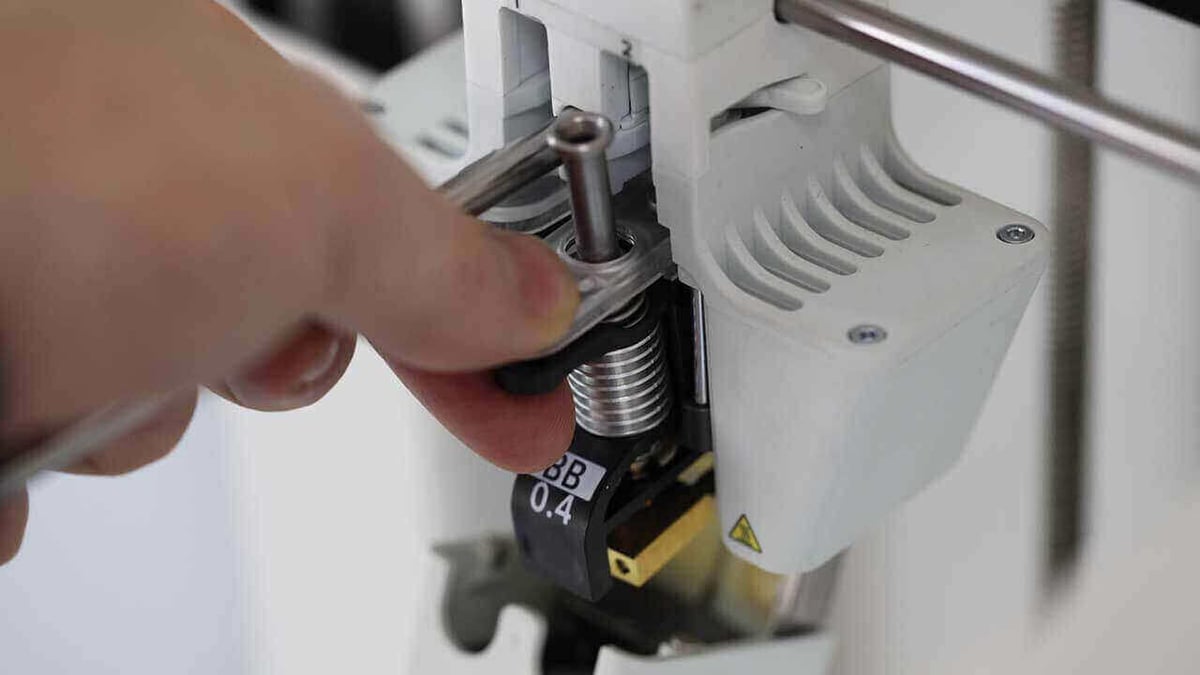
The way Ultimaker 3 print cores work in tandem is fascinating. Take a look at the side of the print head beside print core two and you’ll notice a small lever. This lever is used to raise and lower the second print core as required for printing your model. Another benefit of raising and lowering the core helps prints on the Ultimaker 3 avoid cross contamination of materials. It’s an incredibly simple system, but in practice it works well.
Dual extrusion is of course about printing dual materials and support structure is the most practical use. But there is another use for dual extrusion — multi-color prints and multi-material. On the Ultimaker 3 this is eminently possible too. The process for printing different material prints is slightly different to using the second print core for the support material. The process starts in Cura with two STL files. These need to be loaded into the software together, where you can then assign the loaded material in each print core to each part of the model.
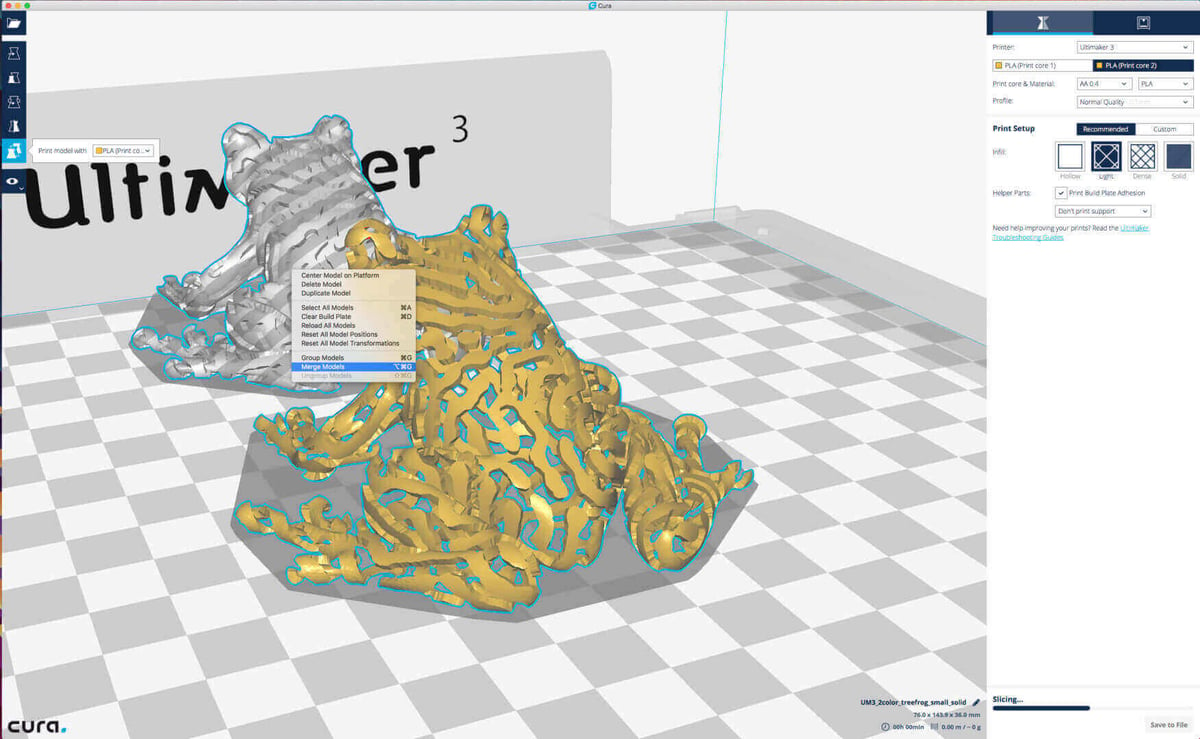
Once your models have been assigned a material, the two can be merged by selecting both and right clicking and selecting Merge Models. Right clicking again gives you the option to unmerge the models should you wish.
Testing the dual color printing showed again that the Ultimaker 3 performs well, producing clean prints with the materials bonding well. At low quality, there was some separation between the materials, but at higher quality the bond was excellent.
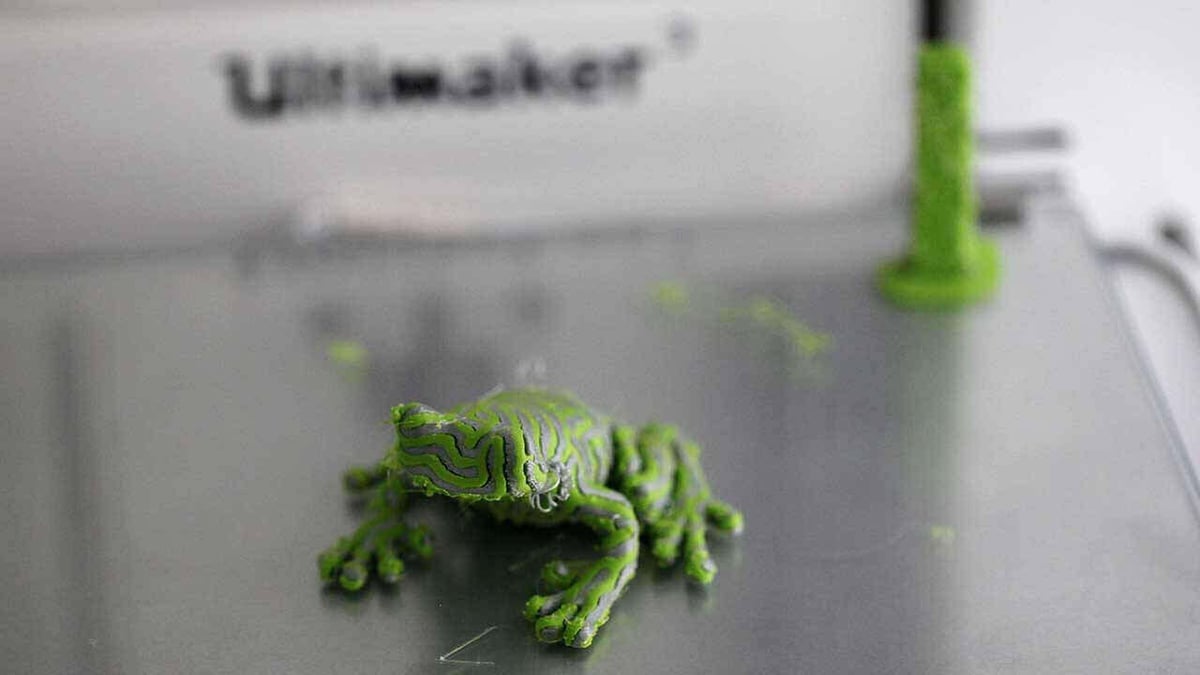
What really stood out during testing is the Ultimaker 3’s ability to sustain print quality despite the use of two filaments. The accuracy is comparable to that of a single filament print.
On a similar note, clean borders where the colors meet shows us that the priming tower is doing its job.
Wrapping Up
The Ultimaker 3 is a high-end 3D printer which demonstrates that Ultimaker can master dual extrusion in a way comparable to thier previous single extrusion machines. Here, print quality is exceptional. Not only this, but the Ultimaker 3 introduces PVA soluble support printing effortlessly. Overall, our biggest issue is that once you’ve started using the Ultimaker 3 dual extrusion system, it’s really difficult to go back to single extrusion.
The hardware itself is solid and built to last, with the centerpiece being the printhead and cartridge-style print cores. As a dual extrusion 3D printer, they work perfectly, and the ability to hot-swap cores and materials has been exceptionally well thought out.
The Ultimaker 3 does feel like a meeting of two generations, however, with legacy elements such as the reel holders hidden away around the back and fiddly metal clips for the glass print bed. These are mixed in a machine that features much that is new. From the well engineered print head and advanced Linux control board to seamless WiFi connectivity. There’s also the fact that this Ultimaker 3 really needs a door to help stop the PVA from spitting, but the issue is a small sacrifice to pay for a machine that prints at this quality.
In addition, we must highlight the issue of speed — the Ultimaker 3 is no sprinter. While you may be producing quality prints, multi-material print times are considerably longer than an equivalent model printed with a single extruder.
But be in no doubt, the Ultimaker 3 is an excellent printer and will find wide appeal. It’s one of the best printers we’ve used and the quality of the prints is outstanding.
With some minor changes such as spool placement and a full enclosure, the Ultimaker 3 could be the perfect 10. But, in its current state, we’ll have to settle for almost perfect.
Expect excellent print quality and reliable dual extrusion printing with the Ultimaker 3, which retains a top spot on our list of the best 3D printers of Spring 2018.
License: The text of "Ultimaker 3 Review: Still a Great 3D Printer" by All3DP Pro is licensed under a Creative Commons Attribution 4.0 International License.
CERTAIN CONTENT THAT APPEARS ON THIS SITE COMES FROM AMAZON. THIS CONTENT IS PROVIDED ‘AS IS’ AND IS SUBJECT TO CHANGE OR REMOVAL AT ANY TIME.