
Top
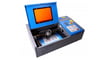
Pick
Pick
Check out our picks for the best budget laser engravers and a quick introduction to laser engraving, materials, and software.
So, you want to get into the art of laser engraving but don’t want to spend a fortune? Well, that’s perfectly understandable to us. So, here we are with the top three laser engravers that won’t blow a hole in the bank but should still allow you to begin exploring the craft.
In this buyer’s guide, you’ll find a selection of laser engravers that all sing from a similar sheet. They are basic machines, and the user experience may not be as slick as expected – certainly if you’ve never used a cheap laser engraver before.
While a long way from perfect, these machines can cost less than a tenth of the price of other laser cutters, such as the cloud-based Glowforge. Instead, they primarily function as gateway lasers, giving people new to laser engraving the means to try the craft and see if they enjoy it.
If you have a bigger budget, check out our guide to the Best Laser Engravers. But, if it’s cheap and relatively cheerful laser engravers you are after, you’re in the right place.
Laser engraving has become ever more popular amongst tinkerers and hobbyists as a way to add a unique touch to almost any item of your liking. But it’s not just a toy for home users; many small businesses make a living selling customizable items on shops like Etsy. Picking the correct machine to suit the needs of your hobby or business is crucial, and there are a lot of options out there to parse before you decide on the machine that’s right for you.
When shopping for a budget laser engraver, you’re probably going to be looking for a diode laser. CO2 lasers are typically more powerful but they come with a premium and require consumables. Still, if you need to cut relatively thick materials, CO2 might be the right option for you. If you’re not sure which is right for you, check out our Diode Lasers vs. CO2 Lasers section below.
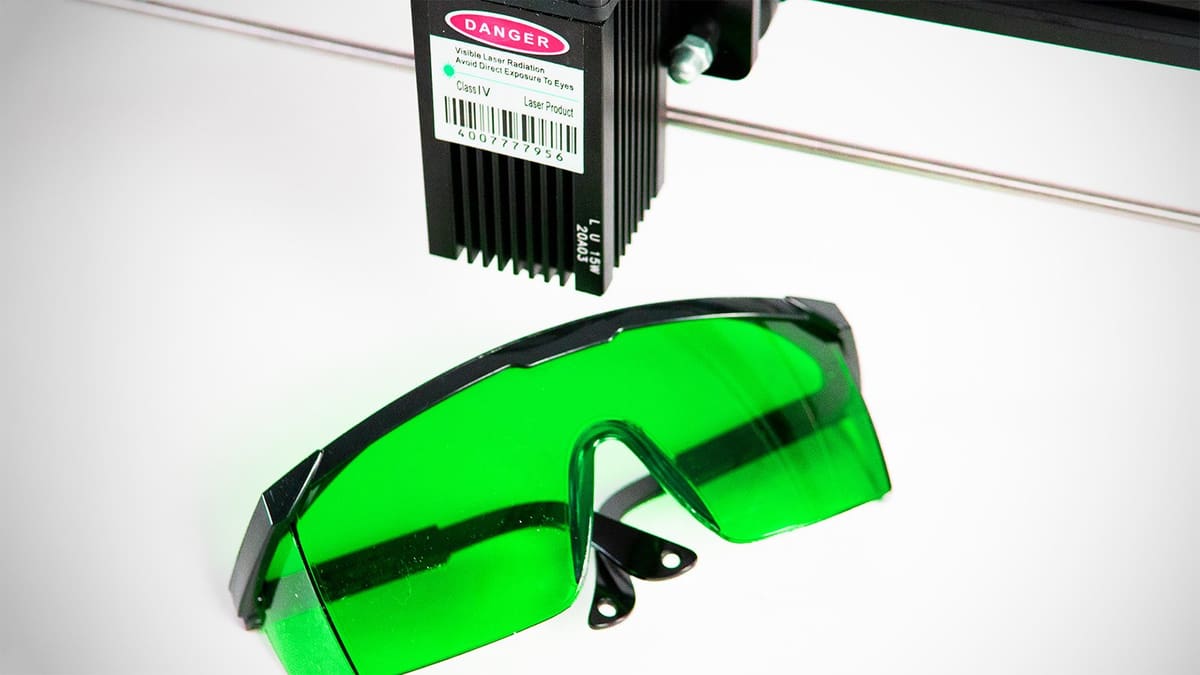
Ventilation is key when it comes to working with laser engravers. The smell of burnt wood or cardboard might not be the most hazardous, but when it comes to burning materials like vinyl, artificial leather, and others, toxic fumes can be emitted that can cause serious health issues. Getting a laser engraver with an enclosure and proper ventilation should be a priority, but open-frame machines undercut enclosed ones significantly – making them tempting on a budget. Enclosures also help ensure your eyes are properly shielded when nearby but, either way, you’ll want to invest in good eye protection: the glasses that come with these machines are often criticized as being poor quality – don’t trust them. Just pick up your own.
And ventilation isn’t the only safety feature you should be considering. Laser engravers can be incredibly dangerous machines, and should be handled with the utmost care. Accident-reducing features like G-sensors, which ensure the laser is stationary during operation; and air assist, which blows waste away from the laser and can prevent the outbreak of small blazes, are all highly desirable on machines like this, along with emergency and auto-shutdown features.
Then there’s the usability factor. A good piece of software can make a real difference when it comes to results. Some laser engravers have incredibly simple workflows thanks to clever software and compatibility with methods of control. LightBurn is a great option for many laser engravers and cutters, being not particularly expensive and with a relatively shallow learning curve. It’s also compatible with a wide variety of machines. Beyond LightBurn, there are also open source and free software such as LaserGRBL.
For more info on software, materials, and dos and don’ts of laser engraving, check out our extensive Laser Engraver Guide below.
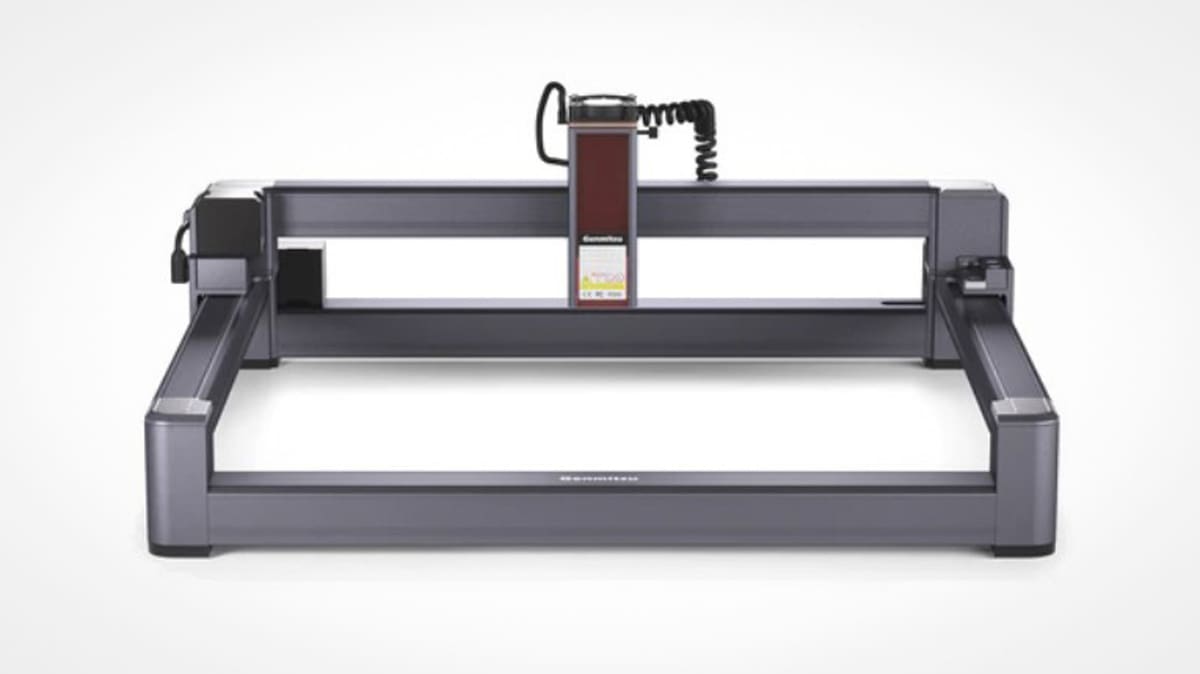
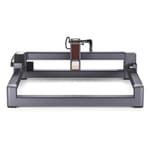
Sainsmart’s Jinsoku LC-40 came out earlier in 2022 and has slowly become more popular with laser engraving hobbyists. Its intelligent design and affordable ~$250 price tag allows it to stand out among affordable laser engravers, despite a relatively low-powered 5.5 W diode laser on the base model. A 10 W version is available, but it increases the price significantly.
Sainsmart has a good reputation with consumers and products, having been a pretty prolific producer of CNC machines, laser engravers, tools, and more for quite some time now. The company is also a reseller of Creality 3D printers. Key to its positive reputation is its communication and support.
The Jinsoku LC-40 benefits from an incredibly intelligent design. Sainsmart appears to have really thought about it, integrating hidden limit switches, linear rails, Bluetooth connectivity, and a toolhead complete with a flue design that helps blow smoke away from the lens and thereby improving engraving potential. That feature alone is almost like having a built-in air assist system, and Sainsmart refers to it as “passive air assist”. But, instead of users needing to buy an air pump, it simply makes use of the cooling fan to channel air down the toolhead and vents from the “back”.
The stability of the frame is also noteworthy, being comprised of a strong aluminum alloy. Sainsmart has made sure two sides of the frame are raised, allowing for a passthrough that helps enormously when working with longer materials. Attached to the frame is a small 5 mm focusing guide; again very neatly integrated, which is a real theme of this product.
All the cabling in the Jinsoku LC-40 is beautifully arranged and sorted, a real step up when compared to much of the market alternatives, and a huge point scorer with anyone infuriated by lazy cable management.
Providing a working area of 395 × 365 mm, a bunch of clever features, and a laser just about potent enough to engrave all the necessary materials, the Jinsoku LC-40 laser engraver is an easy recommendation at its affordable price point.

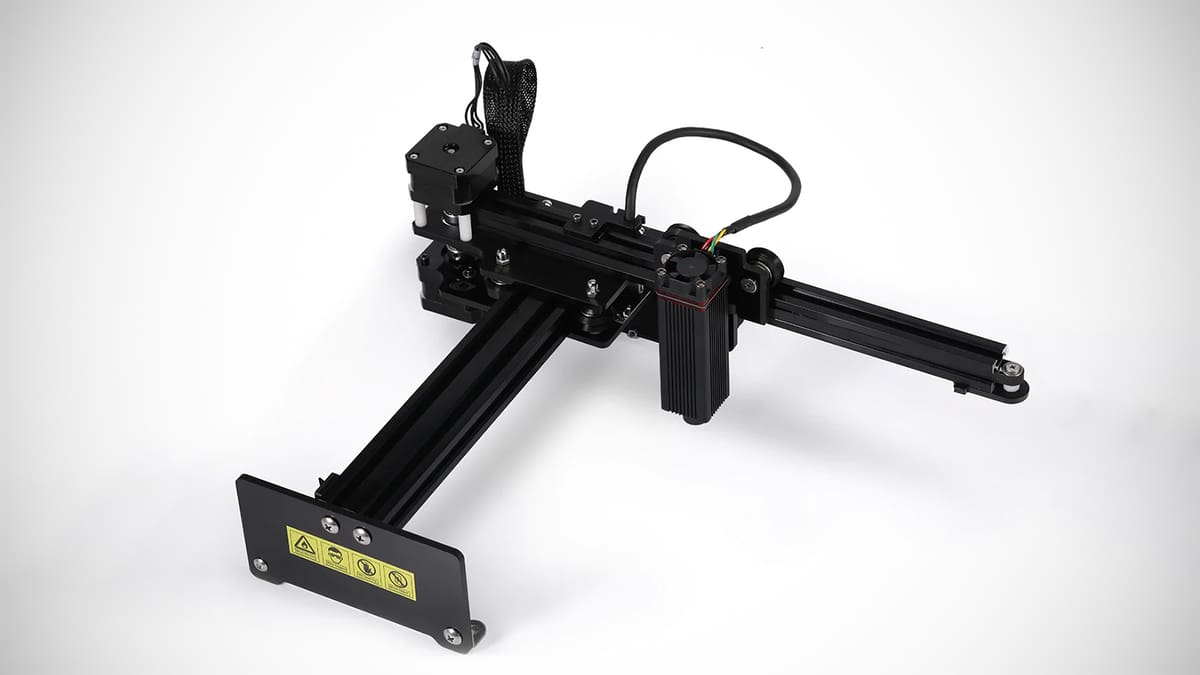
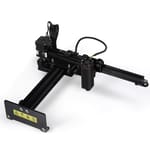
The Neje 3 is a simple, open-frame construction available with either a 5.5 W or 7.5 W diode laser, which makes it perfectly adept at engraving paper, leather, soft wood, acrylic, and the like – and you can cut some thinner materials of up to 8 mm.
It differs slightly in its construction and work area, though, being just a cantilever-style machine that also comes in different sizes. As this is our Budget Pick, we focus on the smallest with a 170 x 170 mm work area, but a 255 x 420 mm Plus version is also available.
At the time of writing, the Neje 3 will cost you $234 in its 5.5 W form. Honestly, not worth the $16 difference compared to the Sainsmart Jinsoku LC-40 – which is actually on sale for less than the Neje 3 at the time of writing. But, if you’re hard-pressed for space, it’s still a good choice. The Neje 3 comes with Neje’s proprietary software and an app to create and send projects via Bluetooth to the laser, both of which users have described as simple to use and straightforward. With the upgrade to a 32-bit MCU, the Neje 3 series is also compatible with LaserGRBL and LightBurn software, should you want more versatility.
Safety feature-wise, the Neje 3 comes with a gyroscope sensor, which means if it gets touched or moved during operation, it will automatically cease lasering in order to protect you and your project from any laser damage. Plus, with a breakpoint memory function, the laser will resume operation where it left off, which also allows you to alter the laser power mid-project should you wish to do so.


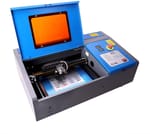
K40s are one of, if not the most popular budget CO2 lasers amongst tinkerers. The moniker refers to a plethora of budget machines, predominantly from China, with no official design or manufacturer that all work in essentially the same way and typically range in the 30 – 40 W range – hence the name.
The combination of price and power makes K40s an attractive option for anyone’s shop, but it has always come at a cost. Over the years, people have had quality issues with these Chinese imports, but OMTech is a relatively new US supplier offering the quality control that the K40 has been lacking. It has US-based customer support and technical assistance, the company checks over the imports, gives them a thumbs up, and slaps a two-year warranty on the products.
Being a CO2 laser, OMTech’s 40 W machine offers significantly more juice than you’d find in a diode laser. This means, as well as engraving leather, glass, acrylic, and wood, it’s also good for cutting many materials up to 2-3 mm deep.
The K40 comes with a workable engraving area of 200 x 300 mm and offers a resolution of 1000 dpi (~0.39 um). However, unlike most other lasers, it does not allow for controlling the laser power from the software. Instead, you will have to physically control the power via control knobs, meaning the laser can’t vary its power during operation.
Software-wise the OMTech 40 W can be operated with either LaserDRW or the open-source K40 Whisperer software. Both are rather rudimentary programs, and you will need Inkscape, Adobe Illustrator, or other design software to convert images or design your own. Unfortunately, in its stock version, the OMTech 40 W is not compatible with the powerful LightBurn software, but you can upgrade the control board on your OMTech for both software laser power control and camera monitoring to precisely position your design on the engraving object.
OMTech seems to have heard complaints about the K40’s missing features, though, and has begun to offer the K40+ for ~$600, adding software laser power control, an adjustable laser head, default air assist, and open source software compatibility to the system –making it compatible with popular software like LightBurn and LaserGRBL. If the extra ~$120 doesn’t break your budget, it’s worth considering.
Being a CO2 laser, the K40 also needs to be water-cooled. In the case of the OMTech 40 W, this means it will come with a water pump and tubing for you to set up with some sort of bucket and distilled water. This simple setup does the trick, but you can find many guides and tutorials online on how to further upgrade the cooling. The same goes for the exhaust. The OMTech 40 W has an internal fan, a port in the back, and tubing to vent the fumes out a window, but for everyone who loves to tinker, there are many community-based improvements that can be found online.
The laser tube will need replacing at some point, depending on power settings, usage, and water cooling performance. If you run it at around 50% (more than enough for most jobs), it should last in the region of 1500 – 2000 hours of use.
The OMTech 40 W is a powerful machine for those wanting to try both engraving and cutting, especially for everyone who loves to tinker and upgrade the machine to get the best out of its powerful CO₂ laser and roomy 200 x 300 mm workspace.

The budget laser engraver market is a relatively shallow pool, with just a few alternatives available that didn’t quite make it into our top three.
If you fancy the cantilever style of the Neje 3, the Aufero AL1 by Ortur may be a viable alternative. It’s slightly more affordable than the Neje 3, with a 10 mm larger workspace on the X and Y axes, but no fancy Bluetooth connectivity and a slightly less powerful laser. Although Ortur says it can cut wood up to 12 mm on the product page, it specifies a 10-watt laser for the cut, but the AL1 is only available with a laser up to a 5.5W LU2-4 long-focus laser – which cuts up to 10 mm softwood – so we’re not sure where that spec is coming from.
If you want to carry your laser engraver around, the LaserPecker L1 might tickle your fancy. It is specifically designed to be portable and comes with an adjustable tripod that allows the engraver to work both horizontally and vertically. It has a 100 x 100 mm engraving area and can be wirelessly controlled via a Bluetooth app compatible with iOS and Android. On the downside, you have a very weak 1.6 W diode laser housed within the LaserPecker, meaning engraving stronger materials is not an option. But paper, cardboard, felt, leather, and cloth shouldn’t be an issue.
We mentioned it above, but it’s worth saying again here. OMTech seems to have heard complaints about the K40’s missing features and has remedied them with the K40+. It’s everything great about the K40 with stock air assist, software laser power control, an adjustable laser head, and compatibility with popular software like LightBurn and LaserGRBL. At $600, it may stretch the “budget” category but is certainly affordable for its features and worth considering for its increased ease of use.
For anyone looking for a little more pizzazz and willing to spend a bit more, we would advise you to check out our Best Laser Engravers Guide.
Below, you’ll find a changelog mentioning things that have changed, so you can see our past recommendations and how the machines, and our opinions, have changed.
Update – 4 August 2023: We popped in to bring this guide up to speed with the current market. The Ortur Laser Maser 2 S2 appears to be on its way out, no longer offered by Ortur. For now, you can still find the system through resellers, but we’ve replaced it with the more affordable Sainsmart Jinsoku LC-40 (which happens to be our overall budget pick in our list of The Best Single-Board Computer for Makers. We updated our Other Machines section to add the Aufero AL1 – a contender for the Budget Pick in this list that does come in a little cheaper than the Neje 3 but lacks some of its handy features – and OMTech’s K40+.
Update – 30 January 2023: We are back with another update. We have replaced the Neje Master 2S, which is on its way out, with the follow-up version, the Neje 3. We’ve also updated prices and checked if there are any other noteworthy machines out there that fit the roaster. Nothing beats the above three, though. If you want to get into laser engraving without breaking the bank, our picks will have you covered.
Update – 25 February 2022: Bit of an overhaul, this one. We’ve updated our buyer’s guide format. In doing so, our recommendations are fewer but more transparent, and we can better convey why exactly we think these machines are great. We scratched the GanGou Laser Engraver and the LaserPecker L1 from this list. Not because they suddenly turned foul, but they just ain’t up there with the top picks.
Two laser technologies are relevant in desktop laser engraving – diode and CO2.
Diode lasers use a semiconductor diode to convert current into light which is then focused into a beam. Generally, diode lasers are cheaper, making them a great low-cost starting point. While they are suitable for engraving most materials, they typically lack the power of stronger CO2 lasers, and their ability to cut materials is limited. That is because the maximum physical output of a laser diode is about 10 W. Note: while some manufacturers claim their diode laser engravers capable of 15-30 W, this refers to the input power. Make sure to check the actual output of a machine.
CO2 lasers are a significant step up from a diode laser, often offering several times more power. They work by passing an electrical current through a CO2-filled glass tube, which creates the light energy. Mirrors then guide this light to the focusing lens.
While powerful diode lasers exist, CO2 lasers generally offer more versatility than diode lasers and are able to cut materials that diode lasers can’t. The downside is, CO2 lasers are very delicate devices with mirrors and glass tubes that are highly susceptible to damage – especially during transport. In addition, there are consumable costs with CO2 lasers in replacement parts needed after a couple thousand hours of usage.
Laser engravers are compatible with a wide variety of materials, but a particular laser may not be compatible with the materials you would like to work with. Before you invest in a laser engraver, it’s very important you know the materials you want to work with so that you get the most appropriate laser engraver for the job.
For the short read, peruse our six-step guide. If you want to delve deeper, consult our in-depth dossiers that will help you improve your laser engraving results.
You can use both raster and vector files for laser marking, engraving, and etching. However, your intended use may impact which one you apply for your design.
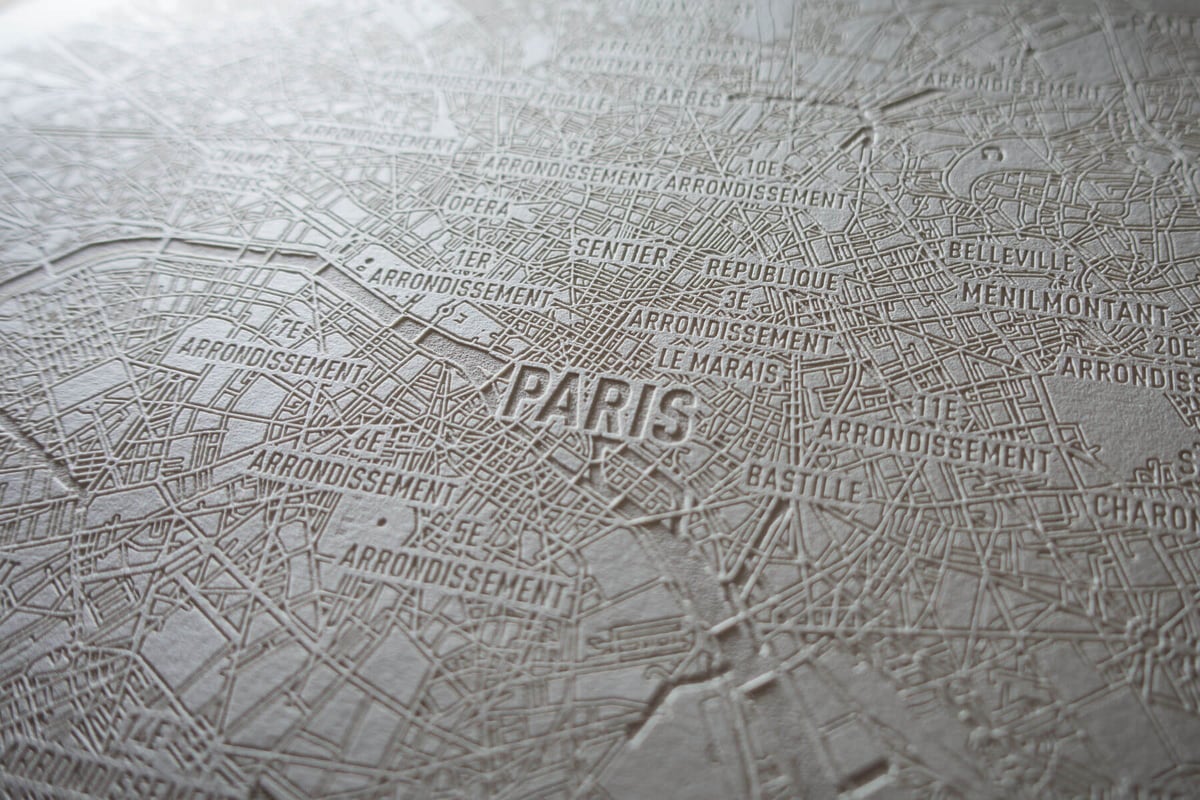
Raster files (JPG, PNG, etc.) are the go-to format for large engravings like fillet letters, images, and stamps. If you want to engrave any image made with a camera, raster engraving is what you want to use. Just like on computer screens, the image is put together by gradually adding points to form any shape you can imagine. Sometimes this method is also called “area engraving.” This method is especially well suited to materials like acrylic because it lends a beautiful frosted finish with a distinct contrast. Avoid raster engraving large glass, stone, and ceramic surfaces, since the results may be visually uneven.
Vector files (SVG, EPS, etc.) are composed of lines that are traced onto the surface sequentially. If your design consists of fine lines and curves, then vector engraving is the appropriate method. Professionals also call this approach “scoring,” and sometimes “line engraving.” Vector engraving lends itself well to wood because the burned outline creates a stunning contrast with the warm surface of the material. It is less suitable for materials like acrylic since the melted outline is only faintly visible. The video above illustrates the strengths and weaknesses of both methods.
For the best effect, it may be worthwhile to combine both methods. The final parts feature the evenly engraved surface from raster engraving and also the crisp outline created by the vector engraving. This effect works exceptionally well on wood.
The difference between both methods can be a substantial cost saver even when you order only one piece from an online service. But how do you decide? As a rule of thumb, if your surface details consist of large, relatively simple shapes, you should opt for vector engraving, as this is the quicker and thus more economical laser engraving method. However, if the design covers a large area that contains many intricate details, you should choose the raster engraving method. However, ultimately, you should decide based on what works best for your design!
Laser engraving is so much more than fastening any material in the work area and pushing a button. Every material has its quirks and idiosyncrasies that will sometimes help you achieve your design goal and sometimes make it hard for you. The following list will guide you through the properties of the most common materials.
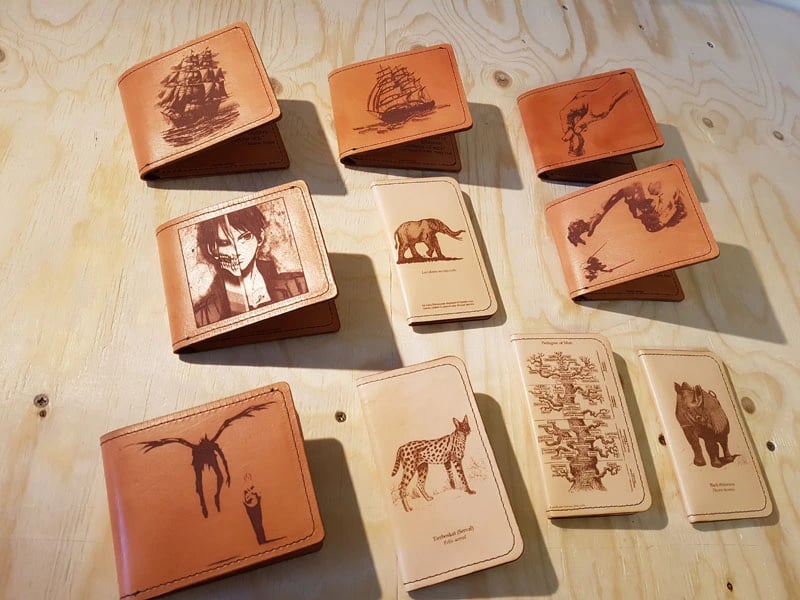
Since leather is a natural material, it may deform during laser engraving if too much power is applied.
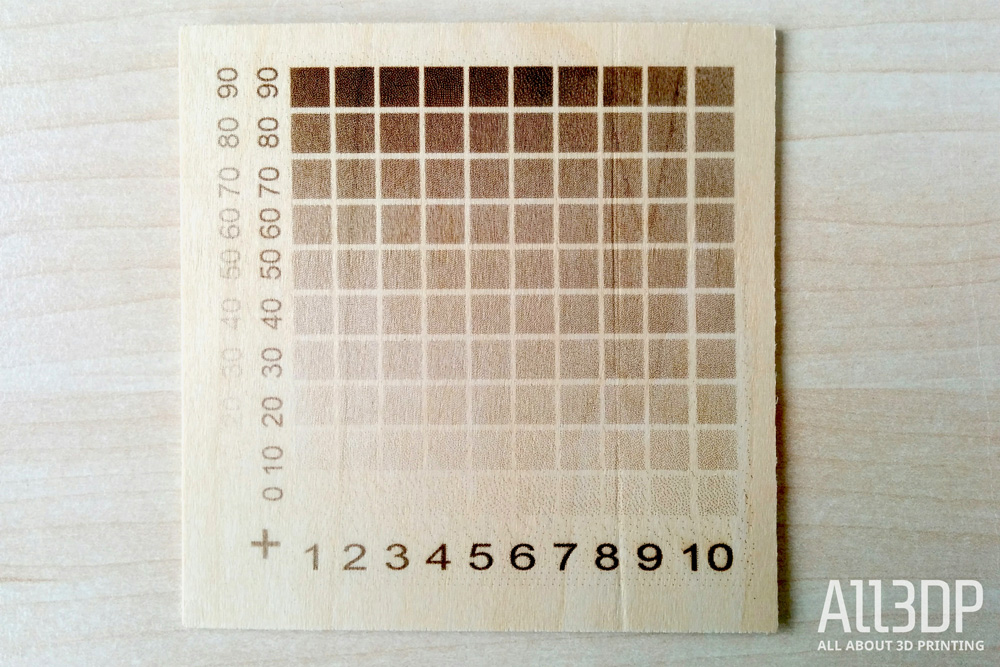
Because of the many varieties of leather, it is difficult to come up with a general rule for laser engraving. Hence, there is no way around determining the optimal laser engraving settings for each kind separately. To this end, test your machine with a grayscale matrix.

In terms of laser engraving, plywood has an additional advantage over natural wood. When cut into sheets, the latter reveals grains in alternating shades that stem from different kinds of growth during the seasons. These differences also translate into different laser engraved surfaces. Usually, the lighter areas will come out lighter, and the dark areas will be darker.
As a rule of thumb, unless the desired look of your design is zebra pattern, you will be better off using plywood that has a uniform surface.
When engraving hardwood, you should always apply higher laser power to achieve smooth results.
To determine the optimal laser engraving settings, test your machine with a grayscale matrix.
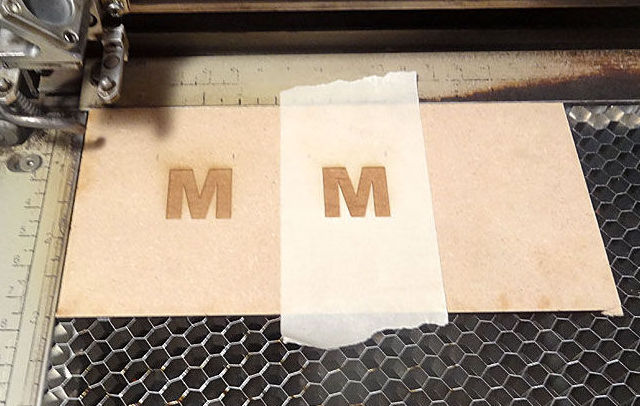
Apply a moist paper towel to achieve a smoother surface finish and a white engraving result. Take care that there are no air bubbles or overlaps because this would distort the effect. Once the engraving is finished, the paper towel can be wiped off easily.
An alternative to paper towels is application tape. Like moist paper towels, application tape is an excellent measure against surface roughening. The same caveat concerning air bubbles and overlaps applies. However, the final engraving color is not a bright white but looks grey. Once the engraving is finished, the tape residue can be easily removed.
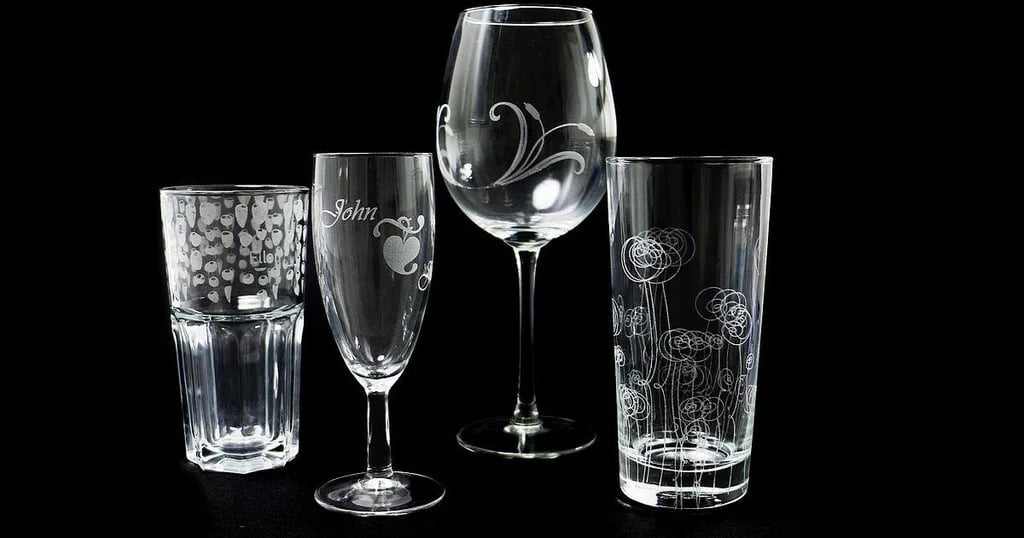
But what to do when your laser engraver doesn’t have enough power to engrave glass? You can still achieve high-contrast designs by stenciling paint with tape! Simply mask the glass surface with tape, then engrave your design into it. Next, cover the revealed area of the tape with a thin layer of paint using a brush. After the paint has dried, peel the tape and remove the tape residue carefully.

If your results are unsatisfactory, consider changing the Z-offset value. This simple trick can significantly improve the result of your engraving. Many professional laser engravers report that hard stones are easier to process if you choose a negative Z-offset value of 1 mm or more. The physics behind this workaround is simple. The closer the surface to be engraved is to the laser, the more energy enters.
But what about when your laser engraver doesn’t have enough power to engrave stone? Or, when working with extremely hard stones that yield no satisfying results? You can still achieve high-contrast designs by stenciling paint with tape! Simply mask the glass surface with tape, then engrave your design into it. Next, cover the revealed area of the tape with a thin layer of paint using a brush. After the paint has dried, peel the tape and remove the tape residue carefully.
Files for use in raster engraving can be created in many graphic programs. In fact, if you are reading this on a Windows, macOS, or Linux PC, then you’ll have a pre-installed graphics program with the operating system that will suffice for your basic needs. But, these programs are our preferences:
If you are looking for a free alternative to Photoshop, try GIMP.

Vector engraving files are created in programs that offer support for vector formats like AI, DXF, EPS, PDF, and SVG. In general, this software comes with different tools to generate the necessary files. Depending on the machine you are using, a different setup is required. For example, if you want to combine vector engraving and raster engraving in the same design, it may be necessary to create separate files or assign different colors for each technique.
If you are looking for a free alternative to AutoCAD, try FreeCAD.
Learn more about this software for laser engraving: AutoCAD 2027: Free Download of the Full Version & What's New
Learn more about this free CAD software:

If you are looking for a free alternative to Adobe Illustrator, try InkScape.
So, you want to know how you can improve your laser engravings? Here are a few tricks that will help achieve that goal.
There are a few hacks that allow you to get you started in no time. However, if you are earnest about laser engraving, then there is no way around measuring the focal point of your laser. We suggest that you test 10 to 15 increments of 1 mm in the Z-axis. Prepare a series of files that contain a straight line and the value you are testing. Once your series of tests is complete, compare the results. You want the laser engraving with the thinnest solid line. Use this value for your future laser engravings.
The same applies to testing the intensity of colors. Modern laser engraving machines can achieve a broad spectrum of shades. However, the appearance of the final engraving cannot always be deduced by looking at the raster file. Laser engraving a grayscale matrix onto your material is an easy way to achieve predictable results, as you can “read” the intensity of shades on a scale from 0 (white) to 100 (black). Ideally, you should run this test for every material you want to laser engrave for the best possible results.
Tidiness at the workplace should be a no-brainer. However, concerning laser engraving, we’re not merely talking about courtesy towards your co-workers. Materials like wood, plastics, or rubber leave large amounts of dust that may cause unwanted results like discolorations, burnt debris, or even distortions. Be sure to install an exhaust system with the necessary capacities. It will take a lot of weight on your shoulders, but won’t clean the entire machine.
You should also be cleaning your laser engraver regularly by hand, removing the bulk of dust with a simple kitchen cloth. Pay extra attention to the machine head and the laser lens: these components should be free from dust and smut at all times to avoid laser engraving mistakes. To increase the efficiency of your exhaust when working with parts smaller than your work platform, try covering the rest of the platform with paper. It will save you a fair amount of manual cleaning.
Here are our tips for making your laser engraving process more efficient with templates:
Watch out for the volume of your workpieces. For thin objects, flat templates are sufficient to keep them in place. However, thicker and rounded objects, like pens, require thicker templates to keep them from rolling away.
In case you work with a large number of different templates, be sure to write (or laser engrave) the name of the graphics file in question onto the template, making it much easier to match your tools in your daily work. File small templates in folders to keep them safe and organized.
License: The text of "The Best Budget Laser Engravers" by All3DP is licensed under a Creative Commons Attribution 4.0 International License.
CERTAIN CONTENT THAT APPEARS ON THIS SITE COMES FROM AMAZON. THIS CONTENT IS PROVIDED ‘AS IS’ AND IS SUBJECT TO CHANGE OR REMOVAL AT ANY TIME.