In 2018, affordable 3D printers have hit a sweet spot with consumers worldwide. And with the Anycubic i3 Mega, the segment of 3D printers under $300 has a new winner.
Related:

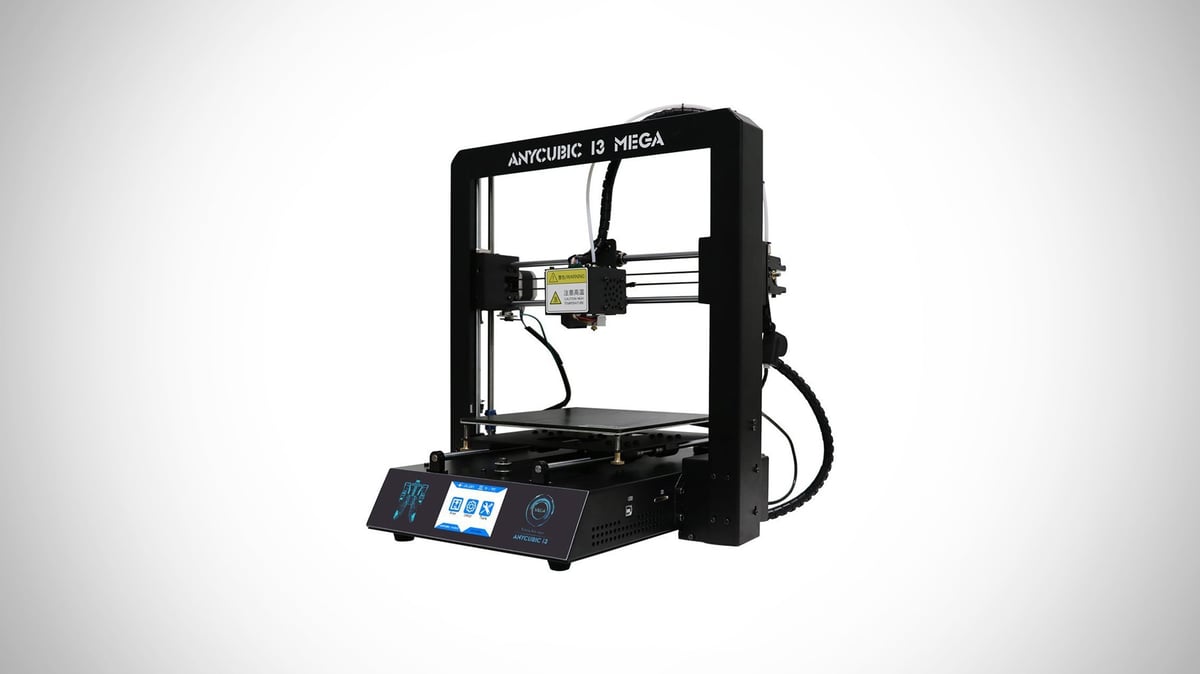
Anycubic i3 Mega Review
In this comprehensive Anycubic i3 Mega 3D printer review, we’ll talk about the pros and cons, show you our test prints and rate the overall performance of the printer.
Pros
- Delivers astonishing 3D printing quality for a low price
- Works nicely with most materials
- Good documentation, spare parts included
- Resume from power outage
- Mechanical filament sensor
- “Ultrabase” heated bed
- Fast and versatile printer suited for most materials
- Quality components, sturdy frame
- Fast and responsive user interface
Cons
- Loose cables in our review sample
- Dirt specks under the touchscreen in our review sample
- Spool of sample filament was extremely bad
- Somewhat noisy
- Not very upgrade-friendly
- Semi-automatic bed calibration advertised as automatic bed calibration
The Verdict
After some initial woes (more below), we were able to get excellent prints from the Anycubic i3 Mega. Also, it handled PLA and PET filaments with ease.
Currently, it is the go-to PLA printer at All3DP. Thanks to the Anycubic Ultrabase print bed, the prints stick nicely during printing and can be plucked off the build plate with ease. If you start tweaking a bit and go for the “extra fine” print quality, the results are simply stunning. We especially liked the layer quality with regular PLA.
In the last months, the price for the machine has come down by roughly a third.
If you can spend more money, you should have a look at the Prusa i3 MK3, which is currently the Best 3D Printer in 2018. If you are looking for an alternative in the same price range, you should consider the Monoprice Maker Select V2, which also has some nice tricks up its sleeve.
But overall: If you choose to buy it, we are sure you’ll like the Anycubic i3 Mega as much as we do.
The Loooong Read
The Anycubic i3 Mega surfaced in June 2017 – since then, it has developed a dedicated base of followers. It hasn’t been officially revised yet (so there’s no “version 2”). Also, the specifications of the printer haven’t changed over the years.
The specifications of the Anycubic i3 Mega read very similarly to other low-cost 3D printers.
- Technology: FDM (Fused Deposition Modeling), single extruder
- Build Volume: 210 x 210 x 205 mm
- Resolution: 50 microns
- Layer Resolution: 0.05-0.4 mm
- Nozzle/Filament Diameter: 0.4 mm/1.75 mm
- Connectivity: USB, SD Card
- Heated Bed: Yes
- Print Speed: 20-60 mm/s
- Travel Speed: 60 mm/s
- Supported Filament Materials: PLA, ABS, HIPS, Wood
- Operational Extruder Temperature: max 260 °C
- Operational Heatbed Temperature: max 100 °C
- Input rating: 110 V/220 V AC,50/60 Hz
- Working Voltage: 12 V DC
- Printer Dimensions: 410 x 475 x 458 mm
So what makes this printer stand out?
- Although it’s considered to be a kit, the Anycubic i3 Mega comes partially pre-assembled. This means its possible to build and calibrate the Anycubic i3 Mega in under an hour.
- The printer has a touch screen instead of the typical click wheel/screen combo, which makes the usage more comfortable. We found it to be very responsive and good to read, even from afar.
- In case of power failure, the auto-resume feature will kick in to finish the print after the Anycubic i3 Mega is powered on again. This is a feature only a handful of 3D printers offer. So if you are living in a place with a notoriously unstable powerline, this could come in handy.
- Also, a dedicated sensor will detect filament outage and pause the print — an ability you would expect from an expensive 3D printer.
- Thanks to the heated bed, you’re not stuck with a limited set of materials.
First, Some 3D Printing Woes
When you start 3D printing, you’ll eventually run into hardware problems – in our case, the bed of the Anycubic i3 Mega didn’t want to heat up. It remained at the comfortable room temperature but made no efforts to heat up to the 60 degrees we had dialed in. So, obviously, something was broken.
As you all probably know, the most common solution to this problem is to check the wiring. Faulty, loose or broken cables often are the problem of hardware components not working – and in our case, we were on the right track.
After removing the case, we found the culprit: the cable for heated bed wasn’t attached to the board. Even worse, it wasn’t even soldered properly! It looks like the quality control for this printer had failed; as obviously, loose cables near a circuit board are a potential fire and security hazard.
After fixing this problem, we started loading the filament and ran a test print.
Unfortunately, the problems with the Anycubic i3 Mega continued. The filament spool that came in the box was probably the worst spool we ever encountered. The quality was horrible: The filament strand was tangled and twisted; while printing, it oozed out of the nozzle and even started to bubble – something we haven’t seen with PLA for a while.
No surprise, the first print – the sample owl print from the Anycubic i3 Mega SD card – didn’t make it even halfway through. The first layers started out okay. But then the object detached from the build plate, resulting in a classic FUBAR print.
Having had enough of this filament, we unloaded the spool and replaced it with some standard white Colorfabb PLA.
Simple Prints: It‘s Getting Better
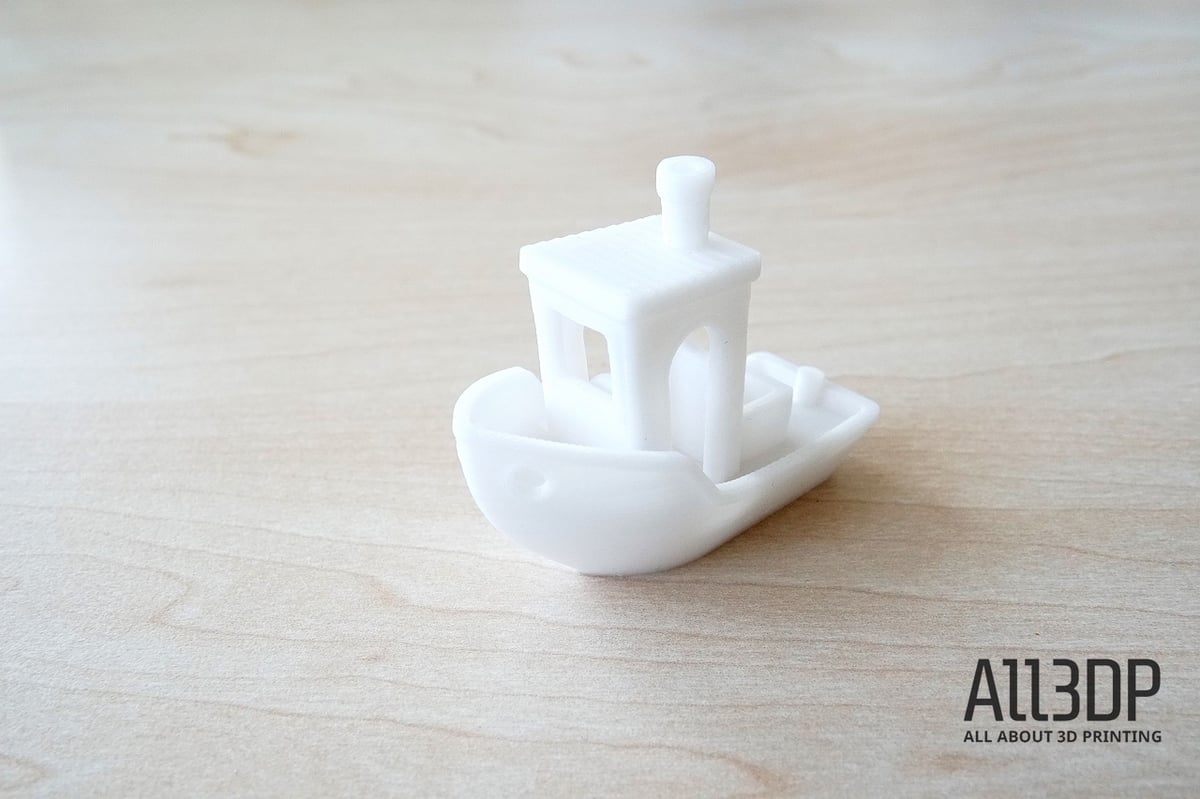
Thankfully, after this horrible start with the Anycubic i3 Mega, things started to get better very fast. We removed the last traces of the black gooey filament and loaded a proper spool of standard white Colorfabb PLA. With it, we managed to get an extremely nice Benchy (see above) from the Anycubic i3 Mega 3D printer.
We had sliced every object in Cura 3.2 with “Normal“ settings and the recommended standard settings for PLA. Pretty much every detail came out fine:
- you could read the lettering at the bottom of the boat
- the bow was nicely curved without any material inconsistencies
- the bridge roof surface was a bit pixelated but okay overall
- the chimney roundness war perfect
- the hawsepipe, the bridge rear window, and the cargo box looked nice
- you could even read the small-detail stern nameplate
So far, this is one of the best Benchy‘s we’ve ever got out of a 3D printer under $300. Impressive!
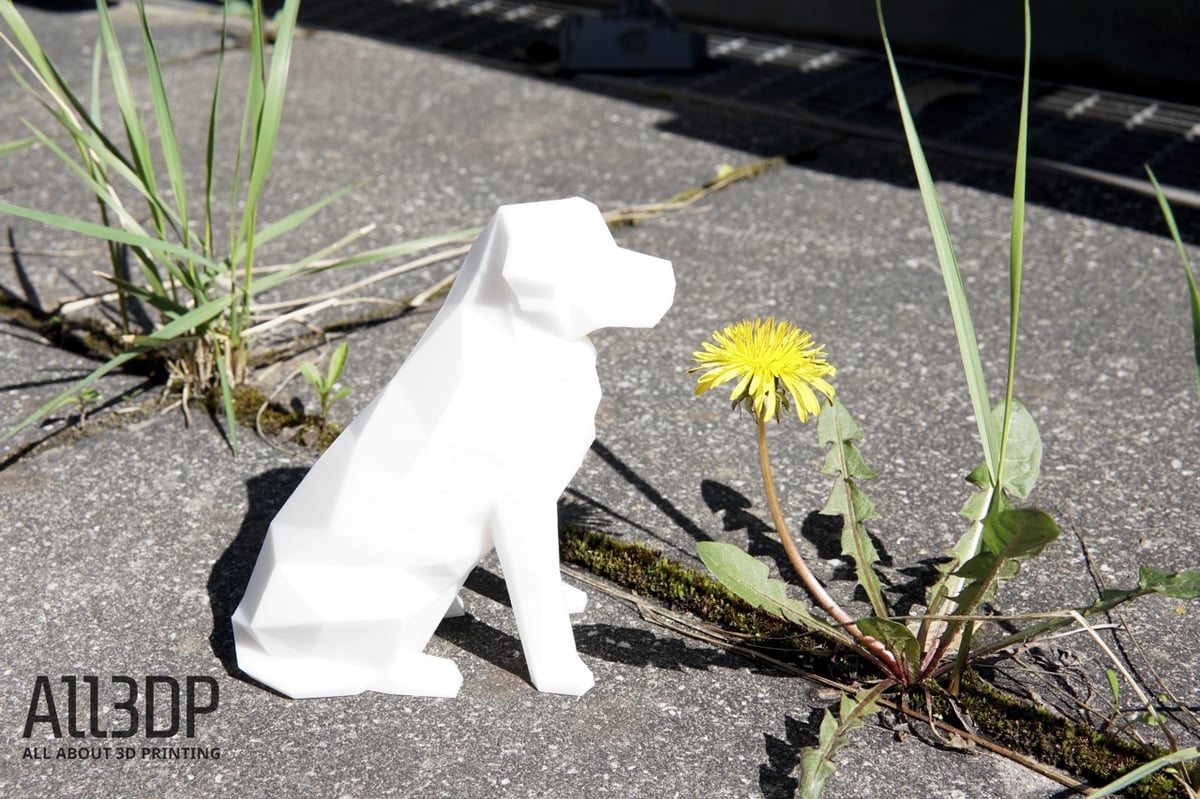
For the next model, we stayed with the Colorfabb PLA and started printing the low-poly Labrador, which also turned out nice (Mommy look, no supports!)
Intrigued by the way the Anycubic i3 Mega handled the low-poly dog print, we chose the Venus de Milo from the Scan the World project to be our next test print. In this print, the delicate details can be ruined easily if the 3D printer has some layer issues. The Anycubic i3 Mega handles the print with ease, the surface turned out to be smooth as the marble original.

Next step was a filament change. When it comes to 3D printing materials, PET-G is a bit more demanding. It needs a heated bed, proper heat settings, and some tender loving care if you want to get decent results.
We chose a spool of Matterhackers Blue house brand and 3D printed a delicate 3-part miniature flashlight in one go. Again, we sliced the model in Cura with „Normal“ settings. The middle part of this print is very delicate and often doesn’t want to stick to the bed. After applying a layer of glue stick to the build plate, the Anycubic i3 Mega solved this task without running into problems.

It’s Getting Challenging: Printing a Project
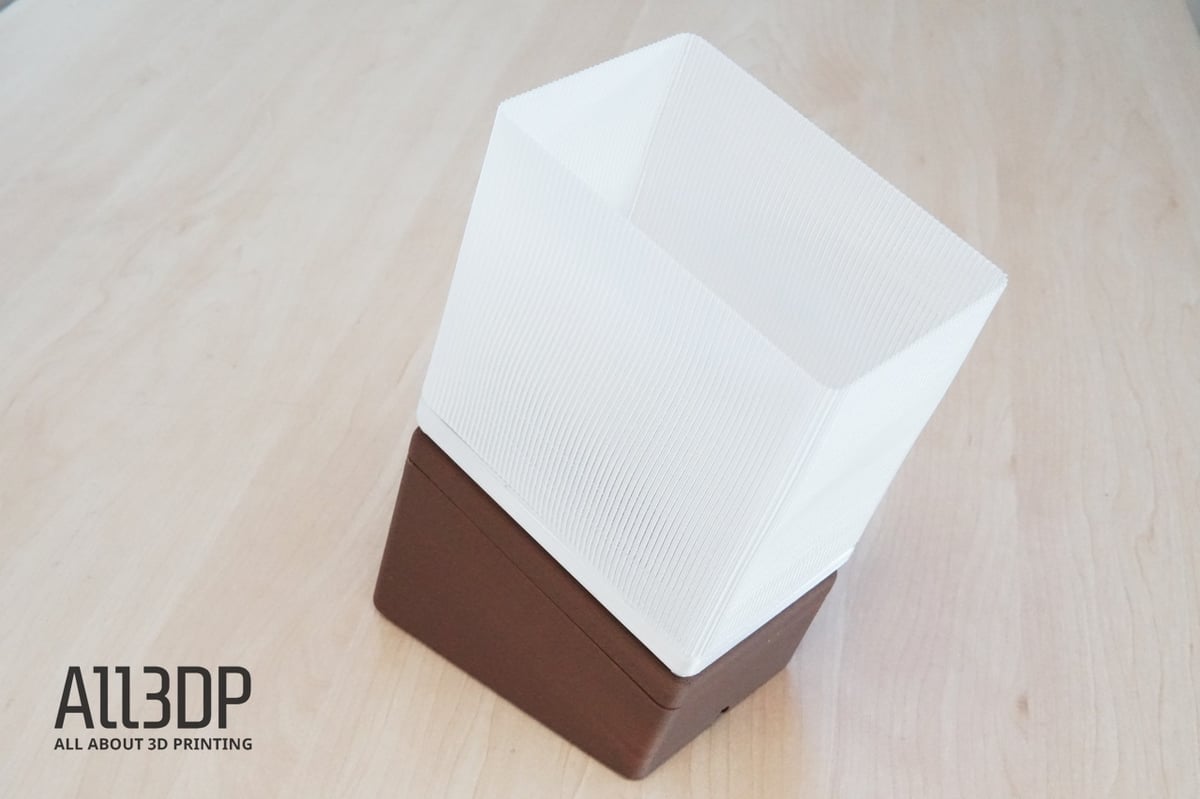
As a bigger 3D printing project for the Anycubic i3 Mega, we chose Flowalistik’s Lampe. It is a lovely 6-part lamp that you just snap together. Flowalistik printed it with wood and white filament, which is a classic combination – but we wanted something special.
So we chose a dark brown Colorfabb corkFill for the base material (it also smells nice while printing) and a translucent Verbatim PET for the lampshade. As usual, we used the recommended temperature and speed settings for both materials and sliced everything in Cura.
After roughly eight hours of 3D printing, the Anycubic i3 Mega had finished all the parts. The result looked stunning – with one little exception: the walls of the PET-G filament didn‘t come out as expected. They had bulged – with a slower printing speed and some experimental temperature settings, you would probably get better results from the Anycubic i3 Mega.
Long-term Performance
Even if there were at least ten new printers arriving at the All3DP editorial offices, we found ourselves coming back to the Anycubic i3 Mega ever so often.
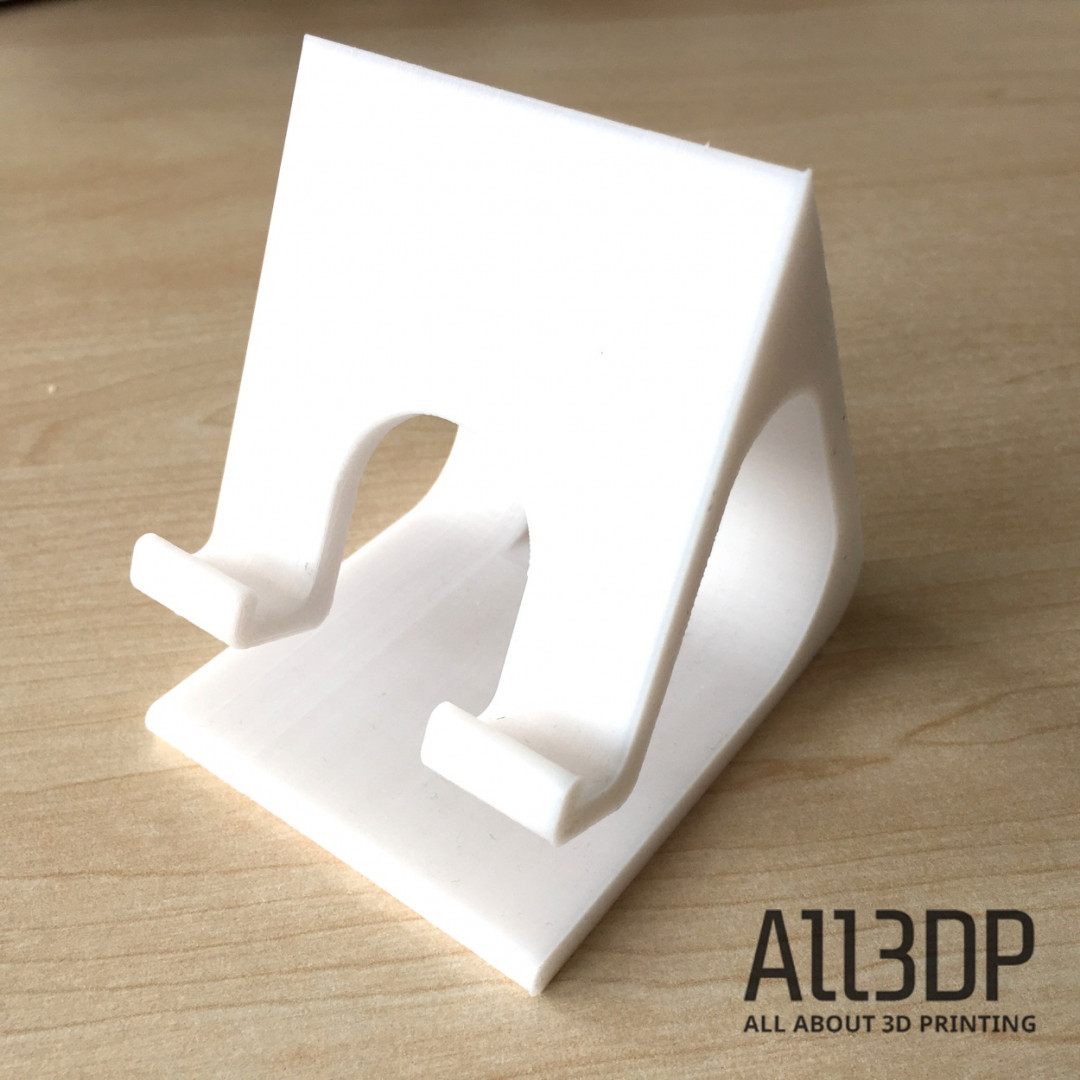
Printing with this machine turned out to be carefree and straightforward. Above you can see a smartphone stand we printed with the Anycubic i3 Mega – worked like a charm.
Also, here‘s an example of the excellent layer adhesion under a USB microscope:
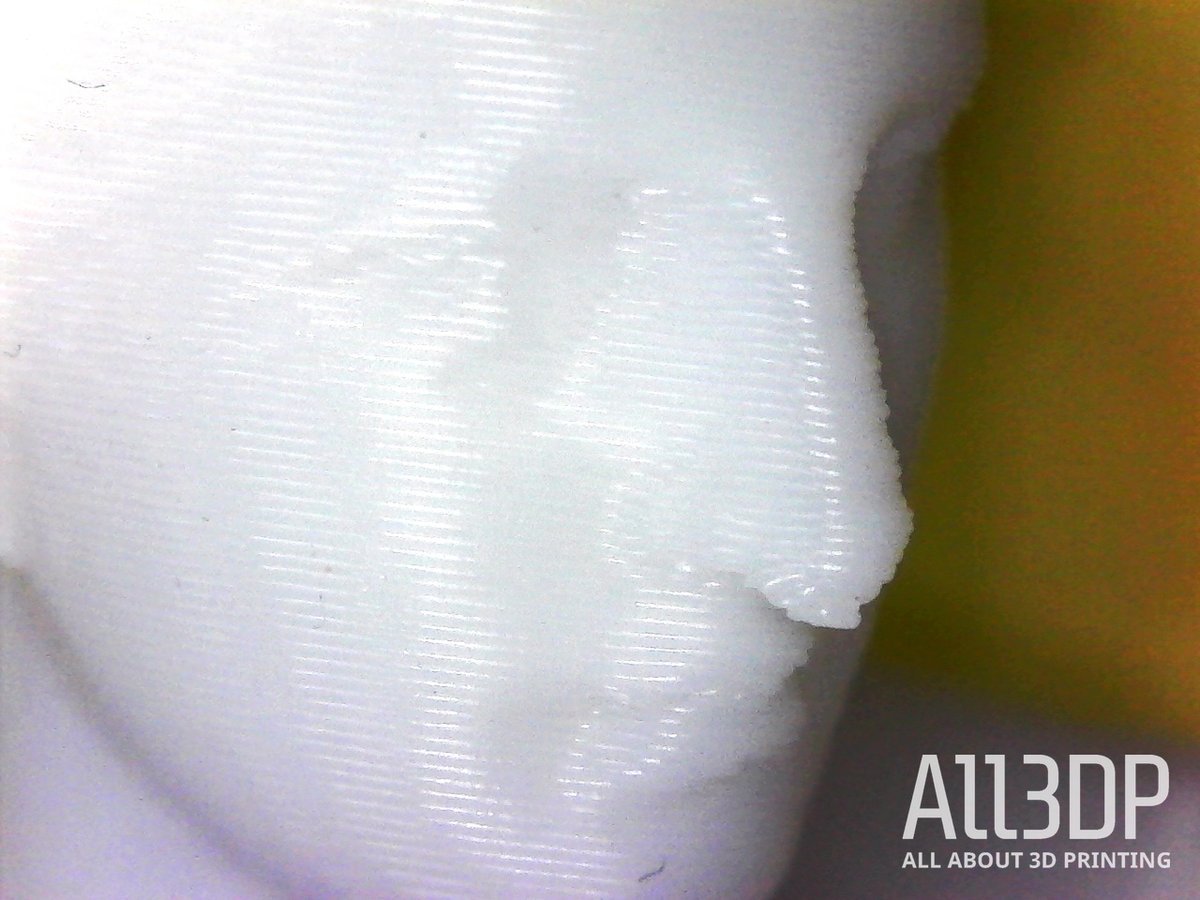
For these prints, we used the latest version of Cura with a 0.1mm layer height (“high” settings) and the regular settings for PLA material (printing temperature 200 degrees Celsius, build plate 60 degrees Celsius).
If you want to know more about PLA filament and its derivates, please continue here:
We used the Anycubic with several different filaments, ranging from affordable to more expensive materials. We never ran into any misprints, support structures came off nicely.
Because the Anycubic i3 Mega delivered consistent quality, we think it’s the best printer you can buy for $300.
Where to Buy it
You can order the Anycubic i3 Mega from the popular online stores like Amazon or Gearbest.
The Anycubic i3 Mega was our spring 2019 pick for the "Best 3D Printer Under $300". It delivers quality prints, features a sturdy full metal frame and a filament run-out sensor.
Anycubic also offers a dedicated homepage. In case of questions regarding the 3D printer, you can go to the Anycubic Facebook group or check the support section at their website.
Anycubic i3 Mega Review: Assembly
The Unboxing
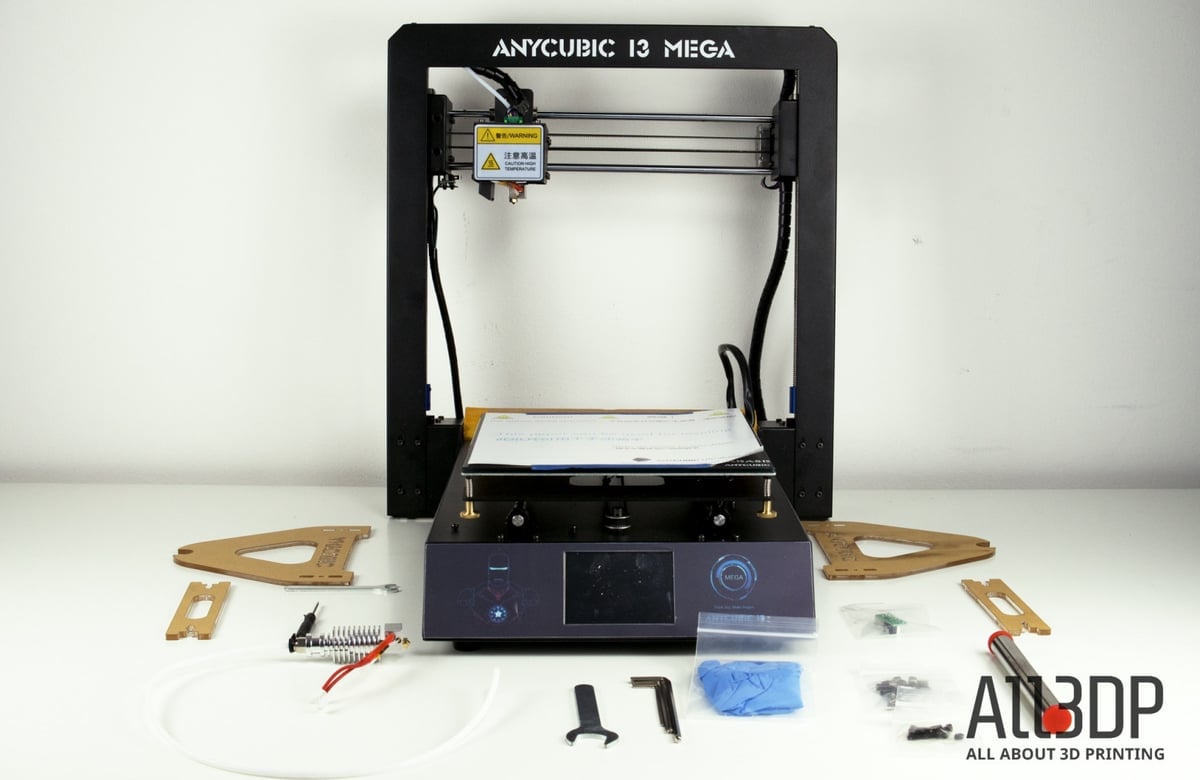
If you order the Anycubic i3 Mega 3D Printer, a big and heavy package will be delivered to your house. Parts and packaging sum up to nearly 15 kilograms. We found all parts to be embedded thoroughly in plastic foam and packed in plastic packaging – lots of plastic waste, though! Picking through the parts, there was no sign of damage or wear from transit.

Before you open the Anycubic i3 Mega’s box, be sure that it’s the right way up. The last thing you’ll want is this printer falling on you — these parts are heavy!
In the box you will find:
1. Anycubic i3 Mega base: The base part of the Anycubic i3 Mega is made from sheet metal. Its wide footprint looks stable, and the aforementioned weight ensures this stability. On top of the base you’ll see the heated bed. It is already mounted to the printer’s Y-axis rail, so you‘ll only have to calibrate it before the first print.
Hidden in the base is the power brick, most of the wiring and also the RAMboard (a.k.a. “the brain”) that drives the Anycubic i3 Mega’s movements.
On the surface of the base you’ll also find connectors (we’ll come to that later), the power socket, the SD card slot and a female USB plug. Also, sitting pretty on the front of the printer’s base is the 3.5-inch capacitive TFT touchscreen. During our Anycubic i3 Mega unboxing, we discovered a small cosmetic issue with the screen — small white flecks of paper or some other foreign junk are trapped behind Anycubic’s hard sticker panel on the front of the machine. A layer that adds tranparent plastic over the printer’s touchscreen, these dots are preserved forever to taunt us as we go about printing on the Anycubic i3 Mega. A casualty of a sloppy quality control, we suspect.
The printer works fine despite the screen crud, so first world problems… but still.
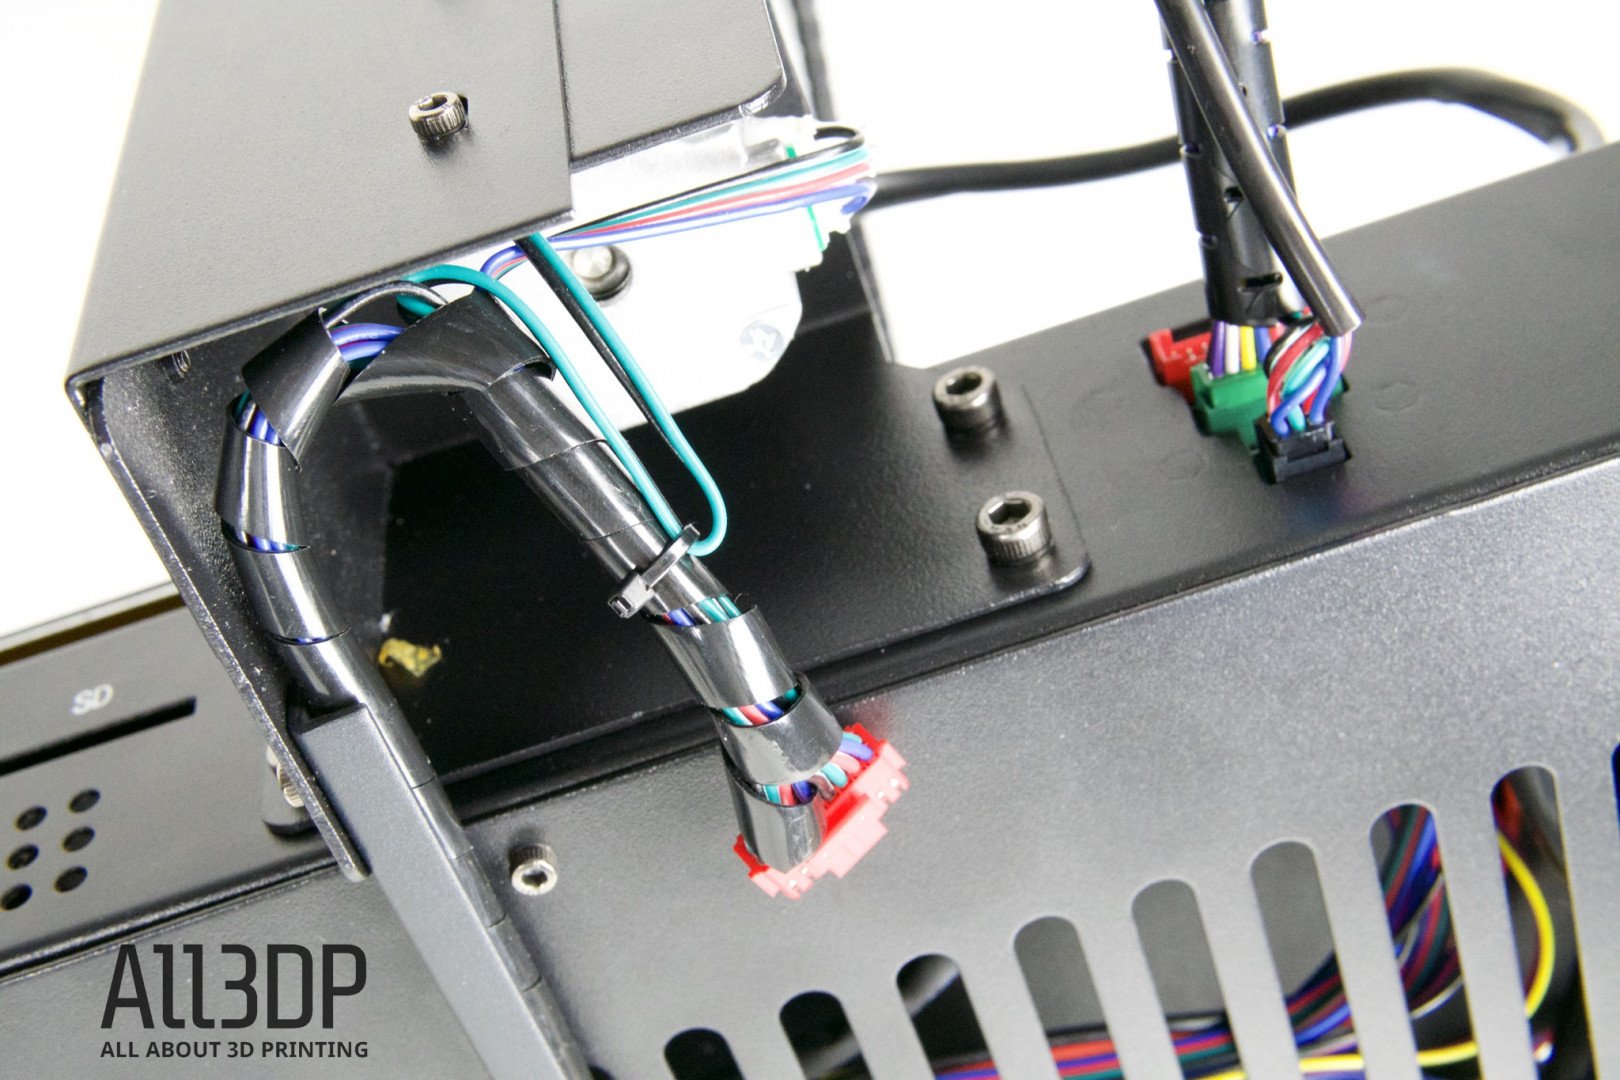
2. Anycubic i3 Mega frame: This part is attached to the base with 8 screws. The Z-frame consists of two rods, the X motors, the extruder, and the end stops. Everything, including the Bowden drive extruder, is already mounted to the frame. All the wires are nicely stowed away in spiral cable wrap.
3. Anycubic i3 Mega User Manual: The “Anycubic i3 Mega 3D printer User Manual” contains technical data, assembly instructions, software installation guide, general tips, and a troubleshooting guide.
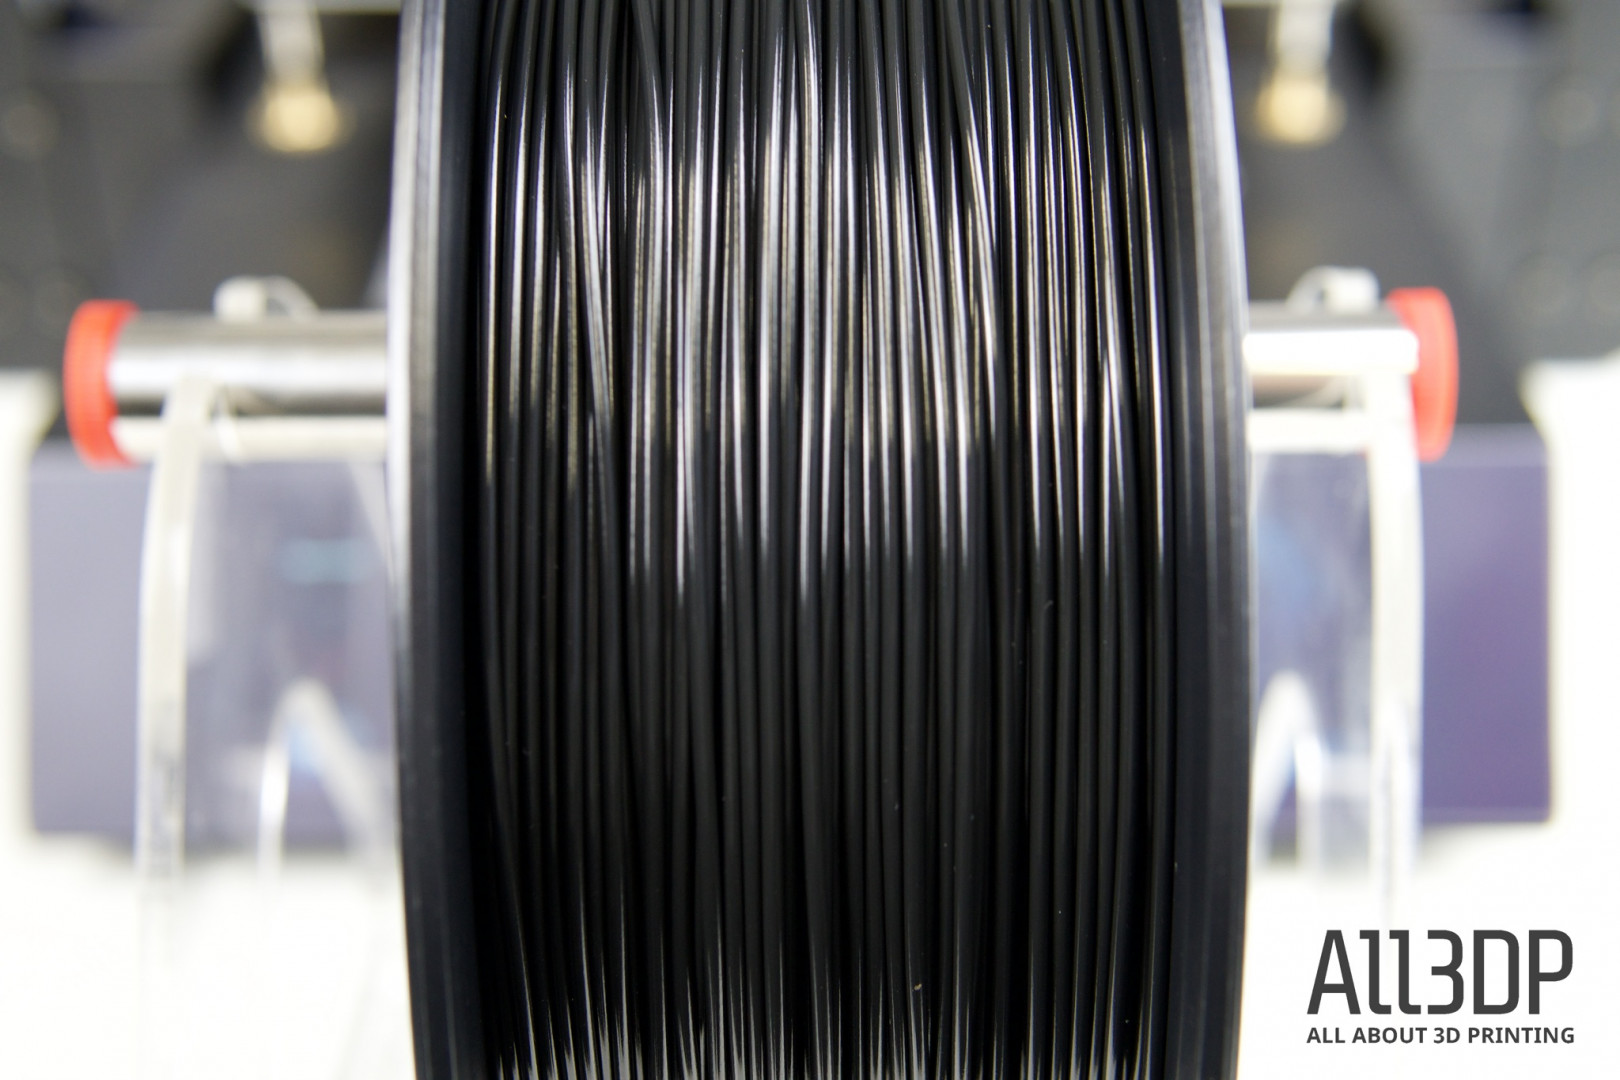
4. PLA filament: Our Anycubic i3 Mega came with a 1-kilogram spool of PLA filament sealed in a plastic bag. The color of the filament may vary. Ours was black.
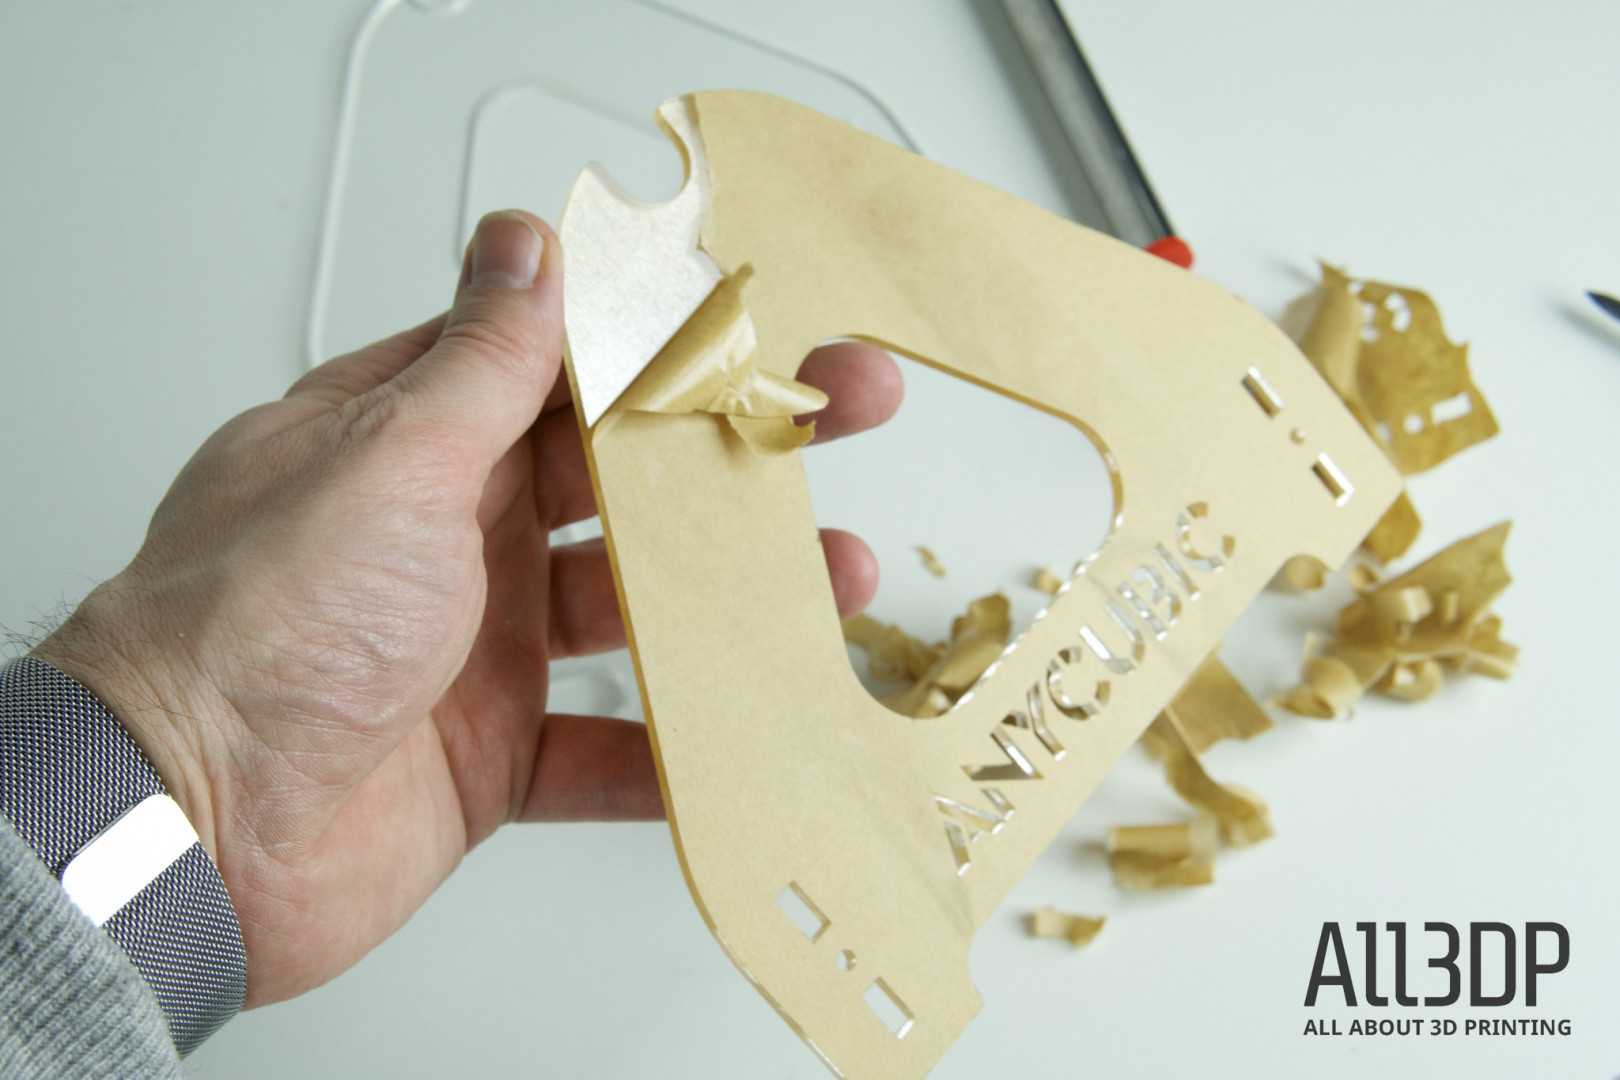
5. Anycubic i3 Mega Spool Holder: The spool holder consists of four acrylic parts and a detachable rod. It’s capable of holding the regular 1-kilogram spools or loose 3D printing filament.
6. Anycubic i3 Mega Tool Kit: This toolkit will provide you with all the basic tools for the assembly of the 3D printer. It will also help you fasten and unfasten screws or remove the 3D printer nozzle if you really need to do so.
7. Rubber Gloves: We learned this hard way: Look for the blue gloves in the Anycubic i3 Mega package (they are really easy to spot). The rods and mechanical parts are heavily greased, so unless you enjoy smeared fingers and a greasy workbench during unboxing and assembly it’s best to glove up.
8. Scraper: The heated bed of the Anycubic i3 Mega 3D printer is known to be pretty sticky. Handily a print removal spatula is provided in the box. Be careful not to apply too much force when removing the prints otherwise you might damage the bed coating.
9. Tweezers and Pliers: These can be used to remove leftover filament from the heated nozzle. Also, the pliers will come in handy if you want to remove supports from your finished prints.
10. Removable Drives: Anycubic throws in not only the usual 8GB SD card for storing files but provides you with an additional USB SD card reader. This part is absolutely not needed for the Anycubic i3 Mega 3D printer to work, but it’s a nice addition. Also, there’s a USB cable in the box in case you want to hook up the Anycubic i3 Mega to a PC, Mac or Linux machine.
11. Spares and Extra Hotend: It’s not unusual for 3D printing companies to throw some spares in the box. With the Anycubic i3 Mega, you get a generous pack. In addition to an extra end stop switch and spare screws, the kind folks at Anycubic include a spare hotend! This is something we haven’t seen before. Nozzles, yes. But a hotend? That’s really cool.
The Verdict
Our review sample of the Anycubic i3 Mega 3D printer came perfectly packaged. All the components made a solid, strong impression. Also, the company throws in a very generous pack of spares and tools that is probably only topped by the kits coming from Original Prusa 3D printers (spares and gummy bears!). The only problem we encountered so far was dirt under the screen.
The Assembly
The main assemblies of the Anycubic i3 Mega 3D Printer come pre-built, which means the overall build is easy enough (even for beginners) to assemble the machine an hour or less. Oh, and as mentioned: Wear those blue gloves. Those rods are greasy!
Anycubic i3 Mega Assembly Part 1: Unpack and Check the Parts
Start by removing the components from the package and check if all the parts are there. There’s a useful list in the manual that should help you. Lay out the parts in front of you.
You will need the base and the frame first.
Anycubic i3 Mega Assembly Part 2: Assemble the Frame
In the first step, you attach the frame to the base. You only need to fasten 8 screws, four on the right side, four on the left. Make sure the orientation of the frame is right. The letters “Anycubic i3 Mega“ on the frame should be visible if you look at the front of the 3D printer.
Anycubic throws in 10 screws in our bag, so you’ll have some spares if you need them. Fasten the screws tight, but don’t overdo it.
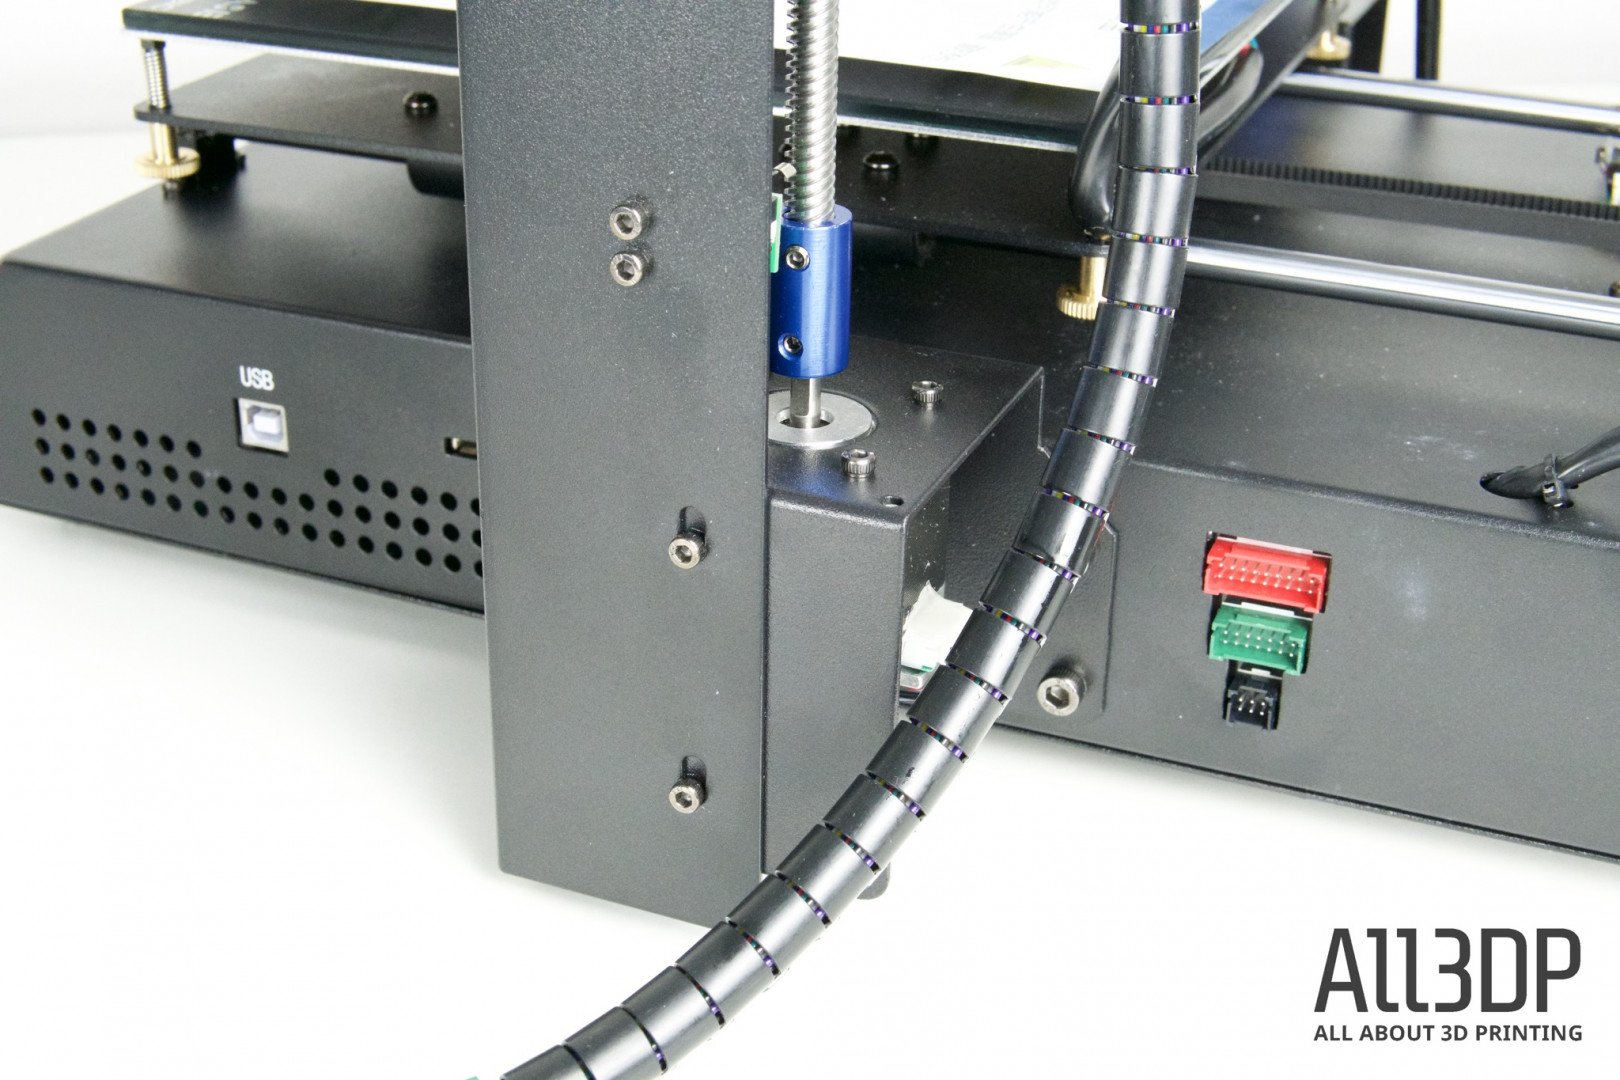
Anycubic i3 Mega Assembly Part 3: Wire it up!
Depending on your region it’s power grid, you can use the Anycubic i3 Mega 3D printer with either 110 V or 220 V. The switch for this is found on the left side of the base. You can use an Allen key to switch to the correct local voltage.
Next step: Attaching the wires.
Also, this is extremely easy, as everything is color coded. There are three cable connectors: red, green and black. You will find the green and black cables hanging from the frame.
Locating the red cable proved tricky, since it had moved into the frame during transport and packaging. We found it in a cavity on the lower left frame (see image above).
With that, you’ve completed building the Anycubic i3 Mega 3D Printer. Still, you’ll need to setup the spool holder and feed the filament into the Bowden tube.
Anycubic i3 Mega Assembly Part 4: Build the Spool Holder
The spool holder is not just an accessory, it prevents your filament spool from getting tangled up.
The Anycubic i3 Mega spool holder comes in four parts. First, you might want to peel off the protective paper stickers. This fiddly process took nearly as long the assembly thus far.
The rest is easy: Just insert the nuts into the side parts and fasten them. Please be careful, as these acrylic panes will break if you apply too much force. Place the rod on the spool holder – and you‘re done.
Anycubic i3 Mega Assembly Part 5: Feed the Filament
The last step is also easy to manage – feeding the filament into the Anycubic i3 Mega 3D printer. Put the spool on the spool holder and check the filament. The first 10 centimeters of our filament were wonky and bent. Make sure you get a straight strand, otherwise the filament might get stuck in the Teflon tube leading to the hotend.
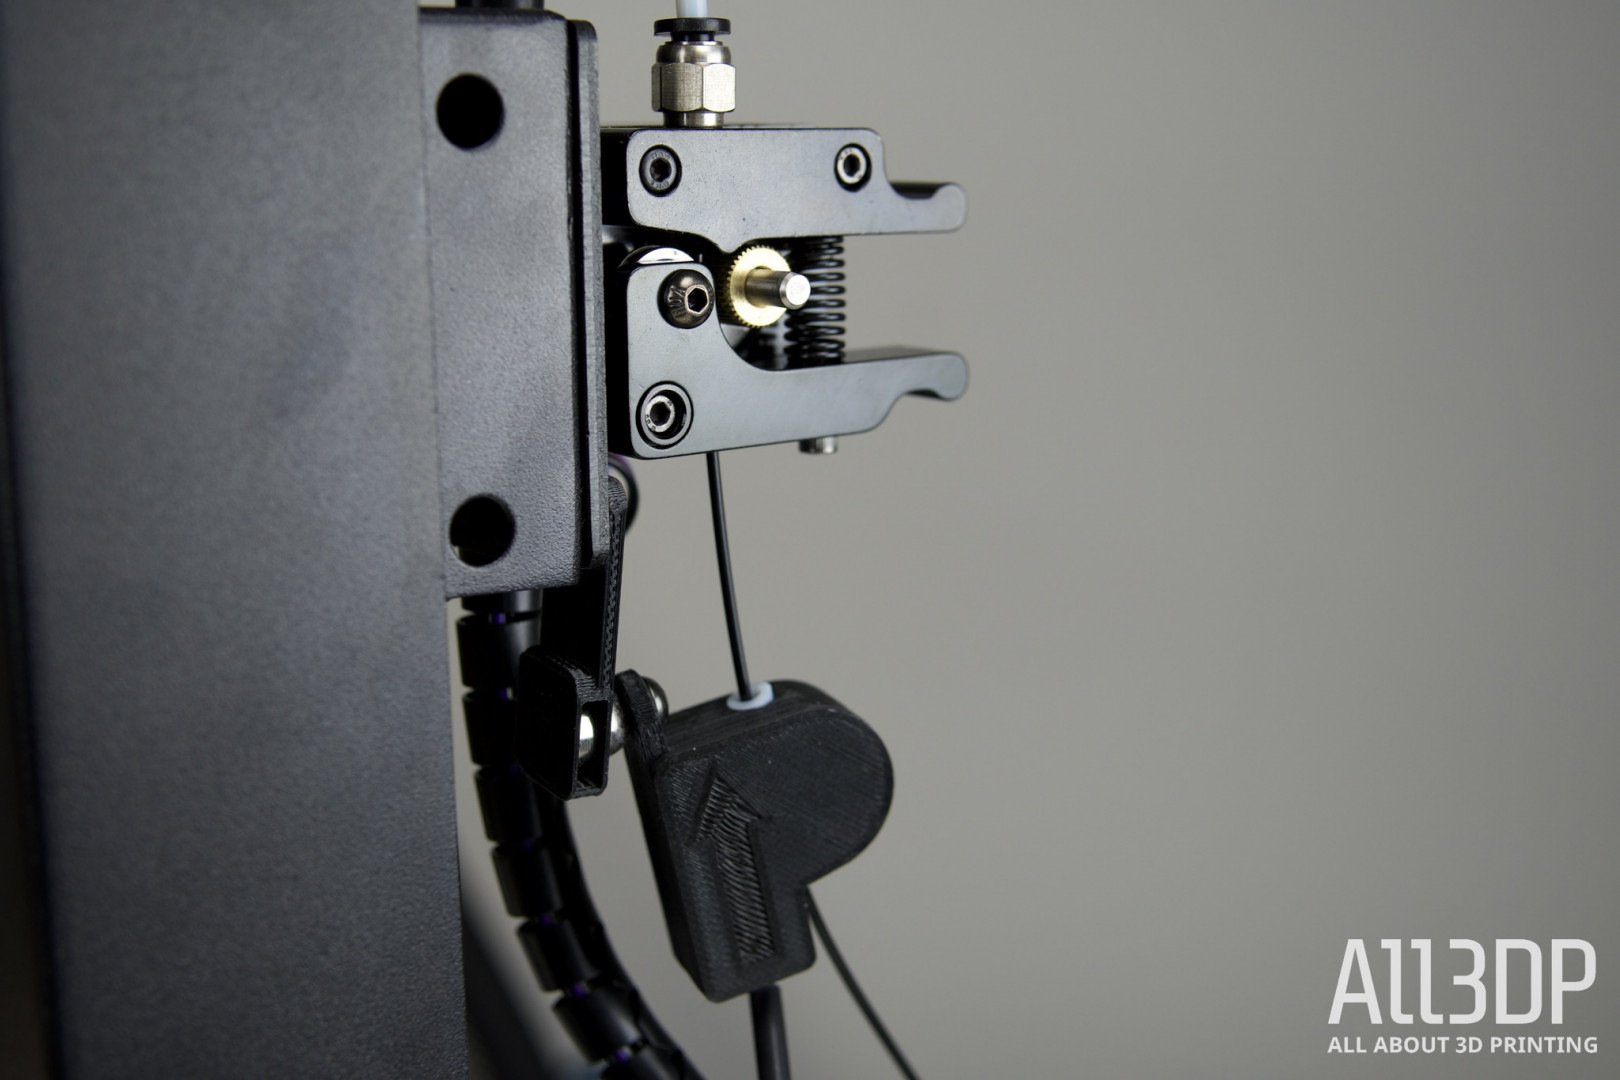
The next step is different from most printers. The Anycubic i3 Mega 3D has a dedicated filament sensor. It will detect when the filament runs out and stop the print automatically – a sophisticated feature for a sub-$500 3D printer.
Just thread the filament into the sensor. You can find it hanging loose on the right side of the printer. Having done that, attach the sensor to the frame by holding the metal ball to the magnetic plate directly under the feeding mechanism. It should snap right in.
Now it‘s time to start the Anycubic i3 Mega 3D printer for the first time and pre-heat the nozzle. When it has reached the right temperature, you can feed the filament from below into the motor by pressing TOOLS >PREHEAT on the touchscreen. As soon as the filament comes out of the nozzle, you’re ready to go.
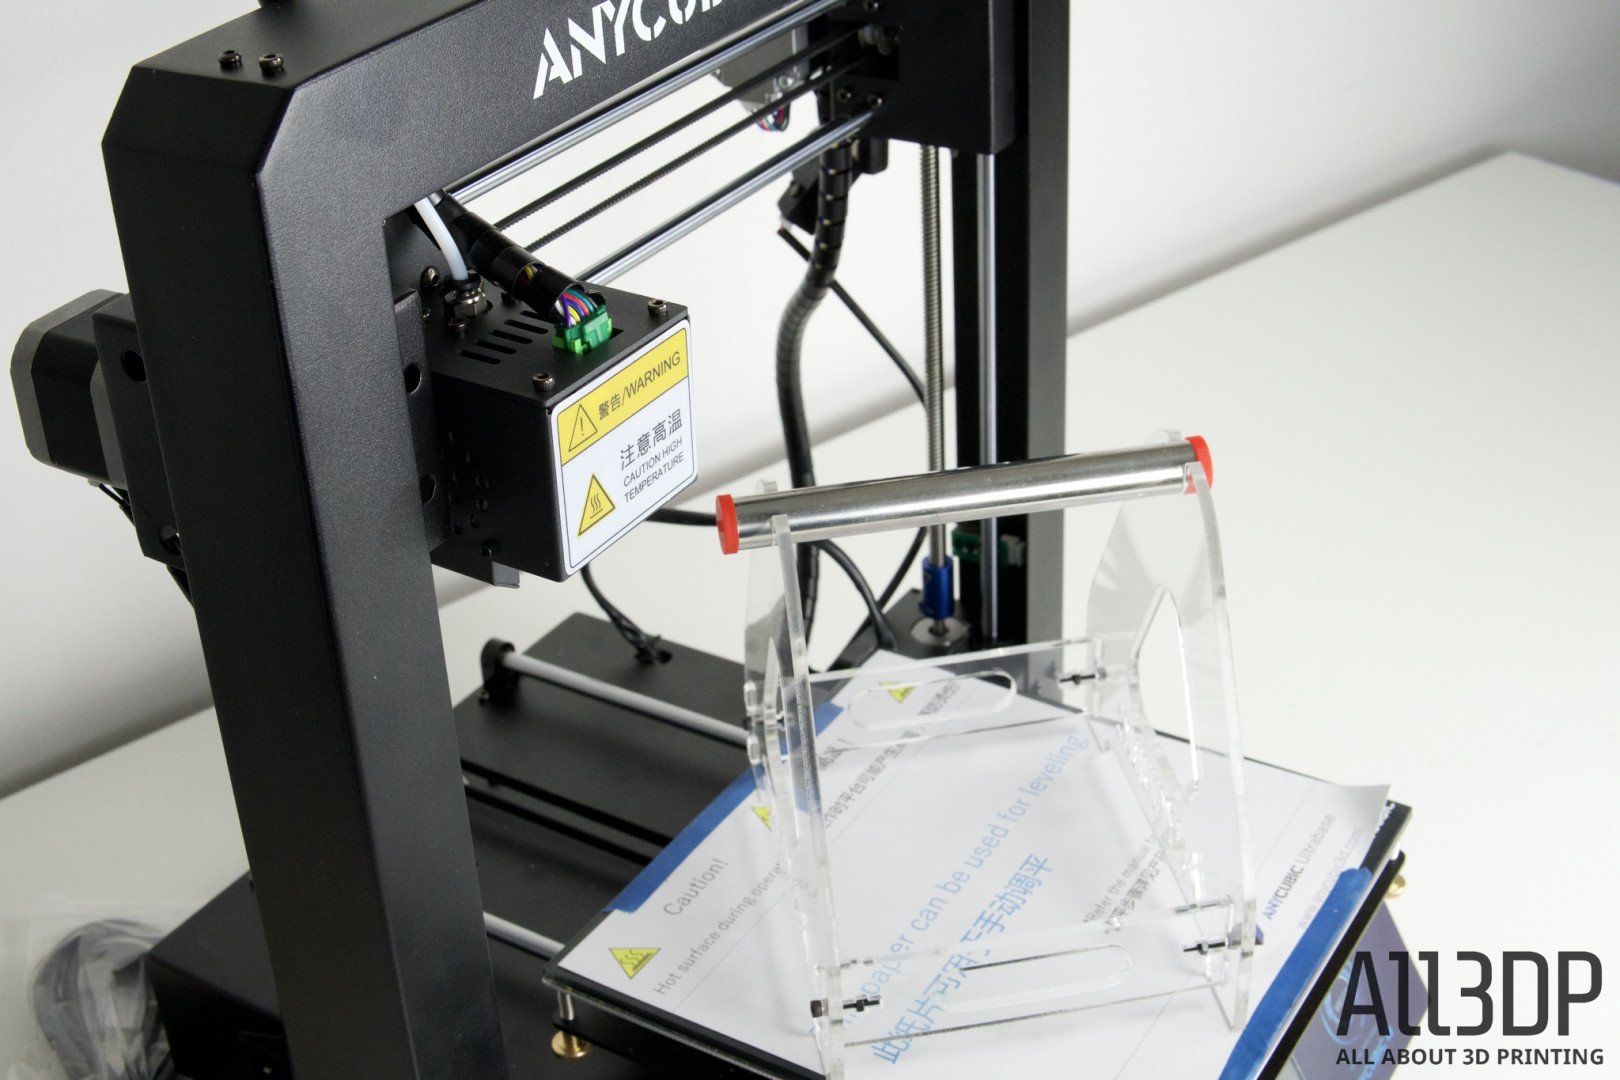
Anycubic i3 Mega Assembly Part 6: Level the Bed
Leveling the bed is a pretty straightforward procedure. You need to get Anycubic i3 Mega’s bed to a perfectly horizontal position, so the extruder can print on an even bed.
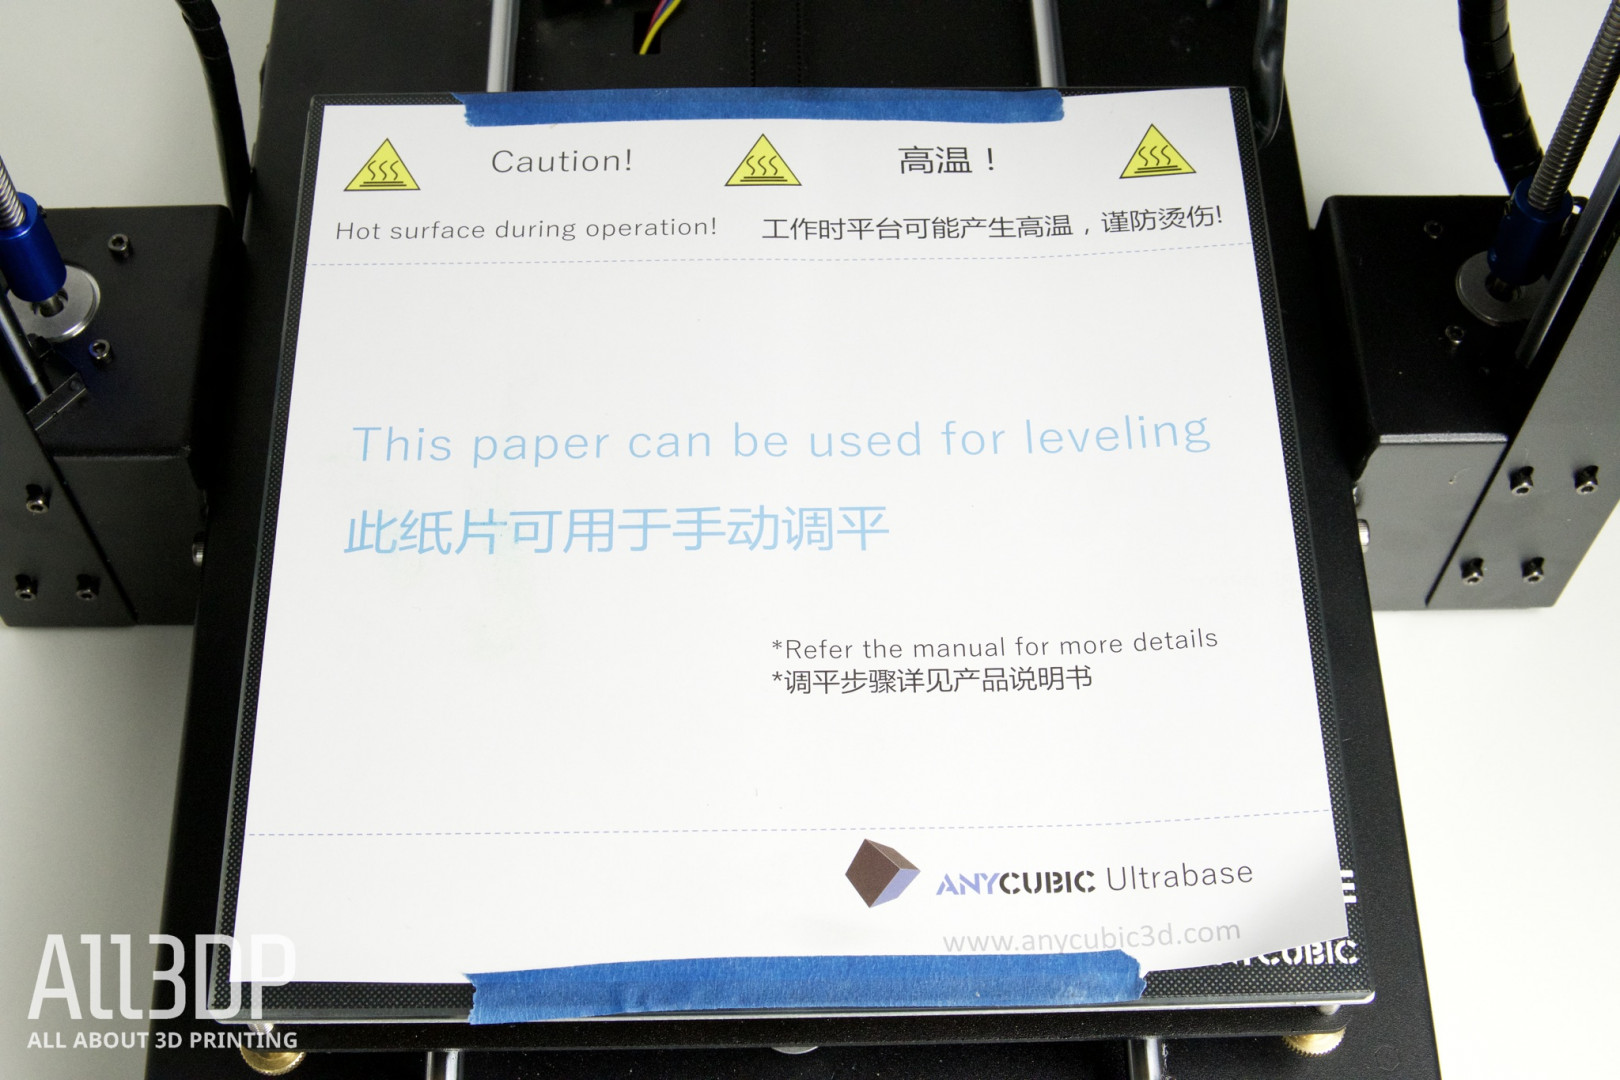
First, remove the paper sheet from the bed – but don’t throw it away, we’ll need it in a minute.
On the touchscreen, go to TOOLS > HOME > HOME ALL. This will move all axes to the outer- and innermost positions. Then you have to disable the motors (HOME MENU > SETUP > MOTORS > DISABLE), so that the axes can move freely.
Put the piece of paper under on the printer platform, then manually move the printhead back and forth. Avoid any nozzle contact with the bed, so keep your eyes peeled. Move the print head to the front left corner. Tighten or loosen the screws until you feel a drag on the paper from the nozzle. Repeat this procedure on the diagonal corners until the bed is even.
Anycubic i3 Mega Assembly: The Verdict
Building and setting up the Anycubic i3 Mega was easy as 1-2-3. It took us longer to peel off the labels from the spool holder than to set up the printer itself. All in all, it took us 30 minutes to set up the Anycubic i3 Mega 3D printer.
The documentation is written in plain English and helpful if you run into problems.
What we liked so far is the build quality of the Anycubic i3 Mega. With the exception of the touchscreen and its trapped dirt, the whole printer makes a sturdy impression.
Cable management is excellent, there’s virtually no way to wire it incorrectly (besides the 110 / 220 V switch, of course).
It’s also worth noting that the touchscreen is fast and responsive. It would seem that Anycubic invested in a decent chipset to keep the user interface running buttery smooth.
That concludes our Anycubic i3 Mega review, for now. We’ll keep you up to speed as soon as we have the first test prints. If you have any comments, please feel free to add them below!
License: The text of "Anycubic i3 Mega Review: Great 3D Printer Under $300" by All3DP is licensed under a Creative Commons Attribution 4.0 International License.
CERTAIN CONTENT THAT APPEARS ON THIS SITE COMES FROM AMAZON. THIS CONTENT IS PROVIDED ‘AS IS’ AND IS SUBJECT TO CHANGE OR REMOVAL AT ANY TIME.