Most mistakes in the video footage occur during the shoot ‒ With a little preparation they can be avoided. Accessories from a 3D printer are very useful here. Oh, and by the way: You don’t have to have a 3D printer yourself – just upload the designs to Shapeways or Sculpteo.
Learn from the pros: With the right preparation, you’ll get the desired results. Here are the most important tips on how to get organized for your video shoot.
1. Check the conditions beforehand

In order to be prepared for all eventualities, you should familiarize yourself with the location before the shoot. For instance, if you check out the ski resort where you’ll be shooting the video, you can plan ahead and decide which spots will give you the best shots. Here’s just one of the advantages of being prepared: Depending on the time of day, the sun will impact the lighting ‒ if you know the angle at which the sun is likely to hit your subject, you can avoid shooting into the sun (backlighting).
So that your shots are successful no matter what, you can use a GoPro lens filter. Sculpteo offers a 3D printed adapter that allows you to use filters for Canon lenses on your GoPro camera.
2. Write a storyboard
A storyboard is always part of the professional planning process…otherwise it’s easy to shoot too much, and then you’ll have to work through masses of material later on. A storyboard helps you organize the sequence of each and every scene.
This is done to ensure that the focus of the shoot is not just on the “icing on the cake,” such as the downhill skiing action, but also on everything else that is part of the whole experience, such as having breakfast with friends, getting to the ski resort, taking a break in the ski lodge or enjoying après-ski. These might seem like obligatory shots, but they add a vivid and interesting dimension to your footage. It helps to add notes with specifics about each sequence: exact location, light conditions as well as the arrangement of the individual sequences.
3. Make sure your GoPro is fully charged at all times
The most important thing is never mentioned in a storyboard: No fully charged camera, no shoot! The 3D printing service Shapeways offers a holder that allows you to charge a GoPro camera with a regular USB external battery charger. This comes in handy when you’re out and about and need to recharge your camera.
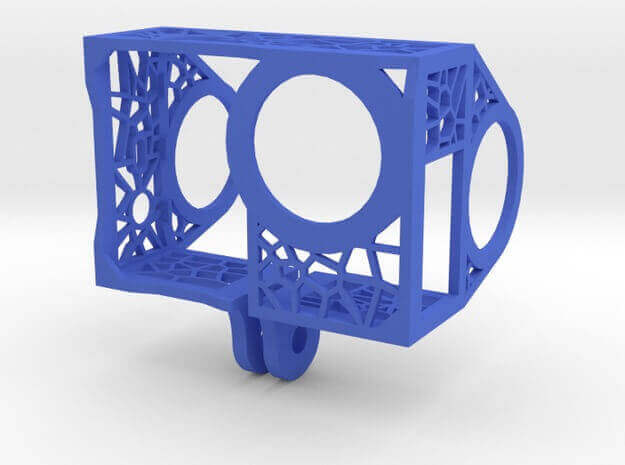
Want another alternative? This case now supports external battery backpacks and LCD backpacks! Also, an added wall connects the lens to the bottom of the case for extra rigidity and more stable video.
4. Determine which equipment you will need
There’s nothing more annoying than to realize you didn’t pack a specific tripod or bolt that you badly need on the ski slopes. Use your storyboard to determine ahead of time which equipment you will need on the shoot.
Ideally, you won’t pack too little or too much. On the one hand, you won’t want to carry around a heavy backpack, and on the other, you’ll want to focus on your shots without having to constantly reattach your GoPro to something or the other.
3D printers can print out virtually any equipment. Especially adapters, tripods and holders can be of great use and offer many new possibilities.
5. Quick check of footage while still on location
After the shoot, you should take a quick look at your footage. First, make sure that you’ve filmed all of the sequences outlined in the storyboard. If the recording is blurred or useless for any other reason, you can always do another shoot right away.
In addition to quality control, you could also use the time to sort the recordings. Keeping track of the individual recordings will save you a lot of time when you are editing/cutting the raw footage.
You can, for instance, use a different SD (memory) card for each shoot day. Together with the storyboard, this storage device helps you to find a particular recording easily.
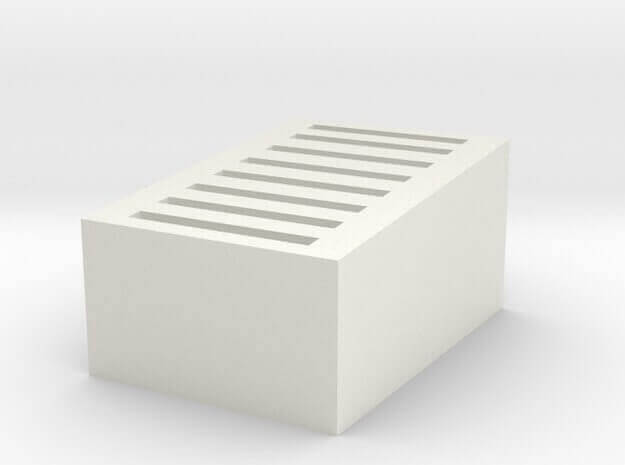
The 3D printed SD card holder is perfect for this.
Do you have any other tips on how to create great video footage with the help of 3D printing? If so, please entry your tips in comment section.
You might also want to read about the best 3D printed tripods for your GoPro.
License: The text of "GoPro: Better Video Shoots Thanks to 3D Printers" by All3DP is licensed under a Creative Commons Attribution 4.0 International License.