3D Slash Review: 3D Modeling Made Super Easy
Rating

3D Slash proves that 3D modeling doesn’t need to be rocket science. It can be fun, but nevertheless extremely productive. For more details, read this 3D Slash review.
If you are already familiar with 3D Slash, read on to find out about the new and improved features. If you’re new to the software, you may want to start with the section “3D Slash explained” and come back afterwards.
3D Slash Review: What is new version 2.0
Normally, after a leap in version number from 1.1 to 2.0, we’d expect some spectacular new features in version 2. When you look at the new/changed features in 3D Slash 2.0, you might be disappointed. But only at first sight.
The main objective in developing 3D Slash has been: Making 3D modeling “a piece of cake”, making 3D modeling child’s play. And the new and improved features make 3D Slash even easier to use, make handling 3D objects smoother and allow you to do things you couldn’t do before.
Verdict: 3D Slash version 2.0 is an impressive improvement of an already impressive software.
New and improved:
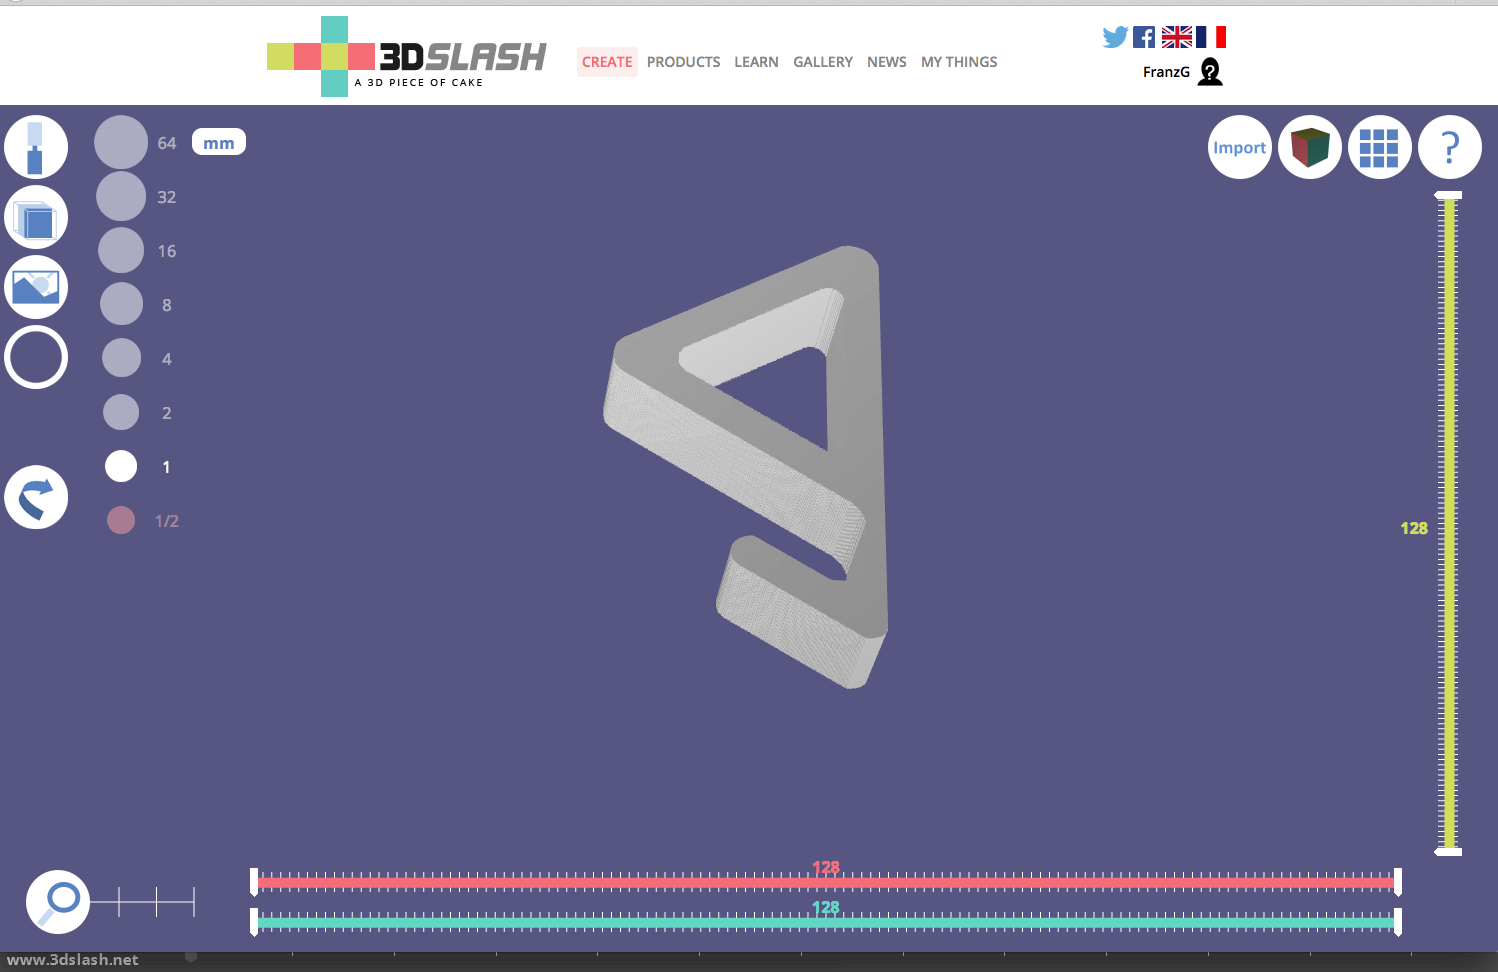
- Logo mode now in the desktop application – not only in the web application as before (the Text mode is still only in the web application). In December, the web application of 3D Slash received a Logo and a Text mode. In Logo mode you can import an image file containing a 2D logo – and have 3D Slash create a 3D logo from it. In Text mode, you type in and format text and have it extruded, i.e. turned into 3D text. Now, the Logo mode is in the desktop app, too.
- Selecting and copy&paste is easier now.
- Selecting by color has been introduced.
- Move, resize, flip, combine can now be done in a click.
- Insert rounded shapes or STL/OBJ files to your model.
- No more need to switch between Basic and Expert mode – the Expert features are now already in the toolbox. This also means that the desktop and the web application have an identical feature set (in 3D Slash 1.x the web application lacked the Expert features) – one exception: Text mode is only available in the web application for now.
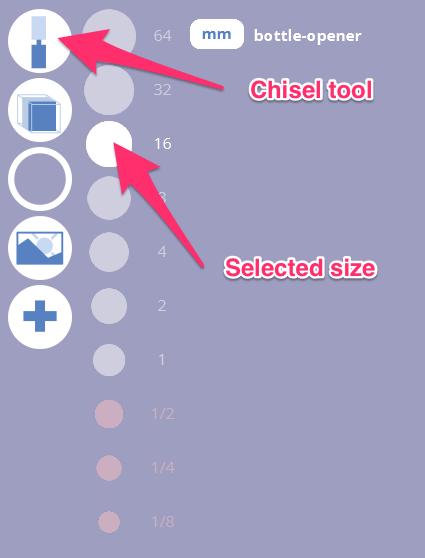
- New High Definition mode: In Standard Definition mode you can only select cube sizes from 1/2 to 32 mm (similar to the Basic mode in 3D Slash 1.x). If you need to work more precisely, click the Plus icon in the top right corner and switch from Standard to High Definition. This adds the smaller sizes (1/8 and ¼) to the Size toolbar.
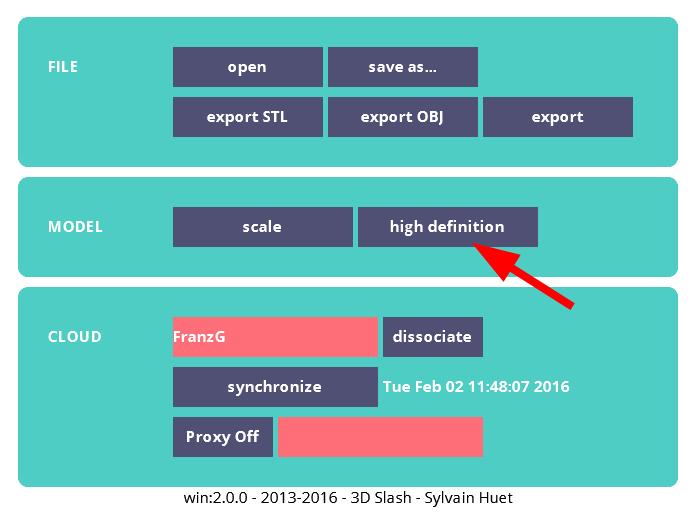
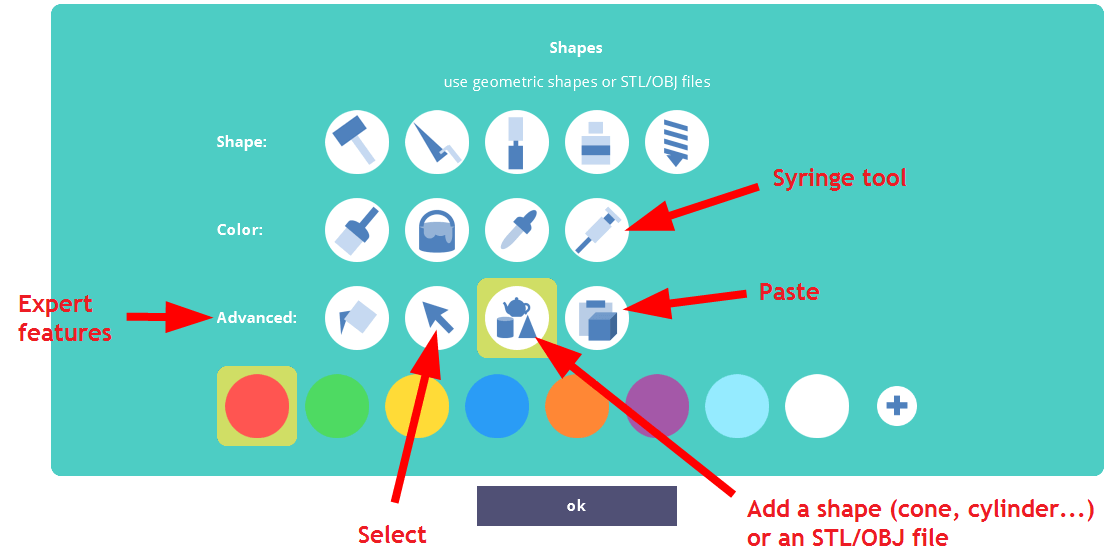
Select High Definition in the Options menu to be able to use smaller cube sizes. - New Syringe tool. Applies a color to all the blocks underneath the area you click – in contrast to the Brush tool that applies a color only to the block you click.
- VR mode allows you to view your 3D model in virtual reality on your smartphone, using Google Cardboard or other available devices.


Our embedded viewer gives a feel for the Text mode:
3D Slash Review: 3D Slash explained
3D Slash is a free and easy to use 3D modeling software that lets you create models using a simple building-block concept. It seems to have been inspired by Minecraft, a video game that’s all about placing and breaking blocks.
3D modeling isn’t rocket science, but it’s pretty damn close. It can be difficult to learn, and you’ll have to spend hours and hours before you’ve master the skill. Well, that’s what we thought right up until we clapped eyes on 3D Slash, an ingenious 3D modeling software that’s fun to use and provides usable results after just an hour or two of use.
We were able to create very simple 3D printable models without spending hours to learn to handle the software. As per the Minecraft aesthetic, you can build your models by adding and removed pixelated blocks. The level of detail on these models can be as simple or as complicated as you choose.
We were also able to edit an existing STL file we downloaded from Thingiverse, selecting and removing extraneous details that we didn’t want to print.
Using the software is pretty straightforward. A bit of trial and error is involved, but after following the instructions given on the 3D Slash website, things worked exactly as we expected them to.
If you’re already proficient in typical 3D modeling software like SketchUp, Blender or FreeCAD, you will probably be searching in vain for a number of features like extrusion, revolution, sweeps, patterns, and text editing & formatting. 3D Slash simply doesn’t have these features.
But once you understand how the software works, you won’t really miss these advanced features at all. Others can simply be replicated – extrusion, for example, can be imitated by “copy & paste”, and “push” commands.
3D Slash is available as either a free software download – for Windows, MacOS X, Linux, and Raspberry Pi (new in version 1.1) – or as a web-based application. Both the downloads and the web tool can be found at www.3dslash.net.
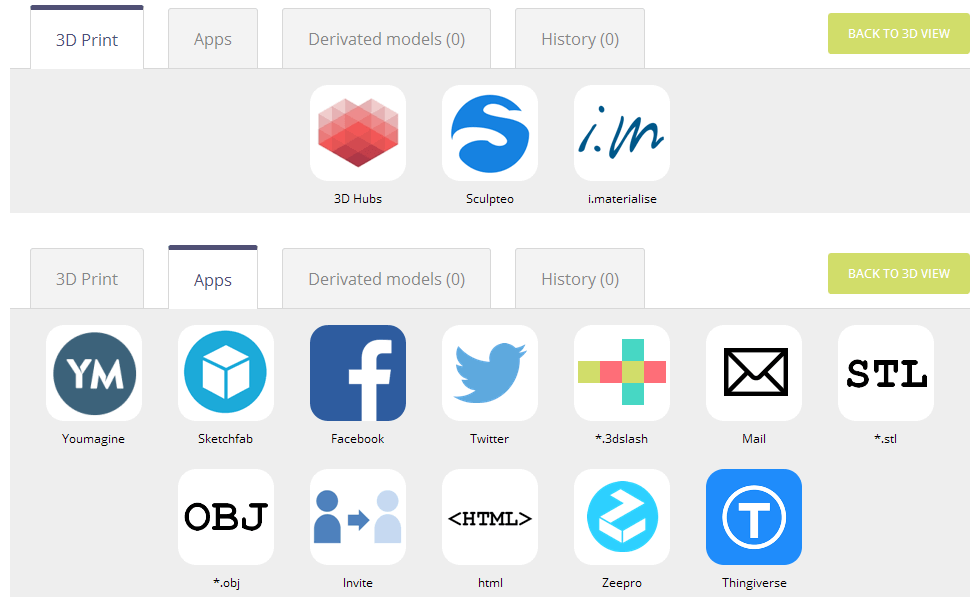
The models are saved in the proprietary .3dslash format. Once you’re ready, you have three options; first, you can export the model to a service provider (Sculpteo, 3D Hubs, etc) for printing. Seconldy, upload it to a 3D model repository like Youmagine or Sketchfab. Finally, just create a STL file and send it to your 3D printer.
3D Slash Review: How it works
You start with a cuboid, a solid block that can be subdivided into smaller blocks. 3D Slash uses an octree system, i.e. each block can be divided into eight blocks of identical size. Each of the eight blocks can be divided into another eight sub-blocks, and so on.
You create a 3D model much like a stonecutter would. You start with a solid block and use the Hammer tool to remove so-called cubes – these are small blocks of different sizes. If you need to, you may use the Trowel to add cubes. The size of the cube can be selected next to the tool.
Note, however, that you can only add cubes within the original block – which makes sense, as the original block corresponds to the maximum print size.
Use the mouse to rotate or move the model and use the mouse wheel or the Zoom slider to zoom in or out.
There are more tools:
* The Chisel tool (or Cisor as 3D Slash calls it) removes a row of cubes (or „slice of cubes“ as they call it).
* The Pulpwood tool adds a row of cubes
* The Drill removes everything within a selected area.
* Undo and Redo (only as buttons on the left side, no keyboard shortcuts).
What we found especially practical was that with a tool like hammer selected, we didn’t need to select the rotation tool. You simply hold the left mouse button down, and you may rotate the block.
New in 3D Slash 1.1: Colors
In version 1.1, some new buttons were added:
Paint the cubes (the paintbrush icon) applies the selected color to the cubes that you click.
Fill with color (the bucket icon) applies the selected color to an area you click – i.e., all the cubes of the same color next to the cube you clicked.
Select a color (the pipette icon) is a color picker: It selects the color you click on in the model.
Customize the current color (the plus icon) allows you to modify a color; the modified color replaces the original. In version 1.1 there is no way to reset the colors to the original setup.
Why increase complexity by adding colors? After all, most FDM and SLA printers can print one color only.
The reasons:
-
Dual-nozzle FDM printers are able to print two colors. 3D Slash now supports that.
-
One target group of 3D Slash is children. Being able to color 3D models is more fun.

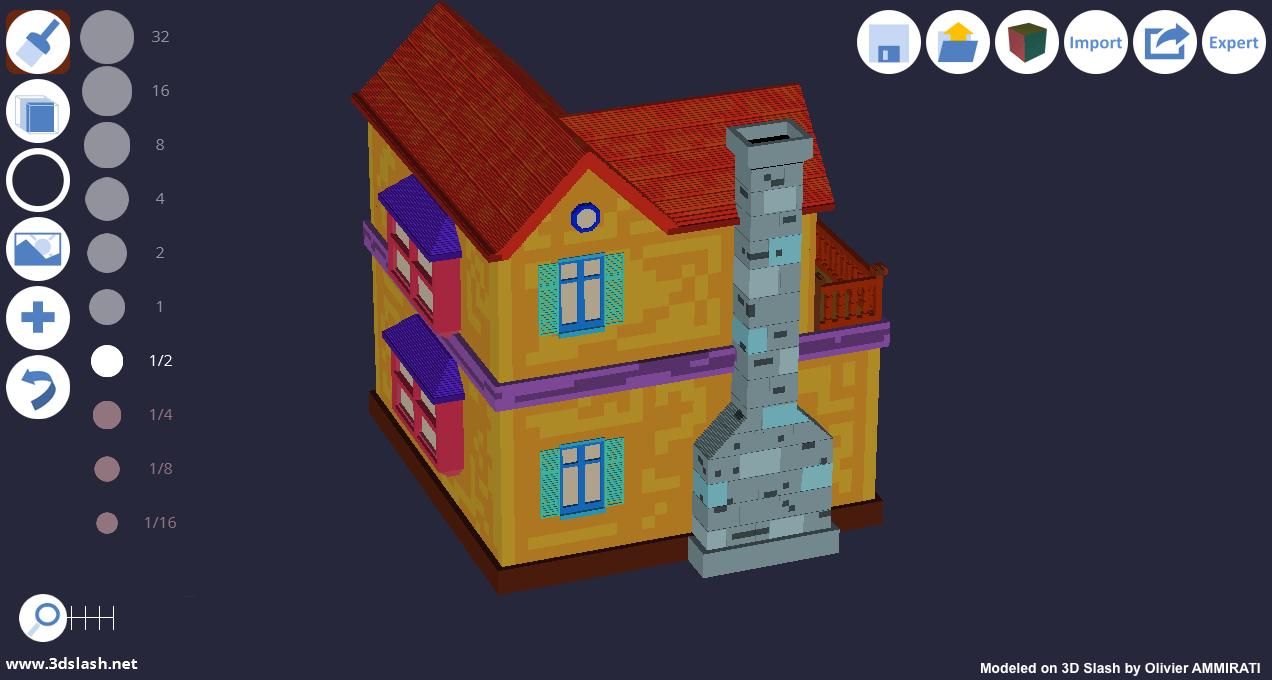
Colors added: more fun and a better understanding for your model (image: 3Dslash.net)
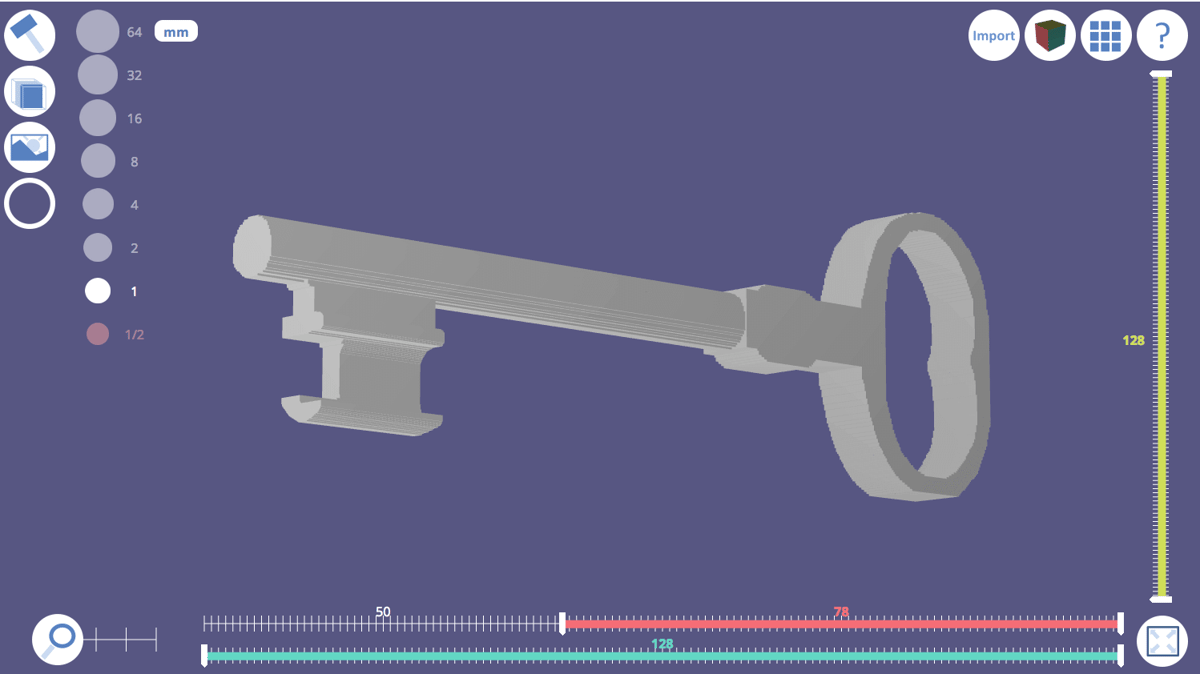
Selecting areas
As in other software tools, you select areas to work on them – e.g. to remove them using the drill or to fill the selected area. You may also copy, push or pull the area.
Selecting is different to e.g. a graphics software or a 3D software: 3D Slash has three rulers through which you define the selection box. Using the red ruler you define the width; with the blue slider you define the depth; and through the green slider (to the right of the window) you select the height of the selection.
Each ruler has two “cursors” through which you set the borders in the respective plain. Figures on the sliders show the coordinates of the borders and the center of the selected object.
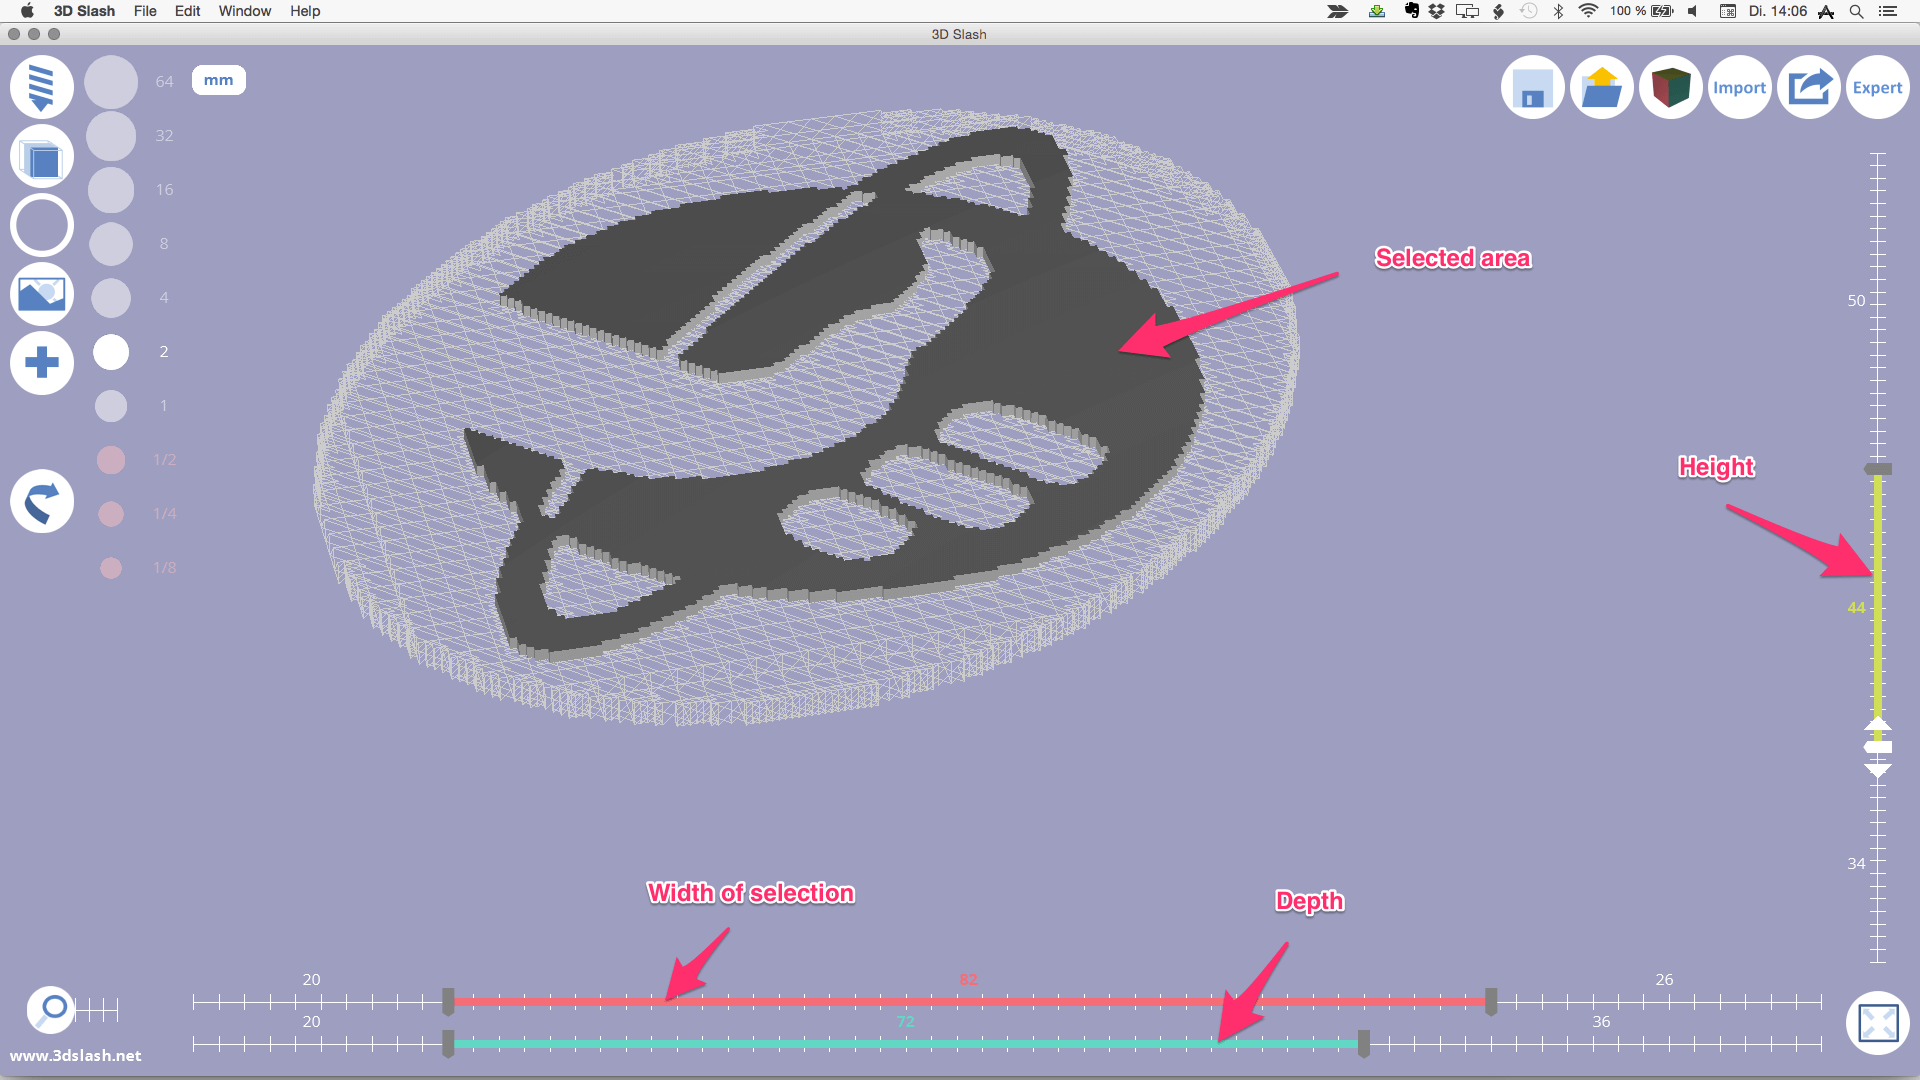
In the image, the dark shaded area is the current selection, the rest of the object is displayed as wireframe.
Rendering modes
There are three rendering modes (selected through the second tool from the top):
- Solid mode displays only what is visible from the outside
- The two “in between” modes display the selected area as solid and the rest in wireframe (that is the mode displayed in the screenshot above) – by switching between the two modes you switch the selection.
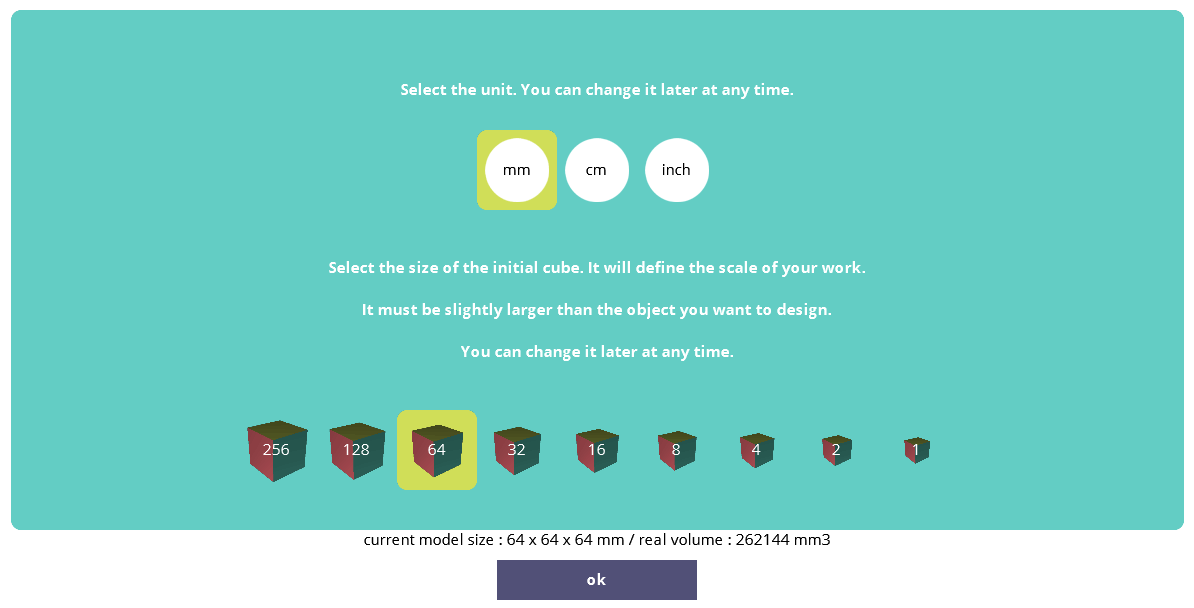
Creating new models, or editing existing ones
3D Slash allows you to create models from scratch – you simply select the size of the block from which you cut out cubes. The software supports blocks of up to 256 x 256 x 256mm.
Of course, you can edit existing 3D Slash files you have created, or other files shared on the 3D Slash community.
Plus, you can also import STL files to edit them. This comes in handy when you have an STL file that doesn’t have exactly the size you need, or if you need to add details, or has details you’d prefer to remove.
Another nice feature is that 3D Slash allows you to open images to use as a blueprint, or for inspiration.
3D Slash Review: Conclusion
If you’re new to 3D modeling, you should definitely give 3D Slash a try. It is a powerful application that is deceptively easy to use, and contains a broad selection of playful tools.
We’ve learned that 3D modeling doesn’t have to be rocket science. It can also be fun. And nevertheless extremely productive.
License: The text of "3D Slash Review: 3D Modeling Made Super Easy" by All3DP is licensed under a Creative Commons Attribution 4.0 International License.