Terrain to STL – How to Convert Terrain into an STL File

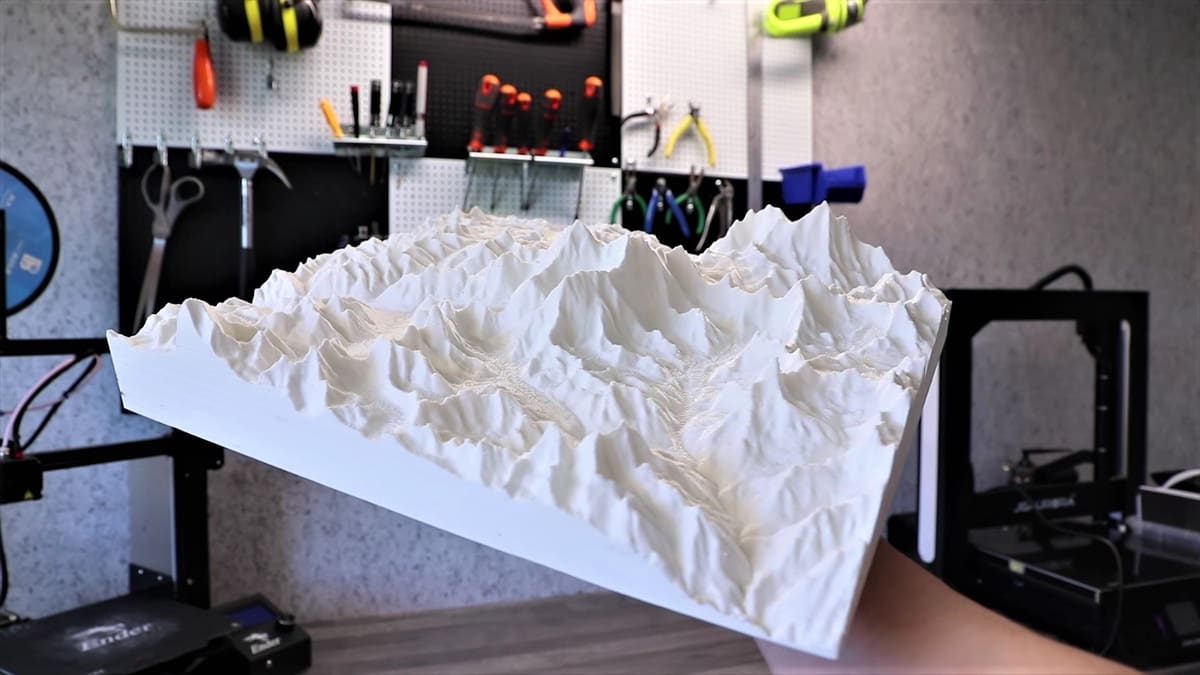
A 3D model of terrain can serve as an interesting display piece or an aid for architects or designers. Dive into this guide to learn how to convert terrain to STL models for 3D printing.
The Podium
For this article, we identified three of the best web apps for converting terrain into STL files. Here they are:
- Terrain2STL
- The Terrainator
- Touch Terrain
Without any further ado, let’s dive right into them!
Terrain2STL
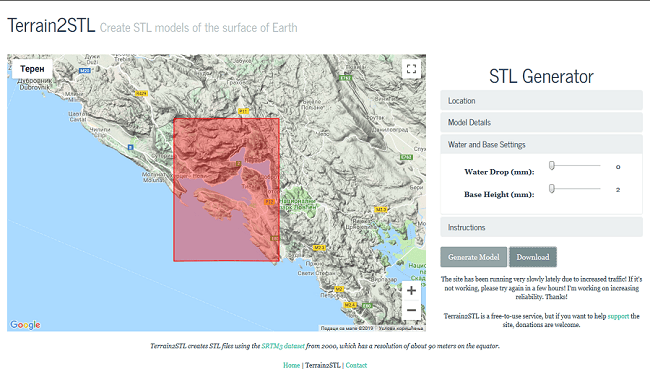
Using Terrain2STL is the most convenient way to make STL files from desired terrain. Just note that, while it’s easy to use and precise, it can only give you a rectangular terrain slice. As stated on the site, Terrain2STL creates STL files using the SRTM3 dataset from 2000, which has a resolution of about 90 meters on the equator. Meanwhile, other apps can even achieve a resolution of up to 10 m.
This free option has decent precision and resolution but lackluster options for manipulating shapes. It’s popularity, however, makes it a safe choice.
Summary: Solid choice, restricted options
The Terrainator
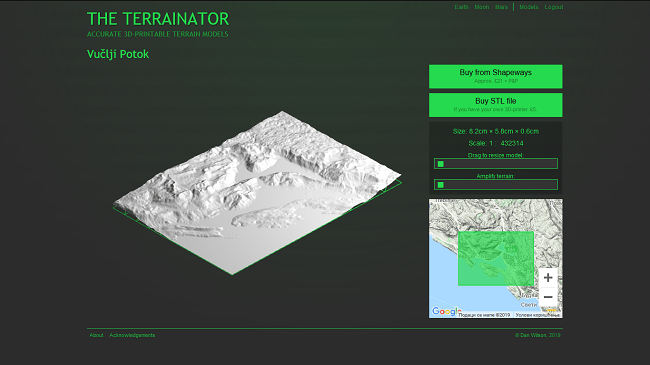
The Terrainator will create precise STL files from the selected terrain and allow you to see them right away. This web tool really looks and feels good, but it isn’t free. You can order your model printed or buy the STL file.
In addition to terrain from the Earth, you can create STLs from Mars or the Moon.
This paid option has good precision and great options to manipulate the terrain model, but its higher barrier of entry limits the popularity.
Summary: Great option if you have specific needs for your terrain model
Touch Terrain
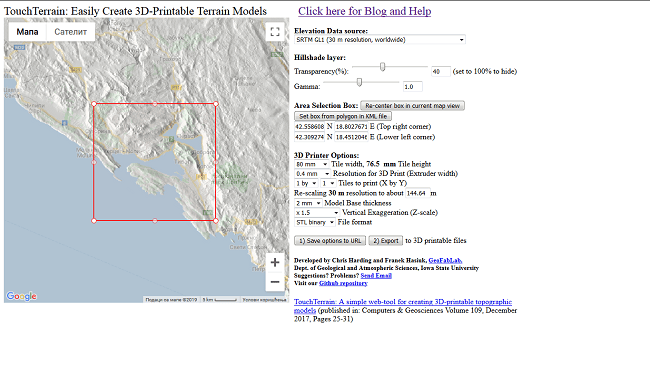
Touch Terrain gives you more control over selecting a terrain area, and it gives you more options for printing setup. It’s more precise than most of the other tools available online.
With precision matching the other two options as well as great resolution and configuration options, this option is likely the best all-round option for most users. Plus, it’s free.
Summary: The best all-round free option with good accuracy and excellent manipulation options.
Let's Create It
In the following mini-tutorial, we’ll use Touch Terrain as our weapon of choice. Navigating to the website, you’ll see a map on the left with a red box and options on the right. Here’s how we create a STL model from terrain using this tool:
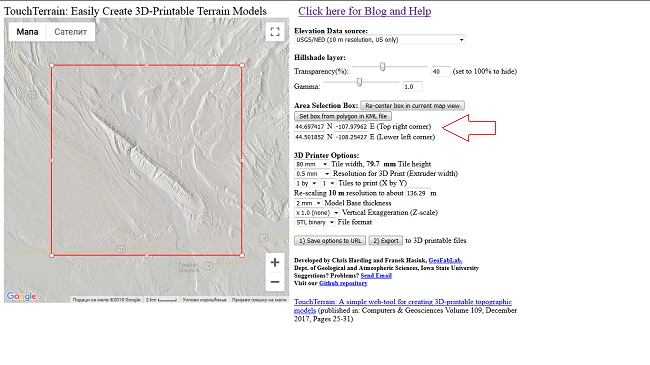
1. First, we need to choose some terrain that we would like to convert to STL. You can manipulate the box with both right and left mouse buttons. Drag it and drop it to your desired location, or write coordinates in the “Area Selection Box” on the right.
2. “Elevation Data Source” is an option that will determine the resolution of your box. US-based terrain can be modeled with as fine a resolution as 10 m, but for other locations, the finest is 30 m. You can also adjust the gamma and the transparency, which will affect details of the terrain. In our case, we left it at the default: 40% transparency and a gamma value of 1.
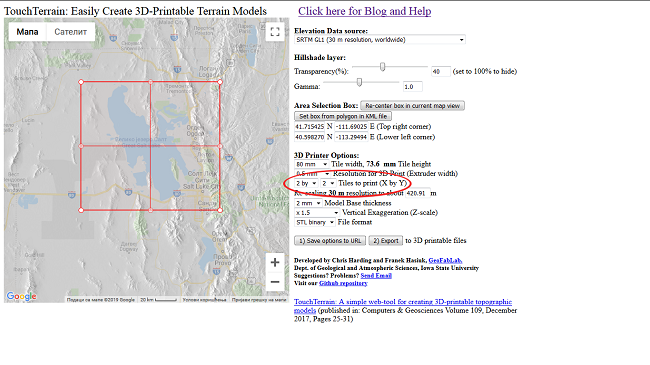
3. Now, configure the printing options. Maximum model width in the current stable version is 200 mm. If you want to print a larger model, use the tile option. Choosing the number of tiles will determine how many separate models will be exported. The resolution for 3D printing needs to be set to the same value as the width of the extruder nozzle.
4. We left model thickness at 2 mm, but “Certical Exaggeration” needs to be set at least 1.5. Otherwise, depending on the size of model, it will be flat, or almost flat.
5. Right underneath, you can choose the file format. Touch Terrain supports STL (binary or ASCII), and OBJ.
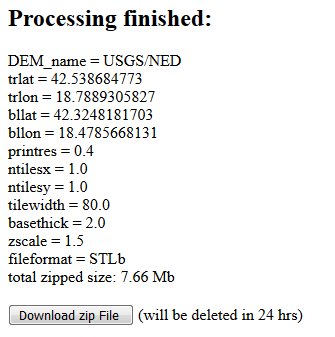
6. After clicking the Export button, you’ll be notified that the process has started. Don’t worry if you get an error message, just use the back button on your browser and click “Start”.
7. When your download is finished, all that’s left to do is to choose your favorite slicing software and adjust print settings based on your printer.
8. If you have any difficulties, or if you want to use expert settings, you can go through the blog and help sections of the Touch Terrain website.
Feature image source: RCLifeOn / YouTube
License: The text of "Terrain to STL – How to Convert Terrain into an STL File" by All3DP is licensed under a Creative Commons Attribution 4.0 International License.