SVG to STL: How to Convert SVG Files to STL

If you have a drawing that you'd like to print or machine, convert them from SVG to STL. Read on to bring your logos and drawings to life!
There are numerous reasons why you might be looking to convert an SVG file to an STL file! However, a fair assumption might be that you want to turn a 2D shape into a 3D one.
Depending on why you want to do this, the best approach may vary, so we’ll cover a couple of different techniques in this article. In the following sections, we’ll do a quick rundown of what exactly SVG and STL files are, why you might be using them, and two ways to convert from SVG to STL.
Let’s get started!
The Basics
Before we get into the conversion methods, let’s start with the basics. SVG and STL are CAD file formats that have different end uses. Below is a quick overview of each format.
SVG
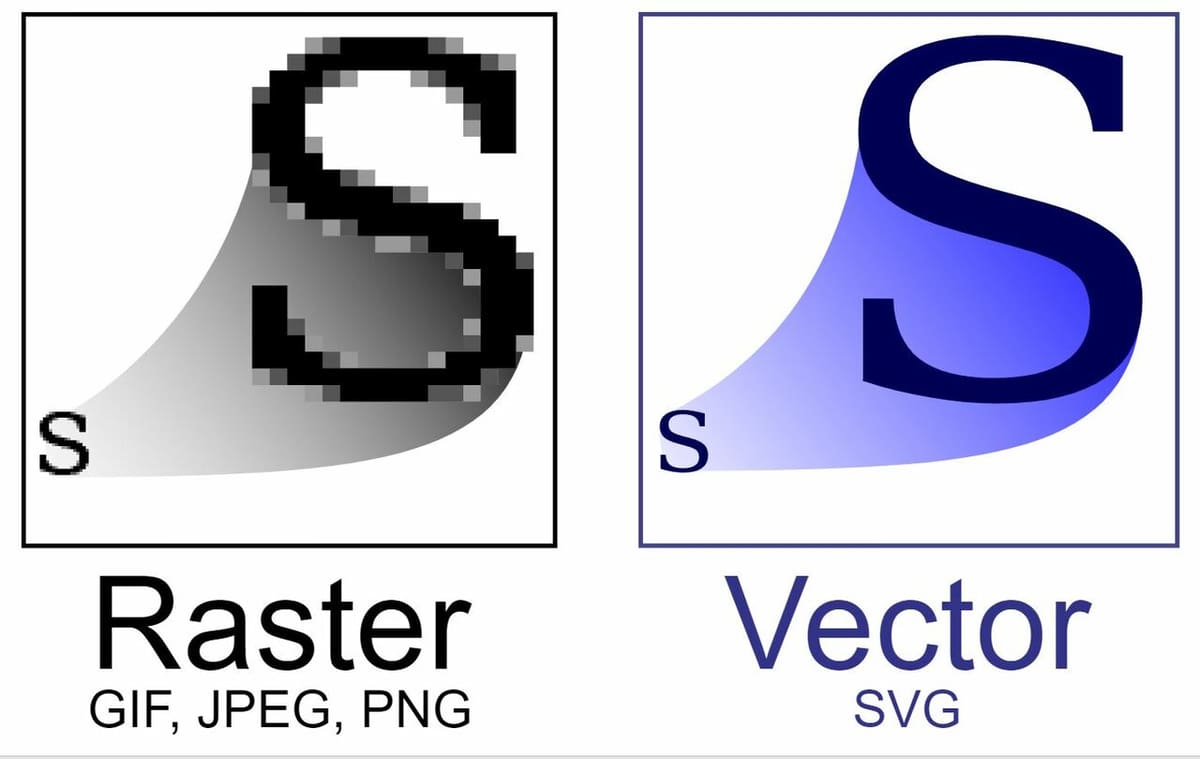
SVG stands for Scalable Vector Graphic. Unlike other image files such as JPEG or PNG, which are composed of lots of tiny colored squares (like pixels on your monitor), SVG files are stored as a series of points and lines based on mathematical formulas (vectors). This means that when the image is scaled up or down, it doesn’t become distorted or pixelated as a result.
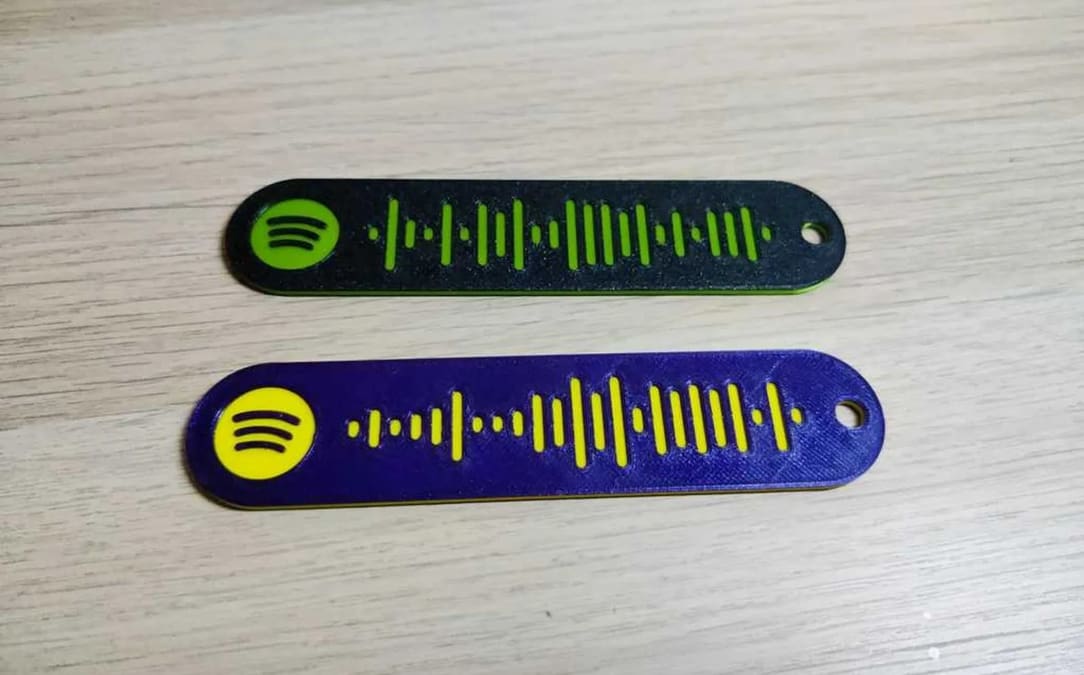
Generally speaking, the most common use for SVG files is in graphics, but they’re also often used for CNC, laser cutting, and Cricut projects because they retain their sharp edges and smooth curves even when scaled up.
STL
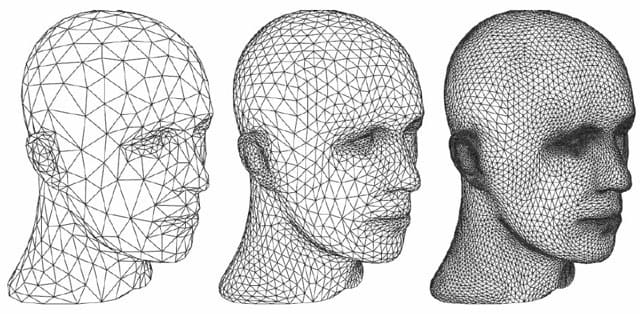
STLs store information about 3D shapes as a triangulated surface. The name STL comes from stereolithography, also known as SLA, a specific type of 3D printing technology.
STLs are no longer used solely for SLA printing, though. In fact, they’ve become the standard format for most forms of 3D printing. As a result, backronyms such as “Standard Triangle Language” are often used because this more accurately describes the contents of an STL file.
STLs are the most common format used when creating and slicing 3D models for 3D printing (though 3MF is fast catching up!) Most modern CAD programs support the STL format, as do most 3D printing slicers such as Cura or PrusaSlicer.
Why Convert?
As mentioned previously, there are many reasons you might be looking to convert an SVG into an STL. Some common reasons for doing this include the following:
- You may have an SVG file that you wish to make 3D printable.
- You may be working on a more complex project in which the image or text in the SVG will be one of many 3D shapes. For example, you may need to add a logo to a larger model.
- You may have found or created a project for CNC or laser cutting that you now want to convert into a 3D printing project.
Of course, there are many other applications as well. Depending on the task at hand, there are a couple of different approaches, as we’ll explore next.
Using an Online Tool
Using an online tool is the quickest and easiest method for most applications. It suits those who aren’t familiar with CAD software, as well as projects where you just want to add depth to an SVG without making further modifications.
All you’ll need is your SVG file and a web browser. You won’t need to install anything, and you’ll have your STL file in a matter of moments! Several different sites offer this service, but the most commonly used is SVG 2 STL.
Step 1: Upload
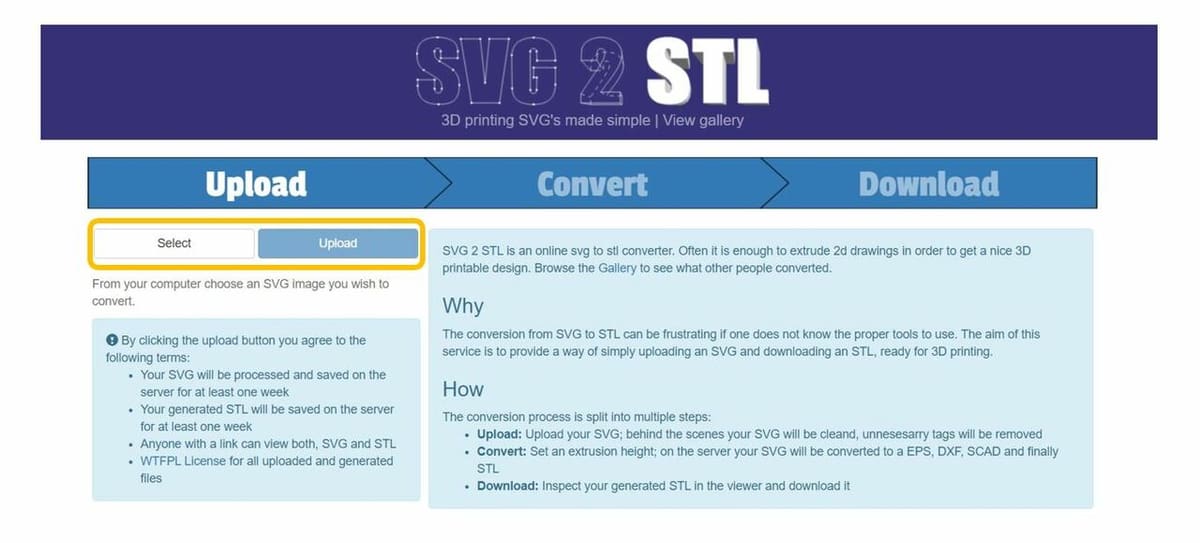
First, make sure you’re on the SVG 2 STL website! Click “Select”. This will open a file explorer window where you can select the SVG file you wish to convert.
Once you’ve selected your SVG, just click “Upload” to move on to the next step.
Step 2: Convert
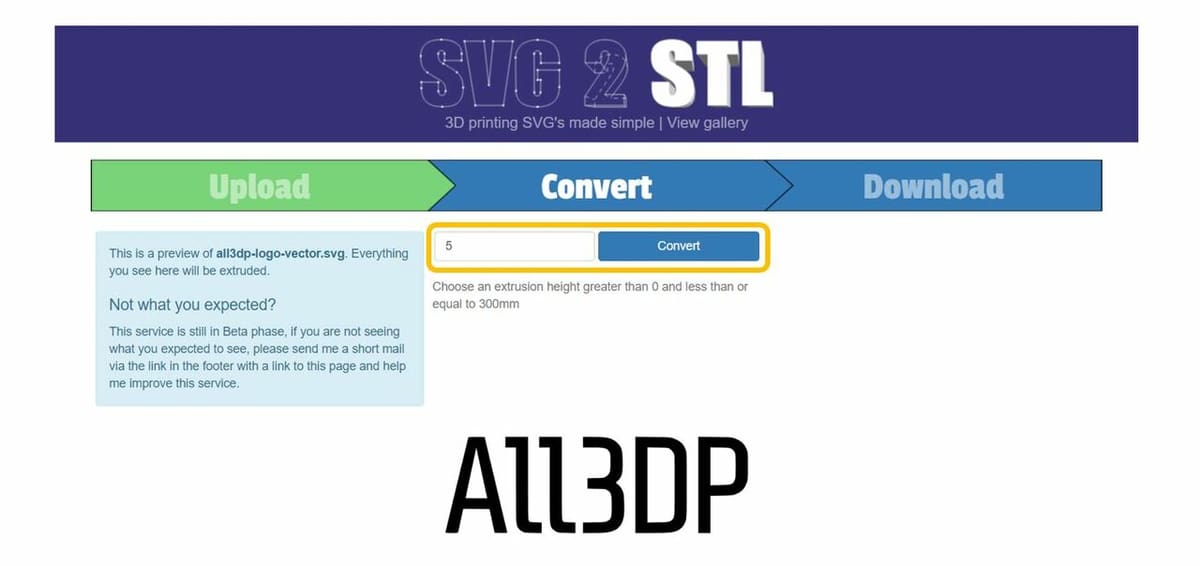
You should now see a picture of the SVG you uploaded. It’s worth noting that very occasionally an incorrect image is shown here. Don’t worry if that happens to you, so long as you’re sure you uploaded the correct image. The tool will still work as intended.
You can now choose the extrusion height using the text box shown above the image. This is how tall the STL will be, measured in millimeters.
Once you’re happy, click “Convert”. You may need to be patient because, depending on your file and the device you’re using, this can take some time to process.
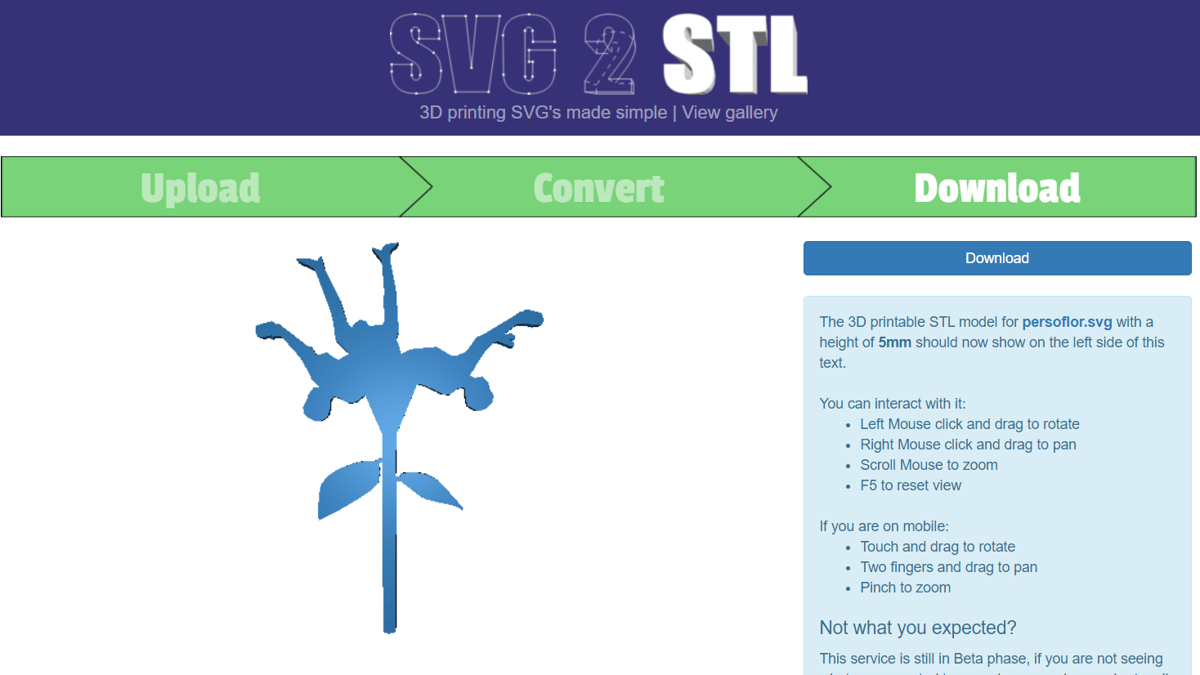
Step 3: Download
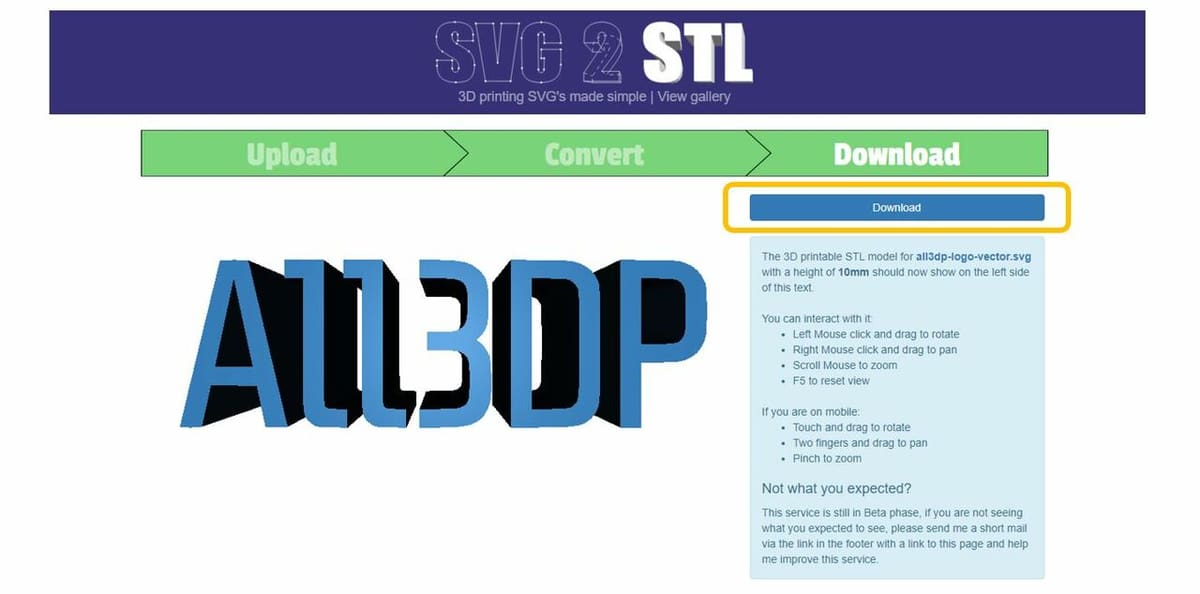
You should now see a 3D rendering of your STL. You can change the viewing angle using your mouse, and there are instructions on how to interact with your new shape on the right side of the rendering.
Once you’ve made sure you’re happy with your STL, click the “Download” button, and within a few moments, your STL will download.
This whole process can take less than a minute!

It’s worth noting that although it’s the simplest approach, using an online tool such as SVG 2 STL is also the method where you have the least control over the output STL.
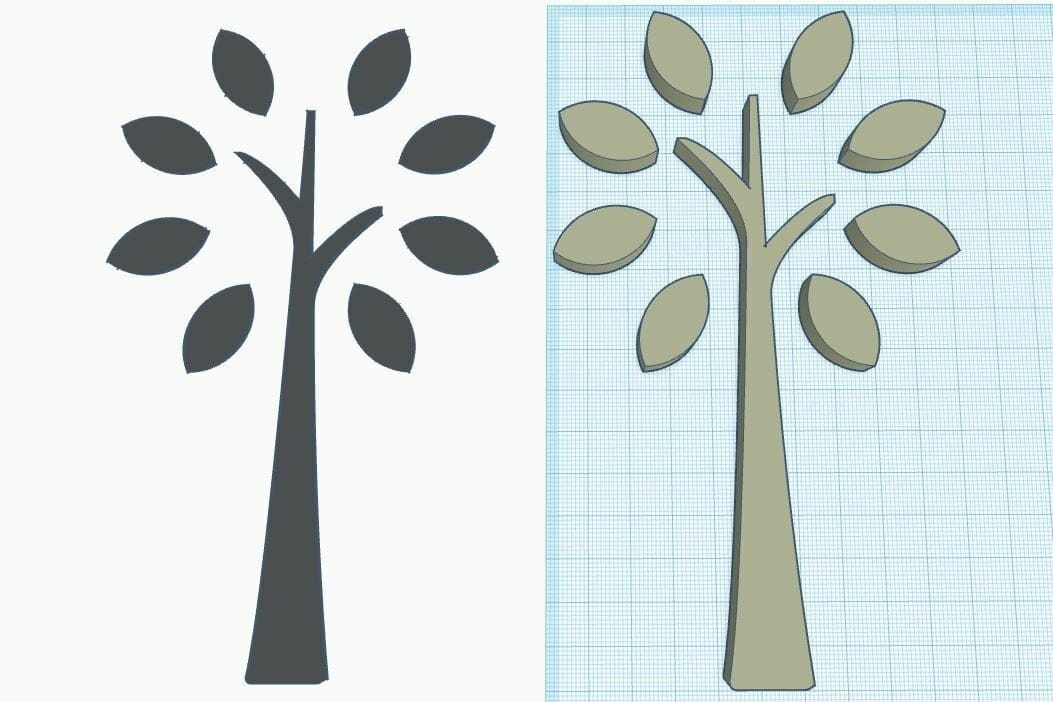
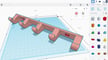
If you find your STL files are coming out looking distorted, as shown here, we recommend converting using CAD software instead. We’ll show you exactly how to do that next.
Using CAD Software
Another option for converting SVG files to STL is to use CAD software, many of which support SVG files. Although it’s possible to do this in software like Blender and Fusion 360, we’ll be using Tinkercad.
It’s free and easy to use, even if you’re not familiar with CAD software. It’s also browser-based, so you won’t need to install anything. You’ll just need to set up an account.
Using CAD software may seem like an unnecessarily complex option compared to an online tool, but if you’re planning to build onto the resulting STL file or use it in a larger CAD project anyway, it speeds up the process and gives you a little more control over the end result.
Step 1: Import Your SVG
Once on the Tinkercad website, you’ll need to sign in and start a new project. To import an SVG, you will need to click “Import” in the top right corner.
You’ll then see a pop-up in the center of your screen. You can either drag and drop your SVG file into this pop-up or click “Choose a File” and select it from the file explorer window that opens.
You can then set the size of the shape that will be imported. Don’t worry too much about this step because you can still change this afterward.
Once happy, just click “Import”, and your SVG will appear as a 3D shape on the workplane.
Step 2: Edit
Here’s where using CAD comes in handy! You now have the SVG in 3D form, so if you wish to make any changes, you can.
For example, you can use the SVG shape to make changes to other shapes. Here, we used our All3DP logo to subtract the shape from a solid block.
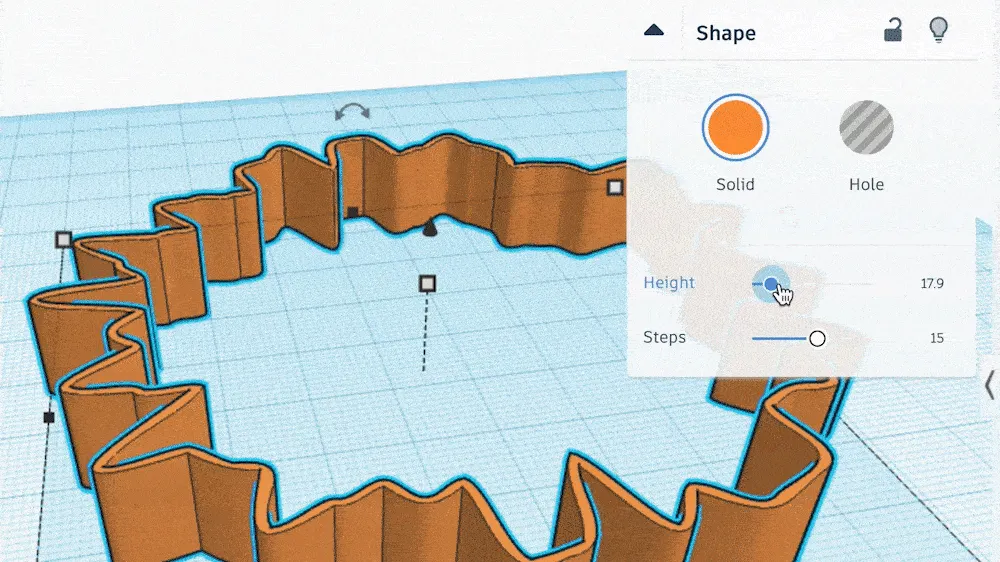
By default, whatever shape you’ve uploaded will have a height of 10 mm. This can be easily changed by clicking and dragging the corners of the shape.
For further guidance on using Tinkercad, check out our Tinkercad tutorial.
Step 3: Export
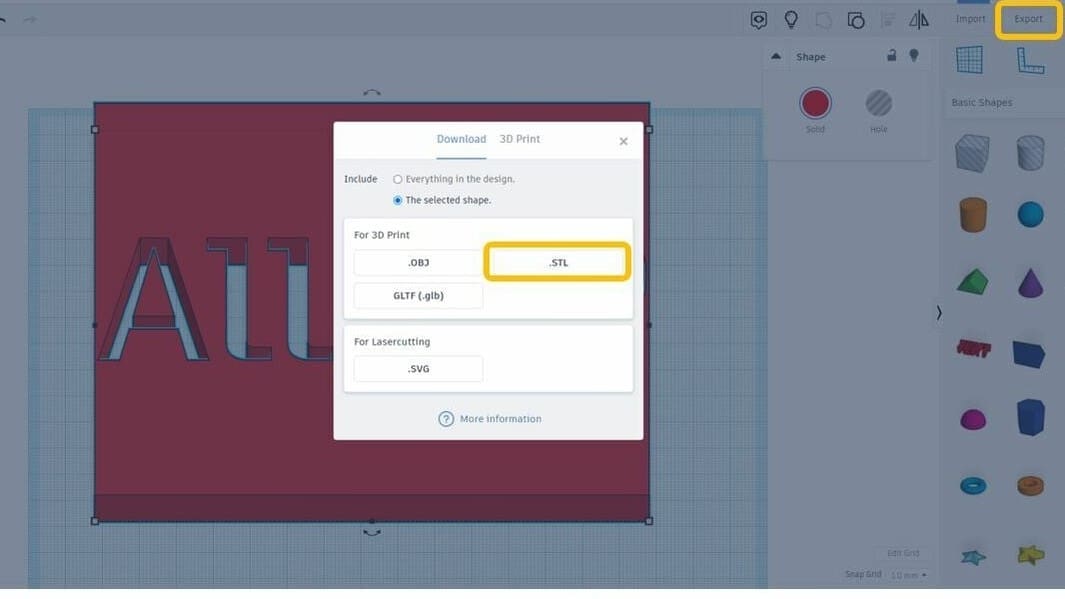
Once you have the shape you want, whether it’s just a 3D version of the original SVG or a more complex design, simply select the model you wish to save as an STL and click “Export” in the top right corner.
You’ll again see a pop-up in the center of your screen where you will need to click the “STL” box. Your STL file will then download automatically.
Quality Issues
Regardless of the approach you use, it’s worth noting that some users see a drop in quality when converting SVG to STL, especially when it comes to complex shapes such as text.
This is usually because the SVG was originally an image in another format that was then converted to an SVG. So, it will not have the clean, sharp, geometric lines of the SVG.
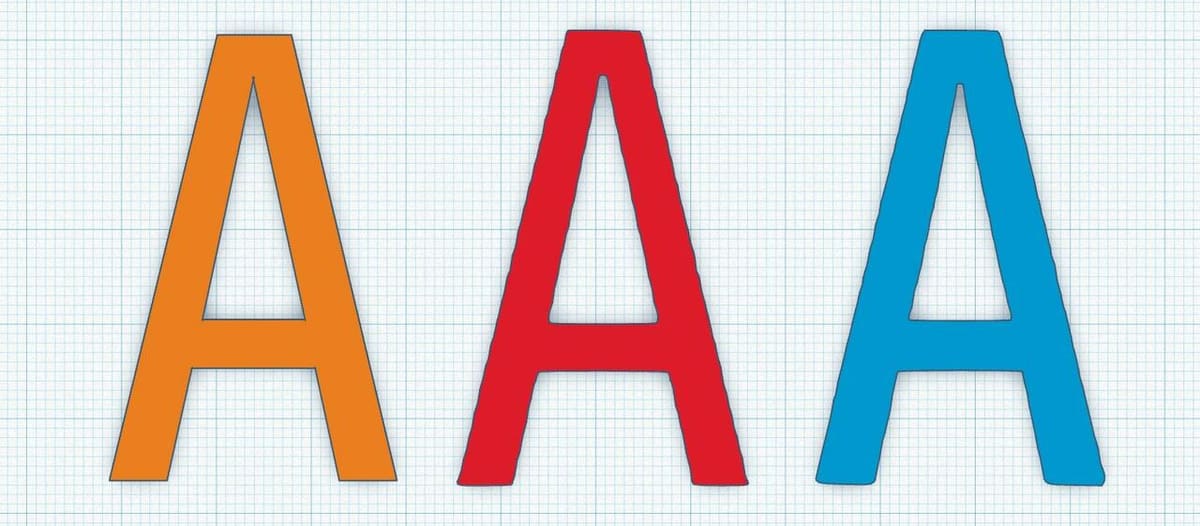
In the example pictured above, all three ‘A’s are taken from the same All3DP logo, but the ‘A’ on the left has sharp edges because it was created by importing an SVG directly into Tinkercad.
The ‘A’ in the middle is bumpy and rough because it was created using a JPEG that was then converted to an SVG before being imported.
Sometimes an SVG isn’t available, and you have to convert from another format. In these cases, a little editing can make a big difference! Eliminating any blurry edges and raising the contrast of the image will help a lot.
As you can see in the ‘A’ on the right, which has been edited before converting, it’s not as clean as the one on the left. However, it’s much better than the middle one!
Final Thoughts
So, we can now turn an SVG into an STL! While it’s super handy, it’s a bit of a process! For those who just want to jump in and get printing, converting SVGs all the time can be tedious and even frustrating.
It may be best instead to find what you need in the right format and only convert when you really need to. Fortunately for you, there are tons of sites where you can find free models in STL as well as other 3D printing file formats.
License: The text of "SVG to STL: How to Convert SVG Files to STL" by All3DP is licensed under a Creative Commons Attribution 4.0 International License.