
Resin Print Support: 5 Great Tips & Tricks

If you're 3D printing in resin, you'll need supports. Read on to learn about setting up and perfecting your resin print supports!
Resin printing is a powerful 3D printing technology that uses light and the starting material of plastic to create objects. These beams of light cure UV-sensitive resin in precise layers in order to create finely detailed 3D models. While resin 3D printers can produce stunning results with a high level of detail, this 3D printing technology is not without its challenges.
For every resin print, you’ll need support structures. Supports are cylindrical structures with an angled end and a pointed tip that hold up a print and help it resist stress. They are essential in preventing models from pulling free from the print bed or having small details ripped away. While supports are designed to be removable and leave as few marks as possible, it’s not always easy to get them just right. Knowing how to add, modify, and remove supports is crucial to ensure the success of your resin prints.
In this article, we’ll cover all you need to know about resin supports in LCD resin 3D printing, as it’s the most common among hobbyists. However, many of our tips apply to resin 3D printing as a whole. To learn how to orient a print, adjust support thickness, remove supports, and more, read on!

Resin Printing Basics
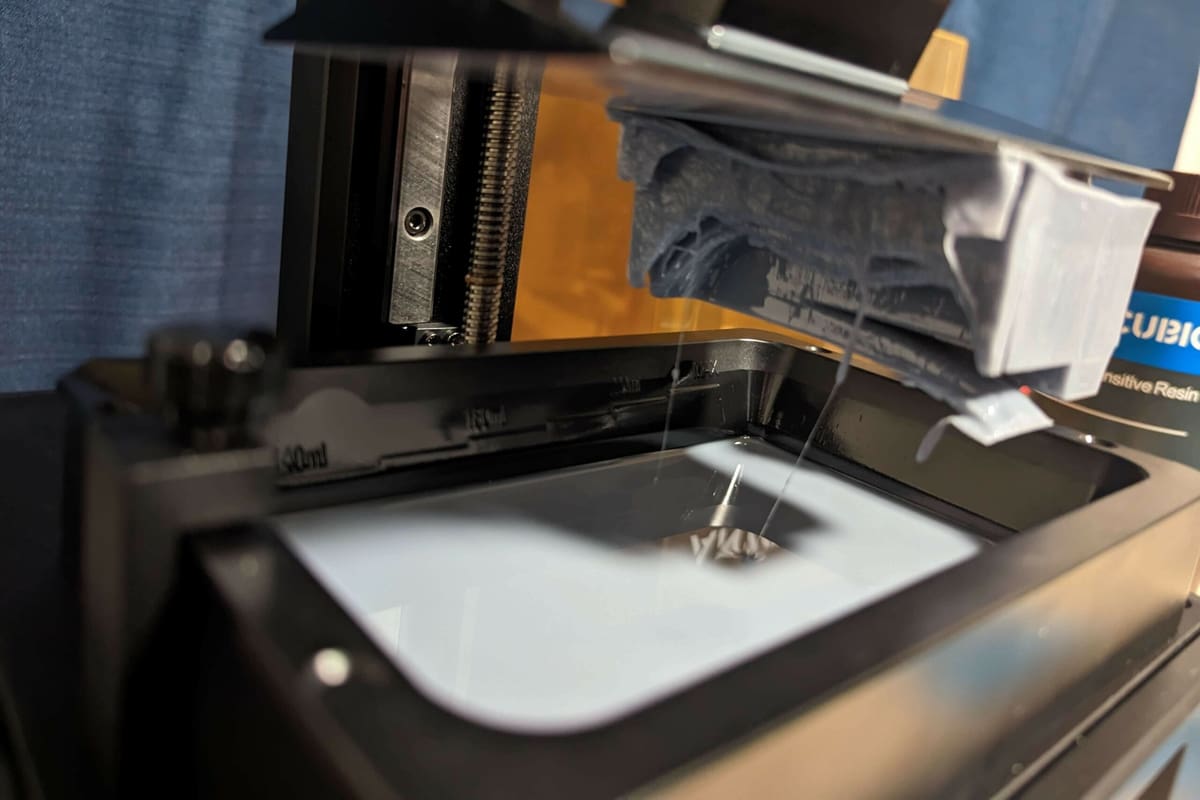
While resin 3D printing may seem complicated at first, it can be broken down into a few main components: the build plate, resin vat, FEP, and light source.
The build plate, much the same as traditional FDM printers, is where the object is built, layer by layer. The appropriately named resin vat is the tray that holds the resin with a bottom made of FEP. The FEP, or fluorinated ethylene propylene, is a transparent sheet specially formulated to let UV rays pass.
For LCD resin printing, the light source is an LED, which is located under the LCD screen. It shines UV light in precise increments to accurately cure resin layers. The screen acts as a mask, revealing only the pixels necessary for the current layer and blacking out the rest. Detail is dictated by the number of pixels, with more pixels meaning higher resolution.
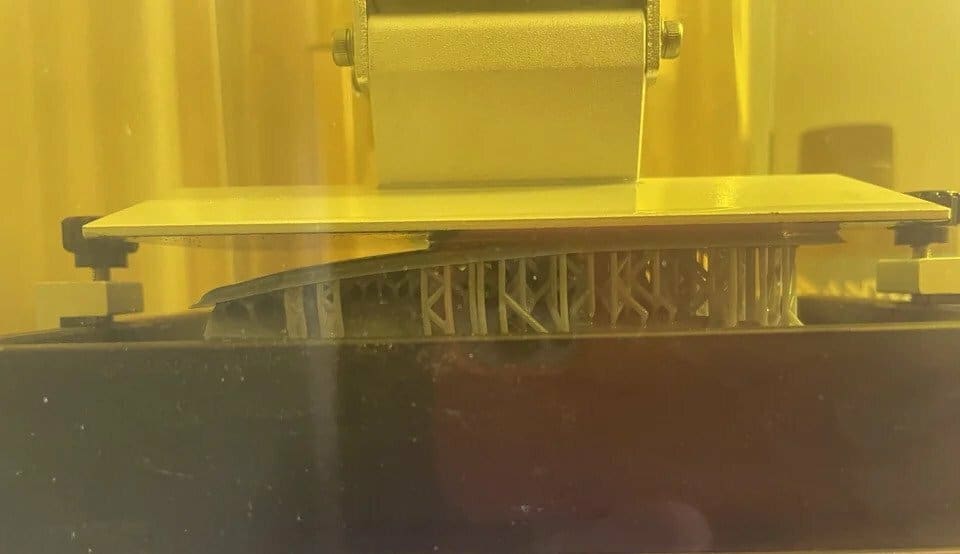
These basic components work together to create a resin print. The build plate lowers into the resin vat and creates a gap of about 50 microns, depending on the layer height. Once set to the correct height, the light from the LCD panels flashes a pattern of UV light, curing the thin resin layer. After the layer has been cured, the build plate rises to allow new resin to flow underneath and the process repeats. Each layer is built upon the next, with the base layer providing the anchor for the print. When a print is finished, the machine simply raises the print bed and allows excess resin to drip off.
Benefits of Supports
Supports are a crucial aspect of nearly every resin print, and using them properly is one of the best ways to ensure that you end up with quality prints. There are a few reasons why supports are important. In resin printing, supports are often anchors holding layers to the build plate, rather than holding layers up as in FDM printing. When a layer is cured, the build plate lifts up, and the layer must pull away from the FEP to make room for the next layer. Without proper support structures to attach parts of the object to the printing platform, the freshly cured layer may get stuck to the bottom of the container and break apart.
Keep in mind that each layer is between 10 to 50 microns, and it does not take much to damage a layer thinner than a human hair. If you do end up experiencing print failures, broken layers, and parts missing from your last print due to inadequate support, some Reddit users recommend filtering the resin. A paint strainer works great to filter out particulates that could otherwise produce blemishes on a print or bunch up to interfere with future layers.
Another reason that supports are so essential is that, unlike FDM printers, resin printers can only produce small overhangs. Anything larger, and there will be a noticeable sag or complete collapse. Poor placement or not having enough support can cause minor problems like bumps as well as larger issues like delaminated prints or a pierced FEP.
For larger prints, a lack of support can cause warping and even delamination. Delamination commonly results from improper curing settings but can also occur when the force between the FEP and build plate is strong enough to pull layers apart. This instantly destroys a print and can leave the remaining layers to cure onto the FEP, creating a difficult mess to clean. To improve your support system and resin prints, or maybe just learn something new, keep reading for some great tips and tricks.
Orienting the Print
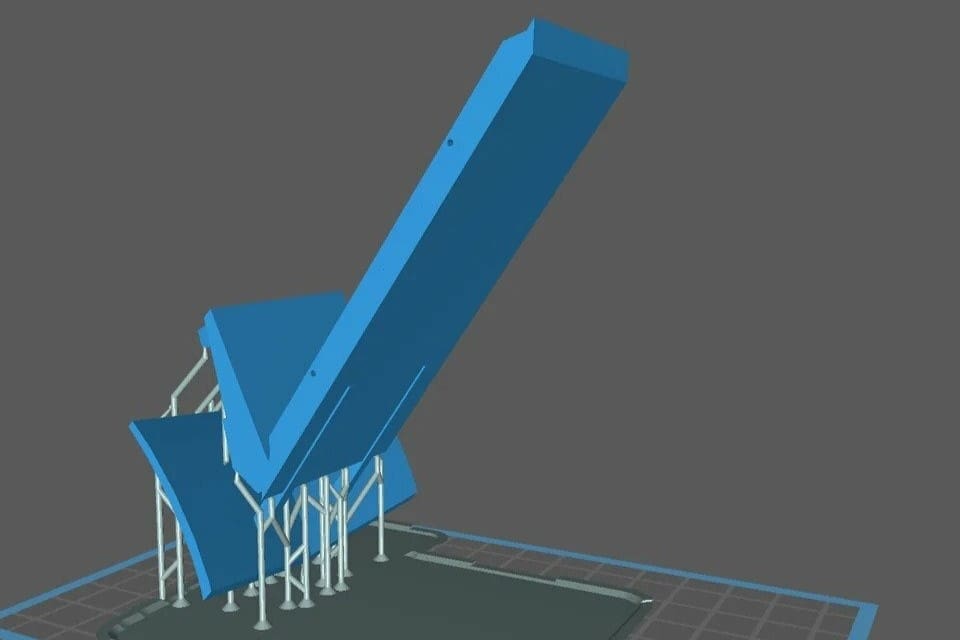
One of the most basic yet often overlooked tricks for better supports is simply to rotate the print in your slicer. Ideally, you should orient your print so that it requires fewer supports and takes less time to 3D print.
As mentioned, every layer in a resin print is consecutive and builds up on the layer beneath it. In most cases, you’ll want to rotate flat-bottomed models so that they’re slightly tilted. Tilting reduces peel force by reducing the area in contact with the FEP sheet. If the first flat layer detaches from the bottom of the container, it may deform or rip apart your model (even with proper supports).
For best results, rotate the print 30-45% to make the base surface area less of an issue. In nearly all resin slicers, there is an option to rotate the object. In ChiTuBox, for example, the Rotate tool is on the left side with large lettering beneath it. Simply selecting the tool brings up a panel with angle measurements, and the three-axis wheels will appear in the middle of the bed.
This simple rotation will create better prints that use fewer supports and have fewer blemishes. The only caveat is if the rotation places a flat edge parallel to the build plate. Much the same as a tent, in the locations without a pole, the tent sags. The same is true for resin layers. Unless the support density is extremely high, every space between supports will sag, as there is no supporting force present.

Determining Strength & Thickness
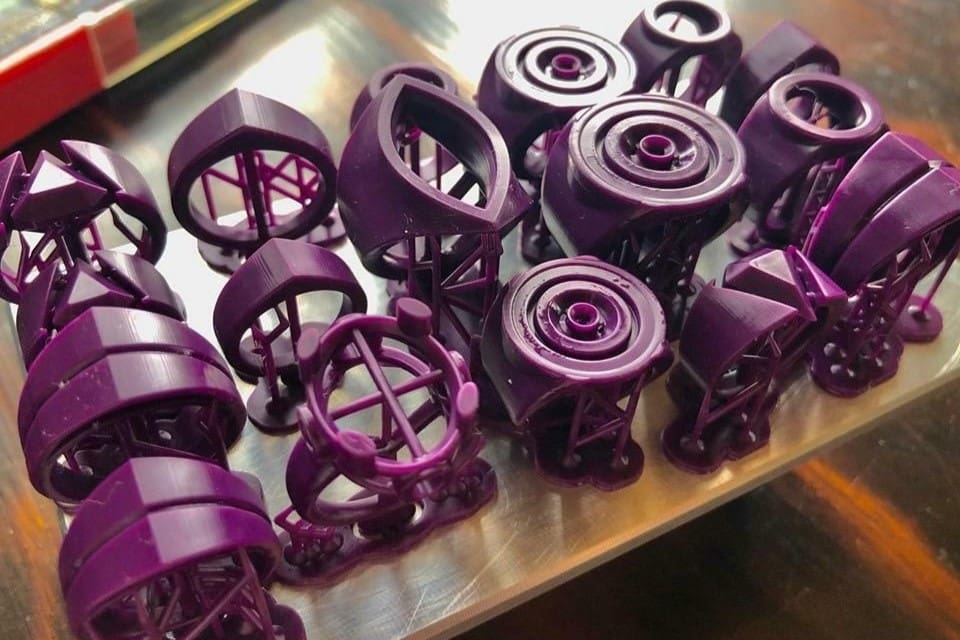
Responsible for holding prints to the bed, supports must be strong and thick, but not so large that they leave unnecessary marks. In most slicers, support thickness comes in three sizes: small, medium, and large. Support tips can be more variable, with common sizes ranging anywhere from 0.2 mm to 0.5 mm. The different sizes account for varying levels of stress throughout a print.
In large prints, the suction from the FEP is much greater, so the diameter of the support tip needs to be on the thicker side. For these models, it’s best to use a high support density with interconnected beams. Connecting nearby beams creates a rigid structure that counters areas heavy in stress. The downside is the mass amount of support marks left behind, requiring lengthy post-processing.
An alternative to high support density is using a few large supports on the bottom to act as anchors, with small and medium supports everywhere else to cut down on marks and resin use. For heavier prints, it’s best to use larger support tips. The weakest point of a support structure is the narrow tip that makes contact with the object. Because of this, prints can occasionally break free from undersized support tips. Thicker sizes like 0.4 mm or 0.5 mm help negate this issue.
For smaller prints with lots of fine details, small supports should provide all the strength necessary. In addition, the support tip diameter on these prints should be smaller in order to preserve fine details. The main problem is avoiding damaging divots and marks from removed supports. In most slicers, resin tips can be changed to a spherical shape in the options menu. When removed, spherical tips are less likely to leave behind marks, and any that do remain as small bumps. Those small bumps are much easier to remove via post-processing than the small gouges left by traditional cone tips.
Determining the perfect support for your print can be tricky. One Reddit user boils it down to, “Large prints, large supports.” As everyone’s machine and resin combination is different, there is no simple ratio for determining support strength. The best way to learn may be through some trial and error. Just remember, it’s better to have too many supports than too few.
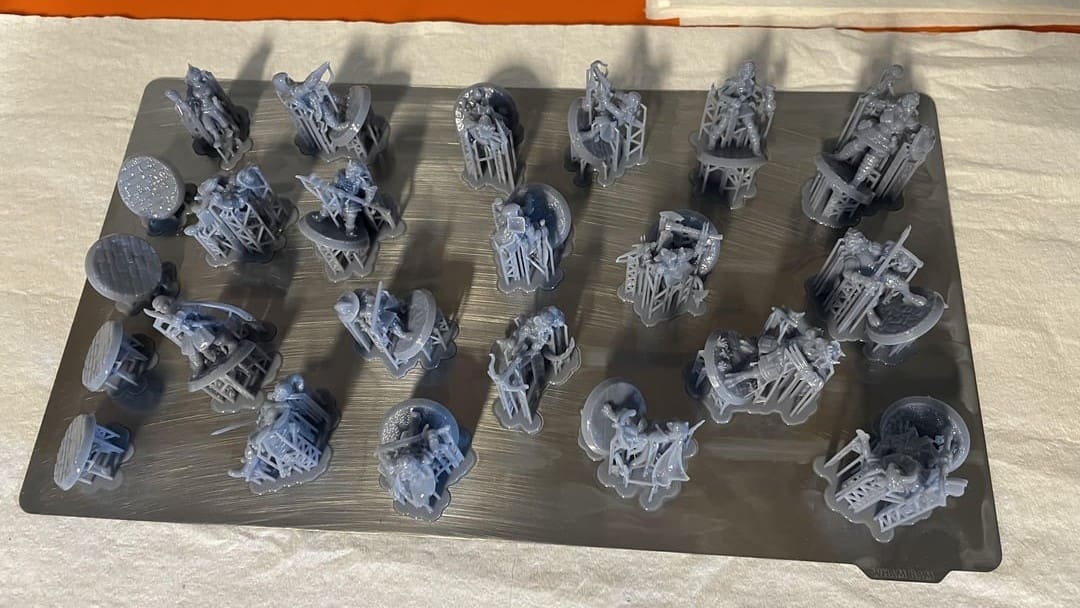
Generating Supports
In recent years, automatic support structures have become a powerful tool for resin printing, but it isn’t perfect. If your slicer’s auto support feature is falling short, don’t fret. In nearly all resin slicers, manual supports can complement the abilities of automatic support generation. They fix what the computer missed, as long as you know what to look for.
Adding supports manually is a process that takes some time, but when used in conjunction with auto-generated supports, it can yield high-quality results. Applying manual supports varies between slicers, but typically involves clicking or brushing over the selected area. When searching for areas in need of support, remember that the part is being anchored, rather than simply held up. Look for flat or long overhangs and large surfaces. For example, a large overhang parallel to the build plate will require denser support to neutralize sagging if it can’t be reorientated. It’s also a good idea to add support to any areas where your previous print had issues.
Islands are often the biggest factor in support placement, and a missed island can cause critical print failures. An island is a part of an object that does not have a surface to build onto, be it a support structure or another part of the model. This leaves the island to be printed on thin air (or rather, into the resin vat). To identify islands, use the layer slider found in most slicers and look for the places where there are large overhangs or where the object appears to be floating in mid-air. If the auto support feature misses one of these locations, simply apply manual support to that region.
When using your slicer’s auto-generated supports, remember that while it takes out the legwork, it always needs a final check. For walkthroughs of your slicer of choice, search YouTube for a comprehensive guide.
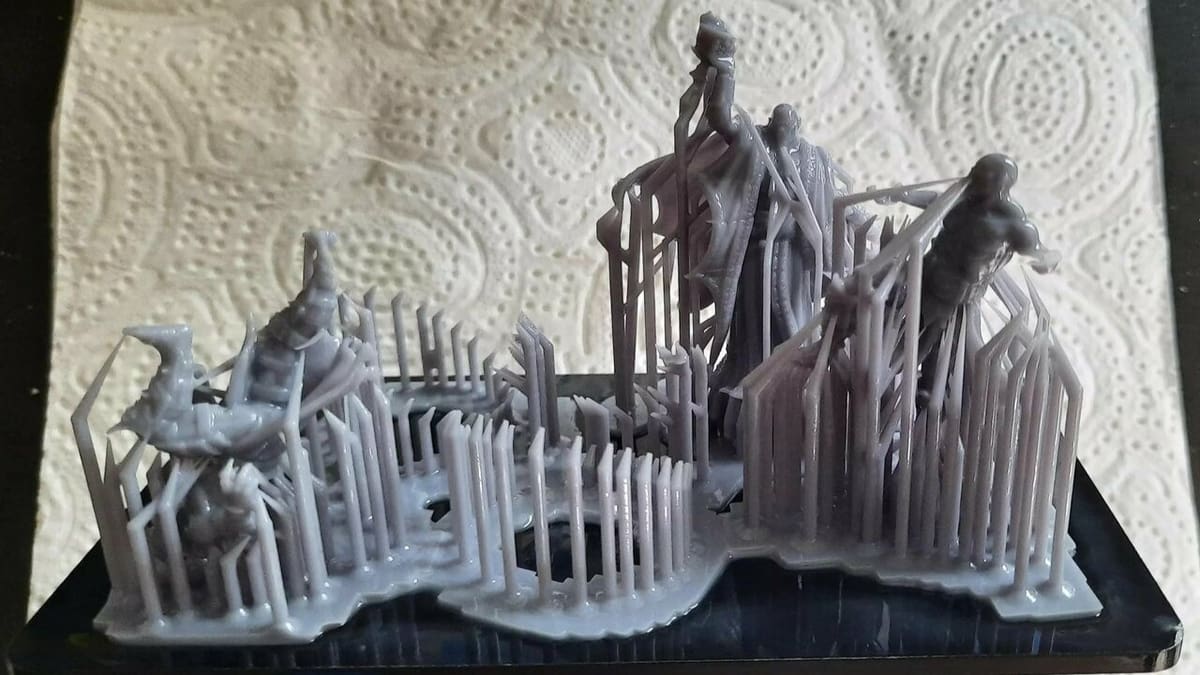
Adding a Raft
Another simple but incredibly effective trick to secure your print and avoid support failure is using a raft. A raft is a thick layer of resin on the build plate that’s cured for an additional amount of time to create a strong bond between the resin and plate.
Without a solid raft, the print will often detach from the plate due to movement, pressure, and other forces. While curing times can vary depending on brand and composition, it’s typically best to cure the raft eight times as long as the print. The overexposure creates a stronger bond to the plate and a better base for supports.
Often, a model’s raft is scaled up to provide a larger base, as this provides a greater surface area on the build plate and increased adhesion. When dealing with particularly tall or dense prints, it can be especially helpful to scale up the raft for extra adhesion. Tall or weighty objects will place more strain on the raft.
While the emphasis on raft adhesion may seem excessive, the raft is responsible for bearing the weight of the entire print and resisting the vacuum force of each layer on the FEP. The pulling away from the FEP places stress on the raft as many times as there are layers, often in the thousands. The moment a raft loses plate adhesion, the object will fall into the resin vat, creating a thick layer of cured resin on the FEP.
With all the adhesion, it can be difficult to remove your raft after a successful print. To help remove the raft from the plate successfully, the edges are angled by default to allow a scraper to gain leverage. The angle of the edge can be increased or decreased, which affects how easily it removes at the end. The raft is the foundation of every good print, and time spent dialing in your raft is well spent.
Removing Supports & Post-Processing

After painstakingly placing every support and checking every angle, your print came out perfectly. But now, what’s the best way to remove those lovely supports?
If done incorrectly, support removal can severely damage your prints. To prevent chipping and cracks, you’ll always want to remove supports before curing a model. When the print is first removed, it’s still soft and slightly malleable. This makes it easy to pull off individual supports with less worry about cracking thin sections or pulling off chunks of the print.
For models with extensive supports, heat can make the removal process easier. The 3D Printing Doctor, a popular resin printing YouTuber, dips models in hot water for about 30 seconds. The heat softens the supports so they come off more easily and cause less damage to the model.
For supports that are only in specific areas, a heat gun can work to the same effect. For tough or larger supports, a pair of wire cutters is a great option to snip the support off close to the model. The remaining bumps can be shaved off with a sharp craft knife for best results. Avoid removing supports by hand, as this can cause gouging and small defects.
Once all the supports are removed, the object can be cured in a UV cure station or in strong, direct sunlight. The post-curing hardens the print and eliminates any residual tackiness. Once cured, the print is hard enough for sanding, which will remove any remaining support elements. Start with either a 220- or 400-grit sandpaper and work your way up from there. Make sure to wear a protective mask when sanding.
You can take your print to the next level by priming, painting, and sealing. After this, your resin print should be ready for use or display!

License: The text of "Resin Print Support: 5 Great Tips & Tricks" by All3DP is licensed under a Creative Commons Attribution 4.0 International License.