Open Source Squared
3D slicers are one of the most important aspects of 3D printing because they convert your 3D models into G-code, which is interpretable by your 3D printer. Many different 3D slicers exist, and one of the most popular options is PrusaSlicer. PrusaSlicer is an open-source program that was forked from Slic3r and further developed by Prusa Research, the makers of the popular Prusa i3 series of printers.
PrusaSlicer contains various unique slicing features, including top layer infill, jerk settings, and more. Another useful feature that PrusaSlicer offers is OctoPrint integration, which allows you to send prints to directly your machine by tunneling OctoPrint through your PrusaSlicer interface.
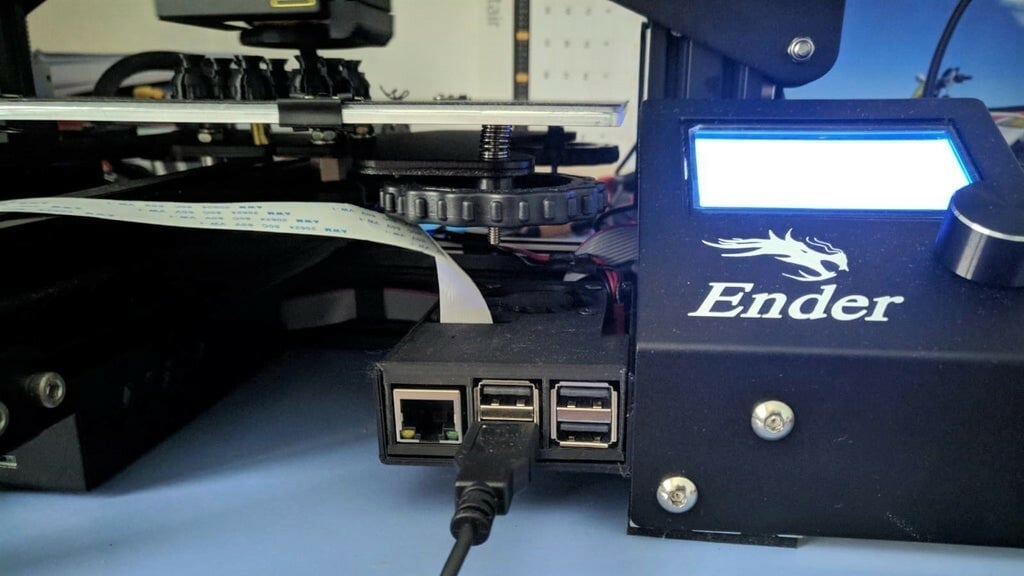
If you’re unfamiliar with OctoPrint, it’s an open-source, community-developed remote printing server that operates on a single-board computer like a Raspberry Pi. OctoPrint enables you to remotely control and monitor your printer, allowing you to send and start 3D prints without needing to be physically near your printer.
In this article, we’ll be going over using PrusaSlicer and OctoPrint together. We’ll first briefly go over the benefits of this setup and then get into how exactly you can get started. Enjoy!

Advantages
As we’ve mentioned, PrusaSlicer is a powerful 3D slicer, and integrating OctoPrint is a great way to reduce the time it takes to go from an idea to a printed object. The combination of these programs means you can slice your model, send it to your printer, and start the printing process, all from within PrusaSlicer.
With OctoPrint connected in PrusaSlicer, after uploading your model and slicing it, you can use PrusaSlicer’s specific button to send your newly-generated G-code straight to your printer. This also means you don’t have to be next to your machine to start the print, as long as the device running PrusaSlicer is connected to the same Wi-Fi network as your OctoPrint server.
Another advantage is that you don’t need a physical storage device (like a microSD card) to transfer your files. All the files you send to your printer are stored on your OctoPrint server device’s storage, so you don’t need to fear losing that tiny microSD card!
Now, let’s get to how to set up the connection.

Setting Up the Connection
Connecting your OctoPrint server to PrusaSlicer is super easy, and you can follow the instructions below to complete this process. Before starting, though, make sure that your OctoPrint server is properly set up, the firmware is updated (at least OctoPrint 1.1), and you’ve downloaded the latest version of PrusaSlicer.
- Open PrusaSlicer.
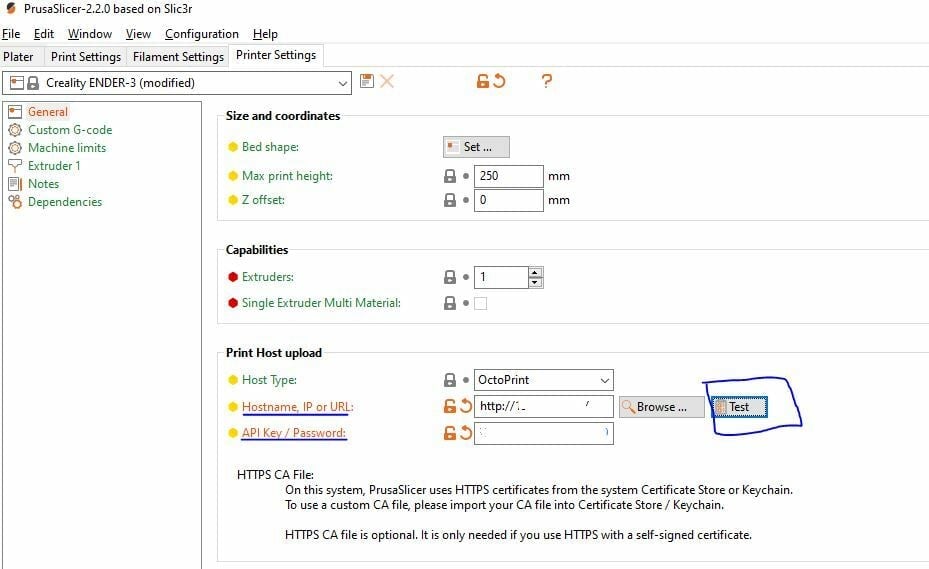
- Go to the “Printer Settings” tab on the PrusaSlicer interface.
- In the “General” section, select “OctoPrint” for the “Host Type” setting.
- Open your web browser and go to your OctoPrint interface URL. This should be the IP address of your OctoPrint server (e.g. “192.158.1.332”).
- Copy the IP address of your OctoPrint server.
- In PrusaSlicer, still in the “General” section of the “Printer Settings” tab, paste the IP address into the “Hostname, IP or URL” text box. Don’t click “Test” (yet).
- In your OctoPrint interface, click the wrench icon in the top-right corner of the dashboard, and go to the “API” section.
- Locate your “Global API Key” and click the copy-to-clipboard icon to the right.
- Paste the API key you copied into the “API Key/Password” box in PrusaSlicer.
- Now you can click the “Test” button to the side of the “Hostname, IP or URL” button. You should see a pop-up box confirming the success of your OctoPrint connection.
Congratulations, you’ve now successfully set up your OctoPrint connection to PrusaSlicer!
Using the Connection
Now that you’ve properly integrated OctoPrint into PrusaSlicer, follow the steps below to use the connection you’ve just set up:
- Open your 3D model in PrusaSlicer.
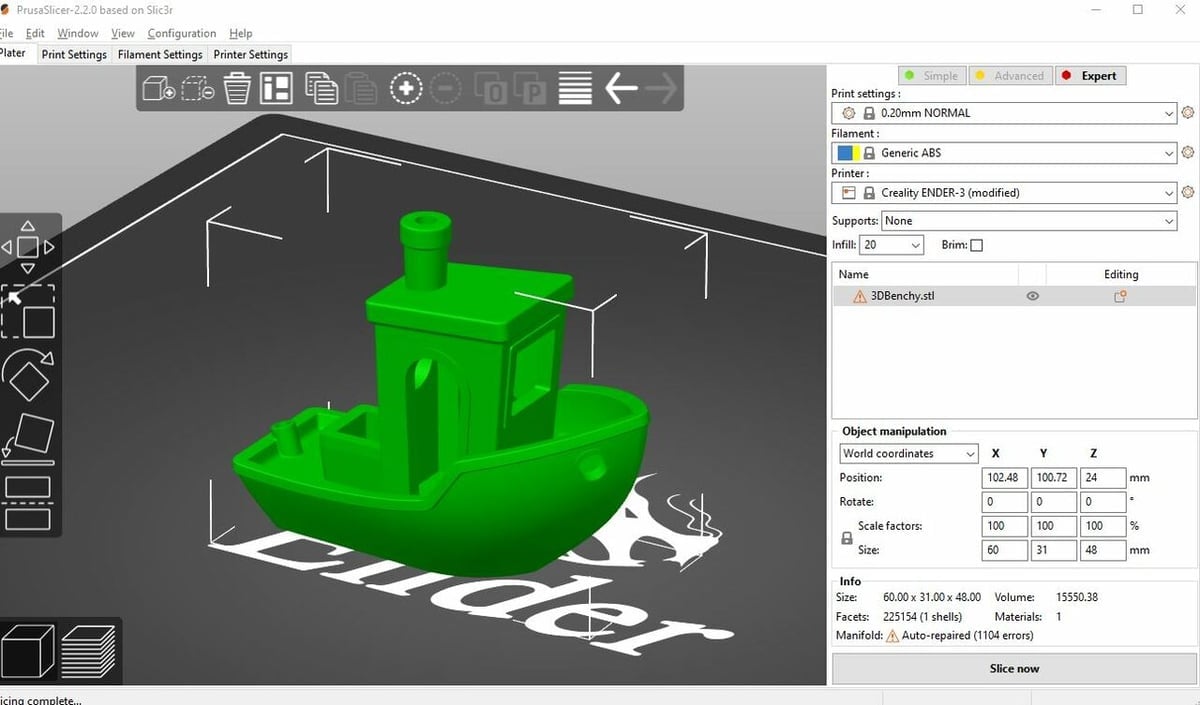
- After modifying the slicer settings as you see fit, in the “Plater” section, click “Slice now” at the bottom-right corner of the interface.
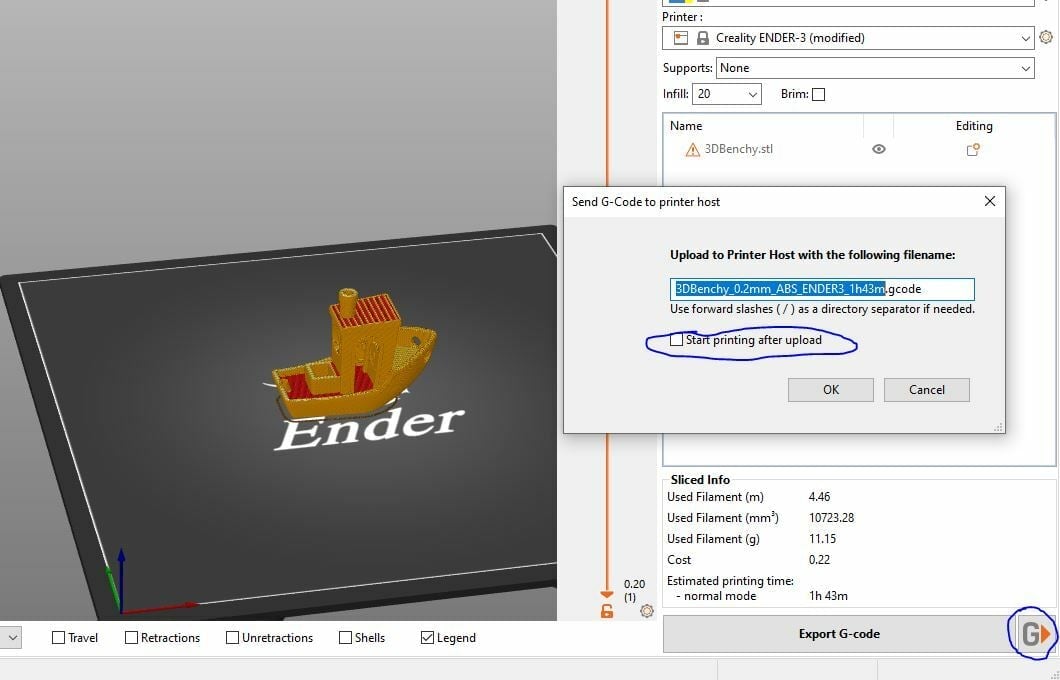
- Click the ‘G’ button to the right of “Export G-code”.
- In the pop-up box that will appear, rename your print and choose whether you want to start the print immediately after uploading by checking the empty box. If you don’t want this to happen, you can always start the print later from the OctoPrint interface (outside of PrusaSlicer).
And that’s all there is to it!
Lead image source: Colaborativa.eu
License: The text of "PrusaSlicer & OctoPrint: How to Use Them Together" by All3DP is licensed under a Creative Commons Attribution 4.0 International License.