Prusa MMU2S: Successfully Install This Upgrade

The Prusa MMU2S helps you print with up to four additional filaments, but getting started can be tricky. Read on to get it right!
Prusing Possibility
A major limitation of traditional FDM 3D printing has historically been the fact that prints are limited to a single filament. Still, there are some techniques for using multiple filaments in a single print, such as stopping the printer at a predetermined layer to manually swap the filament or having multiple nozzles.
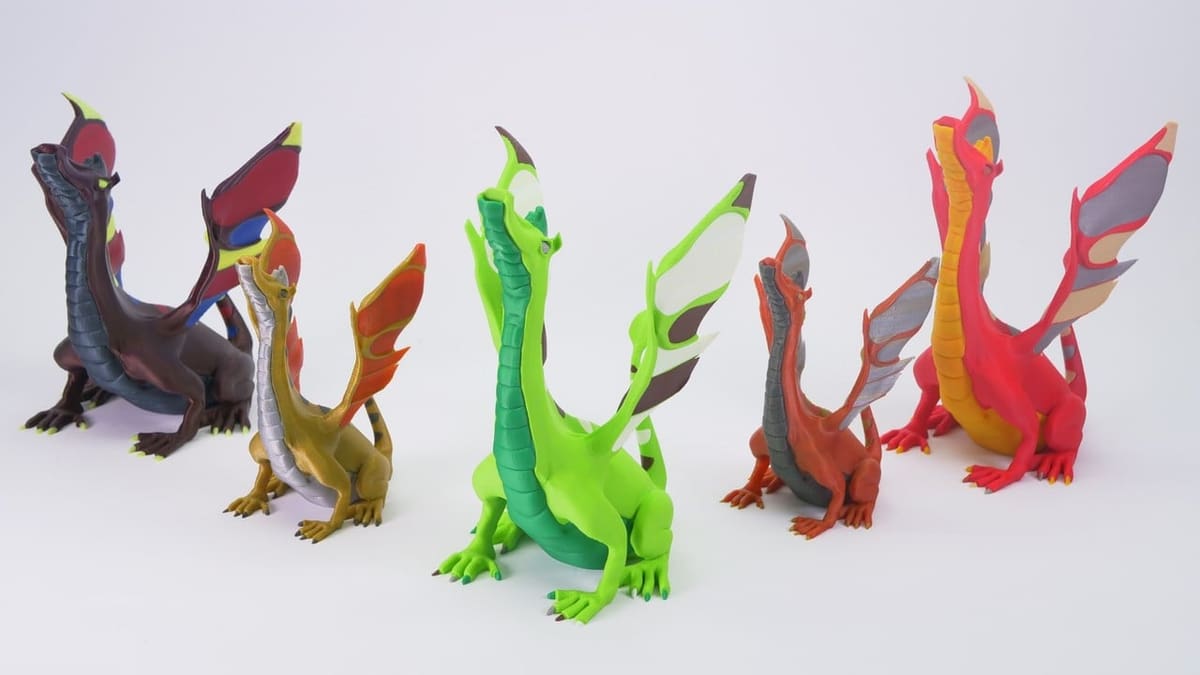
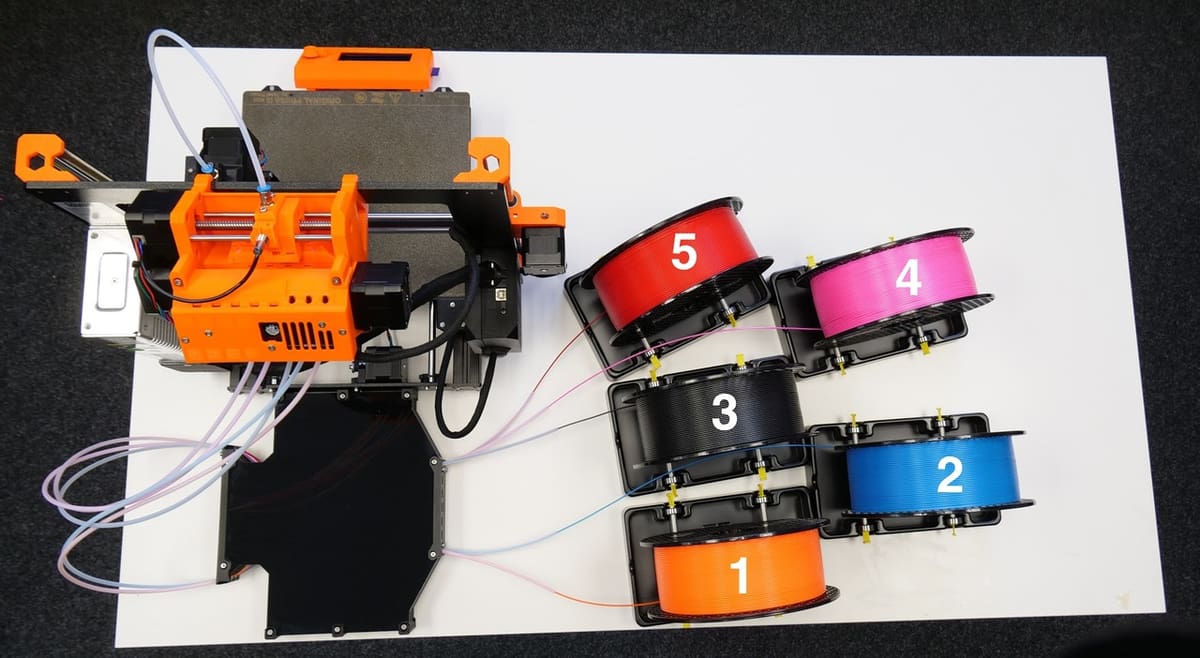
The Prusa Multi Material Upgrade 2S (MMUS), on the other hand, allows you to upgrade your Prusa i3 MK3S or MK2.5S to print with up to five different filaments in each layer, using only a single nozzle.
The MMU2S, however, is not without its issues. After a quick search on the web, you’ll find no shortage of people struggling to print successfully with multiple filaments. It’s an advanced upgrade that requires patience to install and get working correctly. Although it might not be the easiest Prusa upgrade, it’s worth the effort to get beautiful prints in the end.
With this article, we hope to help you get your MMU2S up and running without a struggle. Note that this isn’t meant to be a replacement for Prusa’s instructions but is rather intended to supplement them. We’ll start by looking at an overview of the main steps, then give you some things to keep in mind before you start. Finally, we’ll provide a few troubleshooting areas once your installation is complete. Let’s jump in!
Overview & Tips
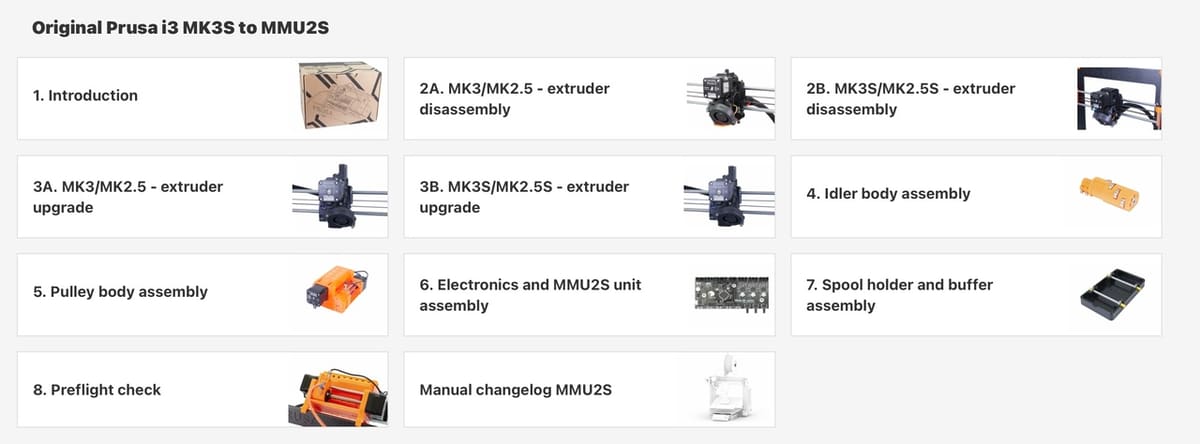
Before getting started, it’s helpful to have a bird’s eye view of the steps you’ll need to carry out to perform for the upgrade:
- Extruder disassembly and upgrade: The Bowden system of the MMU2S isn’t compatible with the standard extruder in the MK3 or MK2.5S, so the extruder needs to be upgraded.
- Idler assembly: The idler body is the part of the MMU2S that rotates in order to select the filament being used to print. The most important thing to pay attention to is the friction of all the rotating parts; everything should be able to rotate freely.
- Pulley body assembly: The pulley body is the most essential component of the MMU2S, as it’s the part responsible for feeding the selected filament to the extruder. This stage is the trickiest part. Really make sure you’re following the instructions to a T.
- Electronics assembly: This step is where you connect the MMU2S to the rest of the printer. This isn’t too difficult, but the wiring, as always, requires some attention.
- Spool holder and buffer assembly: The final stage for setting up the filament feed. In addition to being one of the easiest stages, it’s also the least consequential to the proper functioning of the MMU2S.
If you have experience with assembling the Prusa i3 (i.e. if you built your printer from a kit or have done other upgrades), then Step 1 should be pretty straightforward. However, it’s not a bad idea to do it last instead of first. As noted by Prusa user Scott Spies in the comments section of the instructions, “the extruder upgrade should be as close to the end as possible, just in case you need to reprint damaged parts.”
Preparation
Before you begin installation, you’ll want to take care of a few preparatory items:
- Calibrate your printer: The MMU2S shouldn’t be a day-one upgrade; take the time to calibrate your printer first. Use our guide on calibration and Prusa’s calibration knowledge base for help dialing in your settings. Once you’re getting great prints with a single filament, you may be ready to start assembly of the MMU2S.
- Clean and prepare your workspace: You may find that some parts in your kit have stringing artifacts that block screw holes. Take your time to clean these up.
- Use open-source parts: If a part looks like it’s printed too poorly to be fixed, or if you want some extra parts just in case something goes wrong, print some more. All of the plastic parts of the MMU2S are available to download on GitHub and should be printed in PETG.
- Have patience: Building the MMU2S can be time-consuming, but rushing through the assembly will inevitably lead to headaches later when you try to print. Set aside ample time – maybe even a full weekend – to put the MMU2S together.
- Be careful: When you’re assembling, you’ll need to be extra careful because you may break some parts if you try to force them together. For example, if you’re having trouble inserting a nut in a part, try the “screw-pulling technique” described in step 8 of the introduction to Prusa’s instructions. Also, be especially careful installing PTFE tubes, because they cannot be printed. If they get squished, you may have a really hard time printing since filament won’t flow smoothly.
Reading Instructions Thoroughly
Though it may sound obvious, the absolute most important key to success with installing the MMU2S is carefully following the instructions. Take your time when assembling this upgrade. The time you spend paying attention to the minutiae of the assembly instructions directly translates into time saved troubleshooting later.
Comments & Images
At each step of assembly, you should first read the comments for that step to understand issues that other people ran into. If one particular step has significantly more comments than average, that’s a good indication that you may need to be extra cautious. There are also general comments below the guide that also wouldn’t be a bad idea to skim.
Once you’ve read all the comments, we advise you to read all parts of the instructions for that step including looking at the pictures. Sometimes the text of a step only makes sense if you look at the second or third picture. Only after you understand exactly what you have to do, go ahead and complete that part of the assembly.
Calibrating the Filament Sensors
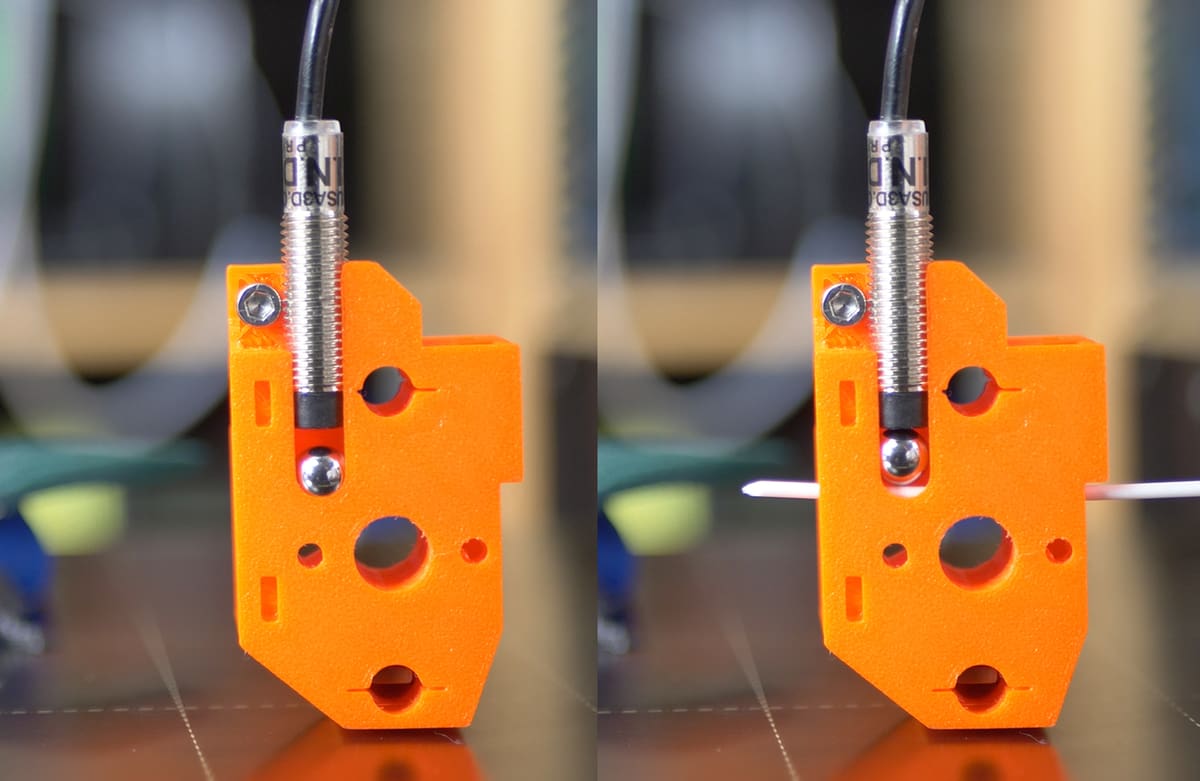
Let’s jump ahead to after you’ve finished building and installing your MMU2S. First of all, congratulations! It’s almost time to get printing, but first, you should calibrate the filament sensors. The MMU2S has two filament sensors: the selector-FINDA on the MMU2S unit and the infrared (IR) sensor at the extruder.
The selector-FINDA is the same type of sensor as the PINDA probe used for bed-leveling. It works by detecting the presence of a steel ball that passes close to it when filament flows underneath it. The IR sensor, which is the more finicky of the two, detects the presence of filament by determining if an IR beam is blocked by a piece of plastic that the filament moves when it enters the extruder.
These two sensors work together to load and unload filament. Naturally, this is necessary to ensure flawless operation, especially if you’re going to have hundreds of filament swaps per print.
Testing
Unsurprisingly, you should follow Prusa’s guide for FINDA setup and IR sensor calibration. The basic idea is that each sensor should read a value of 0 when no filament is present and 1 when the filament is inserted. You can read out the value of each sensor on the printer’s LCD screen under “Support > Sensor info”. Manually try to trigger each sensor by passing filament through the appropriate part of the printer, and adjust the components as necessary.
A common problem here is that the IR sensor may never trigger. If that happens, it’s possible to entirely disable the sensor through the printer settings, but it’s better if you can get it working. If you’re having trouble getting the IR sensor to read a value of 1, do as PrusaPrinters forum member brad suggests: First make sure that the electronics are working by manually blocking the beam, and then adjust the mechanical parts.
Ensure Proper Filament Loading
Many mid-print failures with the MMU2S occur because of problems loading or unloading filament. Calibrating the filament sensors is the first step in this process, but as PrusaPrinters forum member gnat says, “your filament path is critical.”
So, how do you ensure that your filament can be properly fed all the way from the spool to the hot end?
- Check that the PTFE tubes are all intact: Counting the one inside the extruder, there are a whopping twelve PTFE tubes in the MMU2S. (That said, note that the buffer isn’t strictly necessary. Indeed, some people, such as Reddit user DomiStyle, prefer not to use it. Removing the buffer would then reduce the number of tubes from 12 to 7.) If any of the tubes are squeezed too much, the inner diameter may become too small and 1.75-mm filament won’t fit through without significant force. If one of your PTFE tubes is crushed, it’s probably best to simply order a new one from Prusa or another manufacturer, rather than trying to fix the problem yourself.
- Check the Bondtech gear (pulley) alignment: This alignment process is described in Step 11 of Stage 5 of Prusa’s instructions. If the filament doesn’t sit perfectly in the grooves, it won’t feed through the printer. You should also make sure that the Bondtech gear on the extruder motor is aligned properly.
- Angle the end of your filament: Even if your filament path is perfect, the filament can still jam if it has a flat end. For this reason, you should cut the tip of your filament at roughly a 45° angle so that it doesn’t get stuck when changing interfaces through the various holes and tubes in the system.
- Align the natural curves of the Bowden tubes and the filament: The tubes tend to curve in a certain direction, and so does the filament; if these two tendencies fight, the filament may have a harder time making its way through the tubes because of friction caused by pushing against the inner walls. In the worst case, the filament may even break.
- Have enough space: The MMU2S requires a large area to operate: Prusa recommends a surface of at least 70 x 100 cm. If you have a larger surface for your printer, that’s even better.
Reducing Tension
Even if you can load filament properly and begin a print, you may be unable to complete it. One of the most common reasons for this is that the idler is too tight and crushes the filament, making it impossible to push it down to the extruder.
To avoid this problem, adjust the tension in the idler body so that each of the five filaments is held as loosely as possible, but still tight enough to be extruded. As a starting point, try setting the top of the heads of the tension screws just above the surface of the pulley body, and adjust as necessary.
You may occasionally need to go back and forth here because you need to have even pressure on both sides of the idler body. If you focus too much on getting the tension perfect on one side but not on the other, you may start out a print successfully but run into problems partway through when the printer changes filaments.
Though less common, the same problem can also occur at the extruder motor. As with the idler body, loosen the tension screw until it’s just loose enough to guide the filament, but not so tight that it squeezes it.
Troubleshooting

Though this article covers a few common pitfalls, it’s impossible to address every setback you might run into while installing or using the MMU2S. For other issues, there are a number of resources available to you.
As a first step, you may want to see if there have been other discussions about the particular issue you’re facing in Prusa’s MMU2S troubleshooting forum. You aren’t the first person to build the MMU2S, and you likely aren’t the first person to run into a specific issue.
Prusa support is also available 24/7 via live chat in their online shop, and their staff tends to be both friendly and helpful. If that still isn’t enough, don’t be afraid to ask for help on the forum yourself.
Good luck and happy printing!
License: The text of "Prusa MMU2S: Successfully Install This Upgrade" by All3DP is licensed under a Creative Commons Attribution 4.0 International License.
CERTAIN CONTENT THAT APPEARS ON THIS SITE COMES FROM AMAZON. THIS CONTENT IS PROVIDED ‘AS IS’ AND IS SUBJECT TO CHANGE OR REMOVAL AT ANY TIME.