Prisma3D (3D Modeling App): All You Need to Know

With its modeling, rigging, and animation features, Prisma3D allows you to make movies on your Android. Read on to find out how!
Most people model on either a laptop or desktop, where they have plenty of power and a personalized setup for their 3D modeling software. However, on occasion, you may not have access to your usual workstation. Enter Prisma3D, a free Android app that allows you to develop designs on your mobile phone from anywhere.
With several useful features like modeling, rigging, and animation, Prisma3D is an interesting and fun app to work with. The user interface (UI) is incredibly intuitive, and most of the tools are easy to understand and use. Version 2.0 is available for download on Android devices from the Google Play Store. This updated version includes a host of new features, including a fresh UI and precise rotating and positioning.
As far as modeling software goes, it lacks several features that are common on similar, desktop-based software like Blender. With that said, it’s a great option for on-the-go drafting in your free time. If you’re wanting to model, animate, or render while on the go, continue reading!
Download & Installation
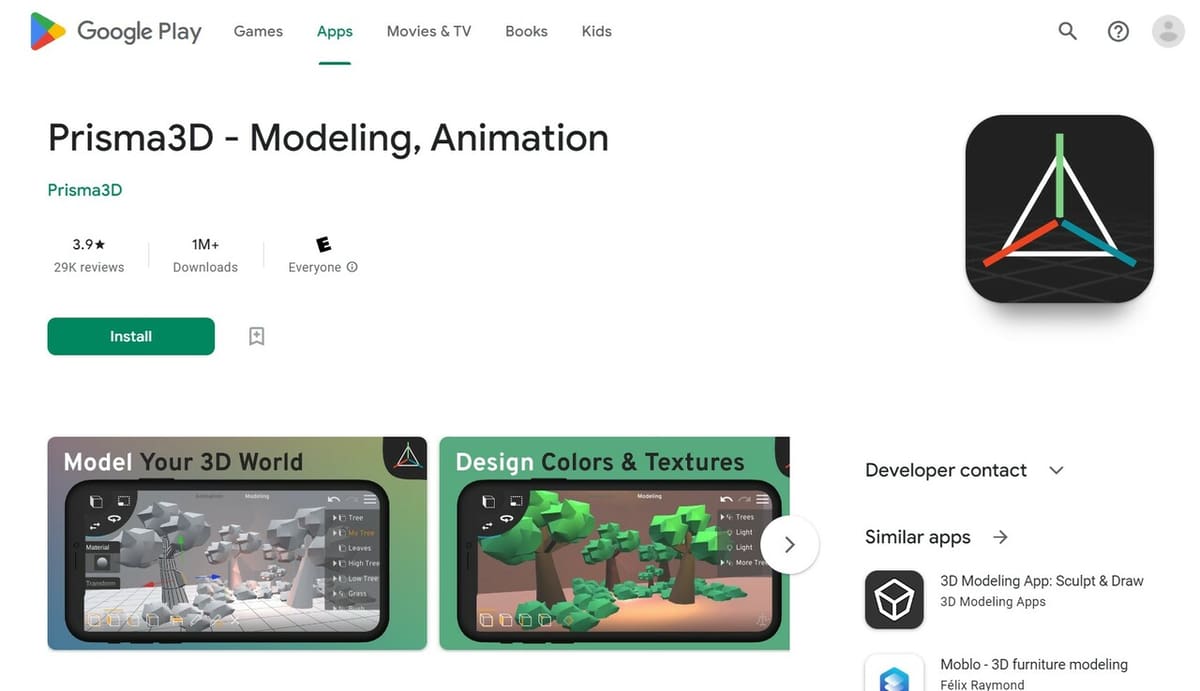
Downloading Prisma3D is as easy as installing any other app from the Google Play Store. Keep in mind that your device must run on AndroidOS 4.3 or later. Based on reviews from the Play Store, you can also consider using devices like the Galaxy S9 or more recent models to avoid lag or other small glitches that may happen when running the app on older phones.
This app also works well with the increased precision of a stylus. So, when downloading Prisma3D, it might be worthwhile to purchase a stylus to use in tandem with the app.
UI & Layout
Prisma3D’s UI may seem confusing at first, as it has to hide a lot of text to preserve as the scene viewing area. Exploring the app for several minutes will give you a better idea of how everything is organized. Here’s a general overview of Prisma3D v2.0’s layout:
- Ribbon: The ribbon is located at the top of the scene viewing area and has two buttons: Animation and Modeling. The buttons switch between the two workspaces, which include the Animation- or Modeling-specific tools.
- Scene Editor: A cube in the top left-hand corner of the viewing area denotes the Scene Editor. By pressing and expanding buttons attached to the scene editor, you can add objects to the scene. The Rotate, Translate, and Scale features are also accessible through this menu.
- Main menu: A hamburger menu icon denotes the scene’s Main menu on the top right-hand side. From here, you can complete external actions like importing or exporting OBJ meshes, saving the document, or rendering the scene for image or video export.
- Tool menu: On the left side, you can find specific options pertaining to the active tool or selected object. This includes the Object Material menu, Precise Move, or the Bone tool, among others.
- Bottom Bar: This bar will display tools specific to the workspace (i.e. Animation or Modeling). If Modeling is selected, mesh-editing tools will be available on the bottom-left and rigging tools on the bottom-right. If Animation is selected, a scene timeline, as well as animation tools, will be available at the bottom of the screen.
- Model Tree: Lastly, on the right of the screen is the Model Tree. It shows the organization of the scene and allows for quick navigation to particular objects by scrolling through and clicking on the object’s name.
Features
Prisma3D provides several different features without making the application feel too cluttered or crowded. This is achieved by separating the main features into the four corners of your device and keeping sub-features well-organized. Follow along to learn about the main features you’ll use when creating characters and models.
3D Modeling
Objects
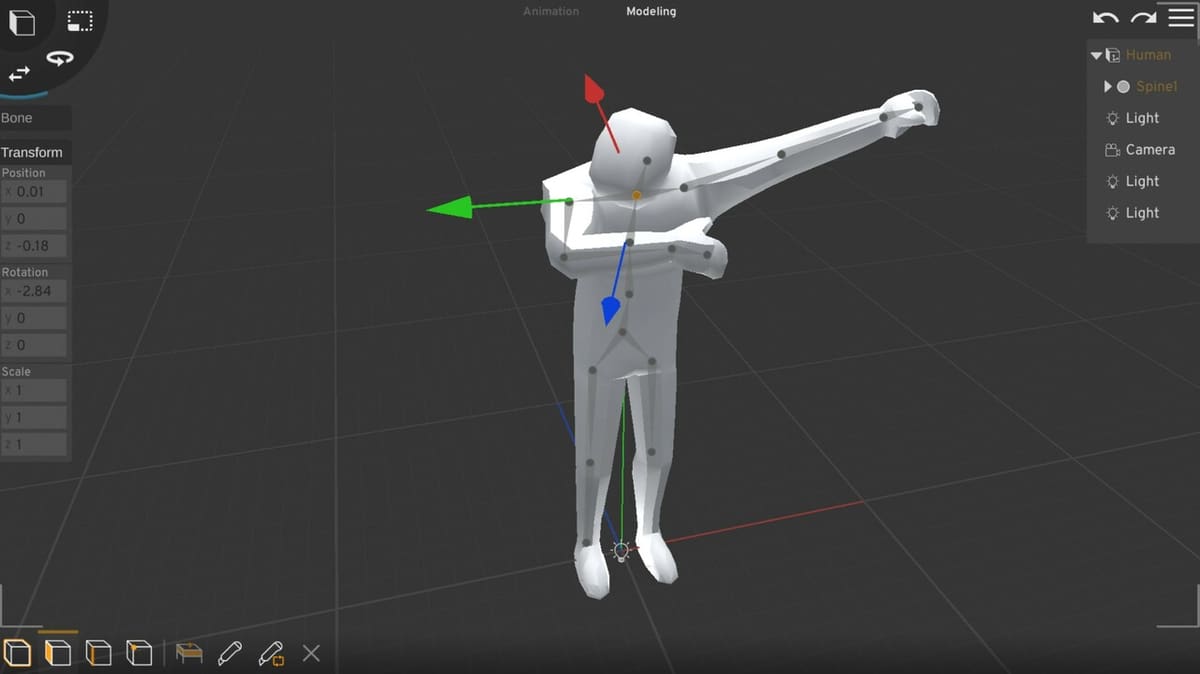
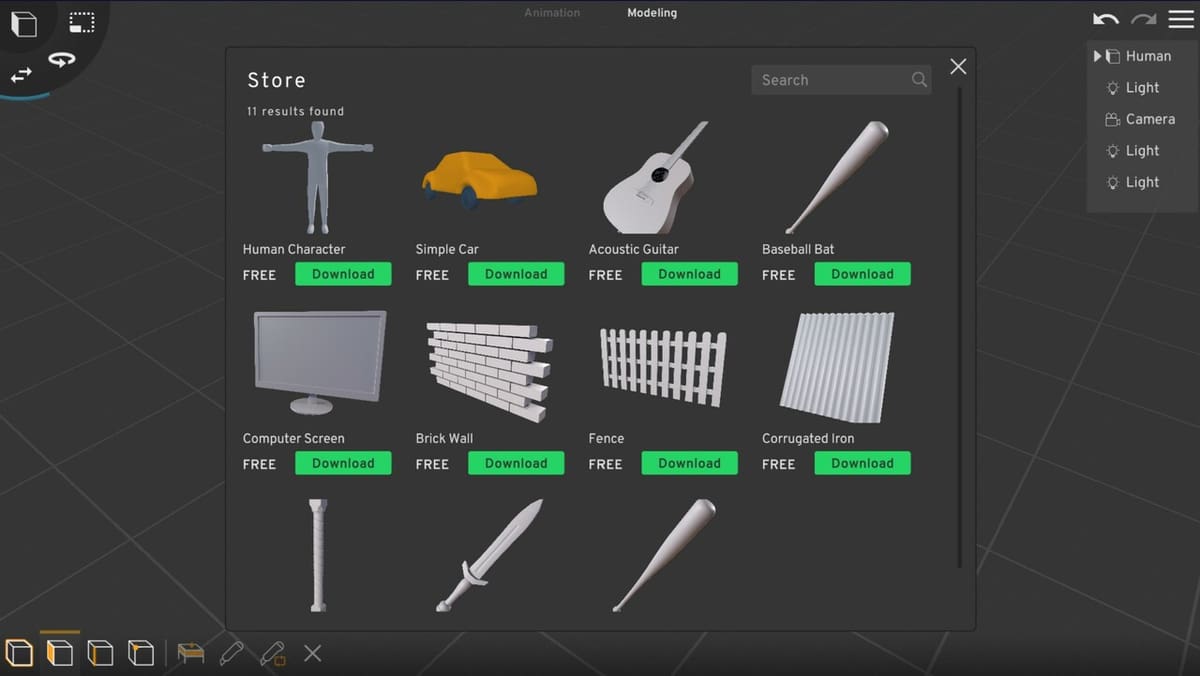
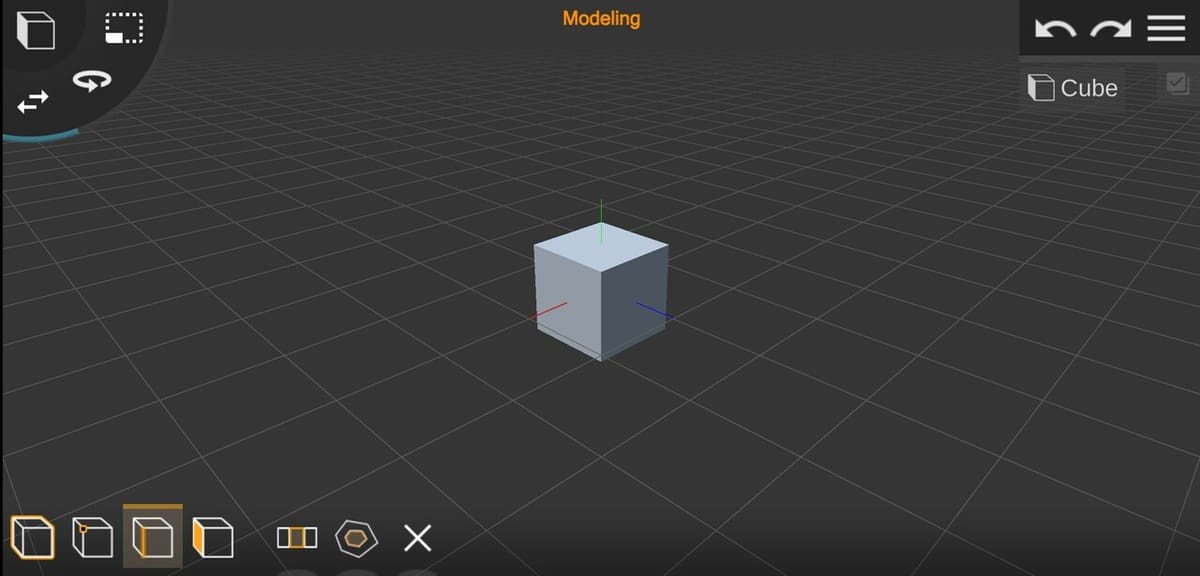
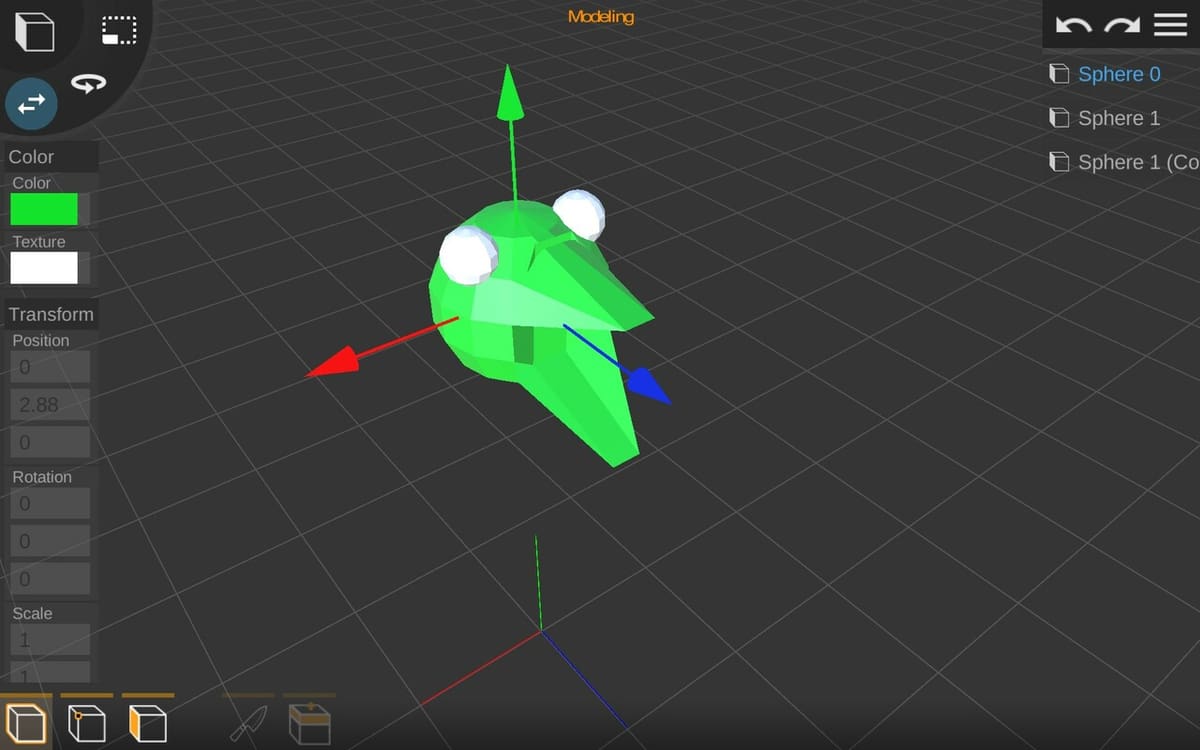
If you select the Scene Editor, an object insertion menu will appear. There are a few default objects like the cube, sphere, camera, and light, as well as an Import button that allows you to import meshes locally from your device. Whenever one of these objects is selected, it’ll automatically be inserted into the scene with the upward-pointing axis at the center of the object.
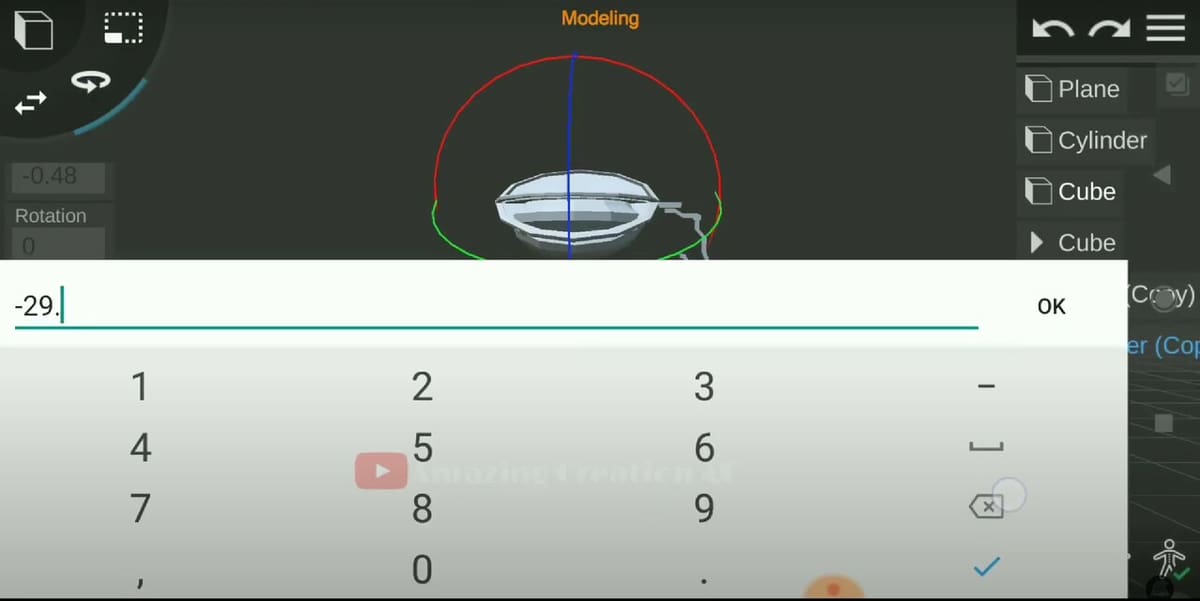
Once the object is in the scene and selected, you can modify it by changing values in the Tool menu on the left-hand side. Selecting the Translate, Rotate, or Scale tools will display an axis on the object for click and drag modification – if accuracy is not needed. In version 2.0, objects can be precision rotated and positioned using an on-screen number pad to specify angle and distance.
Mesh-based objects can be modified in a few different ways, such as changing the object’s color. Text can be altered to show any words that you’d like. Non-mesh-based objects, such as light and cameras, are directional and change the scene depending on which direction they’re facing.
Lighting
Lighting is important, especially when making video projects. In Prisma3D, four types of light objects can be made:
- Spot: Like a typical spotlight, this lighting type emits light in a cone shape from a point in a specified direction.
- Directional: Directional light is equivalent to a panel of light shining from a wall of the scene. Light travels in the same direction from a point far in the distance.
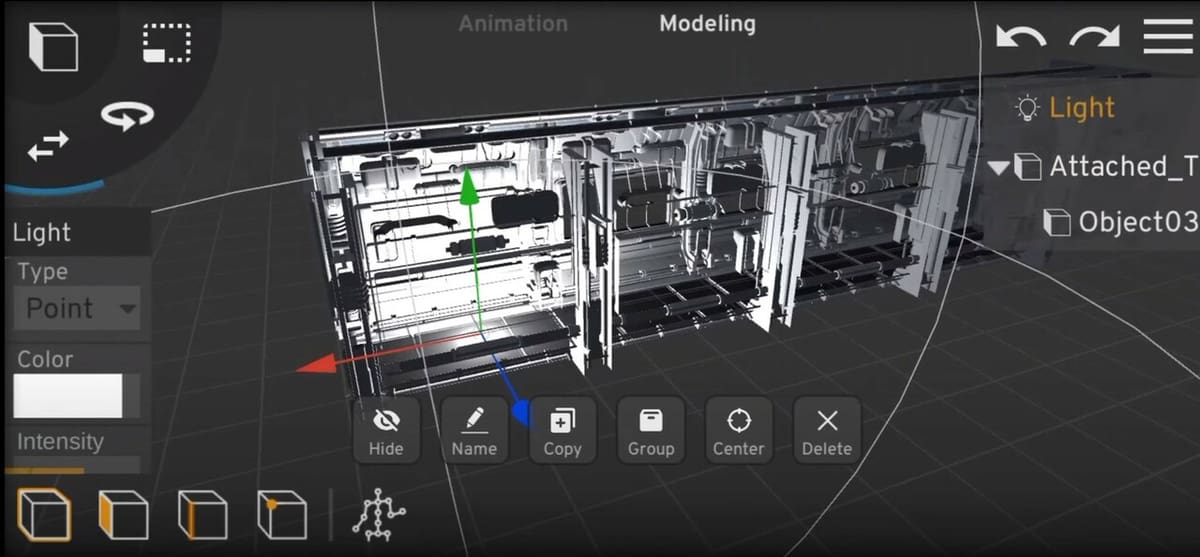
- Point: This object is a point-based light source that emits light in all directions from a point in 3D space. This is especially useful for light fixtures and modeling lightbulbs in scenes.
- Area: Area light is emitted from a specified 2D shape and is a great tool for modeling panel lights and emissive surfaces such as the face of a flashlight.
Lighting intensity and color can also be changed using drop-down menus in the app, and there are many ways to use lighting in Prisma3D to make a scene pop.
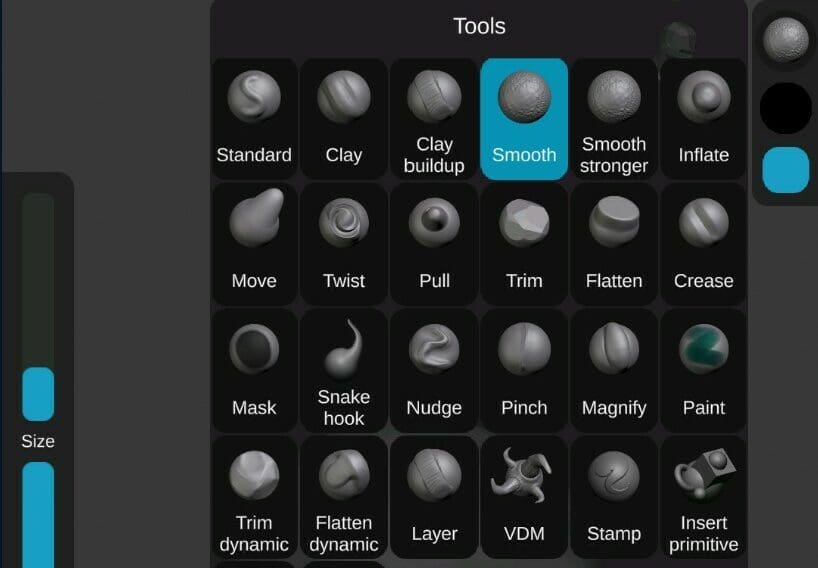
Faces
Nearly all open and closed meshes have solid flat surfaces called faces. Those that don’t are called wire meshes. To edit your object’s faces, select the cube with the shaded side on the Bottom Bar.
When selected, the tool gives you the following editing options:
- Extrude: This tool extrudes faces into 3D shapes. By selecting a face, then the Extrude tool, axis arrows will appear. Click and drag one of the arrows to extrude the face in that direction, even into the model.
- Knife: When selected, this tool can be used to slice a new edge into the selected face. To insert a new edge, select a face, followed by the tool, then click and drag a line across the face. This line will become a new edge on the selected face.
- Edge Loop: Similar to the Knife tool, the Edge Loop tool adds new edges to your model. It’ll create a loop of edges, just like a lasso, in a plane around the selected object as long as there’s a set of edges that wraps contiguously around the model. In other words, you can use this tool on a cube or a cylinder but not on a pyramid or a Mobius strip.
- Mirror: This tool mirrors a shape across a plane perpendicular to the viewing plane and parallel to a line drawn by the user on the screen. It can reduce modeling time for symmetric models or maintain symmetry across a certain area. When a mirrored feature is edited, its corresponding original feature is automatically edited in the same manner, and vice versa.
- Delete Face: Any faces selected can be erased with this tool. Be cautious, as this often creates impossible open bodies that can’t be made in real life.
It’s also possible to select faces and transform them with the Object tools, namely Translate, Rotate, and Scale. Simply select the face you want to alter, then the Object tool you want to use. Each will have a new axis pop up that you can click and drag to alter. Unlike the actual objects, you can’t transform faces with specific values, only by clicking and dragging.
Edges & Vertices
Modeling and character creation require adjusting edges and vertices, and Prisma3D offers a lot of edge and vertex editing features. These are the tools that Prisma3D offers for edge and vertex editing:
- Delete Vertex: This tool is pretty self-explanatory. To use it, select the cube with the circled vertex on the Bottom Bar, then the vertex or vertices you want to delete. Hit the ‘X’ that pops up on the bar.
- Bridge: As the name suggests, this tool creates a bridge (i.e. a face) on your mesh object between two edges. Select the cube with the highlighted edge on the Bottom Bar, then click on two edges on the object. Finally, hit the Bridge tool to create a face to connect the two edges.
- Cover: Similar to the Bridge tool, this tool will create a face using an edge. The face will close the mesh if it’s open.
- Delete Edge: This tool is also self-explanatory. It’ll get rid of any selected edge when used. Any faces attached to the edge(s) will also be deleted. If the selected edges join to any vertices, the vertices will be deleted as well. Be careful when using this tool, as it’ll almost always lead to an open mesh.
Grouping
Grouping allows you to transform multiple objects as if they were one object. This feature includes letting you rotate, move, or resize all shapes or objects at the same time. When multiple objects or components are first grouped, a new axis will be created for the combined objects at 0, 0, 0. For the best results, be sure to keep each object position in mind when working with the group.
The feature is managed in the main viewing area as well as the Model Tree. To group objects, select one you want in the group, then the Group option from the new tools that show up on the Bottom Bar. Adding more objects to your group is pretty easy: Select, then drag the object to the designated group hierarchy in the Model Tree.
Groups can also be put into other groups, and renaming your groups is immensely helpful with navigation if you have more than one. It’s also worth noting that bones attached to objects are automatically transferred when the objects are put in a group.
Rigging
Thanks to its rigging, skinning, and animation features, Prisma3D is great for getting started with character and scene development. To access the Rigging and Skinning features, you just need to check out the bottom right-hand corner of the Modeling workspace.
There, you’ll see a Skeleton button, which opens the Rigging Editor. Next to it is a silhouette icon, which is the Skinning feature. We’ll discuss both in more detail below.
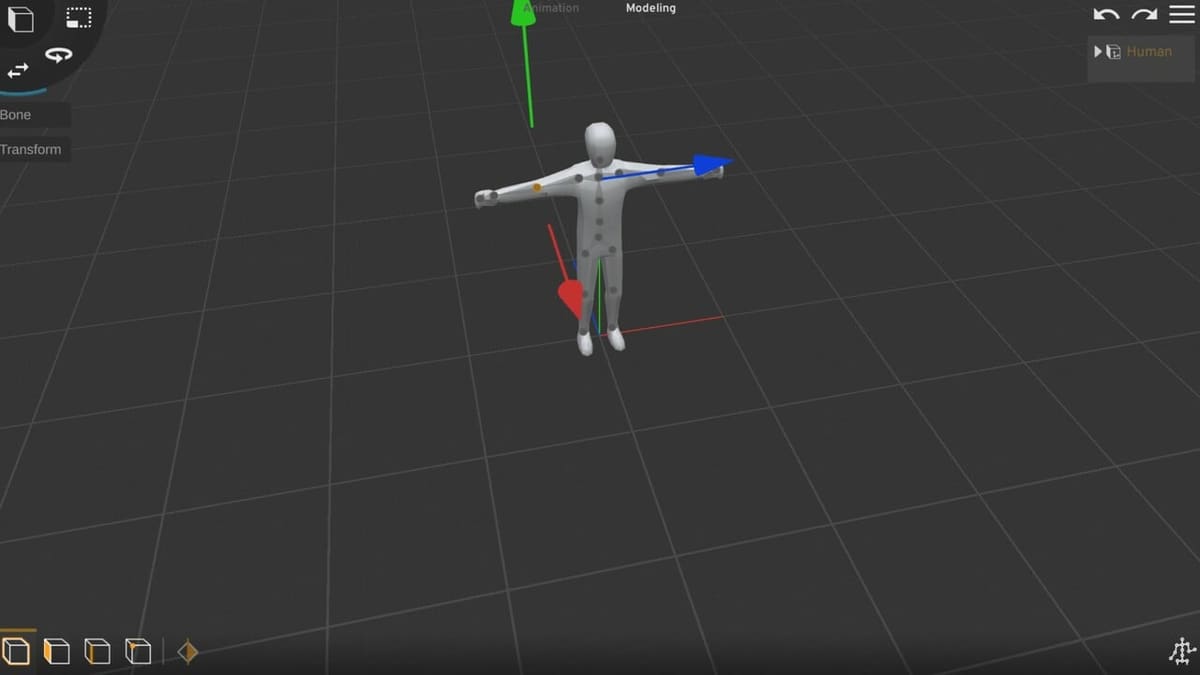
Skeleton
When making a character, you need to give it the ability to move. To make sure only certain components of the character move, you must rig it with “bones” and “joints” that the components will move along or about. These bones are rigged together into a wireframe that’s called a skeleton. This allows an animator to program the character’s movement however they want.
Adding bones is as easy as selecting the object, followed by the Skeleton button, then clicking where you want a joint to be. With the Skeleton tool still selected, clicking the model again will create a bone component between the two. Each new click will add a new bone from the last joint.
Rigging takes practice, and it always helps to have a good tutorial to learn the process.
Skinning

Skinning is the process of binding a 3D mesh to a skeleton, meaning any created joints will have an influence on the components of your model and move them accordingly. Creating a model that moves accurately is dependent on correctly skinning the mesh. Prisma3D doesn’t have the most accurate skinning software, but it’s still great for developing drafts for animation.
To do it, make sure you have already created a skeleton for your model. Once you have your skeleton, select the Skin tool. It’ll ask if you want to skin the bones you’ve created for the object. Selecting “Yes” will enable the model’s mesh to move in relation to the bones.
Keep in mind that skinning a character can be an iterative process. You may need to edit and refine the skeleton and the model’s deformable components multiple times until you get the correct skin deformation effects.
Animation
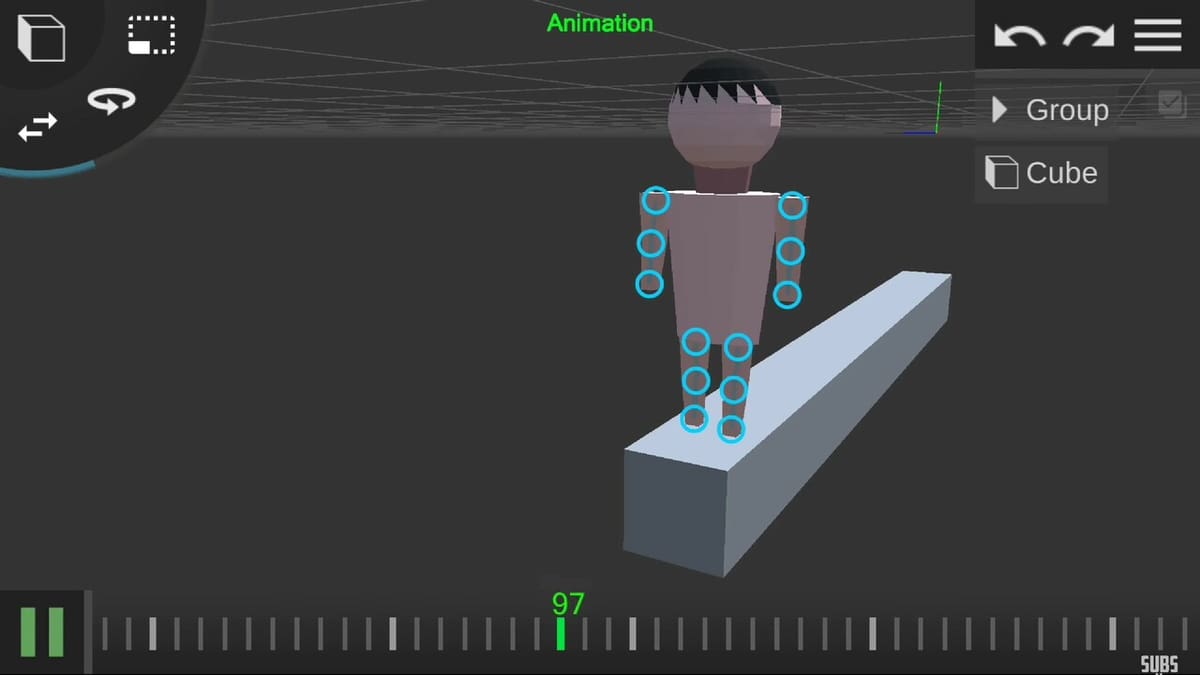
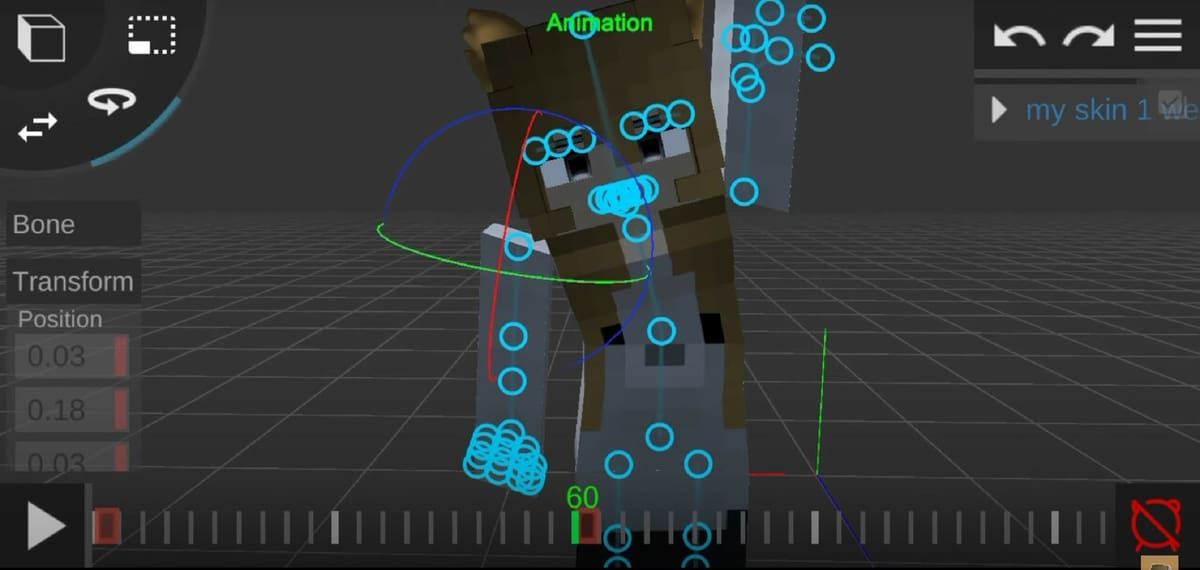
For scene animations, Prisma3D also offers an Animation mode. As mentioned above, tapping the “Animation” button on the Ribbon will toggle to the Animation workspace.
Prisma3D uses something similar to a keyframe animation timeline. Each animated movement for your object is done by selecting a beginning position at a beginning time and an ending position at an ending time. When this keyframe is played, the object moves to that final position using particular movement techniques that can be specified in-app. In fact, multiple objects can be animated at the same time, either as groups or individual selections.
There are quite a few in-depth animation tutorials, including some focusing on the basics. Once you’re comfortable with Prisma3D’s animation tools, you might be able to make impressive animations using just the Android app.
Rendering
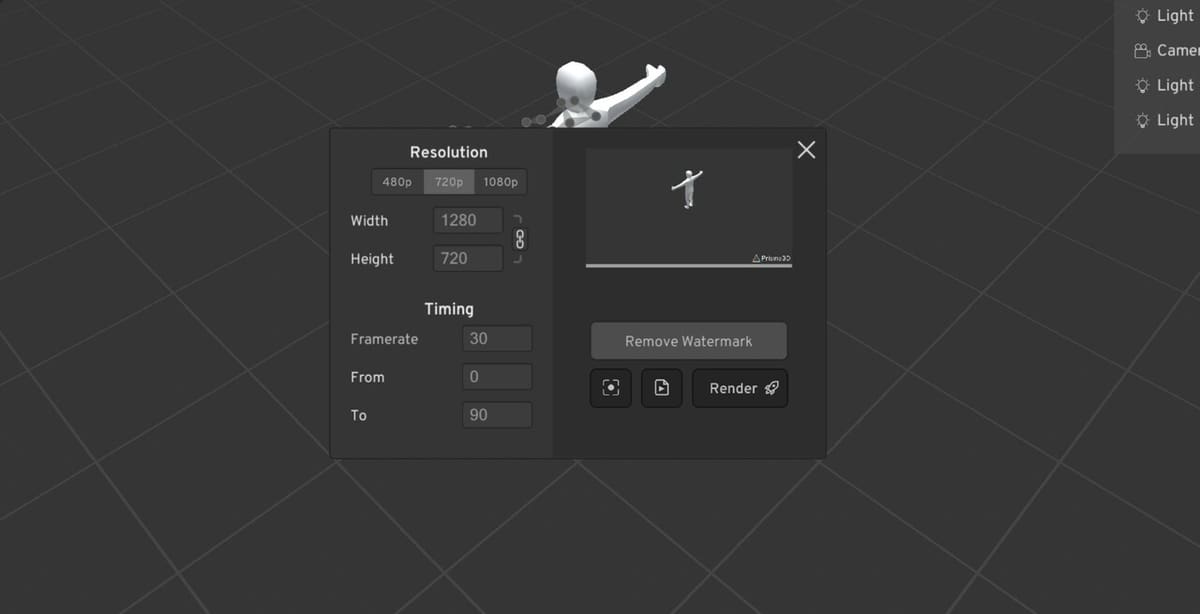
The final step in any video project is, of course, rendering the final product. In Prisma3D, this feature is located in the Main menu. All you have to do is click on the hamburger icon in the top right corner, then select “Render” from the drop-down menu.
Here’s the general process for rendering:
- Orient the scene view to show what you would like to appear in the image or video.
- Open the rendering menu as described above.
- Adjust the settings as you’d like. If you want to remove the watermark from the final video, feel free to do so. Prisma3D will not charge for this feature.
- Click on the dot-in-brackets icon to take a screenshot, the video icon to take a video, or the Render button to take a high-quality, rendered video using lighting objects and ray-tracing. You’ll then be offered the opportunity to save the rendered image or video to your gallery.
Alternatives
While no other actual rigging and animation software exists for Android as of yet, there are apps that share some features with Prisma3D. In some instances, they even offer more powerful tools in particular areas, such as sculpting. You can use these alternative apps to create intricate models and then import them into Prisma3D for animation and rigging.
- Sculpt+: For makers in need of a sculpting tool on Android, Sculpt+ offers a host of 3D sculpting tools that will allow you to make very refined meshes.
- 3D Modeling app: For those who want a mesh-editing environment but don’t need rigging and animation features, the 3D modeling app for Android is a great tool to have on-the-fly. It features a vertex-based editing environment similar to Prisma3D’s without the additional rigging and skinning features that might clutter a workspace.
- Onshape: Compatible with both Android and iOS, this professionally geared app is great for 3D CAD. It has great modeling features and it’s free for non-commercial use. It’s also meant to be used in conjunction with their main desktop platform. Onshape doesn’t have animation features like Prisma3D, though.
As you can see above, Primsa3D’s ability to create animations is rather unique among mobile applications. Other applications tend to focus more on modeling and sculpting features, with users finishing on PC applications. Prisma3D is similar but gives you a head start with rigging and animations, whether for draft purposes or full stand-alone short features.
License: The text of "Prisma3D (3D Modeling App): All You Need to Know" by All3DP is licensed under a Creative Commons Attribution 4.0 International License.