How to Open an STL File in Blender – Simply Explained

Blender 4.0 has just been released. Check out how to open STL files in Blender to get you on your way to making great designs!
If you’re reading this article, you’ve probably settled on using Blender for one of its many capabilities, which include (but aren’t limited to) 3D modeling, rigging, animation, and simulation. Whatever your reason for using Blender, you’ll be pleasantly surprised by its range of functions, which makes it a favorite tool for many in the 3D industry.
Depending on what you want to do in Blender, you’ll need 3D models to manipulate. You can use Blender’s robust and user-friendly modeling environment to design your models or you can opt for other modeling software such as Fusion 360, Onshape, Tinkercad, or SolidWorks. Alternatively, you can download models from repositories such as Printables, Thingiverse, and Cults. If you decide to go with either of these two latter options, you’ll then need to import your models into Blender. With the numerous 3D modeling software available, some of which come with their native file formats, it’s impossible for any one program, Blender included, to support all formats; hence the common use of STLs to solve compatibility issues.
An STL file is comprised of a series of connected triangles that describe the surface geometry of a 3D model, although it doesn’t contain information about the texture or color of the model. Still, it’s generally of a smaller size and easier to process than an OBJ or 3MF file, which is one of the reasons it’s become a cornerstone of the 3D printing industry.
No matter the project you’re interested in tackling, understanding how to properly import STL files into Blender is crucial for paving the way toward success. Keep reading to explore the techniques for bringing your STLs into Blender!
Before Importing
Before importing your STL into Blender, you should verify the units your STL was created with and match that to your scene units in Blender. This ensures that you don’t have a size mismatch with other models you may already have within your scene.
If you intend to 3D print your models later on, defining your units becomes even more important as the default unit in Blender, the Blender Unit, is equivalent to 1 meter. You can see how this can be an issue if you are modeling, say, a figurine for resin printing.
Depending on your particular situation, you may need to apply a scaling factor to the model you’ll be importing (we’ll cover this in the import section).
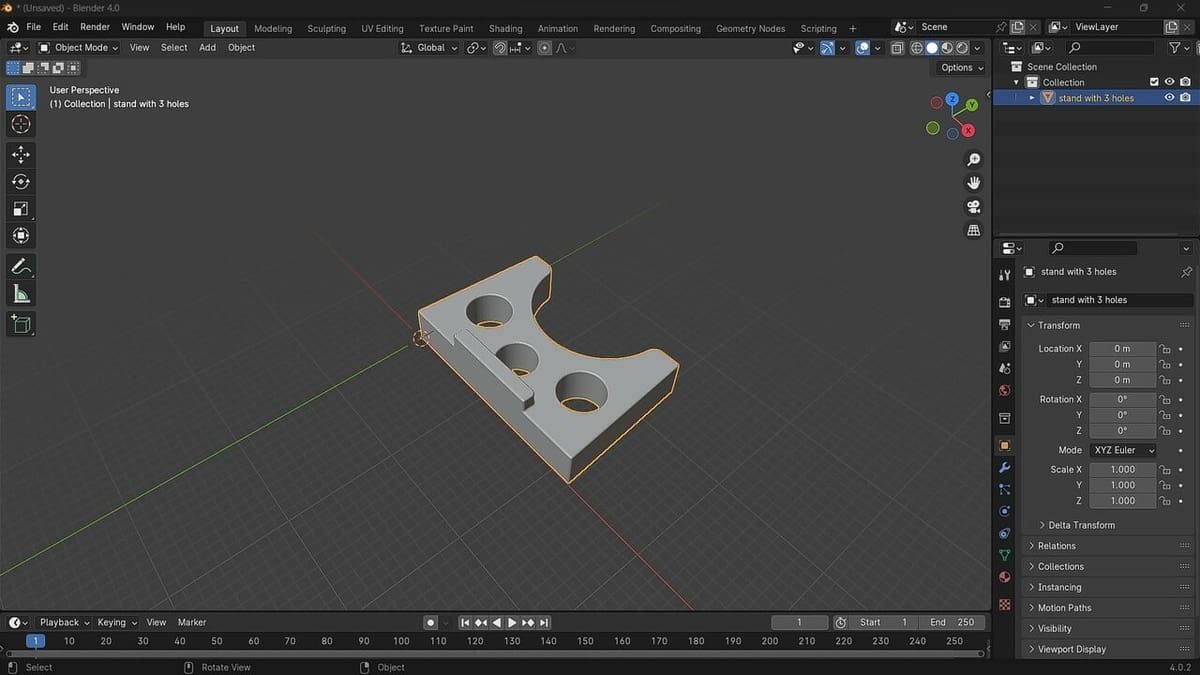
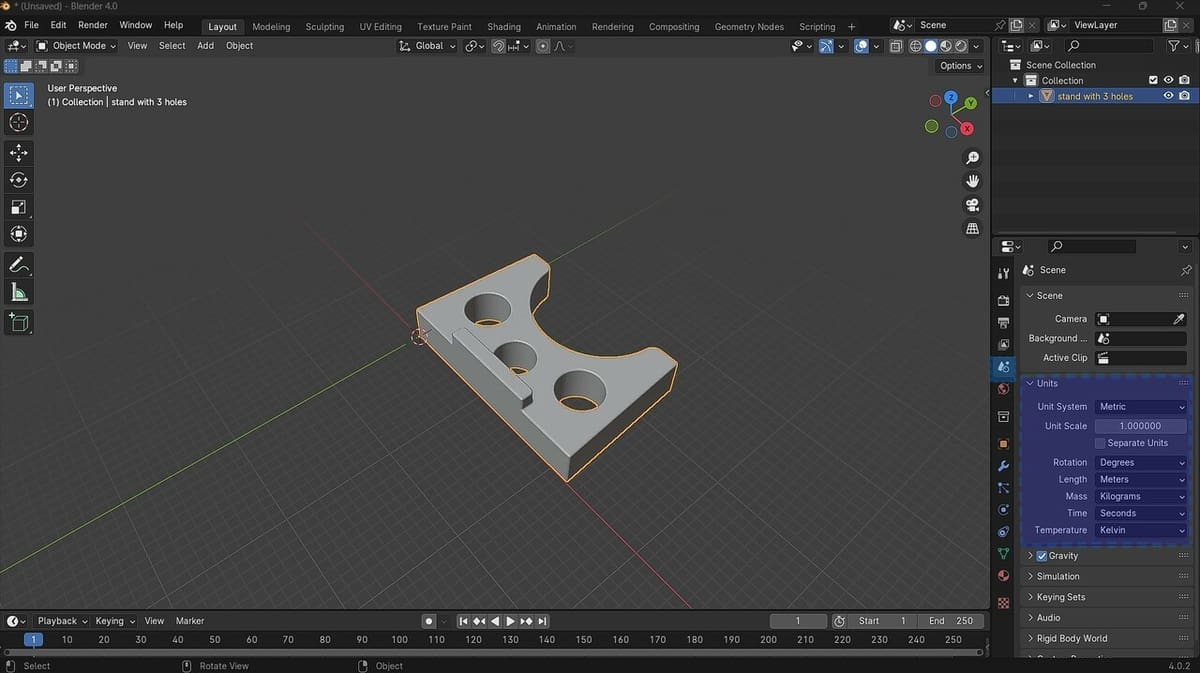
To verify your scene units, on the Properties Editor at the right side of the screen go to “Scene > Units”. Here you can choose the unit system you’d prefer to work in (e.g. metric, imperial), along with other parameters (rotation, length, mass, time, and temperature) that describe your model, and their units.
Once done, you’re ready to import your STL.
Importing STLs
The latest version of Blender (at time of writing, 4.0) provides two methods for importing STLs. The first makes use of the STL add-on while the second uses the STL (experimental) function, which is meant to eventually replace the add-on method as it imports STLs much faster.
That said, given that the add-on method is still available in this version of Blender, we’ll start by looking into it.
The STL Add-On
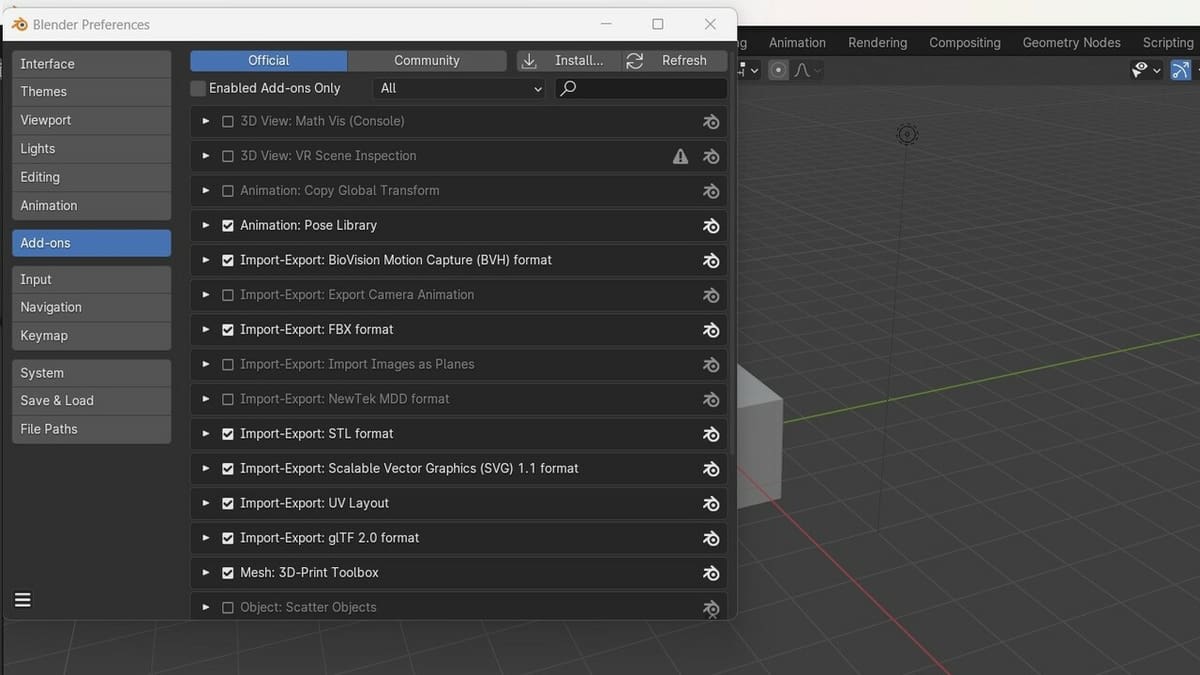
The STL add-on comes pre-activated in Blender 4.0. However, if you can’t find this option and you’d like to use it, here’s how to activate it manually:
- From the top menu bar, go to “Edit > Preferences… > Add-ons”.
- Select the “Official” tab and ensure that “Enabled Add-ons Only” is unchecked.
- Check the “Import-Export: STL format” add-on.
You’re now ready to import your STLs using the STL add-on.
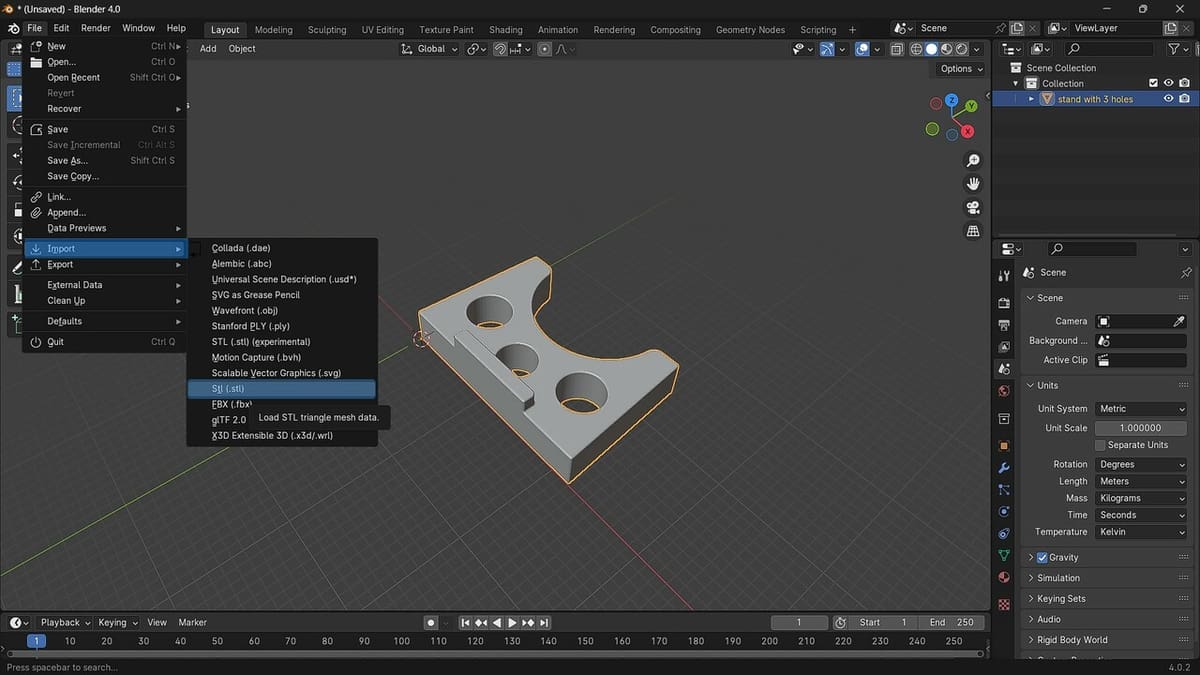
To import STLs into Blender using the STL add-on, go to “File > Import > Stl (.stl)”. The file browser pops up and you can now navigate to your STL’s location, select the file or files you’d like to import, and click “Import STL”.
The file browser also allows you to select a scale value for your model: A positive value lesser than 1 reduces your model size, a positive value greater than 1 enlarges your model, while a scale value of 1 retains your model size. If your model comes in a different unit than you’d like to work in, adjusting your scale value based on a unit conversion scale quickly converts your model to the appropriate size.
You’ll also find within the file browser settings to select the direction of your axes. This is especially helpful in obtaining properly oriented models when importing models created with other software whose coordinate system doesn’t match Blender’s coordinate system.
For example, while Blender has a coordinate system with the Z-axis vertical and the X-axis forward, the SolidWorks coordinate system has a vertical Y-axis and a forward Z-axis, so importing directly from SolidWorks into Blender will give you incorrectly oriented models.
The STL (Experimental) Function
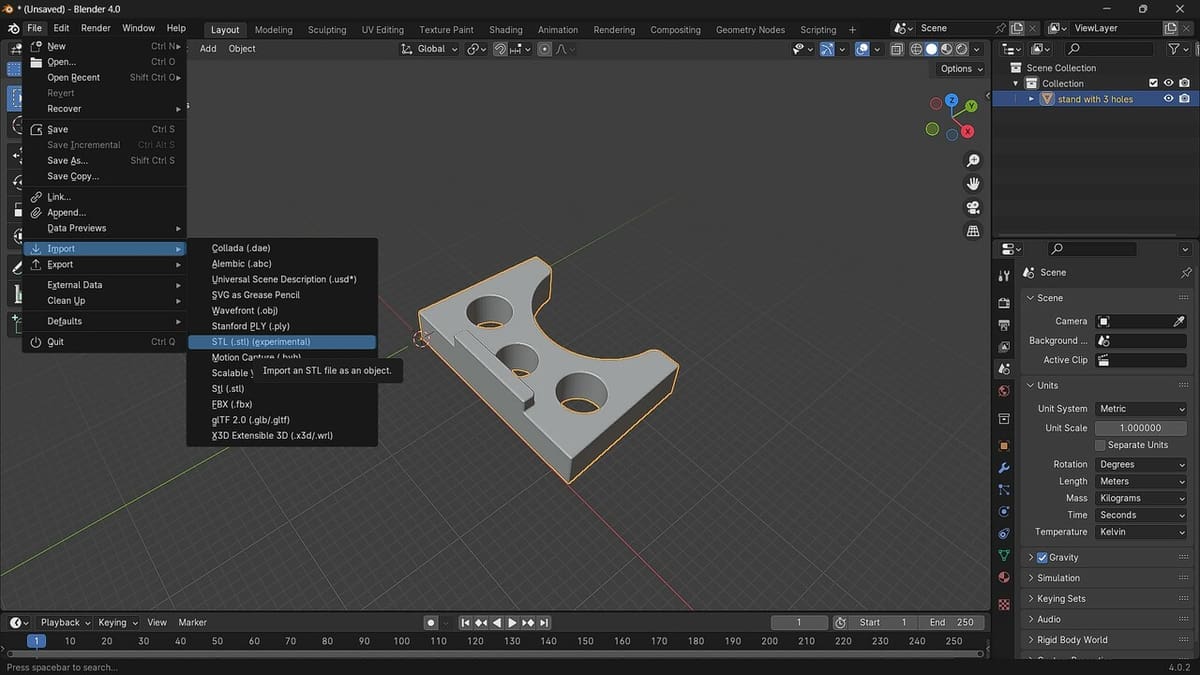
This next method of importing STLs into Blender is very similar to the add-on one but with the advantage of being faster and including the ability to import information about your model’s normals into Blender.
To import STLs into Blender via this function, from the top menu bar go to “File > Import > STL (.stl) (experimental)”. Much like the add-on process, the file browser will open.
The settings found in this window are the same as those of the add-on process and perform the same functions. Once you’ve selected your files, click on the “Import STL” and your files will be imported into Blender.
After Importing
It’s not just about importing a model – you also want to make sure that it will work according to the goal.
Inspecting the Model
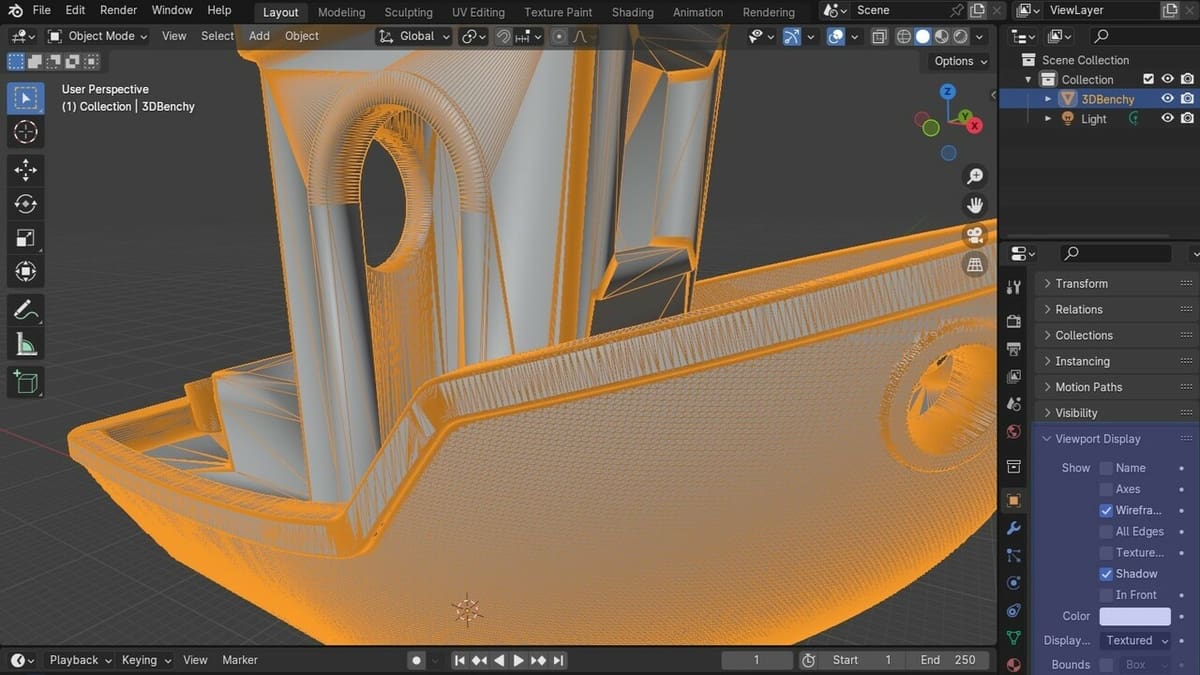
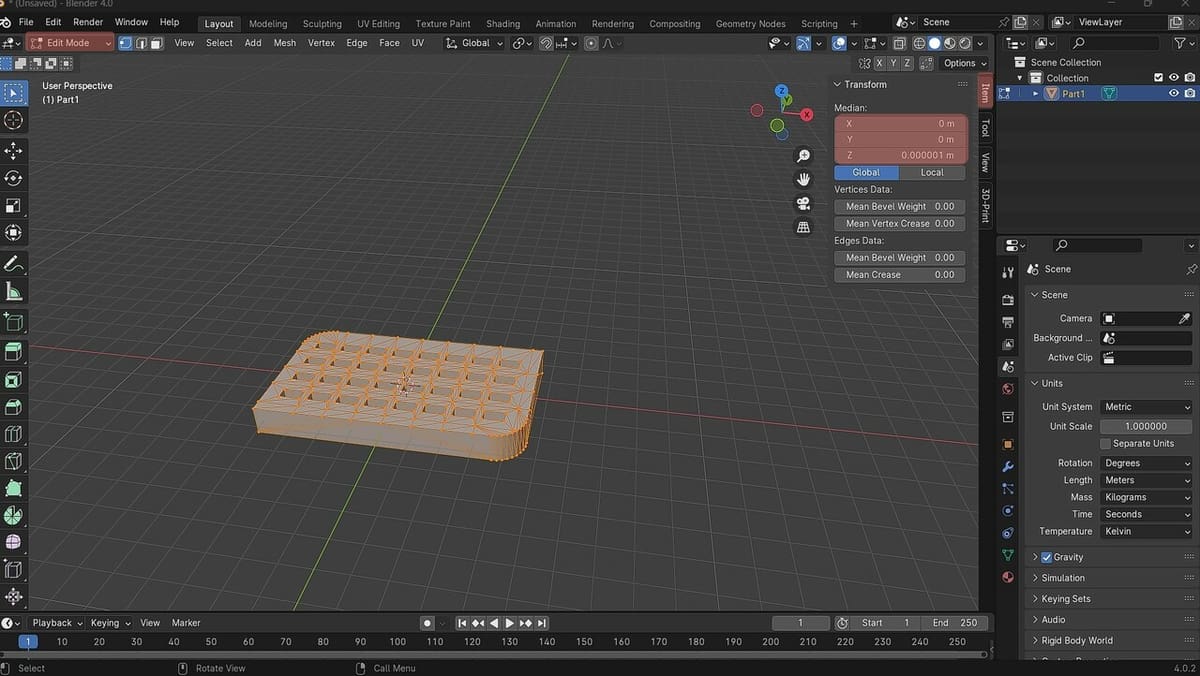
We advise inspecting your STLs immediately after import to detect and correct any defects your STLs might have. To inspect your model, in the Properties menu (to the right of the screen), under “Object > Viewport Display”, change to “Wireframe” and then you can rotate, zoom, and pan to inspect it from all angles. No one wants to spend hours working with faulty models that won’t serve their purpose.
If you’re not sure what to be on the lookout for, here are some of the most common STL errors to look out for when inspecting your model:
Boundary Edges
Especially problematic in models to be 3D printed, boundary edges are when edges of your mesh data (STL) aren’t shared by two polygons. Simply put, these are models with unintended holes. Models with boundary edges are best remodeled or repaired before you work with them.
Non-Manifold Geometry
For many 3D printing enthusiasts, this is the worst kind of fault a model can be afflicted with. Non-manifold geometry refers to a model that has topological defects. There are quite a few instances that can create a non-manifold geometry, so read our article where we do a deep dive on this topic.
The 3D print toolbox add-on in Blender is a handy tool for identifying non-manifold geometry, which we’ll look into below.
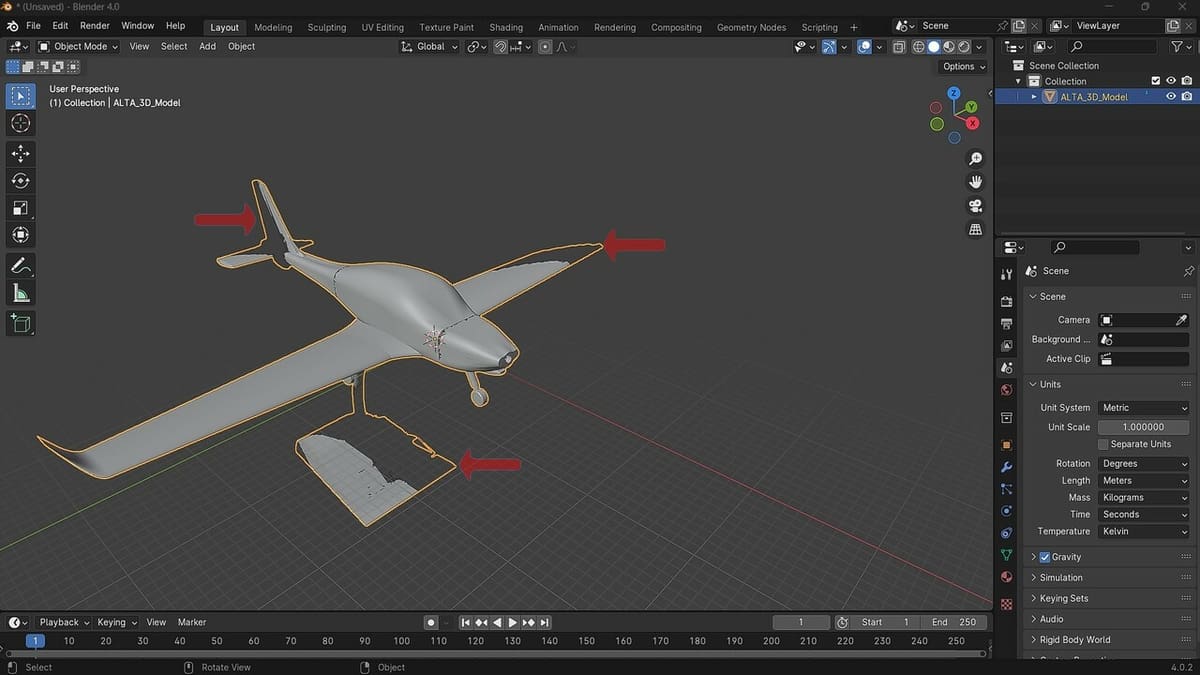
Intersecting Faces
This issue with STLs occurs when multiple faces of a model occupy the same space and overlap. It could also occur when multiple models occupy the same space. While there are different methods for dealing with intersecting faces on a single model, you could try using the Merge by Distance function or deleting the intersecting faces manually.
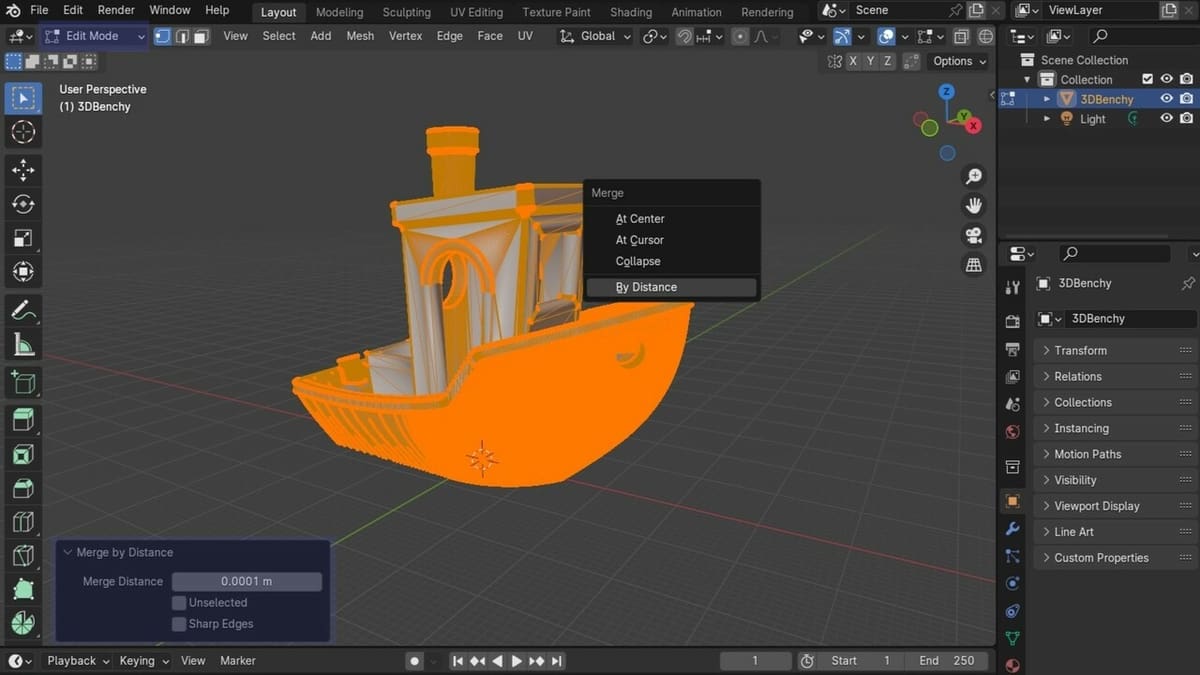
To merge by distance:
- Change from “Object Mode” (top left corner, under the top menu bar) to “Edit Mode”.
- Press ‘A’ to select all the vertices of your model.
- Press ‘M’ to open the Merge drop-down menu and select “By Distance”.
You can change the merge distance by opening the Merge by Distance operator panel at the bottom left of the workspace. Any vertices closer than the Merge Distance will be combined into one.
To delete intersecting faces manually:
- Use the 3D print toolbox to identify all intersecting faces (after adding the add-on, click ‘N’ and select the “3D-Print” tab). Intersecting faces will be highlighted in red.
- In Edit Mode, use the face selection tool (menu beside “Edit Mode”) to select intersecting faces.
- Press “delete” on your keyboard and select “Faces” from the drop-down menu.
- Use the “Make Manifold” function under “Clean Up” to make your model manifold.
When dealing with multiple objects occupying the same space, we suggest combining the models into a single solid in native CAD software before exporting as an STL.
Centering the Model
When you center your imported model, you’re establishing defined coordinates within Blender’s viewport for your model. This simplifies precise translation (movement) of your objects because centering provides a fixed reference point on which you can base all subsequent translations.
If you’re working on the STL in Blender for 3D printing, centering the model isn’t necessary and you can skip this step.
To center your model:
- Open Blender’s sidebar by pressing ‘N’ on your keyboard. Select the “Item” tab and change the location coordinates for the X-, Y-, and Z-axes to 0.
- Next, change from “Object Mode” to “Edit Mode”, and press ‘A’ to select all vertices of your model.
- Back in the sidebar’s “Item” tab, change the values of the Global Median coordinates to 0 for all three axes, then return to “Object Mode”.
We recommend changing your scene units to a smaller unit of measurement (ie. meters to millimeters or miles to inches), as this makes it easier to set your values to zero.
Fixing View Clipping
View clipping limits the amount of graphical information in a scene Blender has to instantaneously render. Think of it like having two walls in your scene whose positions are controlled by the “Clip Start” and “End” settings. Blender will only render the parts of your models that are between these walls at any given moment.
View clipping can be identified by parts of your model becoming invisible as you zoom out of the scene.
To eliminate view clipping:
- In Object Mode, open the sidebar (pressing ‘N’) and select the “View” tab.
- Increase the value of the Clip End setting until your models are no longer clipped.
License: The text of "How to Open an STL File in Blender – Simply Explained" by All3DP is licensed under a Creative Commons Attribution 4.0 International License.