Non-Manifold Edges: Facts & Fixes

Your beautiful model won't print? Non-manifold edges may be your problem. Learn all about this sneaky issue in this nifty guide!
What Is Non-Manifold Geometry?
Non-manifold geometry is virtual 3D geometry that cannot physically exist in the real world. A simple example is a wall with no thickness, but other types exist, as well.
In a computer program, non-manifold geometry isn’t a major problem, as the laws of physics don’t apply to digital objects. However, in the physical world, it can lead to many anomalies that will ruin a print.
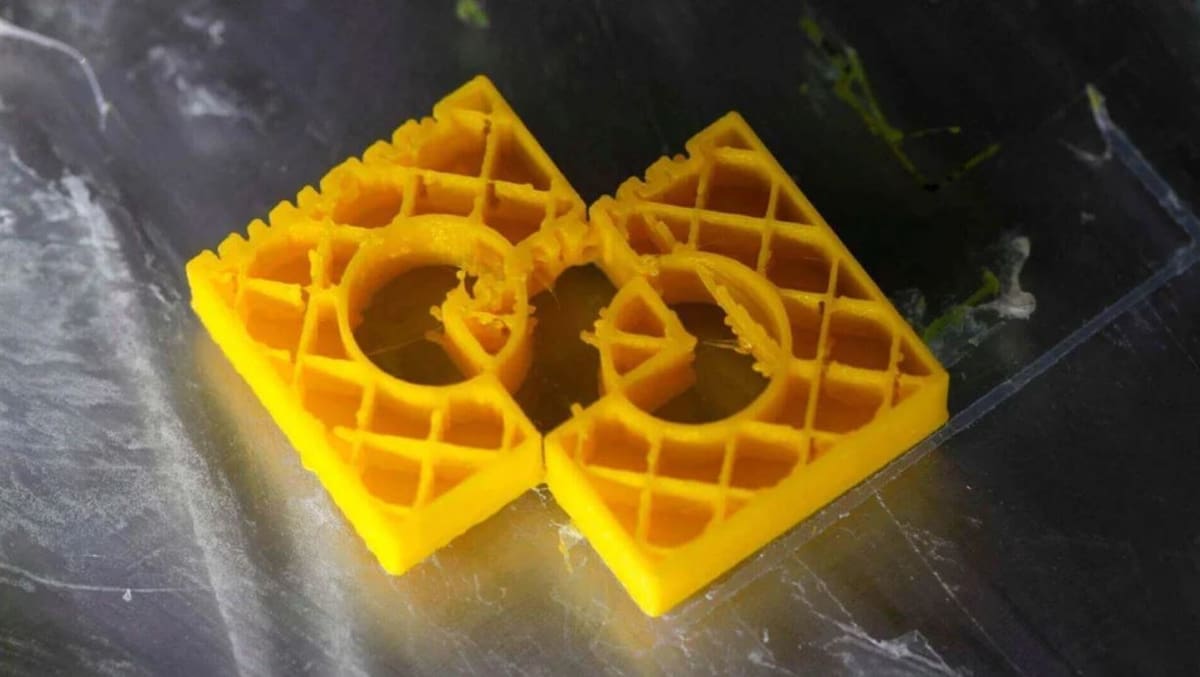
For many 3D printing enthusiasts, non-manifold geometry is a familiar (and unfriendly) friend, often leading to structural failures, wonky edges, or just plain madness. Slicing software simply can’t figure out how to realize these impossible shapes as physical objects, if it even tries, at all. The outcome can be interesting, to say the least.
In this article, we’ll take a closer look at what exactly non-manifold geometry is before presenting solutions and preventative measures.
Types
Non-manifold geometry can take many forms, all of which have disastrous outcomes for 3D printers. Here are some common instances of non-manifold geometry:
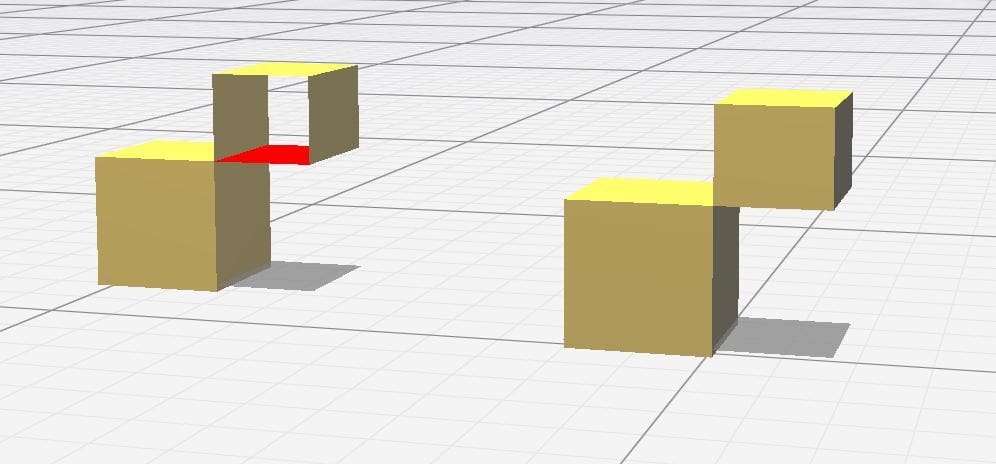
- Disconnected vertices and edges: When edges and vertices are created but not connected to the rest of your 3D object, your slicer will view it as a separate object. This can often lead to holes or gaps in the mesh because, although a face may look like it’s connected to other edges, it may simply be floating in the right position.
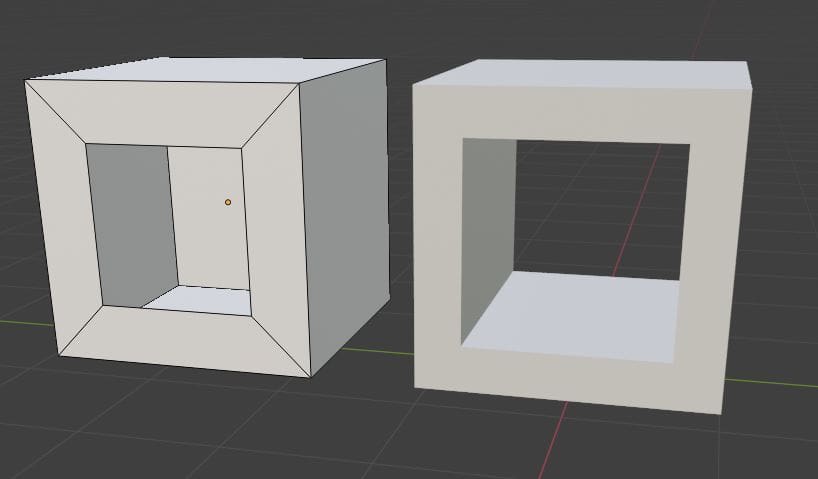
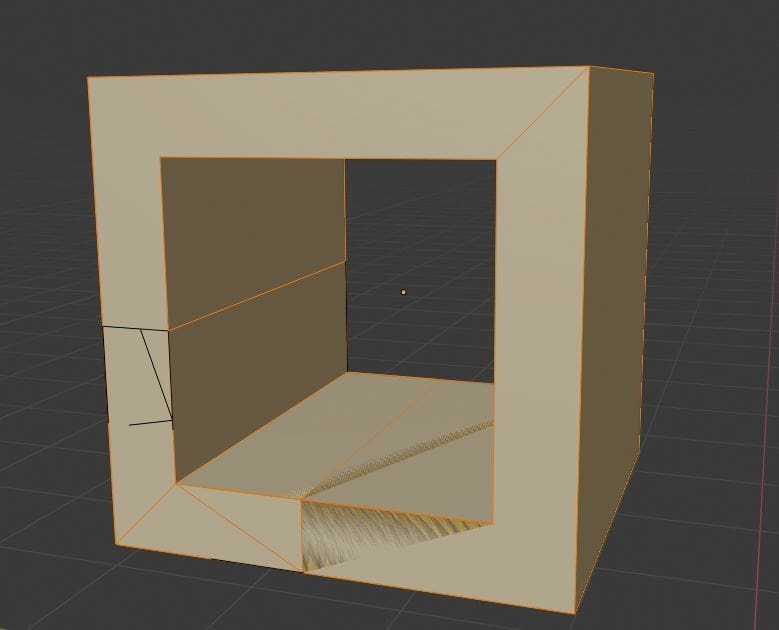
- Internal faces: The walls of your object should be solid walls, and the space inside your walls should be empty. A slicer cannot process internal faces, as it makes the void inside your object appear as a thick wall.
- Areas with no thickness: Printing in two dimensions isn’t possible on a 3D printer. Simply put, we live in a three-dimensional world.
- Holes: A hole in a mesh will cause problems, as you you’ll have poorly defined walls or areas with no thickness. It’s important to understand the difference between a non-manifold hole and a manifold hole, with the latter having clear walls and some degree of thickness.
CAD Solutions
Blender
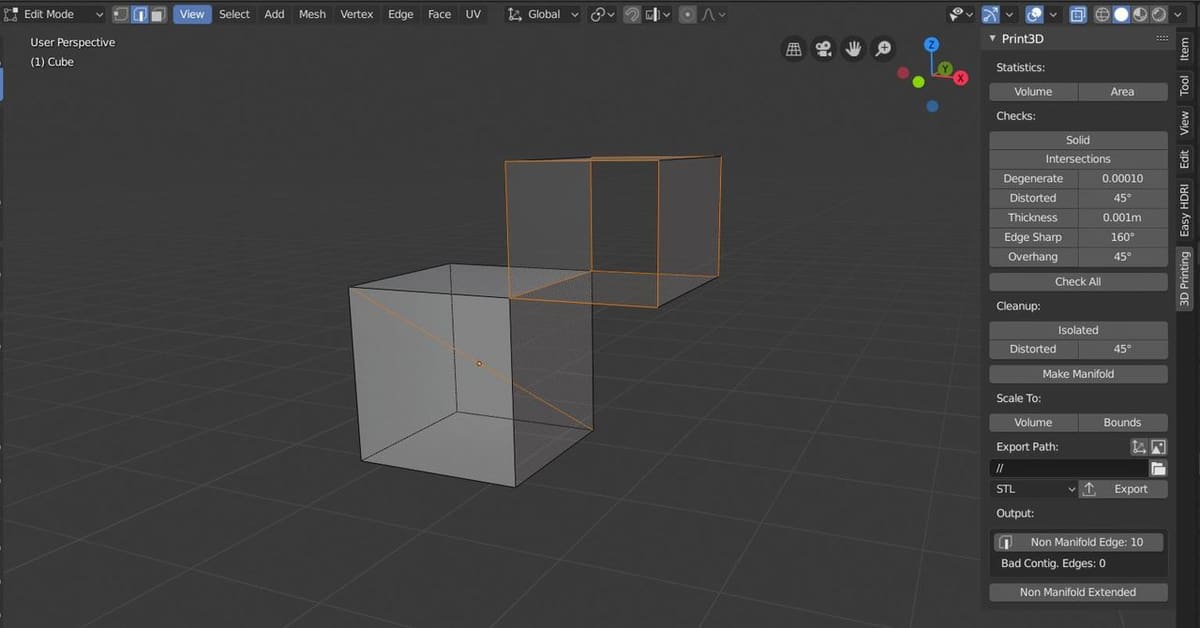
Most modeling suites have their own add-ons or tools for identifying non-manifold geometry, but Blender‘s is one of the best. The 3D print toolbox add-on for Blender can select non-manifold edges, identifying them by the number of faces.
To use Blender’s non-manifold edge tool, install the add-on from the preferences. Once that’s done, here’s how to identify the problem areas:
- Select your object in edit mode and press ‘N’.
- Enter the 3D printing tool shelf.
- Press “Solid” under the Checks header. Blender should now have highlighted any non-manifold edges.
Alternatively, you can use the keyboard shortcut Ctrl + Shift + Alt + M, which will select any non-manifold geometry indiscriminately.
Blender also features the Solidify modifier, which can be found in the modifiers panel. This will give thickness to any non-manifold geometry due to a lack of thickness.
If you have disconnected edges and vertices, you can simply select all the vertices and connect them using “Merge by Distance”. This makes two separate vertices that lay on top of or close to each other a single vertex.
Fusion 360
Each body in a Fusion 360 project should be a complete object with no holes or disconnected pieces. To fix disconnected pieces, follow the steps below:
- Click “Inspect” and apply “Component Color Cycling Toggle”. This will give all bodies a unique color.
- From the Select menu, apply a selection filter.
- Tick the bodies checkbox only.
- Hover the cursor over one of two objects that appear to be the same color. If both shapes are highlighted, they’re considered to be one body and therefore non-manifold.
To highlight missing faces or holes in geometry, you can go to the Patch workspace. Select “Modify” and then “Stitch”. Drag a window over the entire model in question. This will select any non-manifold geometry on the object.
On the flyout, select free-edges and gaps. This will bring up a list of unstitched edges. Selecting an edge and then “Find” will highlight the non-manifold edge.
Meshmixer
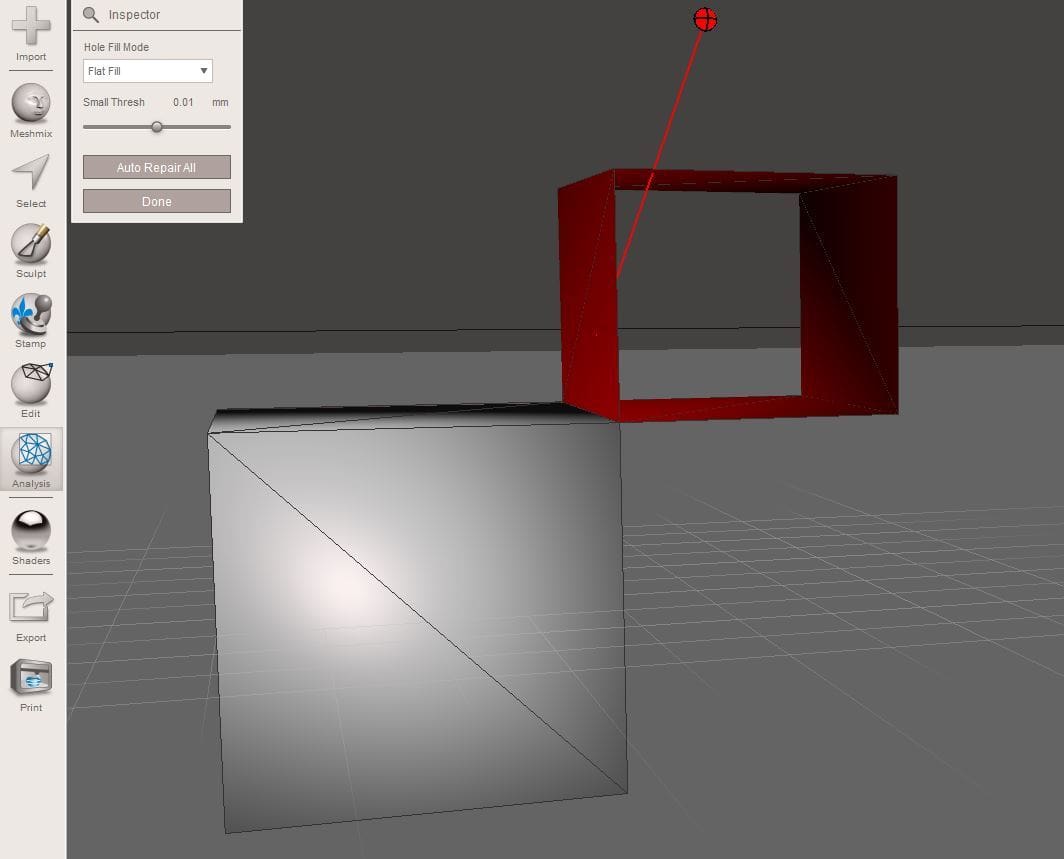
Meshmixer is a simple and powerful tool for 3D printing. First, you need to identify non-manifold edges. Start by clicking on the Analysis icon, then select “Inspector”. Meshmixer will then color the non-manifold geometry:
- Blue outlines highlight holes in the mesh.
- Pink balloons highlight separate objects.
- Red balloons identify all other types of non-manifold edges.
From here, you can either select the “Auto Repair All” button, which might severely disfigure your model, or you can individually repair the problems. To fix individual manifold issues, simply click on the balloons and let Meshmixer do its thing. If a balloon goes black, you’ll need to export the object to more powerful software to try and fix the issue.
Slicer Solutions
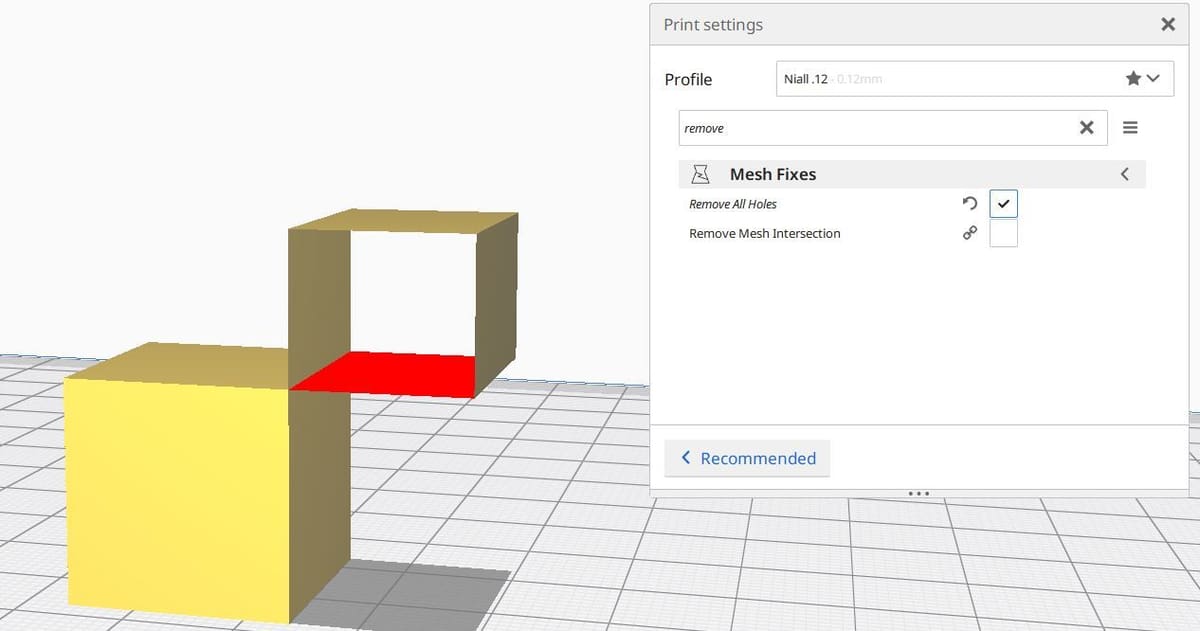
There are several quick fixes for minor non-manifold geometry issues in most slicers. Each setting varies from slicer to slicer, but most do the same thing. Looking at Cura as an example, you can check the “Remove All Holes” setting, which will delete any holes on the inside of the model.
In Simplify3D, you can automatically repair non-manifold geometry. To do this, go into the Repair menu, where you’ll find a number of tools capable of automatically correcting non-manifold issues.
Online Solutions
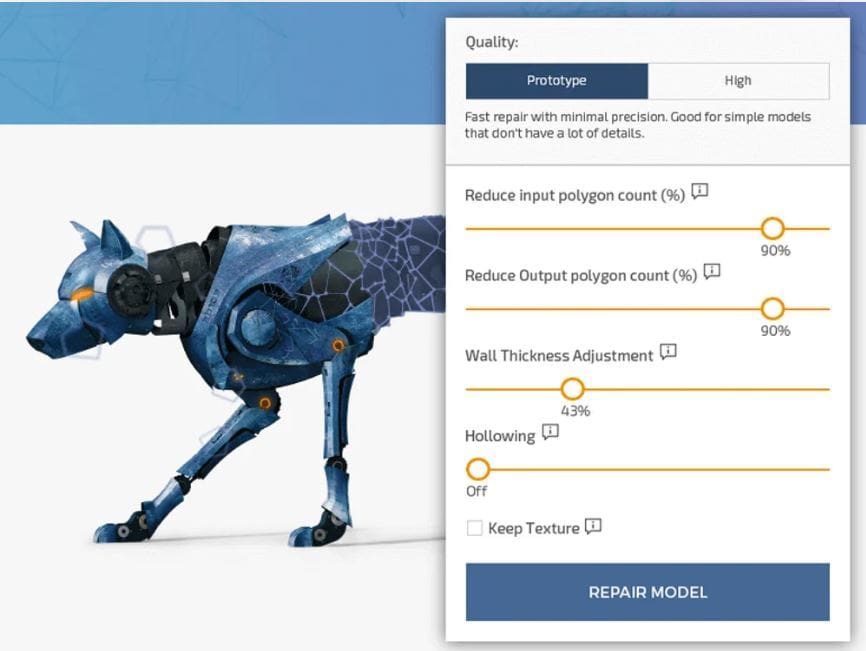
Online STL repair tools are becoming more and more powerful. Though they might not find and correct every instance of non-manifold geometry, they are very fast. Services such as MakePrintable, Trinckle, and Sculpteo offer simple and free STL repair that will close holes, add thick walls, and delete internal faces for you. However, note that some services may charge a subscription fee.
Like Netfabb, these services usually require a quick sign up, after which you upload your model as an STL file. Once the tool works its magic, you can download your manifold, slicer-ready 3D model.
Check out our list of the best STL repair tools in case you’re feeling stuck.
Dedicated Solution: Netfabb
Netfabb is a free program that repairs minor non-manifold geometry. The program is browser-based, so no download is required. You simply log in with an Autodesk account, upload your model, and have your model repaired automatically. Netfabb is perfect for minor problems but might not give you an accurate fix if the non-manifold geometry is too complicated.
Ultimately, if you want an easy-to-use program, Netfabb is the simplest option.
Avoiding Non-Manifold Edges
Once you’re familiar with non-manifold geometry, it becomes significantly easier to avoid creating it in the first place. As you model and sculpt, be careful not to create any internal faces or floating edges.
If you’re dealing with two objects, make sure you’re performing any intersecting operations cleanly. After all, booleans work best on simple objects. It may even be worthwhile to check your objects for non-manifold edges before carrying out the boolean operation, as the boolean will make your non-manifold geometry many times worse.
After large boolean operations, check out wireframe modes to ensure the boolean was carried out cleanly and didn’t create any unwanted geometry.
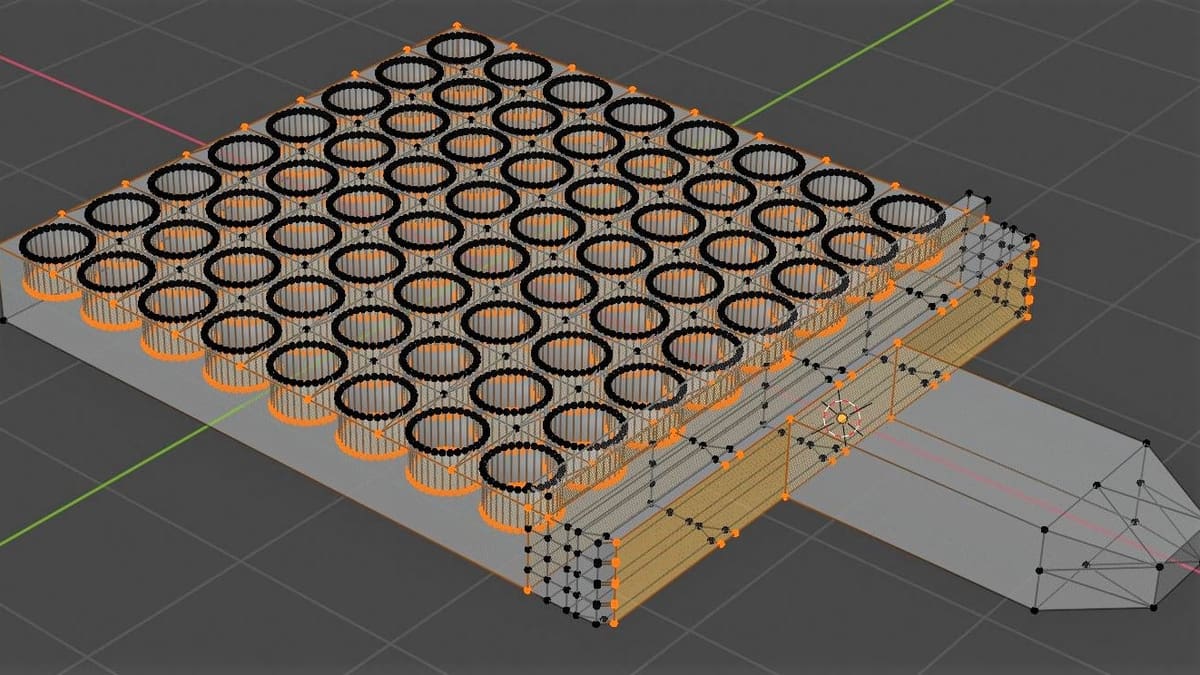
(Lead image source: littleK via Blender Stack Exchange)