Microsoft 3D Builder: All You Need to Know

Microsoft 3D Builder is a lightweight 3D tool that's available on Windows. Learn all about this software and if it's right for you!
Initially released in 2013 for Windows 8.1, Microsoft’s 3D Builder is a free program that came pre-installed on some Windows 10 systems. While it’s no longer installed by default, 3D Builder is still Microsoft’s recommended 3D printing app that can be easily downloaded from the Microsoft Store.
With 3D printing being the main focus, aside from the essential tools, 3D Builder is equipped with specific features to prepare a model for printing, either on your own 3D printer or through a service like Craftcloud by All3DP.
Even though most makers have their preferred programs for designing and 3D printing, 3D Builder is a straightforward program that can be downloaded for free on most Windows computers and is capable of doing some basic designing and printing.
In this article, we’ll take a closer look at 3D Builder and dive into everything you need to know about the program. Let’s get started!
System Requirements
3D Builder is available on Windows 10, Windows 8.1, and Xbox One. It’s an extremely light tool that doesn’t require a lot from your hardware to work, and in most cases, if your computer can run Windows, it can run 3D Builder. The minimum system requirements for the current version, 20.0.4.0, stated below, are from Microsoft:
- OS: Windows 10 version 15063.0 or higher, Xbox One, Windows 8.1
- Architecture: ARM, ARM64, x64, x86
Note that limited printers can be operated with 3D Builder, but even if yours isn’t directly supported, you can still use 3D Builder for designing and repairing models. You’ll just need to export the file to your favorite slicer before printing, but we’ll look into this a bit further below.
Installation
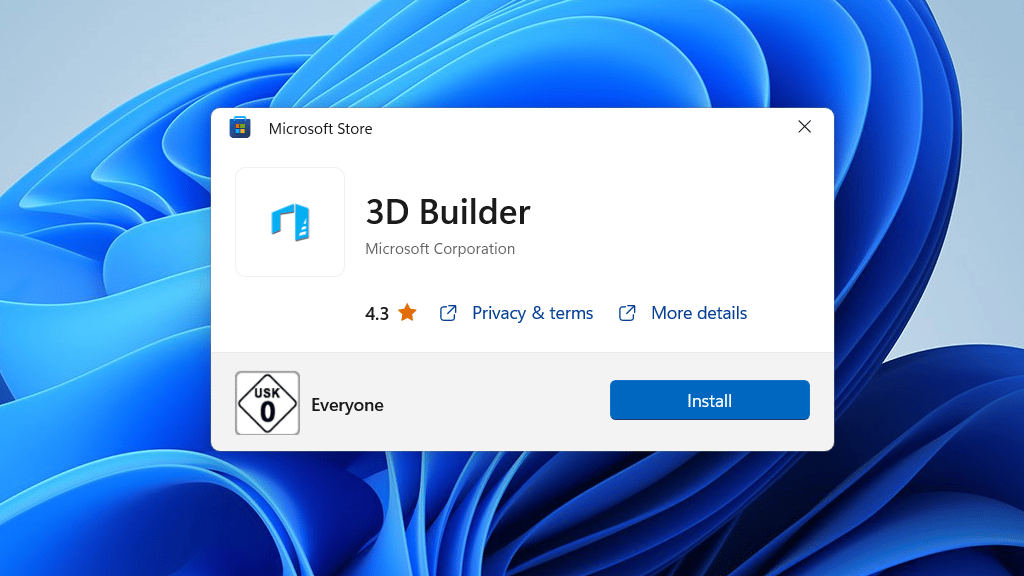
In some cases, 3D Builder might already be available on your computer. But if it isn’t, you can access 3D Builder in the Microsoft Store for free and easily install it.
To do so, simply:
- Open the Microsoft Store app.
- Search for 3D Builder and select it from the presented list.
- On the product page, click “Get” and then “Install”. Once the program is installed, the “Install” option should change to “Launch”.
You can also install 3D Builder through the web version of the Microsoft Store.
User Interface
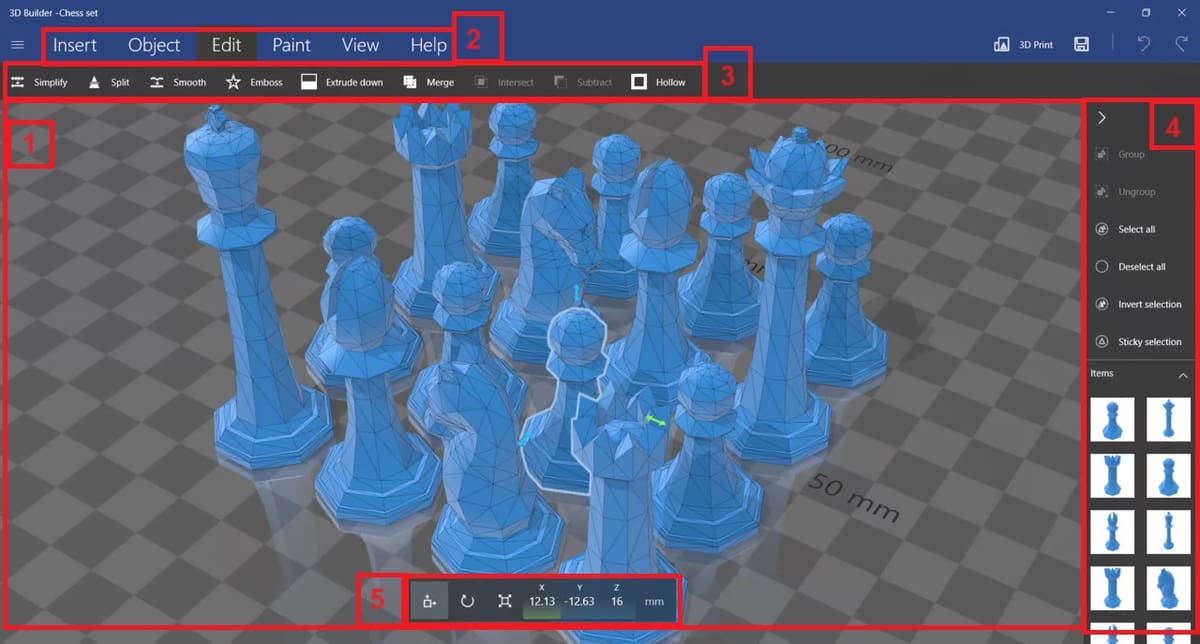
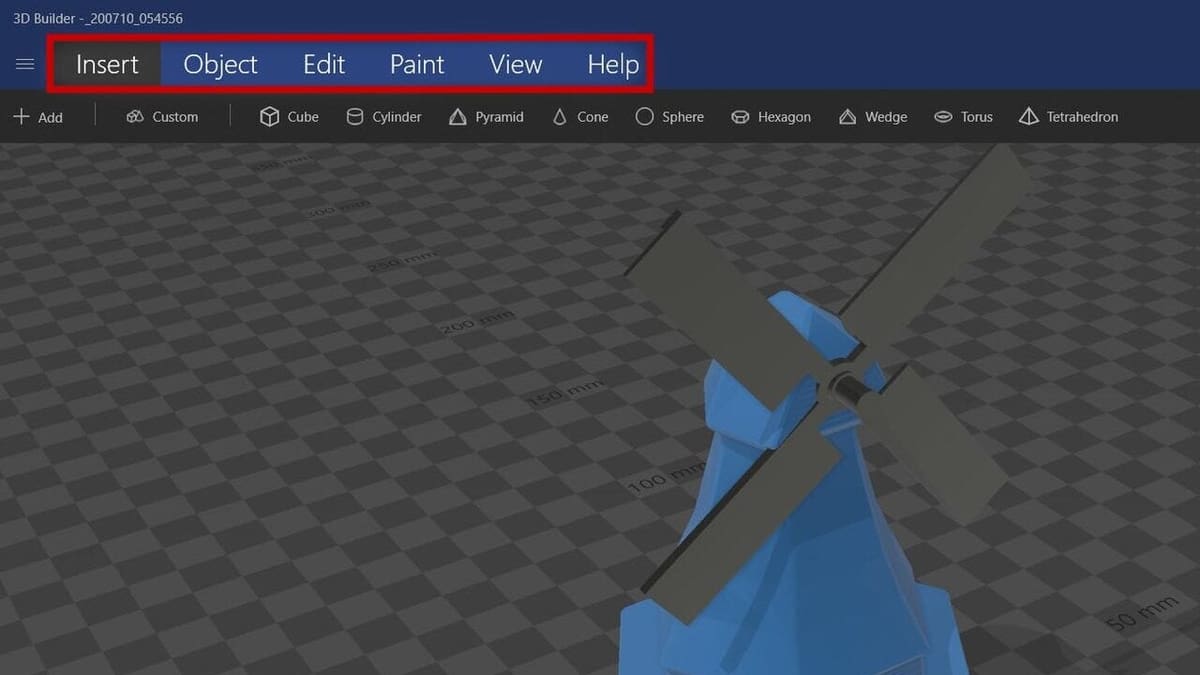
3D Builder has a minimalistic and sleek interface, as it’s designed to be simple and convenient, so you can learn to work with all of the features pretty quickly. The interface consists of the workspace (1), the tabs (2), and the toolbar (3) that’s displayed depending on which tab you’re in.
Additionally, there’s another bar on the right (4) to view and select objects, group, or change the selection method. Finally, a box (5) on the bottom appears whenever you choose an object that allows you to scale, rotate, and move the object.
Next, let’s take a closer look at what can be accomplished.
Features & Functions
3D Builder comes with essential tools and features, but, since it was designed for performing simple 3D printing capabilities, it doesn’t have functions that adjust appearances and aesthetics like lighting, camera, UV mapping, rendering, and so on. However, the tools present are more than enough to edit and alter models or even design from scratch.
3D Builder has six main tabs that contain almost everything the program has to offer. We’ll go through five of the six tabs one by one in the following sections. The one we won’t be dedicating a section to is the Help tab, which, not surprisingly, contains a helpful user guide and a link to the list of compatible printers.
Let’s jump in!
Insert
The “Insert” tab, as the name suggests, contains tools related to inserting objects into your workspace. There are three tools in this tab:
- Add allows you to add an object or an image from the 3D Builder presets or your computer. The most important 3D printing file formats are all supported, including STL, OBJ, 3FM, WRL, and PLY. There’s also an option to connect to your device’s camera, capture an image, and add it to the workspace.
- Custom is short for custom shape. With this tool, you can create and add a custom shape by altering the base shape’s latitude, longitude, width, height, and roundness. For example, if the base shape is “Cube”, you can set the roundedness of the edges by adjusting the slider.
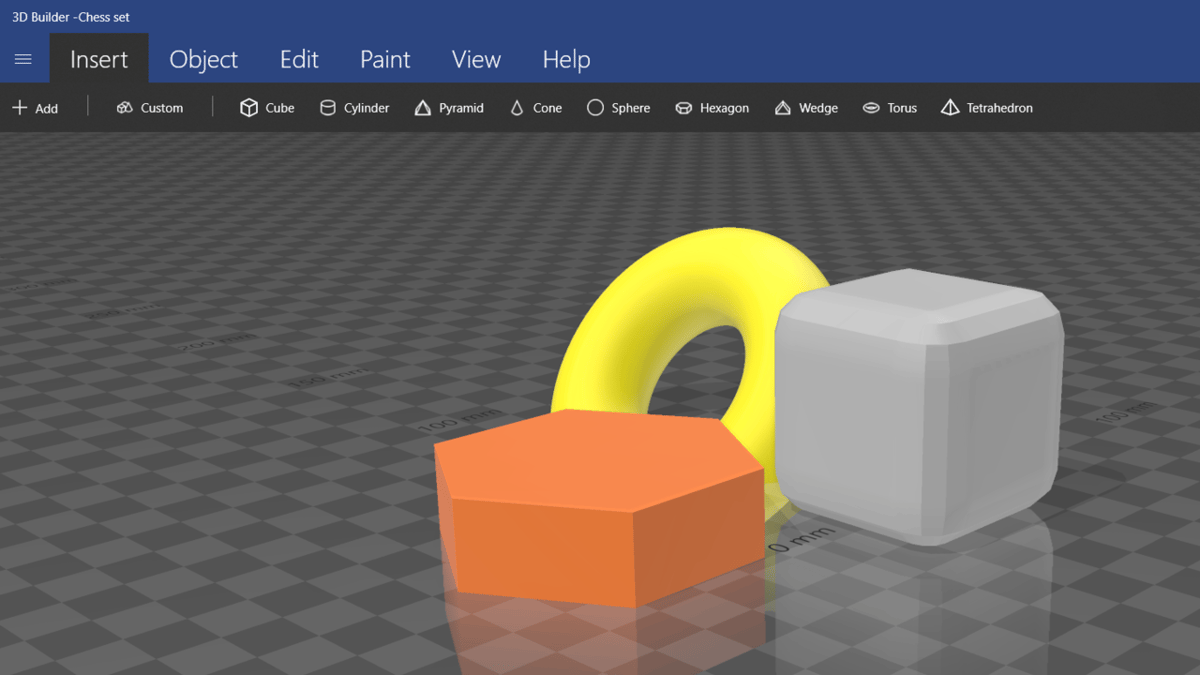
- Cube, Cylinder, Pyramid, and other common shapes are to the right of the “Add” and “Custom” tools. These shapes can also be rescaled once added to the scene.
When adding a shape to the workspace, either custom or preset, click on the tool, and that will add it to the center of the UI. You can also drag and drop a shape to your desired point in the workspace to insert it at that position.
Object
The “Object” tab houses tools that allow you to handle the objects you added to the scene. There are two sets of tools in this tab.
The first set is a list of common functions, allowing you to add or remove objects from your workspace. You’ll notice that the shortcuts mirror other Windows programs. This set includes the following:
- Duplicate reproduces the selected object. The difference between this and the copy and paste function is that duplication occurs instantaneously, while an object that’s copied can be pasted later in time. (Shortcut: “Ctrl + Shift + C”)
- Copy copies the object to the clipboard while leaving the original object untouched. (Shortcut: “Ctrl + C”)
- Cut copies the object to the clipboard while removing the selected object from the scene. (Shortcut: “Ctrl + X”)
- Paste inserts the object into the workspace. The clipboard could be occupied by an object that was either copied or cut. (Shortcut: “Ctrl + V”)
- Delete simply removes the selected object without copying it. (Shortcut: “Del”)
The second set consists of three tools that are some of 3D Builder’s best features. They are all very useful for 3D modeling and printing.
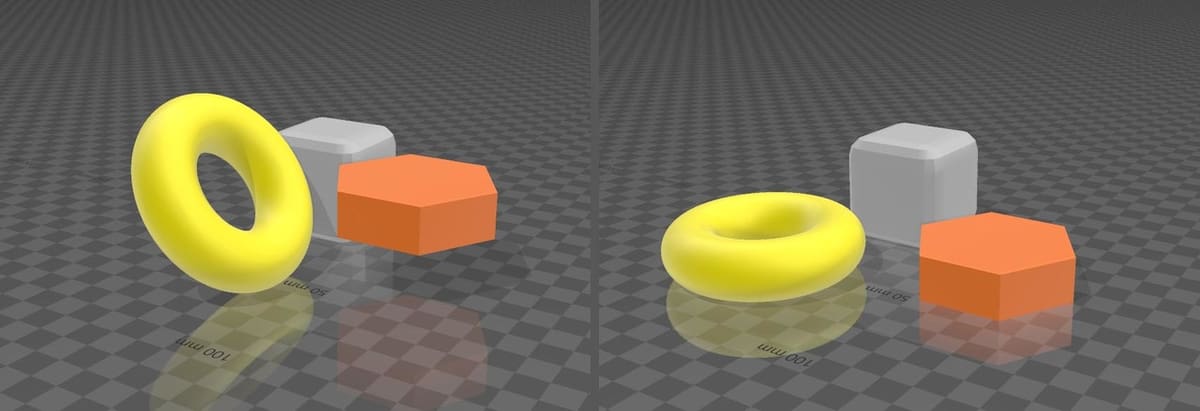
- Settle will take selected objects to a temporary scene and apply gravity on them so they settle on the floor plate. Once confirmed, it applies the new positioning to the object. This is great for 3D printing as sometimes models are not seated on the floor plate, and this distance, no matter how small, will ruin the print or increase the need for unnecessary support structures. It’s best to always settle the objects with this tool before proceeding to print.
- Mirror simply mirrors the selected object across the X-axis.
- Measure is a two-point tool to measure objects. The first click will set the first point and clicking twice will set the second point, which then displays the distance between the two points. This tool can also prove to be handy if you’re designing objects designed to fit or mount other objects.
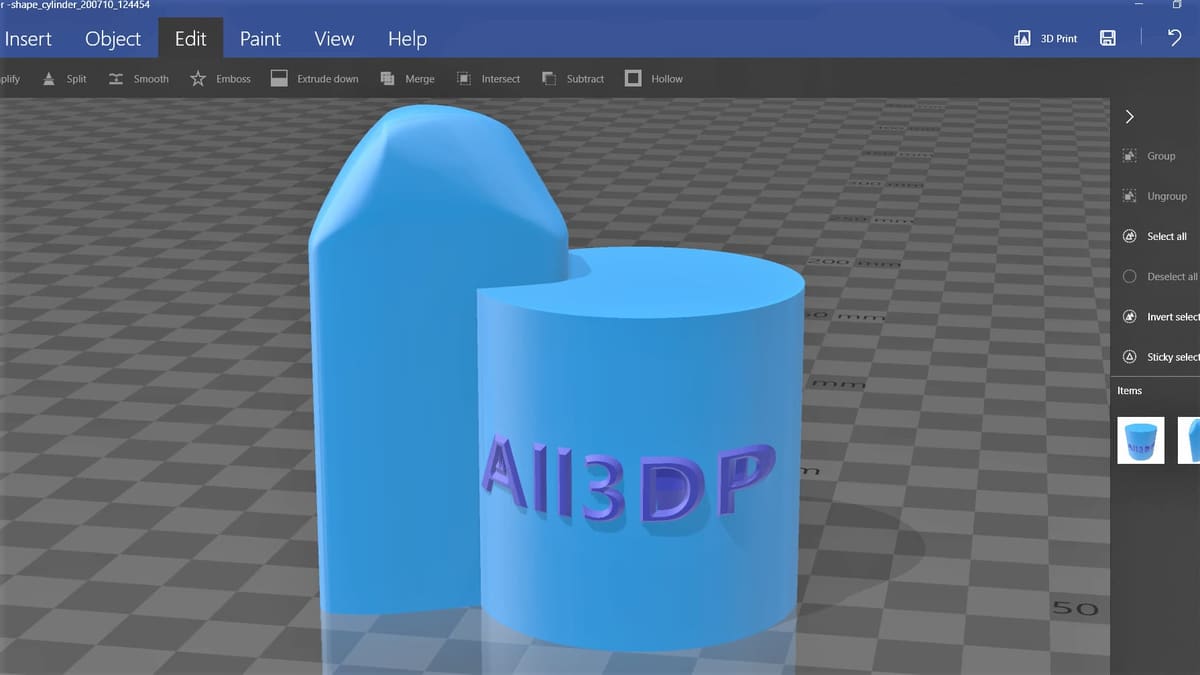
Edit
The “Edit” tab provides tools to manipulate the objects. This is where the design-related tools are stationed. As mentioned before, these tools are few but enough to get you through if you’re looking to do some quick and simple designs.
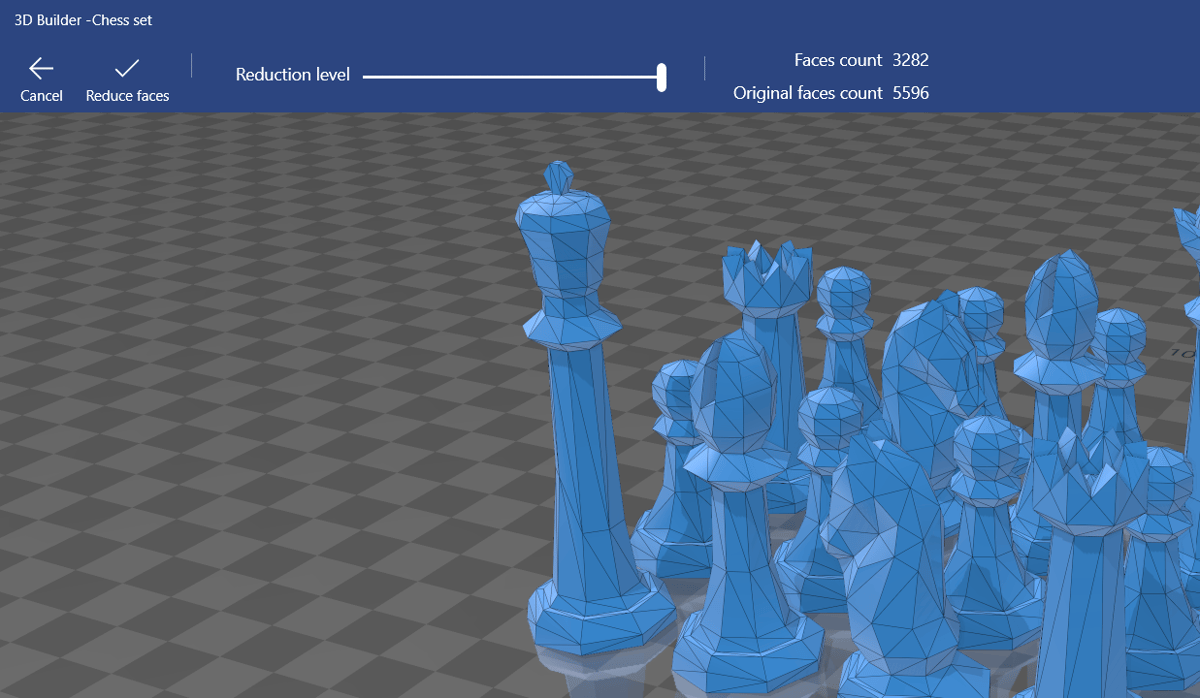
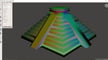
- The Simplify tool is another useful tool that allows you to reduce the faces of an object and simplify models into low-poly versions. Models with fewer details mean easier printing.
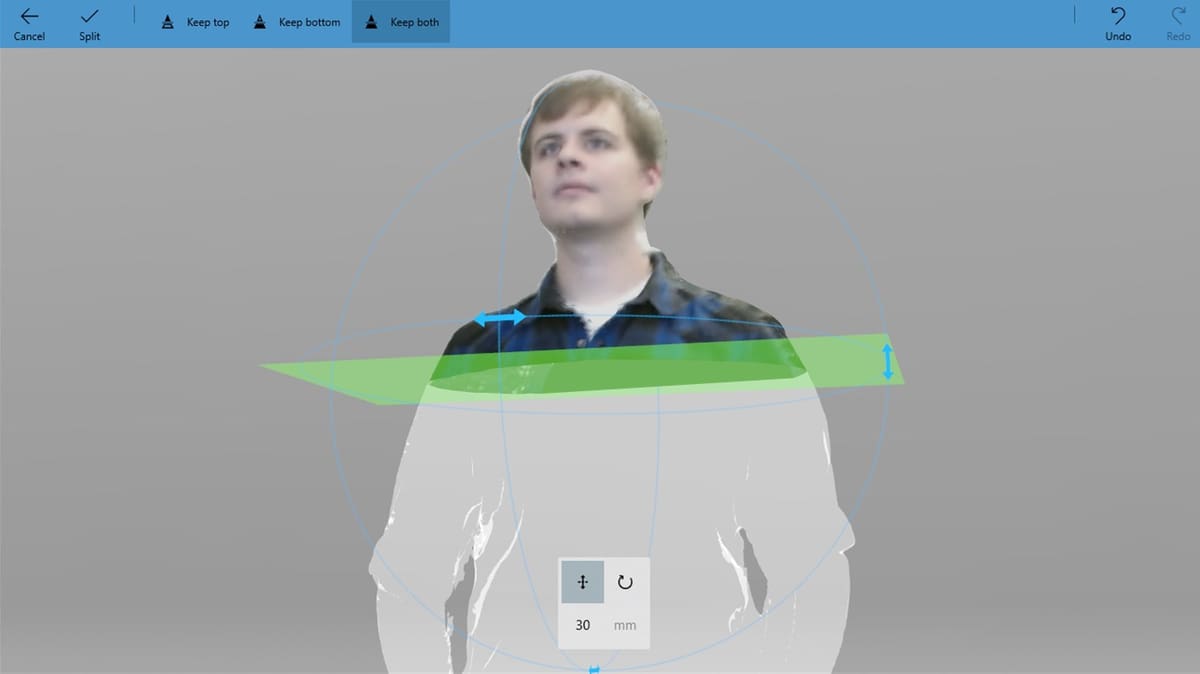
- Split enables a green splitting plane that can be rotated at various angles. Once you rotate the plane the way you want, you’ve got three options: keep the top, the bottom, or both, and split the object in two.
- The Smooth tool averages the surface of objects to smooth them, working best with objects that have sharp edges. For instance, using this tool on a sphere won’t make a difference because the sphere is already in its smoothest form.
- With Emboss, you can emboss text or a shape on your object. You can change the font, the size, color, and the projection type. There are also some preset shapes you can use or you can load your own custom shapes using the “Load” option.
- Extrude down will extrude down following the structure of the object from a determined height threshold until the floor plate is reached. This function can serve as a support structure as well as connecting suspended points to the floor plate.
- Using Merge, you can merge two or more objects into one.
- Intersect takes selected objects that intersect together, keeping the intersection and removing the rest of the object.
- Conversely, if a single intersecting object is selected, Subtract will subtract the selected object from the other objects.
- Hollow, unsurprisingly, hollows a selected object. Keep in mind that all objects are solid and filled by default.
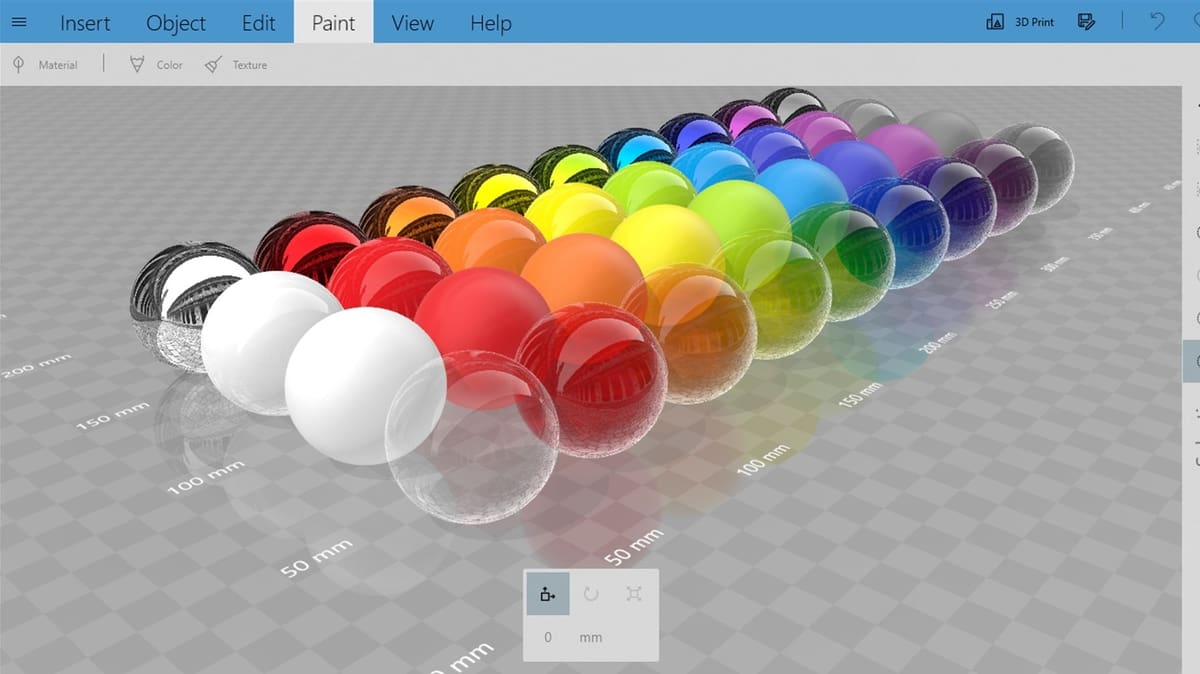
Paint

The tools for painting and texturing models are located in the “Paint” tab. As mentioned before, there are no rendering features present in 3D Builder. With that being the case, coloring and texturing models serve to distinguish models from one another.
- Material allows you to change the material for the selected object. For example, you can make something metallic and change color or the amount of gloss you’d like.
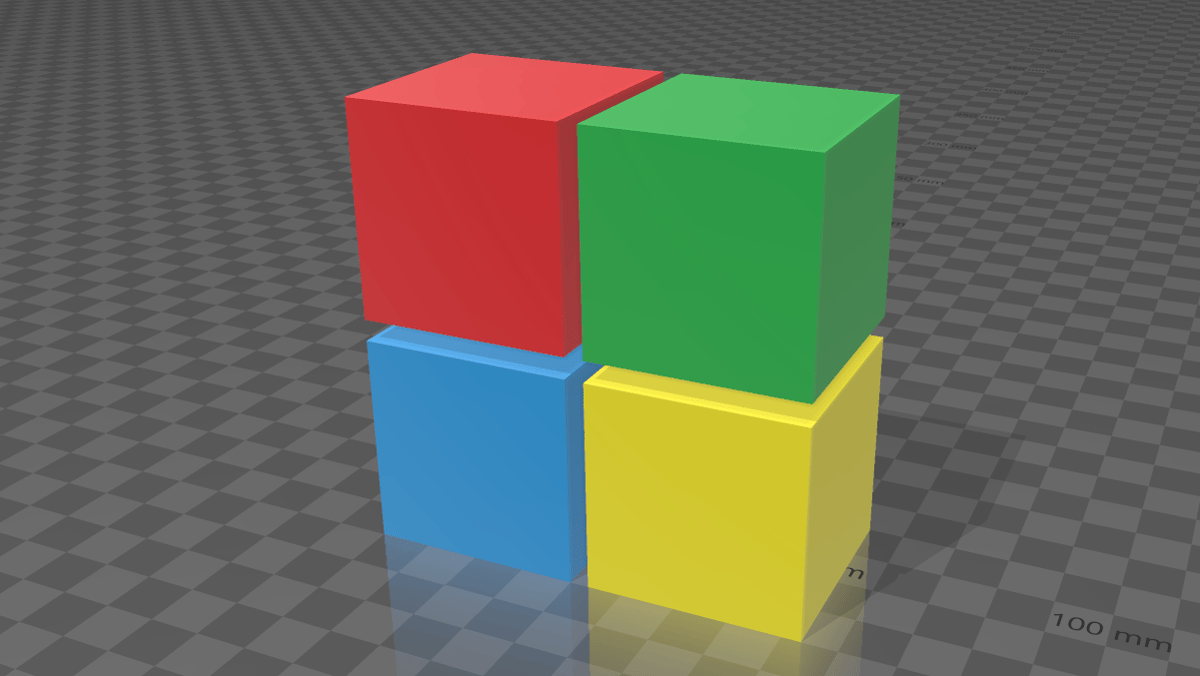
- Color allows you to paint objects a solid color. You can use the preset colors or just enter the hex code for the color you’ve got in mind.
- Texture applies texture to selected objects, with both preset textures available and the option to add your own. Texturing in 3D Builder has two main modes: “Sticker” and “Brush”. Sticker mode will plaster a single unit of the selected texture on the object while Brush textures the faces in the area.
When working with color and texture, you can change the “Coverage”. By increasing it, you gain range and can color or texture the entire model with one click. Conversely, by reducing the coverage, you can color or texture each face separately.
View

The “View” tab is where the functions that help you navigate and view your models are contained:
- Center View will reset the view to the default center view. (Shortcut: “Ctrl + 0”)
- Shading, Shadows, Colors, Reflections, and Smoothing can be toggled on and off by clicking on any of them.
- Wireframe will project lines on the objects to reveal the faces and polygons on each object.
- Grid allows you to customize or entirely disable the scene’s background grid.
- X-ray is a handy tool when working with numerous objects in one scene when an object might block your view from the one you’re working on. With X-ray enabled, only the selected objects will have a solid coloring and all the others will become translucent.
Export
As mentioned earlier, you might be interested in 3D printing, you can opt for two different options.
First, you can export the design as a 3MF, STL, OBJ, or PLY file, all of which are meant for 3D printing. Depending on the specific aspects of the model (i.e. is it meant for multicolor printing), one format might be more suitable over another. You can find this under the main menu (three horizontal parallel lines at the top-left), under “Save as”.
Alternatively, from the said main menu or from the top right corner of the UI, you can select “3D Print”, which will allow you to opt for an online 3D printing service or, if you’ve got 3D printers installed or connected to the computer, they will appear for you to choose from. Once you’ve clicked on “3D Print”, on the bottom right of the screen, you can also click on “Order online”, which will lead to i.materialise’s website, where your model will automatically be added to the cart and you can see the cost.
User Experience
3D Builder is generally considered a stable and reliable program, with many users reporting positive experiences on Reddit and beyond. While the tool set is rather limited and doesn’t offer the advanced modeling features you’ll find in programs like Blender or 3ds Max, it’s extremely accessible and can help you quickly perform simple tasks and fixes. Plus, it’s free and easy to use.
Some users have experienced problems with the program crashing, but the active support community on Microsoft is ready to help with issues such as these. If you run into any issues while using 3D Builder, you should be able to quickly find support.
Use Cases & Applications
Though 3D Builder has the essential functions required to design simple objects, most designers prefer to use more sophisticated programs for modeling.
3D Builder is often used for touch-ups or to finalize objects for 3D printing by fixing them or altering them. For instance, the “Emboss” tool allows you to emboss text on your model in a matter of seconds, and with the “Split” and “Subtract” tools you can remove parts of the object. The “Settle” tool helps you make sure that your objects are all flat on the build plate and that the printer won’t start extruding mid-air.
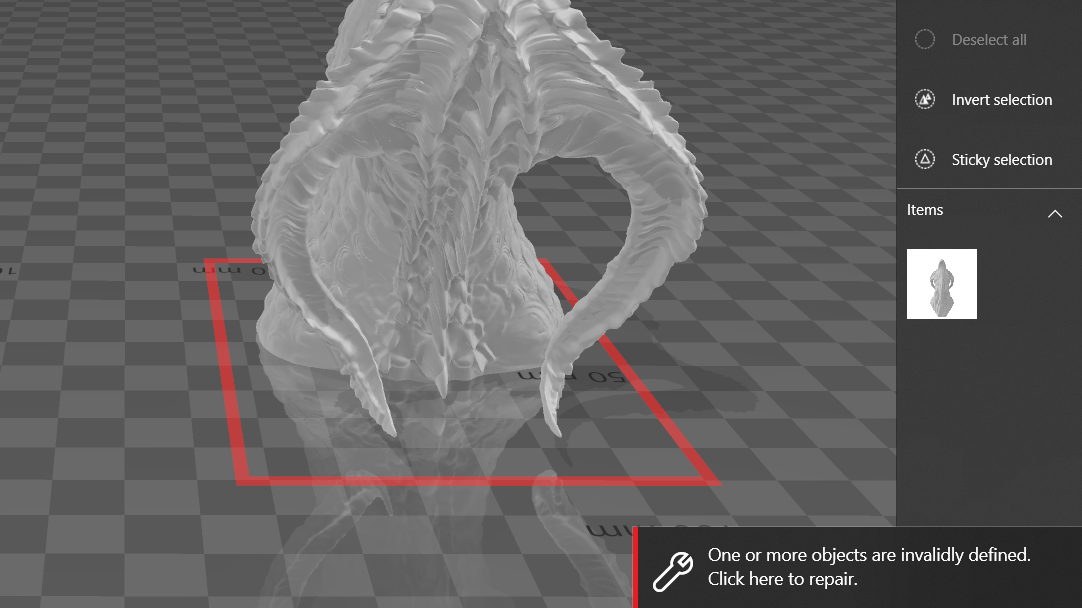
One of the most-used functions of 3D Builder is “Repair”, which is, interestingly, absent from the toolbars. This is because 3D Builder only shows this option when it detects that something is wrong with the model. Once the notification is shown, a simple click will resolve the conflicts and fix the model. This is especially important when 3D printing because slicers can make mistakes when slicing conflicted objects.
Community & Company Support
3D Builder is a Microsoft app that’s fully supported by Microsoft, with users bringing up issues and receiving support in Microsoft Answers. There’s also a Microsoft user’s guide on 3D Builder.
As for the community, there isn’t a large online presence around 3D Builder as it’s a default program that isn’t very sophisticated. However, users still discuss and share information about 3D Builder in the general 3D printing subreddit.
The YouTube channel Design and Deploy has a useful and practical five-part tutorial series on 3D Builder, in which they show how to construct objects from scratch. For example, the first video shows how to model a sink using 3D Builder.
Alternatives
3D Builder is a free, lightweight, simple, and convenient program for designing and preparing objects for 3D printing. Keeping these qualities in mind, here are a couple of standout alternatives to consider.
Meshmixer
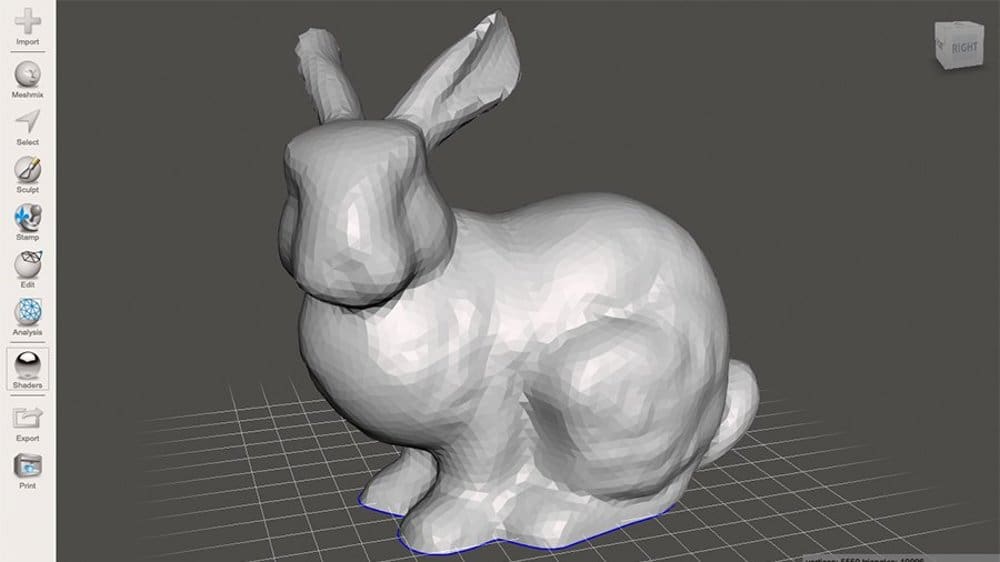
The first alternative we’ll discuss is Autodesk’s Meshmixer. Meshmixer, very much like 3D Builder, is free, straightforward, and has similar features like auto-fixing models and automatic surface alignment. While the program is no longer in development (Autodesk suggests opting for Fusion, which has the same – and then some – features), it’s still available, and there’s a reason why it’s still popular. But in some cases, a more traditional 3D slicer like UltiMaker’s Cura might be the software you’re looking for to prepare models for printing. Slicers tend to have fewer model-editing tools but offer superior control of the 3D printer settings.
Netfabb
A paid alternative to 3D Builder is Autodesk’s Netfabb. Netfabb is packed with features and is much more sophisticated and advanced than 3D Builder. Like 3D Builder, Netfabb has the tools to fix and prepare objects for printing, but it also comes with powerful tools to design and engineer 3D parts. If you’re a student or an educator, you can get a free one-year license for the program.
License: The text of "Microsoft 3D Builder: All You Need to Know" by All3DP is licensed under a Creative Commons Attribution 4.0 International License.
CERTAIN CONTENT THAT APPEARS ON THIS SITE COMES FROM AMAZON. THIS CONTENT IS PROVIDED ‘AS IS’ AND IS SUBJECT TO CHANGE OR REMOVAL AT ANY TIME.