LaserGRBL Tutorial: How to Use LaserGRBL in 4 Steps

In just a few steps, you can prep an image for engraving with LaserGRLB. Read on to learn how to do it in this LaserGRBL tutorial!
With an ever growing selection of affordable laser engravers in the market, it has become a common occurrence to see more hobbyists – and even casual users – wanting to try them out. Laser engravers are really handy machines and can make for great options to get started in the maker world. The applications are varied and can include engraving jewelry, gifts, custom packaging, and many other things.
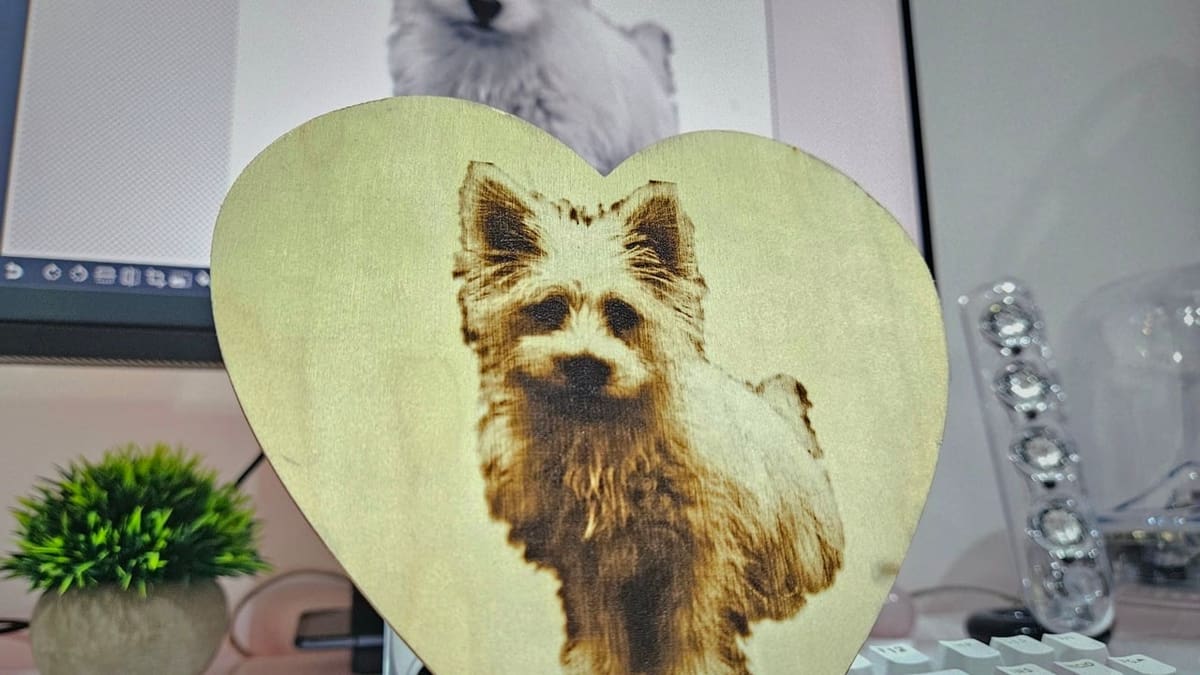
In addition to the many laser engraver options out there, there are also several software options that you can use to control your laser engraver, with many depending on the type of engraver you have. LaserGRBL is popular free control software for Grbl-based cutters and engravers. In this guide, we’ll show you how to use it. We’ll go step by step through the process of engraving a cute picture of my dog, Lars, with a Sculpfun S6 Pro onto a small wooden heart cutout.

Download & Installation
Installing LaserGRBL onto your Windows system is pretty easy and can be done by downloading the executable directly from their download page. There, you’ll also find previous versions and the source code.
Although this software was only built for Windows, Linux and Mac users will also be able to run the software using emulators. You can read more about it from their FAQ page.
When it comes to system requirements, LaserGRBL is quite a lightweight program and will most likely run on any 64-bit system with 2 GB of RAM being sufficient. However, we still recommend using a more modern PC if you’re planning to work on very large and complex designs.
Another important thing to note is that this software will work with any laser engraver that works using Grbl firmware. If you’re unsure whether this is the case with your machine, check the manual or do a Google search to confirm.
UI & Layout
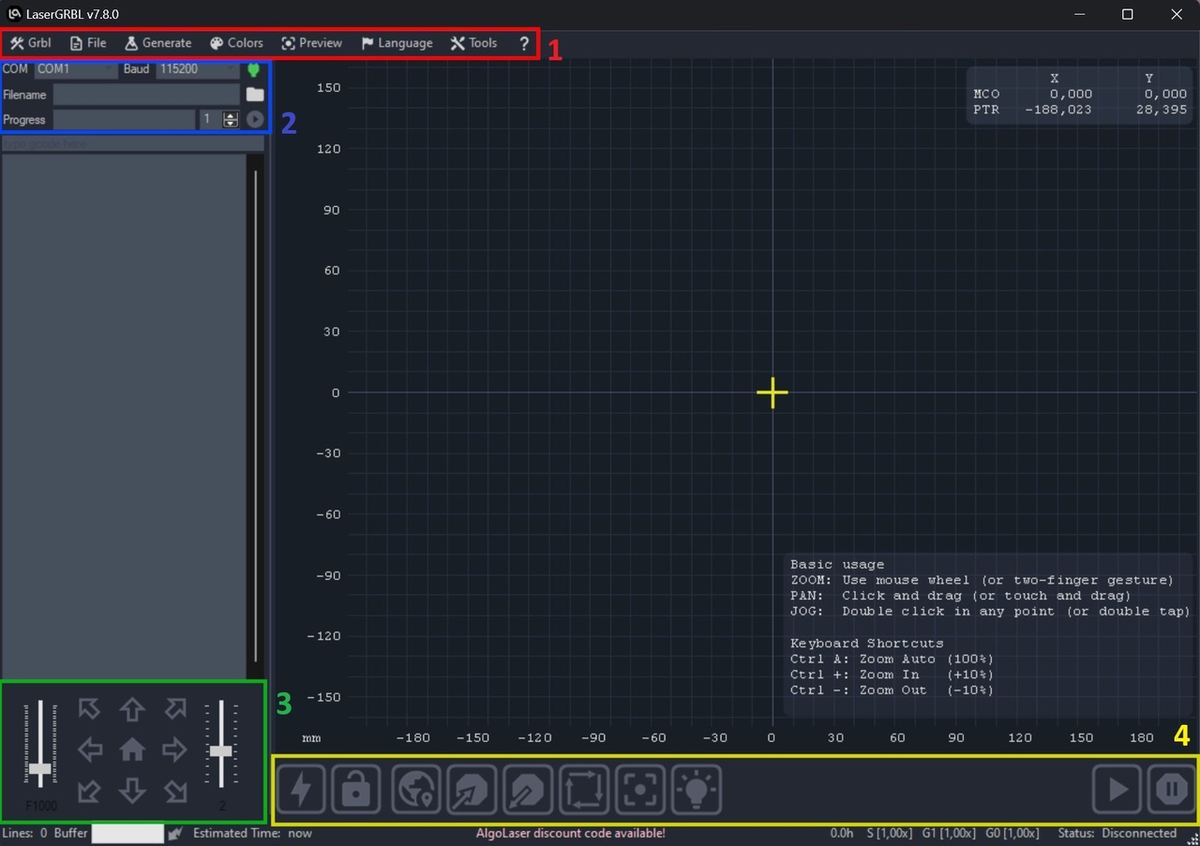
LaserGRBL’s UI is rather straightforward and can be divided into four main sections: the top bar, connection control, jogging control, and laser buttons.
Top Bar (1)
Located at the top of the interface, you’ll find the following menus:
- Grbl is used to initiate the connection with a machine, keep track of your laser’s lifespan, and access other settings.
- File is for uploading, saving, and exporting images.
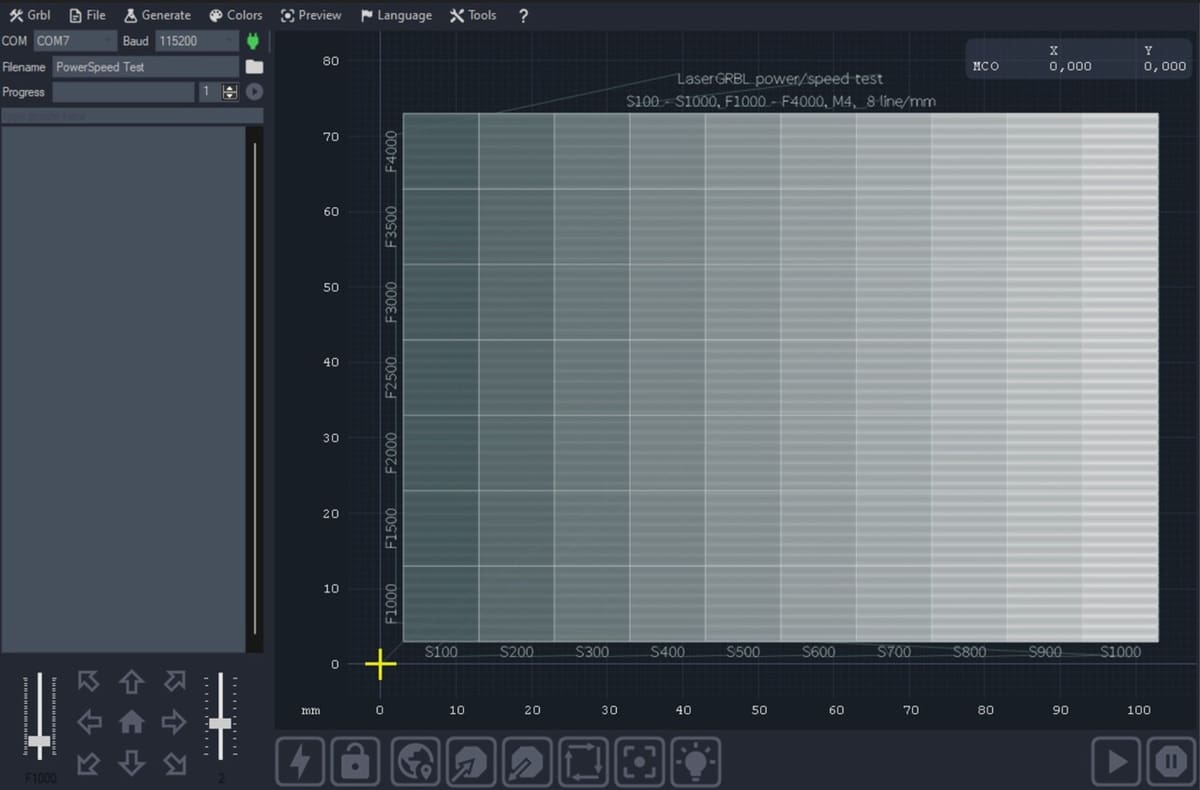
- Generate has options for power vs speed, accuracy, and cutting tests.
- Colors is for selecting the wavelength of light the laser operates at and choosing your preferred color theme.
- Preview allows you to zoom as well as show or hide certain elements from the laser preview.
- Language sets the interface readout.
- Tools allows machine-specific drivers and firmware to be activated.
- ? allows you to access debug logs, set auto-updates, and find helpful FAQ pages and community websites.
Connection Control (2)
Right under the left side of the top bar, you can see everything related to the connection procedure & laser status:
- COM drop-down menu allows you to select the PC port your laser is connected into.
- Baud is also a drop-down menu that allows you to select the baud rate for the laser connection.
- Filename displays the name of the opened file.
- Progress shows the total progress of the engraving once it starts, including the number of runs it will do.
Jogging Control (3)
Located at the bottom-left of the UI, the Jogging Control section allows you to move the laser manually once it has been connected.
The house icon will home the laser. The left and right sliders adjust the speed and distance respectively.
Laser Buttons (4)
The following buttons are located at the bottom of the UI and serve different purposes regarding laser functionality:
- Lightning bolt resets the software after being hung or looped by an error.
- Lock toggles the ability to make changes to the current design.
- Globe moves the laser to the design starting point.
- Center moves the laser to the center of the design space.
- Corner moves the laser to the bottom left corner of the current design.
- Frame outlines the perimeter of where the current image will be engraved.
- Focus allows you to adjust the focal length of the laser to accommodate different surface heights.
- Bulb turns on the laser at 10% power.
- Play start the laser engraving process.
- Stop stops the laser.
Step 1: Connect to Your Laser Engraver
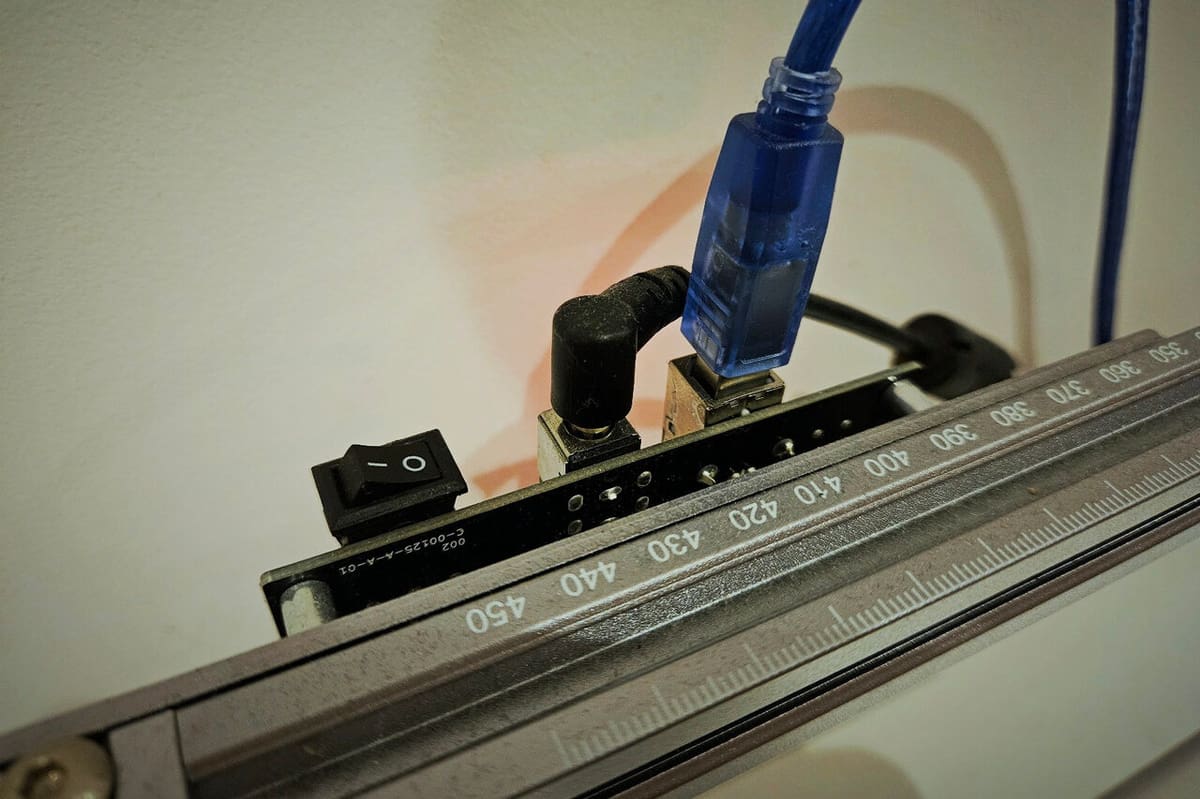
Once we have the software downloaded and installed onto our computer, the next step is to connect into our laser engraver. There are two ways we can do this: via a USB port or via a Wi-Fi module.
USB
This will be the preferred method for most engravers, as it requires no external modules or firmware changes to make work.
- Simply connect the laser engraver to your computer with a USB cable (usually provided with the machine).
- Then, select the appropriate COM port in the COM drop-down menu in the Connection Control section of the UI.
- Press the green plug icon to the right of the Baud drop-down menu to initiate the connection between the engraver and the software.
If the connection is successful, you’ll hear a beep and the jogging controls will turn blue. If you run into some trouble, check out the software’s documentation for more detailed steps and troubleshooting.
Wi-Fi
Connecting via Wi-Fi is possible in LaserGRBL, but not all engravers will be able to use it because it requires an external ESP8266 module to work. Even engravers with built-in Wi-Fi capabilities may not work, as the software is designed only to work with the aforementioned module.
You’ll have to purchase the module separately. While, it’s quite cheap, getting it to work will require a lot of manual work and programming. As such, we don’t recommend this option. But, if you’re up for the challenge, the full procedure can be found in the documentation.
Step 2: Import a File

The next step in our journey is to import the design you want to engrave. Sometimes, though, it would be a good idea to edit an image prior to importing it. Image editing for laser engraving is beyond the scope of this article, but we recommend this handy video that shows ways to optimize the quality of a photograph prior to engraving on wood.
Once you’re satisfied with your image, you can load it into LaserGRBL as follows:
- Click “File > Open file” in the top bar.
- Then, double click on the file you want to open. The program will automatically import it.
A new window will appear with a preview of the selected design as well as a variety of settings and tools you can use to augment the design. We’ll walk you through the Parameters and Conversion Tool options.
Parameters
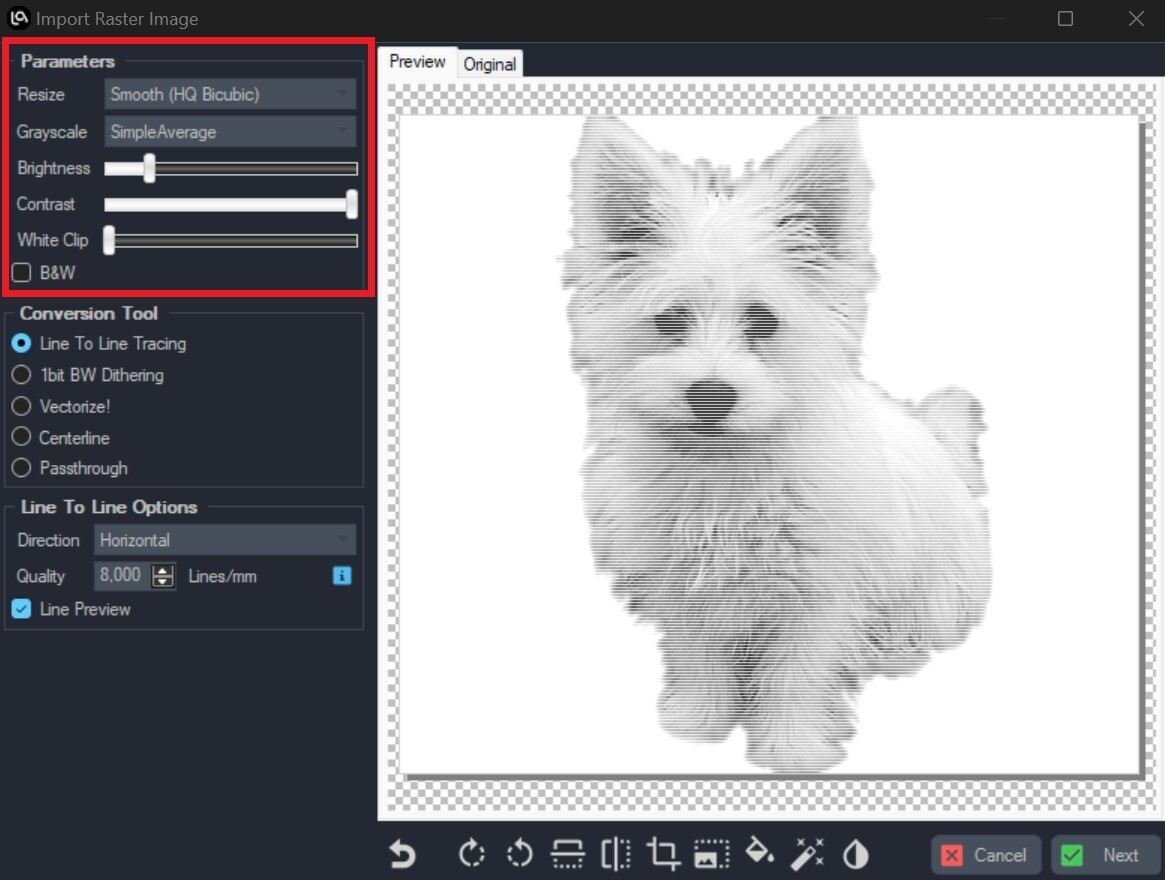
The Parameters panel offers five different settings that allow us to tweak the appearance of the design we just imported. In adjusting these settings, it’s important to keep in mind how a laser engraver works: Darker areas mean the laser engraves more deeply, while lighter areas get a much softer pass.
For the most part, the settings in this panel allow you to adjust the light and dark values in your image. Here’s a brief explanation of each one:
- Resize: Unlike what it may sound like, this option simply lets you smooth out the design if the edges become a bit too sharp after the import.
- Brightness: This slider will brighten up the image, resulting in softer dark areas. This can result in parts of the image disappearing and therefore not being engraved.
- Contrast: This slider will determine how much difference there is between darker and lighter areas. By default, it’s set to the maximum, and we suggest leaving it that way unless you want a more uniform look throughout.
- White Clip: This option allows you to determine how many of the image’s lighter areas should become completely white and therefore ignored by the laser. When engraving photographs, we suggest setting this to 0.
- B&W: This checkbox will make your image black and white with no grayscale. This is very handy when engraving solid colors or logos without gradients.
It may take some trial and error before you find the correct settings for the design you want to engrave. Things may not turn out as expected on the first try. The best way to familiarize yourself with the settings is simply by playing around with them and seeing what each one does to the design preview. It’s also helpful to try out different images, too.
Conversion Tools
Unlike the settings in the Parameters panel, these tools don’t alter the image itself but rather the way the laser will engrave the design. There are five different options to choose from.
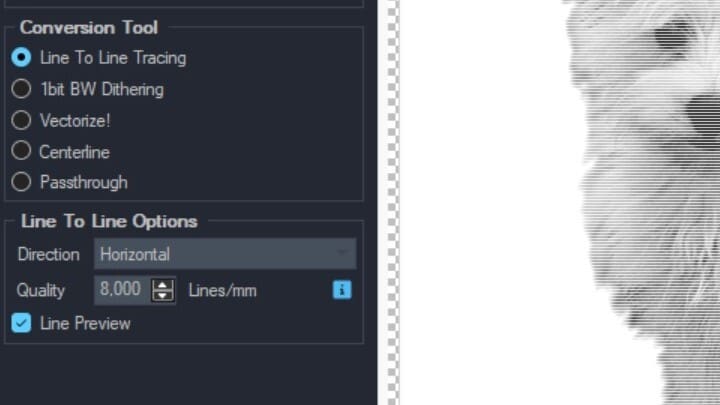
Line to Line Tracing
Line to Line tracing is the default option. It basically slices the image into tiny lines, which the laser will then engrave one by one. This tool has two main settings:
- Direction: You can decide if the laser will move horizontally, vertically, or diagonally.
- Quality: Increasing this number will make the laser move in smaller steps and increase overall quality.
We found that setting Quality to 8 lines/mm provides some good results for smaller designs, but you may want to reduce this number if you’re planning on engraving large designs, as it severely affects engraving time.
1bit BW Dithering
1bit BW Dithering turns the image into small dots, which are then engraved in a similar fashion as line to line tracing. Just as with the previous tool, you’ll see Direction and Quality settings, which work just the same. There’s also a setting called “Dithering”, which basically determines how the dots are generated.
Choosing between different Dithering options, you’ll see a slight change in the way the design is turned into dots. The default one is good enough for most use cases.
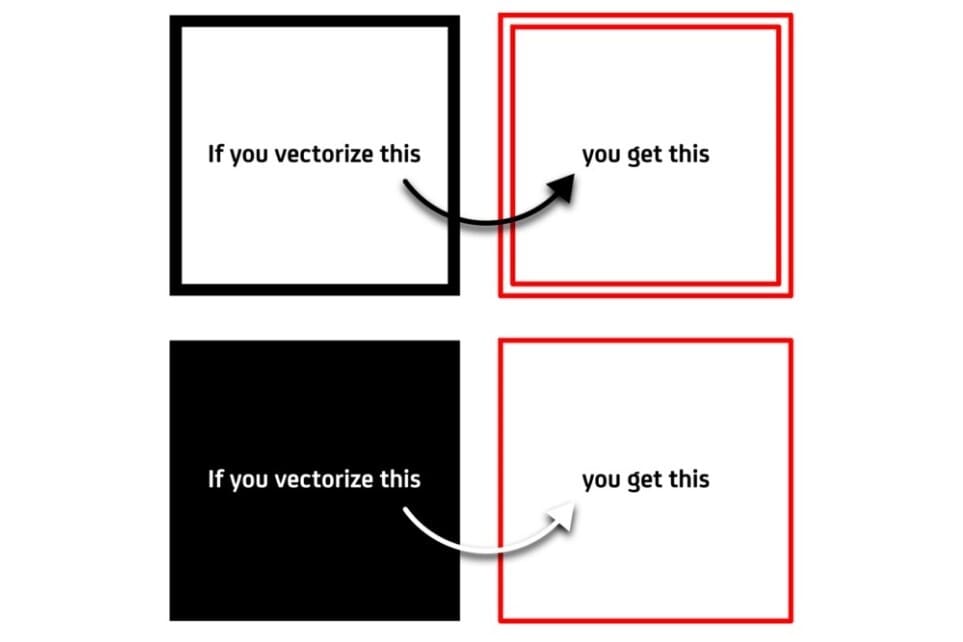
Vectorize!
Unlike the previous tools, Vectorize! turns the design into a vector – meaning no grayscale, just a single outline throughout the entire design.
This tool is mainly used for cutting pieces out of material, as you only want the laser to pass through the outline of the design and any other parts that you may want to remove as well.
There are a few settings to tweak here as well, and the software’s documentation does a great job explaining them with illustrations.
Centerline
Centerline works in a similar fashion to Vectorize!, but instead of converting the whole image into a single outline, it tries to find the center of the design and will draw a line through it. For example, imagine you had a simple rectangle design. Vectorize! will draw the outline of the rectangle, while Centerline will draw a single straight line in the center of the rectangle.
Centerline has two settings:
- Corner Threshold: Smoothes out lines but can cause issues if set too low.
- Line Threshold: Based on our testing, this setting doesn’t seem to make much of a difference for our use case.
Usually, you’ll want to use Vectorize! over Centerline, but this tool can still be useful for use cases where finding the centerline is more important than drawing the outline.
Passthrough
This tool won’t make any changes to the image, and LaserGRBL will engrave it as is. You’ll get the best quality engraving possible base on the image you uploaded.
The main downside of the tool is that you won’t be able to tweak the size of the design in the software itself, as it will rely on its original pixel size. Meaning that any changes to the image’s grayscale value, size, and other features will have to be done beforehand.
For most use cases, you don’t want to use this option. Being able to tweak the design settings within LaserGRBL will come in handy most of the time. For example, I found it very useful to ensure my photo of Lars fit properly in the heart cutout.
Step 3: Configure the Laser Settings
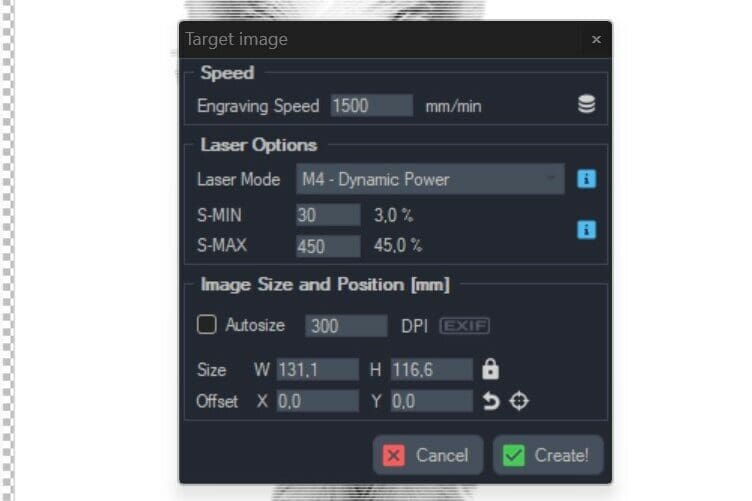
Once we’ve set our desired design parameters and selected a conversion tool, it’s time to set the laser settings for our machine.
A new window will pop up where we can set some values such as the engraving speed, power, and image size. These settings are quite straightforward, so we won’t provide any lengthy explanations. Instead, we’ll mention some important things to keep in mind when playing around with settings
- Your machine: Check the maximum power output and speed for your particular laser engraver model, as these vary from one model to the other.
- Speed: Higher engraving speeds will reduce the amount of time the laser engraves the surface of your material. For deeper engravings or cuts, you’ll want to reduce the speed.
- Laser Mode: We suggest sticking with “M4-Dynamic power” in order to reduce possible burns towards the edges of your design. For cuts, we recommend going with the other option, “M3 Constant Laser Power Mode”.
- Testing: Make sure to do some prior testing on the material you’re planning to engrave. This will help you find the correct power settings for that material.
Step 4: Engrave

With all of our image and laser preparations out of the way, it’s almost time to engrave our image. We’ll go through a few final preparations to help ensure everything goes well.
Please also remember to take safety precautions when working with the laser, especially if it’s on!
Centering the Laser Head
LaserGRBL has two options to help us make sure our laser head is centered to the material we will be engraving.
- Center will move the laser head to the center of our design. You may then need to manually move the laser head so that it also matches with the center of the piece you’ll be engraving.
- Frame will make the laser move all around the edge of the design. This can be handy because we can visually see where the laser will pass through, allowing us to then better adjust the centering or even re-scale the design if it doesn’t fit properly.
Both of these appear options are buttons in the Laser Buttons section of the LaserGRBL’s UI.
Ensuring Proper Focal Distance
Another handy feature is the Focus button, which will turn the laser on at very low power to help us make sure it’s at the correct height from the piece. Pay close attention to the laser dot and make sure it’s as small as it can be. Always wear goggles when doing this!
From our experience, we’ve found that this process can still burn a hole in some materials. So, it may be best to instead use a calibration object (usually provided with the laser), which can be placed between the piece and laser head to adjust the height.
Ready, Set, Go!
Once we have everything ready, goggles on, and our laser centered and calibrated, all there’s left is to press the Run button and watch our laser engrave our design.
Tips & Tricks
As you can see, engraving an image with LaserGRBL is pretty straightforward. To finish off, here is a list of tips that you may find useful for your next project.
- Opening up previous images: LaserGRBL has an option to reload the last imported file, which could help to save you some time. If you need to reset the image parameters, there’s no need to re-import the file every single time. It can be found underneath the “Open file” option.
- Generate menu: The latest versions of LaserGRBL offer a new “Generate” menu, which includes some built-in designs to help you calculate the optimal settings for the material you’ll be engraving on.
- Material database: There’s a built-in material database with some default values for different types of materials. This can be a handy starting point if you’re unsure what values you should start experimenting with. The database can be found inside the GRBL menu located on the top bar.
License: The text of "LaserGRBL Tutorial: How to Use LaserGRBL in 4 Steps" by All3DP is licensed under a Creative Commons Attribution 4.0 International License.