Klipper: Macros – Simply Explained

Looking for insights into the confusing world of Klipper macros? Or maybe an example to copy-paste? Find everything you need to know here!
Klipper has gained much traction during the last two years and with that many newcomers. The simple yet effective web interface, the input shaping technology, and the promise of faster speeds are all appealing. But if there’s one field where Klipper truly shines over its competitors, it’s customizability.
The almost real-time programming completely eliminates compiling and flashing for each small change. And with a capable single-board computer (SBC) at its core, Klipper empowers the user with total control over all its functions. On top of the modular approach to building the firmware, there are also extremely versatile macros.
These small pieces of code can speed up, simplify, and automate many actions. Macros are a great way to complete repetitive tasks with the click of a button. But how do they work, and where can you find the ready-to-go macros? We’ll cover all of that and more in this article, so stick around to find out. But first, what is a macro?
All About Macros
Generally, a macro is defined as a single instruction that expands automatically into a set of instructions to perform a particular task. In our case, it’s a G-code command sequence, a line of code meant to automate an action or a process.
In Klipper, a macro is defined in the config file for the printer (or in a separate .cfg file, if included). It’s then possible to map the macro to a physical button in the web interface. It follows a defined template and grammar based on the Jinja2 Language.
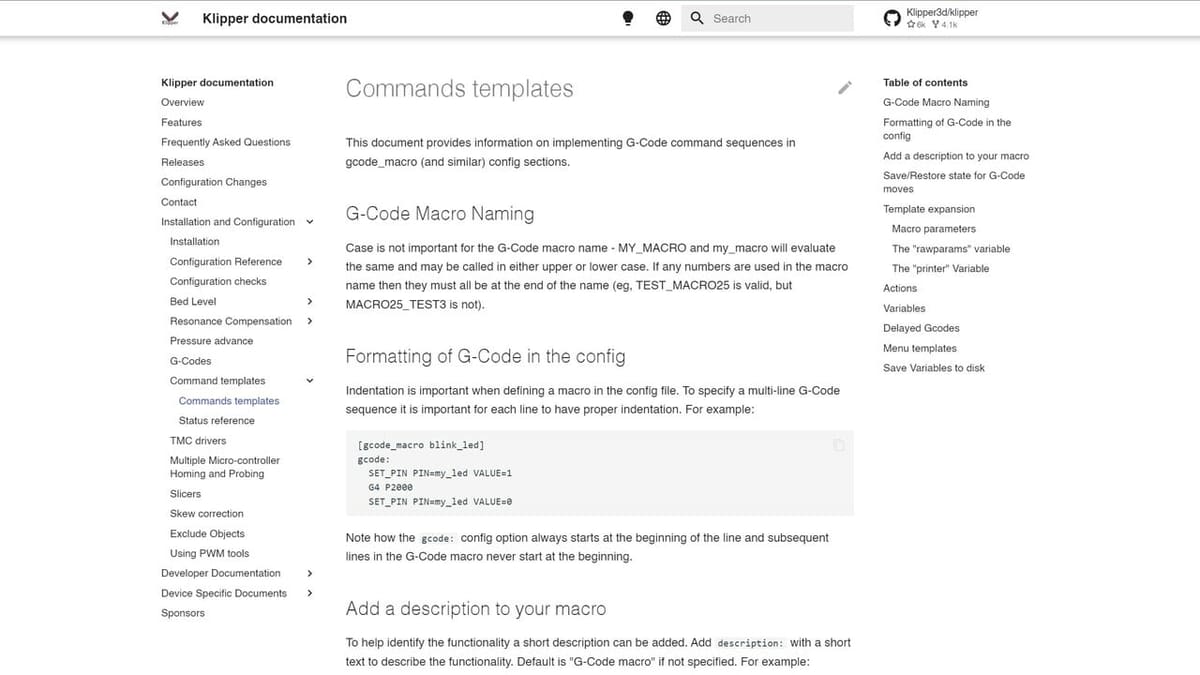
While more complex operations require some coding experience, it’s quite easy to learn for basic projects. Macros can be manually or automatically triggered to perform one or more actions. The general rule of thumb is that if you have a command for it, it can be a macro. You can find more information on how macros work in the official Klipper documentation.
Now that we’ve established the basics, let’s dive into how to create one.
How They Work
We cannot include all of the possibilities and permutations of macros here. Therefore, we’ll point out the general structure, as well as where to find more information and examples.
As mentioned earlier, you can define your macros in the printer.cfg file. It’s not important where in the file exactly, as long as you don’t place them at the very bottom – under the SAVE_CONFIG section. Generally speaking, for the sake of organization, macros go last after all the printer’s parameters. Alternatively, you can create a separate .cfg file specifically for macros and include it in the printer.cfg by adding the following at the very beginning:
[include your_file_name.cfg]
In order to be recognized as a macro, a code section needs to follow a well-defined but simple template. The name of the macro itself is not relevant to its execution. In other words, whatever you call it won’t affect the process. It’s still recommended to assign names that apply to the function of the macro itself. Here’s an example:
[gcode_macro your_macro_name]
description: #An optional written description of the macro
gcode:
        #The code you want it to execute
After this definition, you can write the desired action with the instructions in the order you want them to be performed. If you have a multi-line command set, it’s important to use indentation, as shown in this example:
[gcode_macro PURGE_LINE]
gcode:
       #Move to start position
       G1 X10.1 Y20 Z0.28 F5000.0
       #Draw the first line
       G1 X10.1 Y200.0 Z0.28 F1500.0 E15
       #Move to the side
       G1 X10.4 Y200.0 Z0.28 F5000.0
       #Draw the second line
       G1 X10.4 Y20 Z0.28 F1500.0 E30
       #Reset Extruder
       G92 E0
The lines that start with a ‘#’ are considered comments and will not be executed. They’re extremely useful for quickly explaining what the command does.
In addition to the G-code commands that are fully supported, Klipper adds a series of parameters, variables, and actions. These allow you to retrieve data and issue commands that control all aspects of the firmware. Remember that what in Marlin is an M- or G-command can exist under a separate name in Klipper.
Here’s an example command for calibrating the bed mesh:
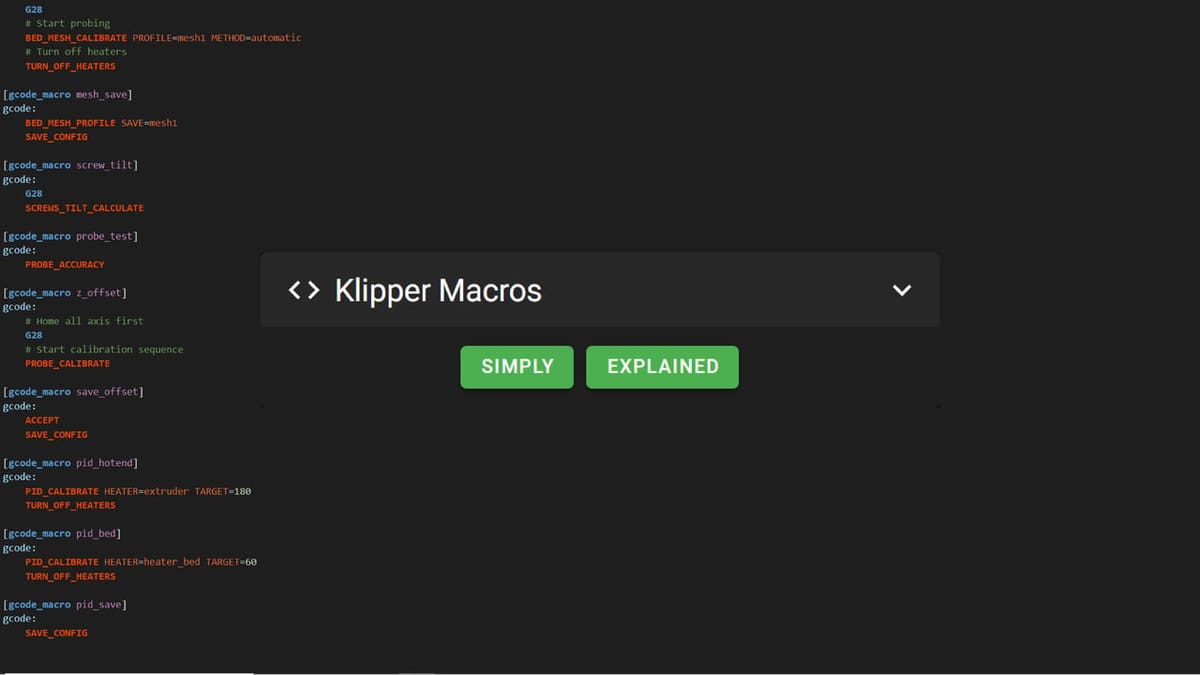
[gcode_macro mesh_leveling]
gcode:
       #Set extruder and bed temperature
       M190 S65
       M109 T0 S120
       # Home all axis
       G28
       #Start probing
       BED_MESH_CALIBRATE PROFILE=mesh1 METHOD=automatic
       #Turn off heaters
       TURN_OFF_HEATERS
Klipper also allows the user to define new variables that can be stored in memory. This is performed with SAVE_VARIABLE and requires an additional config section. This is helpful if you want to save a particular value that’s usually lost when restarting the firmware. There are also ways to define variables, set a delay before execution, and change the screen UI. Since they call for a more complex syntax, we will not explore them in this article, but you can read more in the official documentation.
Running Macros
Now we’ve seen how to create a macro, but you may still be wondering how to actually run one. There are three ways to do so:
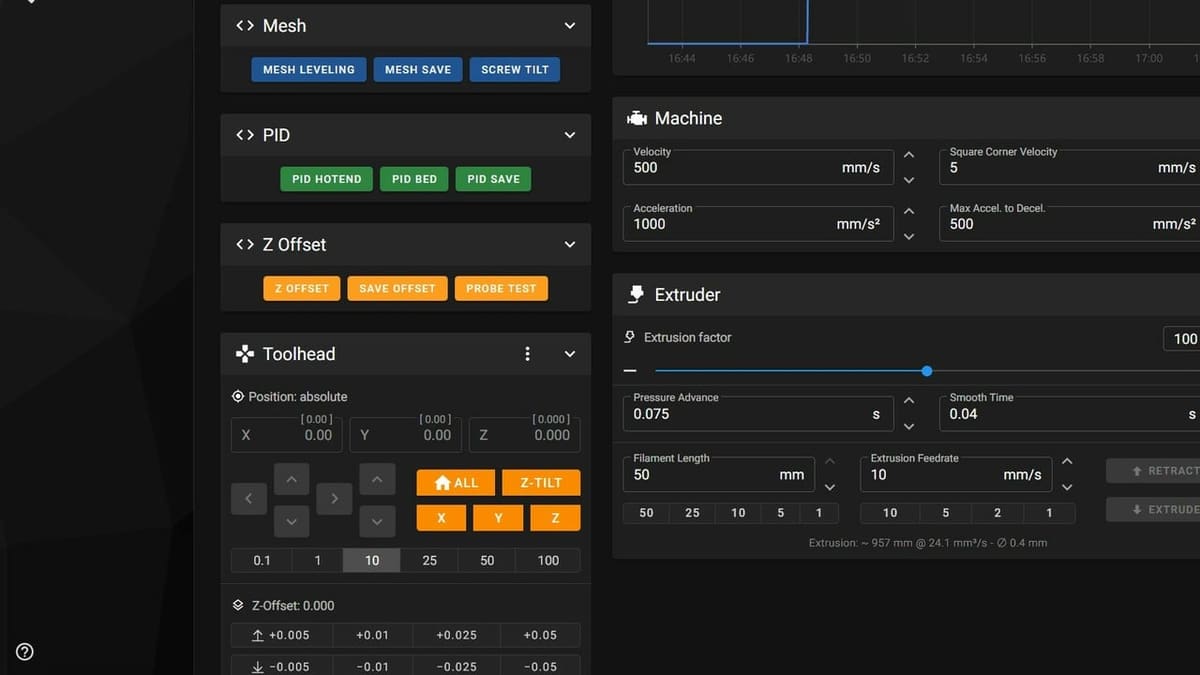
- Option 1: The macro can be mapped to a UI button and pressed by the user. This part is handled by the web interface of your choice (OctoKlipper, Mainsail, or Fluidd) and can be accessed through the settings. For example, in Mainsail, you can add and manage macros from the gear icon in the top right corner, then with the Macros submenu.
- Option 2: It can be issued in the Console terminal. Simply copy-paste the name of the macro and press enter.
- Option 3: The macro can be run automatically by Klipper if it’s present in the G-code being executed. When a G-code file is parsed, Klipper will recognize any command that carries the name of the defined macro and execute it.
All of this information can be extremely useful but also disorienting. Let’s go over some of the most common use cases to help clear up any confusion.
Use Cases
There are infinite use cases for Klipper macros, as they’re not defined structures but templates. Here’s a brief rundown of the most common ones:
- Automating a boring routine: If the printer needs to be leveled before each print, you perform frequent filament swaps, or if you want to simply click a button and have a whole set of actions happen automatically, you can write a macro.
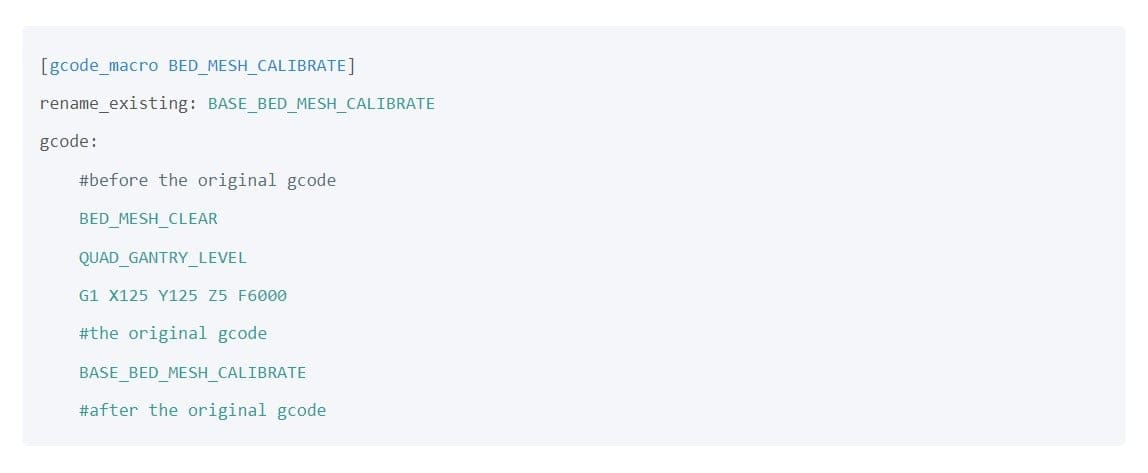
- Start and end G-code: With macros, these pieces of code can now be defined directly in firmware instead of having to re-slice the part every time in order to apply a change.
- G-code translation: If you sliced your model for a Marlin-flavored printer and some commands are not defined in Klipper, you can set up a macro to translate them to their Klipper equivalent.
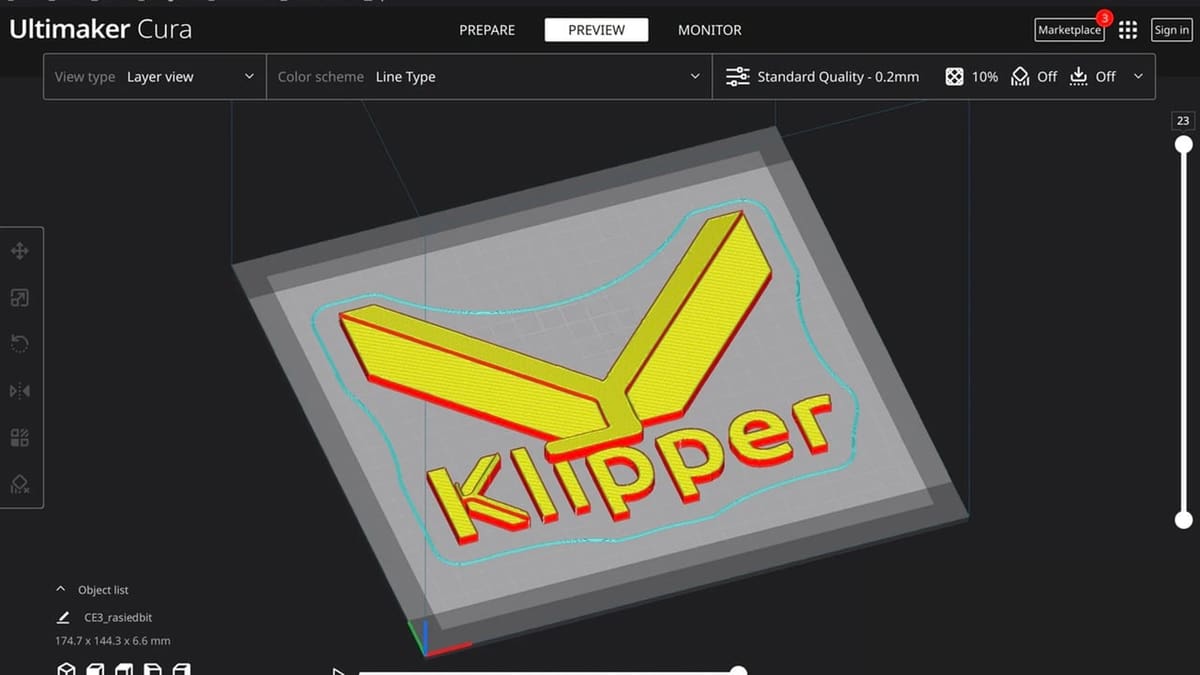
- Passing filament metadata from the slicer: Thanks to deep integration with the Moonraker API, web interfaces such as Mainsail and Fluidd can read additional information from the G-code and display it when choosing a file. The metadata includes filament type and name, layer height, and much more. It’s necessary to set up a macro in the start of the slicer G-code for this to be effective.
And many more are popping up every day, thanks to the incredible and dedicated community! Want to contribute yourself? Next up are some tips and tricks for writing clean and effective macros.
Tips & Tricks
We all know that sometimes things simply don’t go as planned. Here are a few suggestions for identifying problems and avoiding unnecessary headaches.
Comments Are a Must
While you might remember what that specific line did, others reading your code might have a harder time. To avoid confusion and speed up the troubleshooting process, comment on every step and include descriptions of the macro’s purpose.
Code Cleanliness Is Not Just for Aesthetics
Having an organized .config file is not only easy on the eyes. It can help you save time when searching for something, reduces the risk of errors, and generally helps identify what’s responsible for an issue. To keep your macros clean and tidy, either create a specific section for them or a dedicated file, as previously mentioned. Furthermore, remember to use non-generic names (e.g. avoid using terms like macro, variable, actions, x, my macro, and so on). Name your macros in a way that helps you remember the function of the command.

The Parsing State Affects the G0 and G1 Commands
In other words, depending on what comes before the move command, the actual travel move might differ from our initial intent. We can avoid unwanted movement requests by creating a separate G-code state before issuing the command and restoring it afterward. In the middle, we’ll also include a G91 to use relative positioning from the start point.
The code should look like as follows:
[gcode_macro JOG_X_10]
description: Move the X axis in increments of 10mm
gcode:
       #Save the current status to restore it after we're done with our move
       SAVE_GCODE_STATE NAME=jog_x_state
       #Set relative positioning
       G91
       #Issue the command
       G1 X10 F300
       #Restore the status quo to avoid conflict with the reference system
       RESTORE_GCODE_STATE NAME=jog_x_state
Check Before Running Someone Else’s Macros
Since you don’t know how different their setup is from yours, search their macros for commands that might conflict with your configuration. For example, look for different pin names, longer travel moves, bigger boundaries for the axes, and similar machine-specific definitions.
Try a Macro Before Issuing It During Printing
To avoid surprises, test new macros before including them in the G-code. Simply execute them outside of a print job to check for possible undesired outcomes, like movements out of bounds or halts.
Where to Find Them
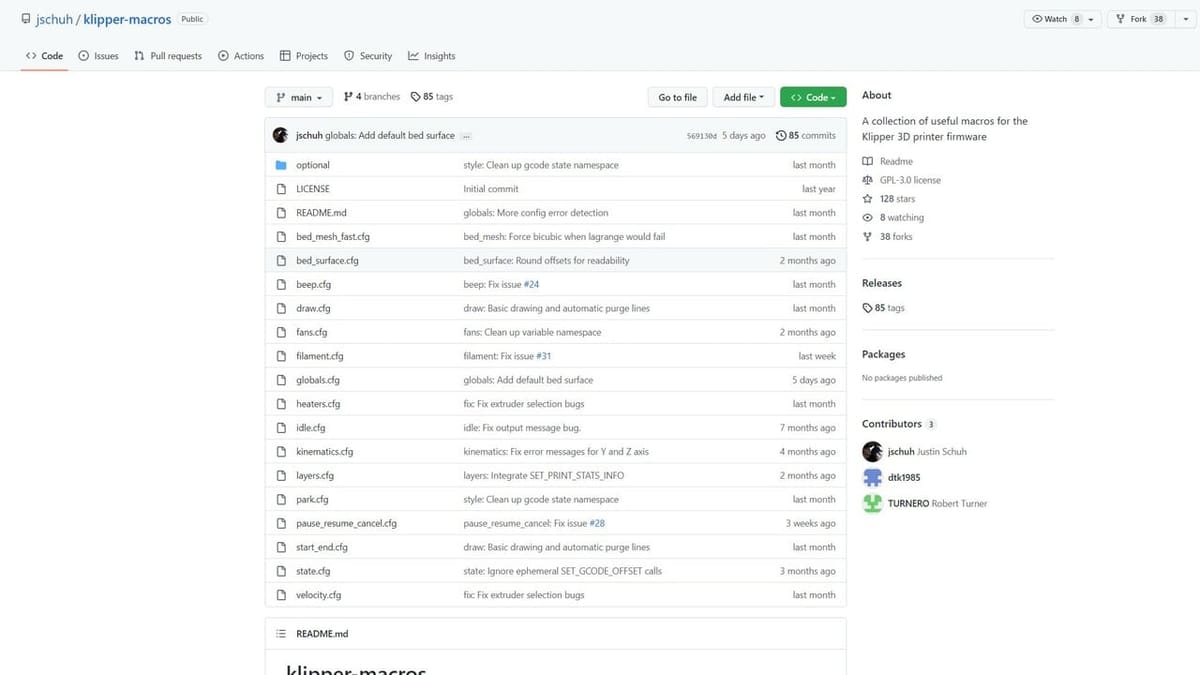
Since Klipper isn’t a niche project anymore, the community has created a lot of macros to cover the most common needs. Most users nowadays can copy-paste the code and modify it slightly instead of writing their own. Here are a few helpful resources:
License: The text of "Klipper: Macros – Simply Explained" by All3DP is licensed under a Creative Commons Attribution 4.0 International License.