From makers to designers, many have taken to 3D scanning as a way to recreate real-world objects in a digital domain. And of the many devices and methods out there, some turned to the Kinect, a motion-sensing device originally developed by Microsoft for the Xbox 360.
The first device, the Kinect for Xbox 360, was released in 2010, with a PC-compatible version, Kinect for Windows, being released in 2012. Later, in 2013 and 2014, upgraded versions of the two devices were released, called Kinect for Xbox One and Kinect 2 for Windows. As a result, the two waves of devices commonly became known as the Kinect v1 and the Kinect v2.
In 2019, Microsoft released the Azure Kinect, a new iteration of the Kinect that is, according to Microsoft, primarily targeted at developers and commercial businesses. With its arrival, Microsoft canceled support for the Kinects v1 and v2, but they still work and can be found on the second-hand market.
Microsoft’s site for the Azure features use cases for the fitness, filmmaking, and healthcare industries, and unlike the previous Kinect models, it’s not compatible with the Xbox. Yet, despite its B2B orientation, hobbyists and researchers alike have been using the Azure for 3D scanning as well as animation purposes.
In this article, we’ll focus on the more consumer-oriented v1 and v2 models and how they can be used as scanners. Let’s start with a more detailed description of both Kinects, then move on to a guide for each.

Kinect v1 vs. Kinect v2
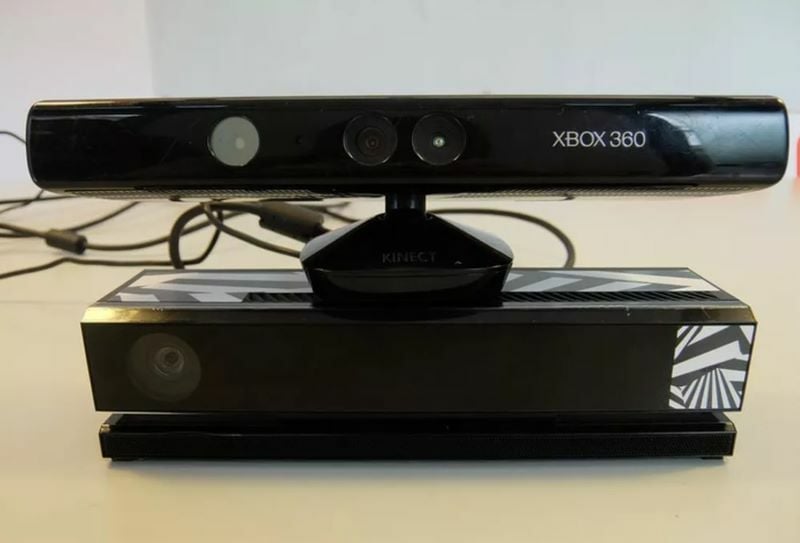
The Kinect scanners use the same technology a mid-range 3D scanner might have, using infrared lights and sensors to calculate the field of depth of and around an object. Yet, while the Kinect v1 uses triangulation paired with structured light, the Kinect v2 uses time-of-flight calculations.
Furthermore, the v1 has a resolution of 640 x 480, while the v2 has an HD quality of 1920 x 1080. The second version can also sense farther than version 1 and has a wider field of view (around 70 degrees). Along with this viewing advantage, version 2’s time-of-flight method of IR sensing makes it less prone to interference from other signals.
Lastly, while the v1 can work with Skanect, scanning software from Occipital, the v2 cannot. It does, however, work with Microsoft’s 3D Scan. But we’ll get more into this later on.
Acquiring the Hardware
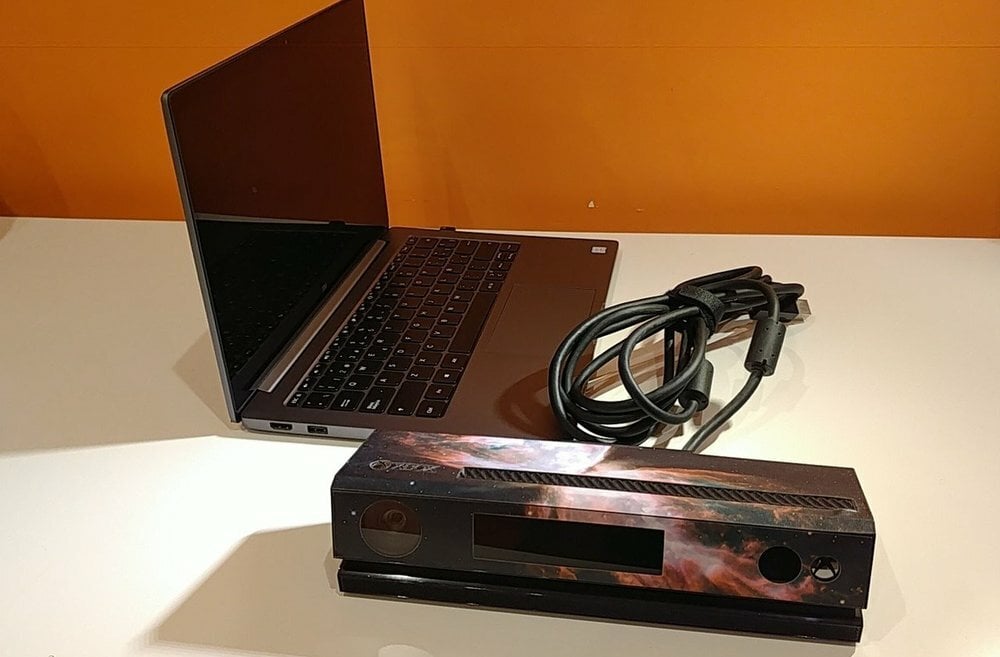
The first thing we need to do is acquire the necessary hardware. There are only three things you’ll need in order to start 3D scanning with a Kinect.
- The Kinect: Whether the v1 or v2, for Xbox or Windows, it doesn’t matter as long as you have a device. The Kinect v1 and v2 models have been discontinued but can still be purchased second-hand through retailers like Amazon, eBay, and GameStop.
- The PC adapter: As you may know, the Kinect for Xbox models were made to be used with their respective Xbox versions, not a PC. That’s why you will need to obtain a Kinect 360 to PC adapter or a Kinect Xbox One to PC adapter. Both Kinect for Windows models, however, come with the necessary PC adapters.
- A PC: This can be a laptop or desktop computer with a free USB port.
Before you get started, make sure yours meets the minimum requirements listed below:
- Latest Kinect drivers downloaded (more below)
- 64-bit processor
- Dual core (3.1Ghz) or faster CPU
- 4 GB of RAM
- Nvidia CUDA graphic card or a Kinect Fusion compatible GPU
- A compatible USB 3.0 port (Intel or Renesas chipset)
Downloading the Drivers & Software
It would be too good to be true if you could just plug in the Kinect and magically start 3D scanning, but it doesn’t get much more complex.
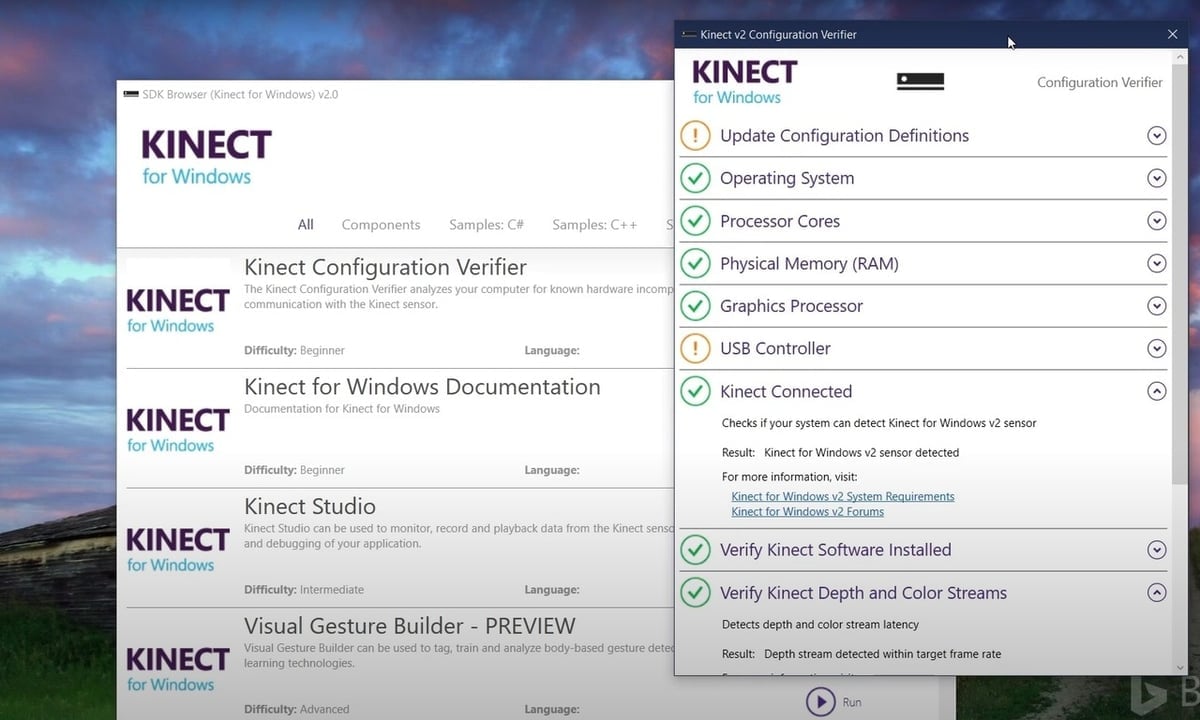
Once you have your Kinect plugged into your PC, you’ll need to download the drivers. This is the code that will tell your computer how to handle the Kinect. If you’re running Windows 10, it’s very likely that the drivers will download automatically after your PC recognizes the Kinect. Very handy dandy, right? If that didn’t happen, however, you’ll need to download the drivers from Microsoft.
Secondly, you’ll want to download the software that will allow you to use your Kinect for 3D scanning.
- Skanect is third-party software that’s compatible with the Kinect, Structure Sensor, or Asus Xtion. Skanect has both a paid and free version, the only main difference being that the paid version allows you to export the model with more faces and in color. You can download Skanect from Occipital.
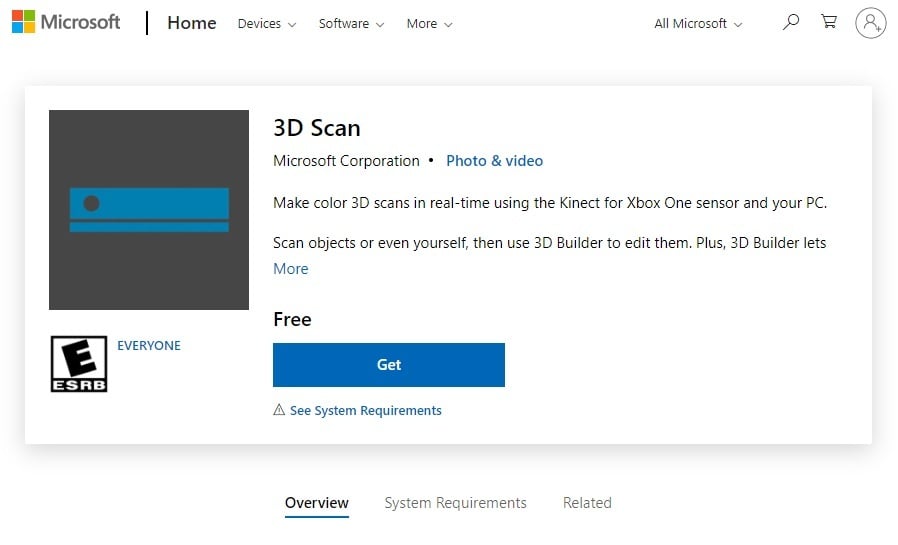
- 3D Scan is a free Window’s 10 app that will use your Kinect to create 3D models. The software can be downloaded from Microsoft. If you have the Kinect v2, you’ll want to go with 3D Scan because the v2 doesn’t work with Skanect.
Next we’ll discuss how to use your Kinect as a 3D scanner in both programs.
Using Skanect
Setting Up the Software
If using Skanect, go ahead and open the “.exe” file once the download is finished.
You’ll be presented with a very simple interface, as the software is designed to run step by step, making it easier to use.
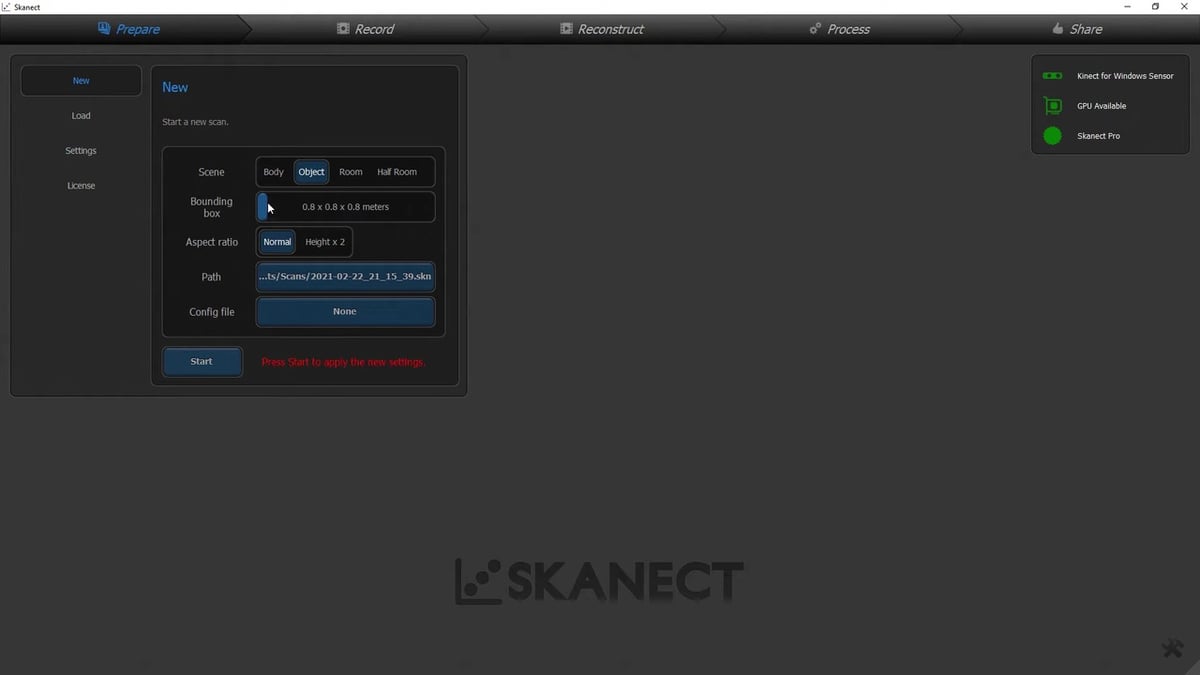
- Click “New” on the menu under the “Prepare” tab. The scene options allow you to play around with various settings depending on what you’re scanning.
- Body is great for scanning a person.
- Object is intended for scanning everyday objects, such as a chair or lamp.
- Room allows you to scan the entirety of a room.
- Half Room is the same as the Room setting except you focus on a specific area of the room.
- Choose the bounding box size most appropriate to the object you’re scanning. Presets are given, but you can also define a custom one by clicking the slider and moving it with the mouse.
- Choose a path to save the scanned object. This won’t be the final model but rather the .skn file, which you can later open in Skanect again.
Once you’ve finished this setup, click “Start” and you’ll be taken to the next step in the scanning process.
3D Scanning
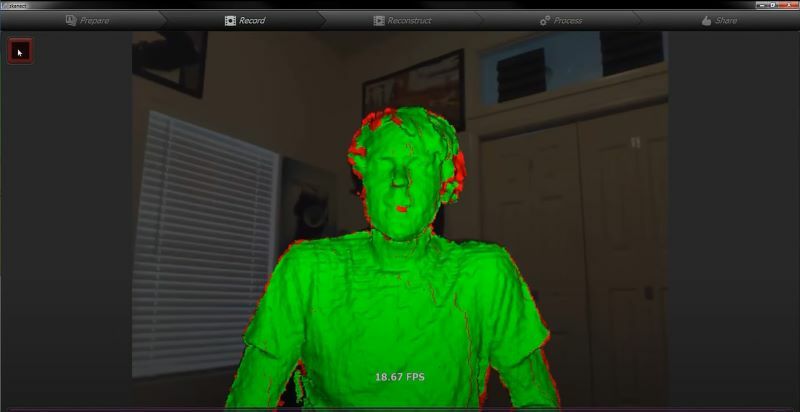
You should now see a bounding box and an area with a grid. The scan of the model will appear inside this box as you scan with your Kinect 3D scanner. You can navigate through this area using your right, left, and wheel buttons on your mouse.
- Press “Delay” to pause the scanner while you get your scanner prepared.
- Press the red button in the top left of the screen to start 3D scanning.
- Once finished, click the red button again to stop scanning.
Scanning Tips
The process of scanning may seem quite simple: Just hover the Kinect over the object, and the scan will appear on the computer. And you’re not wrong, it’s mainly that. But there are some things to keep in mind in order to get better scans.
Avoid Rotating the Object
Although this applies mainly to photogrammetry, it can still be applied to normal 3D scanning. Skanect will use the background to help track the position of the object, so you’ll want to move the Kinect 3D scanner around the object as if it were orbiting the object.
If you rotate the object, the background will always be the same, which will make the scanning harder. If you’re unable to orbit the scanner around the object, you could try placing the object on a turntable and keeping the Kinect in place while rotating the object.
Ensure Good Lighting
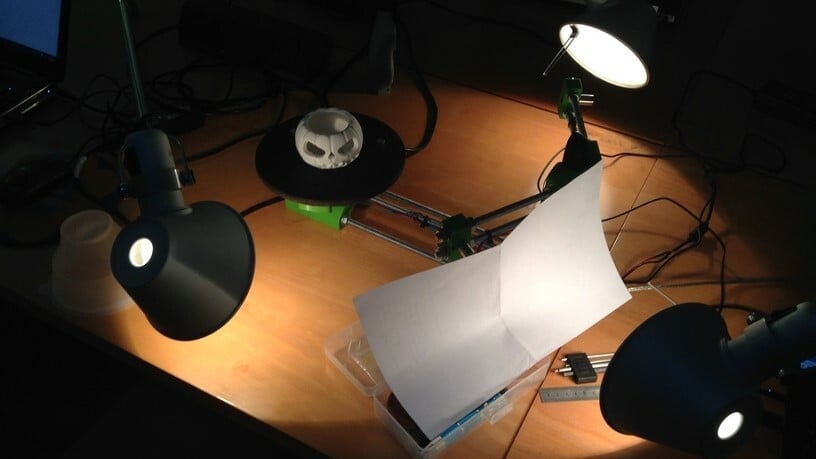
You’ll want to make sure there’s sufficient and steady lighting through the entire scanning process. Bad lighting will make it harder for the Kinect to capture the object’s colors, which will most likely result in a poorly colored model in the final render.
Take Your Time
Most scans will work best if done slowly and with patience, so don’t rush while scanning an object. Make sure you pass the Kinect 3D scanner through various angles around the object and check the screen on your PC while scanning to make sure all the areas of the object are appearing properly.
Processing the 3D Scan
If you’re happy with the scan, click “Reconstruction” on the top bar of the interface. This will allow the 3D scan to be converted to a 3D model.
Skanect allows you to use the CPU or GPU for the reconstruction process. Remember that a stronger PC will take less time to reconstruct your model. After you’ve selected the type of reconstruction and the amount of detail, click “Run”.
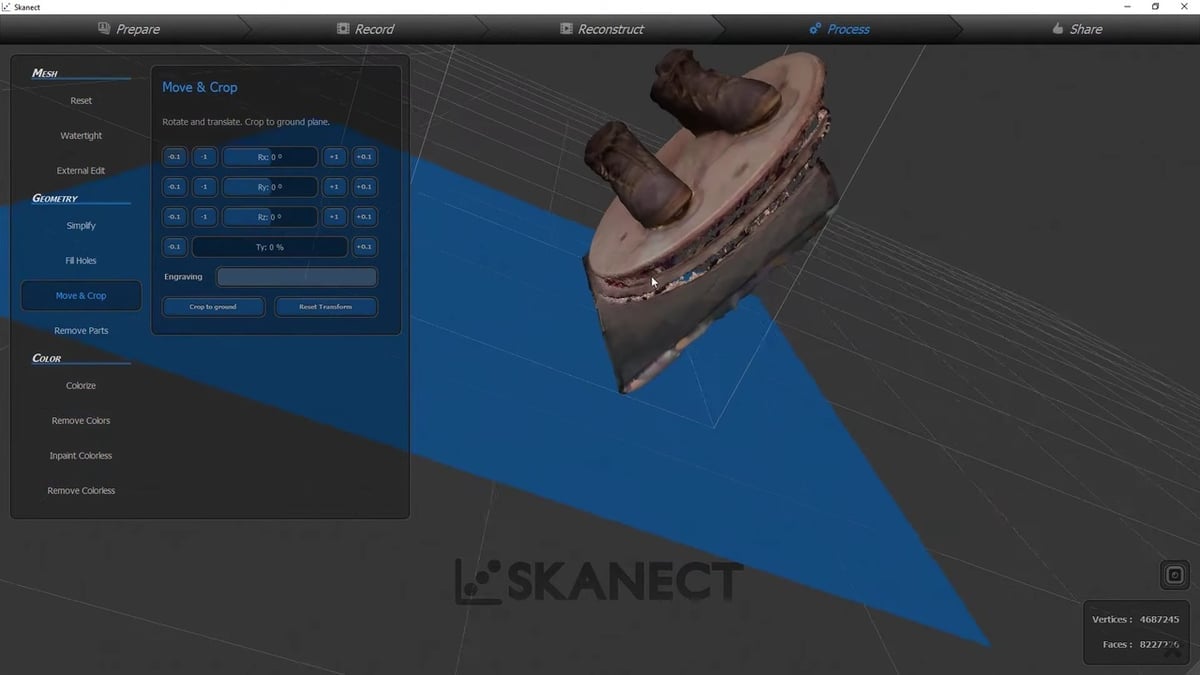
After Skanect has finished reconstructing the model, go to the Process tab. Here you’ll have various options to edit your scan or you can just leave it as it is. For a deeper dive into all the options, check out Step 3 in How to 3D Scan with Skanect.
Lastly, click “Share” for the final process. Here you can choose whether to save the object locally or export it in up to four different formats.
Et voilà! You can now use your 3D model taken from your Kinect 3D scanner in your chosen software, to 3D print your new model, or however you desire.
Using Microsoft 3D Scan
Setting Up the Software
3D Scan is available for download from the Microsoft Store. When you open the application and have the proper drivers for the Kinect installed, you’ll see that the program automatically recognizes the device and shows the view of the device in the window.
Changing Settings
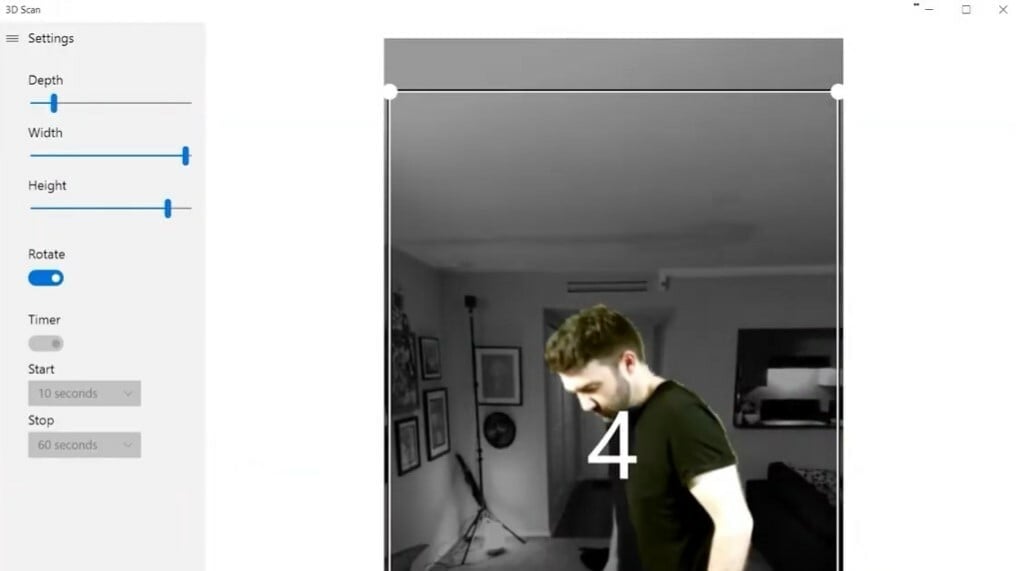
On the left side of the window, you will see a Settings tab where you can change the depth, width, and height of the scan.
You can also change how you scan with the Rotate setting. When Rotate is activated, you scan by moving the Kinect with your hand around the object you want to scan. When this setting is off, you place the object you want to scan on a rotating platform and keep the Kinect in one place facing the object.
Regardless of the option you choose, take your time scanning to help your sensor get a more accurate reading. The same scanning tips we outlined above are relevant regardless of the scanning software.
Scanning with 3D Scan
To start scanning, press the red “Scan” button on the bottom of the window. Once you have gotten a successful scan of the object, click the “Stop” button. If you’re not satisfied with your scan, just press “Cancel” next to the record button at the bottom of the window.
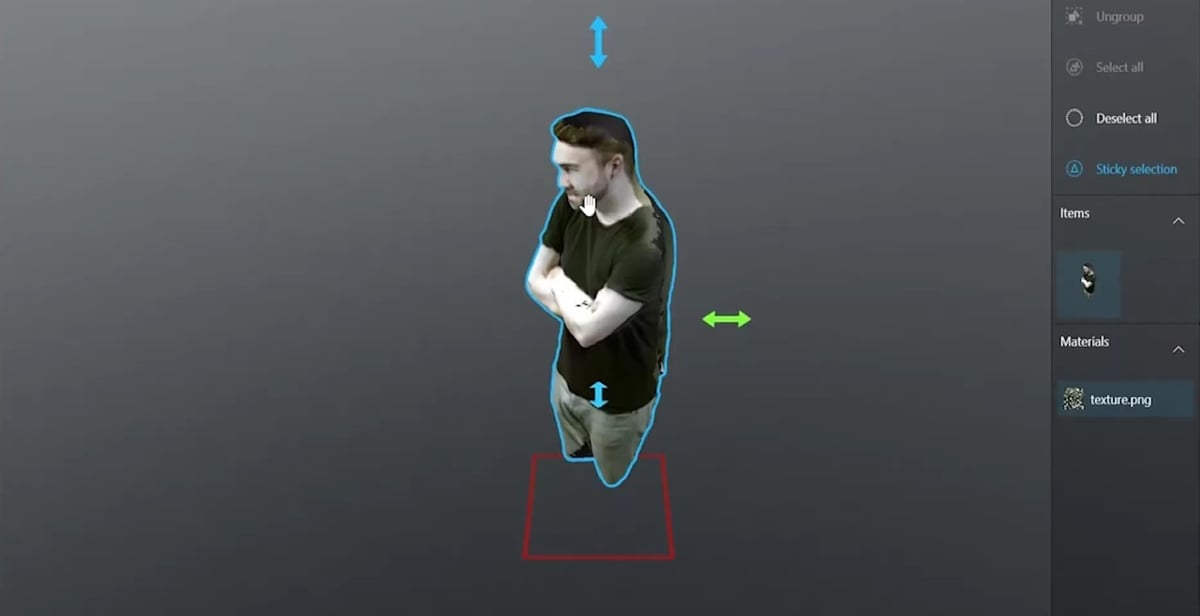
Once you’ve completed a successful scan, press “Save”, which will allow you to save the file in your preferred format along with the file path. If you’re interested in editing the scan, this can be done in Microsoft’s 3D Builder app.
Azure Kinect
Azure vs. Previous Kinects
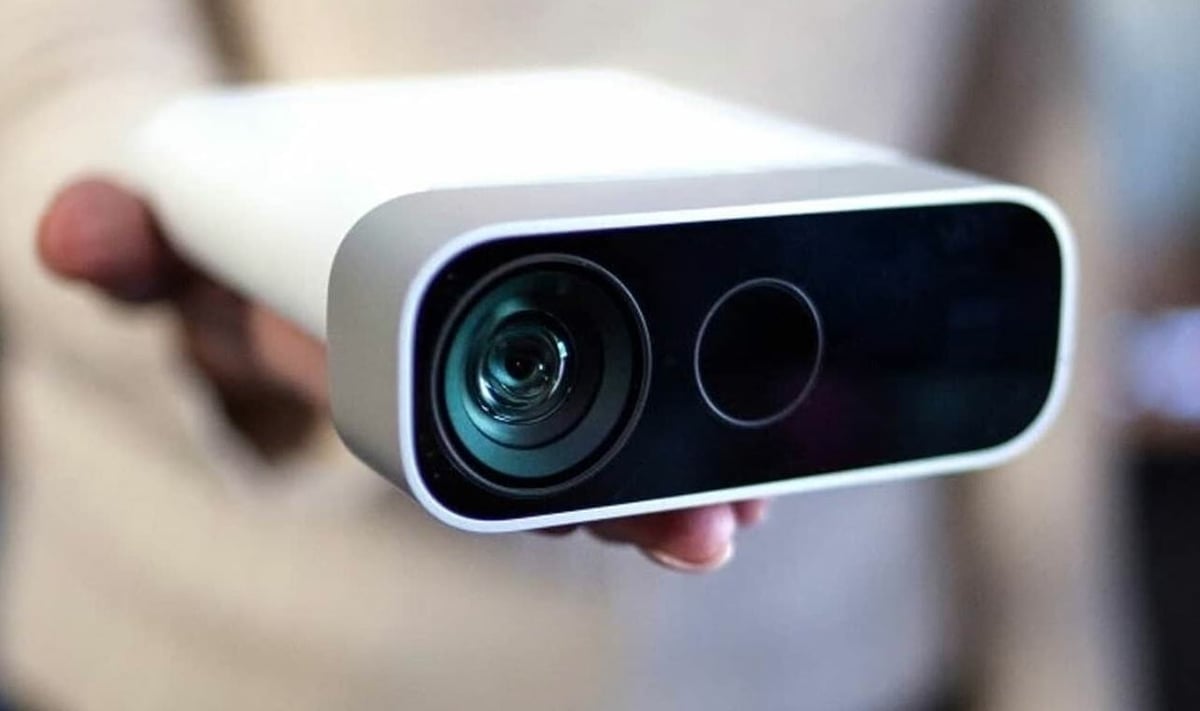
As we mentioned, Microsoft canceled their support for the Kinects v1 and v2, resulting in many compatibility issues between the older devices and various scanning programs. Replacing them, so to speak, was the Azure Kinect, which was released in March 2020.
The device is named after Microsoft’s cloud computing program, Azure, and it’s quite different from the v1 and the v2. To start, it’s lot smaller and has a completely different shape. And as you might expect, it produces much more detailed and accurate point cloud scans, as can be seen in this video from YouTuber Takashi Yoshinaga.
The Azure also offers several new and improved features. For example, it has a 1-MP time-of-flight sensor, a 12-MP CMOS sensor, and many other sensors that allow one to take high-quality scans.
Of course, having all of these upgrades, the Azure comes with a much bigger price tag than those of the v1 and the v2. While they cost somewhere in the range of $40-150 (depending on where you get them), the Azure will set you back a whopping $1,250.
Because of its relative inaccessibility to hobbyists, both due to its price and its software, we won’t go into detail about setting up and scanning with the Azure. But the following are a few notes on which programs one might try.
Compatible Software
Unfortunately, there aren’t too many consumer-focused scanning programs that directly work with the Azure Kinect. However, there are a few solutions, and one excellent choice is KinectFusion (also referred to as KinFu).
It’s difficult to find information on how to set up the Azure with KinectFusion, and this likely has to do with the fact that it’s necessary to work with the device’s software development kit (SDK).
Nevertheless, if you’re willing to wrestle with the SDK, some beautiful scans await you. YouTuber Rene Schulte’s video demonstrates just how accurate the Azure’s point cloud scans are with KinectFusion.
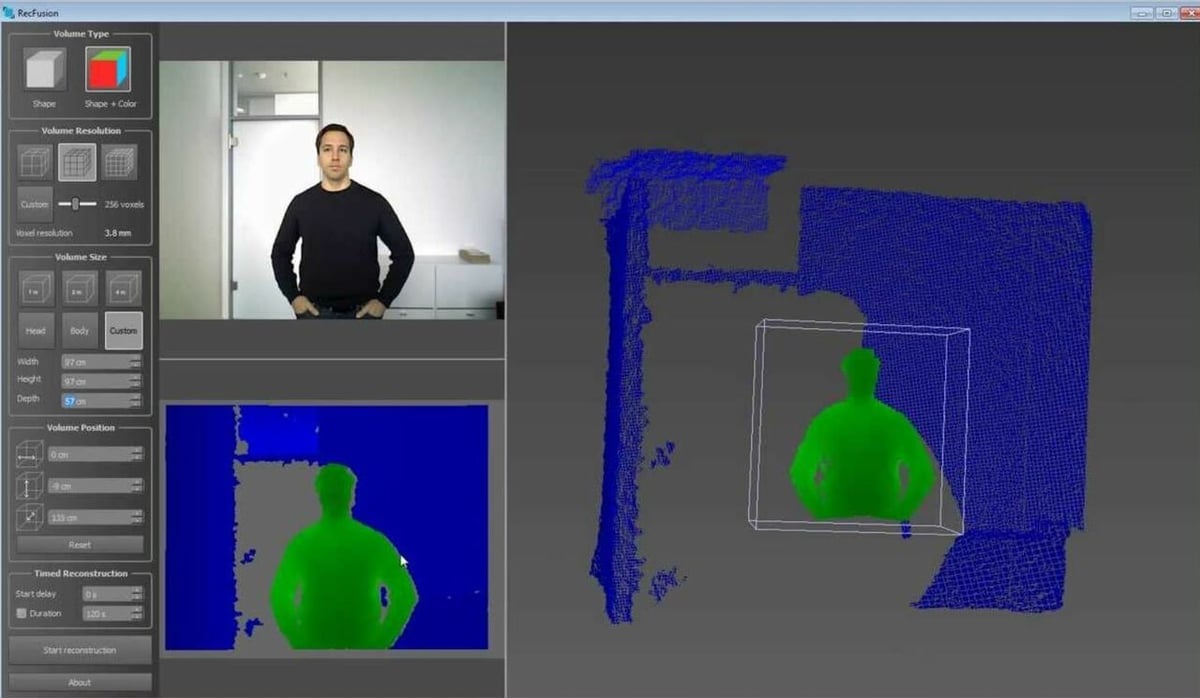
RecFusion is another option recommended by some, but it has limited 3D scanning capacity. Lastly, Open3D supports the Azure with some configuration, and it allows you to create point clouds and meshes.
License: The text of "Kinect as a 3D Scanner: An Easy Beginner’s Tutorial" by All3DP is licensed under a Creative Commons Attribution 4.0 International License.