GRBL Software: All You Need to Know

GRBL is free, open-source firmware that enables precise control of your CNC machine. Read on to learn how to get it up and running!
GRBL has changed the world of DIY computer numerical control (CNC) machining since it first came out in 2009. This open-source software, made to run on Arduino microcontrollers, has become the top choice for hobbyists, makers, and teachers who want an affordable and flexible way to control their CNC machines.
Basically, GRBL acts as the translator between your CNC machine and the G-code commands you give it. It turns digital instructions into precise movements of your machine’s motors, allowing you to mill, carve, or cut different materials accurately.
The real strength of GRBL is that it’s open source. Licensed under GPLv3, it supports a lively community of developers and users who keep improving it with every update. This teamwork makes the software strong and reliable and also lets users customize and adapt it for their unique projects.
In this article, we’ll introduce you to GRBL, explain its uses, and show you how to start using it yourself. Let’s dive in!

System Requirements & Installation
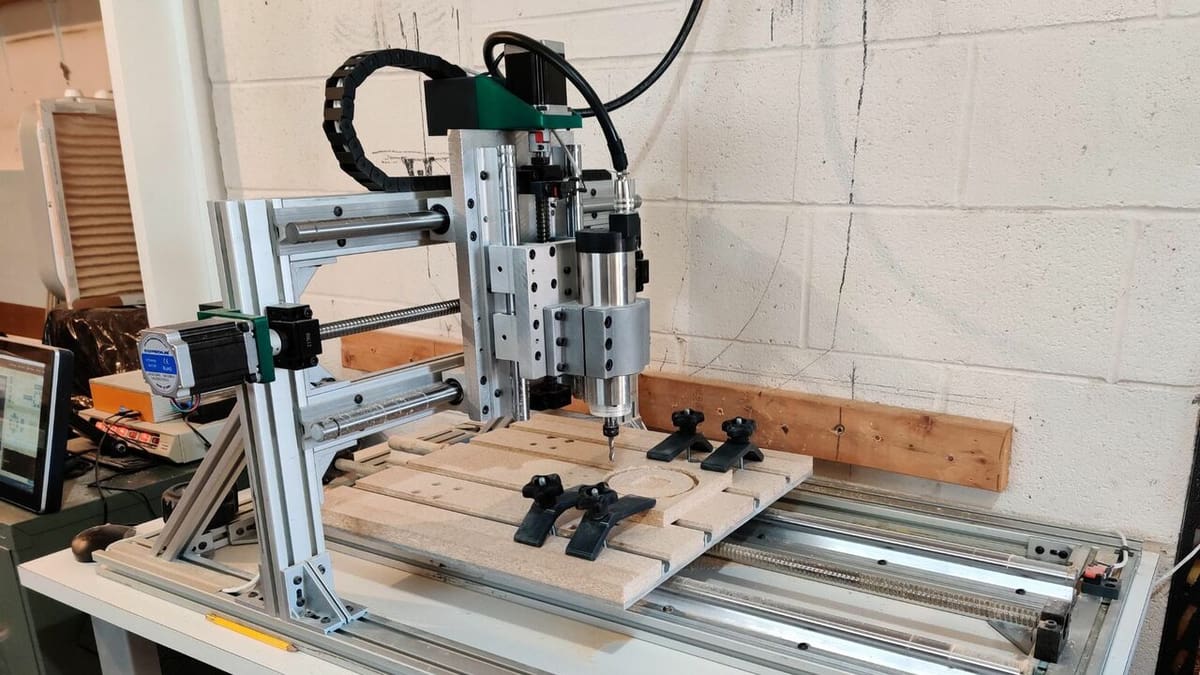
Bringing your CNC machine to life with GRBL starts with gathering the necessary hardware and software components. Fortunately, GRBL is designed to work with readily available, budget-friendly hardware, making it accessible to a wide range of makers.
Hardware
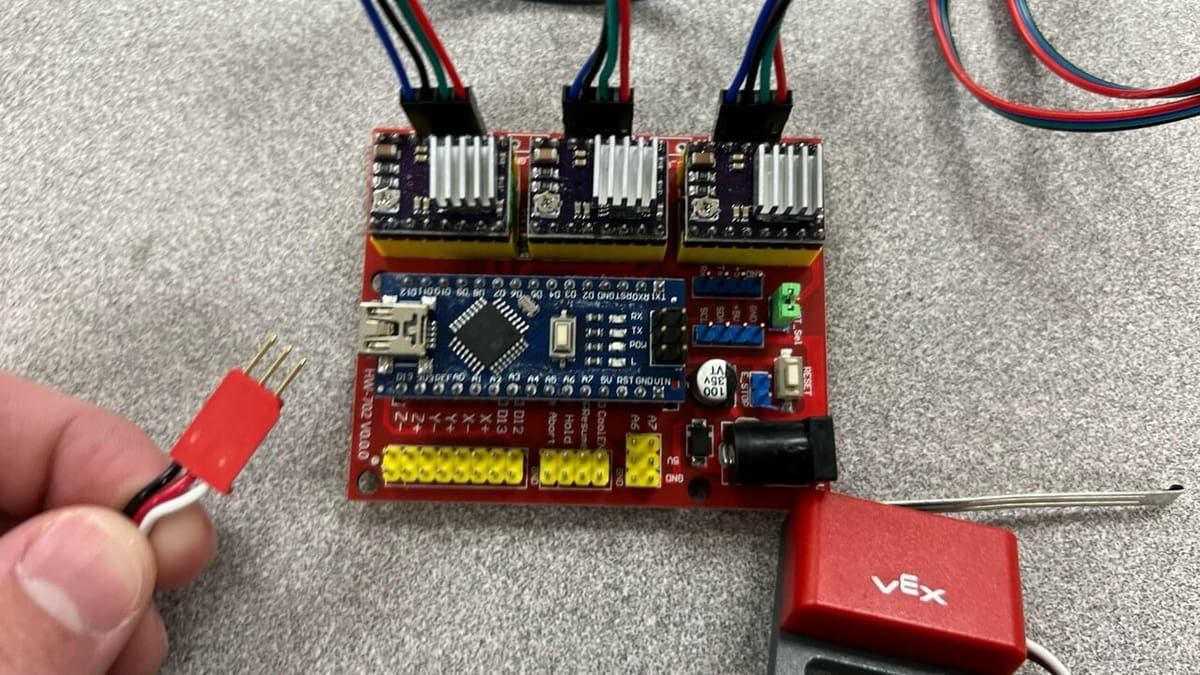
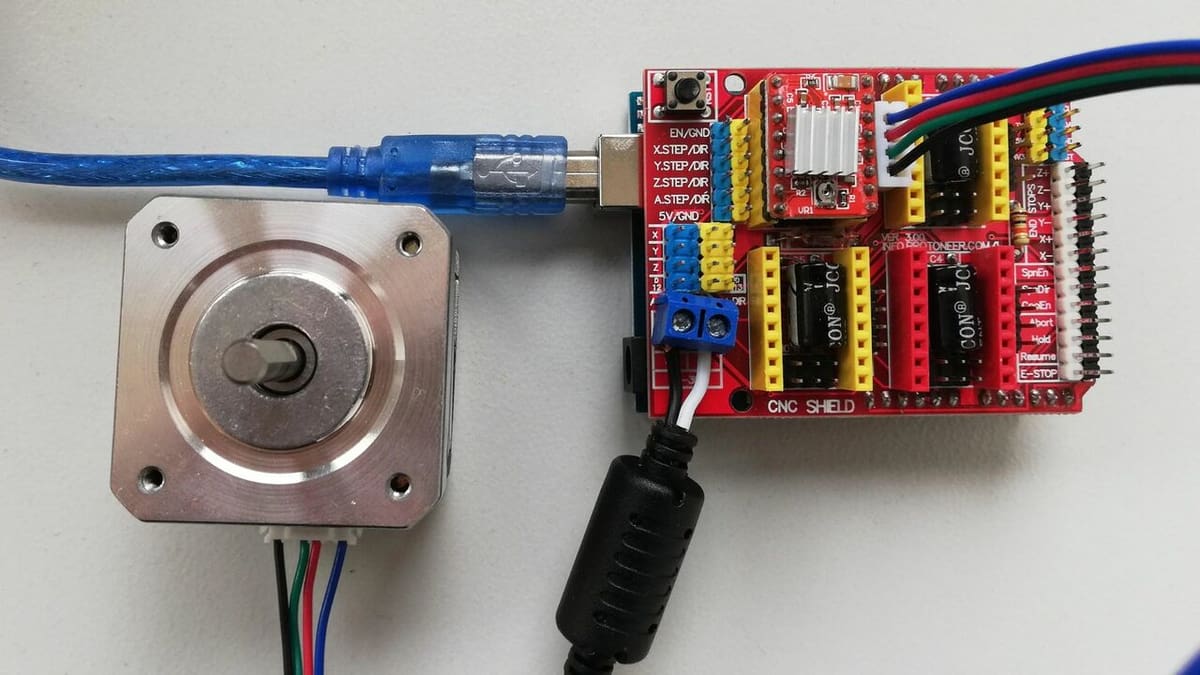
To set up GRBL, you’ll need an Arduino Uno or a compatible board, such as the Arduino Nano or any ATmega 328-based board. The Arduino Uno is the most common choice due to its widespread availability and ease of use.
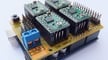
To simplify the wiring and connections between the Arduino and your CNC machine’s components, a CNC shield is highly recommended. This shield typically includes stepper motor drivers and connections for limit switches, spindle control, and other peripherals. Stepper motors are essential, as they drive the movement of your CNC machine’s axes, with the number and type varying based on your machine’s design and capabilities. Finally, you’ll need a computer and a USB cable to upload the GRBL firmware to the Arduino and to establish the necessary connection.
Software
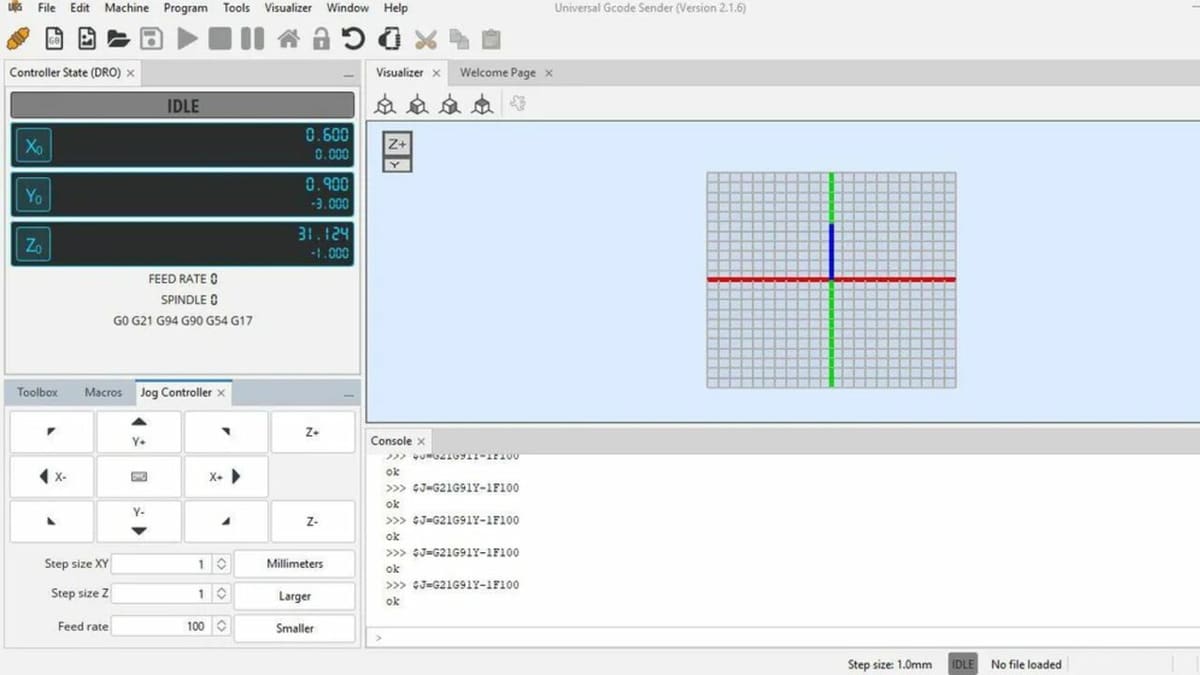
On the software side, the Arduino Integrated Development Environment (IDE) is essential. This is the software environment used to program and upload code to the Arduino board, and it can be downloaded for free from the official Arduino website. Additionally, you’ll need a G-code sender to send G-code commands to the Arduino and control your CNC machine. A popular option is the Universal G-code Sender (UGS), which is user-friendly and offers various features to streamline the CNC control process.
How to Install GRBL
Installing GRBL on your Arduino board is a pretty straightforward process. Here’s a detailed guide to help you get started:
- First, you need the Arduino Integrated Development Environment (IDE) to upload GRBL to your Arduino. You can download the latest version of the Arduino IDE from the official Arduino website.
- Next, download the GRBL firmware from the GitHub repository. From the top right, click on the green “Code” button and select “Download ZIP” from the drop-down options.
- Once the download is complete, locate “grbl-master.zip” in your Downloads folder.
- Right-click on the ZIP file and select “Extract All…”.
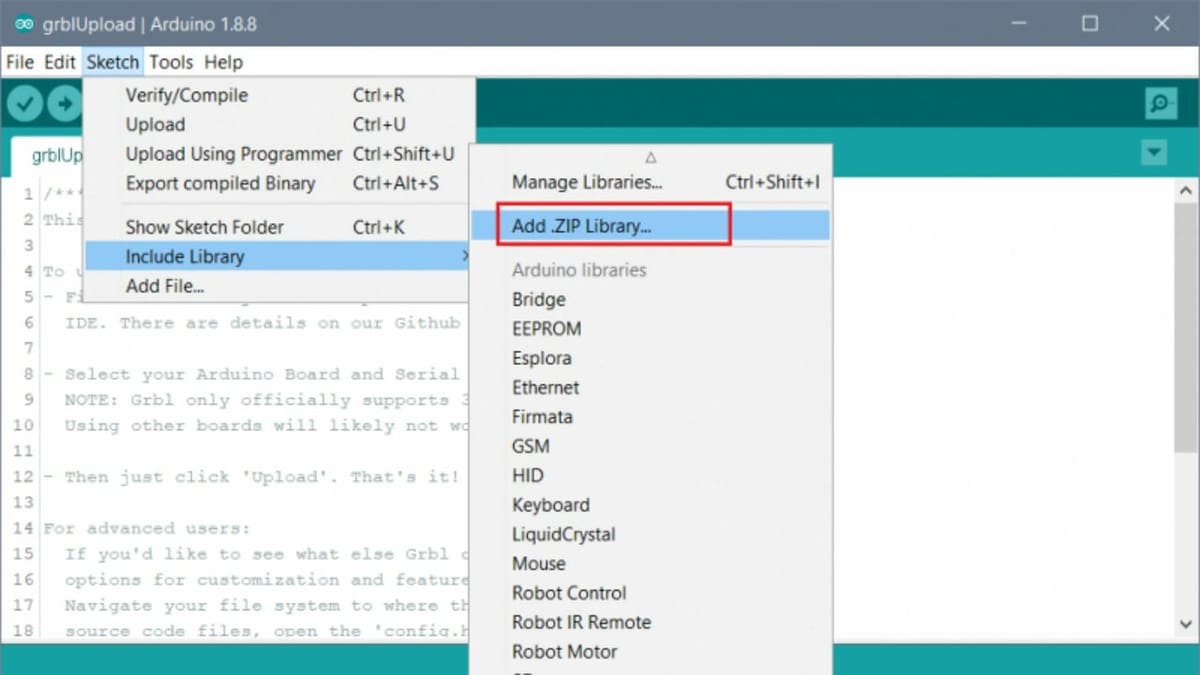
- Add the extracted GRBL files to the Arduino IDE by opening the Arduino IDE and going to “Sketch > Include Library > Add .ZIP Library…”.
- Navigate to the extracted “grbl-master” folder and select the “grbl” folder, then click “Open”. This action will add GRBL as a library in the Arduino IDE.
- Upload GRBL to your Arduino board by going to “File > Examples > grbl > grblUpload”.
- A new sketch will open. This sketch might look minimal because most of the functionality is within the GRBL library.
- Connect your Arduino board to your computer via USB.
- In the Arduino IDE, select your Arduino board type from “Tools > Board”.
- Select the appropriate COM port from “Tools > Port”.
- Click the “Upload” button (right arrow icon).
The Arduino IDE will compile and upload the GRBL firmware to your Arduino board!
Features & Functions
GRBL’s capabilities extend far beyond basic G-code interpretation. The feature set is designed to empower users with precise motion control, real-time adaptability, and safety mechanisms that ensure reliable and efficient CNC machining. Let’s get into the core functions that make GRBL a powerhouse in the DIY CNC world.
G-code Interpreter
GRBL’s core functionality is its G-code interpreter, which translates standard G-code commands into precise movements for CNC machines. This interpreter is unique in its efficiency and ability to run on low-cost hardware like the Arduino Uno. It democratizes CNC control, making advanced features accessible to hobbyists and small-scale manufacturers without the need for expensive industrial controllers.
The interpreter’s robust error-checking mechanisms also help ensure that G-code errors are detected and reported before they can cause damage to the machine or workpiece. It reads each command, decodes the required movement, and translates it into motor signals, ensuring precise control over the machine’s axes.
Key G-code commands include:
- G00 (Rapid Move): Moves the machine at maximum speed to a specified coordinate without engaging the cutting tool. This command is essential for positioning the tool quickly.
- G01 (Linear Interpolation): Moves the machine to a specified coordinate at a defined feed rate, engaging the tool for cutting. It is used for straight-line cuts.
- G02 (Clockwise Arc) and G03 (Counterclockwise Arc): Command the machine to move along a circular path, allowing for smooth arcs and circles. They are crucial for creating complex shapes and curves.

Real-time Control
GRBL allows for real-time control, enabling users to send commands and adjust parameters on-the-fly. This feature is important during machining operations as it allows for immediate responses to unforeseen issues such as tool wear, material anomalies, or unexpected machine behavior.
- Feed Hold (!): Pauses the machine immediately. This is useful if an issue is detected that requires immediate intervention.
- Resume (~): Resumes operation after a pause. This allows the operator to continue machining once the issue is resolved.
- Cycle Start (~): Begins the execution of a loaded G-code program.
- Soft Reset (“Ctrl + X”): Resets the system without restarting the entire machine. It’s useful for quick recoveries from errors.
GRBL’s real-time control commands, like the mentioned feed hold (!), cycle start (~), and soft reset (“Ctrl + X”), are typically sent through your G-code sender software. Universal G-code Sender (UGS) is a popular choice that provides a user-friendly interface for sending these commands and monitoring machine status in real-time.
By enabling real-time interaction, GRBL gives you the power to quickly respond to unforeseen circumstances, ensuring smooth and successful machining operations.
Motion Planning (Look-ahead)
GRBL’s advanced motion planning feature, known as “look-ahead,” analyzes up to 18 consecutive commands to optimize the toolpath. This feature is automatic but can be fine-tuned through configuration settings in GRBL’s parameters to match specific machine dynamics and project requirements. This foresight ensures:
- Smooth acceleration and deceleration: By planning ahead, GRBL adjusts speeds to maintain smooth transitions between movements, reducing mechanical stress and improving overall machine longevity.
- Jerk reduction: Minimizes sudden changes in velocity, which can cause wear and tear on the machine and affect the quality of the finished part.
- Improved accuracy: Ensures that the machine follows the intended path precisely, which is especially important for complex geometries and high-precision work.
Error Handling
Safety and reliability are paramount in CNC operations. GRBL includes robust error handling features such as:
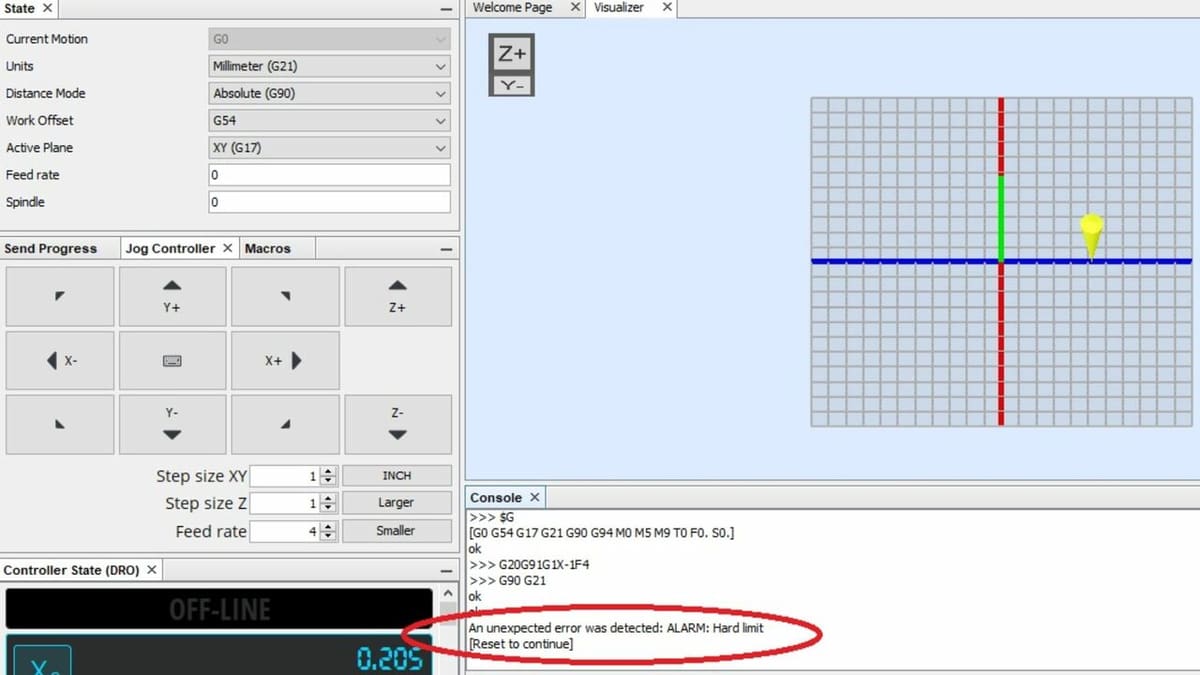
- Limit switch support: Prevents the machine from moving beyond its physical limits, avoiding potential damage. When a limit switch is triggered, GRBL stops all motion and alerts the user.
- Error codes and messages: GRBL provides detailed error messages that help users diagnose and fix issues. Common errors include invalid G-code commands and mechanical failures.
- Soft limits: Configurable limits within the software that prevent the machine from attempting to move beyond its defined work area, enhancing operational safety.
Customization
GRBL offers extensive customization options to tailor the firmware to specific CNC machine configurations.
Among other commands, key customizable settings include:
- Steps per Millimeter ($100, $101, $102): This defines the number of steps the motor must take to move the machine 1 mm along the X-, Y-, and Z-axes, respectively. Accurate steps per millimeter settings are important for precision. Adjusting this parameter ensures your machine moves the precise distance you intend it to.
- Maximum Feed Rates ($110, $111, $112): This sets the maximum speed at which the machine can move along each axis, ensuring that the machine operates within safe and efficient limits. If you’re carving intricate details in wood, you might reduce the maximum feed rate for greater precision, while a project on softer foam might allow for faster cutting speeds.
- Acceleration ($120, $121, $122): This determines how quickly the machine accelerates to its top speed, which affects the smoothness and speed of operations. For instance, if you notice your machine vibrating excessively or that your cuts are rough, lowering the acceleration values could lead to smoother, more precise movements.
- Homing Settings ($22, $23): This configures the homing cycle, which moves the machine to a known reference position at startup, ensuring consistent starting points for operations. If you’ve modified your machine by adding or relocating limit switches, updating these settings is important to make sure there’s correct and consistent homing.
Additional Features
These next features enhance the functionality of GRBL, making it a powerful tool for CNC machine control. For more detailed setup and usage guides, forums like the GRBL Wiki and CNC Zone can be very helpful.
Here are some additional features worth noting:
- Spindle Control: GRBL can control the spindle speed and direction, allowing for automated adjustments during machining operations. This feature is crucial for maintaining optimal cutting conditions.
- Coolant Control: This manages coolant flow, which is essential for keeping the tool and workpiece cool during cutting operations, prolonging tool life, and improving cut quality.
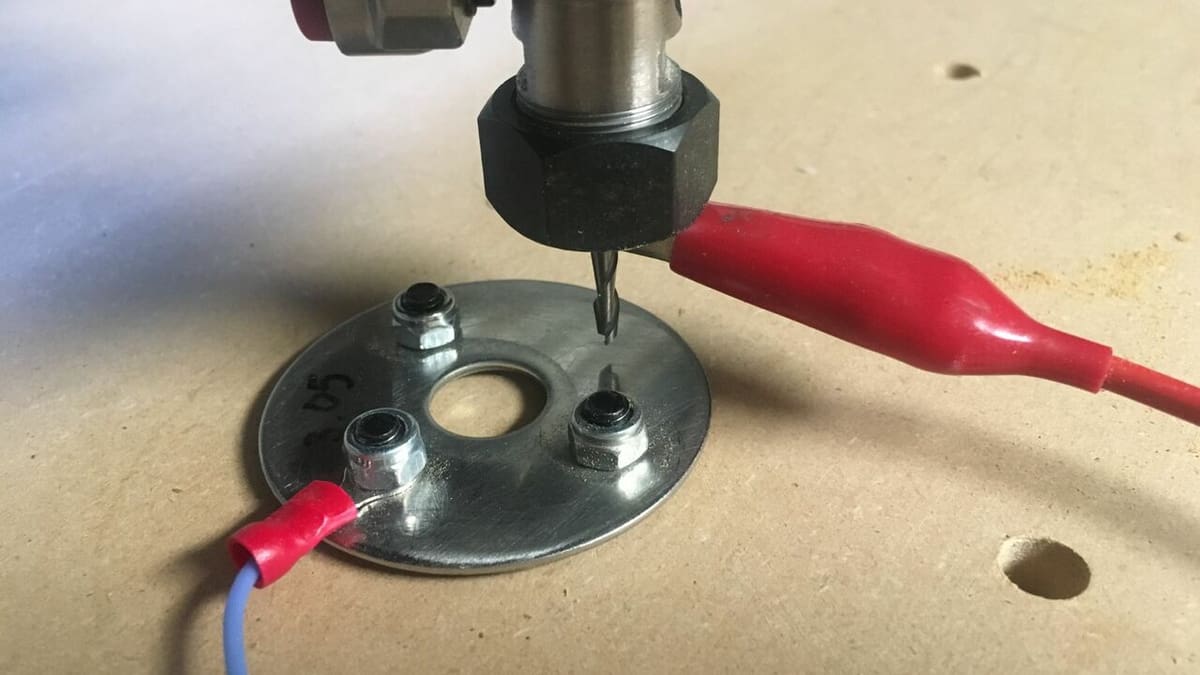
- Probing: This supports probing commands for automated workpiece setup and measurement, enhancing precision and efficiency in complex operations.
User Experience
GRBL’s user experience offers a mix of exceptional performance and a learning curve that reflects its power and flexibility. GRBL is highly reliable and performs well on inexpensive hardware, making it accessible for hobbyists and small-scale users. It turns an Arduino into a dedicated CNC controller, providing a stable and consistent platform for CNC operations.
Several third-party resources enhance the GRBL experience by providing additional tools, tutorials, and guides. One such resource is the Universal G-code Sender (UGS), a popular, cross-platform G-code sender for GRBL. UGS offers a simple interface to control CNC machines, send G-code files, and visualize toolpaths.
Another useful tool is Candle, a GRBL controller application with a built-in G-code visualizer. Written in Qt, Candle supports controlling GRBL-based CNC machines, monitoring their status, and editing and sending G-code files. The visualizer in Candle helps users see the toolpaths and make adjustments as needed, providing a more interactive and intuitive CNC machining experience.
Despite its many advantages, GRBL does have its challenges. Some users find the initial setup and configuration process somewhat daunting, especially those who are new to CNC machining. Understanding G-code and configuring the firmware to match specific machine requirements can be challenging initially. Users often need to delve into documentation and community resources to get everything running smoothly. The lack of support for more complex macros and limited axis control (up to 3-axis natively, with some extended versions supporting a fourth stepper motor) can be a downside for advanced users who require more sophisticated control.
Additionally, GRBL does not natively support complex macro functions, which are pre-programmed sequences of commands. This can be a limitation for users who require advanced functionalities for their CNC operations. While workarounds exist, such as using pre-processors like G-Sharp, these solutions can add to the complexity and require additional learning.
Community & Company Support
You’ll find a variety of resources for GRBL, from both the community and company. For example, the official GRBL Wiki on GitHub is an invaluable resource for users of all levels. It includes comprehensive documentation on the setup, configuration, and usage of GRBL, as well as troubleshooting guides. The wiki covers topics such as the history of GRBL, installation procedures, and detailed explanations of its features and functions. For anyone working with GRBL, this is a must.
Active online communities also provide significant support and knowledge sharing for GRBL users. On Reddit, subreddits like r/CNC and r/arduino host many discussions and posts related to GRBL. Users can share their experiences, ask for help, and provide solutions to common problems. These are excellent for real-time support and community interaction, allowing users to tap into a vast pool of collective knowledge and experience.
Numerous forums, such as the Inventables Community Forum and the CNC Zone forum, provide extensive support, tips, troubleshooting advice, and suggestions on upgrades. This active participation ensures continuous improvement and support for new users.
There are also many other forums from adjacent sites that can prove useful, like LightBurn’s, V1 Engineering’s, and Arduino’s.
Alternatives
While GRBL is a popular choice for many DIY CNC enthusiasts due to its open-source nature and compatibility with Arduino microcontrollers, there are several other robust CNC control software options available. These alternatives offer various features and capabilities for different levels of complexity, hardware configurations, and user requirements. Three prominent alternatives are LinuxCNC, Mach3, and Mach4.
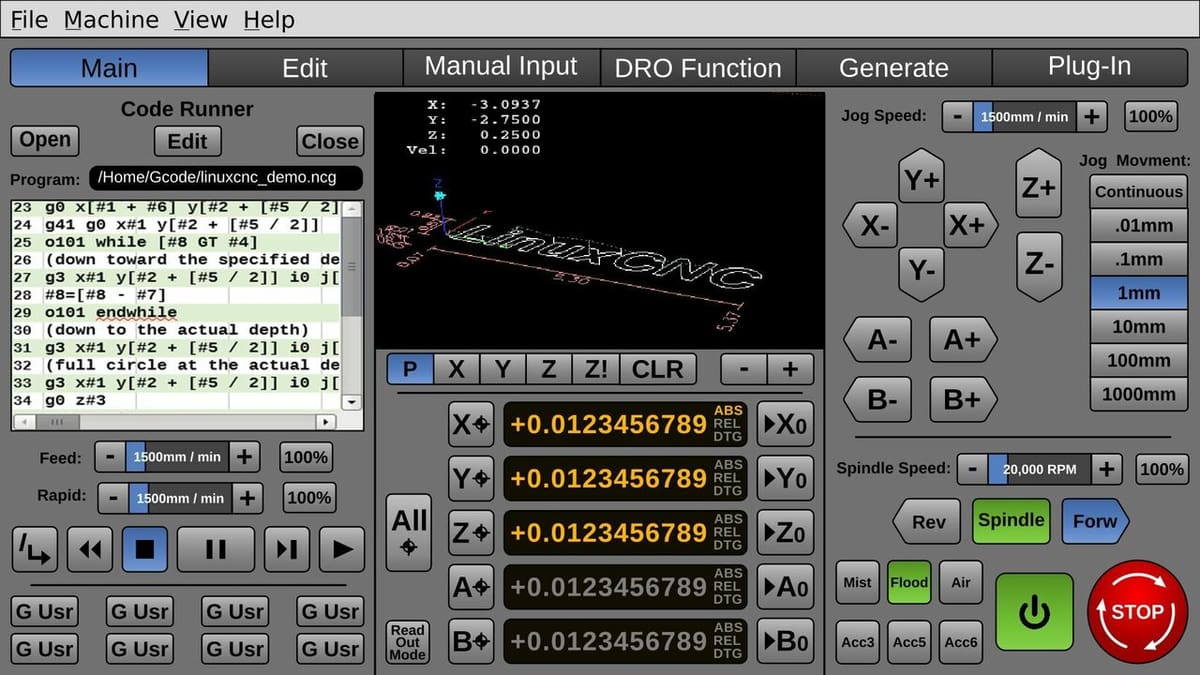
LinuxCNC
LinuxCNC is free, open-source CNC control software that runs on Linux. It’s known for its flexibility and power, and it’s capable of controlling up to nine axes of motion and a variety of machine types including milling machines, lathes, 3D printers, laser cutters, and more. One of its standout features is its real-time control, which ensures precise and accurate operations. Additionally, it supports extensive customization through the Hardware Abstraction Layer (HAL), allowing users to tailor the software to specific machine requirements.
LinuxCNC supports a broad range of hardware interfaces, including parallel ports, Ethernet, and custom FPGA boards, making it highly versatile. Its advanced trajectory planning and kinematics features are crucial for complex machining tasks, providing smooth and efficient toolpaths. The strong community and extensive documentation available for LinuxCNC further enhance its appeal, offering significant support for both new and experienced users.
Despite its powerful capabilities, LinuxCNC requires a Linux operating system, which might be a barrier for users accustomed to Windows. Moreover, it has a steeper learning curve compared to more user-friendly software like GRBL, making it potentially challenging for beginners.
Mach3 & Mach4
Mach4, developed by ArtSoft, is the successor to Mach3, popular commercial CNC control software for Windows that’s widely used in both hobbyist and professional CNC setups. It runs on Windows, which makes it accessible to a broad user base, and features a highly customizable and intuitive interface that simplifies machine operation. The Mach4 version offers improved performance, better architecture, and more advanced features compared to its predecessor. Its highly customizable nature, facilitated through LUA scripting, allows users to tailor it to specific needs.
Mach4 provides more precise and efficient motion control, improving CNC machining quality. Its enhanced user interface features better graphical capabilities and user experience, making it more user-friendly. Additionally, Mach4 is compatible with newer motion control boards and hardware, ensuring future-proofing for CNC setups.
As can be expected, Mach4 is slightly more expensive than Mach3 ($200 vs. $175) and is more complex and has a steeper learning curve due to its advanced features and customization options. This can be challenging for users who are new to CNC software or who prefer a simpler setup.
License: The text of "GRBL Software: All You Need to Know" by All3DP is licensed under a Creative Commons Attribution 4.0 International License.