Klipper on Ender 3 S1 (Pro): How to Install It

Klipper is a superb firmware choice that enables faster printing and other benefits. Learn how to set up the Ender 3 S1 (Pro) with Klipper!
The Ender 3 S1 and 3 S1 Pro are two of Creality’s latest versions of their original Ender 3 printer. The machines boast a lot of new features and improvements over previous iterations, including a powerful 32-bit motherboard.
This new motherboard differs from the V4.2.2 or V4.2.7 boards found on the Ender 3 V2, which means that some adjustments are necessary when installing new firmware.
Klipper is an increasingly popular firmware that enables faster print speeds by using an external computer (like a Raspberry Pi board). This external computer handles the G-code processing so that the printer’s own controller board can focus solely on the movement of the components. While installing Klipper on the Ender 3 V2 is well documented, setting up this firmware package on the Ender 3 S1 (Pro) from scratch has to be slightly adjusted. Or, if you want Klipper without having to worry about breaking something, Creality’s Sonic Pad is a ready-made solution.
In this article, we’ll go over what sets the S1’s board apart, why the Sonic Pad is an alternative you may want to consider, what you need for the firmware upgrade, and the steps to do so. We’ll also explain what the risks are, and we’ll wrap things up with some tips.
It’s worth pointing out that the firmware installation we’ll go over includes adding support for some of the S1’s new hardware, such as its auto-bed leveling sensor and filament runout sensor. Enjoy!

Changes
As mentioned, installing Klipper on the Ender 3 S1 differs from doing so on other Ender 3s due to the different motherboards.
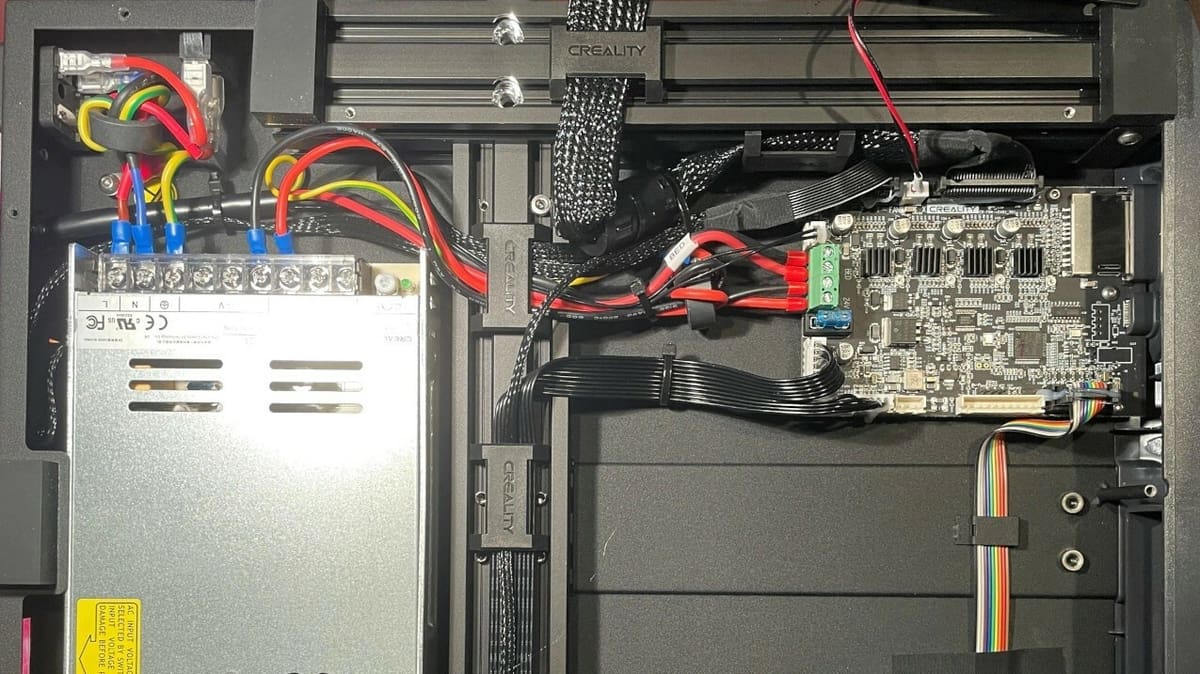
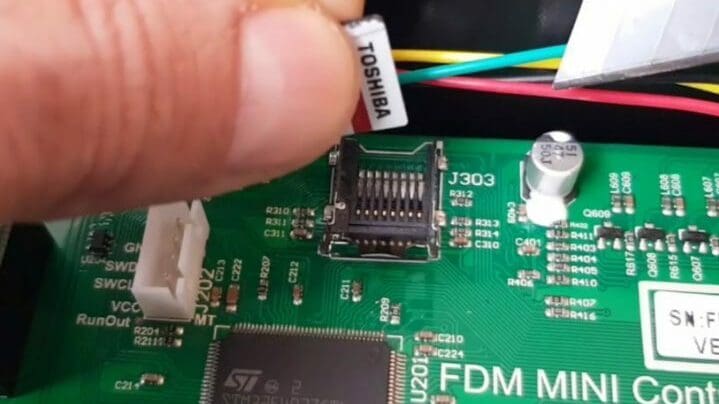
Creality didn’t immediately publish the specifications for the new mainboard, and the hardware ports differ a lot from those on the older Creality Ender 3 boards. Although the company hasn’t publicly discussed it, it’s also heavily suspected that the processor on the S1’s board differs from other Creality boards. Based on the transcription on the board’s central chip, the S1 uses an STM32F401 chip while the V4.2.X boards use an STM32F103 chip. There isn’t much of a difference between the two, but the 401 is capable of faster data transmission.
The reason these differences are significant in the firmware installation process is that each firmware package has to be compatible with the board that it’s being installed on. When new printers with new motherboards come out, it usually takes at least a few months for a compatible firmware configuration such as Marlin to be built, tested, and released. For reference, Klipper’s configuration repository only added a reference file for the Ender 3 S1 in January of 2023, while the printer was available in late 2021.
According to TH3D, Creality has also modified the bootloader on the board so that third-party (non-Creality) firmware programs can’t be installed through the SD card slot. While this is true in general, some users were still able to install third-party firmware packages.
Some digging shows that early Ender 3 S1 buyers have boards with a different mainboard, some of which use STM32F103 and others STMF401 processors. Newer models all ship with STM32F401 chips, but it’s not clear when this situation stabilized.
If you’ve had your printer for over a year (or maybe you’ve just replaced the mainboard), it might be a good idea to open up the case just to read what processor it’s using and the pinout. This is important because configuring a 3D printer with the wrong pinout in Klipper can cause hot ends to heat without thermal runaway.
While we’ll be looking on how to work with STM32F401 chips, for those of you with STM32F103 processors, the instructions from the Ender 3 V2 will work, just make sure to use the Ender 3 S1 configuration file instead!
And if you’ve got an Ender 3 S1 Pro, you’re in the right place! While we’ll be focusing on the S1, the configuration file on GitHub refers to both, although it contains additional instructions on lines that need to be modified for the Pro, so pay close attention to those. The same file also contains the pin mappings for stock 2021 Ender 3 S1 Pros.
If you don’t feel comfortable opening up your printer or don’t want to put at risk the warranty by tweaking things yourself, Creality’s Sonic Pad comes pre-loaded with the necessary software to use Klipper on a variety of printers, including the Ender 3 S1. As such, you should expect a relatively decent out-of-the-box experience no matter which Creality printer model you install it on, and support from Creality should things go wrong.
Now that we’ve gone over the changes that Creality has made to the Ender S1 compared to the previous generations of that printer, let’s get into the process, going first over setting up the Sonic Pad and then looking into the more demanding way!
Installing Klipper with Sonic Pad
Creality realized that the Marlin firmware being shipped stock on its printers has limitations and is potentially missing features. However, Klipper demands a lot more processing power, so they can’t include it with their existing printers out of the box – the electronics can’t handle it alone. So they came up with a solution: the Sonic Pad.
Creality’s Sonic Pad is a single plug-and-play solution to use Klipper on their machines as well as on other brands. It’s a bit pricier than doing it from scratch (∼$160) and some choices have already been made for you compared to what you can do on a built-from-scratch installation, but it’s also a lot less cumbersome as everything you need is in the box in one go.
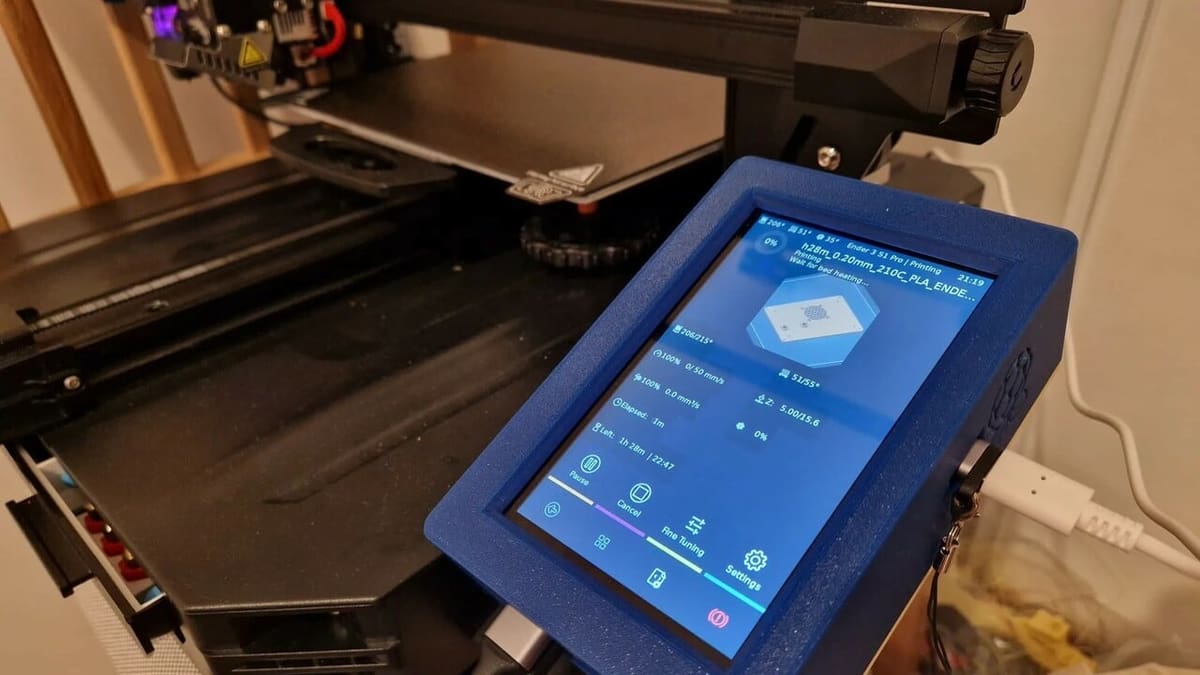
The Sonic Pad presents itself as a tablet-like device that has USB, Ethernet, and Wi-Fi built in to a touchscreen interface. It comes with KlipperScreen, a touchscreen GUI that interacts with Klipper exclusively.
On the Sonic Pad, Klipper is pre-configured with multiple printer profiles; you just need to select which one you want by following the official Creality manual.
It’s not a cheap upgrade at nearly double the price of a Raspberry Pi 4 (chip shortage notwithstanding), but it does bring in a safe and supported way to run Klipper on Creality machines. If a warranty or support from Creality is important to you, then this might just be the best way to run Klipper on your Ender 3 S1.
Installing Klipper from Scratch
If you’re feeling a bit more adventurous, then there’s an alternative to getting the Sonic Pad. You’ll need a few more things before you’re ready, though.
What You’ll Need
Hardware
- USB Type-C cable
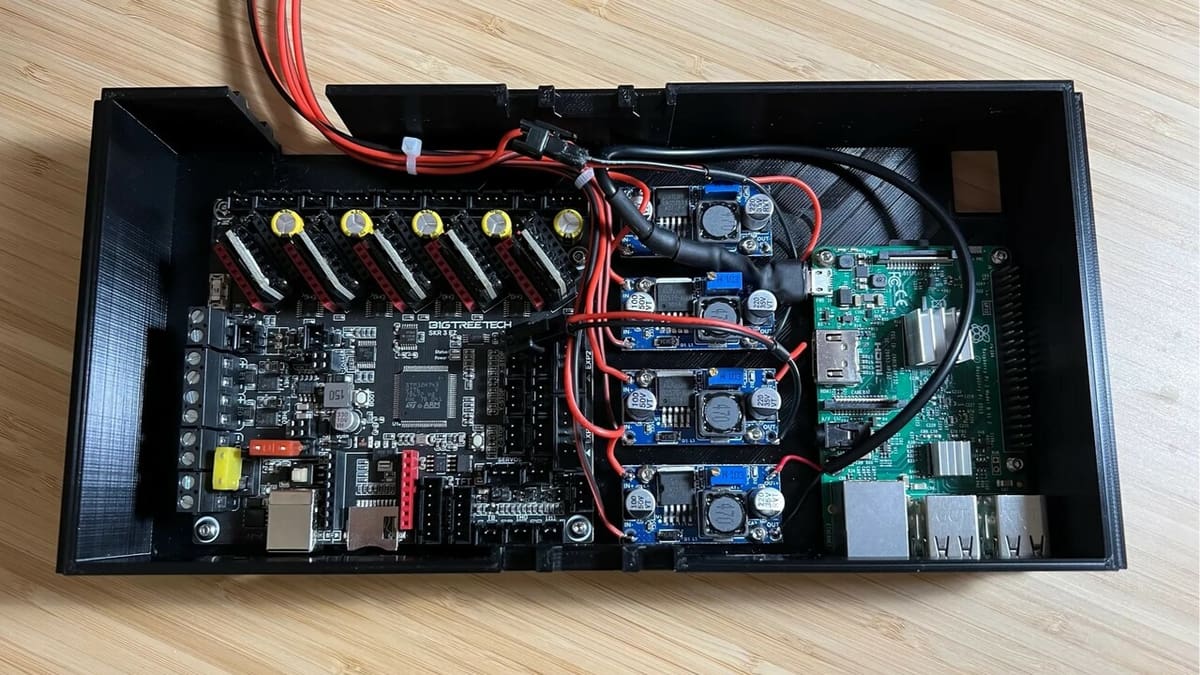
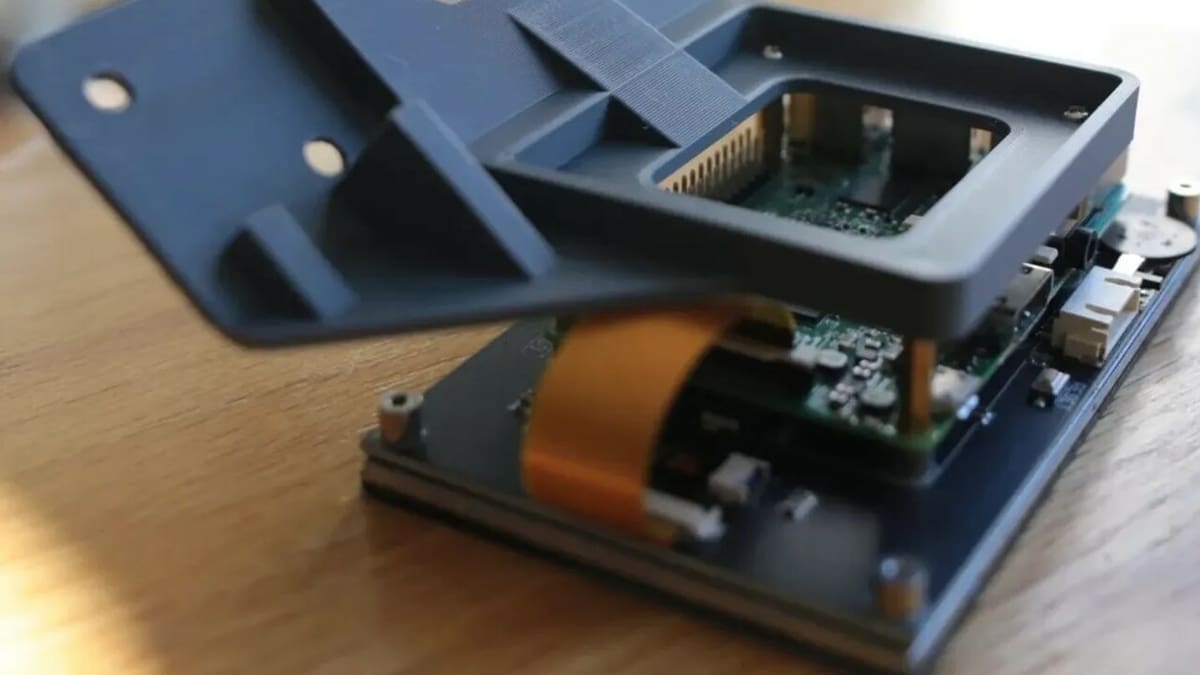
- Raspberry Pi 3, 3+, 4, or other compatible board (see Klipper’s recommendations)
- MicroSD card for the Pi board
- Power supply for the Pi board (make sure it meets the suggested power requirements for the board)
- Laptop or PC with a screen and keyboard
Software
- Raspberry Pi Imager
- PuTTY
- WinSCP (Windows Secure Copy)
- Notepad (pre-installed on most Windows devices) or a similar text editor
It’s important to note that while you can use other SBCs than a Raspberry Pi, it’s the board we’ll be using in the tutorial, so you may need to tweak a few things. That said, the process for different boards shouldn’t be too different as long as you can install MainsailOS.
Once you have all the necessary supplies, we can get started installing Klipper on the Ender 3 S1!
Step 1: Set Up MainsailOS
The first thing you need to do is to set up MainsailOS. Let’s get into the step-by-step instructions:
- Open the Raspberry Pi Imager software on your device (e.g. laptop).
- Insert your MicroSD card (the one meant for your Raspberry Pi board) into your device.
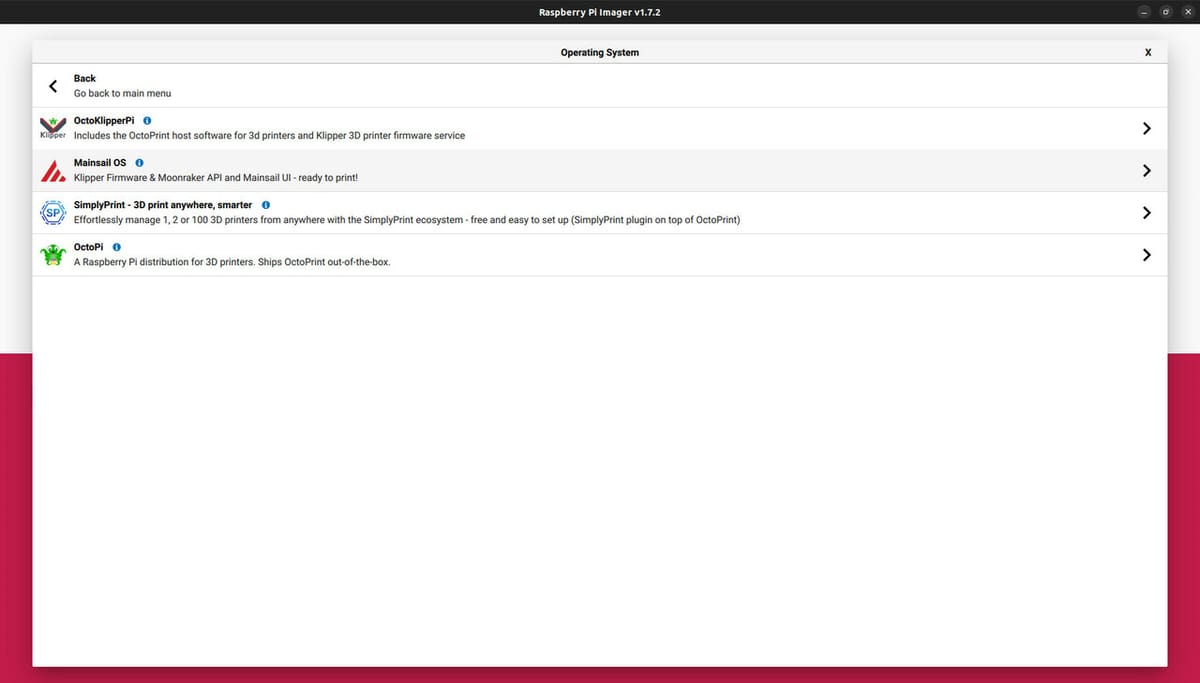
- Click on “Operating System” and, from the pop-up menu, select “Other specific-purpose OS > 3D printing > MainsailOS” (see additional information on which OS to choose).
- Click the settings wheel on the bottom right of the Imager and enable SSH (with Pi as a user, whatever password you choose). Set up the Wi-Fi as you need it in the Wireless Lan section. Then click “Save”.
- For the “Storage” portion, select your inserted MicroSD card, and then click “Write”. This process takes a few minutes, so sit tight! When the writing and verification of the SD card are done, Windows may throw you a prompt to format the SD card. Do not format the card or you’ll undo what the imager has been doing over the last few minutes!
- Eject the MicroSD card and insert it into your Raspberry Pi board. Then, power up your Pi.
Finding the IP Address
While it’s not enough of a process to deserve its own official step, you’ll also need to find the IP address of your connected device. You can find it by following the steps below:
- Open a web browser and go to your router’s control page. (Usually, the manufacturer of your Wi-Fi network router has a specific page or IP address that you can go to.)
- Find the IP address page on the router control hub where you can see all the connected devices and their corresponding IP addresses.
- Locate your Raspberry Pi board, which should be labeled “mainsailos” if it’s running MainsailOS.
Write down the board’s IP address, as you’ll need this in a moment.
In the past, FluiddPi was an alternative to MainsailOS, but it has been labeled as deprecated by the Fluidd project itself. Therefore, it’s recommended to use MainsailOS. You can also use the instructions from the Fluidd project to install a whole image, you’ll need to adjust some of the items in the next step in that case.
Step 2: Configure Klipper
Now we want to configure Klipper on the Pi and then compile it for your Ender 3 S1’s mainboard.
For Windows PC users:
- Open PuTTY on your laptop or PC.
- For the “Host name”, insert your Pi’s IP address, and click “Open”.
For MacOS or Linux users:
- Open up a terminal console.
- Type in the command
ssh pi@<your Pi's IP address>and press Enter. You’ll get a password prompt which won’t show anything as you type, this is normal.
Once you’re up and running:
- After you get the password prompt, type in the password you selected at item 4 of the previous step and press enter. If all goes well you get a prompt that ends with a $.
- Once the previous download is complete, enter the command
cd ~/klipper/and then the phrasemake menuconfig. - Make sure you enable the advanced options at the top of the prompt. To do so, use the up and down keys to navigate to it, and press the spacebar to enable the option.
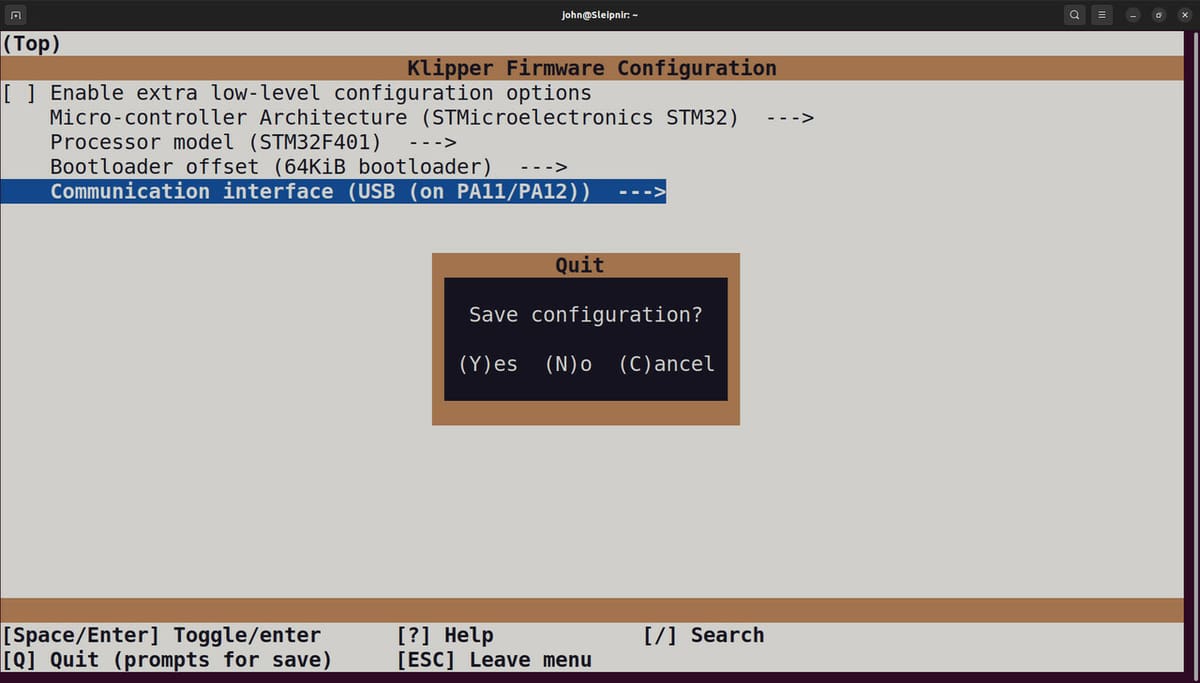
- Use your device’s arrow keys and Enter button to navigate the pop-up menu, and go to the “Micro-Controller Architecture” section.
- The Ender 3 S1 uses an STM 32-bit board, so choose “STMicroelectronics STM32”.
- In the “Processor model” selection, make sure to select the STM32F103 or STM32F401 chip depending on what your printer uses. For the F401, select the “Bootloader” option and then “64 KiB”. For the F103, select the “Bootloader” option and then “28 KiB”.
- On the home menu again, go to “Communication interface” and choose the USB on PA.
- Press the Escape key on your device to exit the menu, and, when prompted, hit ‘Y’ to save your changes.
- Back in the main terminal, enter the
makecommand.
Step 3: Upload New Firmware
The third step in this process is to upload the new firmware to your Ender 3 S1 through MainsailOS’ web interface and other programs. We’ll install the reference Klipper firmware file to the printer and configure it later. Follow along below to complete this process:
On Windows:
- On your device, open the WinSCP application and start a “New Site”.
- Enter your Pi board’s IP address for the “Host Name” and change the “File protocol” to “SFTP”.
- Insert “Pi” for the username and “raspberry” for the password, and click “Login”.
- Open the “klipper” folder, then the “out” folder. Locate the BIN firmware file, labeled “klipper.bin”.
On MacOS/Linux:
- Open a terminal window.
- Type in the command
scp pi@<your Pi's IP address>:/home/pi/klipper/out/klipper.bin ~/Downloads/klipper.bin - Press Enter; it will prompt you for the Pi’s password and as before, not show you an input for it. Press Enter after entering the password – you should see a progress bar confirming the copy of the file.
After you’re set up:
- Insert your printer’s mainboard’s SD card into your device and clear it of any files.
- Copy and paste (or drag and drop) the “klipper.bin” file to your inserted SD card, change the name to anything other than “firmware”, and eject the card from your device. With an STM32F401 processor, you might need to put “firmware.bin” in a folder on the SD card called “STM32F4_UPDATE” in order to flash.
- Unplug the cable connected from your Ender 3 S1 to the LCD display. If you want to use it, you’ll need to do some additional hardware work to wire it up to the Raspberry Pi, as outlined in GitHub.
- Insert the SD card into your machine and power it on.
- Wait a few minutes to be sure the firmware is updated on your printer, and then connect your Raspberry Pi board to your Ender 3 S1 with a USB type-C cable.
There are two ways to tell if the flash was successful. The safest is to plug in the USB cable and follow the process, without getting any “serial connection” errors. The other is to wait two minutes after turning on the printer, then take the SD card out and check on the computer if the original filename was changed.
Step 4: Set the Klipper Configuration
The final official step to installing Klipper on your Ender 3 S1 and Raspberry Pi board is to configure the firmware to support your specific printer.
Since January 2023, Klipper has included a reference configuration for the Ender 3 S1, as you’ll see below.
- Type your Pi’s IP address into your browser to go to the Mainsail user interface.
- Open the “Machine” tab towards the bottom of the options on the left of the screen.
- If the file printer.cfg exists, click on it. If not, create a new file called printer.cfg and open the in-browser editor.
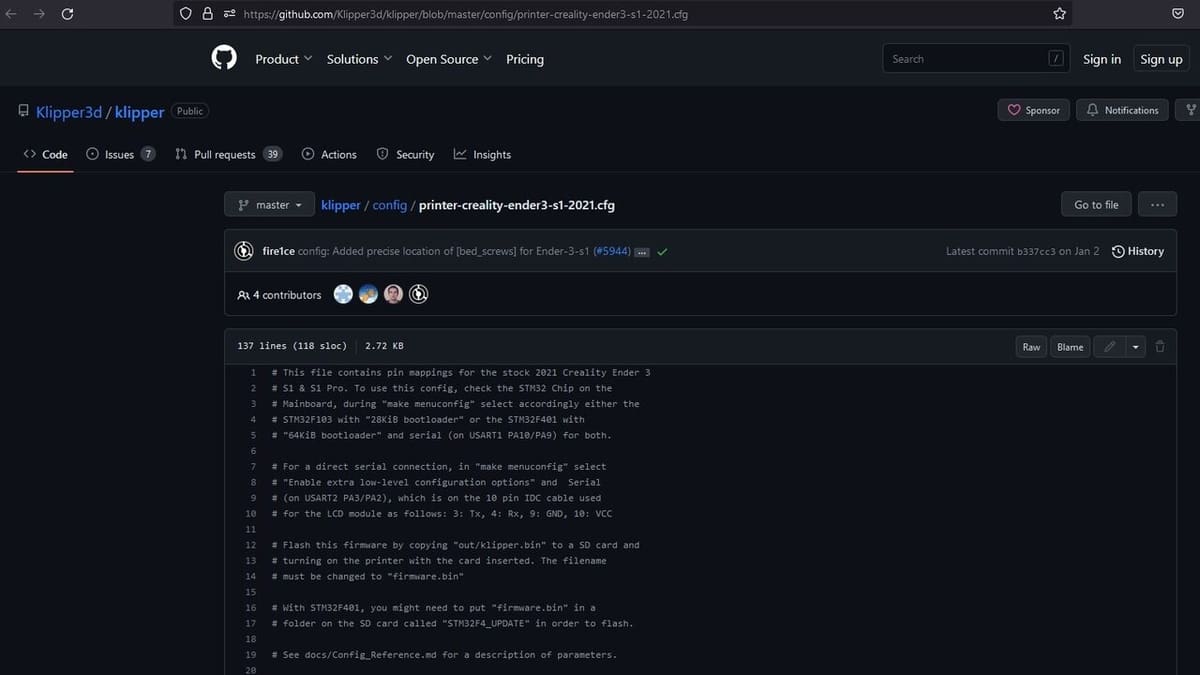
- In a separate tab, open up the official Creality Ender 3 S1 reference configuration file and copy its full contents. You can click on the “Raw” button to get only the file contents in the window and avoid syntax errors when you copy and paste.
- Paste the contents of the file back into the printer.cfg editor.
- At the top right, click “Save & Restart”.
That’s it! You’ve successfully installed Klipper on your Ender 3 S1. It’s worth noting that this configuration file has added support for the automatic bed leveling sensor and filament runout sensor that come with the Ender 3 S1.
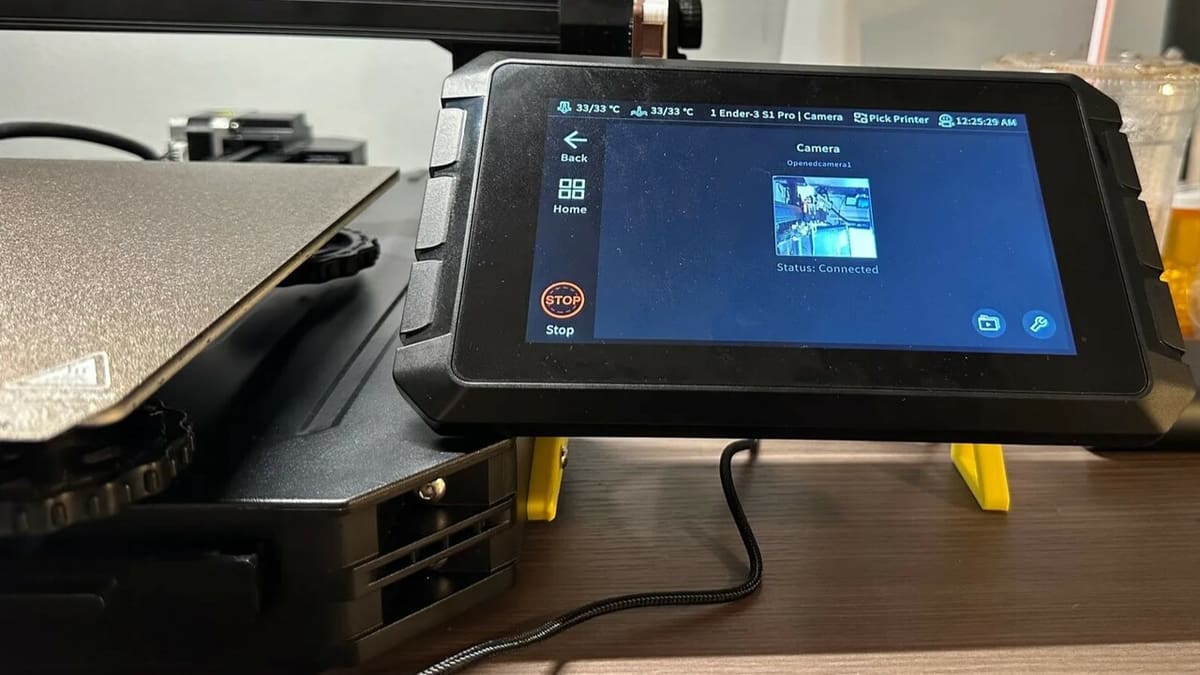
To control your printer, you’ll have to use a web interface because the stock LCD display on the Ender 3 S1 isn’t supported by Klipper at the moment. You can continue reading to learn how to do this with MainsailOS!
(Optional) Step 5: Set Up Klipper for Mainsail
Mainsail is a great web interface that allows you to remotely control your Klipper-running 3D printer. While Mainsail is one of the most popular options, other Klipper-compatible remote control interfaces also exist, such as Fluidd. We’re only going over the configuration process for Mainsail, but the process is very similar for these other programs.
To use Mainsail, you have to make a few changes to the configuration file of Klipper to make the two programs work together. You can follow the steps below to do just that:
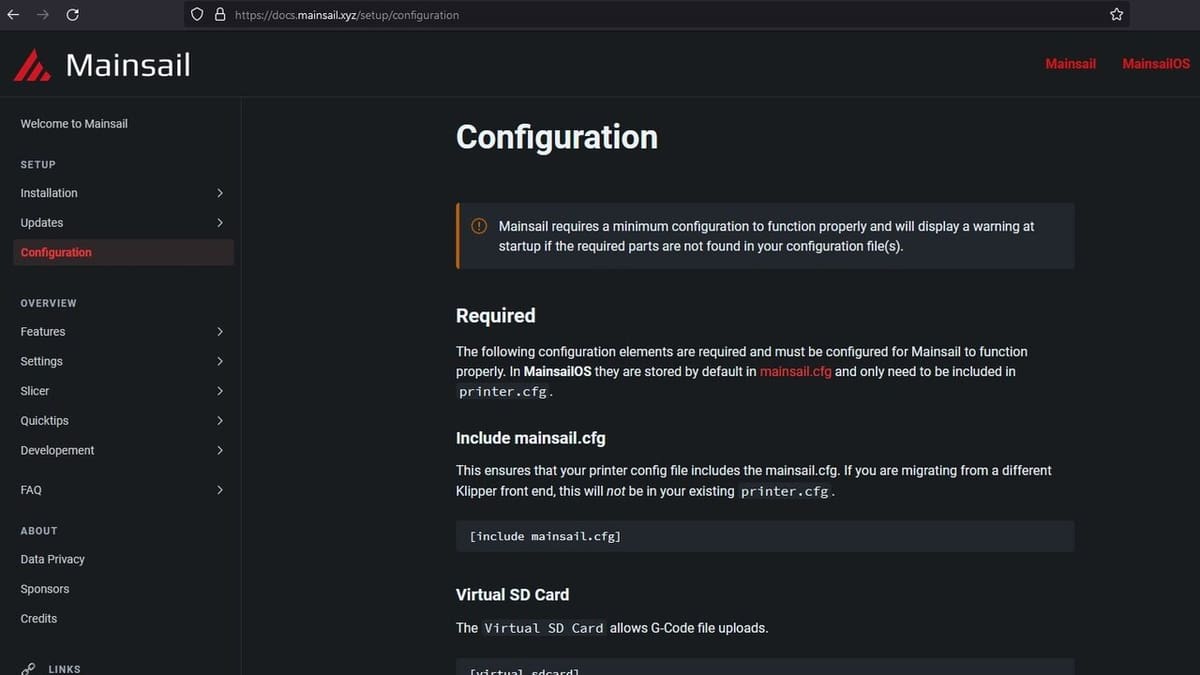
- Open your Mainsail online interface and go to the “Machine” section.
- Make sure you see a file named “mainsail.cfg” listed – if not, it’s missing from the image and you’ll want to download it from the Mainsail website.
- Under the “config” tab, click the file “printer.cfg”.
- Before the first Klipper configuration section in the file, you want to add the following line into the file:
[include mainsail.cfg] - Click “Save and Restart” in the top right corner of the editing page.
And that’s really all there is to it! You should now have a Mainsail-compatible version of Klipper that you can use with your Ender 3 S1.
Tips & Tricks
Lastly, we’ll go over some tips and tricks that might help you during and after the Klipper installation process. It’s important to mention that because this upgrade is community-driven and not officially supported by Creality. We can’t go over every issue, but below are some of the most common ones:
- Prints not centered: If your prints aren’t centered, it may be due to incorrect offsets in your printer configuration file. The most direct fix is to edit the printer configuration file and adjust, in small increments, the X- and Y-axis offsets or bounds. However, you could also try using a different printer configuration file, since each one uses slightly different offsets.
- No IP address: If your Pi isn’t showing up on your Wi-Fi IP address scan, then it’s most likely not connected to your network. Make sure to follow the OctoPi Wi-Fi connection guide and the included troubleshooting information because MainsailOS is very similar in its construction to OctoPi.
- Raspberry Pi reporting undervoltage errors: This is usually caused by using a power supply that doesn’t meet the demand of your Pi board. You can check out Raspberry Pi’s page on the power requirements for each board to see what you need. If your power supply barely meets the requirements, the issue may persist, so try to go above the minimum.
- Issues connecting Pi to printer: First, make sure that the USB connection is secure on both ends (Pi and the mainboard). Then, enter the
ls /dev/serial/by-id/*command phrase into PuTTy. If the response is a phrase like/dev/serial/by-id/usb-1a86_USB2.0-Serial-if00-port0, then the two devices are properly connected. - The “cd ~/klipper/” command doesn’t work: If you entered this command through a direct interface with your Raspberry Pi (e.g. connected screen and keyboard), try using PuTTY from another device.
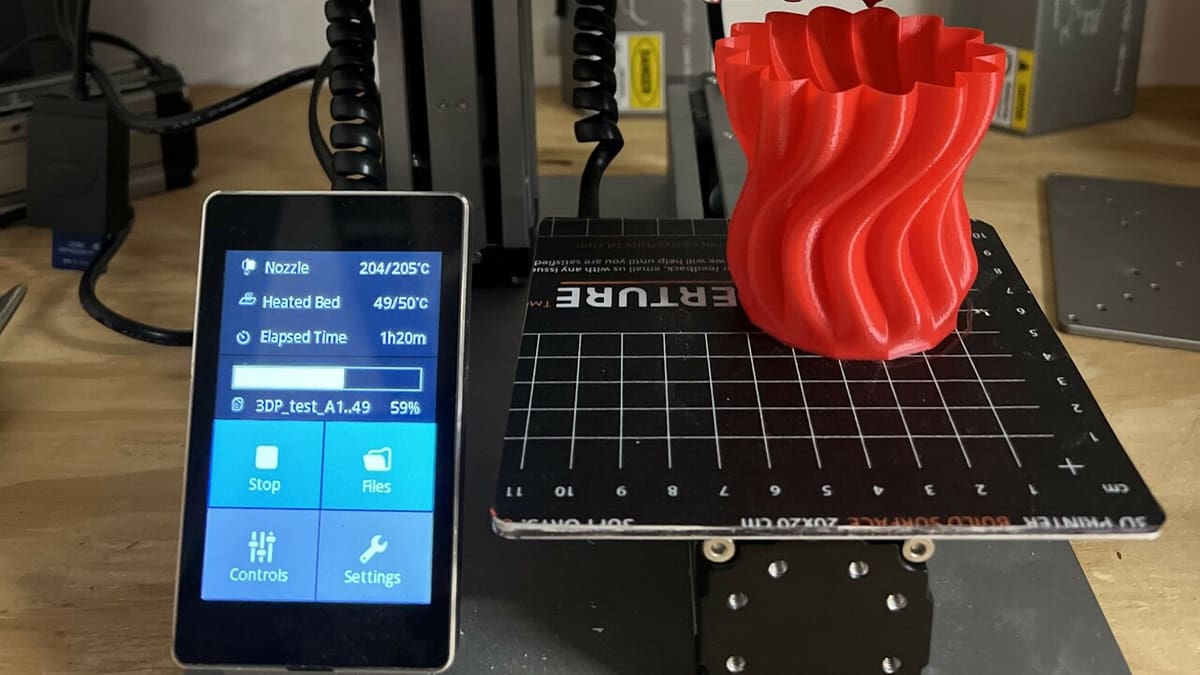
As with any major change to your 3D printer or its environment, it’s also a good idea to print a few test models before moving on to regular use. This will allow you to check that the components on the printer are working properly. Happy printing!
License: The text of "Klipper on Ender 3 S1 (Pro): How to Install It" by All3DP is licensed under a Creative Commons Attribution 4.0 International License.