Ender 3 (Pro) Firmware Update: How to Install Marlin

Updating your Ender 3 or Pro with Marlin firmware can enhance performance, but the process can be tricky. Read on to learn how to do it!
The original Creality Ender 3 is one of the most versatile and popular 3D printers in the hobbyist community, offering some high-quality specs and open-source hardware and firmware. Since Creality’s initial release of the printer, the Ender 3 family has grown to include the Pro, V2, and Max.
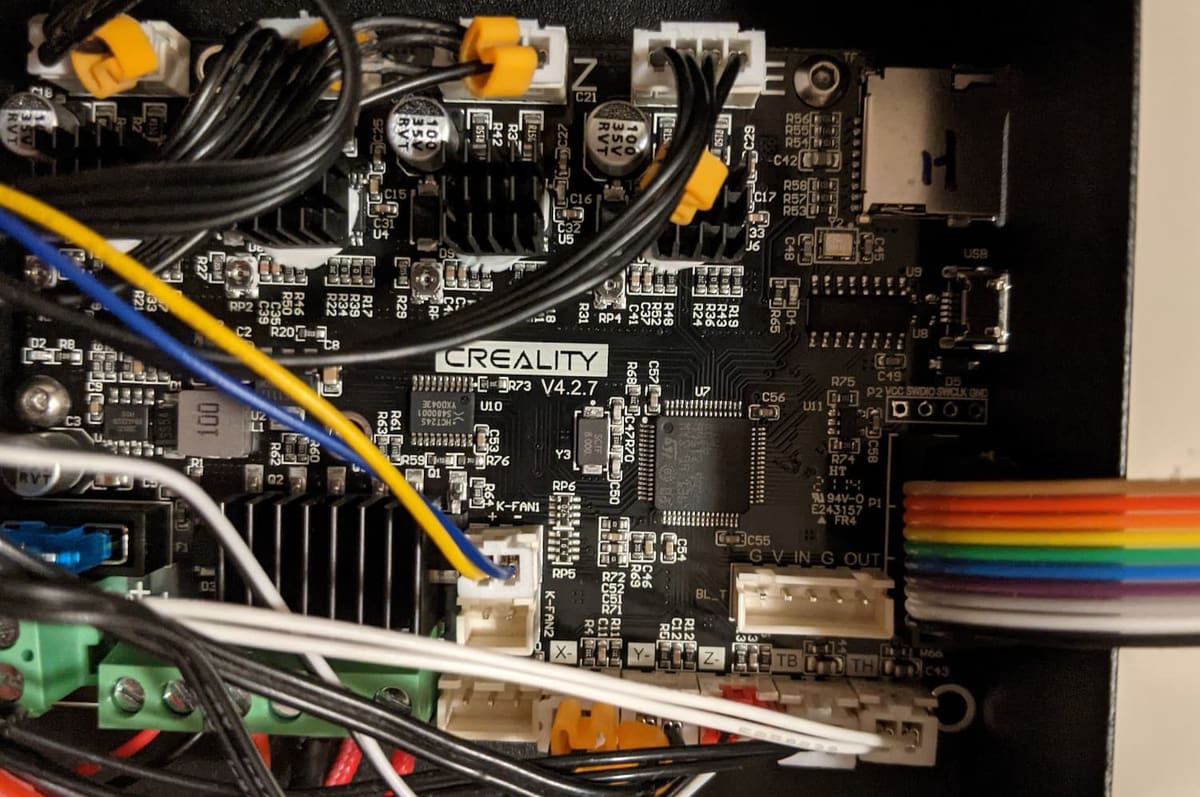
Although all of the Ender 3 variations look very similar, only the original Ender 3 and the Ender 3 Pro ship with Creality’s first-generation 8-bit mainboards. Creality’s second-generation mainboards, like the V4.2.2 and V4.2.7, can be seen on most of Creality’s newer printers. These newer boards are a step up from the originals, with 32-bit architecture, a pre-installed bootloader, and more.
Upgrading your firmware is an important process that can fix bugs on your machine, enhance its capabilities, and support new hardware. With these newer mainboards, new firmware can be flashed easily through the microSD card slot. Unfortunately, for those who have an original Ender 3 or Ender 3 Pro and haven’t upgraded the mainboard, flashing the firmware to the board isn’t so straightforward.
In this article, we’ll give an overview of how you can flash Marlin firmware to your Ender 3 or Pro, but the process is very similar for other compatible programs. It’s important to note that this process is only necessary for those with a first-generation Creality mainboard (e.g. Melzi, V1.1.X). If you’ve upgraded to a 32-bit mainboard, then you should instead follow our guide to installing new firmware on the Ender 3 V2.
An Overview of the Process
The original Ender 3 and Ender 3 Pro, in stock form, use Creality’s 8-bit Melzi (or V1.1.X) mainboards. Out of the box, these boards are loaded with Creality’s own version of Marlin 1.1.9 and should run pretty fine. However, if you’re looking to take your printer to the next level and install some new hardware, like an auto-bed leveling sensor, or unlock new printing features, you’ll need to flash new firmware.
Flashing firmware involves removing the old firmware package from the board’s memory and installing a new one. This process requires a bootloader, which is a digital program that controls how a computer board boots up.
Unlike the newer Creality mainboards, the original boards on the Ender 3 and Pro don’t have a pre-installed bootloader that would let you change the firmware. For this reason, to flash new firmware, you need to use an external bootloader to first flash a bootloader to the board. This often takes the form of connecting a separate Arduino board to your printer’s mainboard.
Finding & Compiling the Firmware
The first step to flashing new firmware is to find or build a compatible firmware program. As this guide is for installing Marlin firmware onto a Creality 8-bit board, you should only use a version of Marlin 1, like Marlin 1.1.9, which you can find on Marlin’s GitHub page. This is because newer and larger versions of Marlin (e.g. Marlin 2.0) are too much for the first generation boards.
Once you find your firmware, make sure you’ve downloaded Arduino IDE and then download the firmware ZIP file. Extract the ZIP file and locate the folder labeled “Marlin”.
In the “Marlin” base folder, find the example configuration folder, and, in the Creality folder, open the folder labeled “Ender 3”. Copy the five files in this folder and paste them back into the base “Marlin” folder and click “Replace” when prompted.
Inside the Marlin folder, find the “Makefile” file and open it in Arduino IDE. Here you can make whatever edits to the code you need to make the firmware compatible with your printer.
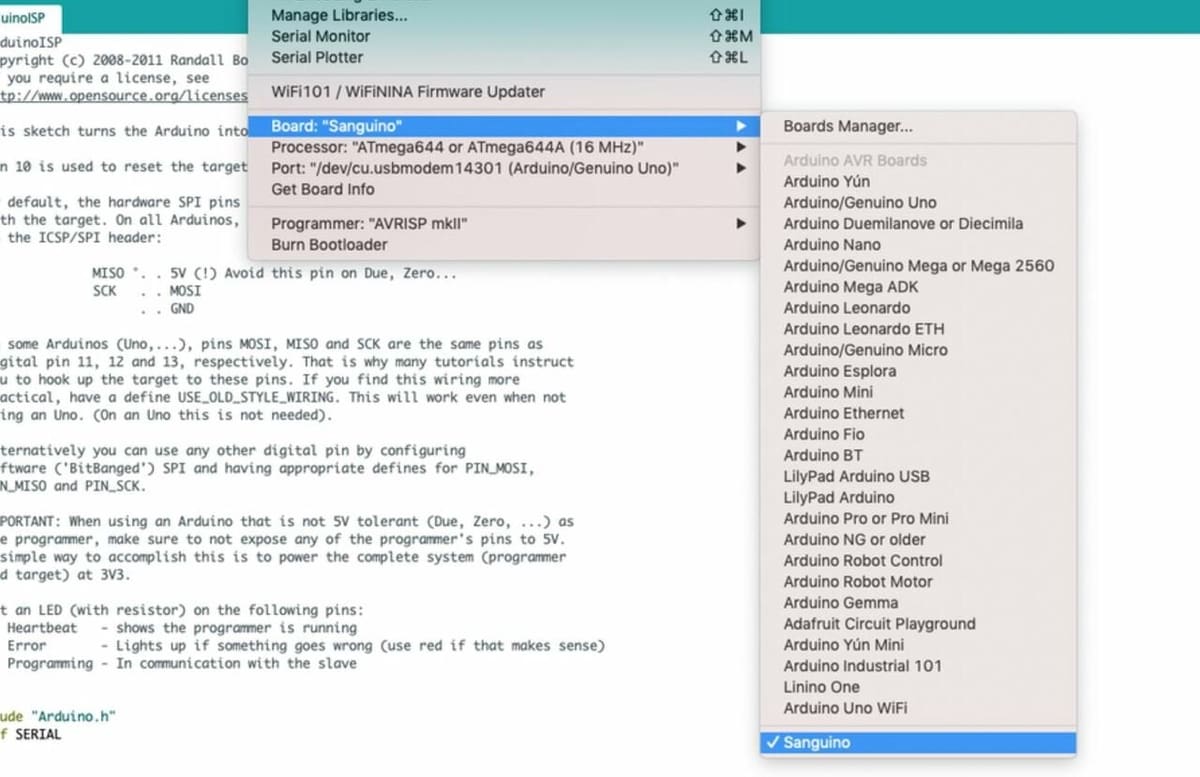
Once you’ve made all of your changes, make sure that the “board” (in the “Tools” tab) is labeled as “Sanguino (1248P Boards)”. Also in the “Tools” tab, check that the “Programmer” is set to “Arduino as ISP”. Now, keep this window open as we’ll come back to it in the next step!
Flashing a Bootloader
To flash the bootloader to your printer’s mainboard, you’ll need an external Arduino board. We suggest using an Arduino Uno, but if you choose to use a different Arduino board, make sure it has an ISP connection. You’ll also need some Dupont jumper cables, including five female-to-female and one male-to-female.
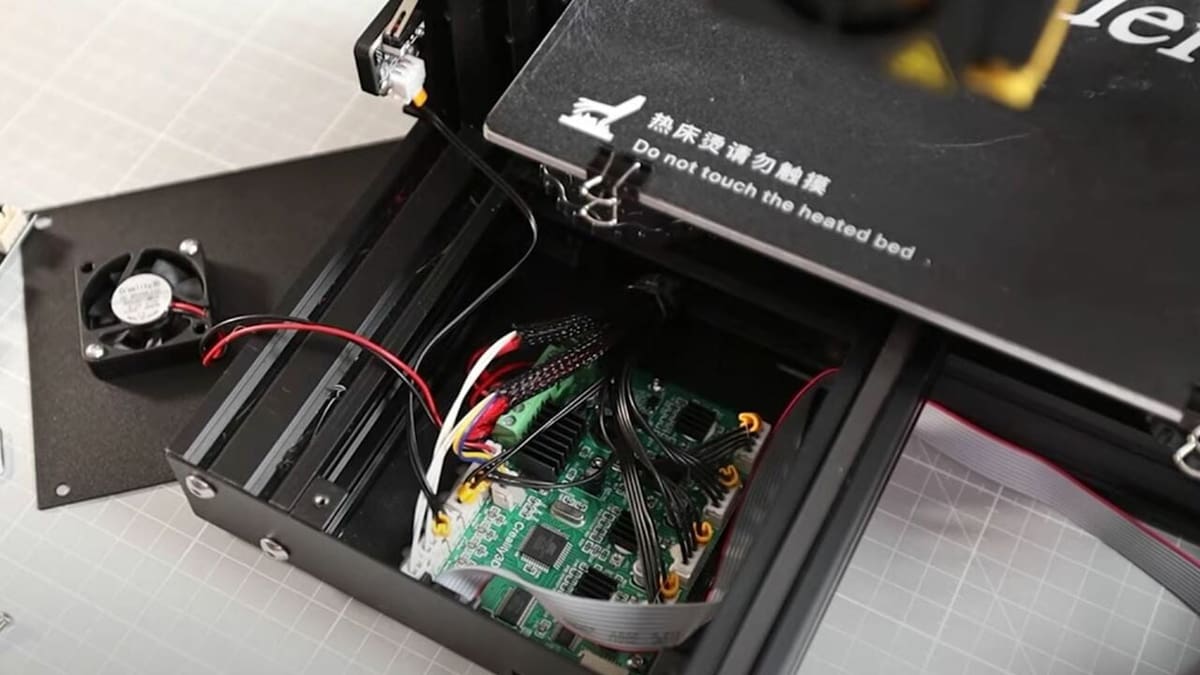
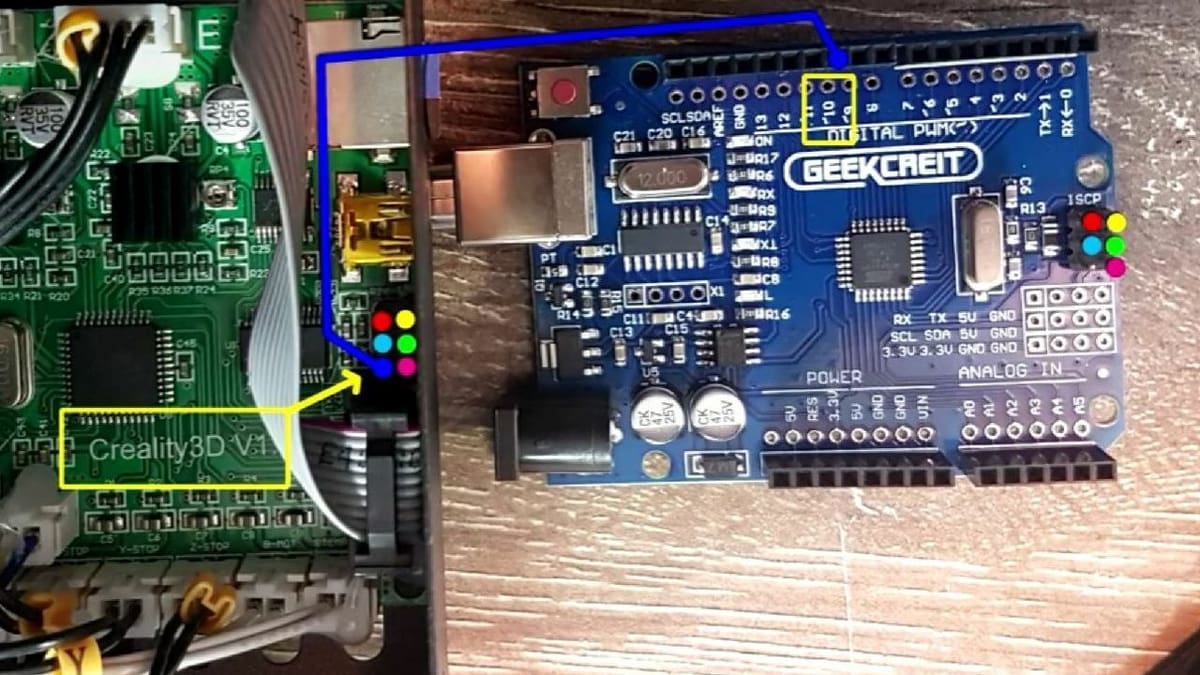
The first part of this step is connecting the board to your printer’s mainboard. With your printer turned off, pop off your Ender 3’s mainboard cover and locate the ISP connector, which is the 3×2 pin port next to the LCD cable.
Next, as seen in the image, use the Dupont cables to connect your Arduino’s ISP connector to the ISP connector on your Ender 3’s mainboard. This connection will make it unnecessary to power your Arduino through other means.
Finally, use a USB cable to also connect the Arduino to your computer, and turn your printer on. Then, after making sure the communication port is correct in Arduino IDE, open the “Tools” tab and click “Burn Bootloader”.
Once the Arduino IDE terminal confirms that the bootloader has flashed properly, you’ve successfully flashed a bootloader to your Ender 3, and you won’t ever have to do this again to flash new firmware. Don’t forget to turn off your printer and unplug the ISP connection.
Installing Marlin
The last step simply involves uploading your firmware to your printer’s mainboard. The first thing you need to do is unplug your Arduino from the computer and connect your printer to the computer with the USB connection.
Then, in Arduino IDE, click the “verify” checkmark at the top left of the interface. This will verify that your firmware package doesn’t have any issues. If any issues do arise, check the Arduino IDE terminal to see what the issue is, locate it in the code, and fix the mistake (the terminal usually tells you where the problem is).
If verification is successful, then click the arrow “upload” icon to install the firmware to your printer’s board. And that’s it! You’ve now successfully installed new firmware to your Ender 3 or Ender 3 Pro.

Alternatives
If you don’t want to go through the hassle of using an external bootloader, but you still want newer firmware, there are a few ways to go about it:
- Upgrade your motherboard: Rather than have to deal with fixing an older generation motherboard, you can simply upgrade to Creality’s new line of 32-bit boards compatible with the Ender 3 and Ender 3 Pro hardware as well as non-Creality 32-bit options. With these new boards and their increased storage space, you can install larger firmware packages like Marlin 2.0 by inserting a microSD card containing a pre-configured “BIN” firmware file.
- Use an ISP-USB cable: There’s also a slightly different way to upgrade your firmware, as instructed by older BLTouch kits. While we won’t get into the specifics, which can be found in Teaching Tech’s guide to installing a BLTouch, the process involves using an ISP-to-USB connection with a computer and a few proprietary programs. Unfortunately, this process is only known to work when installing “HEX” formatted firmware packages, which are less popular than the current “BIN” format.
License: The text of "Ender 3 (Pro) Firmware Update: How to Install Marlin" by All3DP is licensed under a Creative Commons Attribution 4.0 International License.