Ender 3 (V2/Pro) Filament Sensor Upgrade: 3 Easy Steps

Though mighty, the Ender 3s don't have filament runout detection. Learn how to install a Ender 3 filament sensor upgrade on your 3D printer!
Creality’s Ender 3 is one of the most popular 3D printers for hobbyists, and multiple versions exist, including the original, Pro, and V2. While these printers have slight differences, they all can be improved with the many possible upgrades.
One such valuable and low-cost upgrade is a filament runout sensor. With this, you won’t have to worry, especially with long prints, that your filament will run out and cause problems. We don’t want any epic (or harmful) print failures!
The three variations of the Ender 3 have small differences between their components, but their extruders and Z-axis frames are basically the same, so sensor and mount options are generally compatible with any of the Ender 3 printers. The important difference lies in the V2 mainboard, which runs Marlin 2.0 firmware with a port specifically designed to accept a filament runout sensor.
In this article, we’ll give you two filament runout sensor options for your Ender 3: an optical or a mechanical limit switch. The steps are essentially the same for both, so after we give you the pros and cons of each, you’ll get a better sense (pun intended) of which one you’ll want. Lastly, we’ll cover your chosen sensor’s firmware installation for both Marlin and OctoPrint and indicate what’s different for the V2’s mainboard.

Mechanical vs. Optical
As we’ve stated, we’re covering two options for sensors: the traditional mechanical limit switch and the optical limit switch.
Mechanical Sensors
Pros
- They’re extremely cheap.
- They’re very reliable.
- You may already have a spare one lying around.
Cons
- The filament will only feed through one way.
- They might be challenging to load.
- They could cause slight additional wear and friction on filament.
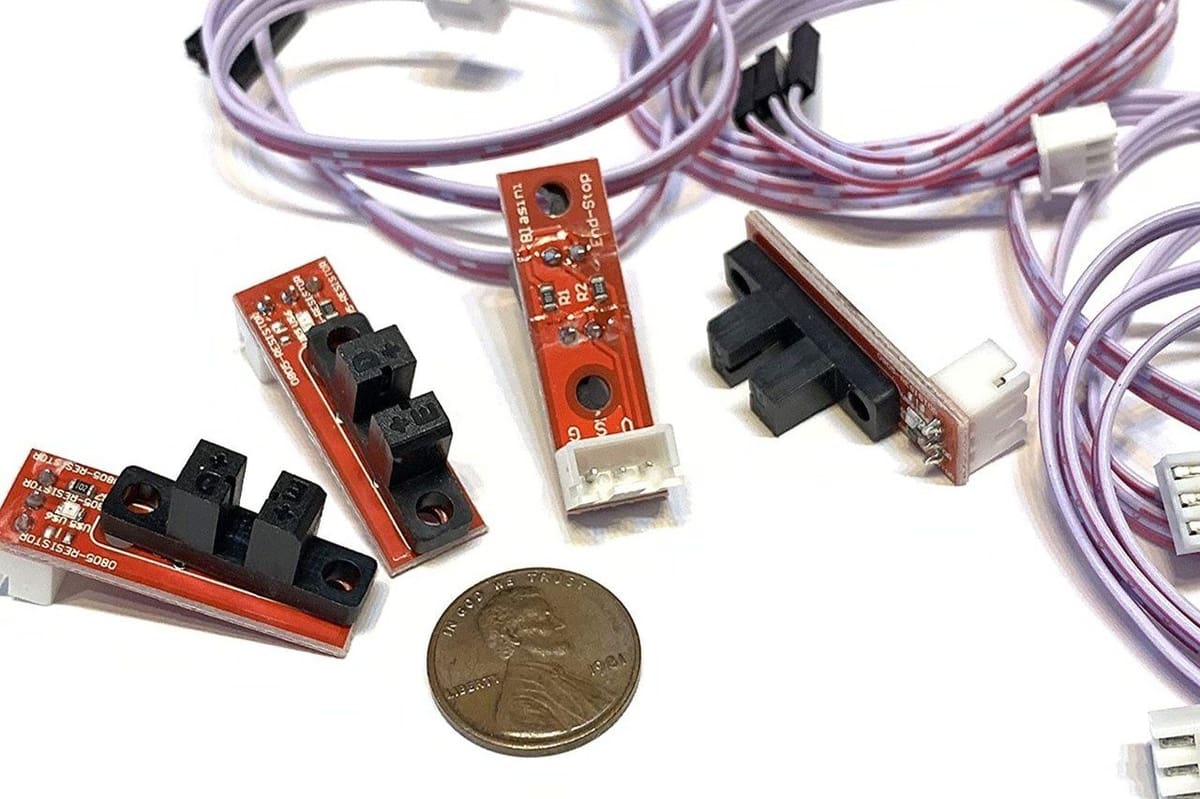
Optical Sensors
Pros
- They’re also very cheap.
- They don’t cause any wear on filament when it goes through the sensor.
Cons
- They don’t work with clear filament.
- They can be less reliable.
Resources Before You Start
Before we jump into the steps of installation, it can be helpful to check out a few resources:
- Although we’re only interested in the installation of the sensor on the stock board, Teaching Tech does cover the installation of other boards.
- Design Prototype Test covers the process of installing an optical sensor on the Duet 2 Wi-Fi and the Duet Wi-Fi in their video.
- As an additional resource, we have an article on fitting your own filament runout sensor as a weekend project that you might want to check out.
Step #1: Setting Up the Sensor
Whether it’s optical or mechanical, the first step is to accommodate your filament runout sensor. The installation and configuration processes for each type of sensor differ, but we’ll go over both in this section, first going over optical and then mechanical.
Optical
After buying a switch, transforming it into a versatile filament runout sensor will require an additional part.
You have a few options:
- A fast and easy one is printing a single-piece model. However, it won’t work to detect transparent filament. If you’re planning on never using transparent filament, it’s an easy choice. Plus, this option doesn’t require an additional spring to work; the sensor just screws straight into it.
- If you want your optical sensor to detect transparent filament, then a multi-part filament sensor is the way to go. You’ll need that additional spring to make it work. It also utilizes a PTFE (Teflon) guide, so assembly is slightly more complex.
- Instead of printing, another easy option is purchasing a sensor with a mount that’s compatible with the Ender 3s. A great choice is BigTreeTech’s smart filament sensor, with two PTFE couplers that you can insert tubing into for 1.75-mm filament.
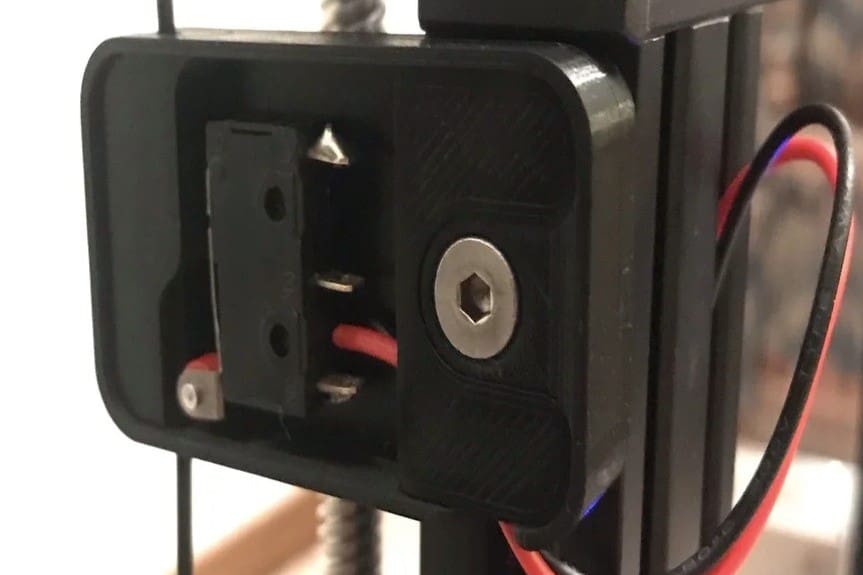
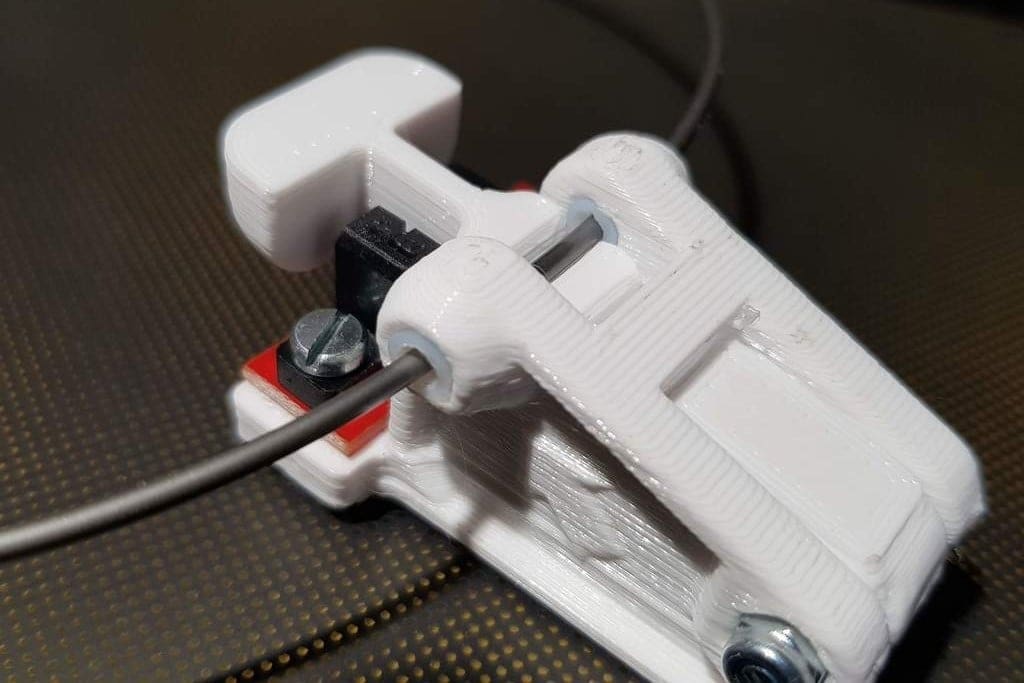
Mechanical
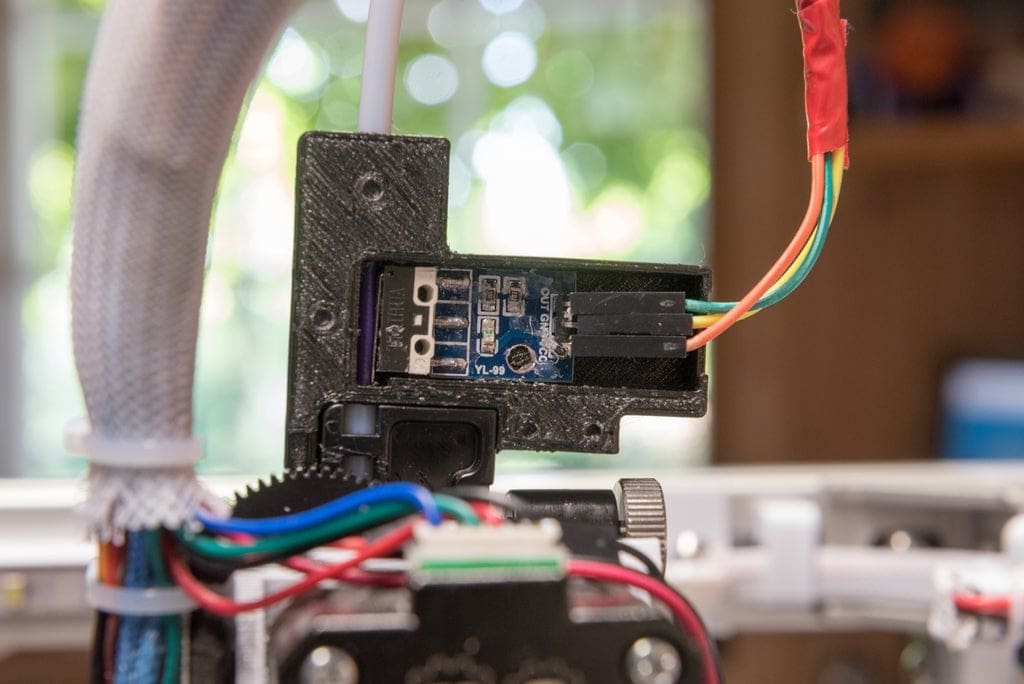
If you decide to go for the mechanical switch, we have two recommended options for the printed part:
- This switch housing is an excellent choice, as it serves the dual function of both being a filament runout sensor as well as guiding the filament away from the Z-axis lead screw (because it screws onto the Z lead screw guide). It should work with the stock screws and doesn’t require a PTFE liner.
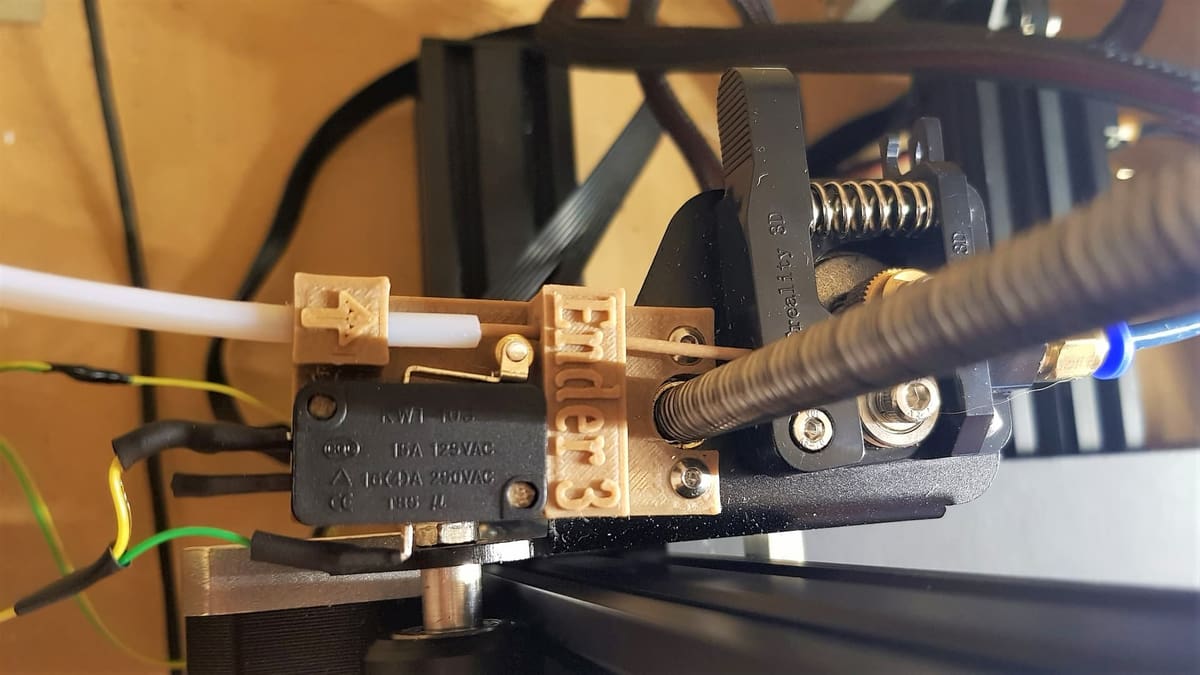
- If you have a larger limit switch, then this sensor housing is for you. It does require a couple of pieces of PTFE as a liner, but it’s nicely demarcated with an arrow for filament insertion direction and is labeled on top with the words “Ender 3”.
Step #2: Hardware & Installation
Once you’ve printed your choice housing and have your sensor ready to go, you’re ready to connect the device to your printer’s mainboard.
The newer Creality mainboards, such as the V4.2.2 or V4.2.7 models, as well as some newer non-Creality boards, have a 3-pin port dedicated to running a filament sensor. If you have a motherboard with a dedicated sensor port, simply plug your sensor’s 3-pin (or 2-pin) connector into the port, properly aligning the ground, power, and signal cables.
If you have an older generation of Creality mainboard or another board that doesn’t have an open sensor port, we recommend using a pin 27 board to easily connect your sensor’s cable to the mainboard. With this, you won’t have to cut any wires or do any complex soldering jobs.
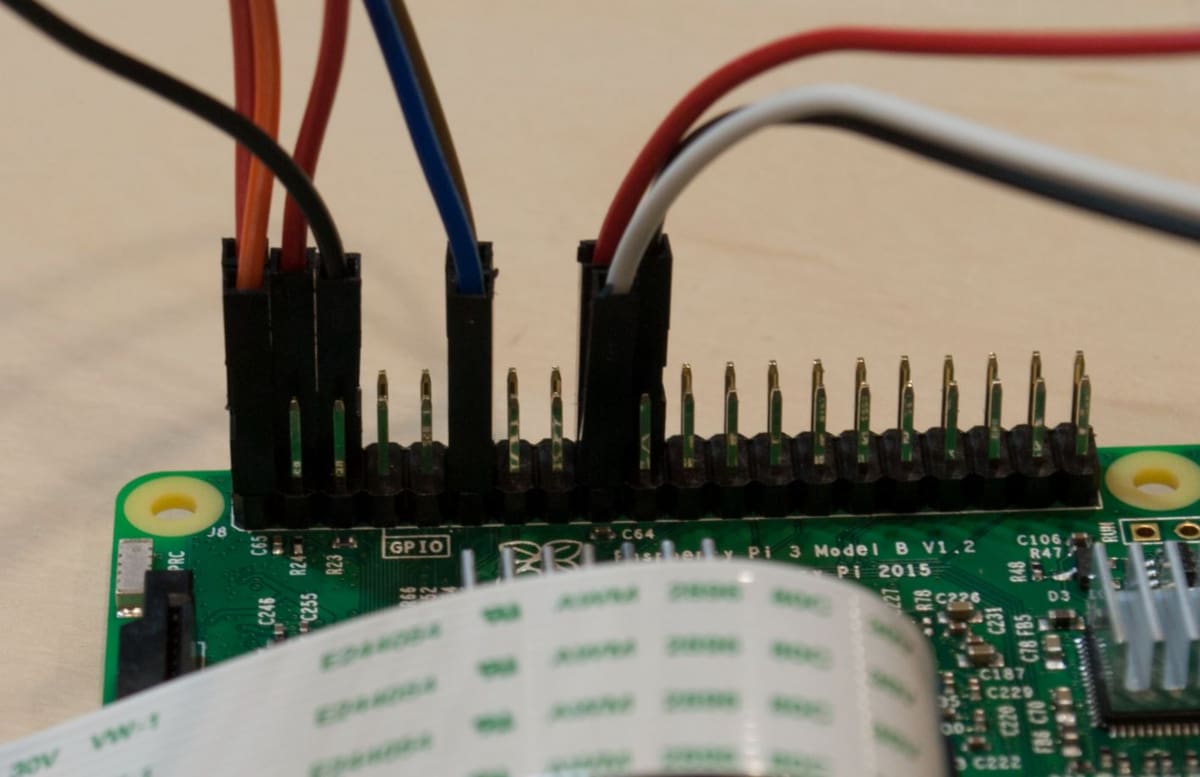
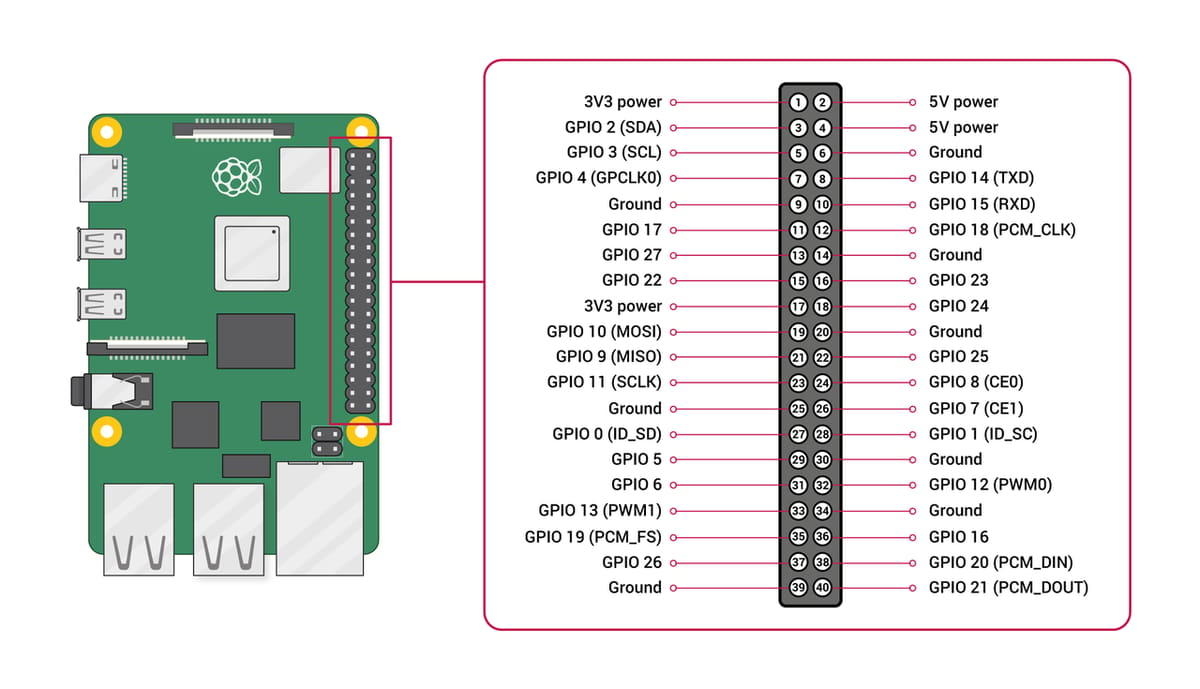
If you’re already using a pin 27 board for auto-leveling your Ender 3, then you can also try using a connected Raspberry Pi board with OctoPrint installed. For this method, you have to plug the signal wire into any of the GPIO pins on the Raspberry Pi pin header and note the pin you used. Then, plug the negative wire into any of the ground pins on the large pin header. If you need help, use a schematic diagram of a Raspberry Pi (we’ve included an image below).
Step #3: Adjusting Marlin
Now you have to adjust your 3D printer’s firmware to enable the filament sensor. This will allow your printer to actually use it to detect if filament is present.
Most people do this the traditional way, by editing the firmware program externally and flashing it to the printer’s motherboard. However, you can alternatively edit your printer’s firmware via OctoPrint, which can do more than just start prints and control temperatures. We’ll go over both methods in this section!

Option #1: Directly Editing Firmware

The Ender 3s all run on Marlin firmware in the stock setup. To connect your filament runout sensor to your Ender 3 and integrate its use, you’ll need to adjust your firmware. Luckily, Marlin makes it super easy to alter the firmware.
The Ender 3, Pro, and V2 are all pretty similar, with the exception of the Ender 3 V2’s upgraded (V4.2.2 or V4.2.7) 32-bit mainboard. The new mainboard has additional ports for a BLTouch and a filament runout sensor, as well as a pre-installed bootloader for flashing new firmware through the MicroSD card slot.
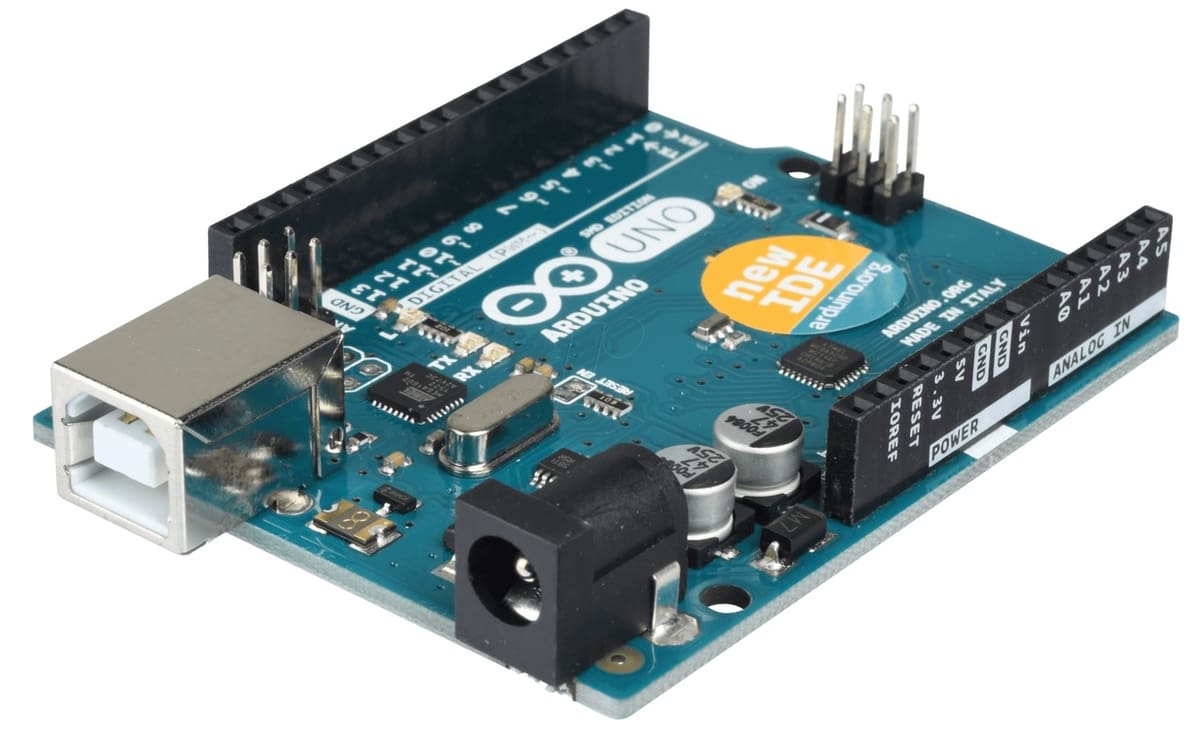
For the original Ender 3 and Pro, you’ll need to use an ISP to USB connector or a microcontroller (such as an Arduino Uno) to serve as a bootloader for the V1 boards on the original and Pro Ender 3s. You can check out our guide to installing new firmware for the original Ender 3 and Ender 3 Pro, as well as our guide for this process on the Ender 3 V2.
If you’re using Marlin 1.1.9 firmware, which many of the original and Pro printers run from the factory, you’ll need the Arduino IDE program for editing your firmware.
If you’re using Marlin 2.0, which the Ender 3 V2 is more capable of using, then you’ll need the Microsoft Visual Studio Code with the PlatformIO and Auto Build Marlin plug-ins.
Below are the firmware modifications and adjustments you need to make before uploading to your printer:
- In “Configuration.h”, uncomment “FILAMENT_RUNOUT_SENSOR” (backspace the “//”).
- In “Configuration.h”, under the “FILAMENT_RUNOUT_SENSOR” section, ensure that “NUM_RUNOUT_SENSOR” is set to 1.
- In “Configuration.adv.h”, uncomment “ADVANCED_PAUSE_FEATURE”.
- In “Configuration.adv.h”, under the “ADVANCED_PAUSE_FEATURE” section, set “FILAMENT_CHANGE_UNLOAD_LENGTH” to 300.
- In “Configuration.adv.h”, under the “ADVANCED_PAUSE_FEATURE” section, set “FILAMENT_CHANGE_FAST_LOAD_LENGTH” to 300.
- In “Configuration.h”, set “EXTRUDE_MAXLENGTH” to 301.
Additionally, before building and flashing your new firmware, make sure that your pinouts match up with how your sensor is wired on your mainboard. However, if you have your stock mainboard and have configured Marlin for your specific mainboard, it should already be correct.
Option #2: Using OctoPrint
For those of you who have OctoPrint already running, this should be easy. If you don’t, then check out our article on setting up OctoPrint on an Ender 3. Note that this modification utilizes the OctoPrint filament plug-in.
- Plug your SD card into the computer.
- Open “config.txt” with a good text editor, like Notepad++. (It’s not recommended to use WordPad because it’ll mangle the file.)
- Put the following code into the file (it can go anywhere). Note that the first line shouldn’t be inset, the second line should be inset two spaces, and both the third and fourth lines should be inset four spaces.
plug-ins:
filament:
pin: XX
bounce: 400
Finally, “XX” should be replaced with the GPIO pin number you plugged the signal lead into.
With these few steps, your Ender 3 is all set to go with its filament runout sensor. Enjoy printing into the night!
License: The text of "Ender 3 (V2/Pro) Filament Sensor Upgrade: 3 Easy Steps" by All3DP is licensed under a Creative Commons Attribution 4.0 International License.