20 Simple Arduino Projects for Beginners

Arduino development boards are nifty little devices with huge potential. Read on for simple and useful Arduino projects for beginners.
Practical Projects
Microcontrollers power everything, from your microwave to your car’s engine. While they were once difficult to program, requiring complex wiring and a deep understanding of chip architectures, that changed with the arrival of Arduino. Launched in 2005 to simplify electronics for design students, Arduino has evolved into a vast global ecosystem that supports everything from simple LED blinkers to advanced AI and Internet of Things devices.
Whether you want to automate your home, build a robot, or make some LEDs blink, the barrier to entry has never been lower. Thanks to a massive global community sharing code and tutorials, help is always just a click away. Coupled with the modern Arduino IDE 2.0, which adds helpful features like autocomplete and error detection, a beginner can now start building without needing an engineering degree.
In this article, we’ll look at some fascinating projects for beginners that you can build with these versatile boards. Remember, these projects are just a starting point, so feel free to make them your own!
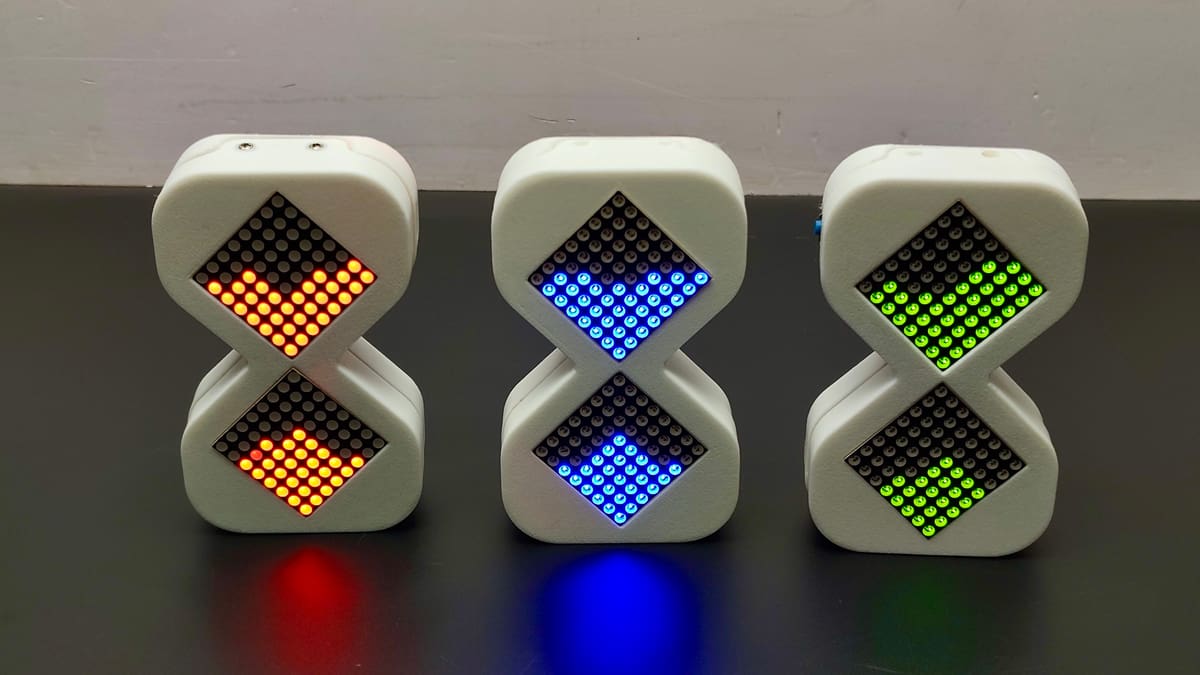
LED Hourglass
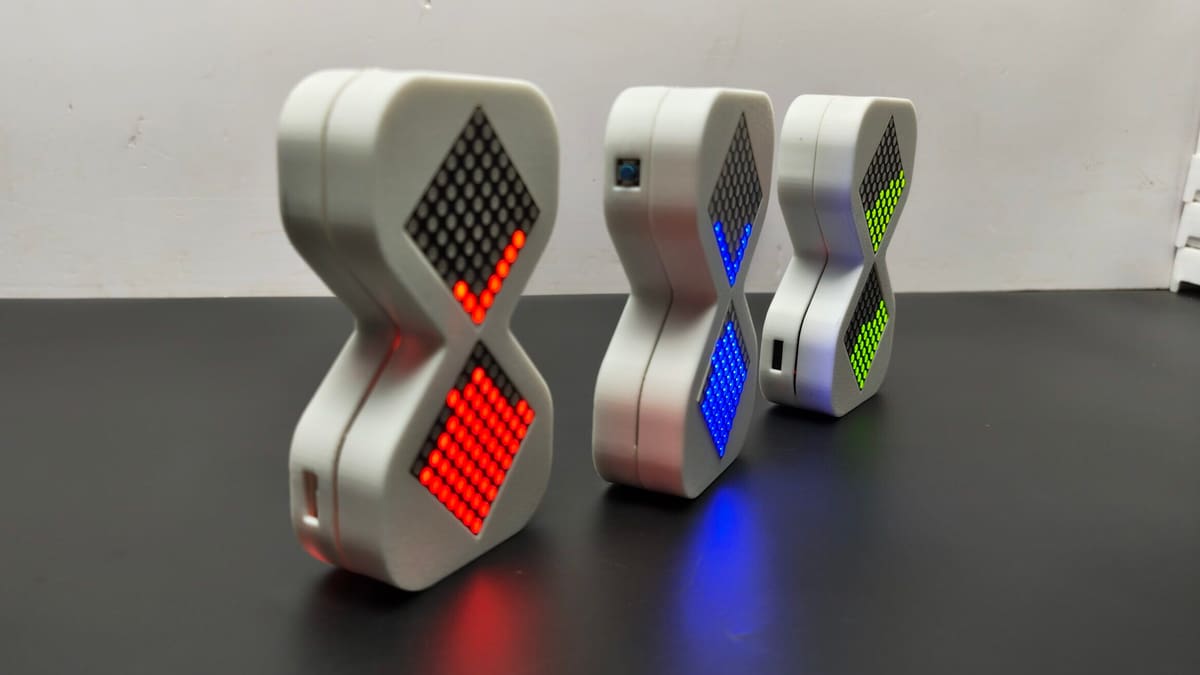
The concept is brilliant yet accessible: two 8×8 LED matrices act as the “bulbs” of an hourglass. The secret ingredient is an MPU6050 accelerometer – a sensor that detects orientation and motion. When you physically turn the device over, the Arduino detects the change in gravity and animates the LED “sand” particles falling down to the bottom matrix.
While the physics simulation in the code may seem complex, the physical build is accessible to beginners: you just need some basic soldering skills. It’s an excellent introduction to using I2C sensors and controlling multiple displays. Plus, the end result is a desk gadget that looks fascinating in the dark! If you don’t own a 3D printer, have the case printed via Craftcloud.
- Designer: Edison Science Corner
- Project page: Arduino Project Hub
- Core components: Arduino Nano, 2x MAX7219 LED Matrix modules, MPU6050 accelerometer
Watering System
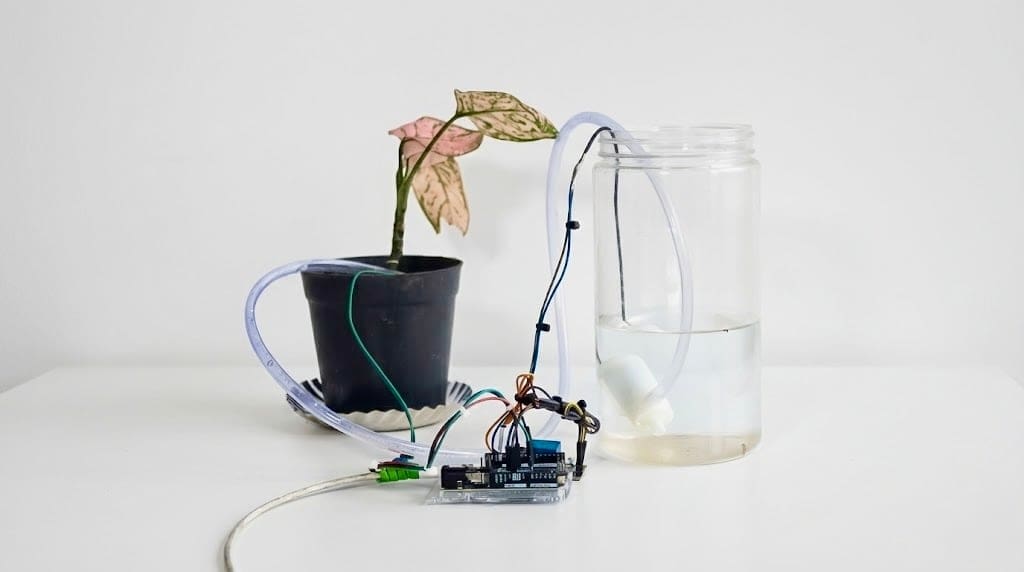
We’ve all been there: you go on vacation and come back to find your favorite fern crispy and brown. This project solves that problem permanently by building an automated, internet-connected watering system. Using the new Arduino Uno R4 WiFi, this system not only monitors your plant’s soil moisture but also allows you to control the water pump remotely via your smartphone.
The project cleverly uses the Uno R4’s built-in LED matrix to give your plant a “personality” – displaying a smiling face when the soil is moist and a sad face when it’s dry. The integration with the Blynk IoT app lets you check moisture levels from anywhere in the world and trigger the pump with a single tap.
It’s a perfect introduction to the world of Internet of Things). You’ll learn how to handle analog sensors, control high-power devices like pumps using relays, and connect your hardware to the cloud without needing complex coding skills.
- Designer: me_yogesh
- Project page: Arduino Project Hub
- Core components: Arduino Uno R4 WiFi, soil moisture sensor, 5V relay module, mini water pump, Blynk app
Touchscreen Calculator
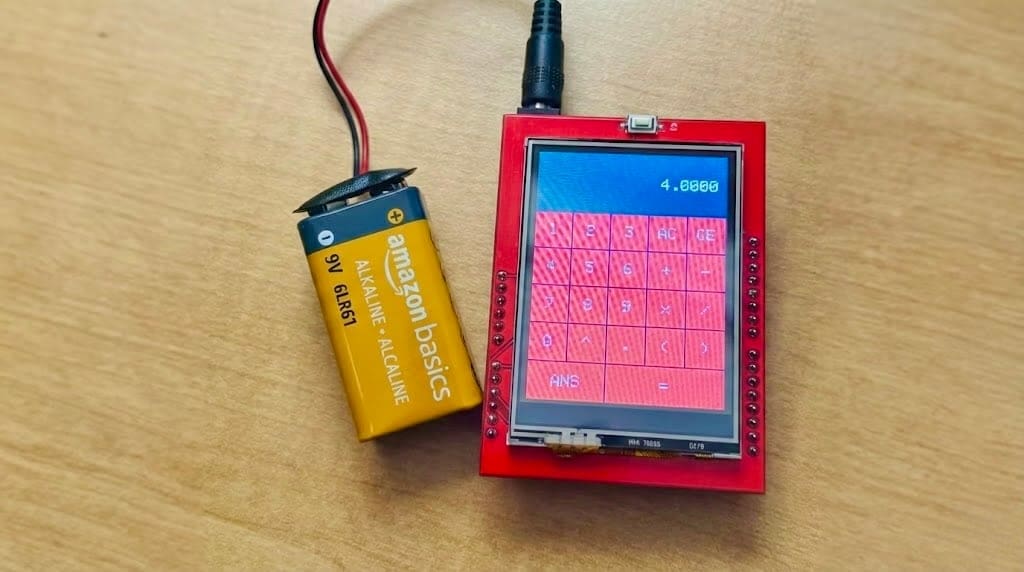
Who says you need buttons to do math? This project upgrades the humble calculator by giving it a full-color touch interface. It uses a 2.4-inch TFT shield that snaps directly onto an Arduino Uno, eliminating the need for a messy tangle of wires.
What makes this project special is the software behind it. Instead of just doing basic addition, the code implements a “stack-based” parsing algorithm – the same logic used by real programming languages to solve complex mathematical expressions with parentheses and order of operations. It even includes an “ANS” button to recall previous results, just like a scientific calculator.
The challenge lies in understanding how the code maps physical touches to screen coordinates, making it a perfect exercise for learning about interface design on embedded systems.
Smart Fan
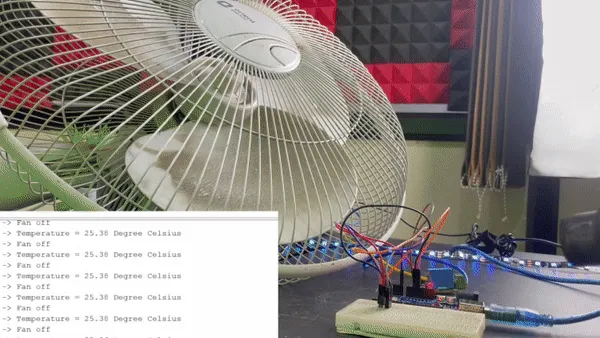
The main components of this project include an LM35 temperature sensor. This is a popular sensor in the electronics world due to its simplicity and accuracy, as well as a relay. A relay is a switch that allows you to connect and disconnect two circuits by controlling an electromagnet. These devices are widely used in various industries, including home automation, the automotive sector, and many others.
The principle is simple: The temperature sensor continuously monitors the room temperature and sends the data to the Arduino. When the board receives a temperature reading that exceeds the desired value (which is previously set), the Arduino triggers the relay to switch on the fan. When the temperature has reached the desired value, the relay will switch off the fan.
- Designer: Prathamesh Barik
- Project page: Circuit Digest
- Core components: Arduino Uno, temperature sensor, relay
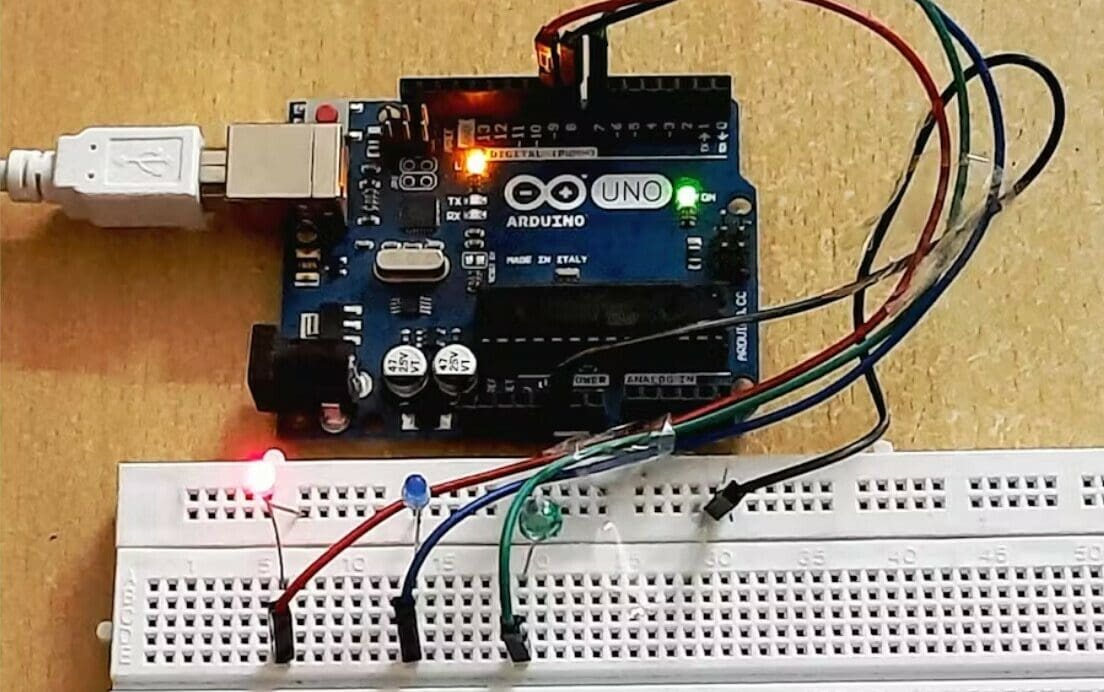
Accurate Clock
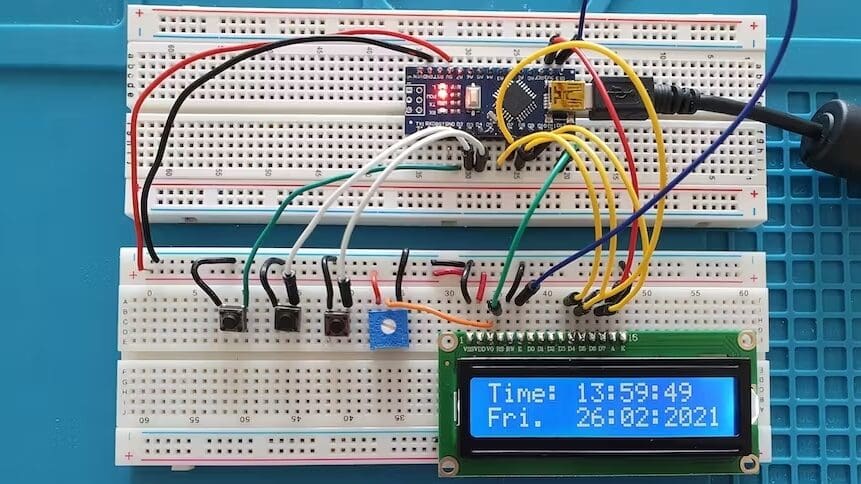
Do you appreciate being extremely punctual and truly knowing the precise time of day? This easy-to-make Arduino clock is accurate. Though the project uses a Nano, it seems replicable on other Arduinos, such as the Uno.
The extremely responsive creator (who carefully answered all makers’ questions) put together this project to make a precision timekeeper. The trick here is the code, which utilizes date storage and calculations. This project is also highly budget-friendly, requiring only a few core components to bring it to life.
- Designer: paulsb
- Project pages: Arduino Project Hub, Hackster
- Core components: Arduino Nano, tactile switch, potentiometer, LCD, jumper wires
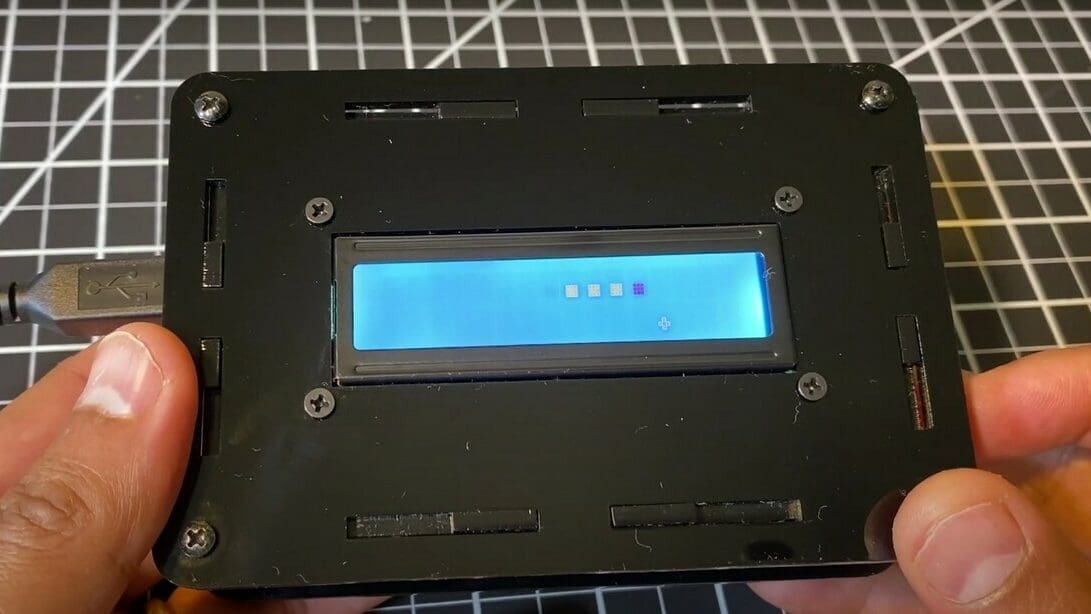
Room Thermometer & Humidity Meter
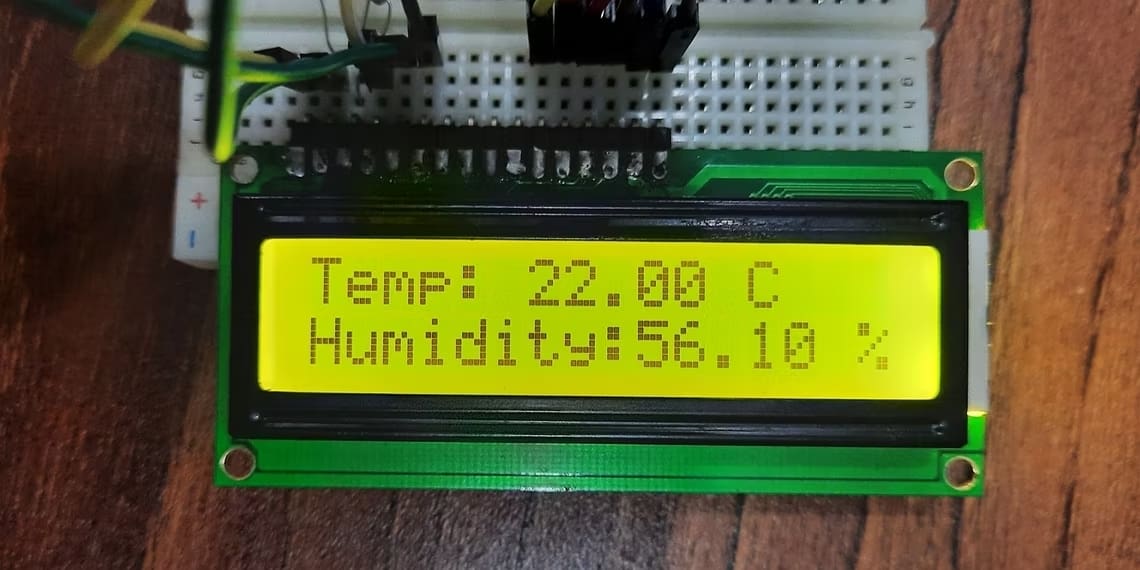
This is a great project if you need to keep an eye out for how warm and humid a room in your home or garden is getting, particularly to prevent mold or overheating. It’s a low-budget creation, and the steps in the tutorial are straightforward and well explained.
You’ll hook up the Arduino to your computer and set up the sensor and LCD with all the relevant schematics included. Finally, you’ll connect the LCD and sensor with a circuit, then upload the code to the Arduino. There’s a helpful YouTube video that shows the testing out of the sensor; the creator recommends to test its accuracy by holding it over a cup of hot water.
- Designer: Ummara Mushtaq
- Project page: Make Use Of
- Core components: Arduino Mega, USB cable, DHT22 sensor, LCD display, breadboard, resistors
RFID Door Lock

There are lots of doors in everyone’s house. The most classic and common type of lock works with a metal key. But if you’re a maker and you’re into domotics, this can be a great project to add a twist to your home while learning to use Arduino. Your key will become a convenient RFID tag that the Arduino will recognize to unlock the door.
The RFID tag is unique, so it’s the only key that can open this lock. The RFID reader recognizes it, and a green LED turns on. Arduino instructs the servo motor to open the lock, which is made out of 3D printed parts. If you try to open the lock with a different tag, a red LED will switch on and the motor won’t move.
The creator has provided a detailed guide so you can bring this project to life, too! Once it works, you can install it anywhere you want it. Feel free to customize the structure or even create a safe.
- Designer: Robo Hub
- Project page: Instructables
- Core components: Arduino Uno, RFID reader, servo motor
Cleaning Robot
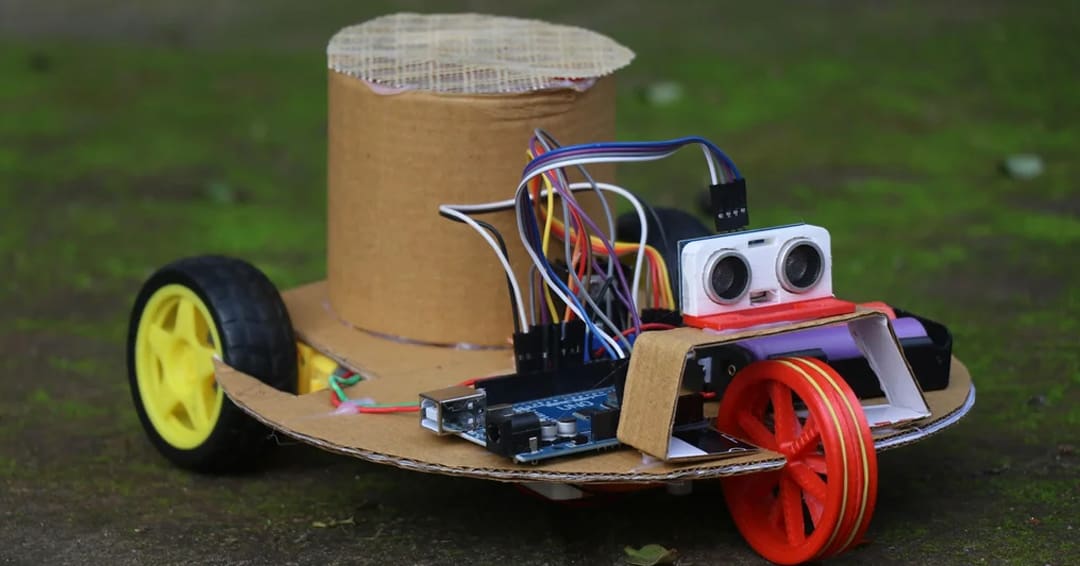
Cleaning the floor is a task that takes a little bit of time every day. When you have a busy schedule, it can get tricky to keep up with the accumulation of dust, especially with pets. That’s where this cute cleaning robot comes in handy! You can assemble it with just a few electronic components and a cardboard structure.
The robot cleans thanks to a simple yet brilliant mechanism. When you turn on the robot, the motors start spinning. An ultrasonic sensor is used to scan the area and detect obstacles. If the sensor notices a barrier, the wheels start running in reverse to change direction, then starts to move forward again. During the whole process, a fan is always spinning to collect the dust and dirt on the floor.
To create the robot’s body, you can use off-the-shelves parts and some carboard sheets. Alternatively, you can get creative and use 3D printing to build a sturdier robot – either designing and printing the components yourself or using a 3D printing service like Craftcloud to get your components professionally printed.
- Designer: CrazyScience
- Project page: Instructables
- Core components: Arduino Uno, ultrasonic sensor, motors, DC fan
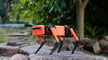
BlindSight

This is a thoughtful wearable (if you add a couple of accessories) device for the blind or sight-impaired. It provides vibrations for its wearer to avoid obstacles in the way via the help of a sensor.
The brains of the wearable is the Arduino Uno, using a beginner-friendly circuit design. The project’s creator does a great job clearly explaining the circuit assembly and how to set up the necessary software, with some helpful suggestions about how to prolong the battery life. All in all, while easy to make, the thought process behind it is sophisticated.
And the creator hasn’t stopped, further developing the project with a second version that has a smaller footprint, among other additional features.
- Designer: Daniel Ramsgard
- Project page: Hackster
- Core components: Arduino Uno, ultrasonic sensor, transistor, vibrating disc motor, jumper wires, 9-V battery
Lightning Monitoring System
By detecting electromagnetic radiation, this clever lightning monitoring system can keep track of nearby lightning, making this both an intriguing and practical project for Arduino newbies.
You’ll need to make the initial lightning detector by the project’s creator to make this monitor, but the initial project is also beginner-friendly. After assembly and installation, the project’s creator suggests testing it out by using an electric lighter to simulate a lightning strike.
All necessary schematics and code are provided as well as a helpful YouTube video to make this cracklin’ creation.
- Designer: Mirko Pavleski
- Project pages: Hackster, Instructables
- Core components: Arduino Nano, signal amplifier module, lightning detector module, soldering iron
Projects for Fun
Anyone who says learning can’t be fun is wrong. With these projects, you’ll get great practice with Arduino boards while also having fun!
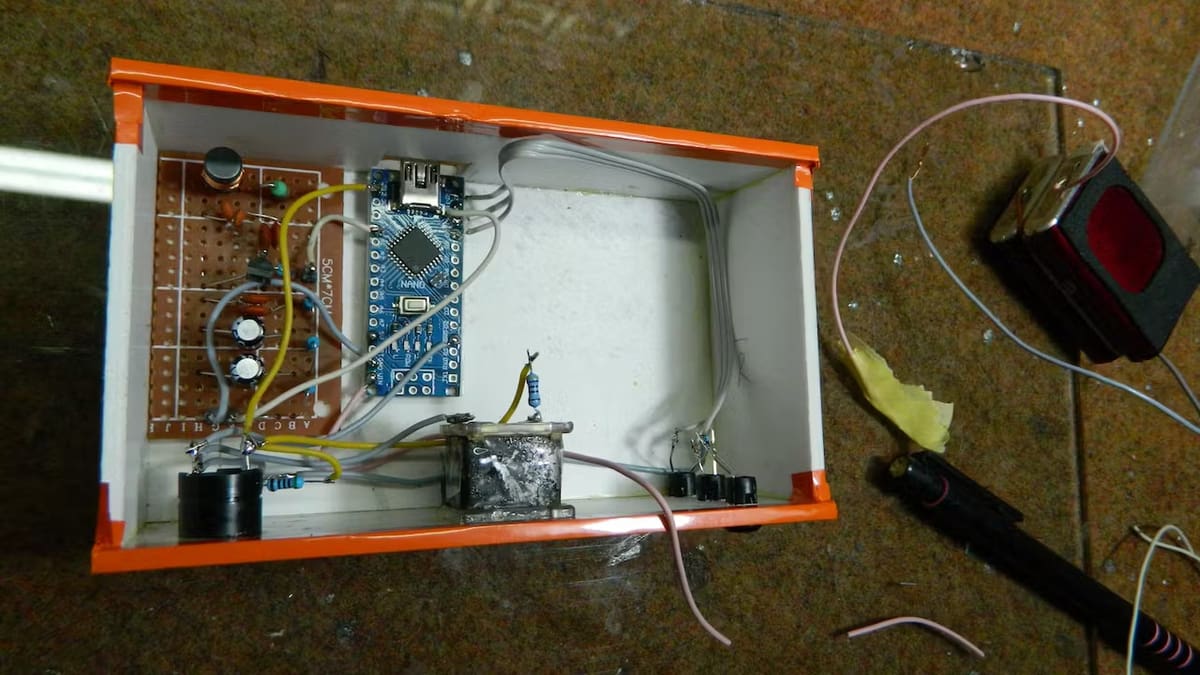
Disco Table
If you are into woodworking, this one’s for you. This DIY “disco table” features a grid of tricolor LED strips hidden beneath a diffused acrylic top. With a simple button press, you can cycle through various dazzling light patterns, turning your living room into a retro dance club or a chill mood-lit lounge.
The construction combines woodworking and electronics. You’ll build a custom maple and plywood frame with dedicated slots for the LED strips and wiring. The heart of the operation is an Arduino Mega, which controls the lights and handles the pattern switching. The creator has designed the table to be entirely battery-powered, so you won’t have ugly cords snaking across your floor.
The woodworking section is intended for advanced users who can operate a table saw. The electronics side is straightforward, utilizing headers and connectors to maintain organization. It’s a rewarding project that yields a functional piece of furniture that definitely sparks conversations.
- Designer: Beaconsfield
- Project page: Instructables
- Core components: Arduino Mega, tricolor LED strips, push button, maple/plywood, acrylic sheets
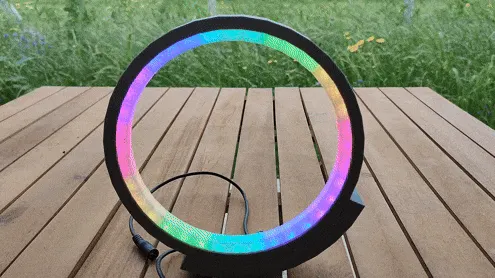
Environmental Station
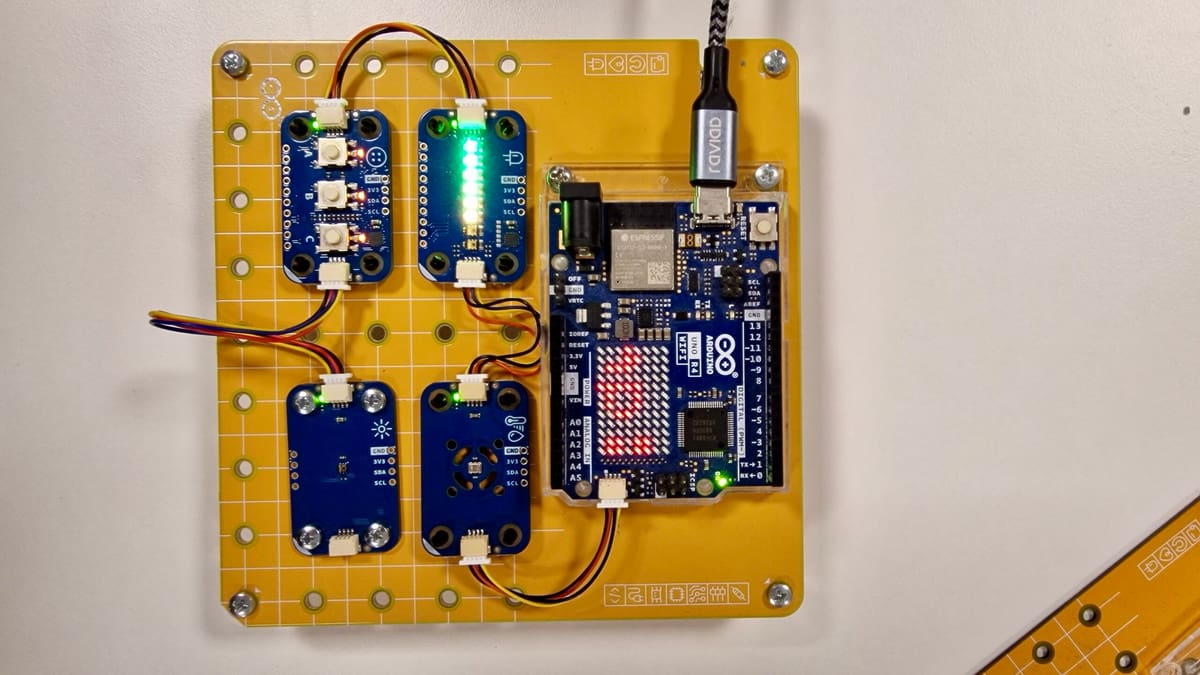
Curious about the air quality around you? This project transforms your Arduino into a fully equipped environmental monitoring station. By using the specialized Modulino sensors (part of Arduino’s plug-and-play “Plug and Make” ecosystem), you can measure temperature, humidity, and light levels with professional precision.
What makes this project perfect for beginners is the hardware simplicity. Instead of wrestling with breadboards and loose wires, the Modulino components connect via Qwiic cables—just snap them together, and you’re ready to code. The station uses an LED ring (Modulino Pixels) to visualize data: it glows red when it’s hot, blue for humidity, and bright white for high light levels.
If you’re using an Arduino Uno R4 WiFi, the project even displays exact readings on the board’s built-in LED matrix. It’s a fantastic introduction to building your own smart home devices without the headache of complex wiring.
Designer: Arduino_Genuino
Project page: Arduino Project Hub
Core components: Arduino Uno R4 WiFi (or any Qwiic-compatible board), Modulino Thermo, Modulino Pixels, Modulino Light
OLED Eyes
This little project is perfect by itself or as part of a larger project. Following the steps in this guide, you’ll create an eye animation by choosing from five designs that are perfect for a robotics project. There are tons of expressions that you can use: happy, sad, tired, angry, and much more. When you get more confident with your skills, you can even customize those animations to suit your needs.
The main component of this project is the OLED Display. This technology is made up of a carbon-based material that emits light when electricity is applied to the screen. This display is widely used in Arduino projects to show messages while keeping energy consumption low.
- Designer: Rithik Krisna
- Project pages: Circuit Digest
- Core components: Arduino Uno, OLED Display
Lie Detector
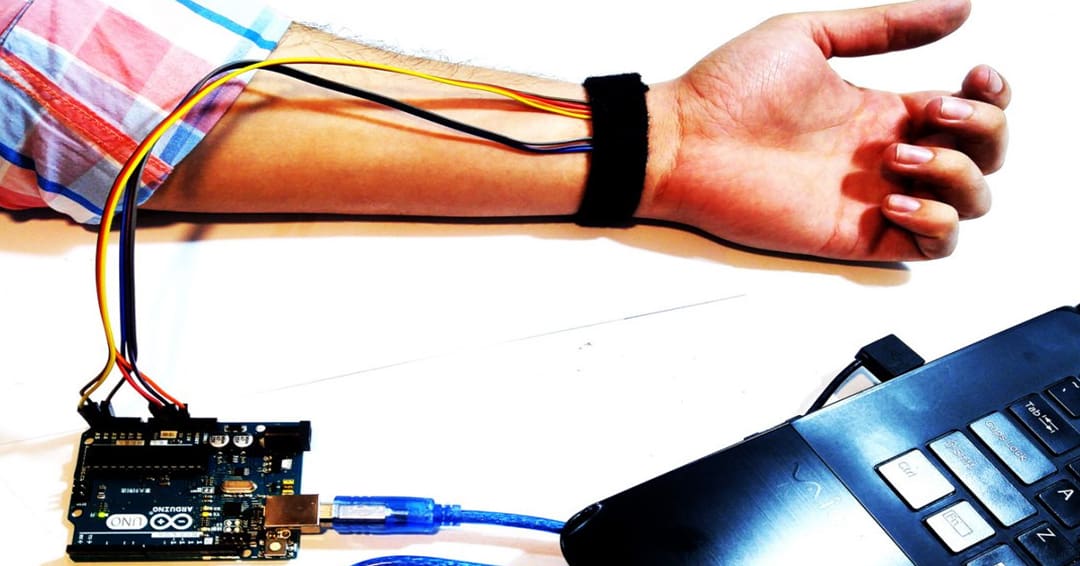
How many times have you seen something cool in a film and thought, “I want it!”? Plenty of times I bet! If you’ve ever wanted your very own lie detector, this project can make your dream come true.
The polygraph doesn’t recognize a lie or a truth; rather, it scans the reaction of the person to a question to provide useful information. The trick stands in the change of reaction: When telling the truth or a lie, our body typically behaves differently. Those signals are scanned by the lie detector’s sensors and presented to the analyzer. For this reason, you should start with some simple questions to establish the normal values before starting the interrogation.
As you can see, two sensors are key to bringing this project to life: a heart rate pulse monitor and a temperature and humidity sensor. The Arduino will record the data and show them in the serial plotter of the IDE. You’ll see two graphs: the Pulse graph and the Breath plot. With this data, you can analyze the answers using the method described above.
- Designer: Saeed Olfat
- Project page: ElectroPeak
- Core components: Arduino Uno, temperature and humidity sensor, heart rate pulse sensor
Minimalist LED Lamp
Time to shine with this simple but fun LED lamp project, creating a lovely round colorful light that you can display around your house or garden. It’s low on components, so it goes easy on the wallet as well.
You’ll need to 3D print then assemble some parts. You’ll want to make sure you’ve got some transparent filament (the creator opted for PETG) for the center, to truly let the lamp shine.
The creator provides helpful tips related to the slicer and print settings as well as helpful photos of the assembly. Detailed guidance is offered on how to program the lamp to achieve a multitude of effects, from rainbow glitter to a cool ripple effect.
- Designer: andrei.erdei
- Project page: Instructables
- Core components: Arduino Nano, 3D printed parts, WS2811 LED strip, DC plug, wires
Nano Piano

This adorably petite four-key piano is an excellent Arduino Nano beginner’s pick, thanks to its relatively simple assembly process. You’ll upload the program to Arduino IDE (all schematics and code are provided), then it all comes together with a construction base and the electronic elements stored inside a box or some such compartment.
While it can be handy to have a 3D printer to make the parts, it isn’t a must for this project. That said, you can take the opportunity to get your bearings with some beginners’ CAD programs and add to those Arduino skills at the same time!
- Designer: Christian Madlansacay
- Project pages: Hackster, GitHub
- Core components: Arduino Nano Every, buzzer, resistor, push buttons, breadboard
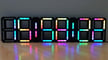
Traffic Light
This is a project that’s perfect for those who are just getting started and are looking to develop some fundamental skills. The goal is to create a traffic light using an Arduino Uno.
Using a bit of code and a simple circuit, you can set up a timer and delay for each of the three LED lights. Check out the final program in a video posted by the creator.
- Designer: DIY Inventor
- Project page: Hackster
- Core components: Arduino Uno, SSD1306 OLED, breadboard, jumper wires, LEDs
Snake Game
Another simple yet captivating game that you can make yourself with the help of an Arduino is the snake game. The module will provide you with the game development environment using a 16×2 character LCD screen. To play the snake game, you’ll need two buttons for control and optionally two piezo speakers for background sound effects and music, which would play when the snake turns or when the game is ended.
In case you’re very young and don’t remember the Nokia game, here’s how you play: The objective of this snake game is to avoid obstacles and eat apples. Each apple you eat will increase your length by one unit, and the game moves faster. The simple code is provided by the author, and it’s great for beginners to dissect and learn from.
- Designer: Sridhar Rajagopal
- Project page: Hackster
- Core components: Arduino Uno, 16×2 LCD module or ProtoStax LCD Kit V2, push buttons or ProtoStax kit for push button switches, jumper wires
Sequence Memory Game
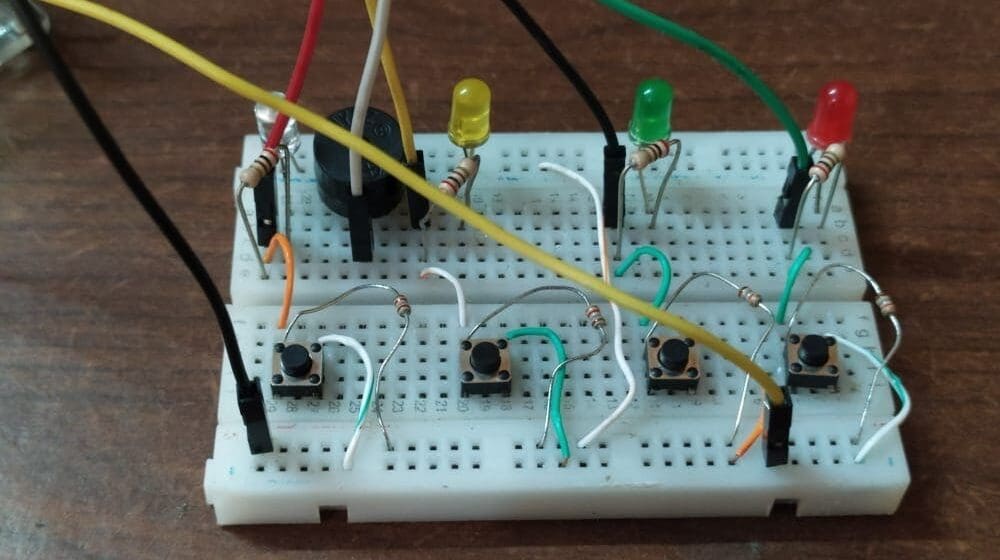
If you were a fan of the memory game Simon, this project is just for you. If you’re not familiar with the concept, this project is a sequence-based game where you watch four LEDs light up in a random sequence, then you have to repeat the sequence back by pressing buttons. Each round, the sequence gets one light longer and more difficult to remember. It’s useful in improving your memory skills, too.
In the code part given by the author, you can set your own high score to make it challenging. You can also change the alter of LEDs by changing the sequence function given in the code.
- Designer: Techatronic
- Project page: Hackster
- Core components: Arduino Uno, breadboard, push buttons, LEDs, jumper wires, buzzer, 220-ohm resistor
Bluetooth-Controlled Car
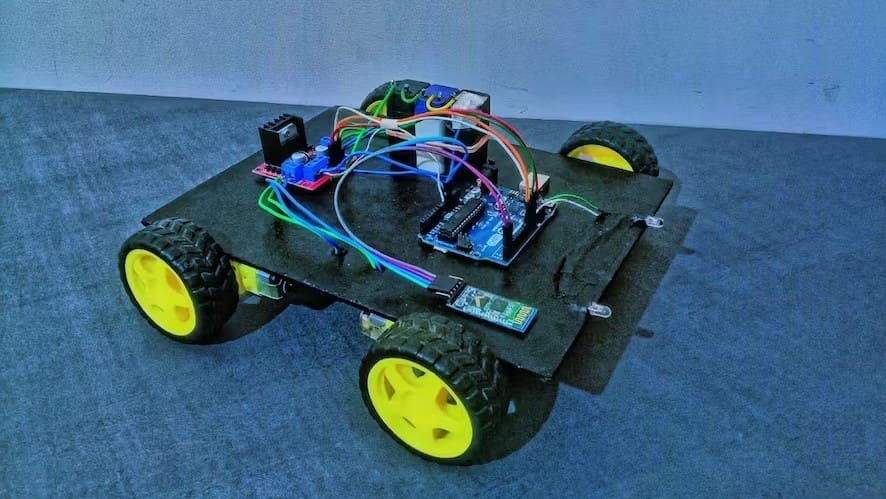
Have a zoom with the help of Bluetooth and Arduino in this remote-controlled car project. You can operate it remotely with your phone.
It’s best suited to users with some prior Arduino experience, as you’ll need to be able to be confident in making all the circuit connections, but it’s still a good stepping stone for those who’ve just gotten their bearings and are looking for a more challenging project.
Using your base, you’ll attach the motor and boards, then upload the provided code. All schematics are included, as well as a YouTube video where you can see the car in action. In case of battery issues with the car, the creator suggests attaching an extra 9-volt battery to the Arduino. Also note that the Bluetooth module should have the code uploaded prior to being attached to the Arduino, for damage prevention.
- Designer: Ameya Angadi
- Project page: Hackster
- Core components: Arduino Uno, Bluetooth module, motor drivers, DC motor, LED, wires, battery
License: The text of "20 Simple Arduino Projects for Beginners" by All3DP is licensed under a Creative Commons Attribution 4.0 International License.