Cura Retraction Settings: How to Avoid Stringing

Retraction is the key to reducing stringing. Find out how to perfect your Cura retraction settings (including the coasting settings).
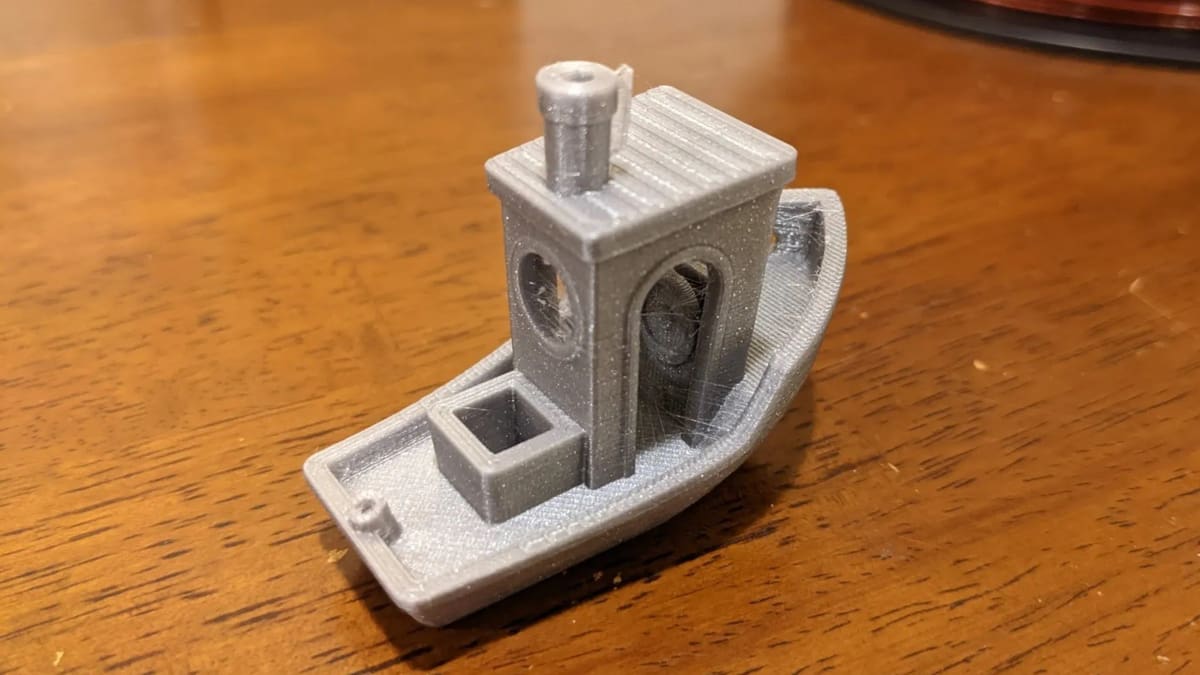
Fused deposition modeling (FDM) 3D printing works by melting plastic filament and extruding it in layers to construct 3D objects. Sometimes, this molten plastic can ooze out of the nozzle when you don’t want it to, leaving unsightly strings and wisps of plastic attached to your print.
Retraction is a process used to reduce this effect. By pulling some of the plastic out of the printer’s hot end before it travels, the pressure in the molten plastic is reduced, decreasing the odds of stringing over open spaces.
This setting is accessed and adjusted through your printer’s slicing software and can be tuned to achieve clean, precise prints. Here, we’ll run you through the right settings for the best results in Cura. Just note that some of these settings aren’t visible by default with “Basic” or “Advanced” settings visibility, so it’s a good idea to switch to “Expert” before you start experimenting.
General Considerations

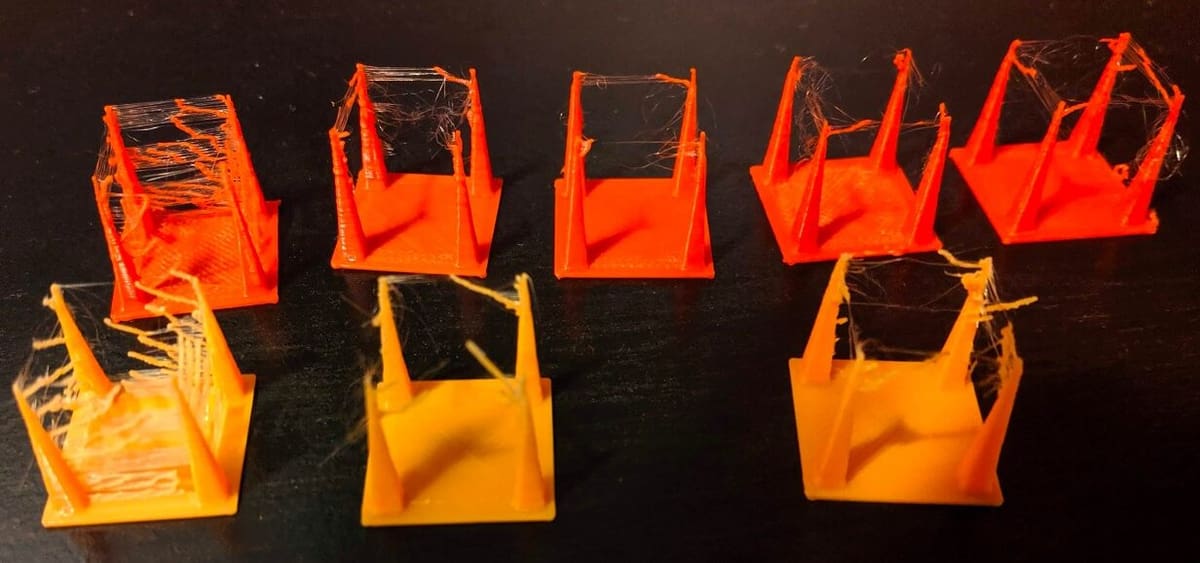
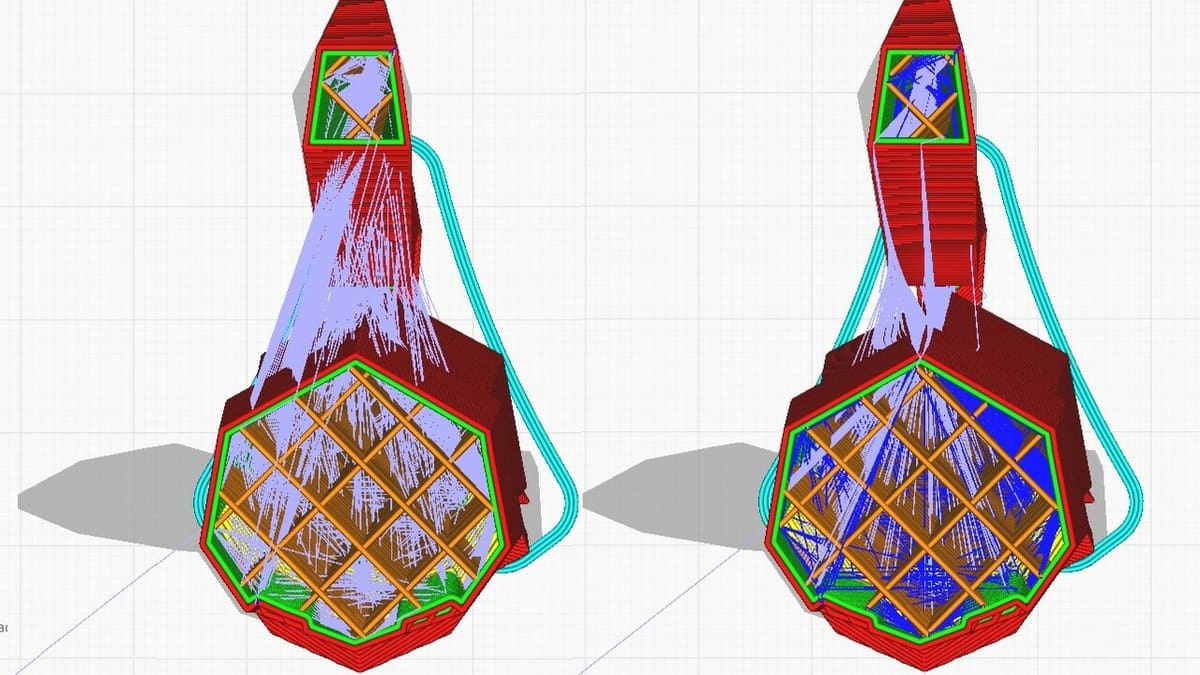
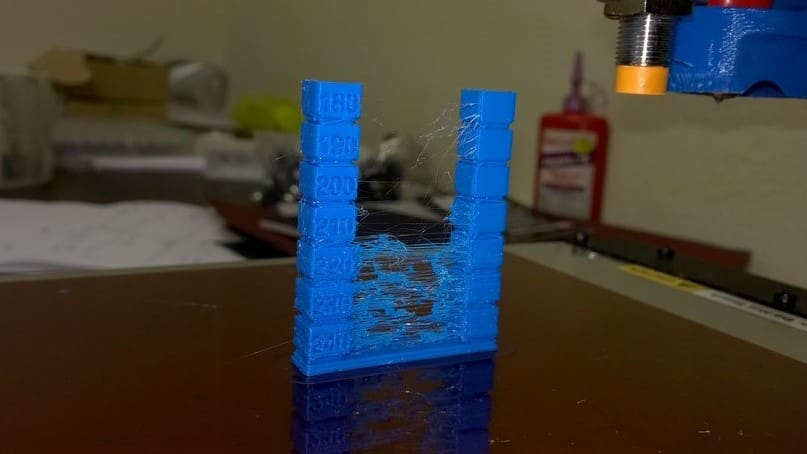
Before we get started, consider downloading this retraction test print for tuning your settings. The recommended settings provided primarily apply to PLA filaments unless specified and will have to be changed (test prints are helpful for this) to fit the type (and age) of your filament. For example, PETG, which is very hygroscopic, will have higher retraction settings than PLA because of its hygroscopic tendencies.
And it’s worth keeping in mind that the combination of the type of filament and your printer’s extruder setup (Bowden or direct) will affect the settings too. Flexible materials are more complicated to retract with a Bowden setup because of the additional pull, which can stretch the material.
The difference in retraction distances based on extruder setup is because of the feed distance from the extruder to the printhead; there’s a noticeable delay in response time, which can be exacerbated if the filament bends inside the PTFE tube and causes friction.
Lastly, it’s crucial to first calibrate your nozzle temperature according to the filament you’re using. Temperature has a significant impact on stringing behavior – too hot, and the filament may ooze excessively; too cold, and extrusion might become inconsistent. In many cases, simply finding the right temperature can greatly reduce or even eliminate stringing, making further retraction tweaks unnecessary. If you haven’t already, check out our temperature calibration guide to dial in the right settings for your material.
With that, let’s get into it!
Distance & Speed
As their names suggest, retraction distance and speed deal with how the filament is pulled out of the hot end. Both will require tuning to find the sweet spot between retraction performance and the hardware limitations of your printer.
Retraction distance changes how far back the filament is pulled. Too low of a value will not properly relieve pressure in the hot end, but too high of a value can cause jams and clogs. To find the optimal value, start with the default Cura settings and tweak the distance by 1 mm at a time until you reach the best possible results.
As a general guidance retractions distance can be set as below:
- PLA: 4-5 mm (Bowden) / 0.4-1.4 mm (direct)
- ABS: 4-5 mm (Bowden) / 0.4-1.4 mm (direct)
- PETG: 6-7 mm (Bowden) / 1-2 mm (direct)
- TPU: 7-8 mm (very hard to work properly on Bowden) / 1-2 mm (direct)
Note that all the values above are estimates just for reference, and can vary depending on your hardware and filament brand. Ideally one should perform a round of tests to find the best parameters for the setup, understanding that retraction distance should be kept as minimal as possible, as it can increase printing time.
Likewise, retraction speed changes how fast the filament is pulled back. Too low of a value will lead to sloppy retractions, but too high of a value may end up grinding the filament. Starting with the default Cura settings, tweak the speed by 5 mm/s at a time to find the optimal value.
Relevant Settings
- Travel > Retraction Distance
- Travel > Retraction Speed
Retraction Limits
First, there’s “Retraction Minimum Travel”. This setting determines the minimum distance for which retraction will occur. It’s a safety precaution against unnecessary, repeated retractions in close proximity to each other, in order to prevent filament grinding. A retraction is only performed if the printhead will be traveling far enough to warrant one.
This setting should be as high as acceptable to decrease the risk of print failure. A lower value will allow for smaller features to be printed cleanly, which is sometimes necessary, but it’ll also increase the risk of grinding. Try starting at 1 mm and adjusting as necessary in 0.5-mm increments.
A second setting meant to mitigate the side effects of retraction is “Maximum Retraction Count”, which limits the number of times that retraction can be performed on a part of the line of filament. It’s meant to reduce filament grinding, much like control of retraction speed, as grinding could potentially cause a filament jam and a failed print (plus time spent on maintenance).
By default, this setting is often way too high (i.e. suited for dual-drive extruders or harder filaments), so, if you’re experiencing filament grinding, lower this setting to 3, 4, or 5 (it’s a unitless setting), and then adjust it upwards if retraction starts to become a significant problem.
Relevant Settings
- Travel > Retraction Minimum Travel
- Travel > Maximum Retraction Count
Combing
For hygroscopic filaments such as PETG, even the best retraction settings are sometimes limited in their effectiveness. This can be mitigated with a strategy called “combing”, but it comes at a trade-off: lower overall print speed.
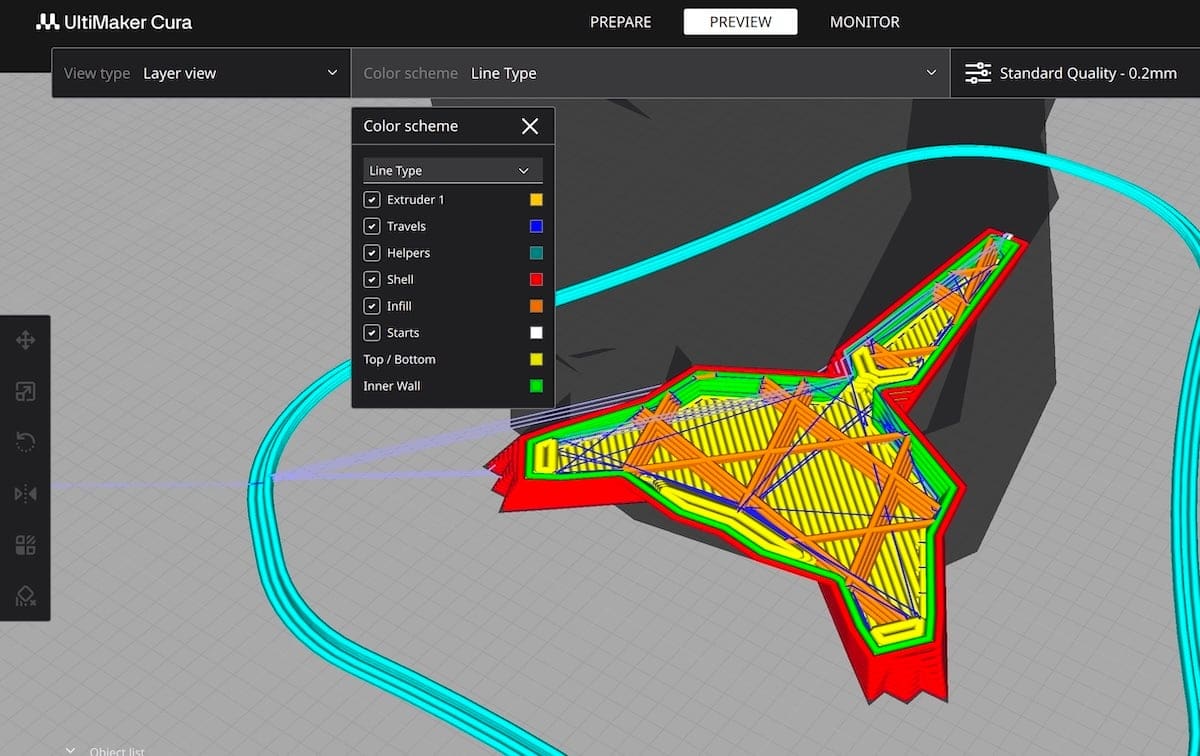
In Cura, “Combing” enables a mode that readjusts the printer’s travel moves to avoid unnecessary retractions. Instead of retracting the filament and crossing open space to reach its next location, the printhead will try to travel directly across the interior of the model. This limits opportunities for strings to form, as any oozing is left within the print.
By turning combing on, you’ll likely also see a decrease in print times, as the printer no longer has to stop to retract. Surface quality will also improve. You may, however, see an increase in scarring on the top layer of the print, left by the nozzle as it drags across the surface. Avoiding combing on top layers is possible by setting it to “Within Infill” or “Not in Skin” instead of “All”.
Relevant Settings
- Travel > Combing Mode
Wiping & Coasting
“Wiping” and “coasting” aren’t strictly retraction settings, but they can improve retraction performance. Both do what their names suggest: “Wiping” moves the nozzle a short distance across the outer wall of the model to smear off any leftover plastic, and “coasting” turns off the extruder for the final millimeters of a print line. This decreases the pressure buildup in the hot end and minimizes any blobbing or zits left by retractions.
Work with the default values (0.4-mm wipe distance, 0.064-mm3 coasting volume) and adjust by 0.1 mm and 0.01 mm3, respectively. Take special caution with coasting, as too much can lead to holes in the print from print lines not being completed. Consider setting the Minimum Volume Before Coasting to around 0.8 mm3, which will limit coasts that are too long.
Another potential cause of holes in the print is due to filament oozing out of the extruder during travel moves. To replace the lost volume that would otherwise be added onto the print as a void in the wall, Cura includes a setting called “Retraction Extra Prime Amount”, which injects a small volume of filament into the extruder during every travel move. If you find that you’re experiencing oozing, start with 0.0 mm3 and increase this setting, in increments of 0.1 mm3, until you see the results you’re looking for.
It’s also worth testing whether “Z Hop When Retracted” is helping or hurting your results. This feature lifts the nozzle slightly during travel moves after a retraction, aiming to prevent the nozzle from hitting the printed part – a concept similar to “Safe Z Distance” in CNC machining. While this can help avoid print defects or layer shifts, it may also unintentionally increase stringing by stretching the molten filament as the nozzle rises. Try printing with Z hop both enabled and disabled to see which gives cleaner results with your setup.
Relevant Settings
- Walls > Outer Wall Wipe Distance
- Travel > Retraction Extra Prime Amount
- Travel > Z Hop When Retracted
- Experimental > Enable Coasting > Coasting Volume
- Experimental > Enable Coasting > Minimum Volume Before Coasting
License: The text of "Cura Retraction Settings: How to Avoid Stringing" by All3DP is licensed under a Creative Commons Attribution 4.0 International License.