How to Connect Cura to OctoPrint – 2 Simple Steps

Connecting Cura to your OctoPrint server has never been simpler. Here's all you need to know to connect Cura and OctoPrint!
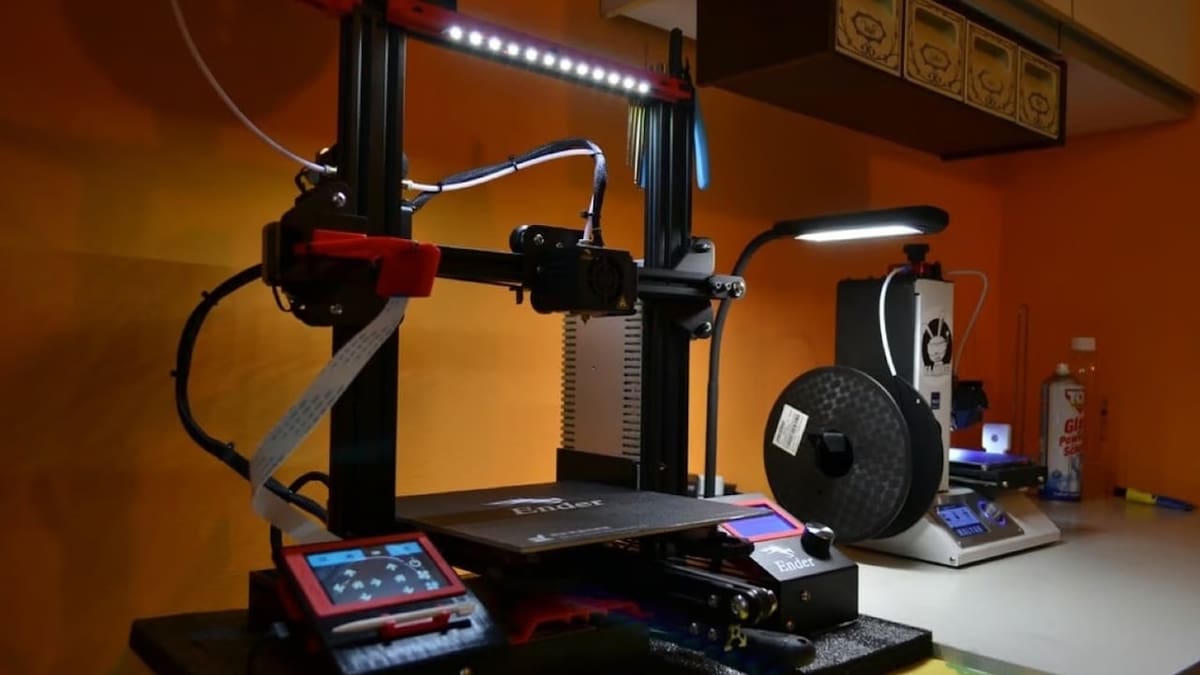
If you’ve had a 3D printer for some time, you’re already pretty familiar with slicers, the software that turns 3D models into G-code (the set of instructions that a 3D printer has to follow to print an object). You’re also probably familiar with UltiMaker Cura, one of the most popular slicers available.
You might also have heard of OctoPrint, another free program that lets you run your printer remotely from anywhere in your home by connecting it to a controller computer. All you need to manage the printing process is a web browser or even a smartphone!
In the past, 3D printing remotely with OctoPrint meant slicing a file in Cura, saving it, sending it to OctoPrint, and, finally, manually starting the print. The OctoPrint plug-in for Cura, released in 2018, streamlines this workflow!
In this article, we’ll go over installing and setting up the OctoPrint Connection plug-in in an easy two-step guide. We’ll also look at some common issues and how to fix them, in case any doubts come up.
Ready to print?
Before We Start
Let’s list everything we need before getting started:
- A computer to run Cura: While we’ll be using a Windows computer, Cura is compatible with MacOS and Linux as well.
- The latest version of Cura: The latest version of UltiMaker Cura is 5.9 at time of writing.
- The latest stable version of OctoPrint: We’ll use OctoPrint version 1.0.0 and OctoPi 1.10.3, installed on a Raspberry Pi computer. Follow our guide to installing OctoPi on a Raspberry Pi for a painless setup! Pay special attention to the “Setting up the Interface” section to get any networking problems out of the way.
- A configured 3D printer connected to the computer running OctoPrint: We’ll use a Wanhao Duplicator i3 Mini, but OctoPrint will guide you through setting up a profile for your own printer once installed. You can also check the non-exhaustive list of supported 3D printers on the OctoPrint forums.
Once all the software is installed, make sure that your 3D printer is connected to your Raspberry Pi and that it’s turned on.
Congratulations, you’ve done the hardest part! Everything from here on out is relatively easy by comparison.
Step 1: Installing the OctoPrint Connection Plug-In
Cura installs with a lot of plug-ins by default, but OctoPrint is not one of them. Let’s go over how to take care of that.
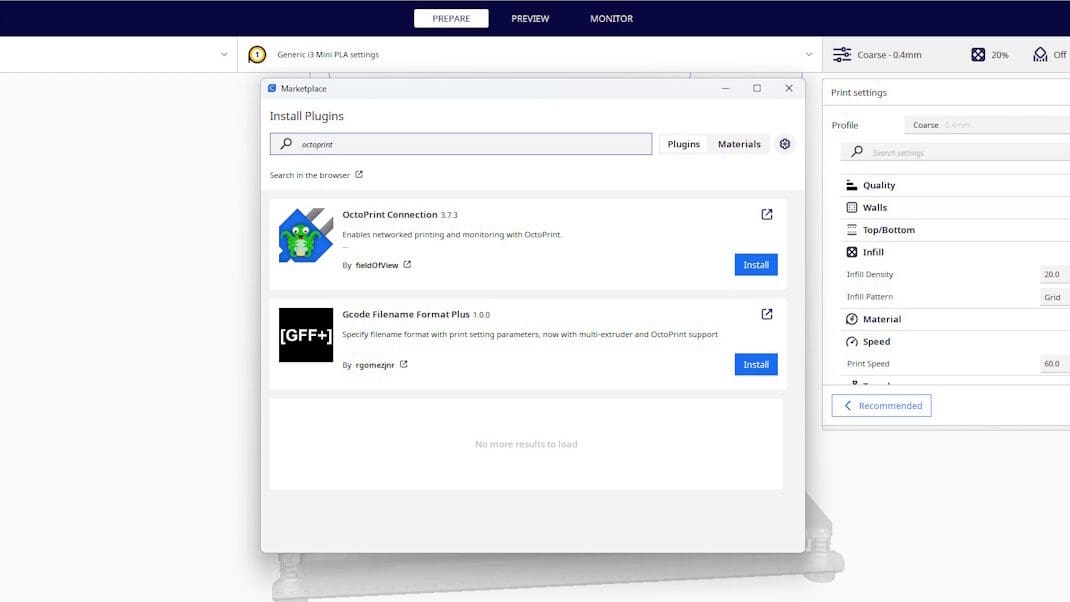
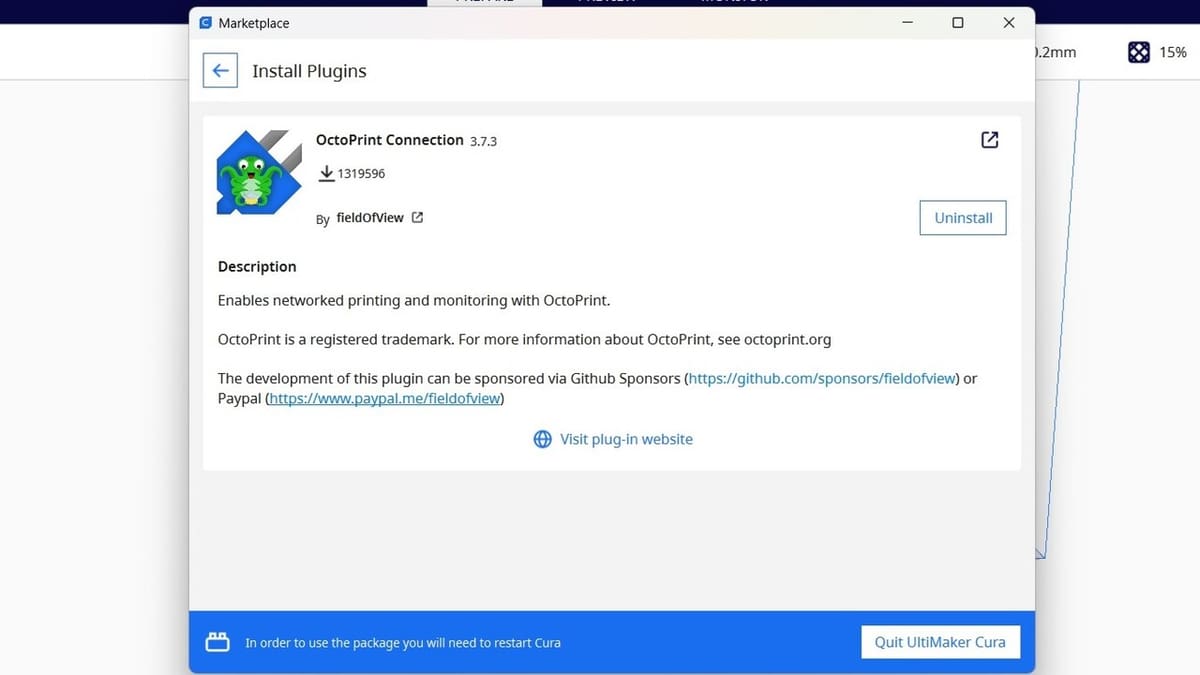
- Open Cura and sign in with a free UltiMaker account using the button at the top-right corner. Then, click on the Marketplace button next to it.
- If you don’t see the “OctoPrint Connection” in the list of plug-ins right away, use the search bar to find it.
- Once the “OctoPrint Connection” plug-in appears, click on the corresponding “Install” button. Accept the terms of the license, and the plug-in will install itself.
- Finally, restart Cura to finish the plug-in installation.
Your OctoPrint Connection plug-in is good to go! Now, we have everything we need to connect Cura to OctoPrint and your 3D printer.
Step 2: Connecting Cura to OctoPrint
Now that we have installed the plug-in, we’ll use the IP address of your OctoPrint computer and Cura’s secure API Request feature to connect them together. Here’s how to do it.
- Open and log in to your OctoPrint web interface. To find it, use the OctoPrint server’s IP address as the URL in your web browser.
- Open Cura and select “Settings” from the top menu bar.
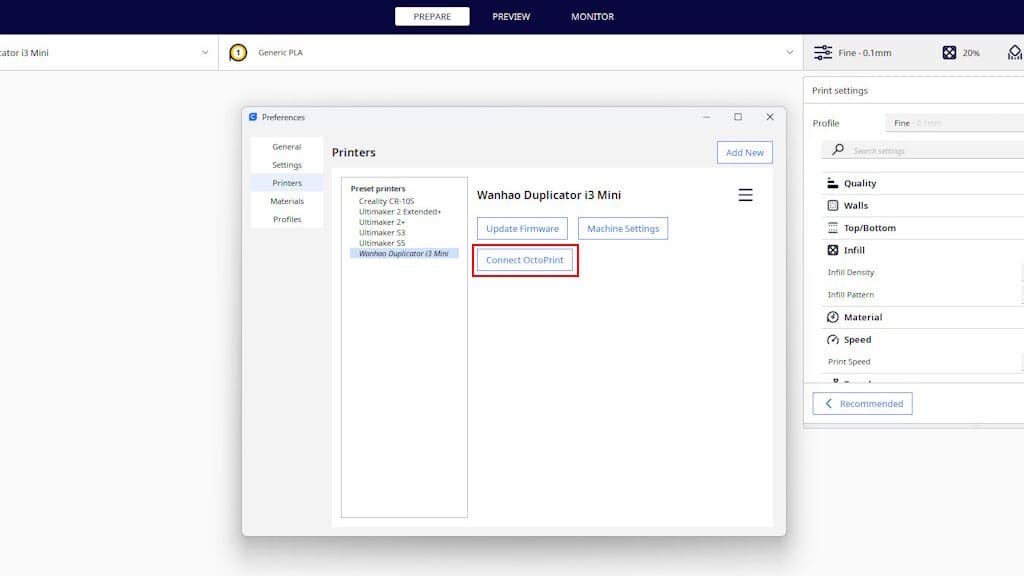
- Click on “Printers”, then “Manage Printers”.
- Select the desired printer from the list of Cura printer profiles, then click “Connect OctoPrint”.
- Click “Add” from the top of the pop-up screen and type in your OctoPrint IP address (the same URL as the OctoPrint web interface) in the “IP Address or Hostname” text box. Alternatively, your OctoPrint instance might have been automatically discovered; just click on it if that’s the case!
- Select “OK” (you don’t have to fill in the other boxes), and you should see an empty “API Key” text box.
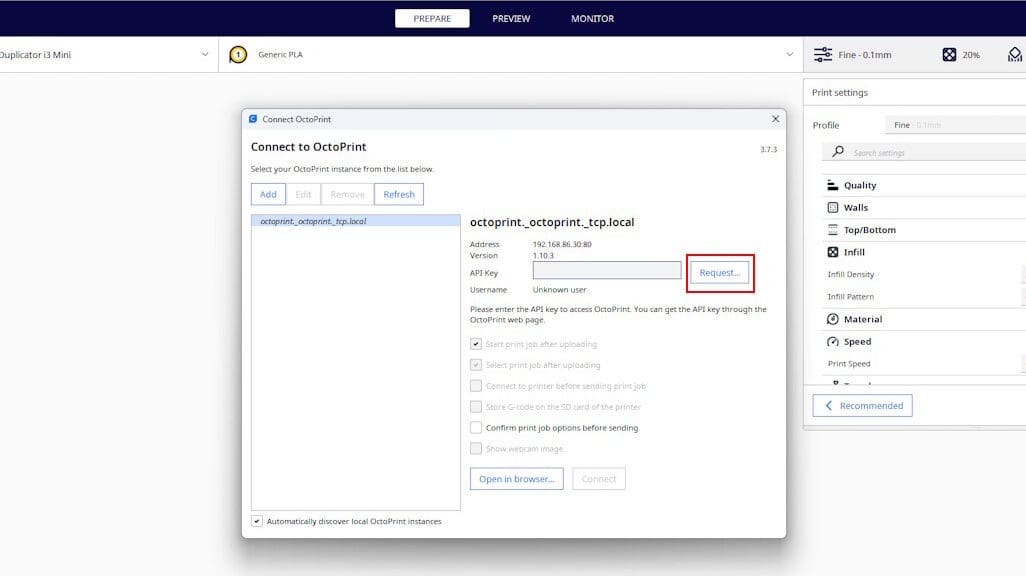
- Click the “Request…” button to the right of the “API Key” text box and your OctoPrint web interface will be opened in a new window.
- On the top-right corner of the OctoPrint web interface, a pop-up box will ask you to approve the API key request. Choose “Allow”. You can now close the OctoPrint web window.
- Back in Cura, the API key will have been copied in the API Key field. Click “Connect” and you’re done!
That’s really all it takes to install and set up the OctoPrint plug-in with UltiMaker Cura! You can now send your prints directly from Cura without needing to download and then upload G-code files.
Troubleshooting
If you run into problems, check out these tips to help you set up your OctoPrint Connection plug-in successfully. They usually fall into two categories: Cura issues and OctoPrint issues.
To Address Cura Issues
- Make sure you’re signed in with your UltiMaker account. This can make the Marketplace and plug-in installations more reliable.
- If your plug-in isn’t loading, make sure you restarted Cura. Then, click on your user icon at the top-right of the screen and click “Check for account updates”. This should sync your online account with your Cura installation. Then, restart Cura.
- If you have more than one printer set up in Cura, click on the correct printer attached to your OctoPrint instance in the printers drop-down menu before slicing files.
To Address OctoPrint Issues
- Make sure you are signed into OctoPrint.
- Make sure your 3D printer is on.
- Make sure your 3D printer is connected to OctoPrint. You can click the “Connect” button to make sure, and check the “Save Connection Settings” and “Auto Connect on Startup” boxes to future-proof that issue.
- If nothing happens when you click “Print with OctoPrint”, check the print queue in OctoPrint. You’ll be able to start the print manually from there.
If you run into any other issues, check out the Cura OctoPrint Connection plug-in page for essential information about compatibility and troubleshooting help. You can also turn to the dedicated communities on Facebook, Reddit, and the Raspberry Pi forums for peer support.
License: The text of "How to Connect Cura to OctoPrint – 2 Simple Steps" by All3DP is licensed under a Creative Commons Attribution 4.0 International License.