
Glowforge Projects: The 20 Coolest Ideas

The Glowforge 3D laser cutter is a capable machine that can create amazing things. Take a look at some of the coolest Glowforge projects!
The Glowforge is a laser cutter that’s designed with both beginner and professional users in mind. It comes in three configurations, including the Aura, Plus, and Pro. All three use mirrors to direct a laser and cut designs out of your chosen material.
While the Glowforge Aura is ideal for personal and portable use in creating items at home, the Performance Series, consisting of the Plus and Pro models, is highly recommended for workshops and businesses due to the machines’ features and capabilities. In terms of the work area dimensions, the Aura can handle materials up to 12 x 12 inches (305 x 305 mm), whereas the Performance Series has a work area that’s about 11 x 19.5 inches (279 x 495 mm). All three of the machines can cut through materials up to 1/4 inch (about 6 mm) thick.
Specifications aside, the Glowforge’s main claim to fame is its user-friendliness. Many amateur makers have given laser cutting a pass, citing the headache of extensive calibration and complicated controls. In contrast, the Glowforges are packed with features designed for convenience, such as cloud-based user software, a camera on the lid that lets you visually match up your design, and point light measurements in the cutting head.
With so much to offer, it’s no wonder that makers have been busy churning out projects on their Glowforges. In this article, we’ll introduce you to some of our favorite projects that have been made or could be made with a Glowforge.
Tools
Every maker knows that the right tools are essential. The following are a few projects that Glowforge makers are using to extend their creative capabilities.
Glowforge Tools
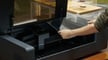
One of the major perks of owning powerful tools like 3D printers or laser cutters is being able to create your own tools for the machine. Once you’re done cutting and engraving, you can use the accessories immediately to get feedback on measurements. And, in case you’re unsure of the fit, simply hold the tools up to your machine and eyeball it.
The Glowforge Community has several to choose from. For example, these material risers are handy blocks that allow you to close the distance between the laser’s tip and the material you’re using. This makes more precise cuts and working with tougher materials possible.
Ever work with a thin material like paper or stamping rubber (see below) that can be easily nudged aside during lasering? These hold-down pins slide into the honeycomb bed, securing your material as tight as, well, a pin.
Blocks aren’t the only way to measure. If your projects aren’t coming out as crisp as you’d like, you can use a focus ruler to reliably gauge the distance from it to your laser and adjust as necessary.
- Skill level: Beginner
- Build time: 2-8 hours, but it depends on the project
- Cost: ~$15
Silicone Molds
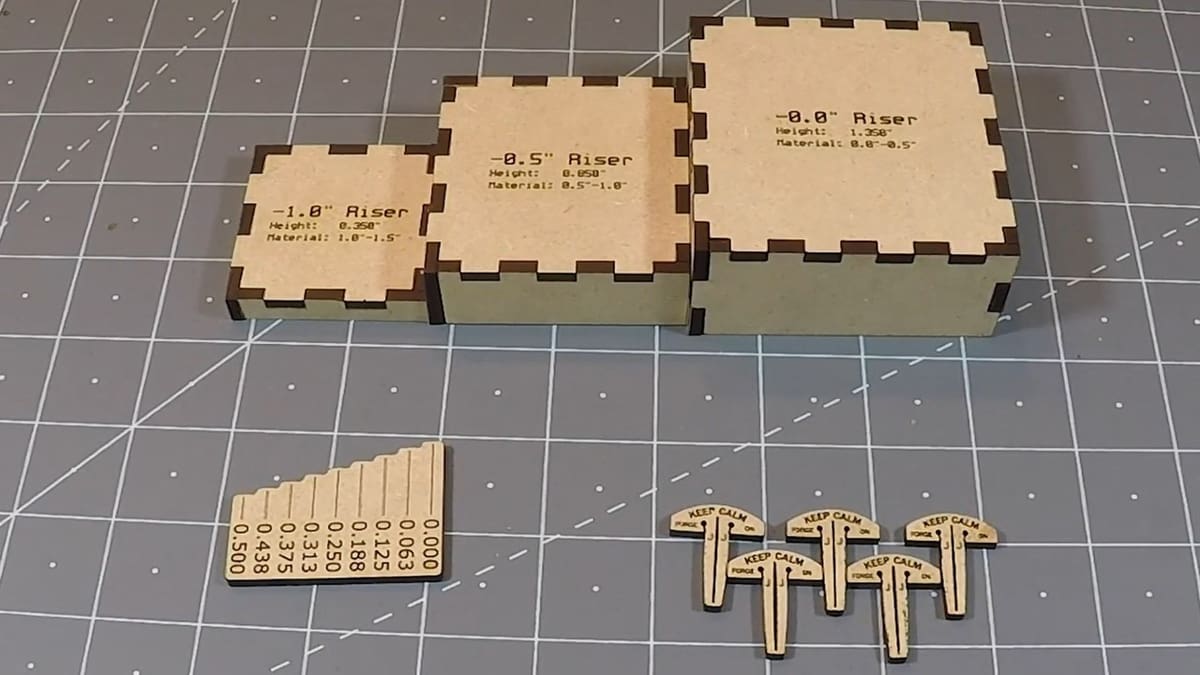
If you’re looking to manufacture a large number of designs or prototype intricate designs, silicone molds are a popular way to go. They allow you to reproduce your designs with ease and precision. Usually, liquid silicone is poured into a physical design to create molds. And what more accessible way to create custom designs other than using Glowforge?
The YouTuber Resin Belle has shared a two-part YouTube series that explains how to design, create acrylic blanks, and form silicone molds using a Glowforge and other tools. In the first part, she begins by designing the blueprint using Inkscape, an open-source graphics editor. Then, the pivotal role of a Glowforge machine shines as it cuts and engraves intricate designs onto acrylic sheets, a pivotal step for subsequent mold creation. In the second part, she gets into the nitty gritty of mold fabrication.
An array of materials is required, including acrylic sheets, adhesives, silicone kits, epoxy resin, pigments, and various tools. The curing period for your molds will be approximately four hours.
- Skill level: Intermediate
- Build time: Roughly 12-24 hours, from designing to having the silicone mold ready
- Cost: ~$30-$50 for materials
Rubber Stamps
Stamping “PAID” in big red blocks on a bill feels satisfying in a way that a hasty scrawl can never match. Stamps can also be an awesome way to personalize your stuff. Alternatively, you can create unique art with stamps and sell it to papercraft artists and bullet journal users for some jingle in your pocket.
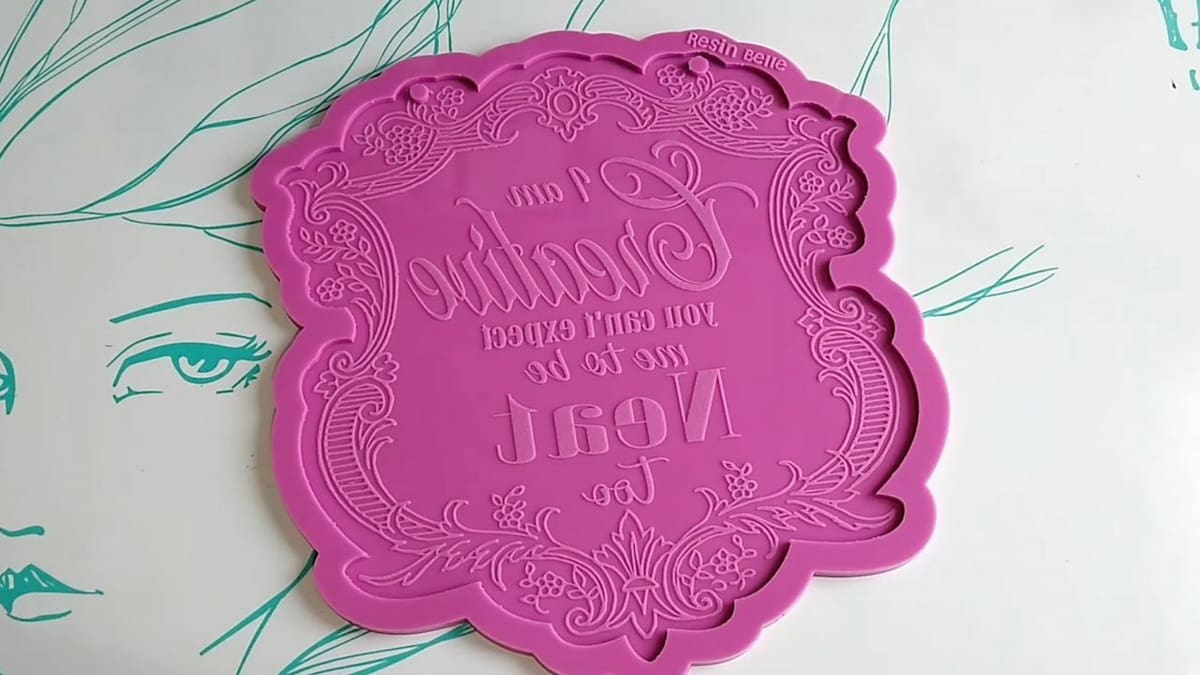
However, finding stamps – and moreover, the stamps you want – is getting more and more difficult as we switch over to online correspondence. Luckily, that’s why you have a Glowforge. The machine can easily cut rubber as long as it’s sourced correctly. Moreover, this machine is capable of cutting through varying layers of rubber, allowing you to create more delicate details in the stamp, like swirls, flowers, and other intricate designs.
Take, for example, Danielle Wethington, a designer and illustrator who documented her experiments to create personalized “wax seals” for use in postage. She has even created a YouTube video tutorial on the topic. The video covers various steps, including finding vector art, uploading files to the Glowforge interface, assembling the stamp, and showcasing the final result!
- Skill level: Advanced
- Build time: Depending on the complexities of the stamp, about 10-20 minutes per stamp
- Cost: ~$20 in materials (you’ll need to purchase special rubbber to make the stamps)
Personal Accessories
Glowforge machines are also great for creating accessories with a personal touch. Let’s take a peek!
Leather
Leather, one of the first materials humanity learned to work with, is a symbol of wealth, style, and quality to this day. The various tanning processes allow different designs and decorations to be applied to the leather, from ink injected just under the surface to deeply debossed stamping.
Lasering leather is relatively new and can create unique patterns, cuts, and images previously unavailable to more traditional techniques. The combination of precision technology and quality leather leads to fascinating creations, yielding finely crafted artifacts. The Glowforge’s settings can be adjusted to create fine detail even in such a rough medium as leather. Unlike industrial lasers, the laser is low-powered enough not to burn through your project.
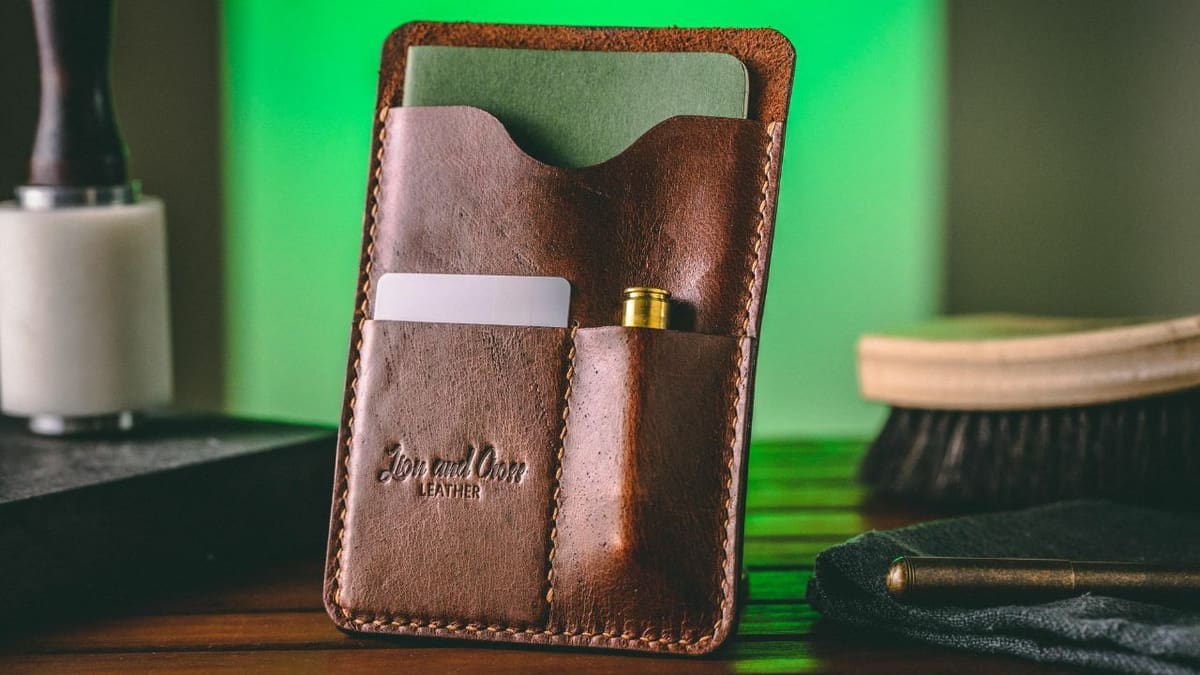
This leather organizer has inspired Glowforge makers to try their hand at leather crafts. Several have shared their versions, adding laser-friendly adaptations and creating unique ones.
The original design can hold A5 notebooks up to 50 pages and has dual front pockets. One of them can house your credit or business cards, ensuring they’re always within reach. The other pocket is a canvas of possibilities that you can customize per your needs.
- Skill level: Intermediate
- Build time: 4+ hours to get the fine-tuning down
- Cost: ~$100-$400 for the leather, depending on size, type, and quality
Jewelry
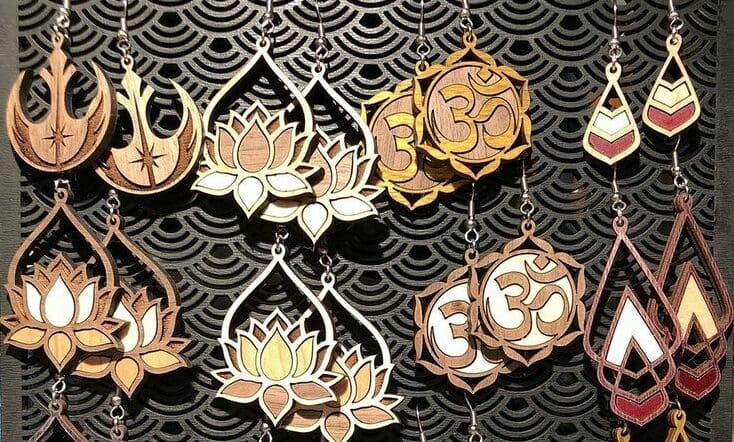
Who doesn’t love jewelry? Gold, diamonds, and bling that makes heads turn! Well, maybe we can’t cut those materials just yet with our Glowforges, but we can make a bunch of other cool jewelry pieces that won’t cost a fortune.
Utilizing scraps from failed cuts or previous creations allows you to get creative with wearable jewelry that will really make a statement! If you need inspiration, check out Glowforge’s website for various designs and ideas for personalizing your jewelry.
The possibilities are endless. A great resource to consider is Vectorstock. It has an extensive resource of vector designs, including royalty-free jewelry designs in vector graphics. Designs in vector format can be resized without compromising quality, making them ideal for printing or laser cutting.
- Skill Level: Beginner
- Build Time: 20-30 minutes (depends on what you’re making!)
- Cost: No more than $20 for materials if you choose not to use scraps
Fancy Buttons
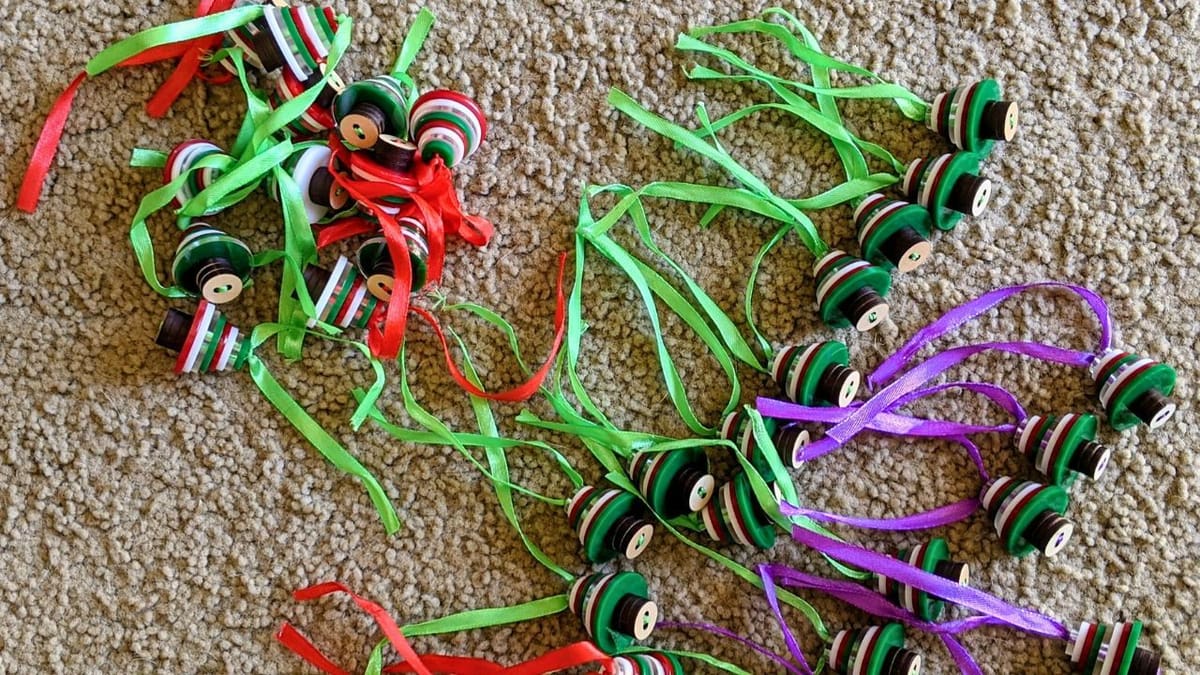
Having extra buttons on hand can extend the life of your favorite clothes by decades. But if you’re like us, it’s frustrating to hold onto those from the manufacturer until you actually need them.
Fortunately, Glowforge has your back. With a Glowforge, you have endless options for customizing your garments. If you don’t like the buttons, simply design and create new ones. The machine’s ample space allows you to cut multiple clothes fasteners in different sizes simultaneously, ensuring you always have a supply.
The crafting community has made all kinds of simple and intricate buttons to suit various use cases. Check out the Glowforge discussion board on making buttons for sewing to release your inner Tim Gunn!
- Skill level: Beginner
- Build time: Less than an hour
- Cost: No more than $10
Home & Office
Want to transform your living space or personalize your office? Take a look at these creative Glowforge projects that are perfect for home (and office) improvements!
Furniture
Want something more exciting than simple furniture? Or wish to go beyond the maze of options at Ikea? The daunting costs of custom-made pieces and the long wait from online retailers can be frustrating. But what if there’s something better, a way to forge on your own?
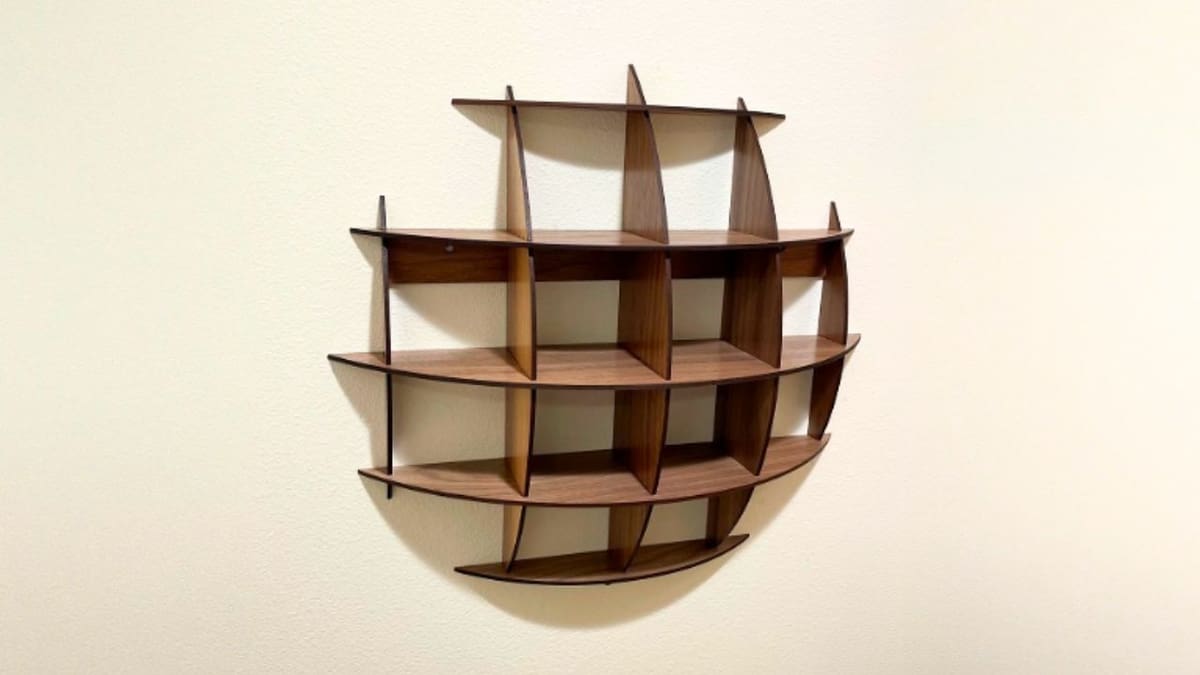
Glowforge has enabled many makers to bring their furniture ideas to life. The Spherical Shelf by TioEmm is a great example, showcasing both innovative and practical design.
Designed through Autodesk Inventor and brought to life with Glowforge, this piece of furniture is a clever solution for space-saving storage. With a diameter of 16 inches and a maximum depth of 4.25 inches, this spherical design was cut from two and a half sheets. What truly sets this piece apart is its easy assembly – an interlocking dance of well-crafted components. Once assembled, this can be affixed to any wall using standard screws.
The designer shared one SVG file containing all the essential parts. One file means you may need to rearrange the parts to suit your laser bed dimensions.
- Skill level: Intermediate, as basic carpentry and design skills are required
- Build time: 12+ hours, including cutting and construction
- Cost: ~$50-$100 for materials
Mandala Business Card Holder
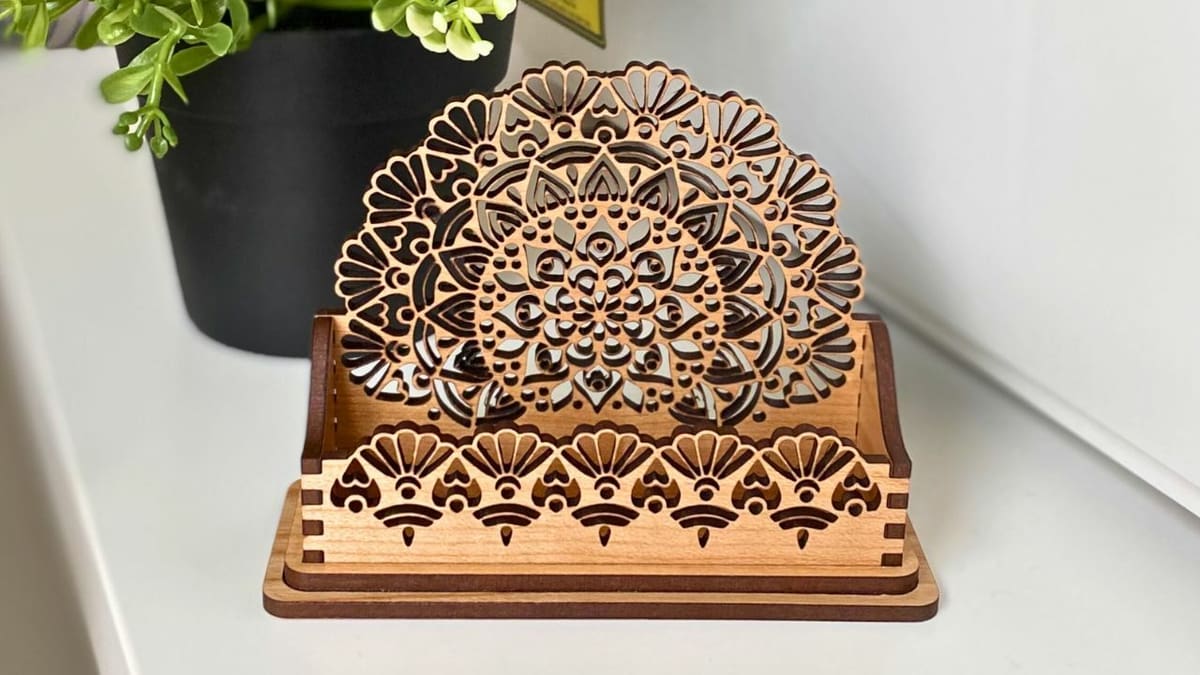
A cosmic fusion of geometric design and practical utility, the Mandala Business Card Holder is a beautiful creation that showcases your business cards and captures the attention of all who behold it. The holder has a warm and inviting golden hue, thanks to the Proofgrade Cherry Plywood. From the same mind behind the Kumiko Dreams Box, geek2nurse’s design demonstrates the remarkable precision of the Glowforge.
Putting together this design is an enjoyable experience that results in a stunning and useful piece. Its intricately cut vertical parts fit neatly into a frame, which is then carefully glued onto the base, using a scored line as a guide for accuracy.
- Skill level: Intermediate, as basic assembly is required
- Build time: About 1 hour for cutting and assembling
- Cost: ~$25 for materials
Custom Sign
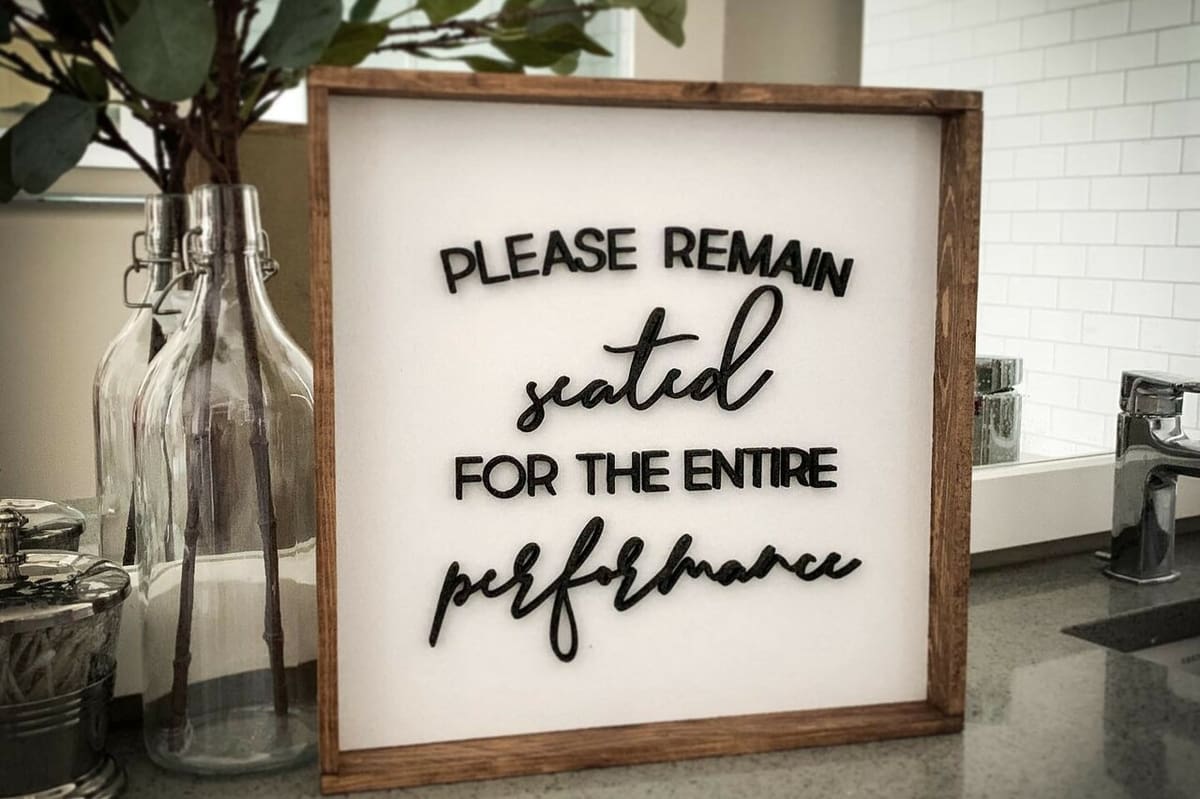
If you want to brighten up a room or area with personalized flair, a sign is the perfect solution! Many designers offer customized laser-cut signs, but if you’re up for a small challenge, it’s totally possible to create your own. There are plenty of templates online.
With a Glowforge, you can pick any material you want and save time compared to ordering a custom designed sign. For inspiration, you can check this YouTube video in which the creator provides a comprehensive tutorial on how to make a laser-cut mountain wood sign.
The video covers various aspects of the process, including designing the sign in Adobe Illustrator, preparing the file for laser cutting, sanding and staining the wood, painting the sign, and fixing any mistakes or imperfections. The creator also shares tips and tricks throughout the video, such as using freezer paper to prevent sticking and applying glue dots to hold small pieces in place.
- Skill Level: Intermediate
- Build Time: 24-72 hours, depends on size and complexity of the design
- Cost: $20-$100
Shadowbox Coasters
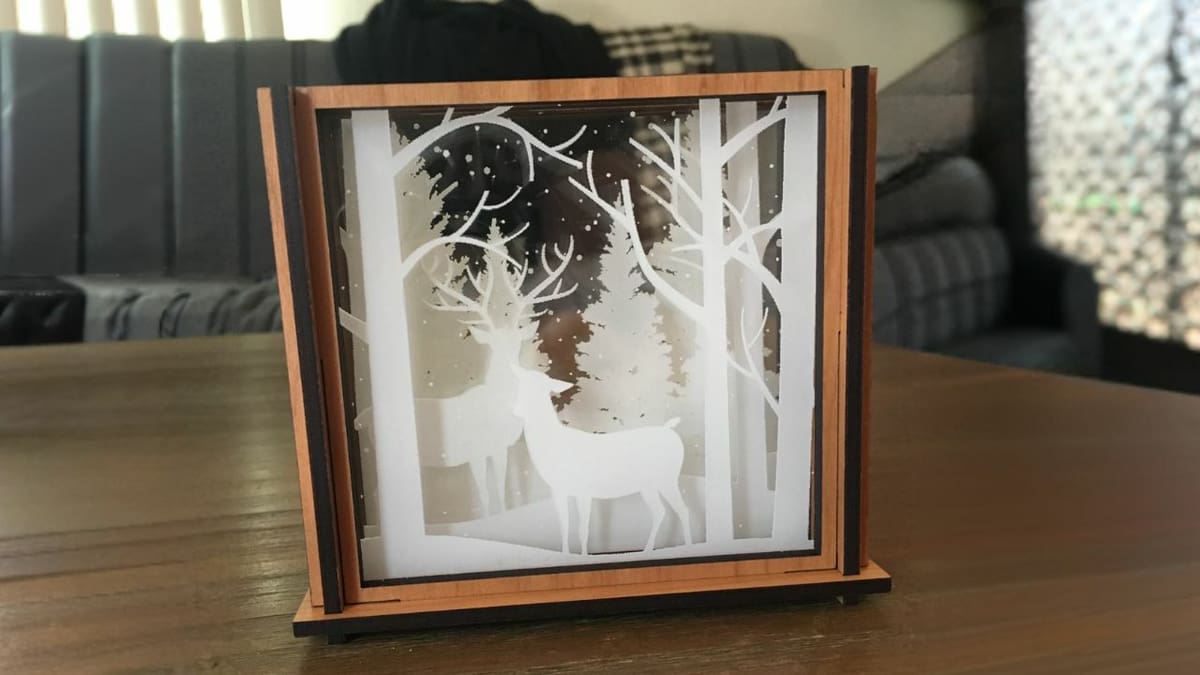
The Shadowbox Acrylic Coasters will protect your surfaces from moisture while infusing your drinks with the enchanting spirit of the forest. Every sip becomes a journey into nature.
They’re made from medium clear acrylic, and the designer set them in a medium cherry plywood box. The coasters measure 3.75 square inches, so they can accommodate an array of beverage vessels, from wine glasses to beer pints and morning coffee cups.
According to the designer’s recommendation, achieving clarity in the design process involves using different colors for each layer. By doing so, it becomes easier to identify what needs to be done for each specific layer. A final tip involves selecting all elements and converting them to black before exporting them as an SVG file.
Once you have the final coasters, make yourself a warm drink and get ready to be transported into woodland realms.
- Skill level: Intermediate, as minor assembly is required
- Build time: About 2 hours, depending on the number of coasters you make
- Cost: ~$20-$40 for materials
Keepsake Boxes
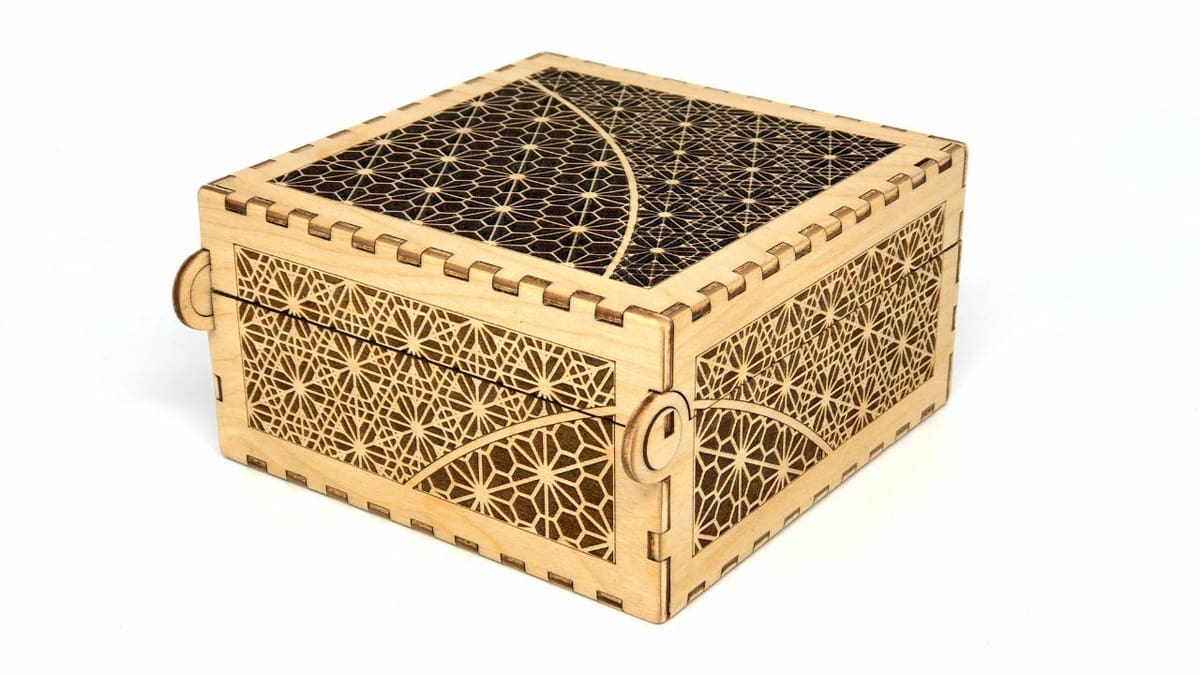
Creating boxes can be a great project for beginners to try out, but using a laser cutter can be challenging. However, Glowforge is designed with the consumer in mind, which makes it user-friendly. Furthermore, the machine is capable of achieving amazing detail, allowing you to produce high-quality and complex designs. You can experiment with the settings to find new ways to work with your materials.
Boxes.py is an open-source, Python-based box generator that can create dozens of different styled boxes for your knickknacks and small items. The website is flexible enough to make the boxes beautiful in their own right, even if they’re empty.
In case you wish to create something traditional, you can immerse yourself in the craftsmanship of the Kumiko Dreams Box, which was inspired by a Japanese woodworking technique. This creation originated in the Glowforge Users Group on Facebook and was awarded third place in a peer challenge. Participants were tasked with transforming a box pattern into something exceptional.
It’s crafted from 1/8″ birch plywood, and was finished with tung oil. Beyond the aesthetics, tung oil gives the box a protective waterproof shield, enhancing its durability and ensuring that your keepsakes remain safe within.
- Skill level: Beginner
- Build time: About 3-5 hours, depending on the size and complexity of the box
- Cost: $40-$80 for materials
Personalized Cutting Board
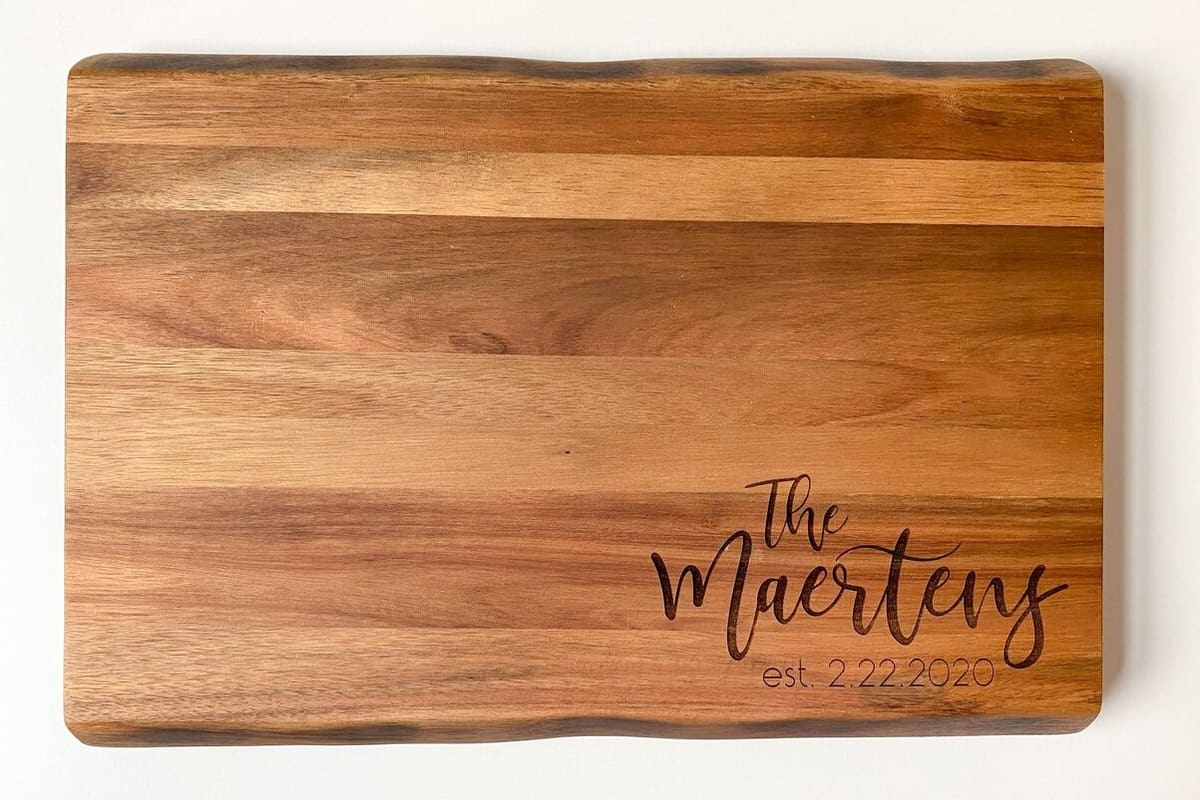
Cutting boards are an absolute must for every cook, making them a staple item in any kitchen. Since almost everyone has one, why not make yours unique? Or even better, engrave a cutting board for someone else as a personalized gift!
Luckily, these ideas are made incredibly easy, thanks to your Glowforge. Pick a design, pop it into your machine, and engrave it away! For more detailed instructions, check out carissawiley’s guide on Glowforge’s community discussion. She provides step-by-step instructions on how to create a unique cutting board, from sharing her journey learning about engraving to designing and finally creating one.
Carissa used a cutting board made of Acacia wood, which is priced at ~$35. But if you have your own cutting board, you get to save that money! The process is extremely simple and won’t take much time. Moreover, Pinterest is an excellent resource for exploring more design ideas.
- Skill Level: Beginner
- Build Time: 20-90 minutes
- Cost: $40-$50 for the cutting board
Resin Stain Glass Lightbox
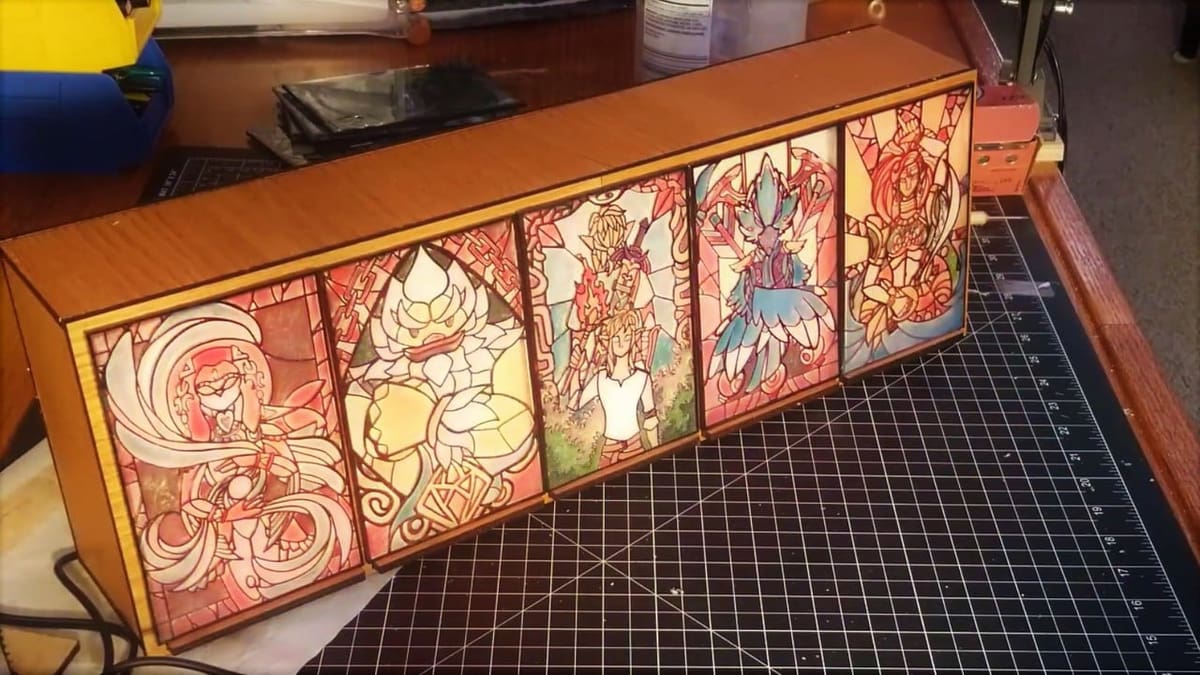
Acrylic is one of the most useful materials the Glowforge can work with. It mimics the properties of glass but minus the weight and the fragility. That comes in handy for projects like this Zelda-themed stained-glass lightbox, which is actually made up of painted acrylic sheets cut by the Glowforge.
The build files for this project are available on the YouTuber’s Patreon page, which requires a minimum monthly payment of $5 for access to the digital files. To save time and costs, you can cut multiple project parts simultaneously by loading up the work area with all the different-sized designs.
- Skill level: Advanced
- Build time: 40+ hours (it’s a big project!)
- Cost: ~$50 for files and materials
Marvel Azteca Calendar
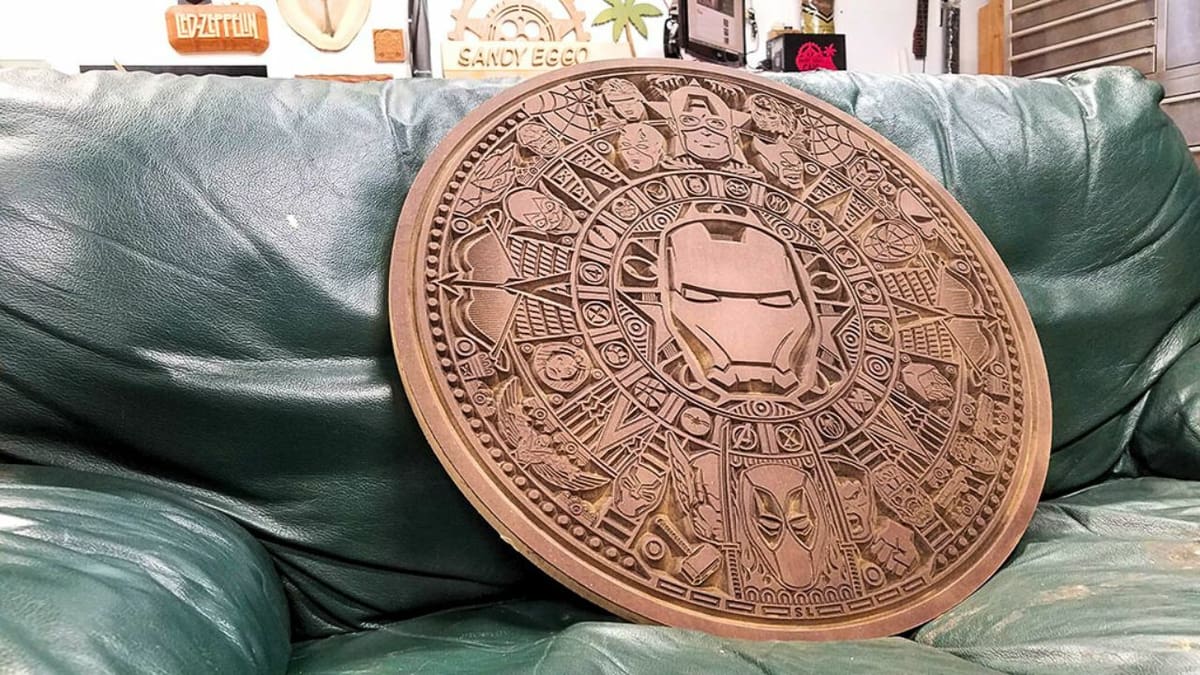
Step into a world where superhero icons blend seamlessly with the detailed artistry of the Aztec Calendar. The Marvel Azteca Calendar is a remarkable example of creativity and craftsmanship. Although initially for CNC machining, it’s versatile enough to be brought to life through laser cutting or 3D printing.
Kyle, the owner of Sandy Eggo CNC, poured over 60 hours into infusing this creation with iconic characters and captivating designs. You’ll find Iron Man, Captain America, and Spiderman as well as many other Marvel Cinematic Universe references.
Every element was redrawn to ensure not only visual symmetry but also the feasibility of machining. Using Vectric Aspire software, he redrew each character and element before translating them into G-Code. The project is available in various formats, including an SVG file optimized for Glowforge – see “SVG Format (dark areas filled in)“.
Additionally, for those captivated by the legendary heroes of the DC universe, a similar DC version of the calendar awaits them.
- Skill level: Intermediate
- Build time: Roughly 24-48 hours
- Cost: ~$50-$80 for materials
Personalized Organizer

What if you want to organize things that don’t conform to ordinary geometry? Glowforge saves the day (and your sanity) with plans for personalized organizers. Godzilla keeps acrylic paints in order with rsummers’ design, while Jeffbowman showcases a classic tackle box construction that gives you folding layers of drawers for various objects.
The tackle box started as a prototype, but it ended up useful itself as a sturdy, five-tray box cut in Baltic birch hinged together with Chicago screws. It’s easy to customize this basic design to your storage needs. Glowforge’s user forums also have a plethora of other organization designs, from utensil trays to drawer systems.
While these designs may seem to take a lot of time to cut, you can simply cut multiple layers of the same piece at once, eliminating the need to wait for repetitive work. Additionally, you can check your pieces directly against the items you want to store, since the Glowforge fits into any living or workspace.
- Skill level: Intermediate, as some small construction skills are required
- Build time: Roughly 9 hours
- Cost: ~$40 for materials
Topographic Map
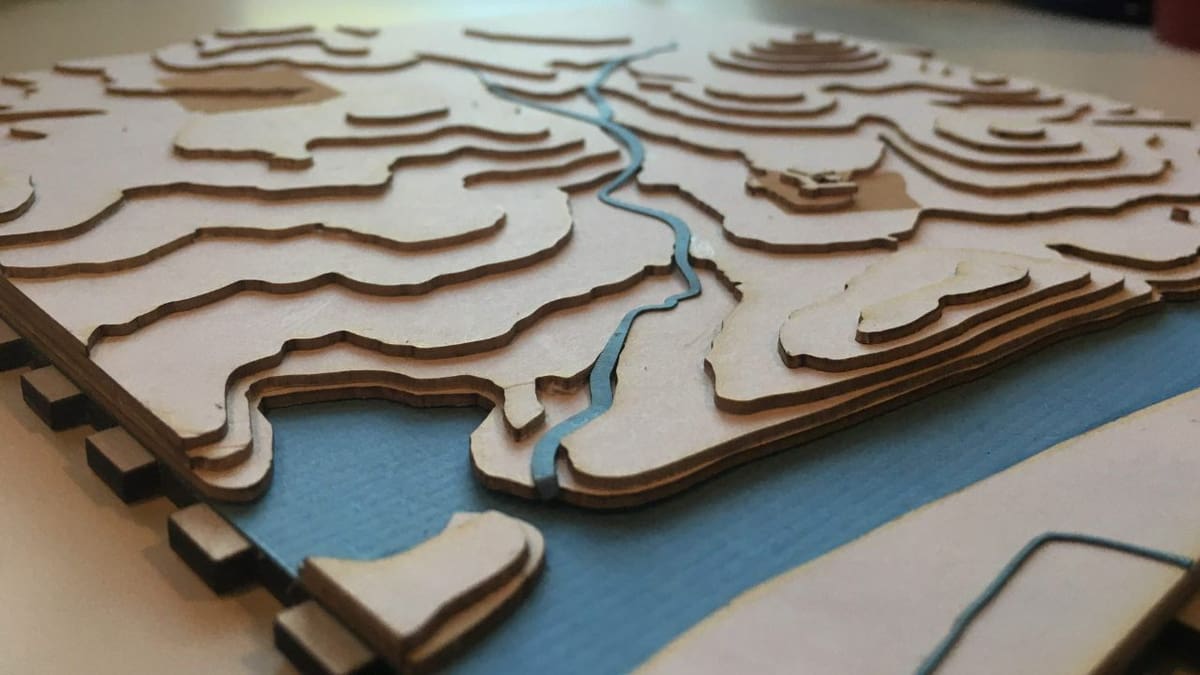
Maps are a great way to visualize any area, especially those you find particularly interesting or places with unique terrain and geographical features. A popular way to represent these places is by using a topographic map representing a particular location’s shape and elevation. Using Glowforge, a 3D visualization of the area can be created through stacking cutouts. While it may require some effort, it can be done by anyone.
You’ll first need a map. Cartocuts is a web-based tool that lets you generate custom topographic maps with precision. Select your location, define the scale, and customize features. The result will be a detailed topographic layout that captures the essence of the chosen landscape. However, you need to pay for the licensing, which starts at ~$10.
Alternatively, Google Maps’ “Terrain” feature is a manual but free option. Enable the “Terrain” feature to reveal elevation layers, then extract and combine them to craft your topographic artwork.
When it comes to the laser cutting, the Topographic Map in a Box is a great example of the map concept. It comprises 13 crafted layers of topography that rest within a closed box. Streets and water features come to life through precise engraving and paper layering, inviting young explorers to trace paths, navigate waterways, and grasp the impact of topography on their surroundings. For more ideas, you can check out Glowforge’s webpage on these beautiful creations.
- Skill Level: Intermediate
- Build Time: 12-48 hours, depending on the size
- Cost: ~$10 for licensing from Cartocuts or pre-made SVG files; material cost depends on the size of project
Just Plain Fun
Even though tinkering around with your Glowforge and different materials is amusing enough, the fun doesn’t stop there. Check out a few projects to keep the good times rolling.
Balancing 'Bot

Put your sense of balance to the test with the Balancing ‘Bot, a game created by a Seattle-based toy designer. It’s pretty straightforward: spin the randomizer to determine how many gears to add, then strategically place them onto the swaying ‘bot. The aim? Achieve this without sending the ‘bot tumbling, and victory shall be yours.
If you make a mistake, the game resets, but the other players keep going. The winner is the last person who can keep the ‘bot balanced and add all the gears without letting it fall.
What sets this game apart is its engaging mechanics and the room for creativity it offers. The designer encourages players to infuse their own personal touch by customizing the graphics. For those seeking an added twist, you can simply replace gears with actual coins.
- Skill level: Intermediate, as basic assembly is required
- Build time: About 2 hours for cutting and assembling
- Cost: ~$20 for materials
Countdown Calendars
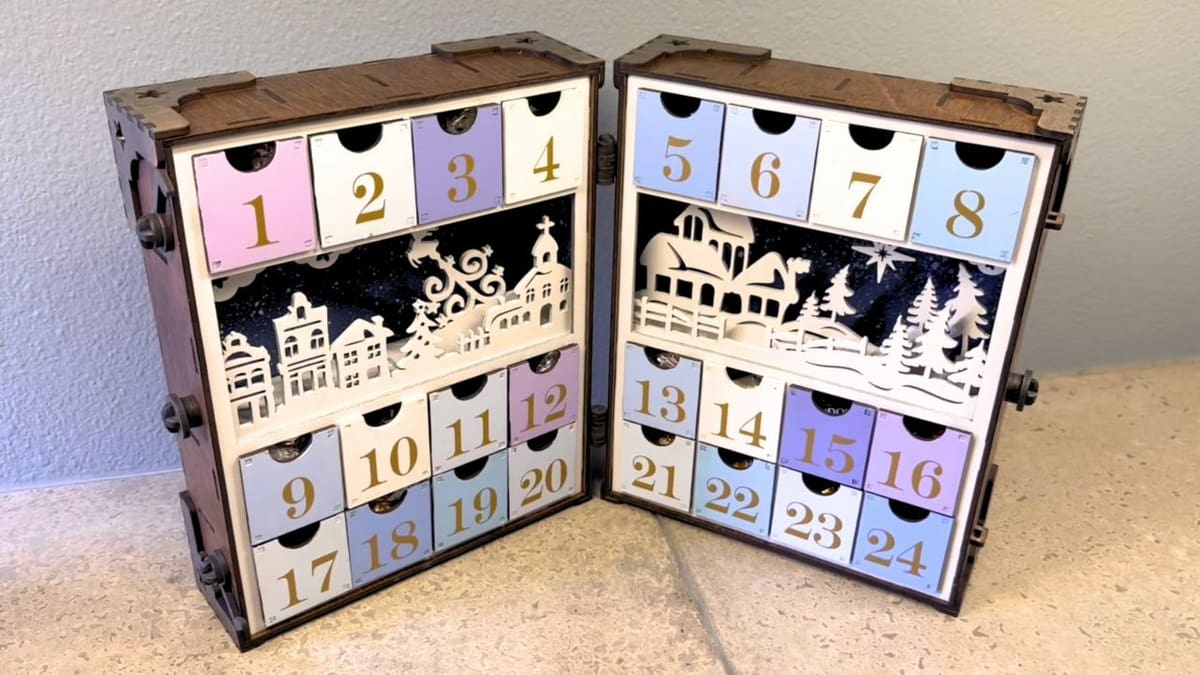
Time is a difficult concept to understand when you’re a kid, especially when something exciting is on the horizon. You just don’t understand why your favorite holiday can’t be right now. Countdown calendars are a great way to help the impatient ones among us keep track of how long they still have to wait for an exciting event. Advent calendars are the traditional model, with little numbered doors that hide treats and count down the days to Christmas.
With Glowforge, you can make your own instead of buying one. Using a design from Toolbox Turkey on Etsy, the YouTuber Catspaw Customs has shared a tutorial on building a laser-cut Advent calendar. To assemble the calendar, they used wood glue and masking tape to bring all the pieces together into a sturdy structure. Paint and staining added the finishing touches.
In addition to the many design available on Etsy, 3axis has some great free resources. Alternatively, you can design your calender from scratch.
- Skill level: Advanced, as precision carpentry skills are required to make everything fit together correctly
- Build time: Roughly 48 hours
- Cost: ~$30 for design files, ~$90 for materials
Basketball Hoop
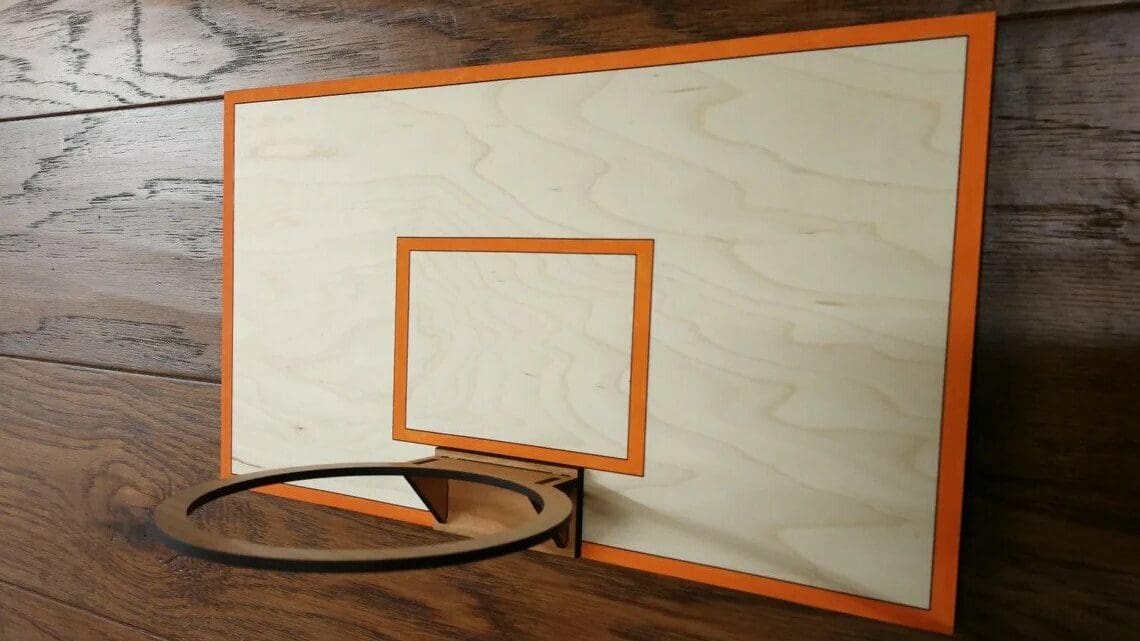
What’s a better way to pass your spare time than shooting some hoops? With Glowforge, you’ll be able to create a mini basketball hoop for the office, your room, or wherever you might need a fun distraction!
You can buy the files for this project on Etsy from FreshStartCustoms. You can choose from a variety of materials to create your hoop, and even add a personalized touch with some paint. The backboard measures 12″ by 6.8″, and the hoop can accommodate balls or paper balls up to 3″ to 3.5″ in diameter.
- Skill Level: Intermediate, as some assembly is required
- Build Time: 12+ hours
- Cost: ∼$6 for the files, ~$20 for materials
Robotic Arm
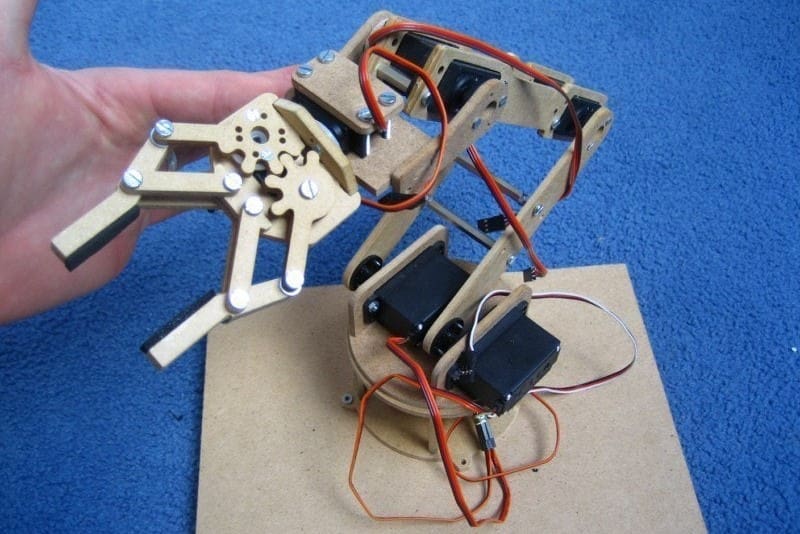
We, for one, welcome our robotic overlords with this very cool robotic arm built by jjshortcut on Thingiverse. The articulated limb and pinching claw are a perfect example of fine detail work on your Glowforge. You can cut single or multiple parts with precision, ensuring a perfect fit every time.
The assembly of this robot arm makes for a great educational project, and the simple design can be modified for all kinds of use cases. If one-dimensional laser cutter projects tend to bore you, the electronics component of this ought to keep you satisfied.
- Skill level: Advanced, as knowledge of electronics is required
- Build time: Roughly 72 hours
- Cost: ~$40
License: The text of "Glowforge Projects: The 20 Coolest Ideas" by All3DP is licensed under a Creative Commons Attribution 4.0 International License.