JPG/PNG to STL: How to Convert Images to STL

Converting an image to the STL file format (for 3D printing) is easier than you might think. Learn how to convert JPG or PNG to STL!
Converting 2D images to 3D models is a valuable skill for 3D printing enthusiasts, and the most commonly used file format for 3D printing is STL. There are several reasons to transform an image into a 3D model, ranging from tactile pictures for people with vision impairment to reference materials for cosplay.
But how do you do it? Well, depending on the desired result, there are three main options: using a photo or photos to build a 3D object, extruding a flat object upwards to be 3D, or simply converting a file from one format to another. While 3D models can be made from flat pictures, without sophisticated software and more information-rich file formats, you won’t achieve complete, detailed 3D models with these methods. Instead, they are more suited for giving flat 2D designs a three-dimensional, yet still more-or-less flat, physical form.
So, if you’re wondering if you’ll immediately get a bust of the Mona Lisa using a picture of it, the answer is no (unless you flex your artistic muscles a little). But that doesn’t mean the following methods don’t have their uses!
In this article, we’ll focus on one program in particular, Smoothie3D, and walk you through the process of converting a 2D image to a 3D model, before discussing some alternative options. Let’s get started!
JPG to STL with Smoothie3D
Getting Started
Smoothie3D is a web-based program that allows users to upload a JPG or PNG image and, with a little effort, convert it into a 3D model that can exported in the STL or OBJ format. It’s a popular tool among hobbyists, known for its accessibility and user-friendly interface. It’s entirely web-based, so you can access it on any browser. However, there’s a small caveat: a minimum donation of $3 is required to get started. There’s also an app available for iPad users that costs around $3.
Once you get Smoothie3D up and running, the first step is to import an image and draw a line around the various parts of the image with your cursor. The program then generates a 3D render from the outlined parts. There are predefined and user-defined shapes that can be manipulated with different tools, such as extrusion depth, revolution, curve definition, and size and position.
However, the resultant model will achieve a somewhat limited accuracy. This is mostly due to the program’s constraints, but also depends on the user’s skill level. While you can convert any object in Smoothie3D, smooth objects with simpler shapes will have better accuracy and be easier to convert. Meanwhile, more complex objects with edges and sharp curves will take a certain degree of skill and understanding of the software to execute.
It’s important to note that this program only works with solid shapes. Although multiple shapes can be combined to form an object, hollow parts and minute details aren’t easy to achieve. It’s theoretically possible to do so by defining smaller shapes and matching them up, but the degree of effort required isn’t worth it. More advanced 3D modeling software like Blender would be better suited to these tasks.
As such, Smoothie3D is highly suggested for hobbyists looking for a quick and reliable solution to their 3D modeling needs. Without further ado, let’s take a look at how Smoothie3D works with a step-by-step example.
Layout
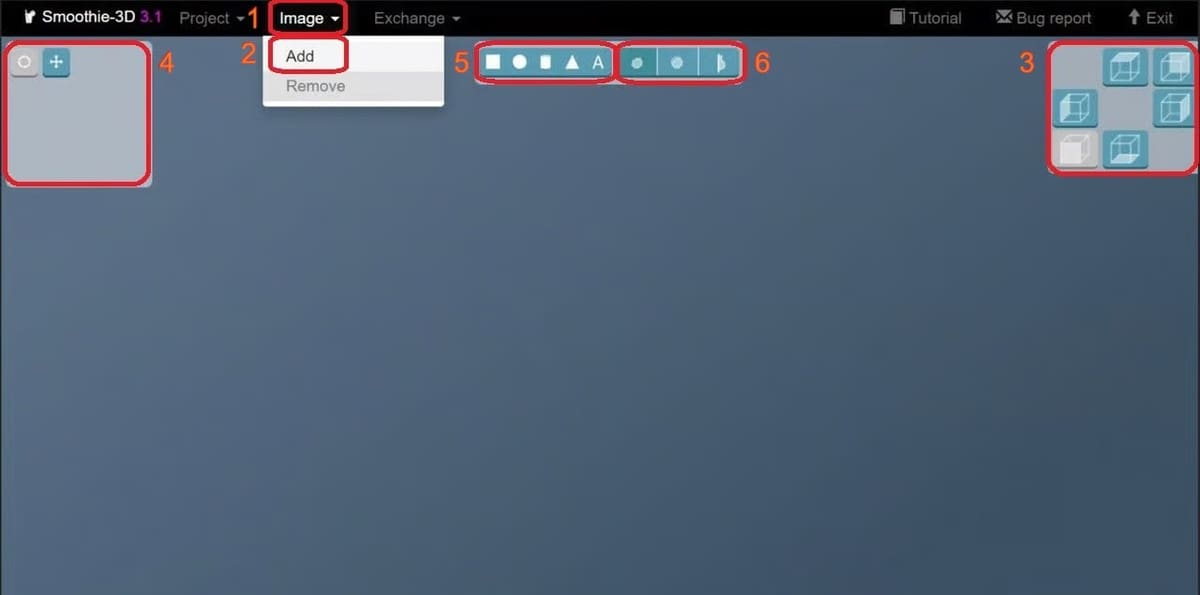
Let’s take a look at the user interface before diving in. To start, the “Image” (1) button is located on the top ribbon. You can click this to import your images by selecting “Add” (2) from the drop-down menu, and then uploading your image.
Below the ribbon, you’ll see three panels. From the top right panel (3), you can change to any of the cubic viewpoints. Or, if you want a free rotation of the view, you can pan the view from the top left panel (4). In the center is the shapes panel. Here, you can select what kind of shape you want to create. If you hover your cursor over an option, it will display its name.
The shape panel is composed of two sections. The five options on the left are the predefined classic shapes (5), which, from left to right, are cuboids, spheres, cylinders, prisms, and text. The three options on the right (6) are for user-defined shapes: smooth, extruded, and revolved.
Step 1: Import Your Image
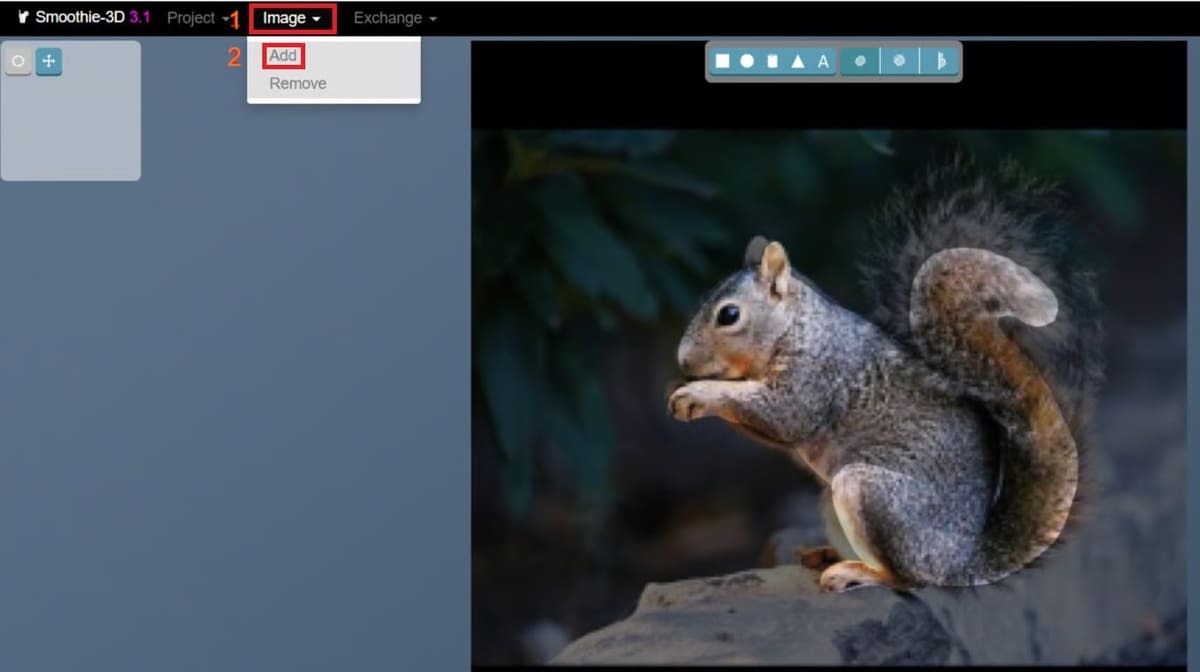
To start, you’ll need the image you want to convert. Click “Image” (1) on the top ribbon, select “Add” (2) from the drop-down menu, and upload your image.
You can also use one of the preset images available in Smoothie3D, such as the squirrel pictured above if you prefer.
Step 2: Outline the Object
Since we want to turn our image into a 3D model, we’ll focus on the outlined shapes instead of the classic shapes. Of course, if you want to try something new and put your own touches on the model, you can get creative and play around with the different tools!
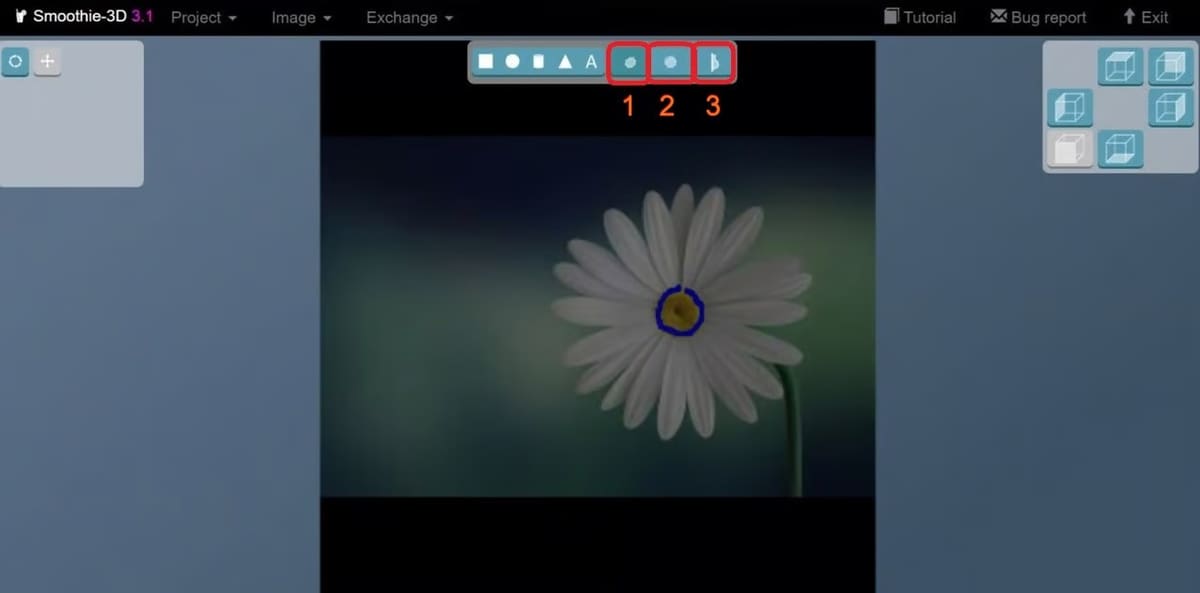
From the shape panel, select the smooth shape option (1). This allows you to define smooth shapes in the image. If you want to extend your shape in a certain direction, select the extrude shape option (2). Similarly, to create a revolved shape, select the revolved option (3).
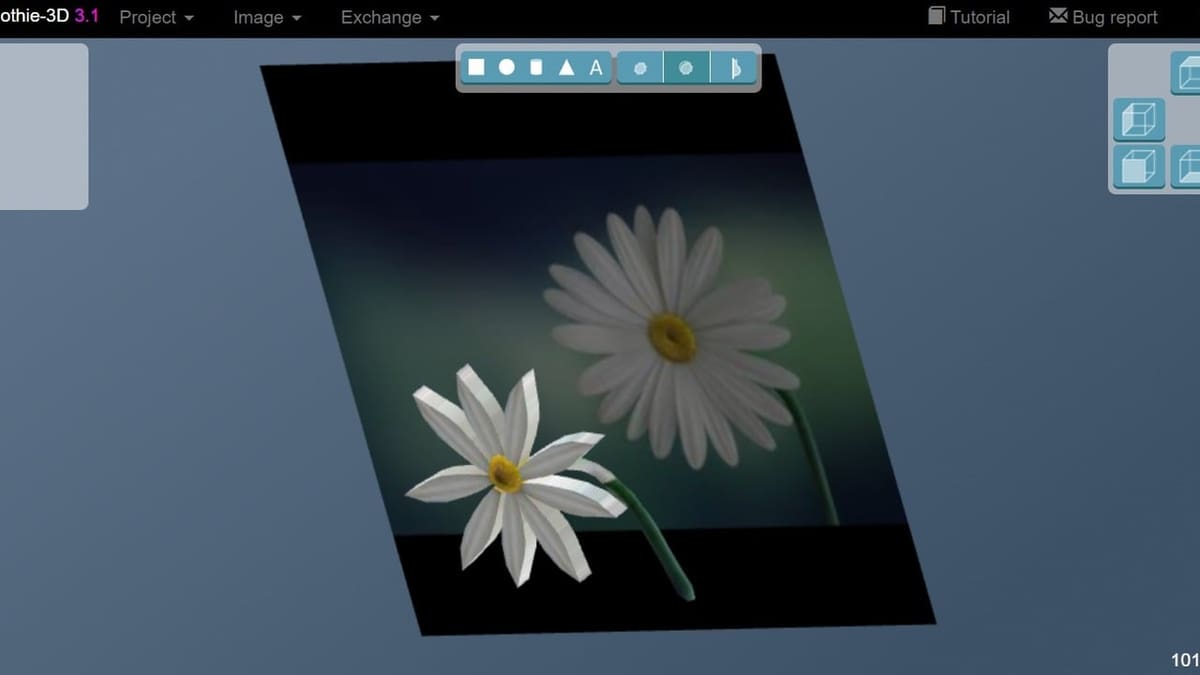
Use your cursor to outline the object by clicking and dragging. Depending on the object, it may be defined as a single shape, or it may need to be defined as multiple shapes attached together. In this case, you’ll outline all the shapes according to your image. For our example, we’ll make smooth shapes for the flower’s bud and stalk, and extruded shapes for the petals. Simply select the type of shape, click and drag to outline the object, and voilà: a shape is born.
Since the flower is a relatively simple model, we only have to draw three shapes: a bud, a stalk, and a petal. If it were an even simpler object, we could make it with a single shape.
Step 3: Edit the Curve
Manually drawing a shape with a cursor may not always provide the most accurate results. However, you can edit the curve to your heart’s content.
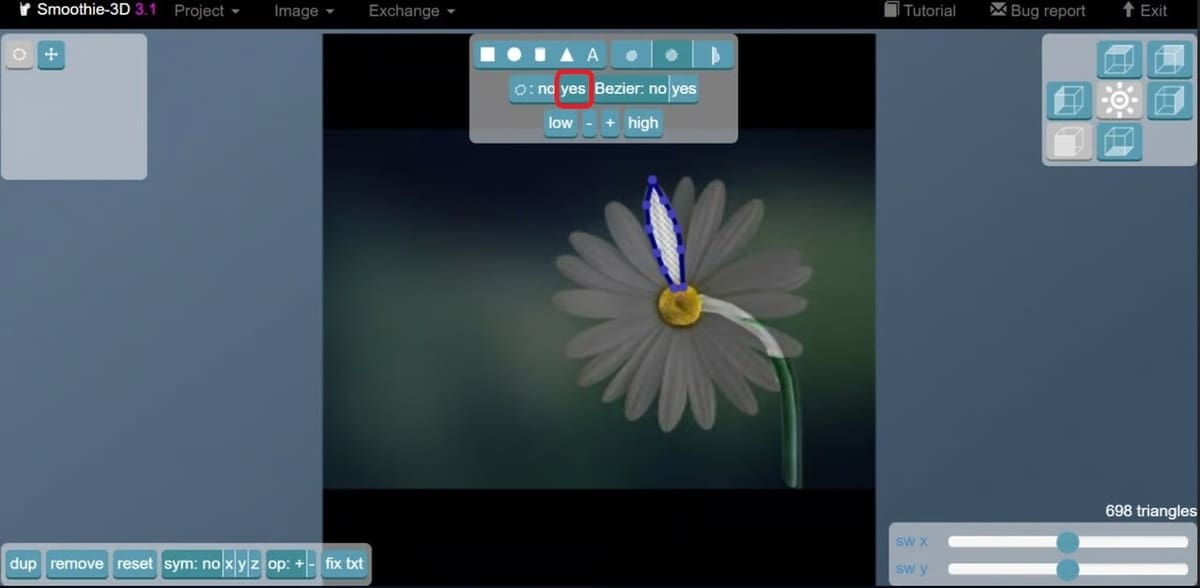
The curve specifications (the contour) can be manipulated by clicking the display contour button from the shape panel and selecting the “yes” option on the left. Note that the “no/yes” option is displayed once a shape is outlined. From the bottom left panel, you can control the degree of curve in the X/Y direction. To edit the curve points, drag a point to the wanted position.
In our example, we can edit the curve of our petals to ensure they’re as realistic and clean as possible. While it’s not necessary to use this tool, it can come in handy if you need to remove mistakes from your outline or want to achieve greater accuracy and complexity. This also means you don’t have to worry about accurately outlining all of the shapes in the beginning, as you can edit them later on.
Step 4: Manipulate
Once you’ve defined your shapes, you can manipulate them as needed. To do this, start by selecting one; in our case, we’ve selected a petal.
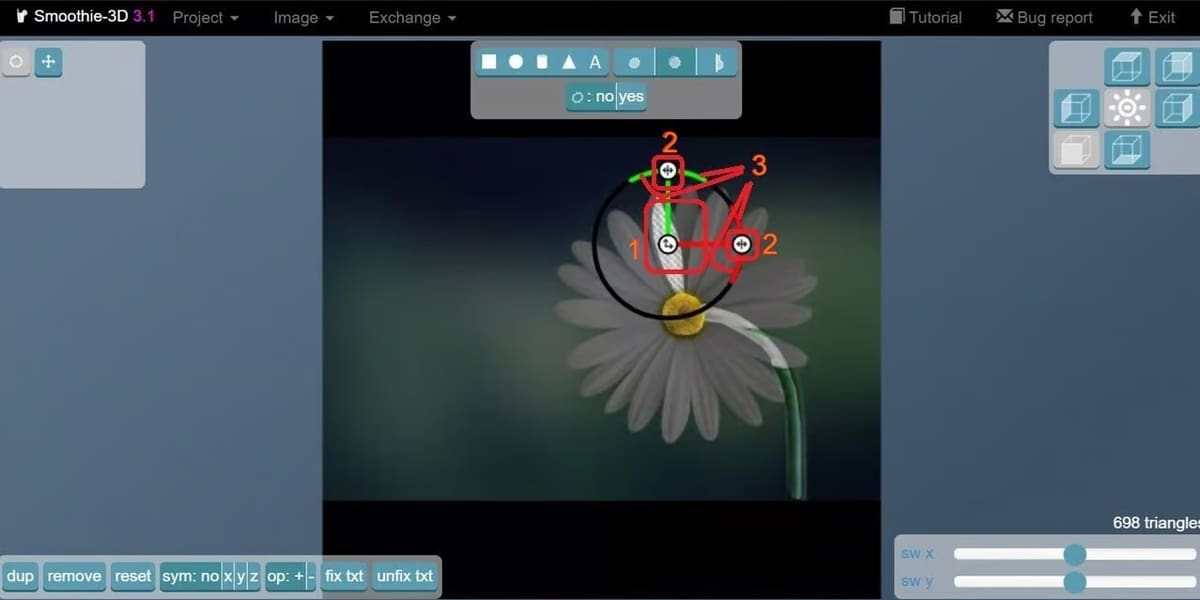
The position and size of the shape can be manipulated using the circular handle that appears when it’s selected, using the translation (1), rotation (2), and scaling (3) functions. To use any of these functions, simply click and drag the respective section of the handle, as we’ll explain below.
While only two bars are visible in the image above, there are three colored bars in total, including red for the X-axis, green for the Y-axis, and blue for the Z-axis. You can simply rotate to a different viewpoint in order to change the bars. In the front view, the X- and Y-axis bars are visible, while the X- and Z-axis bars are visible in the top view.
- Translation: This moves the object on a plane. Click and drag the respective bar for axial translation (in a single axis) or the center button for free translation (without axial constraints).
- Rotation: This tool makes an object rotate around its axis. Click and drag the button at the end of any colored bar to rotate it.
- Scaling: This feature will enlarge or reduce an object. The arc at the end of any colored bar can be clicked and dragged to scale in that respective axis. To scale the entire object, use the circular handle’s non-colored parts.
Step 5: Modify & Arrange
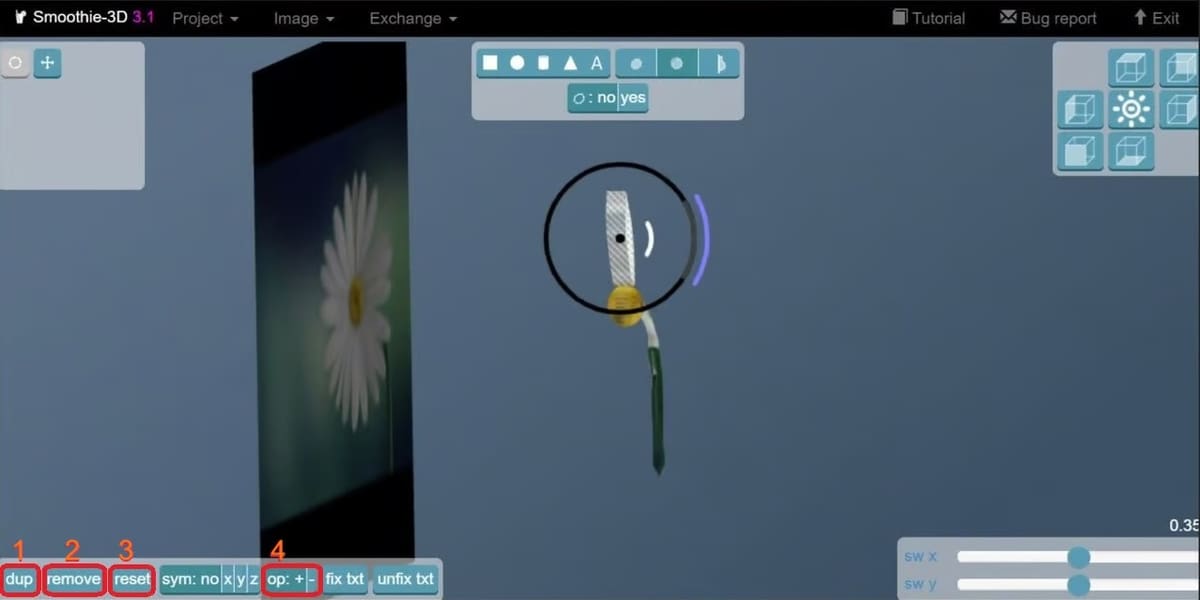
In the bottom left panel, you can duplicate or add symmetry to any object in the axis of your choice (1). For things that come in pairs, such as legs, arms, ears, and eyes, you only need to make one and pair it with symmetry. Note that the duplicated object will appear as its mirror image on the opposite side of the axis you choose.
Other features on the bottom left panel include “remove” (2), which deletes a shape, “reset” (3), which resets all the modifications done on a shape, and “op” (4), which provides a Boolean function. For the Boolean operations, ‘+’ performs union. We used this to unify all the shapes and make sure they become a single object fit for 3D printing. The ‘–’ operation is for subtraction, which can subtract a shape from another object, in simple terms.
For the flower, we rotated the stalk in the Y-axis to avoid overlapping with the petals. The petal shape had to be scaled down in the Z-axis because the standard depth for extruded shapes was too big to fit the bud.
You may also have realized why we only made a single petal. Since all the petals are roughly the same shape, we didn’t need to outline each one separately. We simply made a single petal and used the duplicate function to create more. By moving them to a different point and rotating in the Z-axis, we arranged several petals on the bud to create a full flower.
Step 6: Finalize
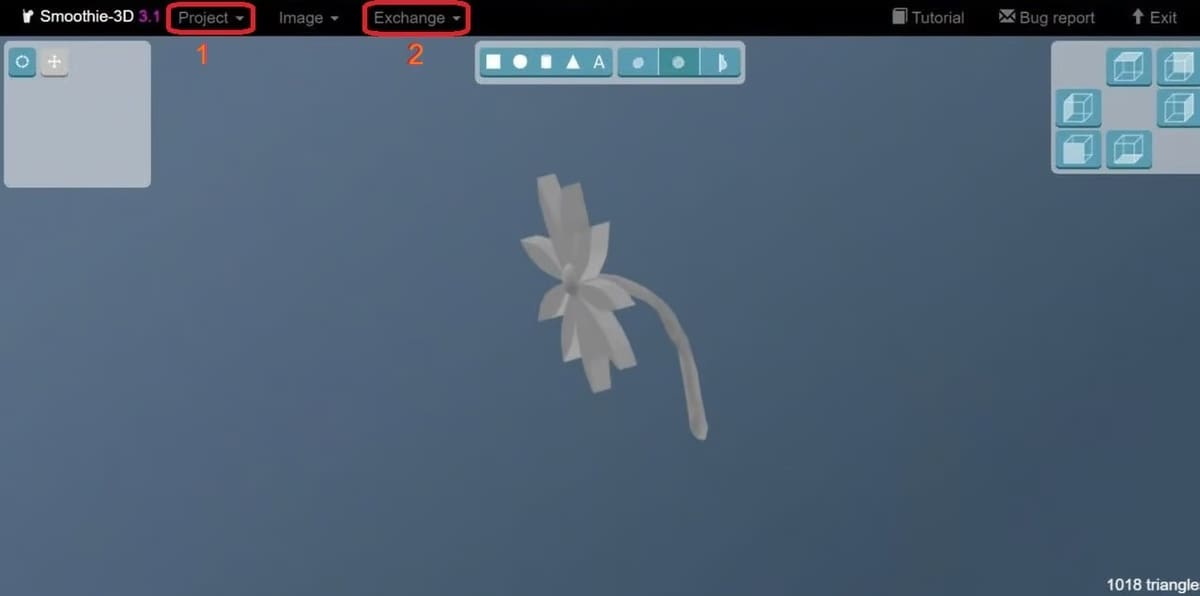
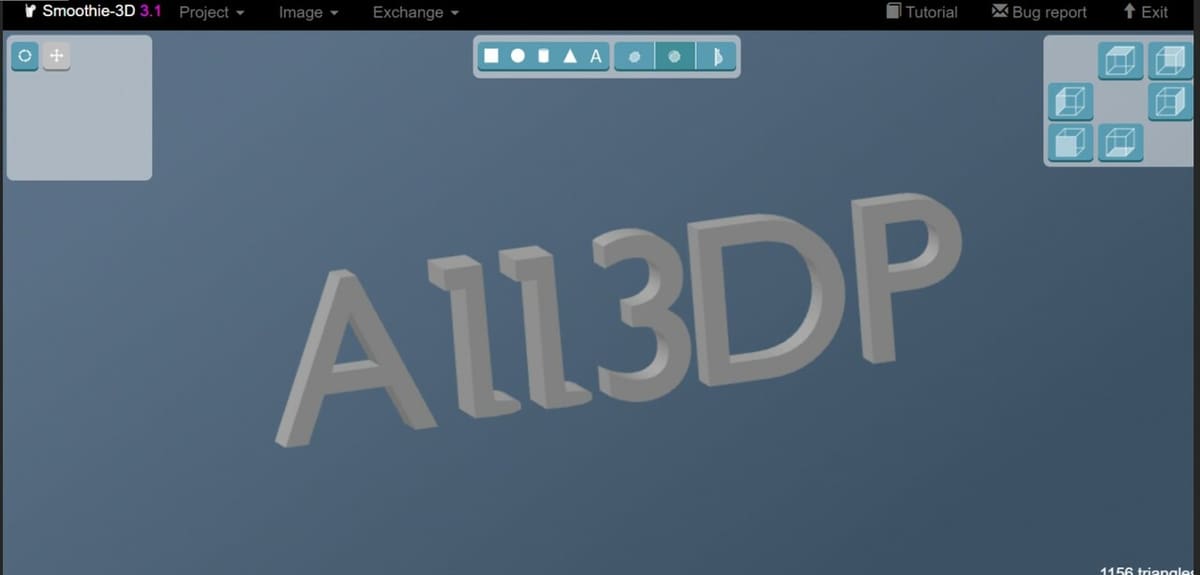
Once your modifications are complete, you can save your model from the Project menu (1) using the “Save as” option. We removed the image using the “remove” option to see what the model would look like without its textures and colors, like an STL.
Lastly, open the Exchange menu (2) and select “Export to STL”. And with this final step, you’re done!
Alternatives
Now, we’ll check out some popular alternative programs and other methods for converting a 2D image to a 3D model.
Similar Programs
If you’re looking for an alternative to Smoothie3D, here are some similar options worth considering.
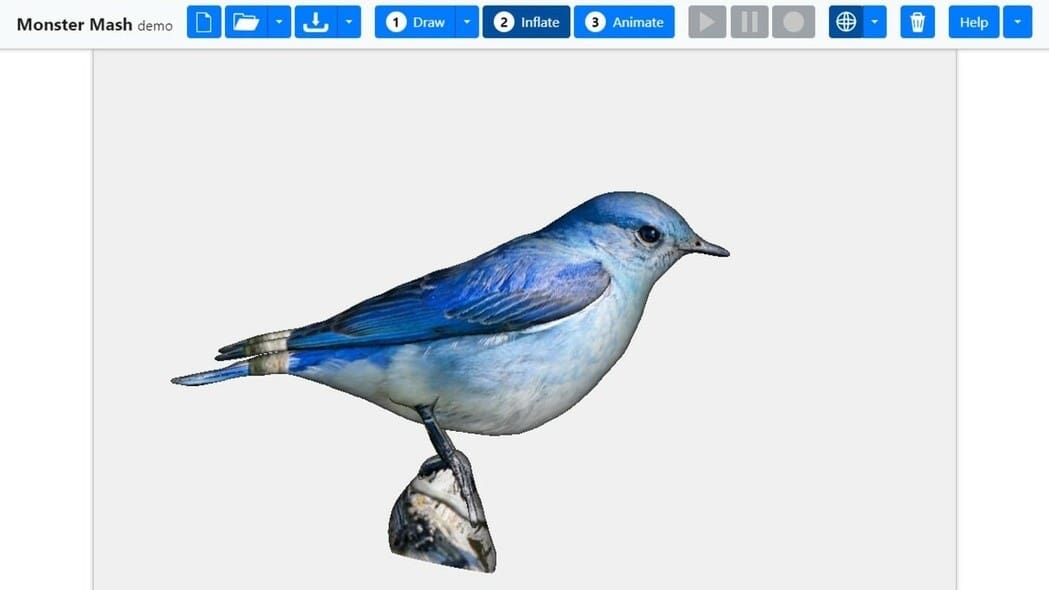
Monster Mash
Monster Mash works by sketching the image outlines, which the program then renders into 3D versions. The 3D model can be exported to OBJ format, which can easily be converted to STL. However, this program has limited functionality and often can’t produce realistic models, since all definition has to be finalized in the sketching phase.
Archipelis
Archipelis is another alternative worth mentioning. It’s paid software (currently costing around $30) that you can download. It works similarly to Smoothie3D but has additional functionality. These features include smoothly merging created shapes, texturing surfaces, and performing union, difference, and intersection operations. It’s also noted to have higher accuracy than Smoothie3D.
Online Converters
Something that will come up immediately if you search online is to use a file converter to convert your image file type to STL. These converters work great for converting from one 3D file format to another 3D file format. As the object in the file is already 3D, all the converter has to do is make it legible for another program that might not accept the original file.
In this article, however, we’re talking about converting from 2D to 3D, and while many online converters will tell you they can do this, in most cases, they merely convert the file type and not its contents. When we attempted to convert a PNG of a logo to STL, the result was an extruded square with no detail to show the image.
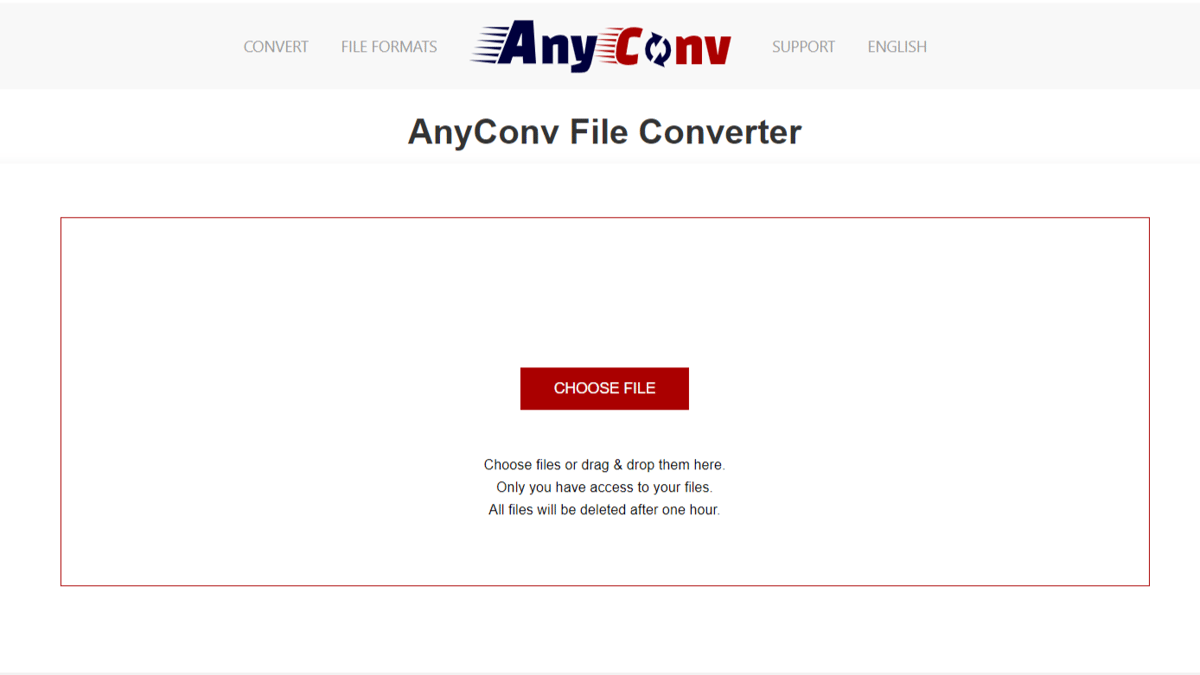
Still, if you want to take your chances, there are a few options for free file conversion online, like AnyConv. It’s as straightforward as dragging the file in, clicking convert, and downloading the result, so it will only take a few seconds to try.
Alternatively, there are downloadable converters like AccuTrans 3D, which is paid, but might be more reliable than the free online options.
Other Methods
Now, we have some other methods of converting 2D images to 3D models that are worth checking out.
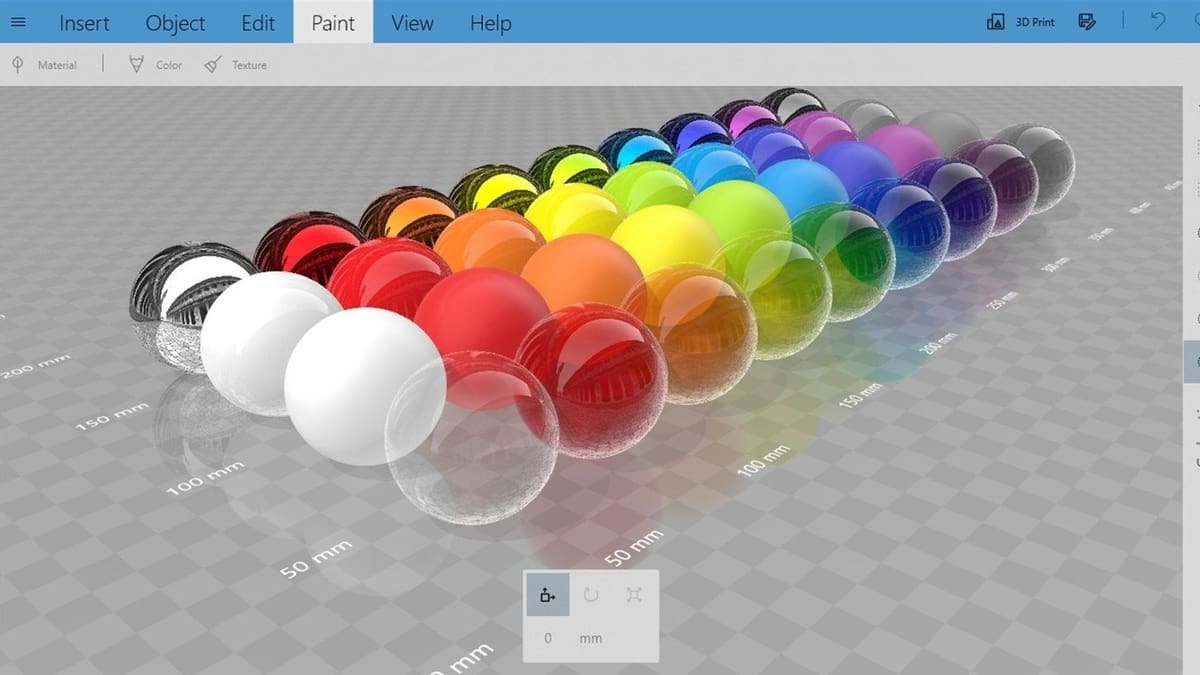
Microsoft 3D Builder
Another option, and probably the easiest to use, is the 3D Builder program that comes pre-installed on most Windows computers. There’s a feature that can convert an image into an STL or OBJ file very easily. (This won’t work on Mac, only on Windows 10 or higher.)
Here’s how it’s done:
- If you don’t already have 3D Builder on your computer, download it from the Microsoft Store.
- After you’ve downloaded and installed the app, drag your image onto the workspace or go to “Insert > Add” and choose the image.
- Adjust the “Levels” and “Smooth” sliders until your image is crisp and clear. You can also change between the methods “Contour”, “Height Map”, “Edge”, and “Stamp” to get different effects.
- When you’re happy with the model, click the “Import Image” button. Here, you can change the scale with the “Scale” tool at the bottom of the workspace. When scaling, it can be helpful to lock the proportions by clicking the lock in the same menu.
3D Modeling Software
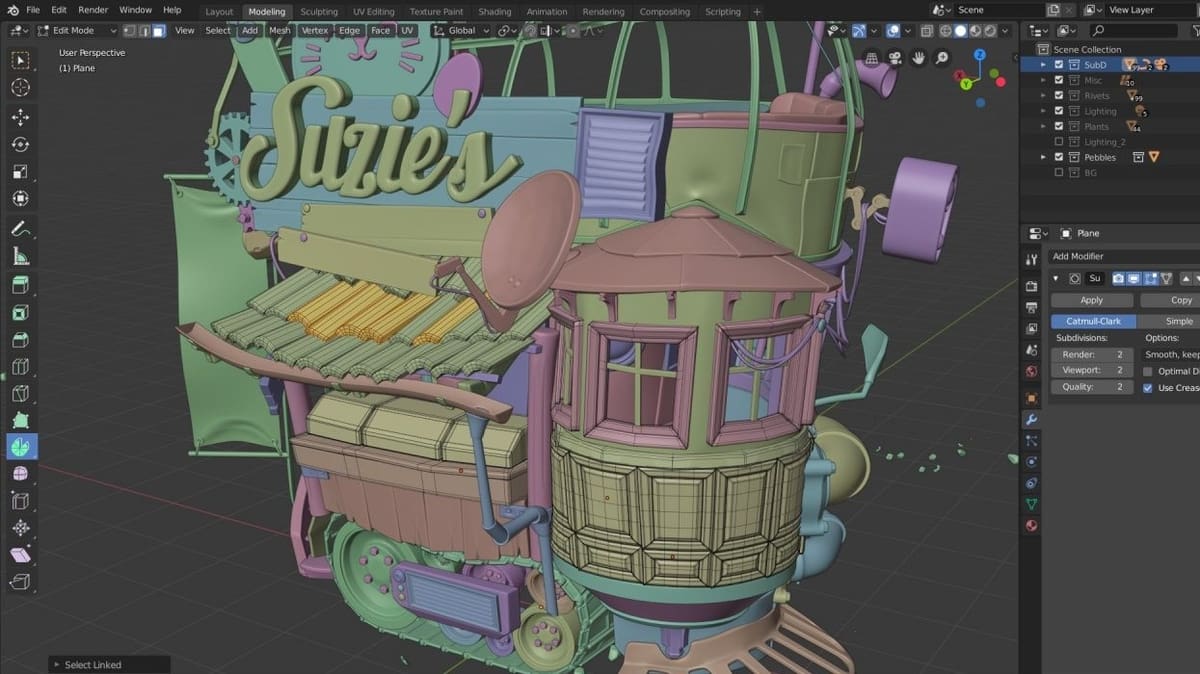
Another option is to use a modeling program like Blender, which you can get for free from its website. This sort of software is generally used to create images from scratch, not unlike sculpting with clay, but they can also read 2D file formats, upon which you can build. It takes a great deal more effort than any other method, but using modeling software also offers you more accuracy and freedom in complex designs.
If you already have Autodesk Maya, it offers largely the same suite of tools as Blender. As it’s mostly used by professionals, you’ll also be paying for what you get.
The middle ground between Blender and Maya is SketchUp, with both free and paid versions. It’s by far the easiest to use, but the ease of use comes with less functionality than the previous two options. SketchUp is a great program to start with if you’re not yet sure if 3D modeling is for you.
One more suggestion is Autodesk Fusion, which, although CAD, CAM, and CAE software, allows 3D sculpting and export to STL format. It’s a great option if what you’re designing has complex mechanical or electrical parts. The plus point is that you can get the license for free if you’re a student or hobbyist intending to use Fusion 360 strictly for personal use.
SVG Conversion
Converting SVG (scalable vector graphic) images to STL files is a method used to extrude flat images, giving them depth, and making them ready to be 3D printed. SVG is a widely used file format and can be created with virtually any text editor or drawing software. In the current context, JPG or PNG files are converted first to the SVG format and are then converted into STL.
For the first step, one way is to use software like Inkscape, while another way is to use online file format converters like Online-Convert, Simplified, or Autotracer.
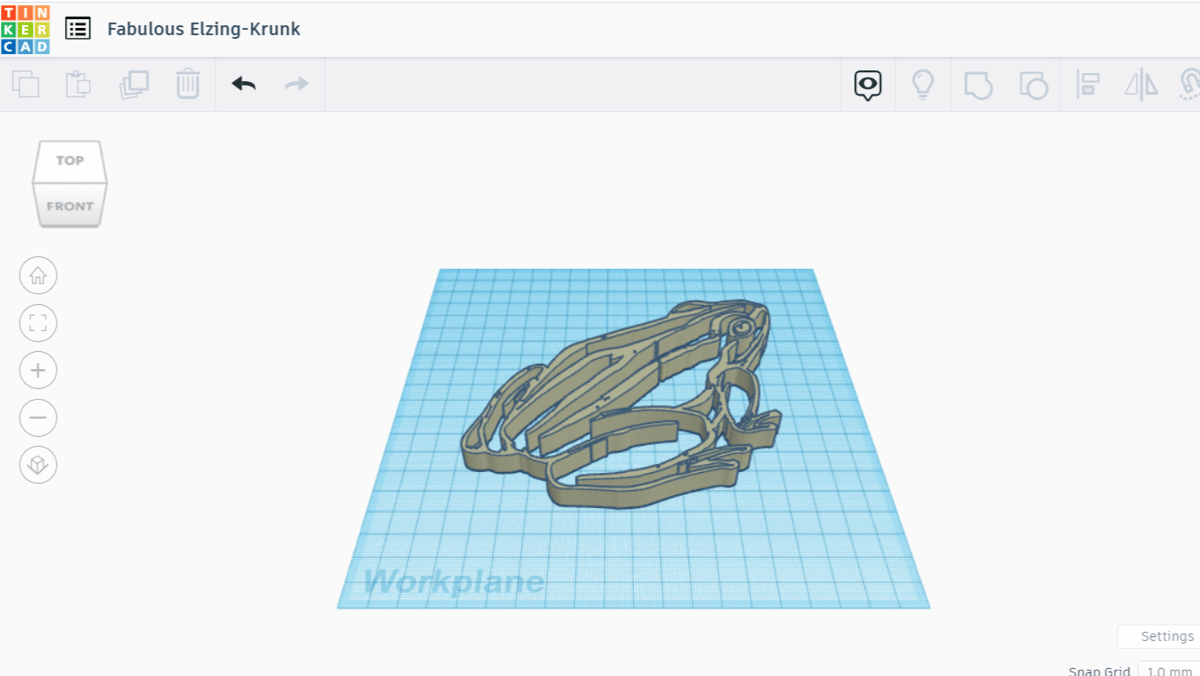
As for converting them to STL, there are a couple of options, including other free programs like Tinkercad.

License: The text of "JPG/PNG to STL: How to Convert Images to STL" by All3DP is licensed under a Creative Commons Attribution 4.0 International License.