Chitubox (Resin 3D Printing Slicer): All You Need to Know

Chitubox slicer is a powerful alternative to proprietary software from 3D printer manufacturers. Find out more below.
Every slicer program is a pre-processing tool that converts digital 3D models and printing process parameters into instructions for a 3D printer to perform. It’s an essential step for any 3D printing procedure, regardless of the technology (FDM, SLA, SLS, and so on).
Most people associate slicing with G-code generation, which is fair since fused deposition modeling (FDM) is the most popular 3D printing technology out there. However, in resin 3D printing, instead of generating G-code, the slicing software creates a different file with (in a nutshell) a series of images corresponding to each layer to be cured.
Due to the difference in nature of the two 3D printing technologies, different software benefits (and is sometimes necessary for) each setup. While most printers are shipped with proprietary slicers, there are third-party options that have plenty to offer and are worth considering.
Chitubox is a third-party tool that’s compatible with the most popular resin 3D printer manufacturers on the market, such as Elegoo, Creality, Flashforge, and more.
In this article, we’ll provide an overview of this slicer and cover its most important aspects and features.

Price & Licensing
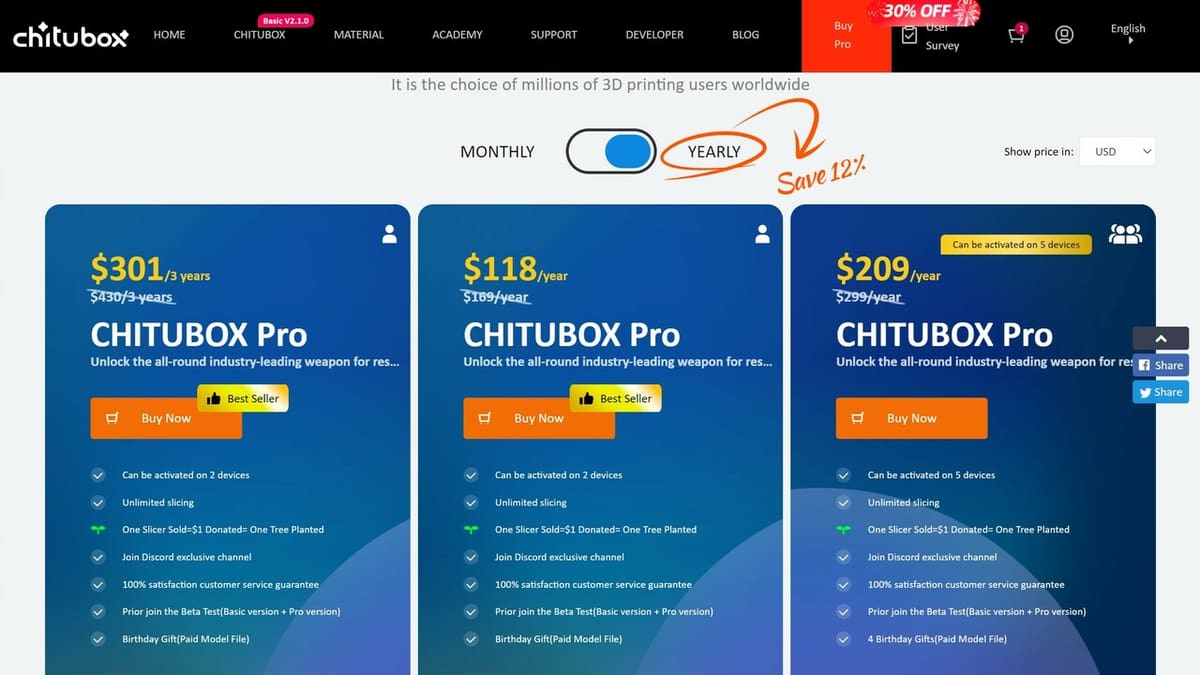
Chitubox provides a free version, Chitubox Basic, and a paid version, Chitubox Pro. The latter is subscription-based, and there are four options available. There’s a monthly subscription at ~$15, a 1-year subscription at ~$170, a 3-year subscription at ~$430, and a subscription for groups at ~$300/year. There’s also a 50% discount for students or educators.
For those who enjoy testing new features before they become officially or commercially available, Chitubox Beta would be a great option, and it’s offered for both the Basic and Pro versions.
Chitubox also has a dedicated slicer for dental 3D printing called Chitubox Dental, which, at time of writing, is at beta stage and access is strictly via trial. While you can also download the program, you’ll need to be registered to use it.
Let’s take a look at what setup you need to download and run Chitubox.
System Requirements
Chitubox is available across multiple operating systems: Windows, Intel Chip (Mac), Apple Chip (Mac), and Linux. At time of writing, the stable versions of Chitubox are v2.1.0 for Chitubox Basic and v1.4.1 for Chitubox Pro.
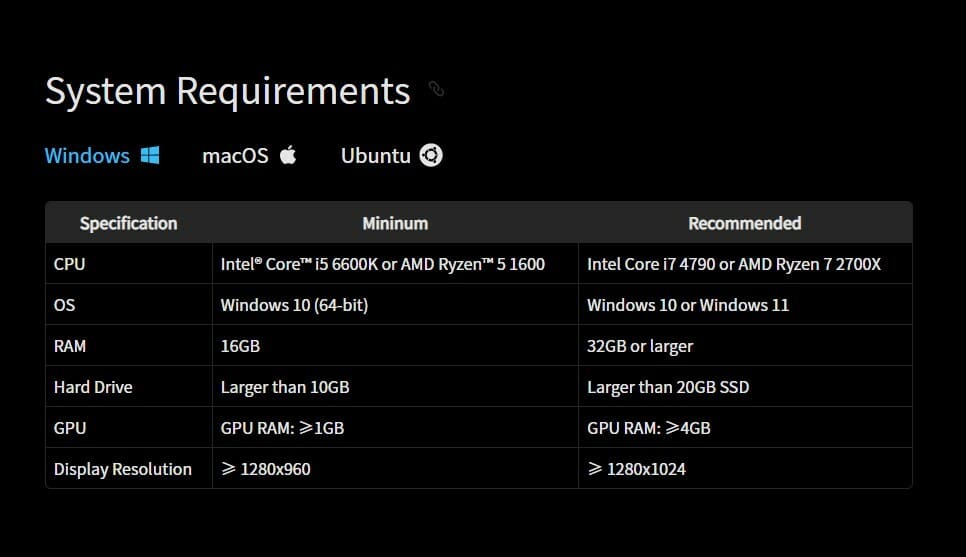
The minimum required settings as shared by the company are:
- CPU: Intel® Core i5 6600K or AMD Ryzen 51600 for Windows and Ubuntu OS; Intel® or M1, M2 processors for MacOS
- OS: Windows 10 (64-bit); Ubuntu 20.04 LTS; MacOS Big Sur (version 11.7)
- RAM: 16 GB for Windows and Ubuntu users
In addition to these, other requirements, like the display resolution, GPU, and more, do apply. While they might not be as critical as the amount of space available on your hard drive, which has the potential to cause a failed installation, they will help ensure a smoother experience.
Upon a successful installation, the next is to understand key areas within the software. Let’s see what this looks like and the functions it holds.
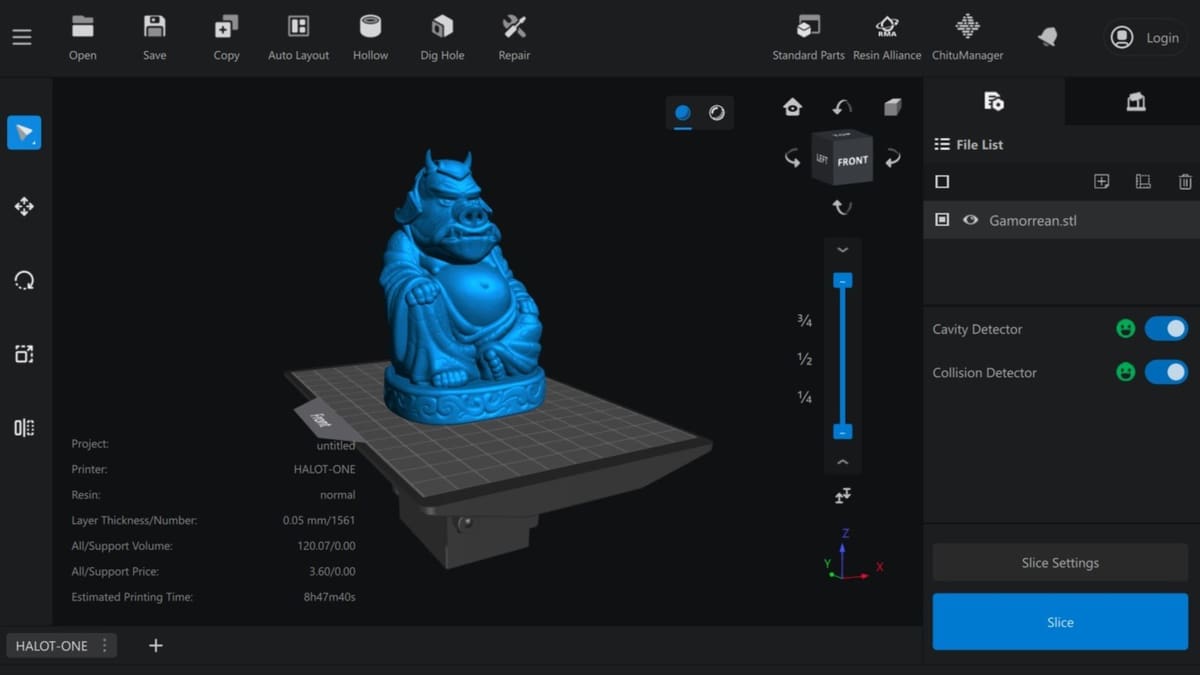
UI & Layout
Chitubox has a clean, feature-filled user interface (UI). Most of its features are only accessible or visible when you try to perform some operations, which helps keep things neat and tidy. Upon opening the software for the first time, you’re presented with an option to select between a dark, light, and classical theme.
Now let’s take a look at the UI for a better understanding of where things are and what can be done.
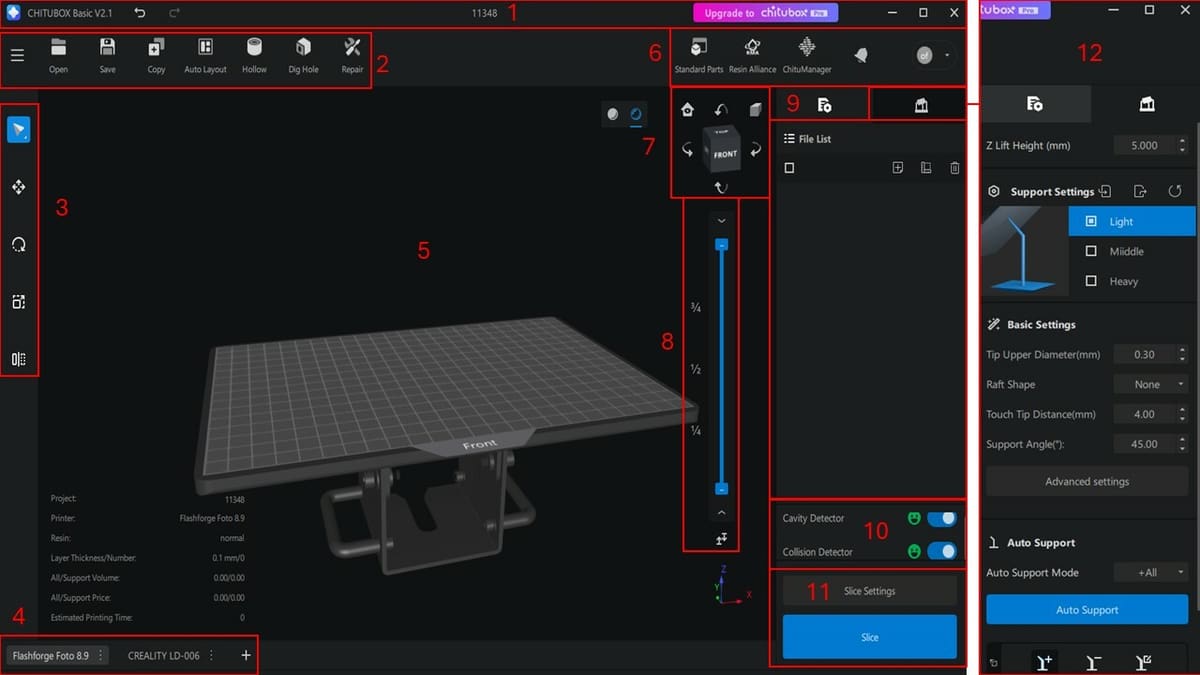
- Title bar: This information bar shows the program’s version and displays the title of the current project; it also provides basic functionalities like undo and redo.
- Menu panel: Here you’ll find features and tools that enable you to perform basic file manipulation, from opening and saving a project, to repairing and hollowing the model, among others.
- Left-side tool bar: This section includes the tools to position, rotate, scale, and mirror a model on the print bed.
- Machine bar: This is where you select and add your 3D printer. You can add multiple printers to the workspace (each added to a new tab), which can be especially useful if you wish to do a quick comparison of the overall process.
- Viewport: Here you’ll see how your settings and applied features affect how your model will be 3D printed. You can right-click this blank area to bring up the Viewport menu.
- Right menu panel: This newly added panel constitutes features like an online repository of standard printable parts (Standard Parts), the Resin Material Alliance (RMA) platform, the ChituManager, and information about the user’s account.
- Viewport cube: This allows you to obtain different views of your model on the bed.
- Sliced preview slider: By sliding the top or bottom of the bar, you can look at a vertical cross-section of the sliced model.
- File list menu: With this, you can manipulate the visibility and inclusion of multiple files on the printer bed.
- Cavity and collision detection panel: This newly added section is only accessible when the file list is active. It enables you to inspect and correct possible collision or cavities in your print, especially when you’re working with multiple parts.
- Slicing profile panel: This consists of a combination of settings that you can combine to optimize your prints. Once you’re satisfied, hit the “Slice” button (in bright blue) to initiate the slicing.
- Support settings panel: Next to the file list menu (9), clicking on the symbol pops up a range of interactive controls to optimize the printing supports. It requires at least one active model in the file list, before it can be accessed.
Features & Functions
The current release of Chitubox Basic (version 2.1.0) integrates ChituManager, which has brought about notable capabilities. This release allows for a workshop or organization whereby users can manage a printer through LAN and quickly transfer files via a network (no need for secondary storage devices), in addition to the integration of software and hardware, and the ability to monitor prints in real time.
There are many features and functions that can be explored with Chitubox; we’ll be focusing on those that make it stand out.
Layout, Hollowing, & Infill
Users can easily arrange the model(s) and are warned in case of cavity or collision issues among various designs, in both the Basic and Pro versions. In addition, holes can be added and the models can be hollowed, while Chitubox Pro also allows for Boolean operations and advanced versions of the same (and more) tools.
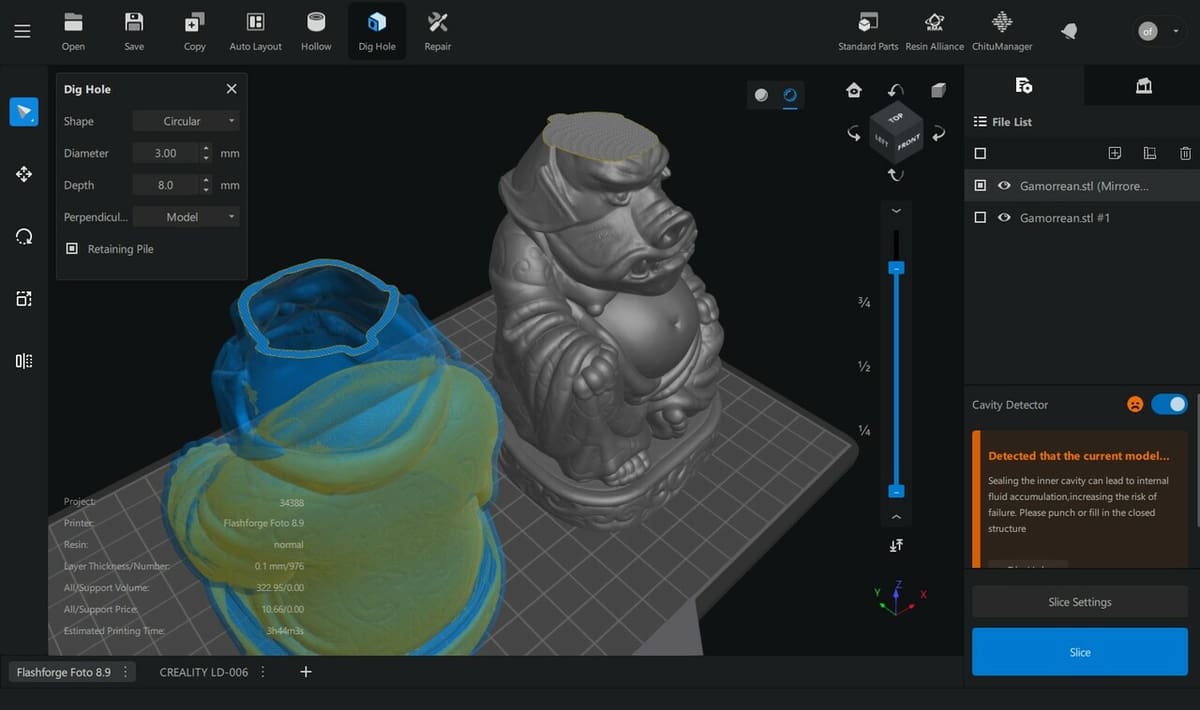
Hollowing models is very important in resin 3D printing to reduce material waste (and cost), and to decrease the possibility of the print detaching from the bed (by having less material to cure per layer and weigh it down). To do this, with the Dig Hole tool, you can specify the size and manually locate punctures, so that the uncured resin can flow out.
Chitubox Basic offers an infill pattern (“Cross 3D”) that’s quite similar to the one available for FDM, and this can come in handy if some degree of infill is necessary to create a stronger print. You can find it under the Hollow menu.
Repair
The ability to repair a model is crucial. When Chitubox prompts you to repair a model you just imported, it signifies the possibility of damaged or inconsistent geometry. Chitubox Basic has an automatic Repair tool, while Pro offers more specific tools (e.g. closing holes, repairing orientation). Most of the time, the prompt is due to errors like non-manifold edges and flipped normal.
In essence, normals are reference points that are perpendicular to each other and that determine the orientation of a model’s planes, specifically whether they’re facing in or out. A model’s normals must face the correct direction, as this is how the slicer will recognize the solid printable volume.
Analyze & Measure
This is a newly added feature in Chitubox Pro, where users can display the model size and initiate measurements between two points, planes, or a mix.
Support Editing
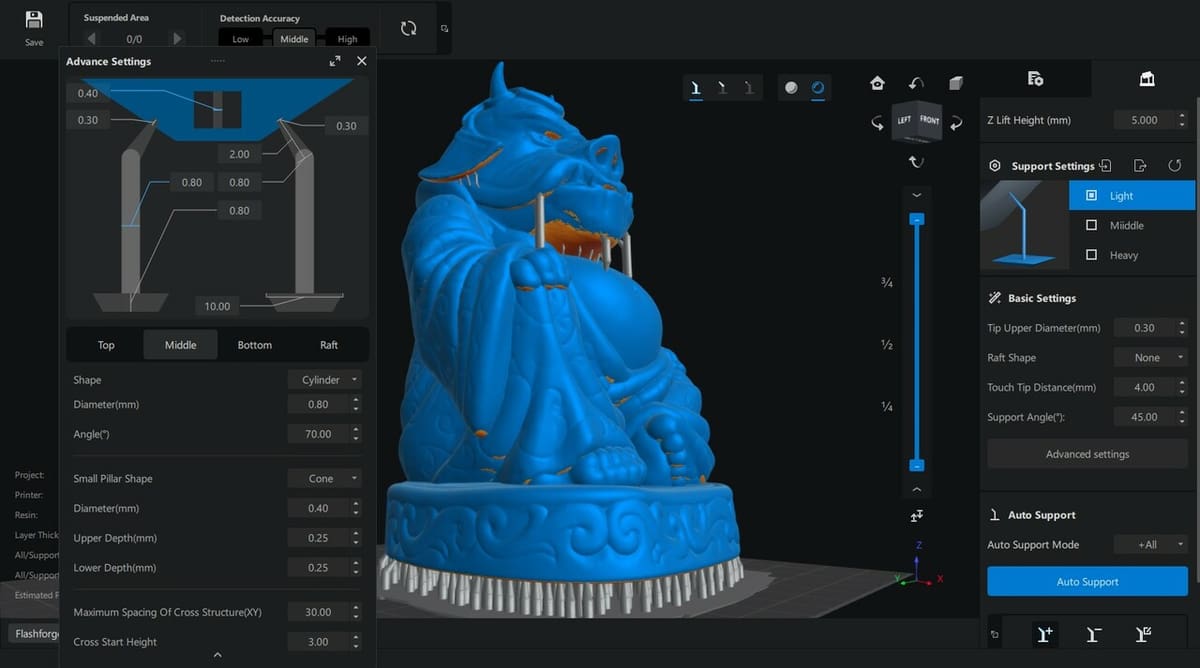
Adding support to the model is very easy, especially since it’s automatic. The challenge arises when you’re faced with the need to tweak and optimize the supports, either to save time, material, or for easier post-processing. Whatever the case might be, a support feature that is easy to configure, predict, and clean off is achievable via the configurable support feature. Users can manually configure and add tree-like supports. Chitubox Pro has advanced options, such as symmetrical, connection, branch support, and contour supports, just to name a few.
Slicing
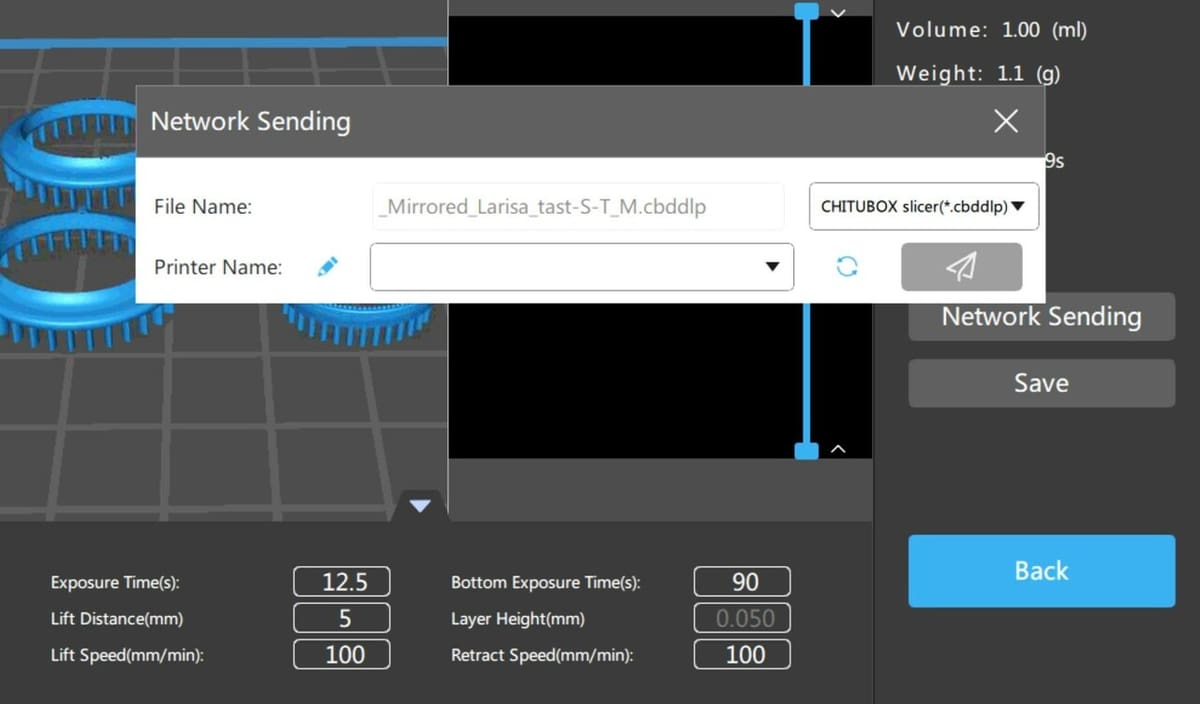
Before you hit the “Slice” button, you might want to take a closer look at the “Slice Settings” available. Machine settings include those related to the 3D printer’s specs, while resin settings allow you to choose the type, name, color, and more. For example, you can input the price, which can help you have an estimation of the overall cost of the print. Under the “Print” tab, relevant settings revolve around layers and exposure time, as well as lifting distance and speed. Last but not least, advanced options allow users to select anti-aliasing, shrinkage and tolerance compensation, and more.
Island Detection
After you’ve sliced the model, you can run the “Island Detection” tool, which will inform you at what layers there are parts of the model without supports and disconnected from the main body that will be challenging to print. In the Basic version, you can either delete the island or, to avoid the issue, go back to the model, look for the specific layer, and add supports manually. Of course, makers have found other solutions. In the Pro version, in addition to deleting the island, you can find more information on the particular issue, as well as the possibility of painting the pixel(s).

User Experience
Chitubox is professional software that is quite advanced. However, the ins and outs can be learned in just a few days.
The software accommodates multiple resin technologies (SLA, DLP, and LCD), as well as types of users. Chitubox Academy is a great resource center to gain speedy knowledge on the use of the slicer, as well as core resin printing insight.
The automatic support placement and UI make Chitubox a fairly approachable slicer for beginners. With guides that explain some of the more advanced features, users can easily take advantage of these features as they become more familiar with the software.
At time of writing, Chitubox is available in 19 languages and supports a significant number of file formats, such as .obj, .stl, and .zip, native formats of supported 3D printers, as well as its own formats (*.chitubox and *.cbddlp), to mention a few. These latter ones are useful if one wants to keep a slicing project for later. One of the perks of Chitubox Pro is the ability to import CAD files, including .3ds, .step, .igs, and .fbx, among others.
While users have encountered version-related problems, the release of beta versions seems to have addressed them. Aside from that, and some other minor issues, users appear to be happy with Chitubox.
Company & Community Support
Whether you’re just getting started with Chitubox or are an experienced user facing a new issue, there are plenty of resources for support. In addition to the official support page and forums, where users are constantly helping each other out, you can visit the Chitubox Facebook page.
Among the community-based sources, there’s the Chitubox Subreddit and an active Discord channel.
Chitu Systems, the company that makes both the slicer and motherboards for many well-known resin printers, did score some unfavorable points when they locked access to new features such as wireless file transfer to the Chitubox software only, not allowing competitors such as Lychee to take advantage of them when using a printer that comes with a Chitu Systems board.
After community backlash, they unlocked Wi-Fi functionality for other slicers to use as well, so it’s safe to say the developers behind the program are listening to the community’s feedback.
Use Cases
Resin 3D printing applies to a wide range of industry applications. While Chitubox Dental is dedicated software for the dental industry, Chitubox (Basic and Pro) can be useful in a variety of applications, be they hobbyist or professional.
The slicer is compatible with a wide range of machines, and it allows for a high level of customization as you can add more profiles. The resin type and printing criteria are combined with the use of professional resins such as tough and flexible ones to obtain customized engineering products or prototypes. Due to the high resolution and finishing using resin printing technology, users can easily prototype earbud housings and more.
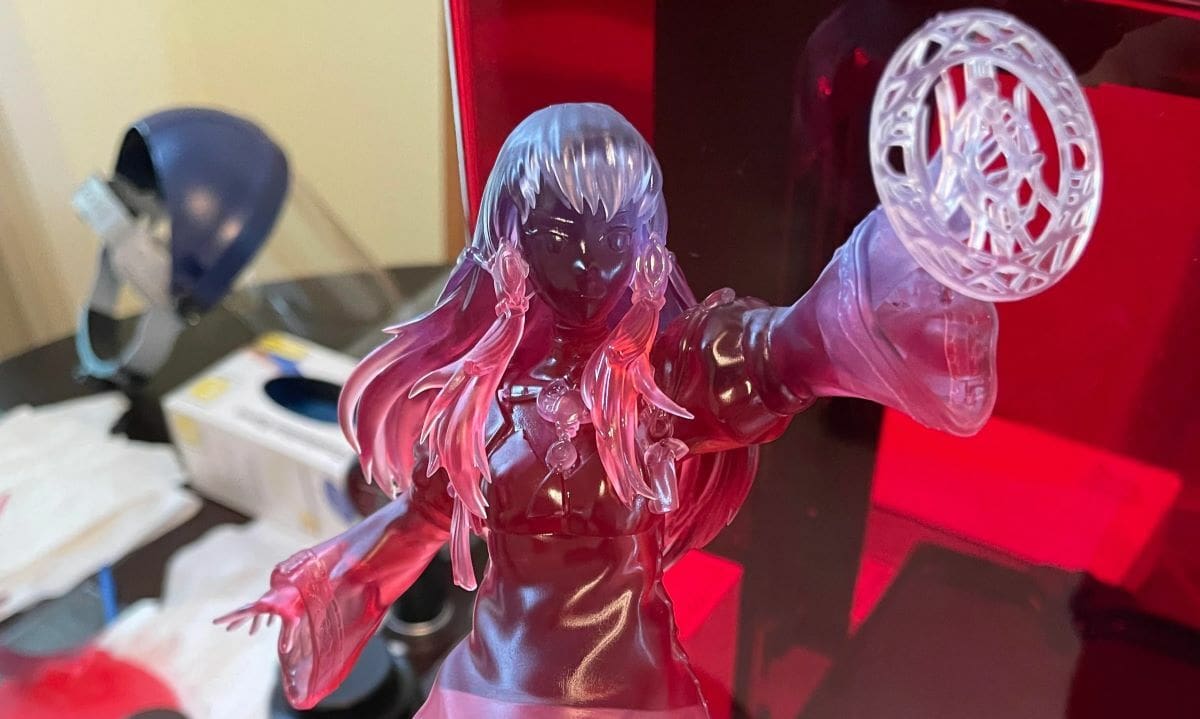
And, of course, if you’re looking to 3D print miniatures for your gaming setup or to sell, Chitubox has plenty to offer before it’s time to paint.
Alternatives
It’s no accident that Chitubox is the most-used third-party slicer software for resin 3D printers. The level of control and built-in features can really speed up the slicing workflow while maintaining a high-quality output file. As good as it is, Chitubox does have competition. There are only a few notable alternatives.
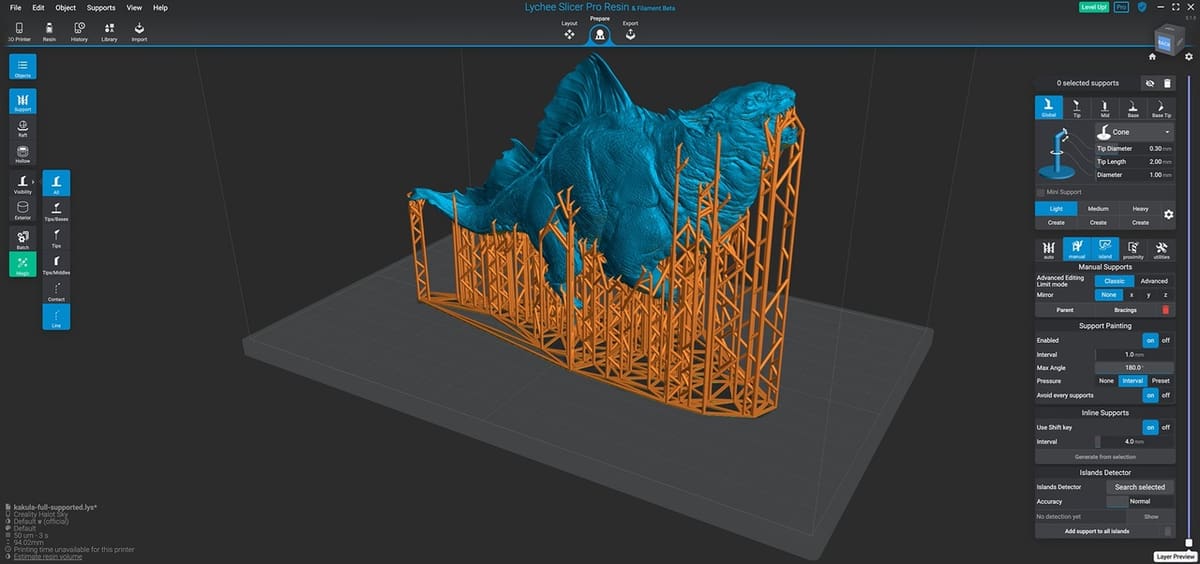
Lychee
From Mango 3D, Lychee is increasingly popular, with many of the same features that Chitubox has to offer. There are Free, Pro, and Premium versions of the software (also available as a bundle along FDM slicing), with the paid versions available through monthly or annual subscriptions. The differences aren’t that significant overall to make one stand out over the other (although when it comes to the paid versions, users appear to prefer Lychee), and it might just come down to individual preference and which UI suits the maker the most.
Photon Workshop
Anycubic Photon’s slicing software, Photon Workshop, is a great place to start when getting into resin 3D printing with a Photon printer. The slicer is made to plug-and-play with their own lineup of printers. While this slicer doesn’t offer a ton of advanced features, it will have everything you need to get started.
PrusaSlicer
PrusaSlicer might be a community favorite FDM slicer, but that doesn’t mean that it doesn’t deliver when it comes to resin printing. For those familiar with the slicer because of its FDM capabilities, it might be a good option given that the interface and controls are all the same. There are automatic profiles generated for more than 180 resin printers, so compatibility shouldn’t be an issue for most users. While current versions of the slicers offer competitive settings, in the past, some worked both of them into their setups.
NanoDLP
NanoDLP is more than a slicer – it’s an “all-in-one controller” for slicing that can either be set up on a Raspberry Pi (or another single-board computer), or downloaded for Windows, Linux, or Mac. Because its main goal is to ease the workflow rather than act specifically as a slicer, this last offer isn’t as necessarily advanced as what Chitubox has to offer. This is why many users opt to have both in their setups.
License: The text of "Chitubox (Resin 3D Printing Slicer): All You Need to Know" by All3DP is licensed under a Creative Commons Attribution 4.0 International License.