
Blender: Mirror Modifier – Simply Explained

Having a hard time getting your symmetries nice and even, or want to flip an object the opposite direction in Blender? Learn more about the Blender mirror modifier which makes this task straightforward!
Here's the Flipside
Blender is a great program for 3D modeling complex objects. Even though it’s free, it offers a lot of handy tools that can smooth out your workflow. One of the things that can be a bit tricky when it comes to modeling is symmetry. Getting an object or character looking the same on both sides can be a real headache unless you use the mirror modifier.
Let’s take a look at how using the mirror modifier can help solve the issue of symmetry. By the way, you might also want to get familiar with merging if you’re making complicated models!
Mirror, Mirror
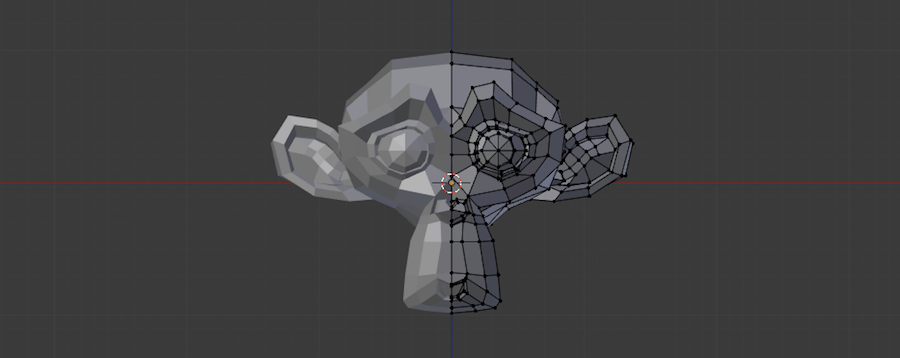
For our first example, we’re going to make use of the Blender Monkey. This is a neat little test mesh packaged with Blender that you can use for your experiments. Since it is also common to use the mirror modifier when modeling characters, it’s perfect for our example!
We’ll start with the most straightforward use of the modifier: Mirroring a mesh which is half of an object so that it makes a complete, symmetrical object. For this purpose, the monkey has been cut in half in Edit Mode.
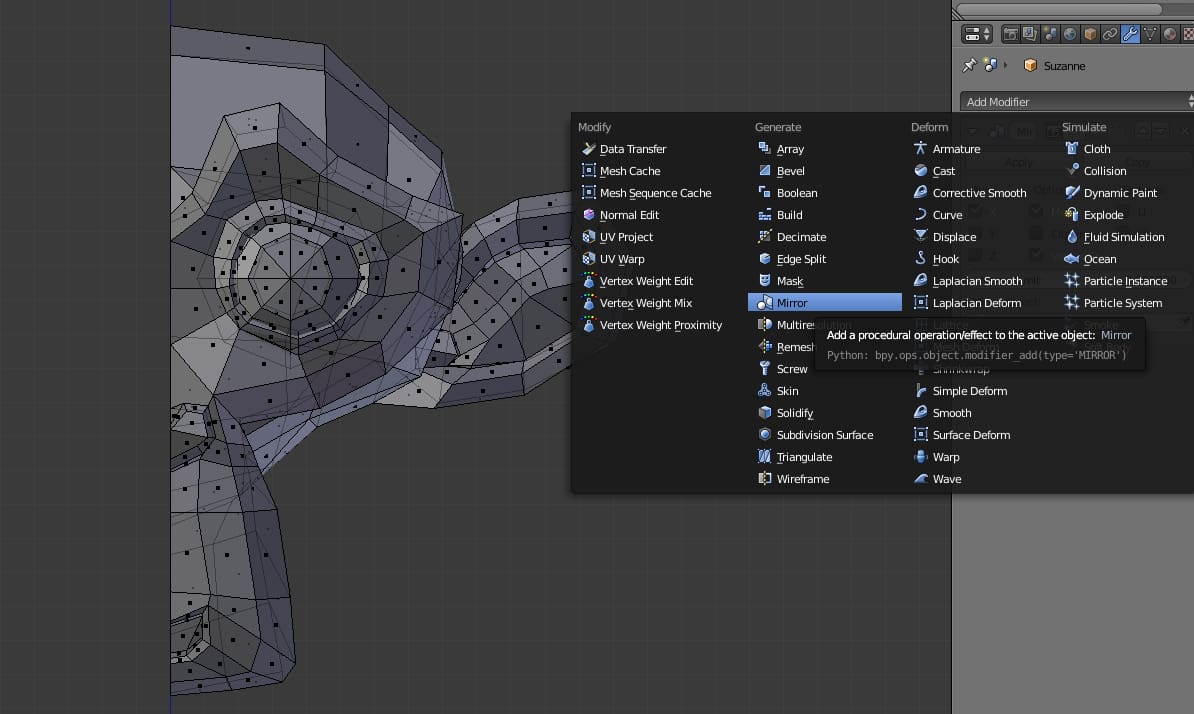
Applying the modifier is easy:
- In Object Mode, select the mesh.
- In the Editor on the right side, find the Modifiers tab.
- Click the Add Modifier drop-down menu and select “Mirror”.
Remember, modifiers can only be applied in Object Mode, although you can still use Edit Mode and preview the effects.
Nothing Inside
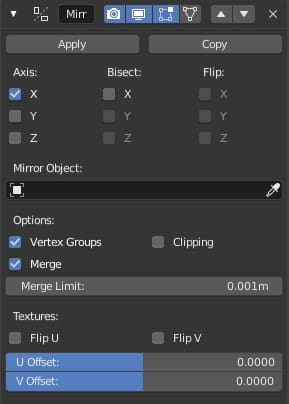
Now, the object is mirrored! The plane of mirroring is based on the Origin Point.
By default, the object is mirrored along the X-axis but can be any combination of X, Y, and Z. Make sure you have “Merge” selected so the two halves are properly combined!
Bisect can be used if you haven’t already cut your object in half for the same effect.
Flip will make the object half switch sides.
The Merge Limit determines how close vertices need to be to the mirror plane to be merged to the other half. A higher limit means a wider range will become merged.
Some of the options are not available in older versions of Blender. It’s important to make sure there are no faces inside the object along the mirror plane, especially if you intend to 3D print the object, as this will affect whether or not it is manifold.
Other Uses

There are other ways to use the mirror modifier other than to just create symmetry in an object. It can also be used to create symmetry of position. An example might be placing four pillars in a square. This requires moving the Origin Point outside of the object so that the entire object is duplicated by the mirror modifier.
Here’s how you would do it:
- Create a cylinder and adjust to taste.
- Use the left mouse button to select a point anywhere diagonal from the cylinder. The farther away, the larger the space between the duplicates. This sets the position of the 3D Cursor.
- From the menu at the bottom of the viewport, select Object > Transform > Origin to 3D Cursor.
- With the Origin Point set, you can apply the mirror modifier. If you select the X- or Y-axis alone, you will get a pair of pillars, or together you get the square formation.
You can also experiment with the Z-axis to create other kinds of arrangements. It can be an interesting way to discover unique shapes and patterns!
Feature image source: Blender Gallery Archive