Blender: How to Group Objects – Simply Explained

Your work can get chaotic if you're looking at too many objects in Blender. Group objects in your design workspace to keep things organized!
Blender provides a platform to do almost anything as a 3D designer. The free graphics software can be used for 2D and 3D art, animation, visual effects, texture painting, rendering, virtual reality, rigging, character modeling, and more. We’re not afraid to say it, Blender does it all!
Given everything that can be accomplished in Blender, sometimes the design workspace can become cluttered and disorganized. When building a big 3D scene with lots of objects, it can be hard to keep track of each and every one of them.
This is where grouping objects comes in handy. Blender offers a way to categorize objects into respective groups so that the users can access the objects easily and edit them as required.
One thing worth noting when you’re working with grouped objects: In Blender, you can use the Transform tools to define and edit an object’s location, size, and angle of rotation, among other characteristics. Grouping objects in a Collection won’t affect the transformations of individual objects in a particular Collection. So, for example, if you choose to put a cone and a sphere in a Collection, and you change the latter’s size, that won’t affect the size of the cone, irrespective of the fact that they’re both in a Collection.
In this article, we’ll look at how to group objects in Blender and why it’s helpful to keep up with organizational needs! Let’s get started by getting our bearings in Blender.
User Interface
The screen that appears right after opening Blender is called the Splash Screen. It contains an Information Region, which displays the Blender version used, and an Interactive Region, which allows you to open a new, recent, or pre-saved file, to open files that were auto-saved by the software, and displays links to the Blender Release Notes and the Development Fund.
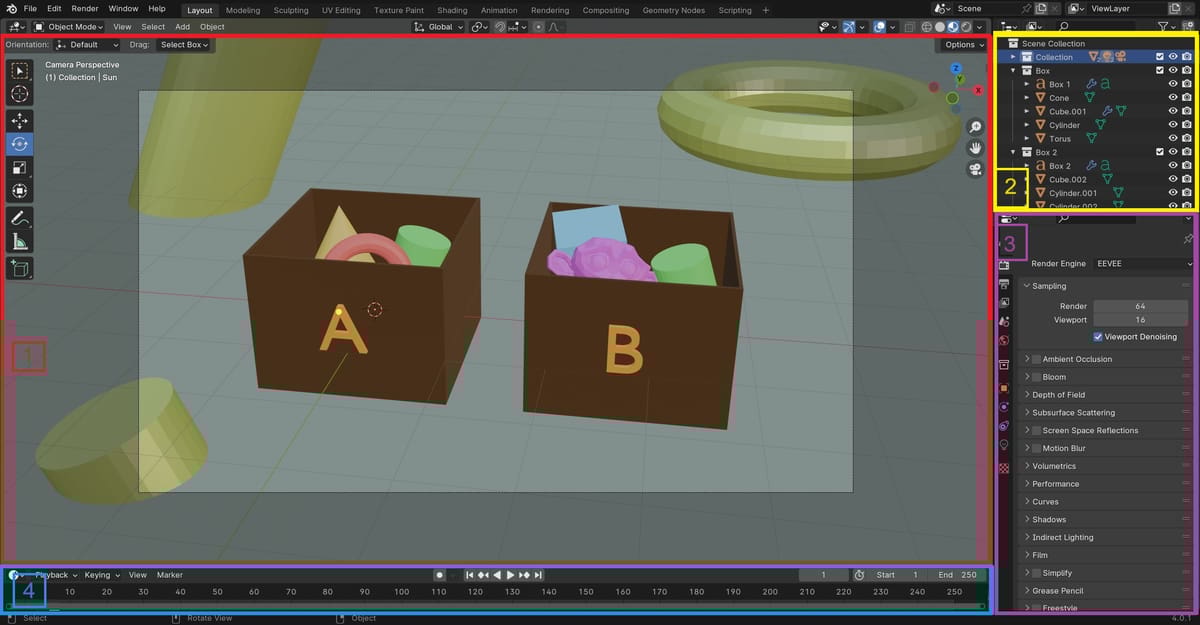
After opening a Blender file, the user interface (UI) can be broken up into four important sections:
- 3D Viewport (red border): This workspace displays all the 3D models currently in use. This is where you’ll do most of your modeling.
- Outliner (yellow border): All the objects in the 3D viewport are listed in this box.
- Properties (purple border): Tools to edit the active objects in the scene are available here.
- Timeline (blue border): This bar displays animation frames of the scene.
Now that we’ve gone over the basics, let’s look at the steps for grouping objects in Blender!
Step 1: Selecting Objects to be Grouped
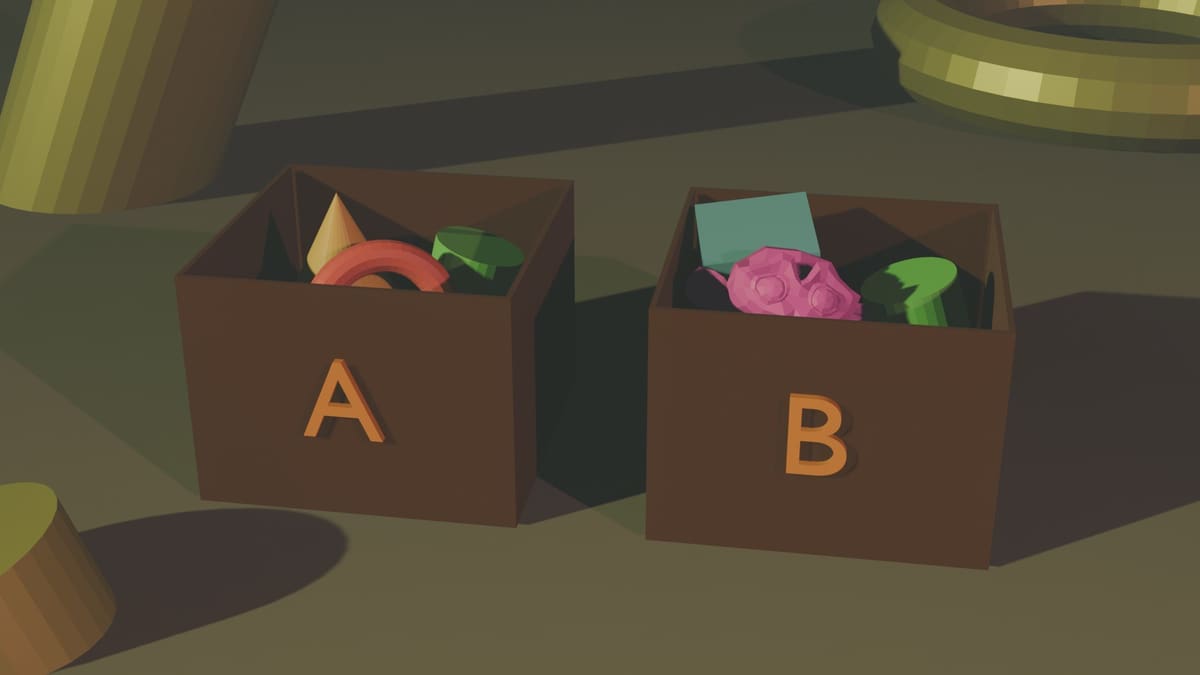
First, you need to decide what objects you want to put together in a group. The groups in Blender are referred to as a Collection. For demonstration, we’ll use the random objects pictured above that can be added to the 3D Viewport.
- Press “Shift + A” on your keyboard, which opens the “Add” menu.
- Expand the “Mesh” option.
- Left-click on the objects that you want to add to the scene.
After choosing the objects that you want to group together in a Collection, complete the following steps:
- Hold down the Shift key on your keyboard.
- Select the chosen objects with the left mouse button.
Tip: If you want to select all the objects in the scene, simply press the ‘A’ key on your keyboard.
The selected objects will be highlighted in orange.
Note: There’s a collection in the Outliner named “Scene Collection” by default. It can’t be deleted, and it contains all the objects and Collections in the scene, as it’s the highest in the Collection hierarchy.
Step 2: Moving to a Collection
After selecting the required objects:
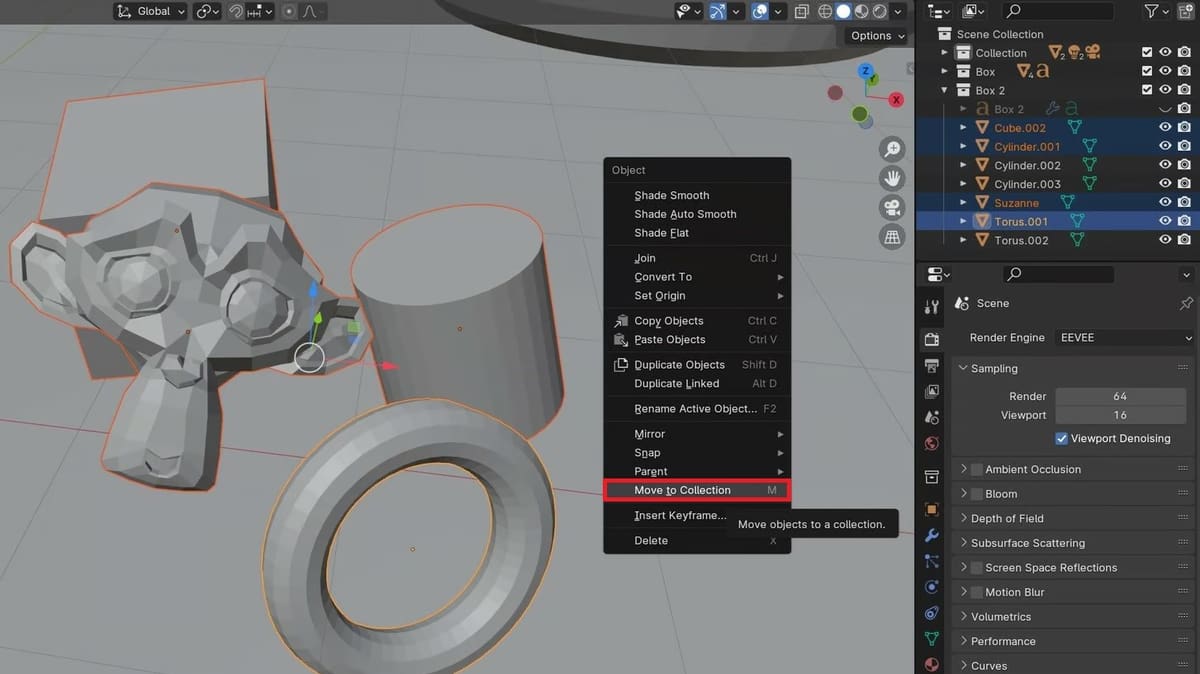
- Right-click on one of the selected objects to open the Object Context Menu.
- Click on “Move to Collection” (or just press ‘M’ to open the “Move to Collection” menu).
- Now you can either click on “+ New Collection” to make a new Collection for the selected objects, or you can choose to add them to any of the existing Collections.
- If you start a new Collection, you’ll be asked to give it a name. Also, any Collection in the Outliner can be renamed by double-clicking on the Collection name and typing in the new name.
Tip: To make a new Collection, you can also press “Ctrl + G” on the keyboard. Alternatively, click on the “New Collection” button at the top-right corner of the Outliner.
After successfully grouping the objects together, we’ll look at some important tools and menus related to grouping in Blender.
The Outliner & Collection Menu
All new and already existing Collections can be found in the Outliner. The Collections can be expanded or contracted by clicking on the small arrows to the left of the Collection name. (Expanded Collections display all the objects and Collections contained within.)
There are two tools that can be useful for managing multiple Collections:
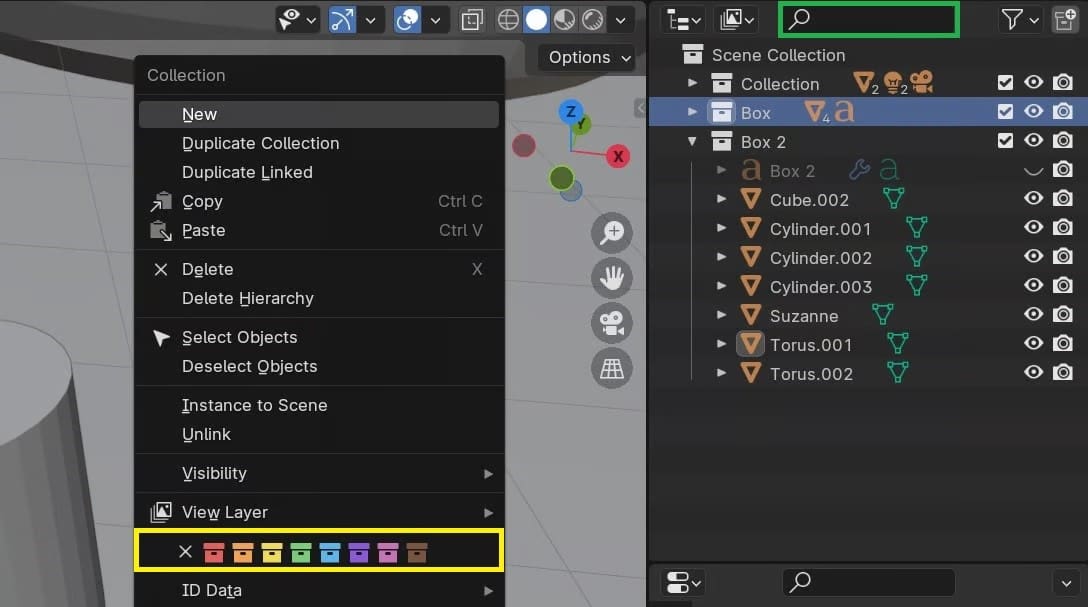
- Color coding (yellow border): Collections can be color-coded for better organization. To do so, right-click on a Collection’s name, which will open the Collection menu, where you’ll see the color tag option (located just below the View Layer option) displaying different colors. You can set your preferred color for the Collection.
- Search bar (green border): Using the search bar at the top of the Outliner, you can search for any object or Collection present in the Outliner by simply typing in the corresponding name, and the matching results will be highlighted in green in the Outliner.
If you’re searching for an object in a contracted Collection, you don’t need to expand it for the searched object to be highlighted – the respective Collection will expand on its own.
The Collection Menu
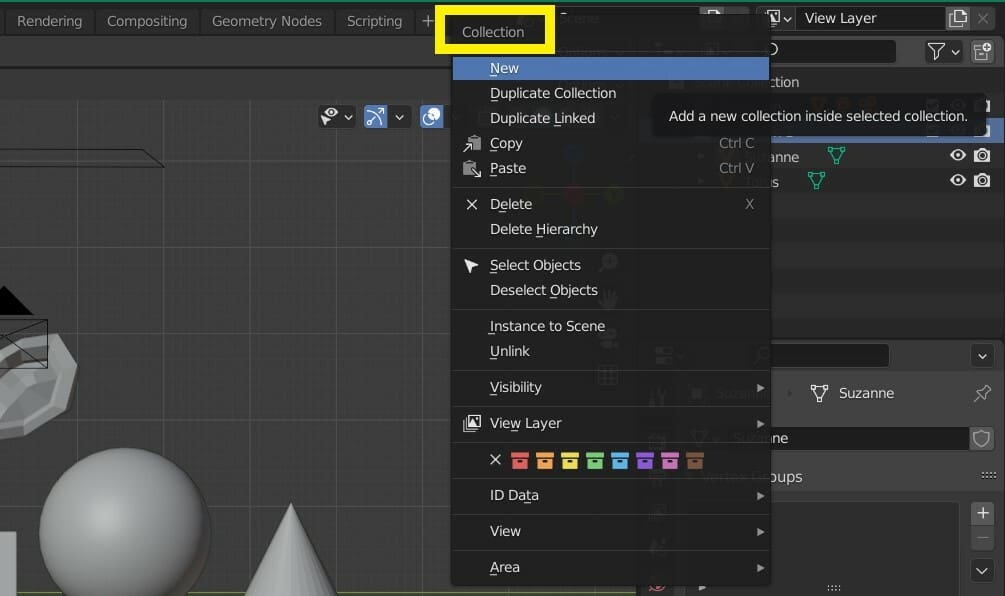
When you right-click on a Collection’s name in the Outliner, a Collection menu opens, which displays the following options:
- New creates a new Collection inside the Collection you right-clicked on.
- Duplicate Collection creates a duplicate of the currently selected Collection, with the names “Collection name.001”, “Collection name.002”, and so on.
- Duplicate Linked creates a copy of the selected Collection with the objects’ data linked to the original Collection. Changes to the original objects (other than transformations) will be applied to the Duplicate Linked Collection.
- Copy and Paste can be used to copy and paste an entire Collection, along with its objects.
- Delete removes the selected Collection only and not the objects in it, whereas Delete Hierarchy erases the entire Collection along with its objects.
- Select Objects and Deselect Objects are used to select and deselect all the objects present in the selected Collection.
- Instance to Scene creates a copy of the selected Collection in the Outliner and selects all the objects in the 3D Viewport present in the selected Collection.
- Unlink removes links to the scene from the selected Collection and its objects from the scene.
- Visibility shows or hides the selected Collections and their objects in the 3D Viewport and the final render.
- View Layer enables or disables the entire layer in the scene.
- View shows entire Collections, active Collections, and their first objects.
- Area duplicates or splits the entire screen into new windows.
Visibility of Objects & Collections
You can also control the visibility of the objects and Collections in the Outliner and the scene. Here’s how to do it:
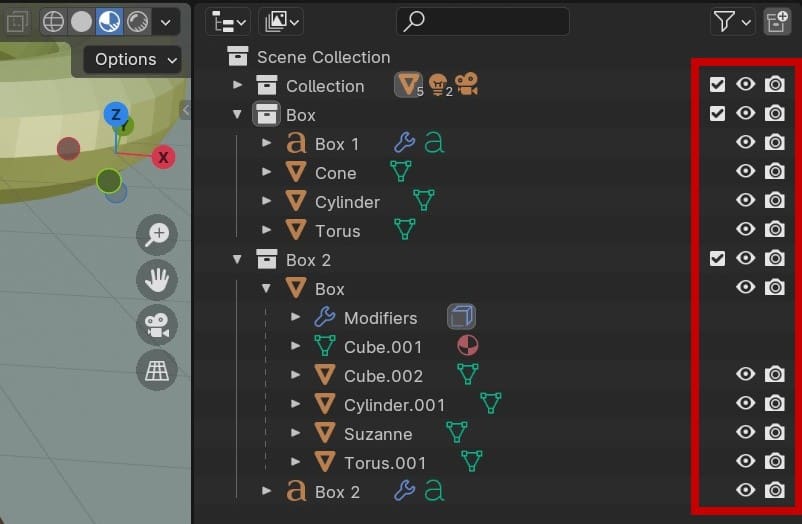
- Each Collection has a check box to its right in the Outliner, which, when unchecked, contracts and dulls out the Collection in the Outline and makes its objects invisible in the 3D Viewport.
- The “eye” symbol to the right of every Collection and every object makes the Collection or the object dulled out in the Outliner and invisible in the 3D Viewport when unchecked. Note: If a Collection is unchecked using this option, the objects in that Collection can’t be enabled and made visible.
- The “camera” symbol to the right of every Collection and object, when unchecked, disables the selected object or the entire Collection in rendering. Therefore, those objects or that whole Collection won’t be rendered.
Filtering Collections
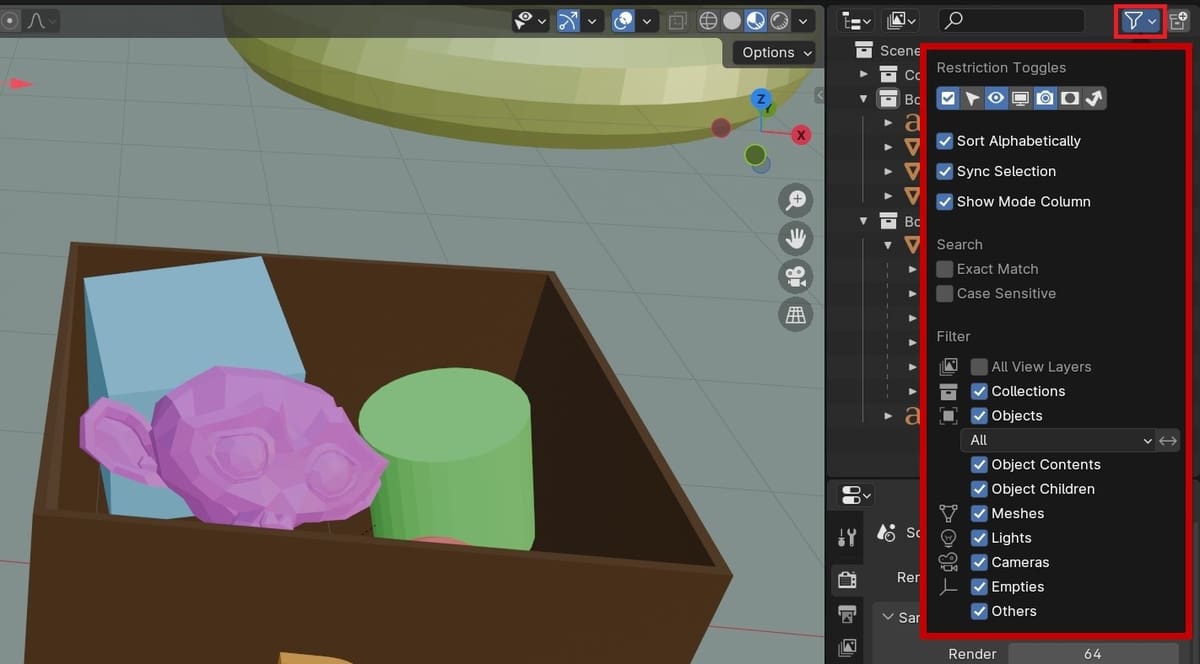
You can filter the Collections and objects in the Outliner as you need. The Filter option is present at the top right corner of the Outliner, which displays the following options:
- Sort Alphabetically does exactly as you’d expect: It sorts the objects in all the Collections alphabetically.
- Sync Selection syncs whatever is currently selected in the Outliner with other editors like the 3D Viewport, UV Editor, etc.
- Show Mode Column displays the Mode Column for Mode toggling.
- Exact Match requires the exact, complete name of an object or Collection in the Search Bar for a search to be successful.
- Case Sensitive makes searches in the Outliner case-sensitive.
- All View Layers switches between just the active view layers and all the view layers of the scene.
- Collections shows or hides Collections in the Outliner.
- Objects shows or hides objects in Collections in the Outliner.
- Object Contents shows or hides objects’ contents in the Outliner.
- Object Children shows or hides objects’ Children in the Outliner.
- Meshes shows or hides mesh objects in the Outliner.
- Light shows or hides lights in the Outliner.
- Cameras shows or hides cameras in the Outliner.
- Empties shows or hides empty objects (like images) in the Outliner.
The Parent-Child Relationship
Assigning the objects as “Parents” and “Children” in Blender is another way to organize their hierarchy. Although it’s not the same as “grouping”, it does help set which object will be at the top of the hierarchy and which objects will be below it.
Note that one Parent can have multiple Children, but one Child cannot have multiple Parents.
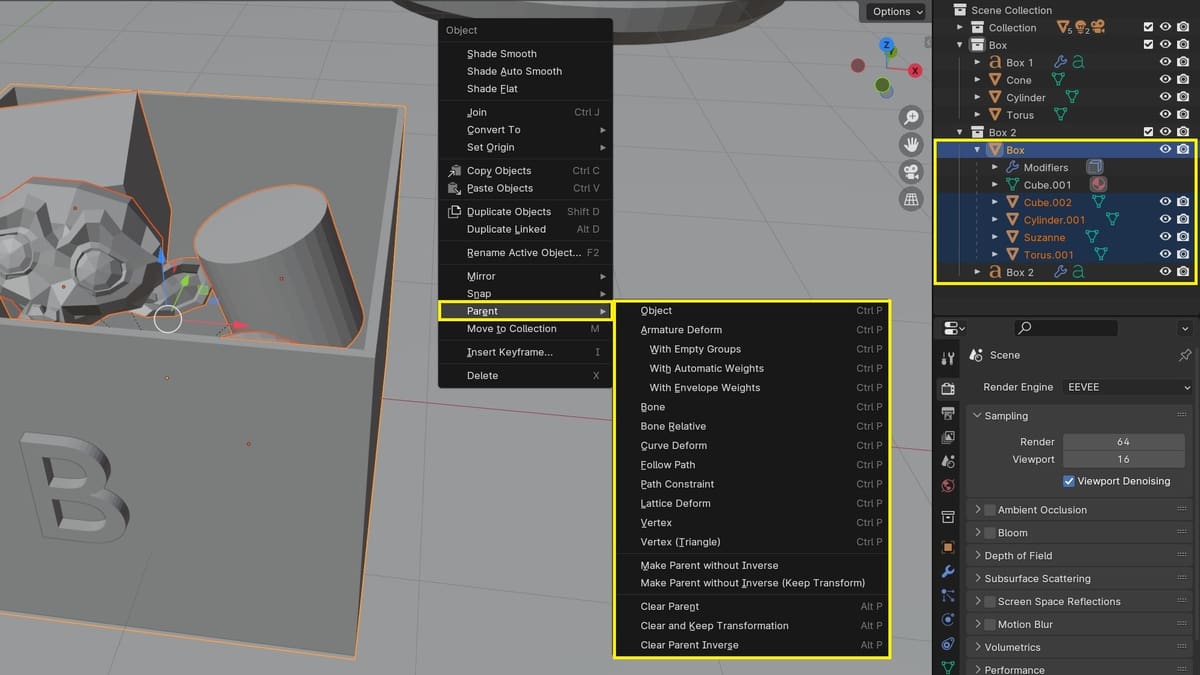
To assign a Parent-Child relationship in Blender:
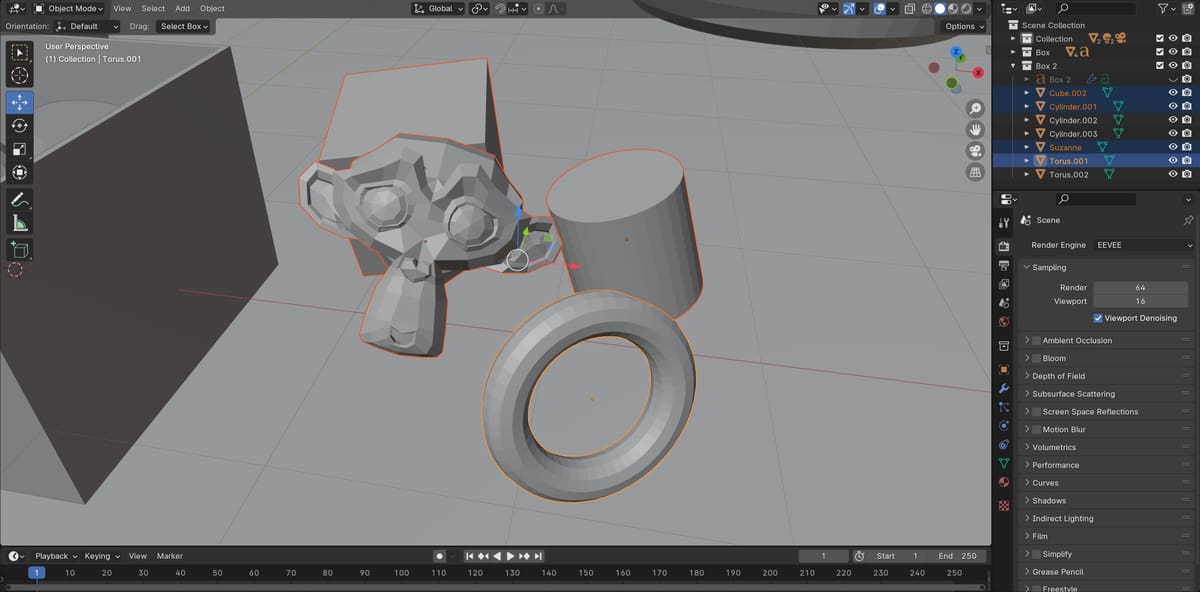
- Select the object/s you want to assign as Children, followed by selecting the object you want as “Parent”. Note that you need to select the object you want as Children first because Blender will set the object selected last as Parent. The Parent will be highlighted in a lighter shade of orange, with the Children in a darker shade.
- Press “Ctrl + P” on your keyboard or right-click with your mouse, which will open the “Set Parent To” menu.
- Click on the “Object” option.
In the Outliner, you should see that the objects have been set as Parent and Children respectively. That means that the object selected as a Parent will have the objects selected as Children under its hierarchy. We set the box as the Parent for our demonstration in the image above.
The Parent-Child Relationships vs. Collections
One of the important distinctions between forming Collections and forming Parent-Child relationships for grouping is the behavior of the Transform Tools (translation, rotation, and scale) for both scenarios.
As mentioned in the beginning, grouping objects in a Collection and transforming one of them won’t affect the transformation of other objects in the same Collection. However, when you form a Parent-Child relationship between objects, the transformation of the Parent will usually also apply to its Children. It’s also worth noting that transforming Children won’t transform the Parent.

License: The text of "Blender: How to Group Objects – Simply Explained" by All3DP is licensed under a Creative Commons Attribution 4.0 International License.