Blender: How to Add a Vertex – Simply Explained

Adding vertex in Blender is easy, and it's useful to improve your models. Find out how to add vertices in Blender through this simple guide!
In 3D modeling, a vertex is a single point in three-dimensional space. A single vertex has three coordinates: A value for the X-, Y-, and Z-axes, respectively.
Adding vertices can be critical for improving the detail and control over your 3D models. For example, if you’re refining an existing item, putting vertices into edges or faces allows for more precise sculpting, particularly in complex areas. After adding vertices, you can use them to seamlessly connect objects or edges, resulting in a clean geometry, which is essential for high-quality modeling or to avoid issues when 3D printing them.
However, you should be careful when adding in vertices, as too much detailed geometry can make an object overly complicated or even cause non-manifold edges and floating vertices. If you’re modeling for animation, you might want four vertices for each face, as this helps with deforming during movement.
There are several techniques for adding a vertex in Blender, and each one has a unique purpose. In the following, we’ll look at some of these options for and related to adding vertices. Let’s get started!
Let’s begin!
Ctrl + Right-Clicking
Also known as the “Adding by Right-Clicking” method, this is the easiest and fastest method of adding vertex in Blender. Here’s how:
- Start by importing (or creating) your model.
- Switch from “Object” to “Edit” mode by pressing the “Tab” key.
- Press and hold the “Ctrl” key, then right-click with your mouse in the direction you want the vertex to be placed.
If an edge or vertex was already highlighted (selected), then, when you press and hold the “Ctrl” key and right-click, a new vertex will be created connected to it via an edge.
It’s important to note that there is a difference between a vertex, an edge, and a face, which they most likely will form. You can read more about them from Blender’s guides.
Subdividing

Also known as a method of “adding a vertex to an edge”, this is a way to add more detail to a part. It allows you to manipulate your geometry into a more exact shape.
Here’s how to add a vertex by subdividing an edge:
- Again, with the object in the workspace, switch to “Edit” mode by pressing the “Tab” key (red).
- Switch to “Edge select” (yellow, second option), then select the edges that you wish to subdivide.
- Right-click anywhere in the 3D view to open the Vertex Context Menu.
- Select “Subdivide”.
- In the bottom left corner of the 3D view, an operator panel will appear (green). Here, you can edit the number of vertices added; this will divide the edge according the number of vertices, tweaking the smoothness and other variables. This method also works for faces (another type of object).
Note that this creates the vertex at the extremes (ends) of the subdivided edge, and you will need to switch back to “Vertex select” mode (yellow) to find the newly added vertex.
Merging Edges with a Vertex
Disconnected geometry in a single object can lead to complicated problems, including non-manifold geometry, n-gons, and weird artifacts. You can join meshes with Boolean operations, but sometimes this leads to unexpected results. It’s a lot more precise to merge edges by adding and merging vertices in specific places as follows:
- Using the subdivide method we learned in the last section, add vertices near the point of contact.
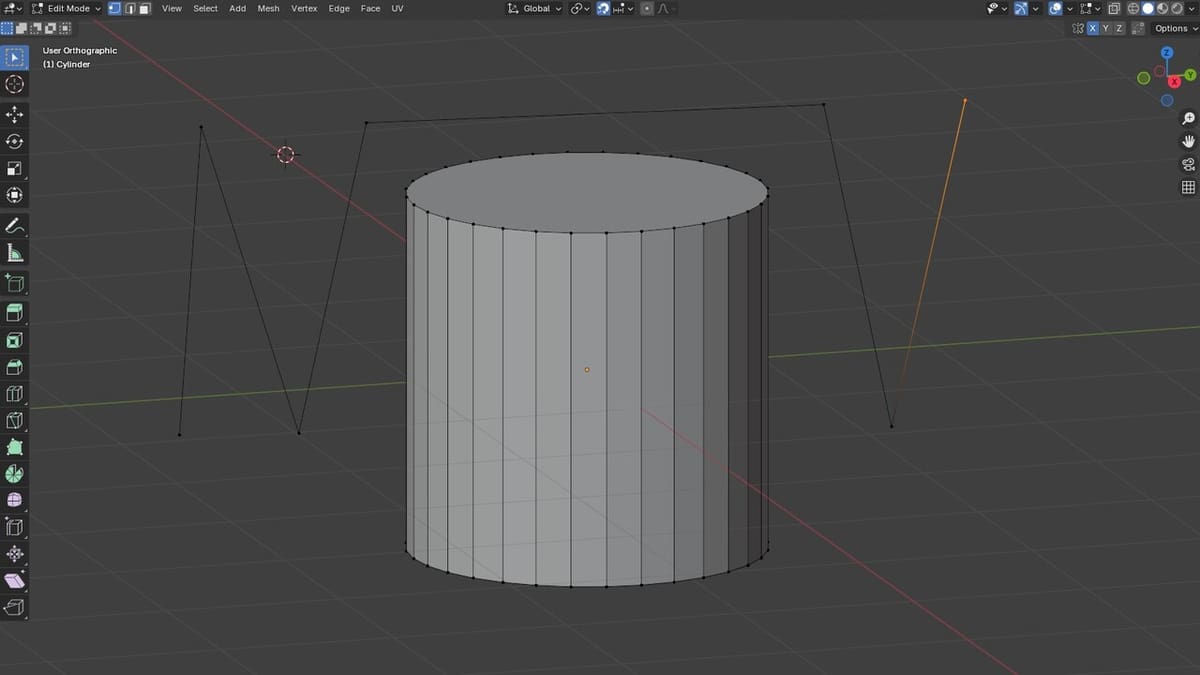
- Use the “Vertex Slide” function (“Shift + V”) to position your new vertex as close as possible to the point of contact. It will slide along the direction of your mouse motion and can be fixed in place by left-clicking.
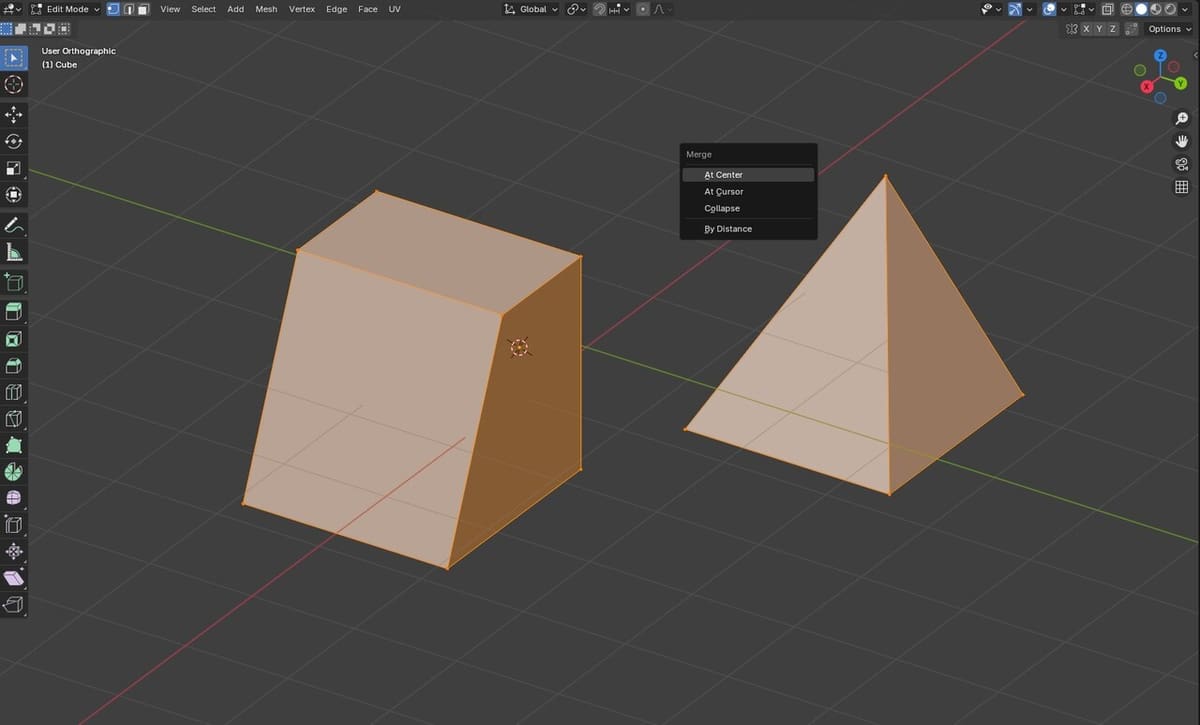
- Select one vertex, then hold down Shift and select the other vertex. Press ‘M’ for the merge function, then select how you’d like to merge the vertices from the available options.
Voilà! You’ve just merged two edges by adding in a vertex.
Note that “n-gons” is short for polygons with more than four sides, like a hexagon (six sides) or any other shape with ‘n’ sides. They are useful for modeling complex shapes but can cause issues in 3D animation and rendering, especially when subdividing or deforming a model. The more sides, the less predictable the outcome, and this can be especially problematic if you then intend to 3D print the model.
"Extra Objects" Add-on
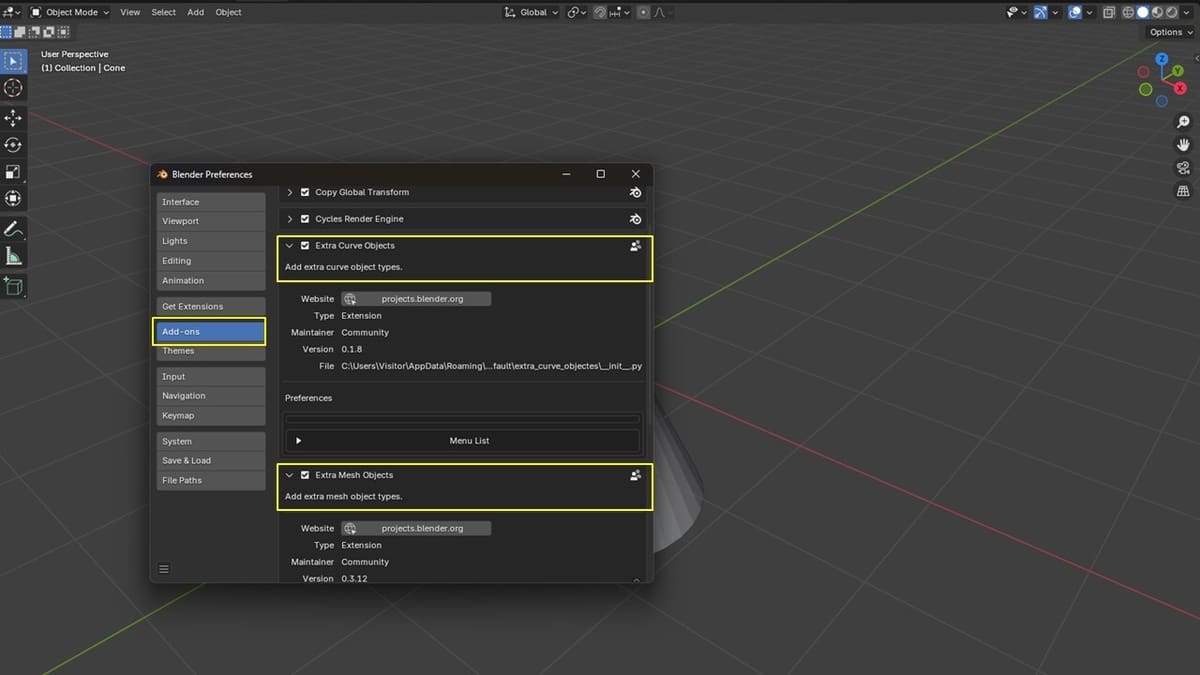
You can add a single vertex as a new object using the “Extra Objects” method. If you’ve got a version of Blender previous to 4.1, you’ll need to install the “Extra Mesh Objects” and “Extra Curve Objects” add-ons. There are various ways to do this; let’s see one of the easy ones:
- To locally install the add-on, you’ll need the installation file. You can simply downloaded it from the Blender Extensions to your local device (desktop).
- Navigate to the “Edit” menu in Blender and select “Preferences”.
- Scroll to “Add-ons”, which allows you to search through all available add-on to personalize your version of Blender. On the top right, select “Install…” in order to install the just-downloaded add-on.
- Navigate in the window to find and select the add-on.
- After installation, ensure that the checkbox “Extra Mesh Objects” and “Extra Curve Objects” are checked. Close the menu.
Alternatively, if you’ve got a version of Blender starting from 4.1, you won’t need to follow these steps as the add-ons are now part of the setup. You’ll have to enable them, though, by going to “Edit > Preferences > Add-ons”, and checking “Add Curve: Extra Objects” and “Add Mesh: Extra Objects”.
Now, in “Object” mode, you can select “Add” (or “Shift + A”) and then navigate through “Mesh > Single Vert > Add Single Vert”. This will add a vertex at the origin by default, but you can change the target location with the sub-menu options.
Alternative Methods
These are secondary (not commonly used) methods that create the vertex either instantly or by facilitating its creation and manipulation. Lets see what they are.
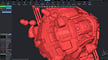
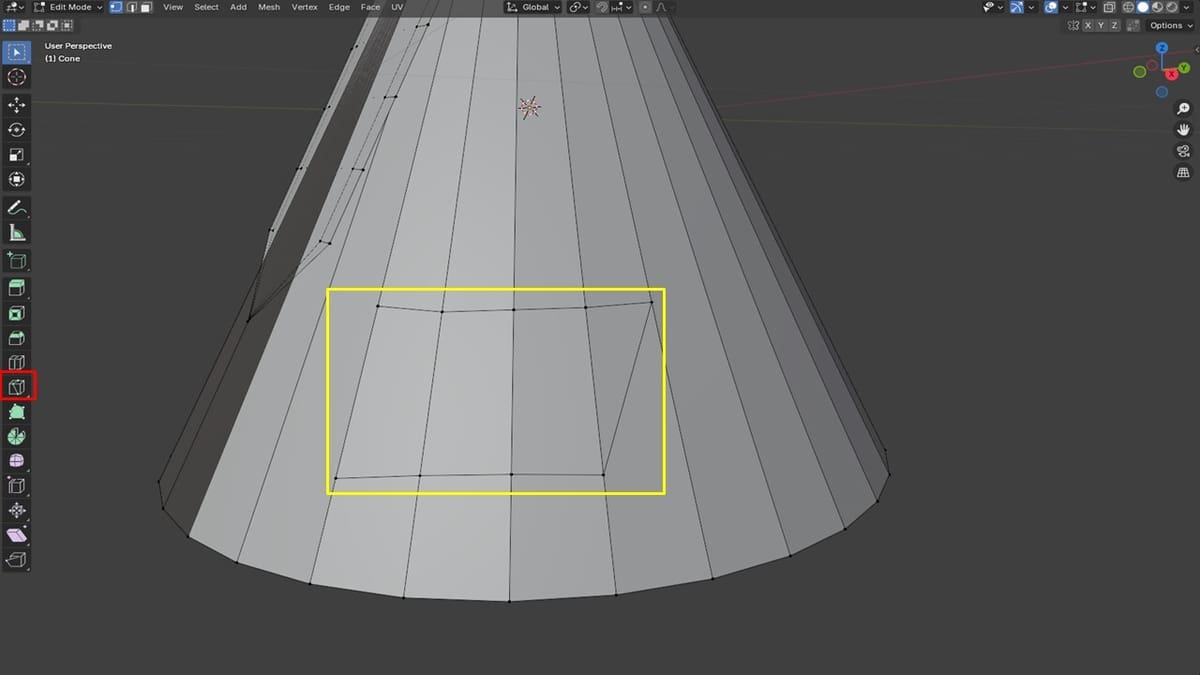
- Knife Tool: In “Edit” mode, this will enable the addition of vertex in a controlled manner, according to the path the knife moves in (yellow). Note that it introduces some edges. The image above shows a vertex added alongside an edge, indicating the part where the Knife tool (red) was placed.
- Poke Faces: This works best on faces, allowing the addition of vertex and some edges that can be dissolved or removed. In “Edit” mode, switch to “Face select”, then click on the face you want to add a vertex to, right-click on it and, from the options, choose “Poke Faces”. As mentioned, this will a vertex in the center of the face.
- Extrude: In “Edit” mode and with “Vertex select” chosen, select the vertex of choice and press the ‘E’ command to extrude it (a new vertex will be created). If two vertices that form an edge are selected, the ‘E’ command will extrude a face.
- Auto-merge Vertex: This method shrinks down vertices into a single vertex point. In “Edit” mode, from the Properties menu to the right of the workspace, select the “Tool” settings (first from the top). Expand “Options”, enable “Auto Merge”, and change the “Threshold” to 0. Then select the vertices you want to merge, click ‘S’ and move the mouse in the direction where you want the merged vertex to appear, then left-click on it.
Useful Shortcuts
If you know anything about Blender, it’s that plenty can be done in it. Given that there are so many features, tools, and options, it’s not surprising that there are also very helpful shortcuts. To create or manipulate vertices, every user should explore the following:
- “Alt + D”: This creates a vertex and an n-gon (increases the number of sides). It works on edges and faces and should be implemented while in “Edit” mode. If not, it will end up duplicating the selected object.
- ‘J’ or ‘F’: These work like alternatives to merging vertex, and they allow you to join two vertices using an edge. ‘F’ fills an edge between two vertices (both vertex must be selected first), while ‘J’ connects vertices across an existing face.
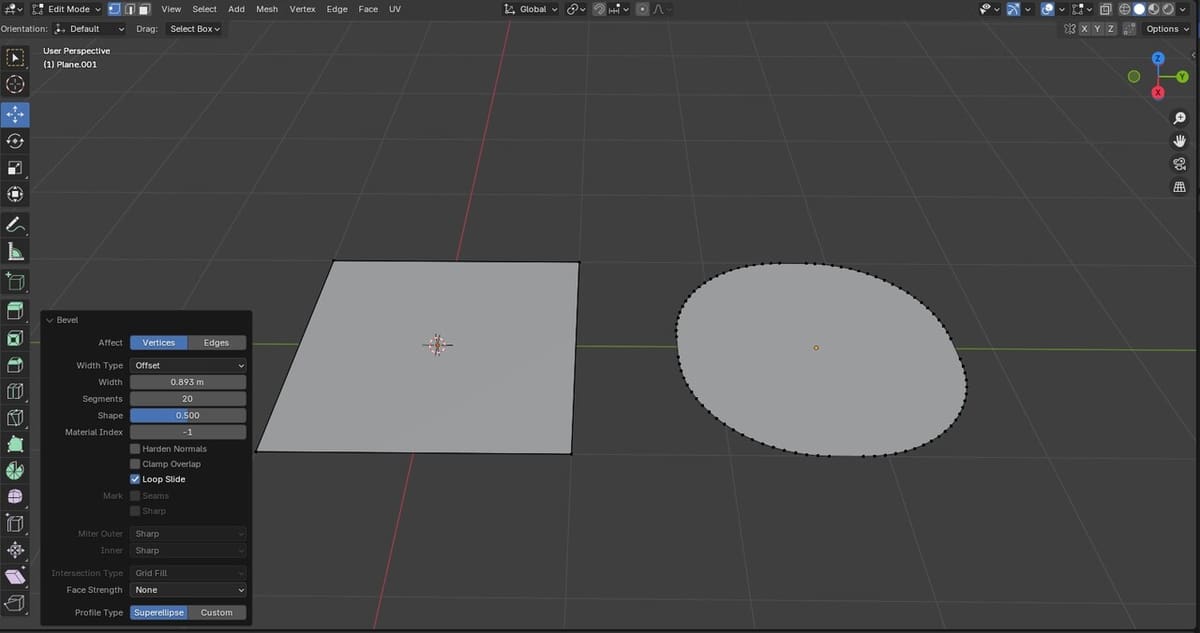
- “Ctrl + B”: This feature creates a Bevel vertex, an easy means to add more vertices and round up sharp corners.
- “Shift + D”: This shortcut allows for the duplication of a vertex or vertices. Simply highlight the face, vertices, or vertex of choice, apply the “Shift + D” command, then left-click to place the duplicates where desired.
License: The text of "Blender: How to Add a Vertex – Simply Explained" by All3DP is licensed under a Creative Commons Attribution 4.0 International License.