Building Bridges
Whether you design professionally or for fun, we’ve all been in situations where we’ve spent hours designing a 3D model in Blender – simplifying the meshes, looking for various tutorials online, or just trying our best to make the perfect model, only to find those small, narrow loops in between, stopping us from going further.
These narrow loops prevent us from applying textures to the model, bring problems in rendering and using the UV mapping, and prevent us from 3D printing the model by making it unstable, along with numerous other issues.
There’s a number of reasons for the formation of edge loops, the most common one being inconsistent geometry of the faces of the model. The presence of double vertices can also be a major headache and form edge loops. (The solution to this particular problem is linked in the “Problems Faced” section of this article, below.)
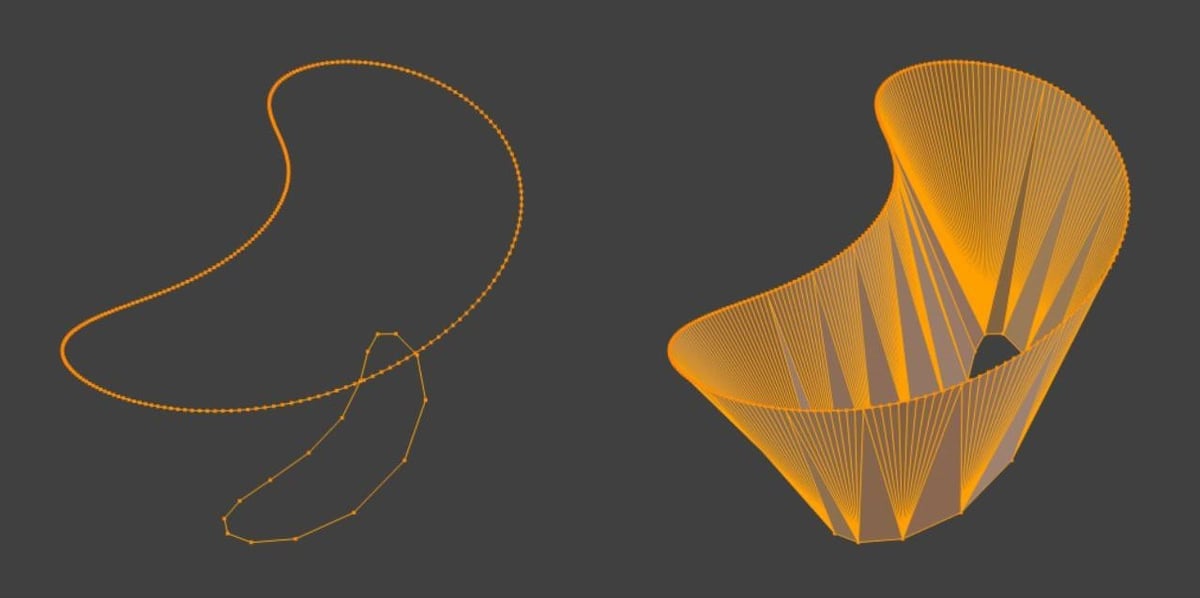
The Bridge Edge Loops tool gives us a way to fill these loops. It works by joining a sequence of adjacent loops by adding faces between them. This gives us a quick fix to fill all these loops without redesigning the whole model again.
In this article, we’ll look more closely at this tool and how to use it.

Where to Build
Bridge Edge Loops can be helpful in a lot of situations with a variety of meshes and loops.
First, Blender already provides a number of ways to cut holes in meshes, with tools like the Boolean Modifier. The Bridge Edge Loops tool provides an easier and quicker way to cut holes in 3D models and gives the same result.
It can also be used to connect a number of simple loops quickly, which is useful for creating low-poly models.
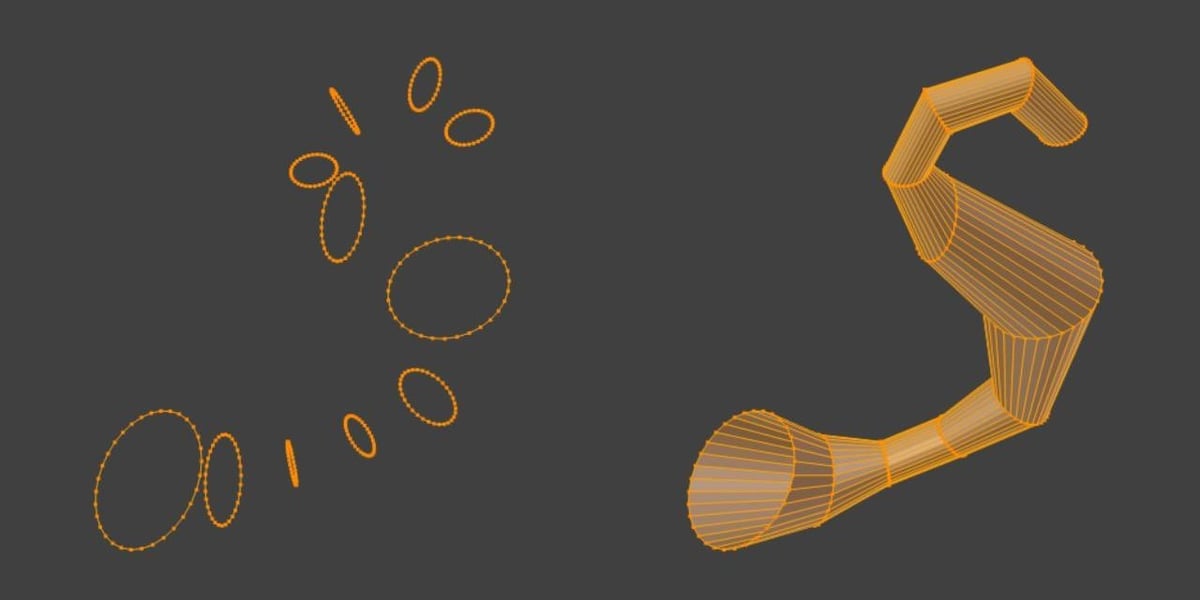
And if you’re thinking that a difference in the number of vertices of different loops might lead to the failure of this tool, you’d be mistaken. The Bridge Edge Loops tool doesn’t pose a limitation to meshes with a varied number of vertices.
Below are the steps you need to follow to use the Bridge Edge Loops tool.
Identify the Loops
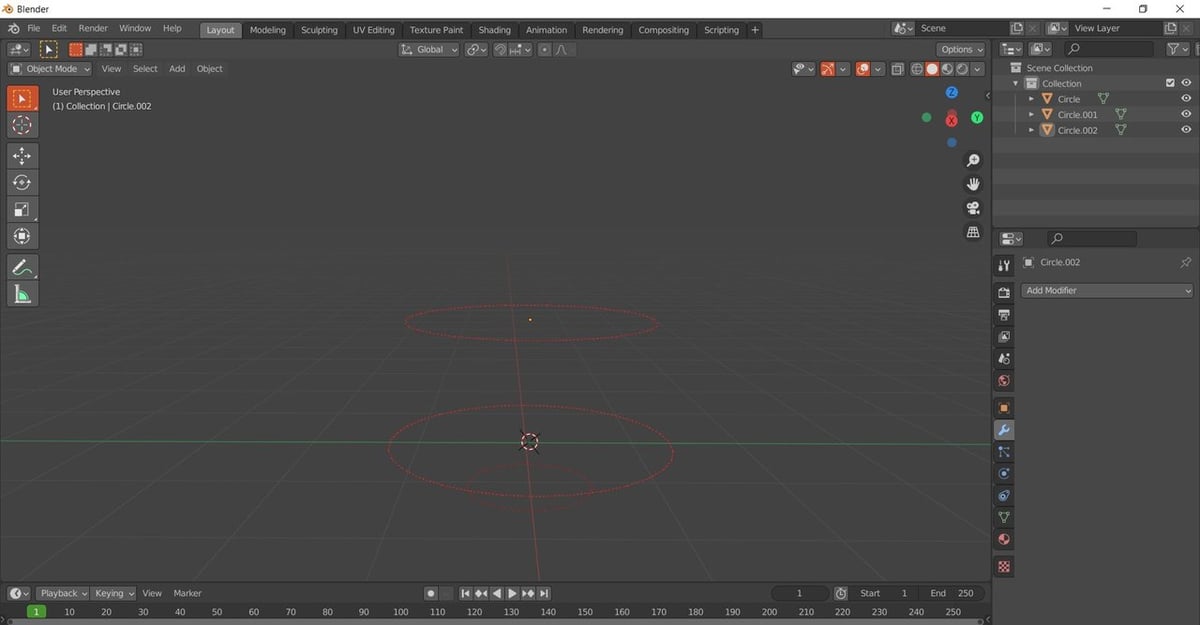
For the first step, we’ll identify the loops we want to connect. We’re going to use a set of three simple loops to demonstrate the process, as shown in the image above.
If your model is more complicated than ours (which is almost certain to be the case) this is the stage at which you identify which loops need to be connected to each other.
Select the Loops
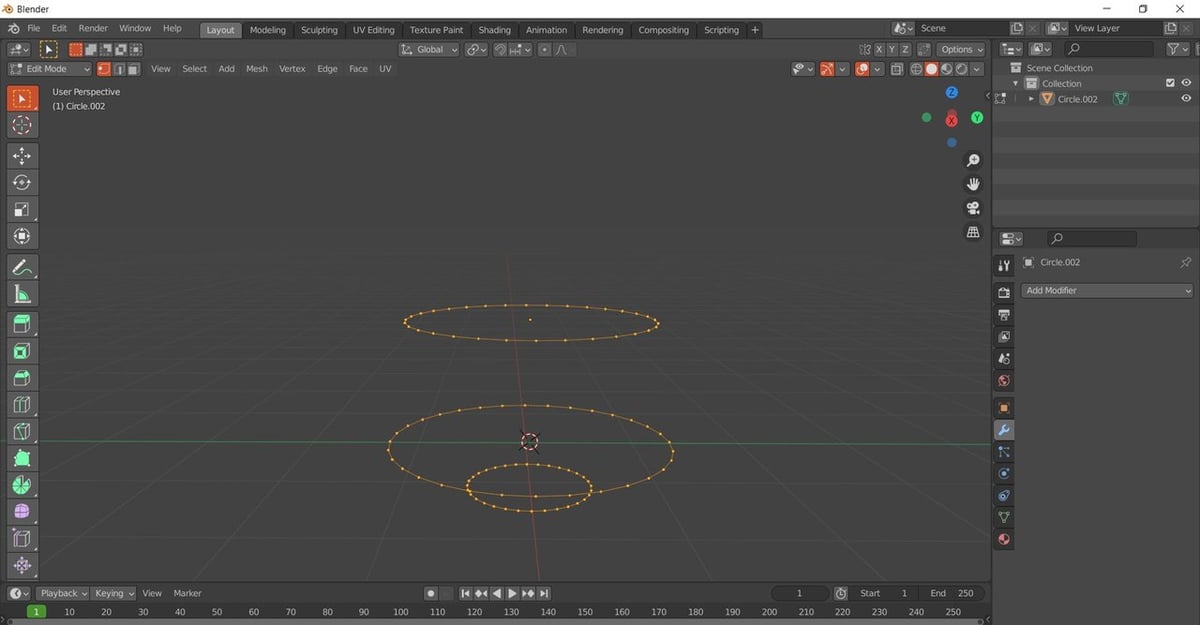
For the next step, we need to be in Edit mode:
- Switch over to Edit mode by using the drop-down mode list at the top left corner of the display screen, or by simply hitting the Tab key.
- Select all the loops by holding down the left mouse button and dragging the cursor over the loops, or by simply hitting the ‘A’ button on our keyboard.
All the loops will now be selected!
Edge Menu
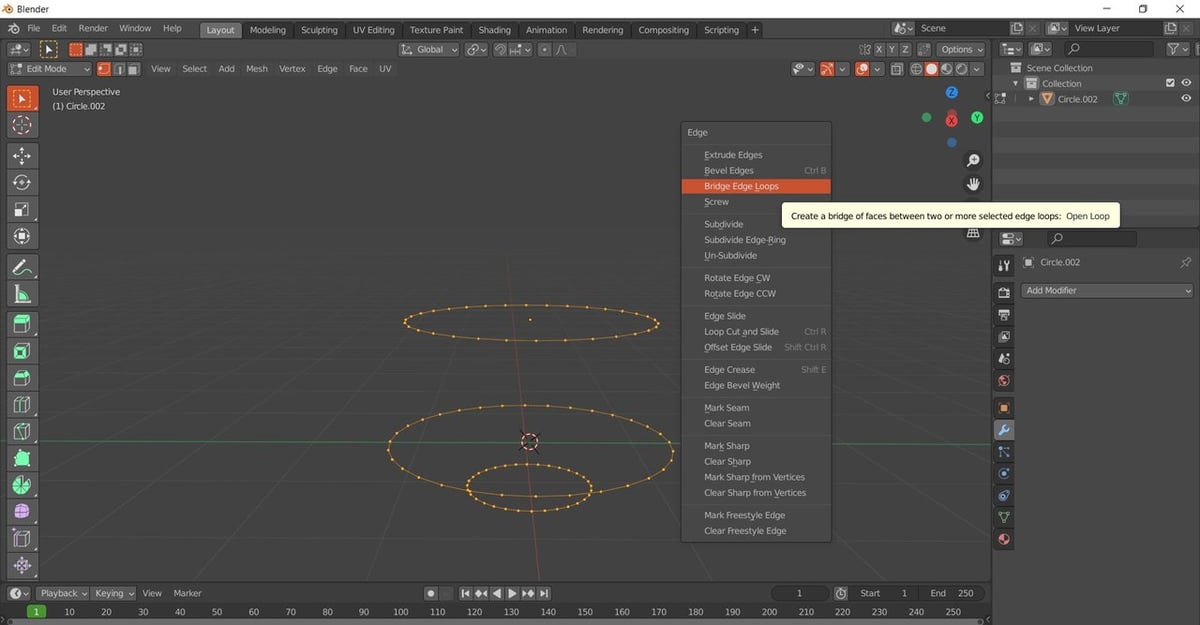
The Bridge Edge Loops tool is accessed via the Edge menu.
- Still in Edit mode, hit Ctrl + E to open the Edge menu.
- Click on the “Bridge Edge Loops” option in the menu that pops up.
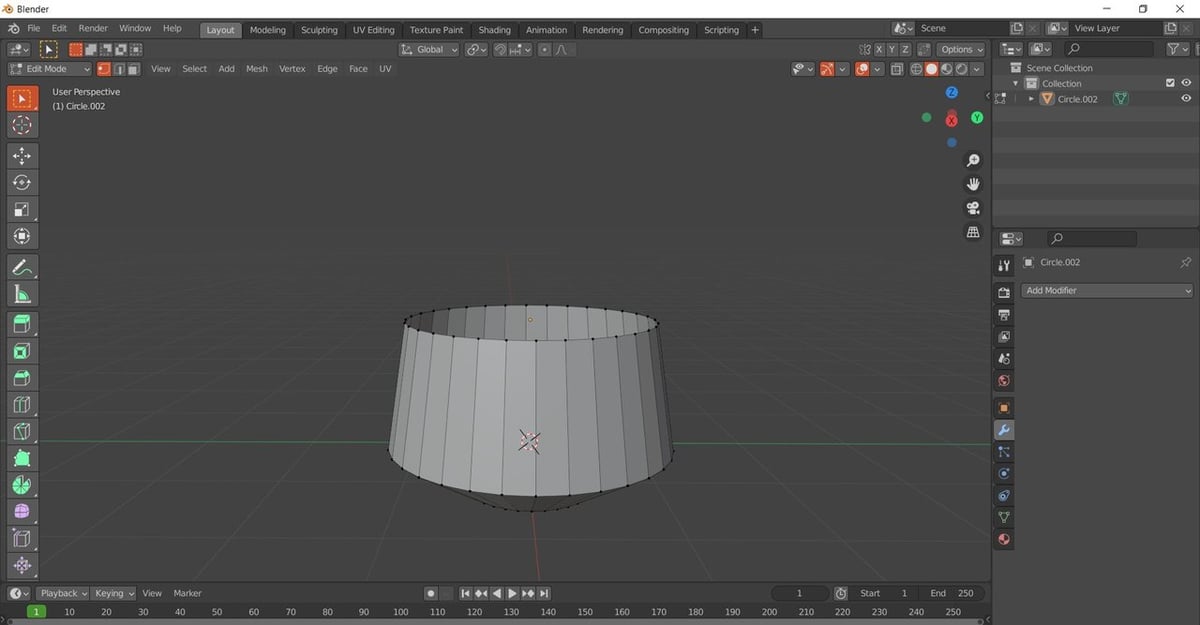
The loops will be successfully bridged to each other!
Common Problems & Solutions
We have successfully used the Bridge Edge Loops tool! Hopefully, the process went smoothly, but just in case, here are some tips to counter common problems.
Select All Loops
The Bridge Edge Loops tool requires all the loops to be selected to work. But sometimes, with multiple edge loops, the software is only able to select one edge loop at a time. To fix this problem, simply switch over to Object mode by hitting the Tab key again, select all of the loops by holding down the Shift key and selecting with the left mouse button, then hit Ctrl + J buttons. This will combine all the loops into one object, which means you will be able to select them all at once when you switch back to Edit mode.
Select the Correct Vertices
Make sure you select the correct vertices you want to bridge. In complex models, adding and selecting the required vertices can become a little difficult for beginners, so cross-checking which vertices or loops are selected will prevent a possible future error.
Untangle the Normals
Make sure the normals of all the faces are consistent. Sometimes, during modeling, the face normals can get a little messed up and point in different directions. To use the Bridge Edge Loops tool, or even to successfully 3D print the models, the normals must point in the same direction. Recalculating the normals proves to be very helpful to prevent such scenarios.
Rotate the Loops
An inconsistent order of vertices also leads to failure of the Bridge Edge Loops tool. You can prevent this issue by rotating the edge loops. To do this, select the loops to be rotated, hit ‘R’ on the keyboard, hit ‘X’, ‘Y’, or ‘Z’ according to your preferred axis of rotation, and then enter the angle of rotation.
Remove Duplicate Vertices
The presence of double vertices can create an issue too, but simply removing any duplicates will lead to a hassle-free application of this tool.
Resources
The internet offers a huge variety of helpful articles that users need for working with Blender and the Bridge edge loops tool, some of which are mentioned below:
- The Blender manual is the official documentation for the software. You can search through it online or download it for an offline reference.
- Release notes provide the latest updates of the software, so you can choose which version will suit you the best.
- The developer’s blog keeps you updated on what the developers of the software are working on.
- The Blender website also allows you to report software bugs, talk with the developers, and keep up to date with other developments.
- Video tutorials on Youtube can also be very helpful for users. Blender has its own YouTube channel, and there are a lot of other amazing content creators ready to help you like CG Cookie, Blender Guru, Ducky 3D, and many more.
License: The text of "Blender: Bridge Edge Loops – Simply Explained" by All3DP is licensed under a Creative Commons Attribution 4.0 International License.