The Best Arduino Nano Projects

The Arduino Nano is a clever little board with a tiny form factor. Read on for some interesting Arduino Nano projects for all skill levels.
The Arduino development board first arrived on the scene in 2005. Back then, it was produced in small quantities and used as an introduction to microcontrollers for design students. Without needing any extensive knowledge, beginners could get started prototyping their ideas.
Now, they’re widely available, with a huge range of uses, including many beginner-friendly projects. With an Arduino and a few other basic parts, you could build your own watering system, smart dustbin, or even a radio, just to name a few examples.
The Arduino Nano is based on the ATmega328 chip and is similar to the popular Arduino Uno. However, one key difference is its lack of a DC power jack: It works with Mini-USB Type-B instead. Another difference lies in the number of analog input pins, as it has eight while the Uno has six. The Nano comes in a smaller form factor, and its FTDI chip is located on the back of the board. Finally, due to its size and form, the Nano is breadboard-friendly, making it an ideal choice for tinkerers.
Now that we know about the Nano, let’s get to some cool projects!

Smart Home
When the words “home automation” come to mind, we may think about controlling our appliances. For example, clapping to control lights or turning on the TV with your voice. There are plenty of home automation products available on the market, such as an RFID door lock or remotely controllable lights. However, it’s also possible to create your own smart home with the computing power of the Arduino Nano.
Let’s check out some of these projects!
Color-Changing Coffee Table

This dazzling coffee table changes color when touched. It can be controlled with a custom-made Android application, and the reactive color, background color, and brightness can be easily adjusted.
It utilizes the popular and well-documented FastLED library on GitHub. While this other tutorial uses an Arduino Mega, the creator mentions that an Arduino Nano will work just as well, and it’s smaller, lighter, and cheaper! There’s also a YouTube video tutorial on the whole process, including the construction of the table itself.
- Who designed it: Dejan
- Core components: LED strips, IR proximity sensors, HC-05 Bluetooth module, 5-V 6A DC power supply
- Difficulty: Beginner
- Where to find it: How to Mechatronics
Ambilight

Looking for some mood lighting in your life? Here, you’ll create a budget Ambilight for your home, ideal for evening movie watching, relaxation, or just impressing your guests.
The project includes video tutorials, instructions, and all the needed codes to make the Ambilight with the help of Arduino Nano. As a helpful bonus, it also includes tips on cleaning your LED strip.
- Who designed it: RGBFreak
- Core components: RGB LED strip, breadboard, power adapter
- Difficulty: Beginner
- Where to find it: Instructables
Air Quality Monitor
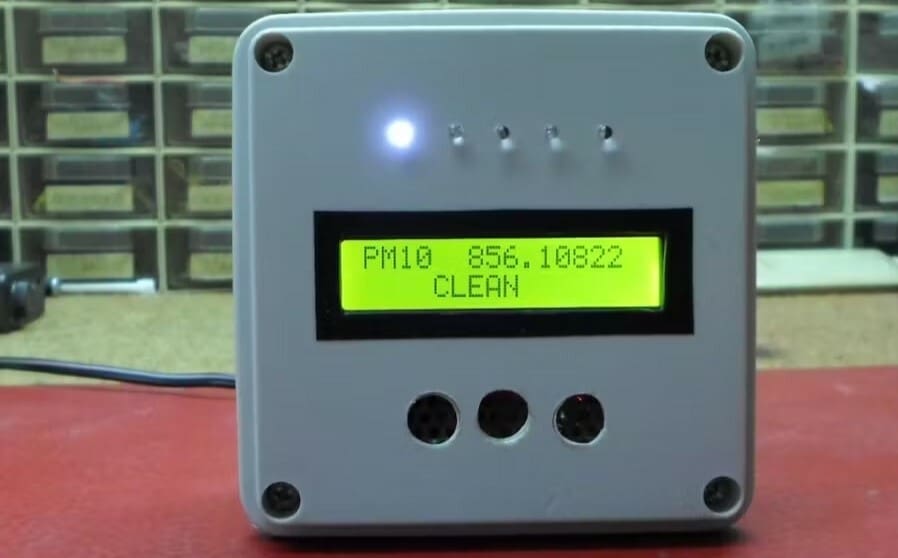
You can set up your own affordable air quality monitoring device using an Arduino Nano R3 and a DSM501A dust sensor module. The sensor in this project can detect PM2.5 and PM10 particles.
PM2.5 and PM10 are air pollutants made up of tiny particles that can be harmful when inhaled. PM2.5 particles have a diameter of 2.5 micrometers or smaller, while PM10 particles have a diameter of 10 micrometers or smaller. PM2.5 particles are especially concerning as they can enter the lungs, causing respiratory and cardiovascular issues. PM10 particles are larger, but can still cause respiratory irritation and worsen existing respiratory conditions.
The concentration of both particle types can be monitored on an LCD display. LED diodes are used to show the degree of contamination. The creator also notes that a fan can be installed to improve the sensor’s accuracy.
- Who designed it: Mirko Pavleski
- Core components: Dust sensor module, LCD screen, LEDs
- Difficulty: Intermediate
- Where to find it: Hackster
Universal TV Remote
A universal infrared remote control is a handy thing to have around. Anyone who has had a lost or broken TV remote knows the pain of not being able to control your device fully, or at all. Although you can purchase a universal remote control, it’s a simple enough concept to be replicated with only an IR LED, some buttons, and an Arduino Nano.
This project makes use of the IRremote Arduino library and requires only basic knowledge and tools. There is also a guide on decoding signals from an existing infrared remote in order to replicate them with your homemade one. This isn’t always necessary though, as the IRremote library contains many of the most common infrared communication protocols for popular electronics brands like Sony, Panasonic, LG, etc.
- Who designed it: Sagar 001
- Core components: IR LED, tactile buttons, resistors, breadboard
- Difficulty: Intermediate
- Where to find it: Hackaday
Bathroom Ventilation Fan Controller
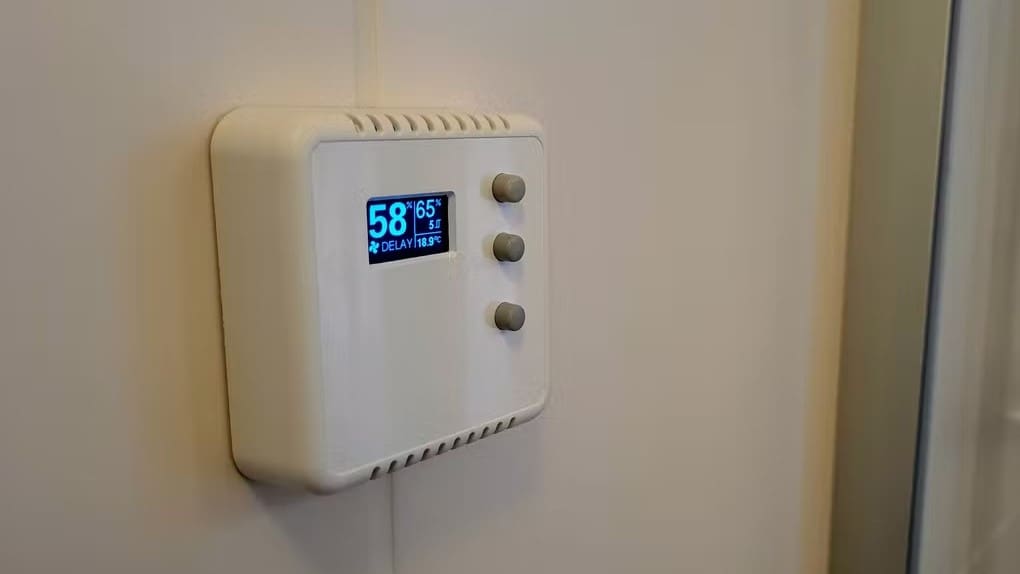
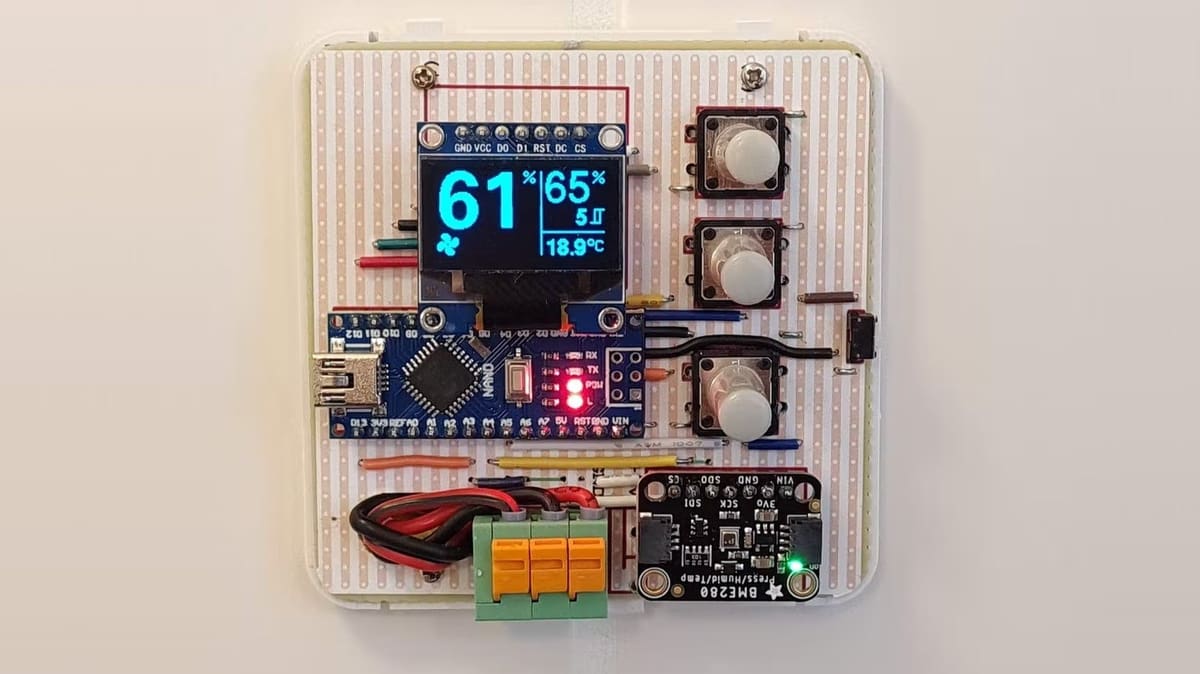
If you’re looking for a practical Arduino Nano project, this handy ventilation fan controller can help monitor the humidity levels in your bathroom. Using a sensor, it will turn on and off as needed.
This is an extremely detailed project, but all of the necessary files and schematics are included. It’s a particularly interesting task in that it combines the sensor with the fan operation. It’s perfect for any mechanics buffs out there!
- Who designed it: Erik de Ruiter
- Core components: Adafruit BME280 sensor, LED display, NPN transistor, resistor, Panasonic relay
- Difficulty: Intermediate
- Where to find it: Hackster
MIDI Arpeggiator
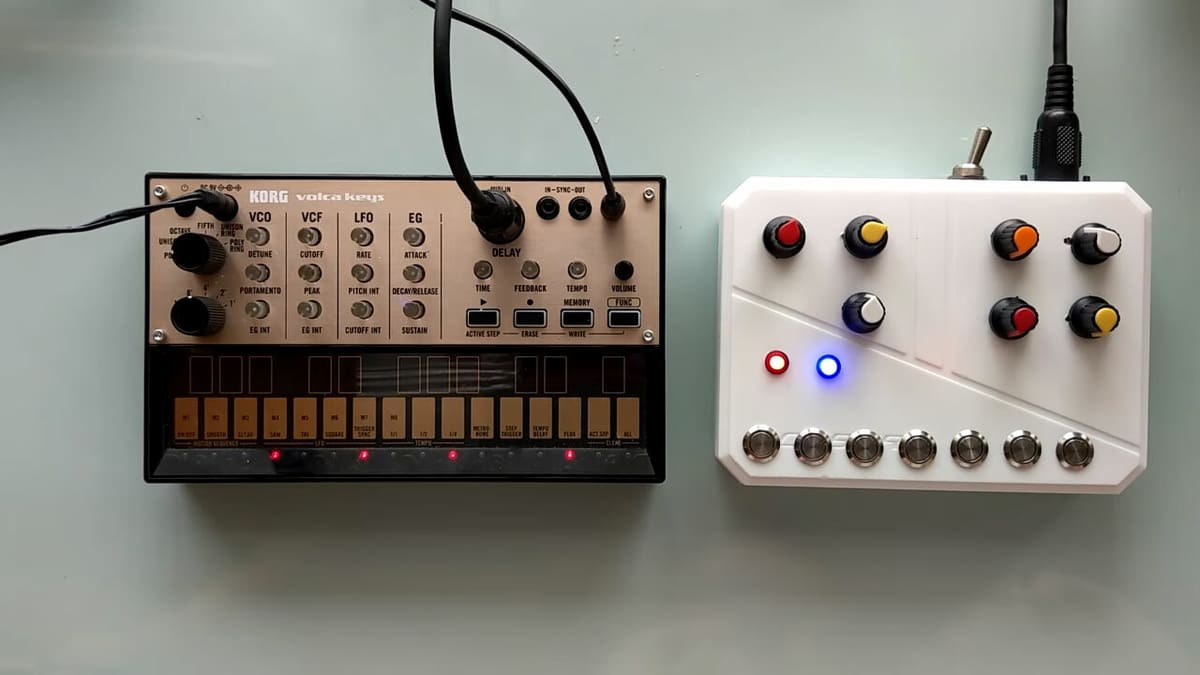
An arpeggiator is a type of synthesizer that reproduces a chord, a group of notes that are played together, individually, which is known as an arpeggio. Arpeggios can be played, depending on the arpeggiator, at different speeds and with different movements.
MIDI refers to Musical Instrument Digital Interface, and in this project, the MIDI arpeggiator creates beautiful arpeggiated sequences through custom firmware, featuring Euclidean rhymes. The maker was inspired by the web application called “Chord Progression Arpeggiator” and decided to create his own arpeggiator device using Arduino.
This DIY arpeggiator generates arpeggios in the form of MIDI messages that are sent through the DIN (MIDI) port. In addition, this device can be used with other hardware or software synthesizers! The maker has even included a demonstration video.
- Who designed it: Dmitry
- Core components: Rotary potentiometer, pushbutton switch, resistors, LEDs
- Difficulty: Intermediate
- Where to find it: Hackster
DIY Fitness Tracker
GetFit is a fitness tracker that can record activity level and estimate the calories you burn on a daily and weekly basis. It’s an open-source project powered by Arduino Nano 33 BLE Sense and Edge Impulse, and uses machine learning to recognize activities.
The device is connected to Edge Impulse for data acquisition and model generation. It also uses Bluetooth Low Energy to send data to a phone, which forwards it to Firebase as a database. The model generated by GetFit is said to have 93% accuracy.
The makers have developed a web application with a neuromorphic design to accompany the device. The design utilizes soft UI elements such as background colors, shapes, gradients, highlights, and shadows to create graphic-rich buttons and switches. And as for hardware, the STEP files are included, so you can easily customize them if needed and 3D print them.
To begin your workout, you’re required to fill in personal details like your name, age, gender, height, and weight under the “Personal” tab. This information is used to analyze your workout, and how you use this information will be up to you!
- Who designed it: CodersCafeTech
- Core components: Barometer and temperature sensor, relative humidity sensor, digital proximity, light, and gesture sensor, digital microphone
- Difficulty: Advanced
- Where to find it: Instructables
Analog Style VU Meter
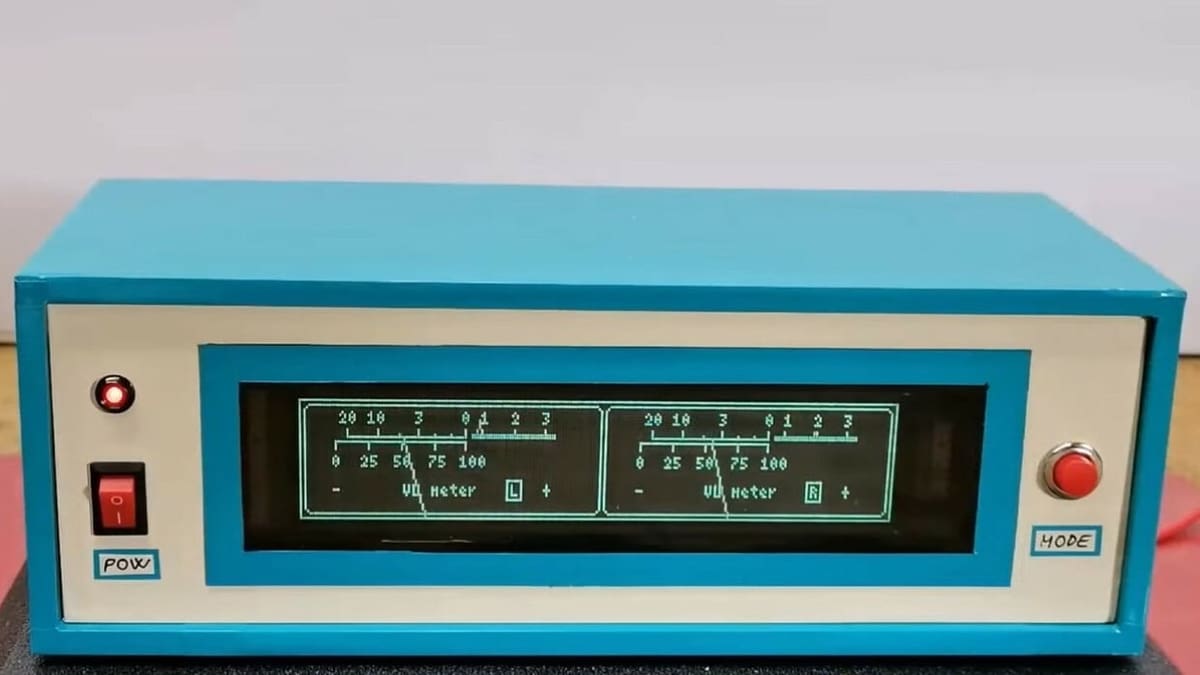
Lovers of vintage audio equipment will certainly appreciate this project. Back in the days of analog sound, many devices had one or more VU (Volume Unit) meters for visually representing the volume of playback or recording in decibels. By utilizing the Arduino’s analog-to-digital converter (ADC) you can feed in audio signals and emulate the function of a VU meter.
The designer makes use of another piece of retro tech, the vacuum fluorescent display, or VFD, in order to emulate the VU meter’s classic look on an electronic display, although a standard 128 x 64 LCD display could also be used in place of the VFD. Put that all in an enclosure that is styled to fit your equipment and add some classic visual appeal to your sound system.
- Who designed it: Mirko Pavleski
- Core components: GP1287 VFD display (or LCD display), potentiometers, capacitors and resistors
- Difficulty: Advanced
- Where to find it: Maker Pro
IoT Weather Data Logger
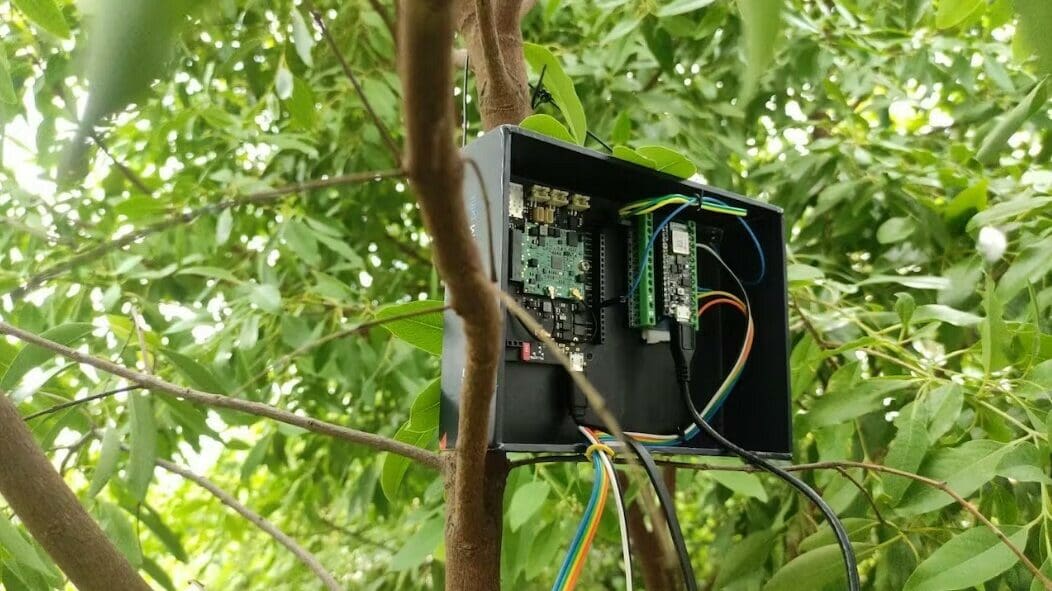
With an Arduino Nano, you can build your own IoT-based weather data logger using the Blues Wireless Notecard and Notecarrier. You can measure temperature, humidity, rain, air quality, and light level with it!
It also utilizes Qubitro, which is a cloud-based platform used to connect and manage IoT devices. In this project, Qubitro visualizes and processes the data collected by the weather data logger. It also provides a user-friendly interface for visualizing and analyzing the data in real-time.
With rising global temperatures, it’s crucial to monitor environmental conditions, and this project provides an easy way to do so. By using the Blues Wireless hardware modules, users can track their weather data without the need for an SD card, Wi-Fi, or BLE.
- Who designed it: Pradeep
- Core components: DHT11 temperature and humidity sensor, Blues Wireless Notecard, Blues Wireless Notecarrier-A, Seeed Studio Grove light sensor, Seeed Studio Grove air quality sensor v1.3
- Difficulty: Advanced
- Where to find it: Hackster
Robotics
Assembly line robots, the Roomba, and Amazon delivery drones are some examples of real-life robots found in our everyday lives. There are even fully open-source 3D printed robotic arms available to anyone who wants to build their own. But if you want an introduction to DIY robotics, you can get started with these Arduino Nano projects!
Micro Robot
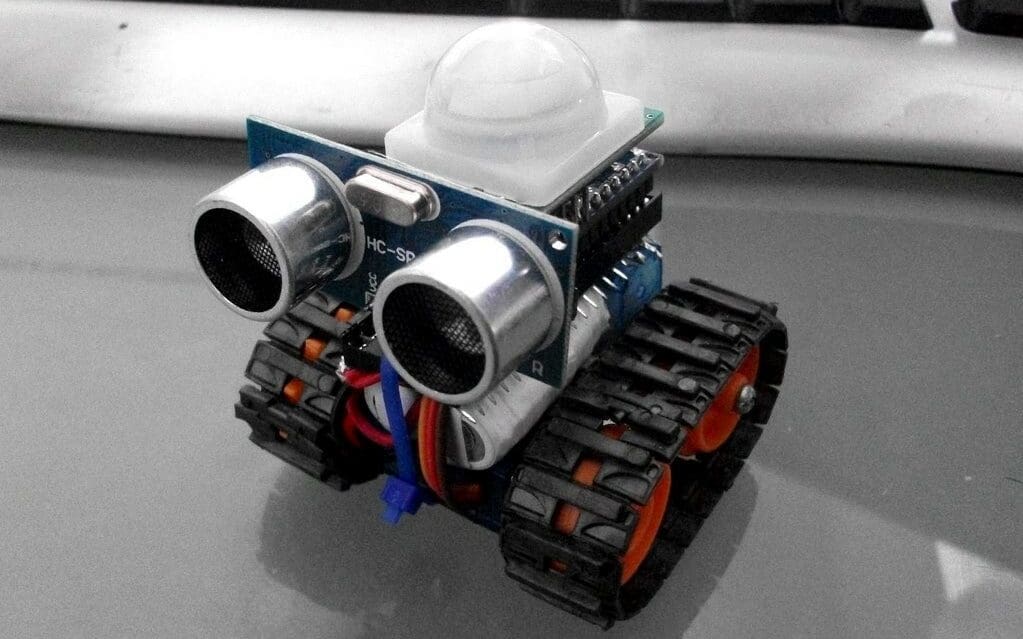
This project will teach you how to build an inexpensive and simple robot that will fit in the palm of your hand. You’ll learn how to modify the servos for continuous rotation, build a custom battery pack, and customize it further.
This project makes a great starting point for your own robotic buggy projects, and the creator has offered some customization ideas to get you started!
- Who designed it: PaulMakesThings
- Core components: Rechargeable battery, servos, 40-pin DIP socket, Tamiya track set or similar
- Difficulty: Beginner
- Where to find it: Instructables
Cat Laser Toy
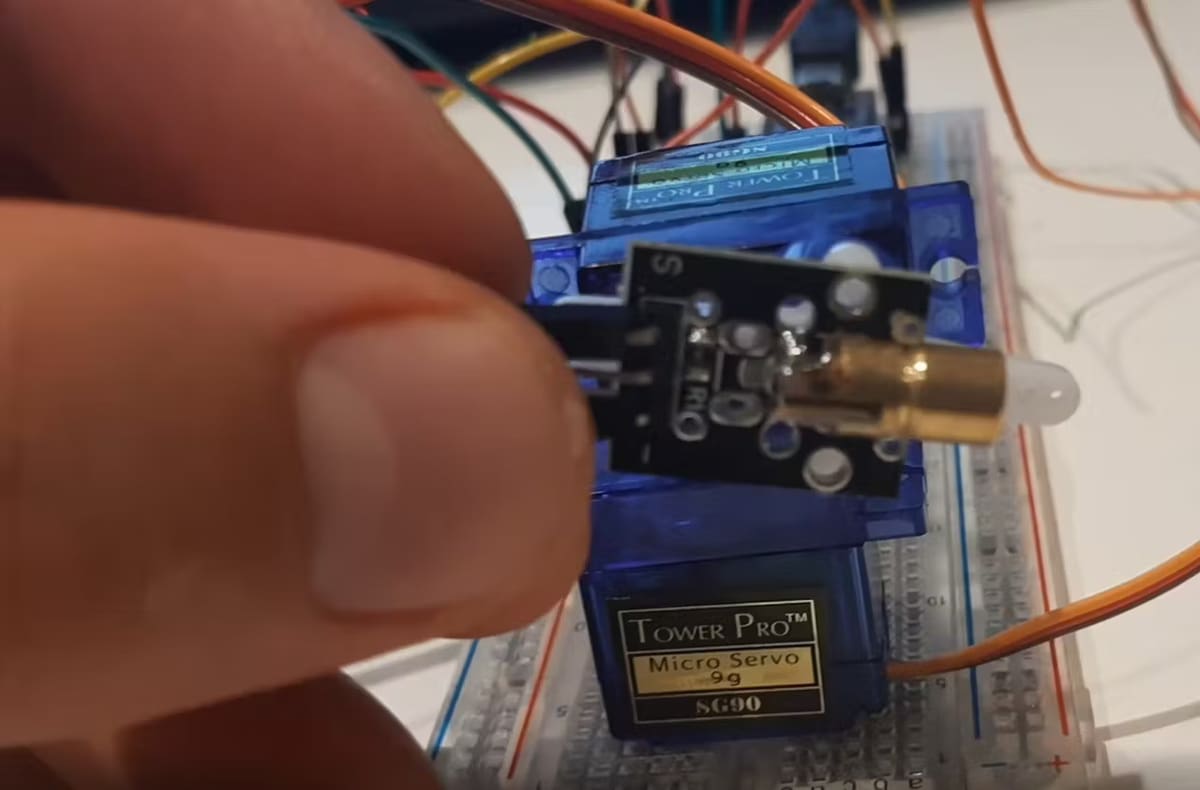
Here is another fun one that uses servos to control its motion. By arranging two servos on either axis, you can create a pan-tilt mechanism, much like the DIY gimbal project. Just attach a low-powered laser pointer, and you’ve created an automated cat agitator that will provide hours of entertainment to both feline friends and pet parents alike.
A super simple construction using the bodies of the servos themselves as attachment points makes this a very accessible project for novice makers. And by using breadboard and jumpers, this project is solderless as well. The code side of it is very simple and can be customized to provide more or less motion to fit the size of the room it’s used in.
The designer also suggests that you could use a smart wall outlet or power supply to make this controllable through a smart home assistant like Alexa or Google Home, adding another layer of automation to this purr-fect project.
- Who designed it: Seafox_C
- Core components: Servo motors, laser diode module, breadboard
- Difficulty: Beginner
- Where to find it: Hackster
DIY Gimbal
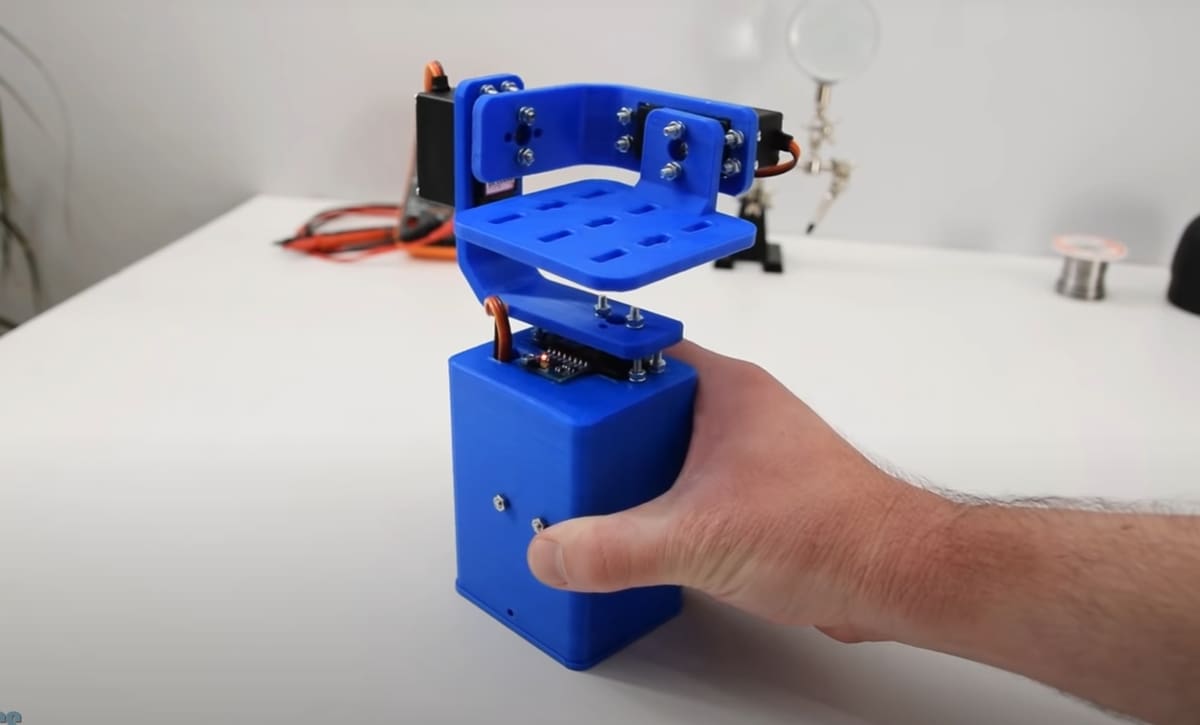
A great way to explore motion controls is through the use of an accelerometer, and this project does just that. By reading the output from the accelerometer and adjusting servo motors, you can effectively build a rudimentary gimbal that is controlled with an Arduino!
The whole project features a well-thought-out and detailed set of instructions, along with STL files for 3D printing a rather nice-looking mount and enclosure for all the components. The end product is a functional gimbal that runs the provided code to constantly compare and adjust the servos to maintain steadiness.
The designer notes that while this is a working gimbal, it’s not super smooth due to the nature of servo motors. Its purpose is more educational rather than to accurately dampen all motions of a camera. That said, the concepts and code could be applied to any number of projects that require these sorts of feedback-based motion controls.
- Who designed it: Dejan
- Core components: servo motors, MPU6050 module, buck converter
- Difficulty: Intermediate
- Where to find it: How to Mechatronics
Balancing Robot
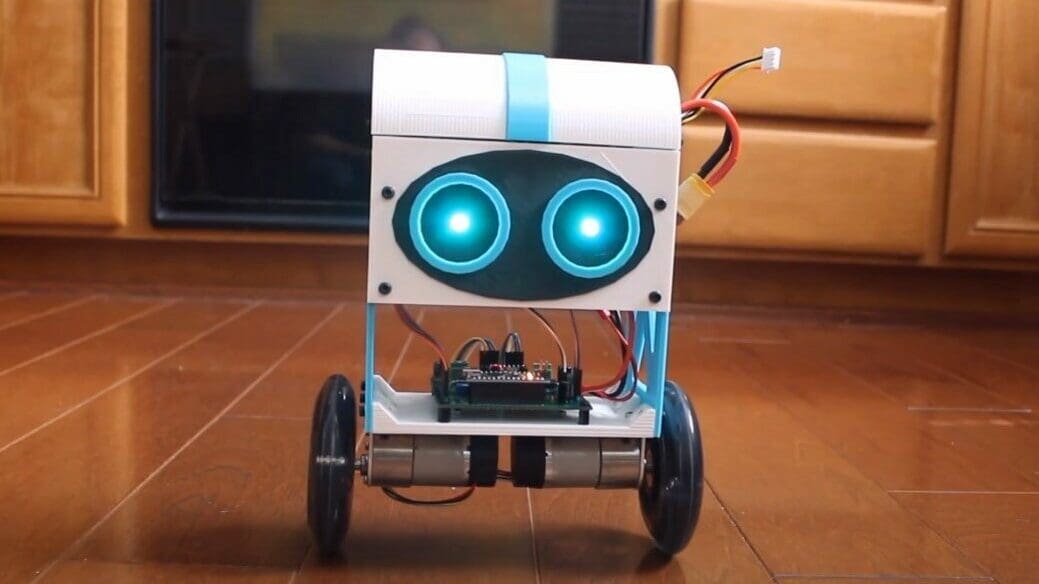
Ever seen someone riding around on a Segway and wondered how they work? In this project, you can learn to build an adorable, two-wheeled robot using an Arduino that balances itself – just like a Segway!
The gyroscope and accelerometer used in this project provide both acceleration and rotation data. This data is interpreted as feedback by the Arduino, which can then utilize its motors to counteract the robot from falling.
The body of the robot in the video was cut from acrylic. If you have access to a 3D printer, there are also files for a similar project with a 3D printed body on Thingiverse.
- Who designed it: Reginald Watson
- Core components: Geared DC motors, MPU6050 module, prototyping board, L298N motor driver module, rechargeable batteries
- Difficulty: Intermediate
- Where to find it: Maker Pro
Enhanced Spider Robot
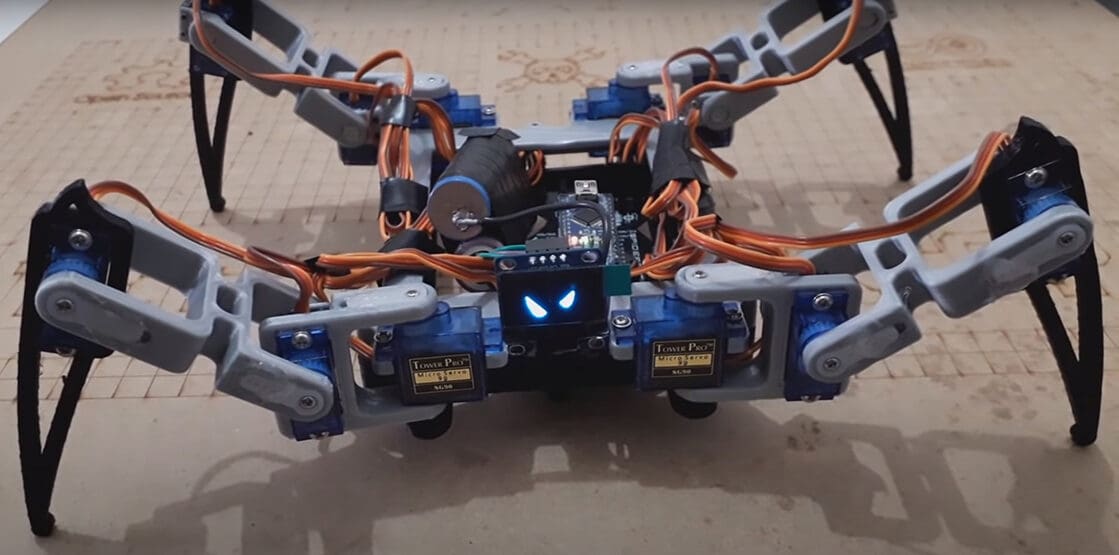
Once you’ve made a basic two-wheeled robot, the next step is to create a quadruped robot. This project shows you how to build and program a remote-controllable spider robot. It utilizes common and inexpensive components such as a generic HC-06 Bluetooth module, an OLED screen, and servo motors. The project also includes the Gerber files for manufacturing your own printed circuit boards.
- Who designed it: DIY Guy Chris
- Core components: Servo motors, HC-06 Bluetooth module, OLED display, LEDs, header connectors
- Difficulty: Advanced
- Where to find it: Instructables
Intellisaurus

Intellisaurus is a robot made to look like a dinosaur that runs with an Arduino Nano, and it was so popular that it won the Grand Prize in the Instructables Robotics 2019 contest.
The 10 servo motors of this robot are controlled by the Arduino Nano. A Raspberry Pi Zero W lets it connect to the internet and run Google Assistant and other AI algorithms. The software is open source, allowing for modifications and improvements, so you can try to enact Jurassic Park scenes at home or in the garden.
No soldering or programming skills are required to build your own Intellisaurus. The parts that need to be 3D printed and the ones that were originally in acrylic are well-organized. The creator of this project thought of everything to make adding this cool dinosaur to your home or workspace as easy as possible.
- Who designed it: JacquinB
- Core components: Servo motors, digital distance sensor, MPU6050 module, servo controller board, 3D printed parts
- Difficulty: Advanced
- Where to find it: Instructables
Gaming
With the availability of various Arduino development boards and the ubiquitous Raspberry Pi running RetroPie, building your own gaming device has never been easier.
Gaming projects can be a great learning opportunity. First, you’ll learn to build circuits and customize the design of an enclosure. Next, you can express your inner creativity by creating your own retro games. Finally, there’s always the option to modify open-source designs. Check out the following Arduino Nano projects for some inspiration!

Star Wars Game
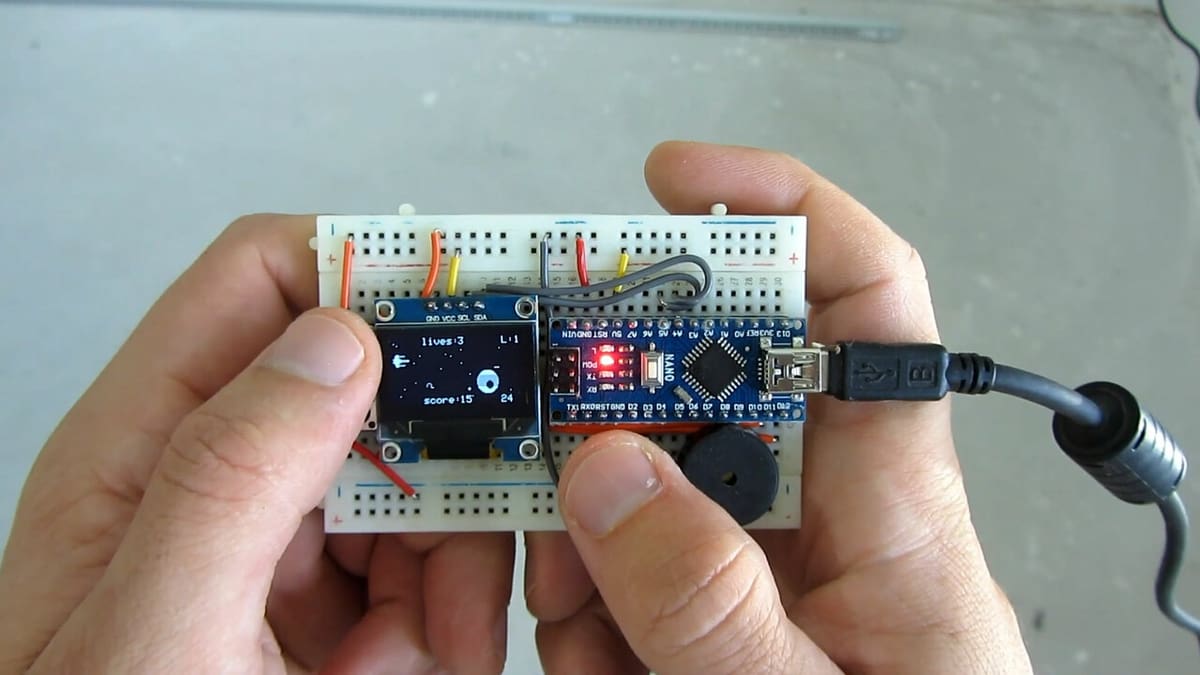
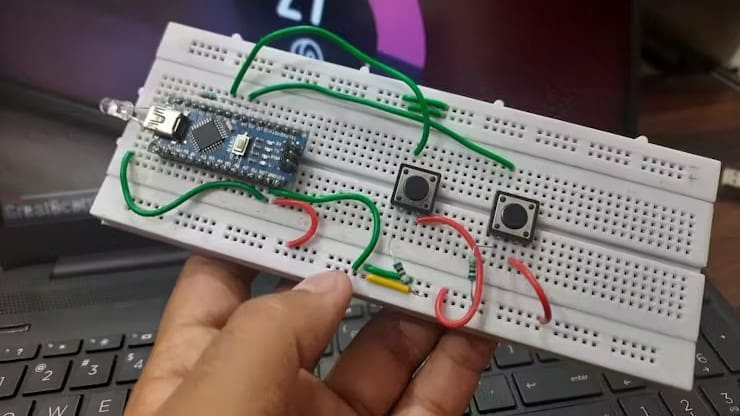
Create and program a simple Star Wars-themed game on a breadboard. The game uses three push-buttons to move the ship and fire projectiles at the enemy. The player gains points for every successful hit, but loses a life for every hit received. The game also gradually increases in difficulty every 45 seconds.
The maker provides step-by-step instructions on how to connect the push buttons and OLED display to the Arduino Nano, along with a code that can be downloaded in the video description.
- Who designed it: Volos Projects
- Core components: OLED display module, piezo buzzer, breadboard
- Difficulty: Beginner
- Where to find it: YouTube
Toy Traffic Light
On the hunt for a super creative project? Perhaps you may want to investigate this toy traffic light, which meshes Lego Duplo bricks with a creative Arduino-operated LED toy to make a traffic light effect.
The project does require some light assembly and tool work, but nothing too complex. It also provides well-written instructions and several YouTube videos, plus all necessary code and schematics.
- Who designed it: beshur
- Core components: LEDs, resistor, pushbutton, Duplo blocks
- Difficulty: Beginner
- Where to find it: Instructables

Arduboy Clone

Have you heard of the Arduboy? It’s a tiny game console the size of a credit card, explicitly designed to be hacked. It includes an Arduino board with a display as well as buttons. Someone even added a crank mod to it! This device can be loaded with classic 8-bit games, or you could even create your own.
The design includes a 3D printed case and buttons for maximum customizability! While the original version is based on the ATmega 32u4 microcontroller, it can also be created with an Arduino Nano board.
- Who designed it: mircemk
- Core components: OLED display, LEDs, resistors, breadboard
- Difficulty: Beginner
- Where to find it: Instructables
Doom
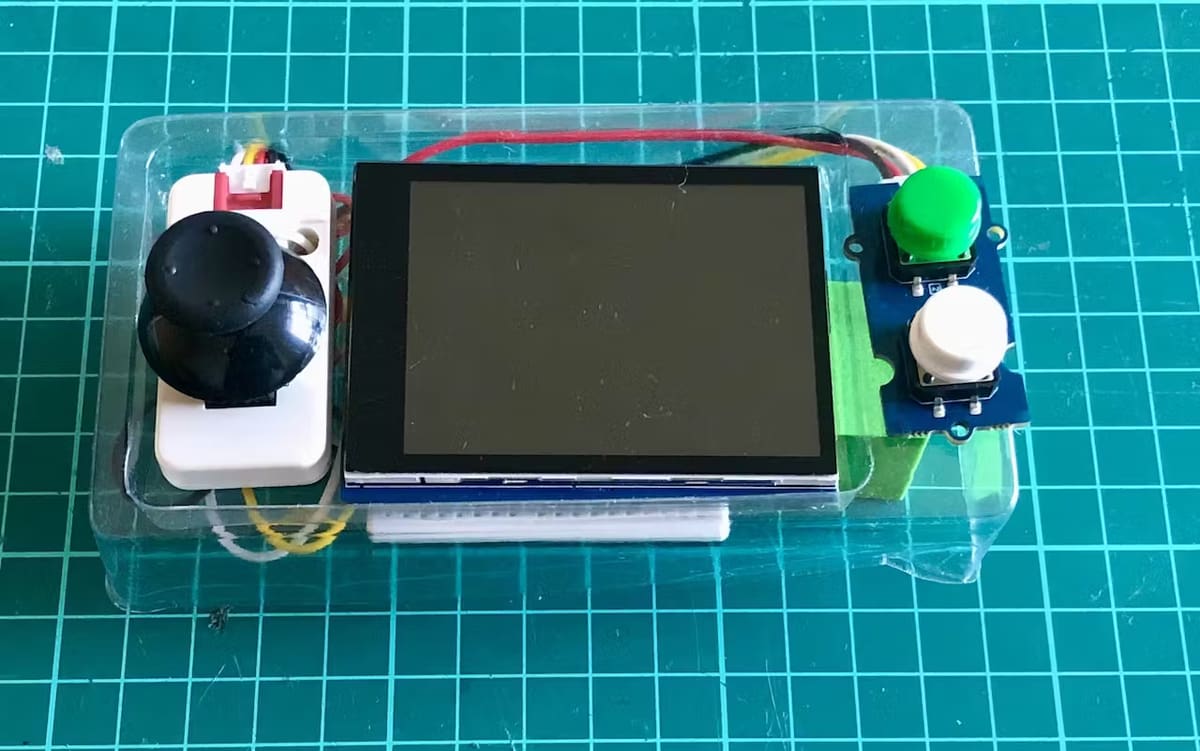
If you are not already aware, there is a popular software optimization challenge for programmers to get the classic FPS game Doom to run on less-than-ideal hardware. People have managed to run Doom on everything from graphing calculators to treadmills, so it should come as no surprise that someone managed to run it on the Arduino Nano ESP32.
This project requires the extra features and processing power found in the ESP32 version of the Arduino Nano, and uses a single joystick and two buttons as controls. Amazingly, the game runs at a playable 34 frames per second average at the 320×240 pixel resolution of the chosen display. The programmer responsible somewhat fittingly used a discarded bit of plastic packaging as an enclosure but recommends using a 3D printed chassis for a more finished appearance.
- Who designed it: Naveen
- Core components: Adafruit 2.8″ TFT Touch Shield, I2C joystick unit, breadboard
- Difficulty: Intermediate
- Where to find it: Hackster
TeleBall
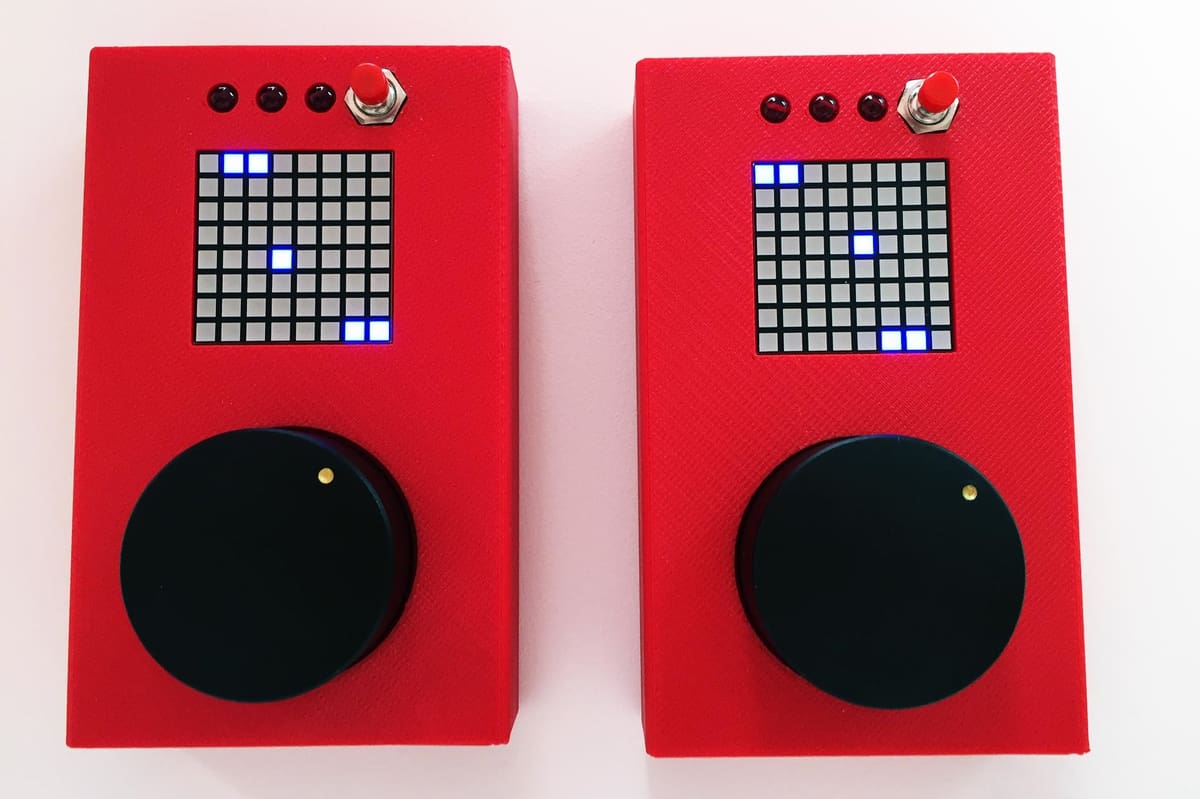
Another retro and minimalistic console you could build with an Arduino Nano is the TeleBall. This little device lets you play Breakout in single-player mode or even Tennis for Two! The build is simple enough for beginners, but still fun for those with more experience.
This build includes an 8 x 8 pixel LED matrix display, a paddle, and one button. For more information on all of the necessary parts, check out the bill of materials. The case is fully 3D printable and available for free on Thingiverse.
- Who designed it: Sy Twothousandandtwo
- Core components: 8 x 8 LED matrix, LED display driver, NRF transceiver module, LEDs
- Difficulty: Intermediate
- Where to find it: GitHub, YouTube
PC Game Controller
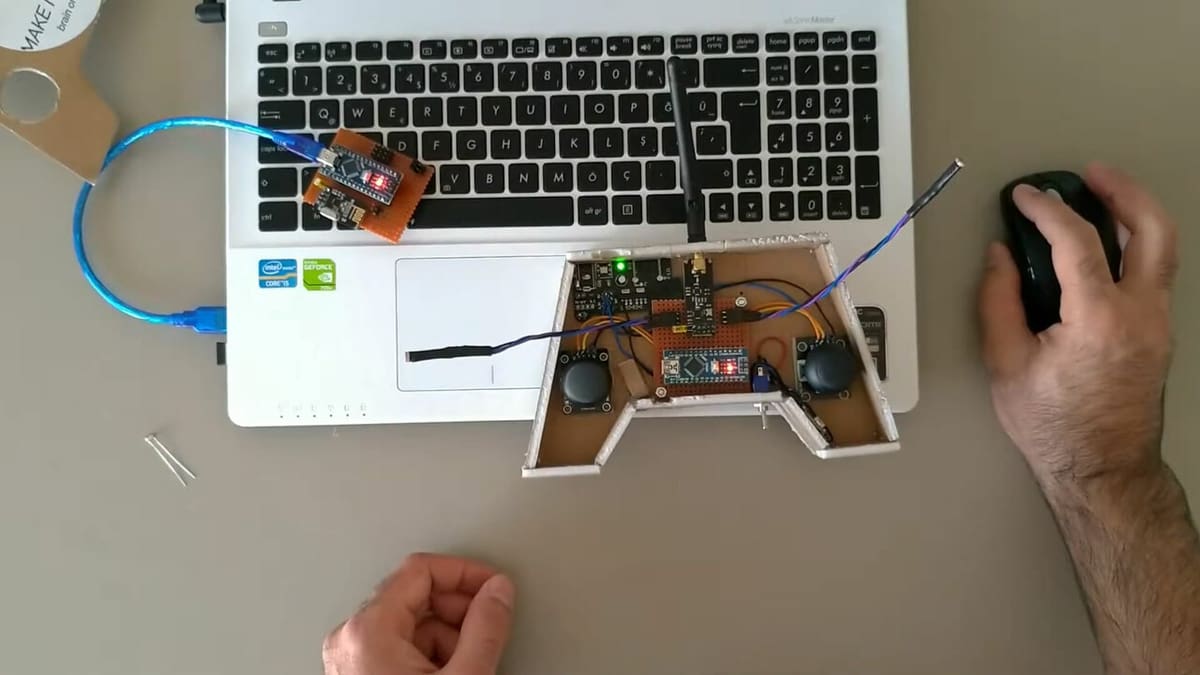
In this project, you can learn how to make a wireless gamepad using an Arduino Nano! The modules in the tutorial are used to create a transmitter and receiver, and the creator also demonstrates using it with a laptop computer to play PC games.
To get started, you can download the Arduino code and schematics from the link provided in the video description. There are also videos for creating the transmitter and the receiver, which are then customized to create the game controller.
It’s worth noting that the desktop application requires .NET framework 4.5.2 or higher to run, which can be downloaded from the official Microsoft website.
- Who designed it: Make It Smart
- Core components: Arduino joysticks, NRF transciever module, voltage regulator, potentiometers, toggle switch, LDR sensors
- Difficulty: Intermediate
- Where to find it: YouTube
Arcade Lego Games Box
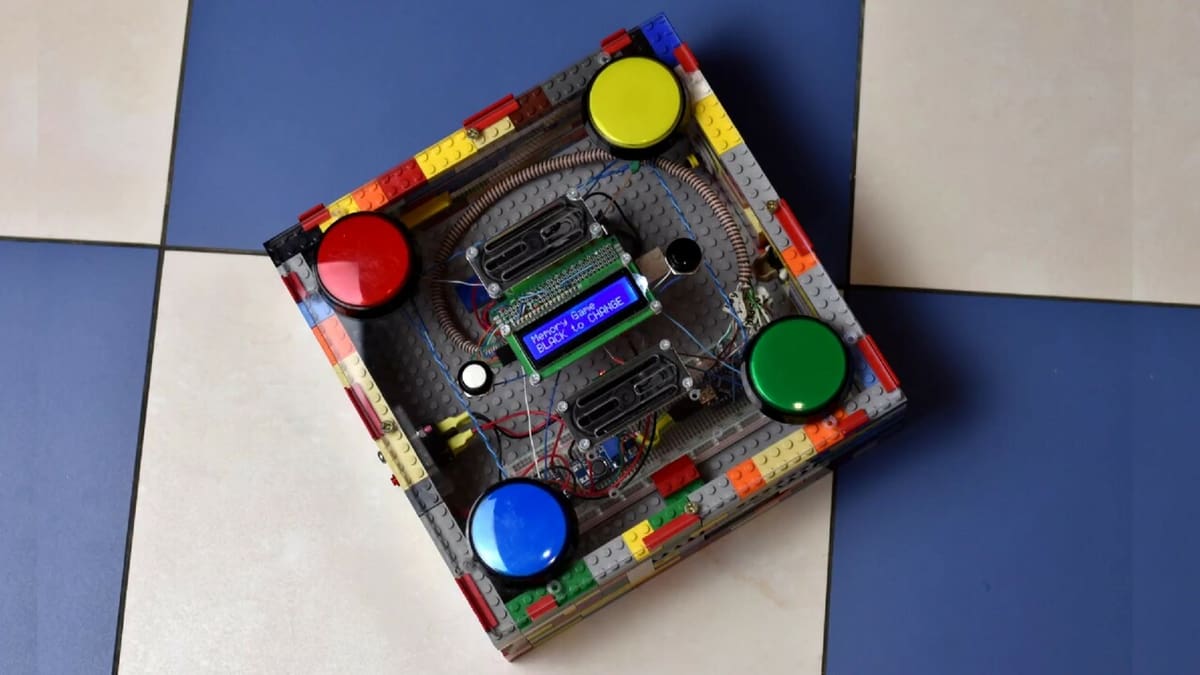
This is a 4-button arcade game made out of recycled Lego bricks! The maker of this project wanted to solve the issue of having so many unused Lego sets lying around, so they’ve been repurposed into something new and fun.
The arcade game has five built-in games, including a memory game similar to Simon Says, a reaction game similar to Whack-a-Mole, a competitive game for 2-4 players, a melody game for toddlers and younger children, and a war game for 2-4 adults.
Additionally, its environmentally-friendly design is fantastic and can be easily replicated, so it’s a great project to encourage the reusing of plastic parts. And while the cover was done in plexiglass, because the creator included the DXF file, it can be adapted for 3D printing.
And if the thorough tutorial isn’t enough, there’s also a demonstration video on how to create your own Arduino game from Lego bricks.
- Who designed it: LenkaDesign
- Core components: Arcade buttons, LCD display, charger module
- Difficulty: Intermediate
- Where to find it: Hackster
Chess Clock
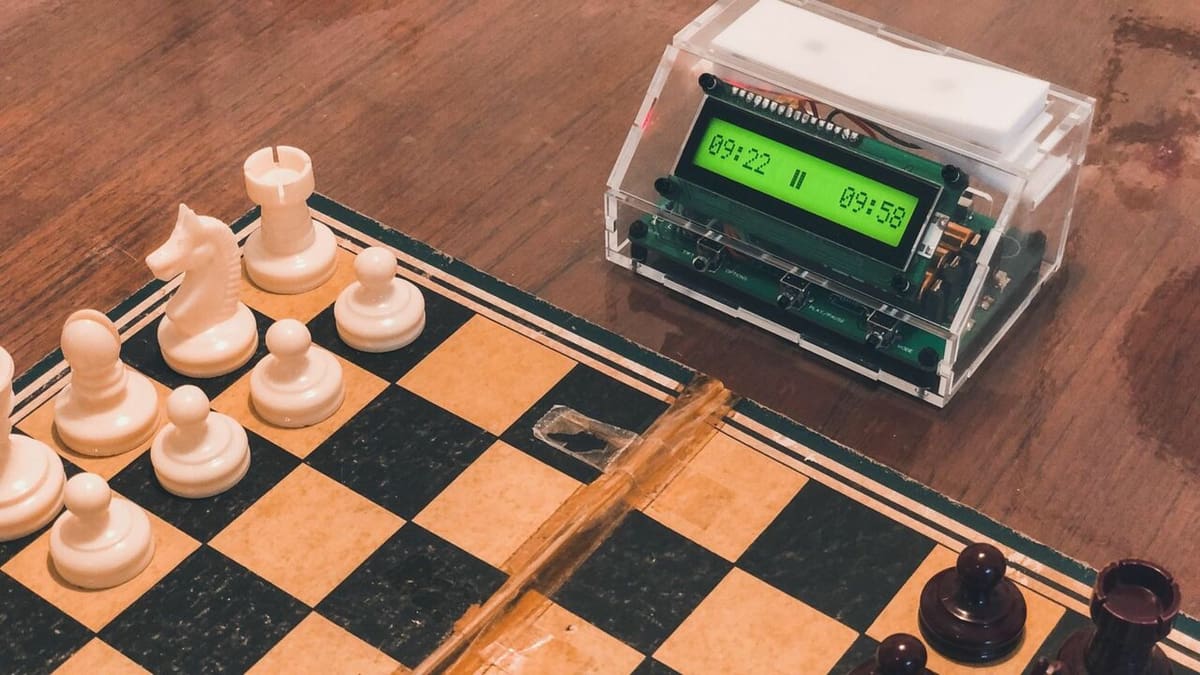
A digital chess clock is a device used to keep track of time during a game of… chess. Commonly found in tournaments or other competitive settings, it helps ensure that players have an equal amount of time to make their moves.
This project does exactly that. It’s a digital chess clock that uses an Arduino Nano and an LCD display to keep things even. It can be powered by AAA batteries for portability or with a Micro-USB cable.
To customize this clock, you may choose to 3D print a pre-existing design for a chess clock stand or an enclosure, although for that you’ll need access to a 3D printer. The creator of this project opted for laser-cut acrylic, but the DXF files are included, so you can also convert them to STL for easy 3D printing.
- Who designed it: Anders644PI
- Core components: 16×2 LCD display, resistors, buttons, Micro-USB breakout board, pin headers
- Difficulty: Intermediate
- Where to find it: Instructables

Custom Motion Controller
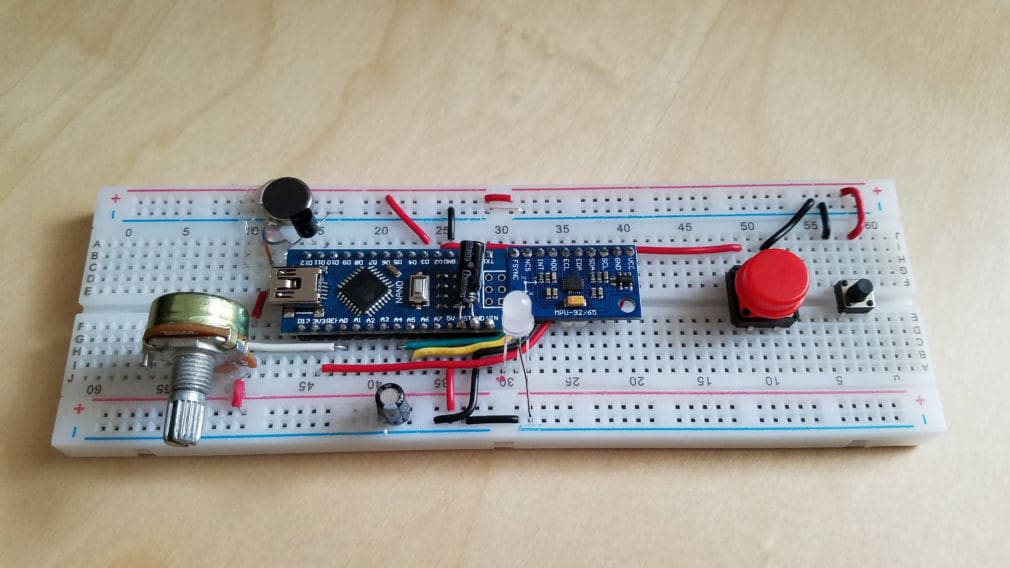
Build your own motion controller for game development in Unity! This project combines game development, hardware hacking, and embedded programming. It relies on an accelerometer and gyroscope to communicate the controller’s movement.
All components are relatively inexpensive, and you can check out how the controller works on a video shared by the designer.
- Who designed it: Aidan Lawrence
- Core components: MPU-9265 module, transistor, LEDs, resistors, breadboard
- Difficulty: Intermediate
- Where to find it: Aidan Lawrence
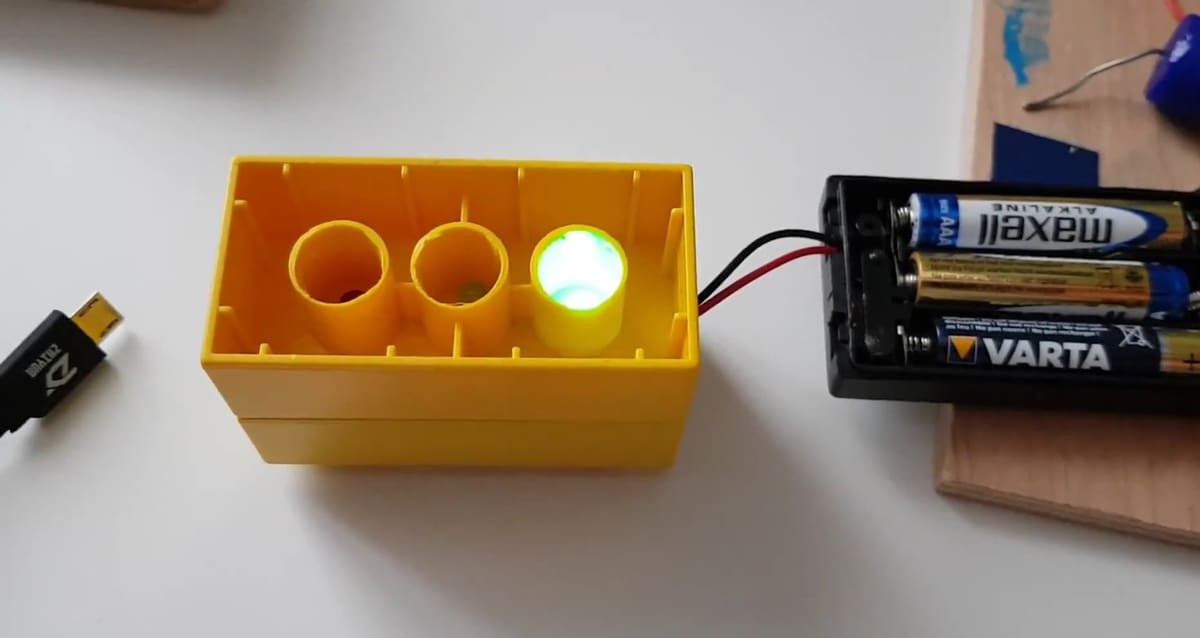
Roulette
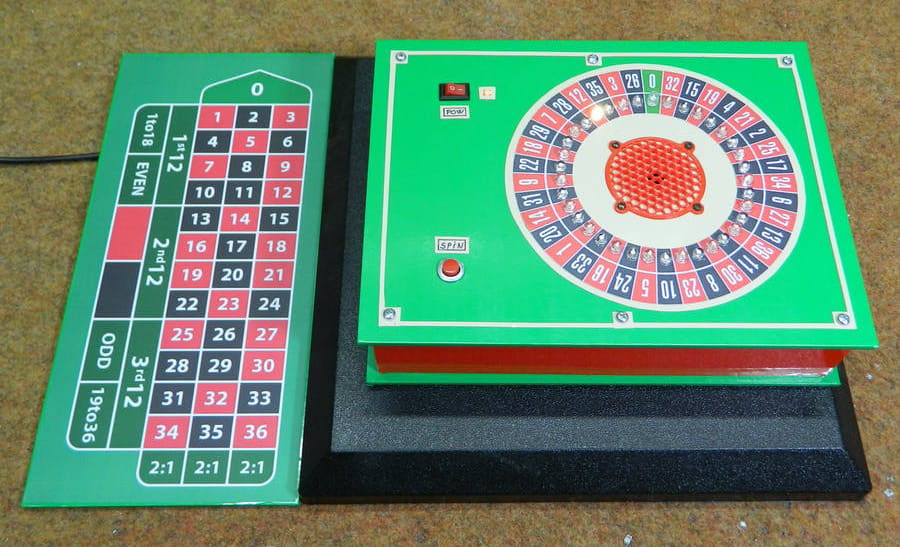
Why take a gamble when you could simulate the experience with Arduino? With the Arduino Nano, you can create your own game of Roulette.
This project follows the principle of the original Roulette; the movement of the LED simulates a ball whose speed gradually decreases until it stops. All components are relatively inexpensive and include the Arduino Nano, LEDs, a transistor, resistors, and a buzzer.
- Who designed it: mircemk
- Core components: LEDs, resistors, buzzer, speaker
- Difficulty: Advanced
- Where to find it: Arduino Project Hub, Instructables
License: The text of "The Best Arduino Nano Projects" by All3DP is licensed under a Creative Commons Attribution 4.0 International License.
CERTAIN CONTENT THAT APPEARS ON THIS SITE COMES FROM AMAZON. THIS CONTENT IS PROVIDED ‘AS IS’ AND IS SUBJECT TO CHANGE OR REMOVAL AT ANY TIME.