The Best Arduino DIY CNC Router Projects

Arduino CNC Routers are fun to build and provide great results. Take a look at some of the best Arduino CNC projects available today!
If you’re looking to make your own CNC router, you came to the right place. Building your own machine gives a deeper knowledge of the system itself and facilitates future troubleshooting that might be required. Also, it can be very fun and satisfying to design and build your own creations, not to mention they will be custom-tailored to suit your needs.
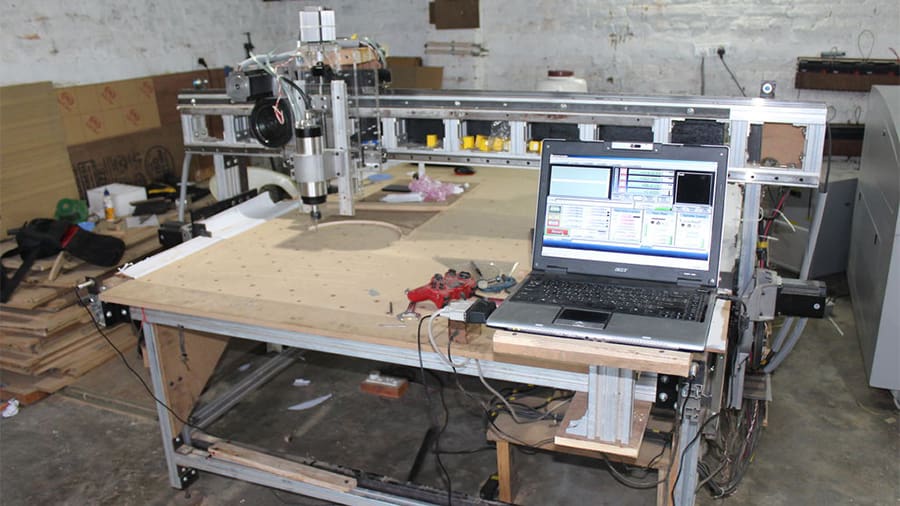
CNC routers work similarly to handheld routers, but the X, Y, and Z movements are driven by electronic systems that allow excellent precision and higher speeds than working by hand. Enter the Arduino, a well-known open-source microcontroller board that has sufficient processing power to control a router’s movement.
In this article, we’ll show you a few DIY Arduino CNC router projects that you can build yourself, or draw inspiration from while designing and building a more customized machine. But first, a little more background information…

Behind the Names
CNC
Computer numerical control (CNC) is an automated form of system control used largely for machining equipment but also for 3D printers. That said, the term “CNC” today is often used to refer to the machines themselves, typically automated lathes, mills, or routers. In this article, we’ll be focusing on the latter.
Like their hand-operated counterparts, CNC routers are often used for cutting softer materials, such as wood, plastic, foam, and aluminum. Routers usually operate at much higher speeds than CNC mills and typically feature larger, stationary tables.
Arduino
Arduino is hardware company that produces a wide range of low-cost electronics. Perhaps the best-known piece of hardware is the Arduino Uno (which has given rise to numerous clones on the market).
And although it has decent processing power, it requires an additional external board to be able to provide enough current to the motors and actually drive the whole thing. This extra add-on hardware is known as an Arduino shield.
On the software side, there’s plenty of open-source firmware available, such as GBRL, Klipper, and even our popular 3D printing companion, Marlin. As this is another topic, we won’t be detailing specifics here, but for a detailed list of the best software to run your CNC router, you can check our article:
Tools & Materials
Although each project requires slightly different sets of tools and parts, in this section, we’ll talk about some of the basic things that are generally required for building a machine like a CNC router, regardless of the design. Still, be sure to carefully look into your chosen project to make sure you have what you need before starting to build it.
Besides a standard set of tools, including screwdrivers, hex keys, pliers, and cutters, you’ll likely need the following:
- Spindle: This is arguably the heart of any CNC router since it’s the part that does the hard work of actually cutting materials. Choosing the right spindle for your project will determine which materials you can use and what cutting speeds will be possible once the machine is finished. Cost is also relevant here, since it can easily be the most expensive component of the entire machine.
- 3D printer: Many projects utilize 3D printed parts, either as joining components, structural parts, or both. Depending on the build, having a well-calibrated 3D printer capable of making ABS or PETG parts will be very handy and should reduce your assembly efforts greatly. Of course, you can always order 3D printed parts through Craftcloud.
- Drill: This tool is definitely a must. It doesn’t need to be a heavy-duty drill press, though; a handheld drill or driver will usually suffice. The right set of drill bits is also important, depending on the material you’ll be working with for the frame of your machine. HSS bits are good all-rounders, but depending on the material, you may wish to use a more specialized bit.
- Stepper motors: All Arduino-based CNC routers use some variation of a stepper motor to move each axis. It’s important to choose your motors correctly based on the torque and speeds the CNC router will require. The projects below will assist you in choosing the right motors and driver boards for your own project.
Homebuilt DIY Router
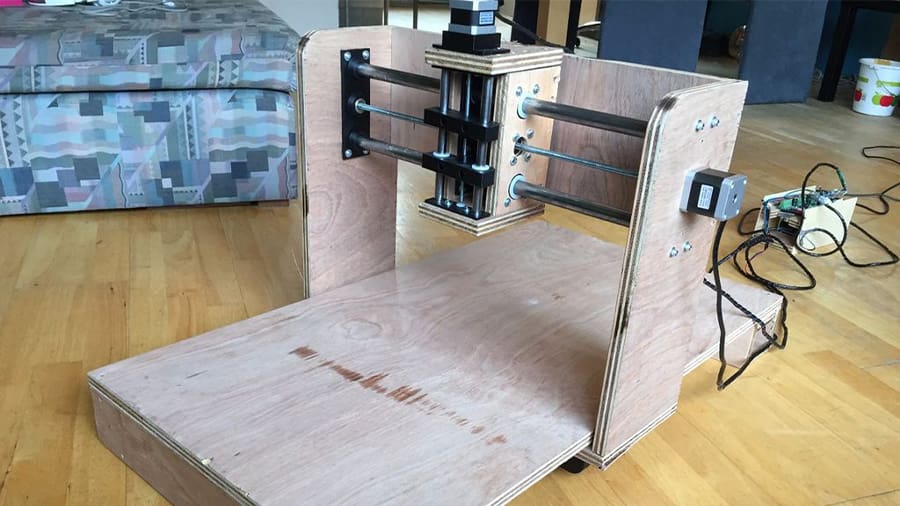
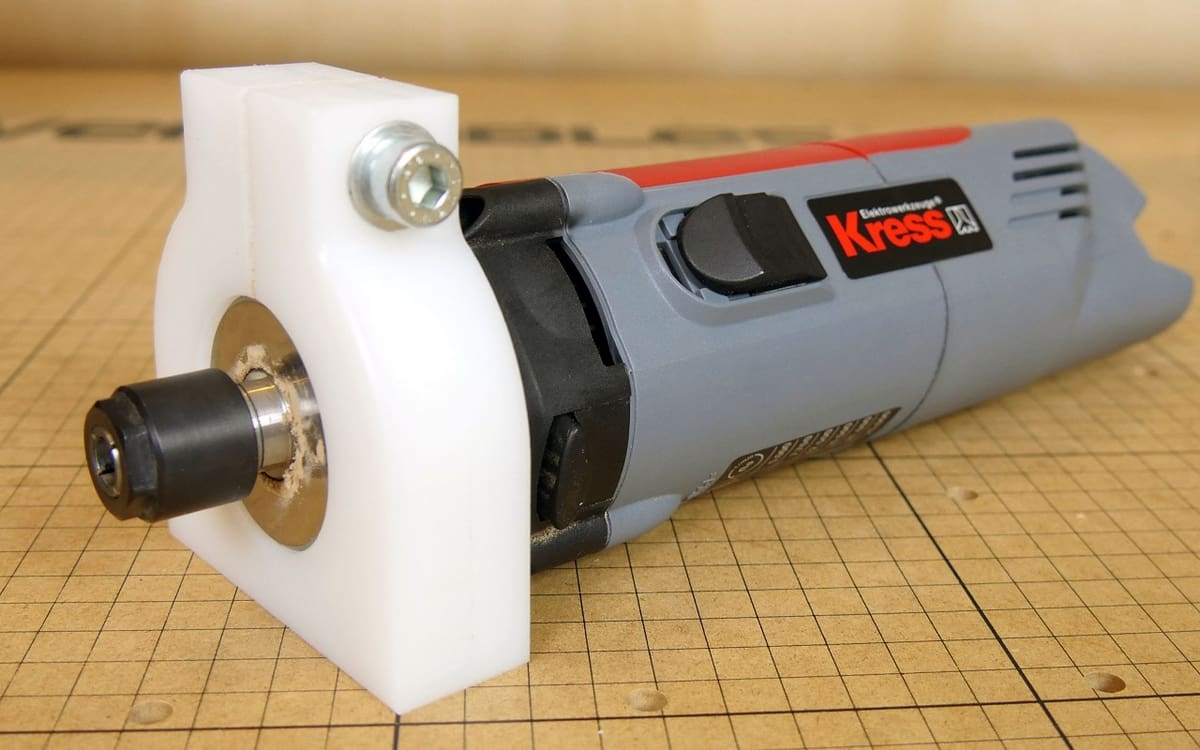
The so-called Homebuilt DIY CNC Router is an Instructables project by Azielaan015. The machine’s frame is made out of 18-mm hardwood plywood and the linear movement is achieved with steel rods and leadscrews. Originally, the designer used a Dremel handheld rotary tool as a spindle.
The Instructables page goes through all the steps of preparing the parts (like cutting the wood) and assembling the machine, including the electronics. It also shows how to test it using a drawing pen and the Universal G-Code Sender software. This project is a good choice for those who don’t have access to a 3D printer, although having one will make some steps easier.
- Frame: Plywood
- Tested materials: Hard foam, wood
- Firmware: GRBL
- Source: Instructables
- Overall difficulty: Medium
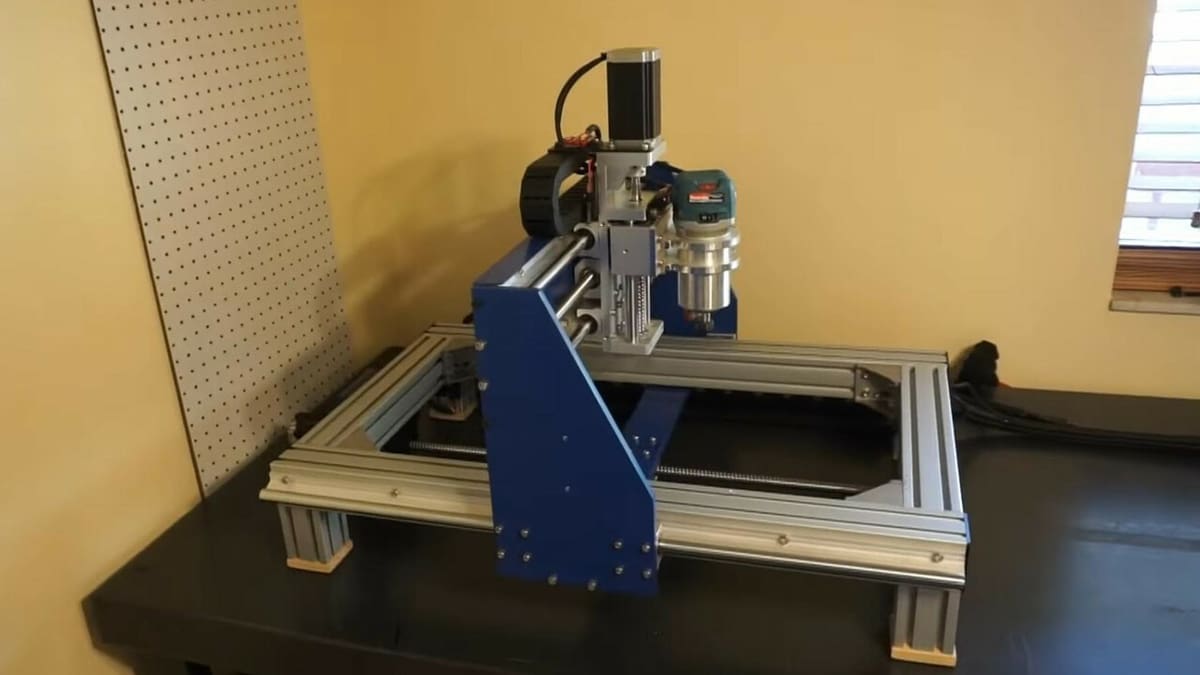
Heavy-Duty Router
Mr Innovative’s DIY CNC router was built by combining laser-cut 10-mm mild steel and aluminum profiles on the frame, which makes for a very stable platform. At the heart of the machine lies a 500-W spindle that can carve aluminum with ease. The project page is very well documented, with an extensive bill of materials that includes aluminum extrusion profiles for the frame, linear rails for the X- and Y-axis, and three 76-mm NEMA 23 steppers.
The laser-cut steel parts add to the overall stability of the frame, but these parts need to be buffed, primed, and painted to prevent corrosion. The video shows this process and goes on to detail every step of the assembly, including the tedious process of soldering all the components on a custom Arduino GRBL CNC shield that can control the motor drivers directly.
All the electronics and power supply go into a separate enclosure which Mr Innovative chose to screw to the side of the table where the machine sits. There are a few comments about adding more 2040 aluminum extrusions for extra stability in the X- and Y-axes, but this is a pretty accurate CNC machine as it is.
Mr Innovative has more CNC designs, including the impressive Homework Writing Machine, which is part CNC, part plotter, part childhood dream.
- Frame: Aluminum, mild steel
- Tested materials: Aluminum, acrylic
- Firmware: GRBL
- Source: YouTube
- Overall difficulty: Medium
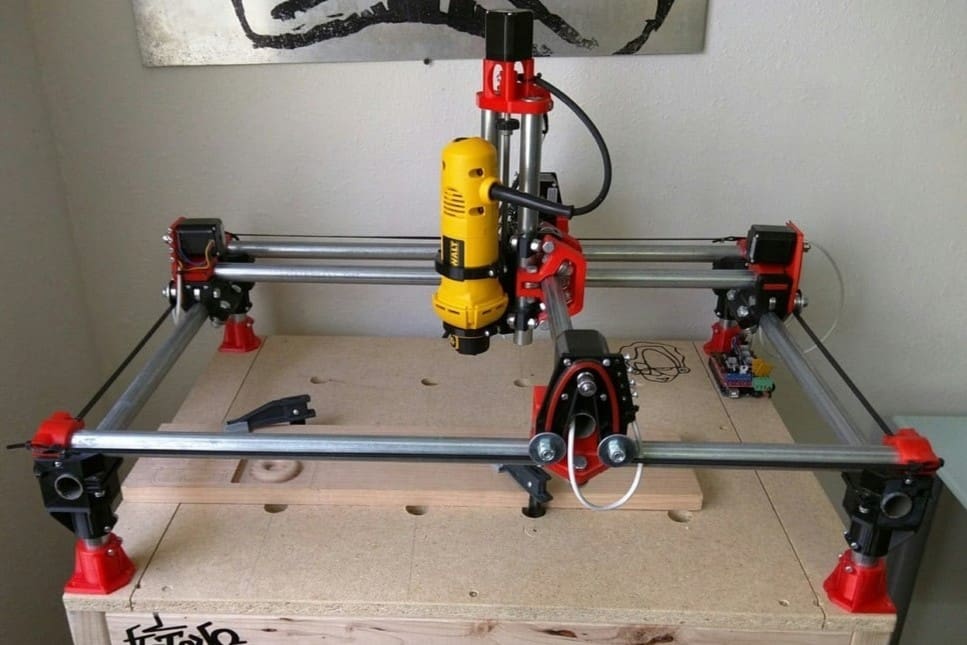
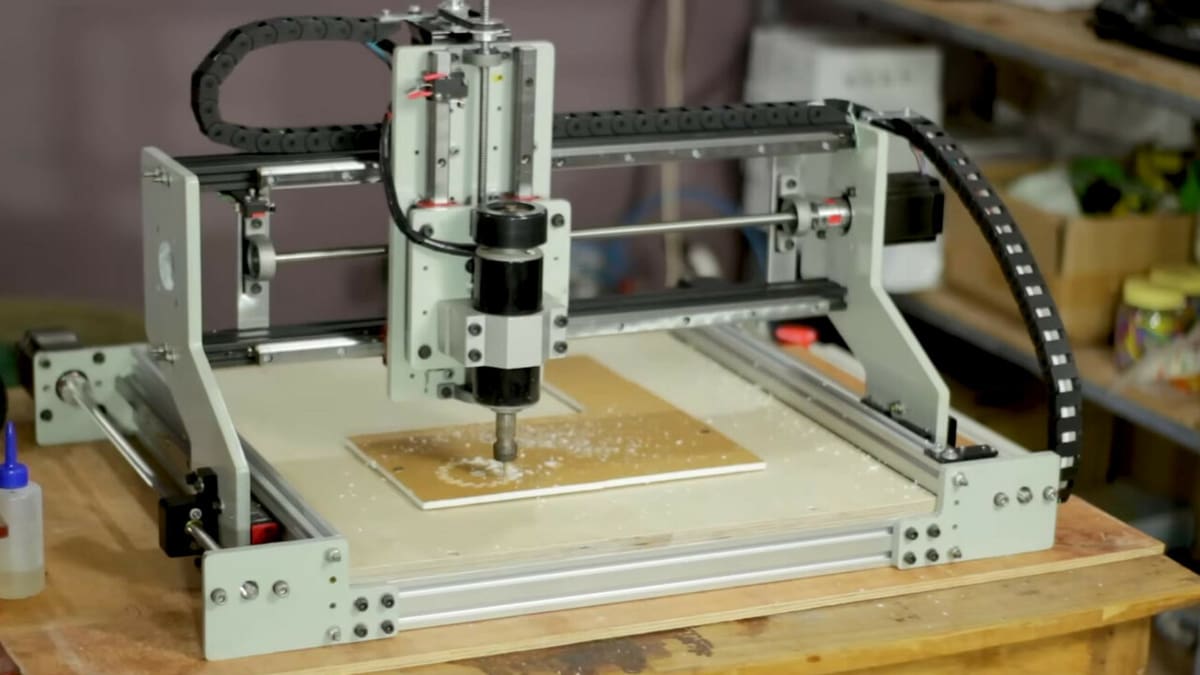
Full-Size Router
This next designer was inspired to build a CNC machine from scratch for three reasons: It sounded fun, the budget was limited, and the cutting area needed to be large. Enter the Arduino CNC Router. There are quite a few helpful hints for the build throughout the first video, like using a stop block when cutting with a miter saw to get repeatable cuts, or hanging the metal gantry plates from one of the screw holes with a piece of wire to spray paint it on all sides at once.
One thing about this design that we don’t see often is the hidden corner brackets that fit inside the aluminum extrusions. They’re an aesthetic upgrade, but also a functional one, as in some cases, they allow the assembly to have the full range of motion, with no exterior corner brackets on the way.
There’s also a second video that focuses on the software side of things. The instructions guide us through three steps. The first is a run-of-the-mill Arduino flashing of, you guessed it, GRBL. Then, as with most Arduino CNC machines, there’s the Universal G-code Sender (UGS) install. Should you run into any trouble, the video explains every step in detail.
The author built this very capable machine for around $600, and there are makers in the comments sourcing all of the parts for even less than that. This design definitely offers quite a bang for the buck!
- Frame: Aluminum, wood
- Tested materials: Wood, aluminum, acrylic
- Firmware: GRBL
- Source: YouTube
- Overall difficulty: Medium
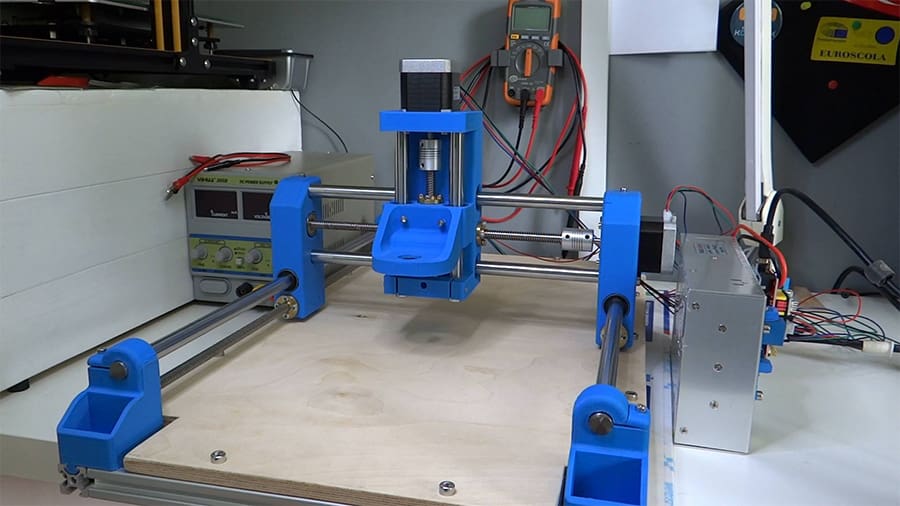
Simple DIY CNC
The DIY CNC is Ben Makes Everything’s personal take on a home-built CNC using only simple tools. For Ben, commercial options were either too small or too expensive.
Using only an old miter saw, a cheap benchtop drill press, a handheld drill, a belt sander, a metric drill and tap set, a few files, digital calipers, a tape measure, a steel punch tool, and a few screwdrivers and Allen wrenches, he built a powerful machine, measuring 800 x 600 mm. As seen in the first few seconds of the video, it’s capable of machining aluminum with a 1.25 horsepower Makita router. The creator does mention that it might be worthwhile paying to have some of the metal parts machined, as he found it difficult to make them all by hand.
The router was designed in Fusion, with some pre-designed parts, like the aluminum extrusions, found on GrabCAD. From there, he started fitting the pieces together on the screen and then in real life. Perhaps the single-most repeated step was to drill a hole and then tap it to accommodate metric screws.
As for the wiring, the creator mentions that the cheap, unshielded wiring he chose at first promptly succumbed to electromagnetic interference, causing the machine to stop. The solution? Shielded microphone cables. After installing GRBL on the Arduino and Universal G-code Sender, the machine was ready to run. One recommended last step is to add an enclosure to prevent the machine from sending chips everywhere and make it quieter.
A bill of materials is provided in the video description, and there’s a follow-up vídeo that responds to some common questions that appeared in the comments, like the cost of individual parts or wiring and design files.
- Frame: Aluminum, wood
- Tested materials: Aluminum
- Firmware: GRBL
- Source: YouTube
- Overall difficulty: Hard
$50 CNC Router

What a great name for a project! It’s all there in the title, and that first part, the $50, now that’s the star of the show. The YouTube video lets us in on the magic before we even reach the one-minute mark. DAZ has managed to design and 3D print functioning linear rails, which you can find on Thingiverse. The linear block is filled with airsoft BBs for bearings.
Instead of using tried and true Nema 23 stepper motors like most builds, DAZ shows us how to hack some 28BYJ-48 stepper motors to run as bipolar motors. It’s all brilliantly simple, somewhat wacky, and incredibly functional. The spindle is a 775 motor which can be had for under $10.
As for the electronics, we’re pretty sure the Arduino either lost its logo or it’s a clone. The author doesn’t mention the type of shield he mounts on the Arduino, but it appears to be a V3 CNC shield, which can be obtained from the usual places for just under two dollars.
After attaching all the parts, it’s time to upload GRBL and proceed to set up the motor values. The author used Fusion to generate some G-code and suggests using Easel to send it to the CNC, but you can use UGS or any G-code sender.
The author immediately proceeded to cut and build a custom wood and acrylic lamp to test the machine. It’s a premium design, but hey, sometimes we just have to splurge.
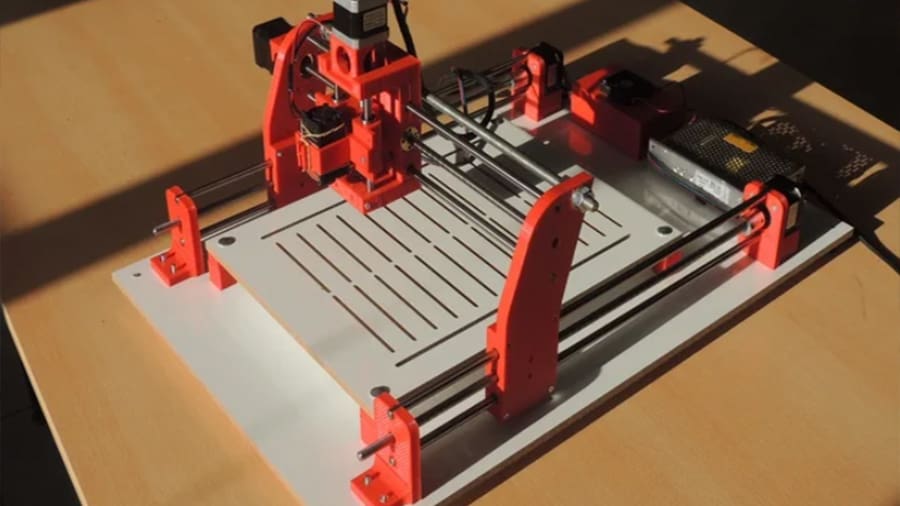
Dremel CNC
This is a very popular project by Thingiverse user Nicodem Bartnik. The Dremel CNC has its own builders group on Facebook with different versions and adaptations, providing great user support and design alternatives. The full list of parts and materials is readily available, including different store links for purchase.
The Dremel CNC project relies heavily on 3D printing, so if you have a well-calibrated printer, the assembly process will be a walk in the park. Nicodem has all the design and assembly steps documented in several videos, including the first steps once the machine is built. As implied by its name, this router originally used a Dremel tool as a spindle, but the creator later updated the parts to allow a standard 500-W spindle to be attached if necessary.
- Frame: Aluminum profiles, 3D printed parts
- Tested materials: Wood, acrylic, foam, aluminum
- Firmware: GRBL
- Source: Thingiverse
- Overall difficulty: Easy
Triple CNC Machine
The Triple CNC Machine by Arduino Project Hub user TheTNR is a 3-in-1 solution. Rather than only cutting and engraving like other CNC routers, this device brings extra functionality from the start, as it allows for the attachment of secondary tools like a laser for cutting and engraving or the good old pen to serve as a plotter.
This is another project that requires extensive 3D printing. The main difference, however, is the suggested spindle: a brushless motor, or as the creators call it, a “drone motor”. The build instructions are comprised of a series of three videos, and the 3D printed parts are available on Thingiverse.
- Frame: 3D printed parts, steel leadscrews
- Tested materials: Wood
- Firmware: GRBL
- Source: Arduino Project Hub
- Overall difficulty: Medium
Mostly Printed CNC (MPCNC)
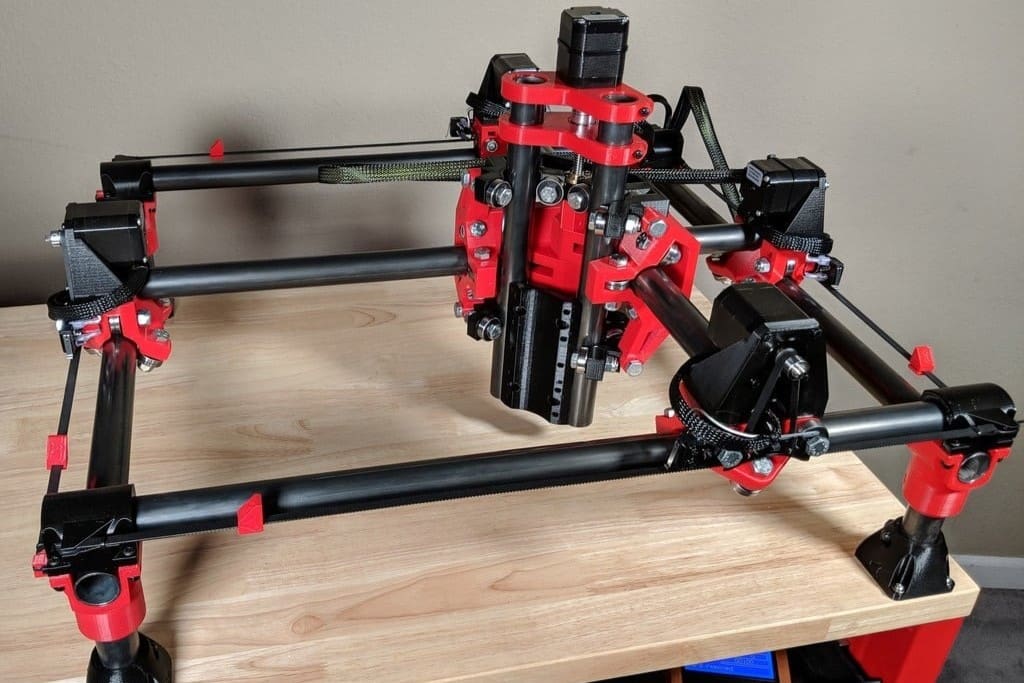
The Mostly Printed CNC (MPCNC) is a more complex project featuring a unique design. It uses steel tubes as the main structural parts, being easily expandable in size. Rather than a closed system, the MPCNC is a platform for motion control, adaptable to any kind of machine, including 3D printers and vinyl cutters.
While the project provides a full list of materials and purchase links, many design choices are left to the user. That said, the recommended size for the MPCNC is 600 x 600 mm (2 x 2 ft). For those with limited access to 3D printers, or for those simply looking to purchase all of the required parts in one place, V1Engineering offers bundles in their online shop. All the design files, however, are available on Thingiverse.
While the recommended control board for this project is the UltiMachine, the creators make it clear that other boards, including Arduino-based solutions, are totally fine, and they even provide some support for these systems. For more information, be sure to check our in-depth article on this project.
- Frame: 3D printed parts, conduit rails (or steel tubing)
- Tested materials: Wood, acrylic, foam, metals
- Firmware: GRBL, Marlin, others
- Source: V1Engineering
- Overall difficulty: Hard
The Overpass
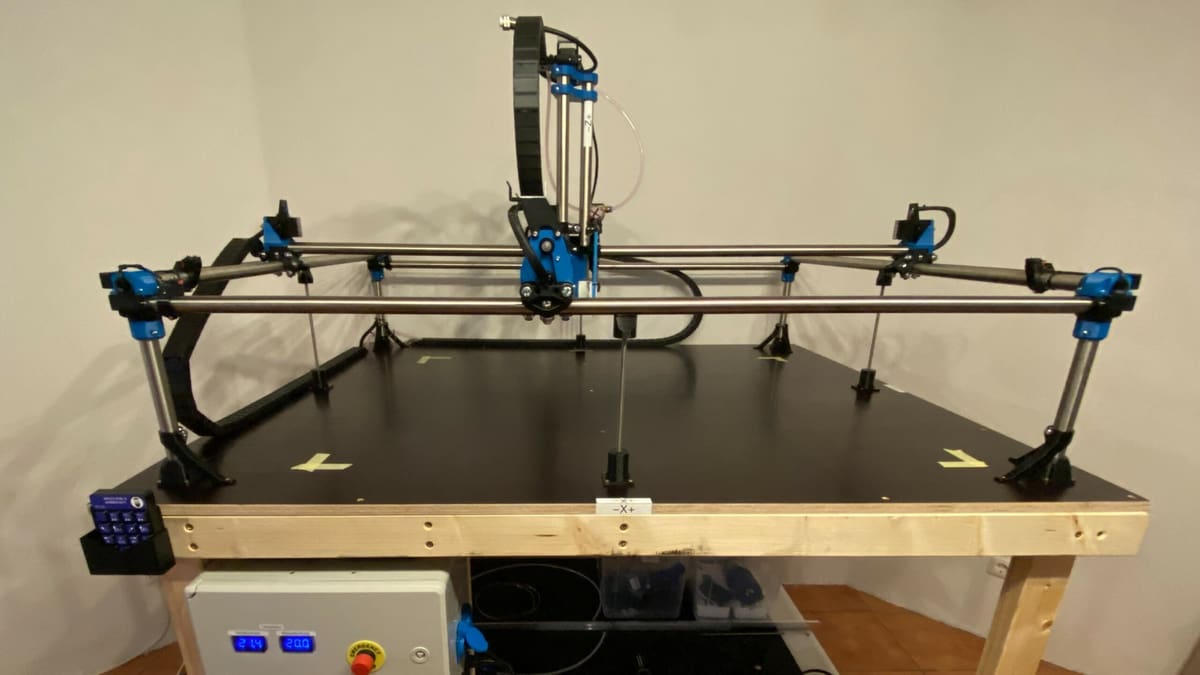
The Overpass is a large format (1,500 x 3,000 mm) router project by Instructables user Nishantkinshu. As they put it, this Instructables page isn’t really a tutorial for building but rather a thorough document describing how this sturdy CNC machine was designed and built.
This machine doesn’t employ 3D printing, and all parts are bolted together, making it easier to scale down if space is a concern. Nishantkinshu says their machine cost a total of $3,500, including shipping costs, and took around four months to complete. Quite an enterprise!
- Frame: Aluminium profiles, plywood
- Tested materials: Wood
- Firmware: GRBL, Marlin, others
- Source: Instructables
- Overall difficulty: Hard
Other Resources
After completing your build, there are a few last steps required before you can finally put your CNC router to work.
If you’re planning on running the machine using a computer, there a few extra pieces of software that you’ll need to download. While CAM programs will convert digital designs into G-code instructions, usually another program is necessary for sending these instructions to the Arduino. For an in-depth look at these programs, check out our article on CNC router software, which includes a few free options.
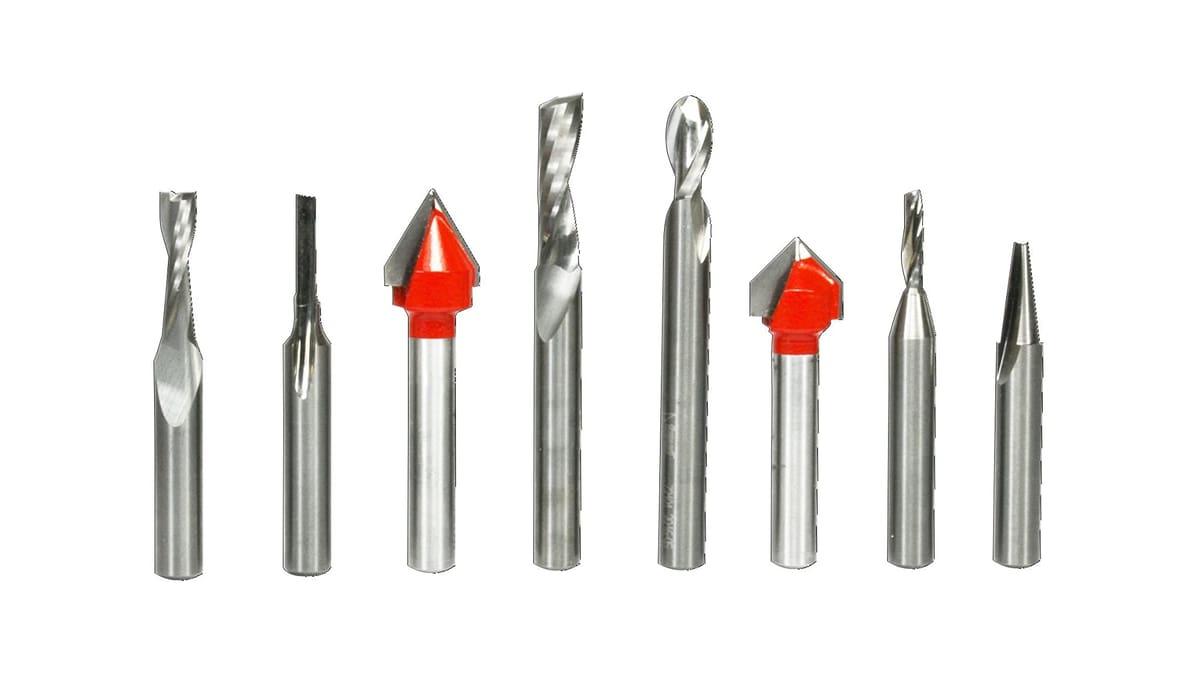
Last but not least, choosing the right bits will definitely make a difference in how your router will perform. Guess what? We have an article for that too!
Once everything is working as it should, you can go ahead and browse some popular websites for CNC router STL files.
License: The text of "The Best Arduino DIY CNC Router Projects" by All3DP is licensed under a Creative Commons Attribution 4.0 International License.