
3MF to STL: How to Convert 3MF Files to STL

Whatever your reason, we've got the answers on how to convert 3MF to STL file format. Read on for two easy solutions!
STL (or “stereolithography”) files are the standard 3D file type used for 3D printing. They describe objects using mosaics or triangular surfaces that fit together to create a single 3D object.
3MF (or “3D manufacturing format”) files also describe 3D objects. However, unlike STLs, they contain information about cores, materials, and other details that aren’t included in the geometry of an STL file.
Despite the popularity of the STL format, 3MF is gaining ground. Industry players like Microsoft, Autodesk, and others are abandoning the use of STL for an easier-to-edit format. 3MF is better for defining more complex information that can be included in each 3D model, like for multi-material 3D printing.
Given the growing number of 3MF files, but the relatively slower adaptation of this file format by certain modeling or slicer programs, you might find yourself needing to convert to an STL at some point. Let’s take a look at some ways to do that!
Using Software
In terms of software options, you probably have one capable of converting 3MF to STL installed already that you use as a 3D design program or as a slicer. No matter which modeling program or slicer you have available, the step-by-step process for converting is very simple: load one format and save it in another.
The only thing to look out for is that, depending on the program you’re using, some navigation and other terminology may be slightly different.
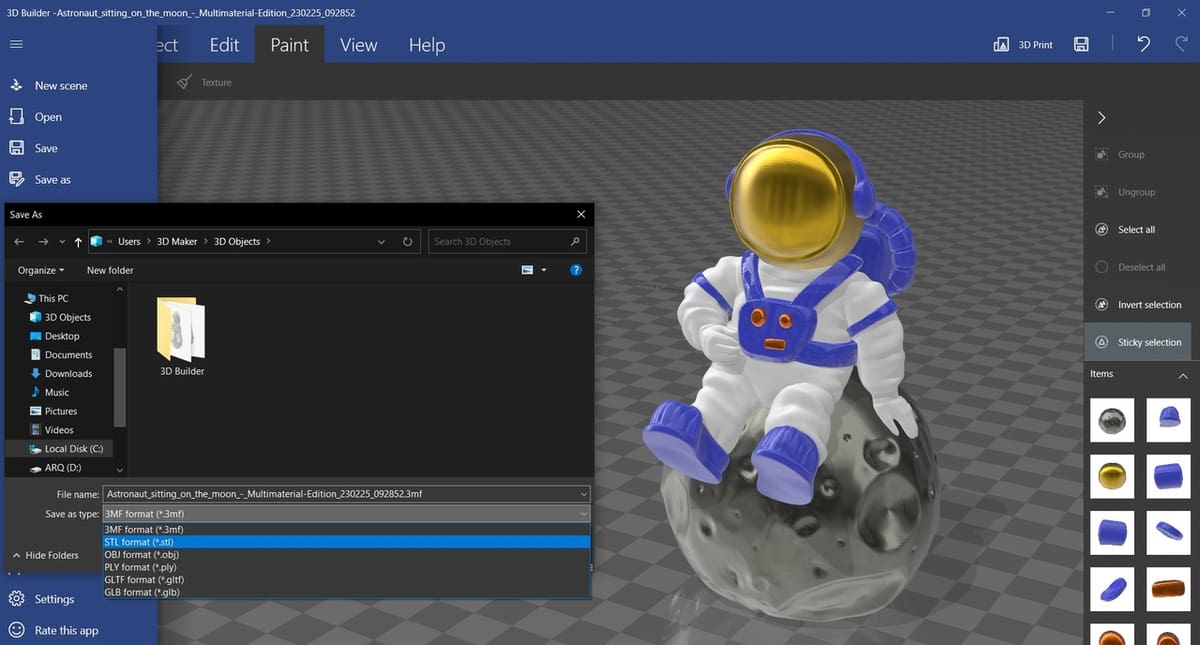
There are many free 3D design programs out there that can open the 3MF format without any problems, like Meshmixer, Paint 3D, and 3D Builder. The latter is a great option because it automatically adjusts the zoom to frame when loading the object, and if you have Windows, it may be pre-installed on your system already! If you have another operating system, such as MacOS or Linux, Blender is also able to do the conversion.
When it comes to slicers, STL still predominates as the standard. Some slicers out there, including PrusaSlicer, MatterControl, Cura, and Slic3r can be used to import 3MF files while exporting them as STLs. Some even have a repair feature for STL format to help out if an issue arises during conversion.
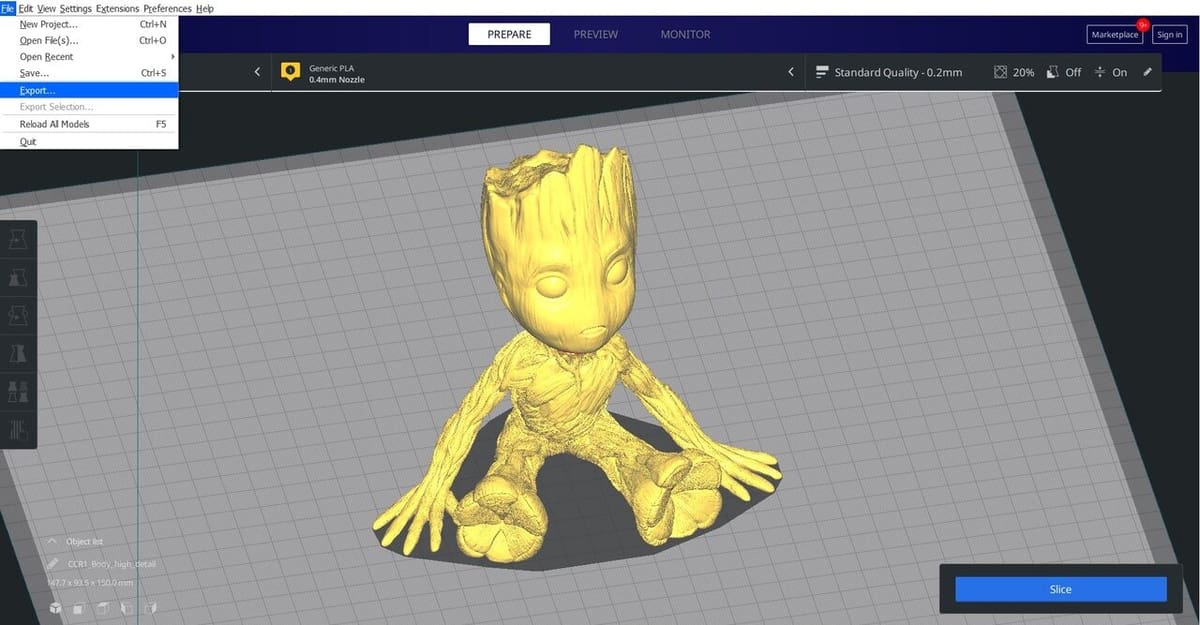
As we said, any of these programs will work, and the procedure to do so is as straightforward as it gets, regardless of the program. If it’s really the first time you’re converting a file, you may be a little shocked by the simplicity! Here it goes, using Cura as an example:
- Load the 3MF file with the simple drag-and-drop technique or go to “File > Open File(s)”.
- Make changes as necessary (if any), and once you’re set, go to “File > Export…”.
- Select “STL File” under “Save as type”.
Across most programs, you’ll have options to load the file using either drag and drop, the “Open File” option, or the “Import” function under the “File” menu. When exporting your file, there may also be some differences in terminology to look out for. Most commonly, you’ll find that either “Export” or “Save As” will get you where you need to go, with some including ASCII or binary versions.
ASCII vs. Binary
From a printing perspective, the primary difference between the two has to do with file size. For particularly complex models with many small triangles, the file size for the ASCII STL can become huge, whereas the binary STL file is more compact. For example, we converted the astronaut on the moon model from 3MF to both STL formats in Cura with the following results:
- ASCII STL: 173,616 kB
- Binary STL: 33,131 kB
For this particular model, there weren’t any discernable differences in the final models. So, choose whichever file format works best for your needs, and you’ll be set!
Using Online Services

Another fast way to convert from a 3MF file to an STL file is to use an online option. If you have a good internet connection and your file isn’t very large, this conversion will be simple and quick.
Even though online conversion may be pretty simple, the process is not without shortcomings. As we said above, the 3MF file format stores more model data than STL files, including mathematically accurate geometry data. In converting 3MF files to STL, this information is lost, which can affect how geometries are represented when you go slice and print the model.
Nevertheless, if you’re interested in giving it a try, there are several platforms that can do this. Regardless of the platform you choose, the process is very simple. Using SwiftConverter as an example, here are the four easy steps:
- Upload your file.
- Select “STL” as the format you wish to convert to.
- Press “Convert File” and be patient.
- Once confirmed, click on “Download converted file”, and your file should start downloading!
The step-by-step may be a little different across various sites, but the basic principle is always the same: Load the file, convert it, and save it in a new format. That’s it!
License: The text of "3MF to STL: How to Convert 3MF Files to STL" by All3DP is licensed under a Creative Commons Attribution 4.0 International License.