3D Printer Light: Simple Solutions

There are different reasons why you might want some 3D printer light. Check out practical solutions to avoid being left in the dark!
Lighting does more than prevent neck pain when you watch your printer work or enable you to monitor the printing process at night. Depending on your goal, you can light the printhead, the entire printer, or even the whole workstation. No matter what you’re after, the proper lighting solution can make a big difference. And even if it doesn’t have a specific purpose, it can just be really cool to give your printer a new look.
In addition to aesthetics and better visibility, another benefit of having adequate lighting is the accuracy afforded when using a webcam. This is necessary for running programs like Obico to monitor printing errors, and you can also take advantage of the setup to make time-lapse videos. Adding some brightness can lead to a whole new 3D printing experience.
In this article, we’ll cover tips and some simple examples of lighting sources for your 3D printer, printhead, and workstation. Before we get into those options, however, we’ll cover some considerations for your lighting setup. Let’s get started!
What to Look For
There are a few factors to consider when deciding what type of 3D printer lighting will best suit your setup.
- Positioning and orientation: The most important thing is to keep in mind what you’re aiming for with this upgrade. For example, you can direct the light toward the center of the printer, you can illuminate the printhead, or you can cast light on the entire workstation. It’s important to keep in mind where the focus should be, and after completing your main objective, think about other aspects (e.g. cable organization, special covers).
- Power: This can be provided by the printer or by another power source. If your printer uses a motherboard that supports lighting, such as the SKR Mini E3 V2 or the MKS Robin E3D, then you can connect a compatible (same voltage) light source directly to your printer. However, if the motherboard doesn’t have this capability, you can power your lighting externally from another source, such as a computer or wall outlet.
- Color: If you just want a bright light, you’ll find LED options in white or yellow that, in some cases, have a controller or dimmer to regulate the brightness and color. On the other hand, if you opt for multicolor or DIY lighting, keep in mind that there are different types of LED strips. RGB LED strips with three connections are the go-to for makers who want to enhance the setup’s look because the LEDs can be controlled individually.
- Safety: Once you’ve decided what type of lighting you need, be sure to consider how your printer will handle upgrades. Extra care with proper voltage, a suitable power source, and no moving or loose parts is essential for safety and a pleasant experience.
Now, let’s check out the options!
Keep in mind that although some are called DIY, they don’t necessarily require any preparation of the electrical circuit beyond its installation. They mostly depend on manufacturing some component or part of the solution yourself. And while some of the designs we found are made for specific printers, it shouldn’t be too difficult to change them or find a similar solution for your printer model.
Frame (to Buy)
Our first lighting method focuses on options that you can simply purchase and add to your printer’s frame without radically modifying it. Many 3D printers use V-slot aluminum profiles as part of the frame, which makes them a great choice for mounting lights. These fittings are standardized and in many cases are simply plug-and-play.
You can find lights with adhesive tape or can opt for T-nuts or clips, as well as other options that are compatible with these simple-to-install standards. While there are options for specific printers, like Bambu Lab’s LED light for the X1 series, there are also general lighting options that are universal and can be installed on any model. There are also a variety of devices depending on the power source you’ve got, be it a wall outlet or the printer’s motherboard, for example.
One of the most popular options among makers out there is to use RGB LED strips. Typically, this method involves fitting a light strip into a V-slot insert, which can slide into the frame of your 3D printer. Since these strips are often fragile, it’s important to take extra care when attaching them to avoid causing any damage. A safer way to do this is to pull the strip in rather than trying to push it in, as demonstrated by Teaching Tech.
While these are practical solutions, consider that in some cases the installation can be more tedious and difficult, so set aside adequate space and time to work on this. There are alternative methods as well, such as using other 3D printed parts that can be mounted on an extrusion to hold the lights, and we’ll cover these below.
Frame (to DIY)
Perhaps the simplest option is to use 3D printed LED strip mounting brackets if part of your frame is V-slot. If this isn’t the case, don’t worry, there are still plenty of ways to make this happen, especially with your own printer. In addition to self-adhesive LED strips, you can explore a number of printable adapters and mods, or make your own if you have some modeling skills.
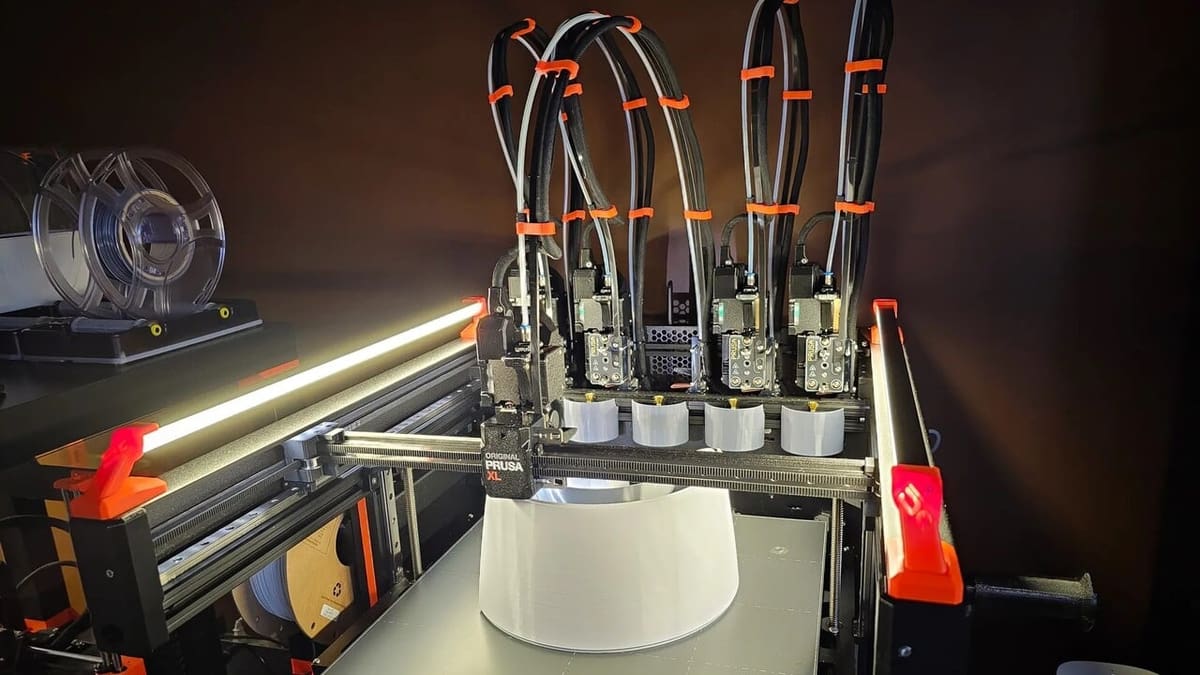
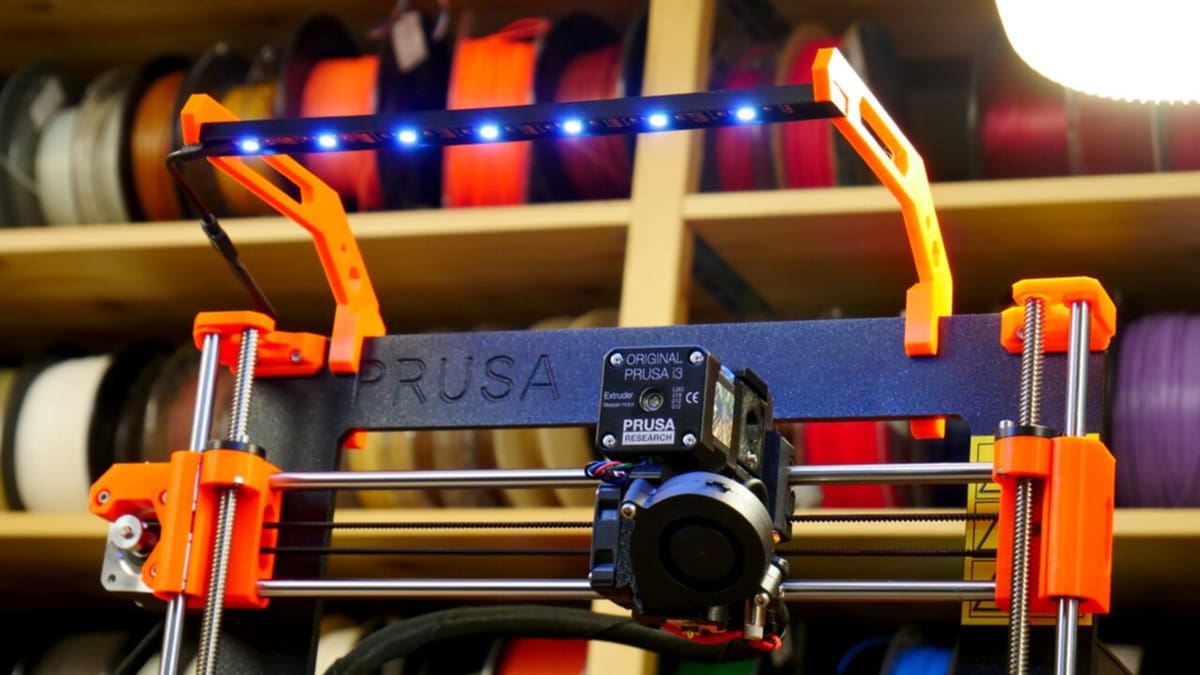
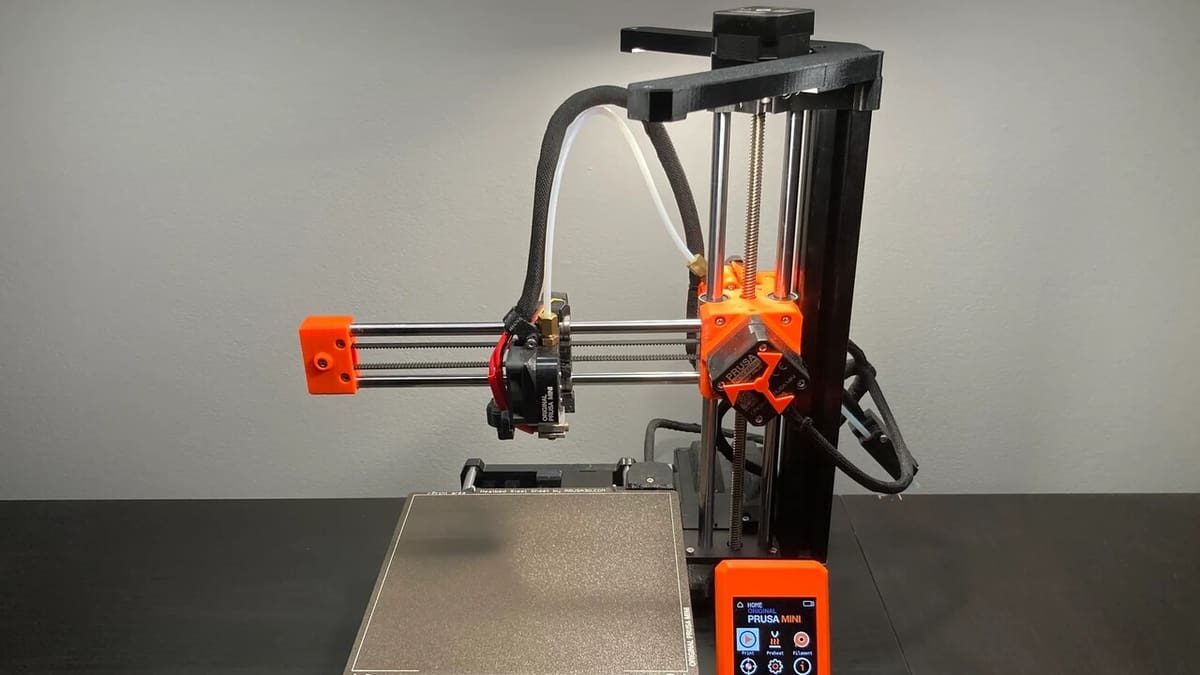
Given that there are so many unique options out there and the sheer number of different printer models, it’s very likely that you can easily find a solution that’s just right for you. For example, you can find a LED light bar for the Prusa Mini, a chamber LED for Bambu Lab machines, or a LED support bar for Creality’s S1. Even if you don’t find a complete solution right away, you’ll certainly find some accessory or modification that can help – like this flashlight mount.
Some options, like the magnetic LED light bar for Prusa’s XL, are simply added to the frame, while others, like the one Prusa Mini’s pictured above and the bar for the A1 Mini, are integrated into the frame. This can be especially useful for aesthetics and organization, and can make installation safer and more secure. You can also use other frame accessories that are specific to your 3D printer. For example, these 3D printable parts are designed to be mounted on a Prusa i3 printer frame.
It’s also possible to make the entire electrical circuit from scratch and there are many tutorials out there. If you need a very simple one using the printer’s own power supply and that doesn’t depend on the V-Slot profile, it’s worth checking out this Instructable by zankostas. It reinforces something obvious but that many end up missing: If you decide to use an existing power supply, it’s vital that you choose a LED strip with a compatible electrical voltage.
Printhead
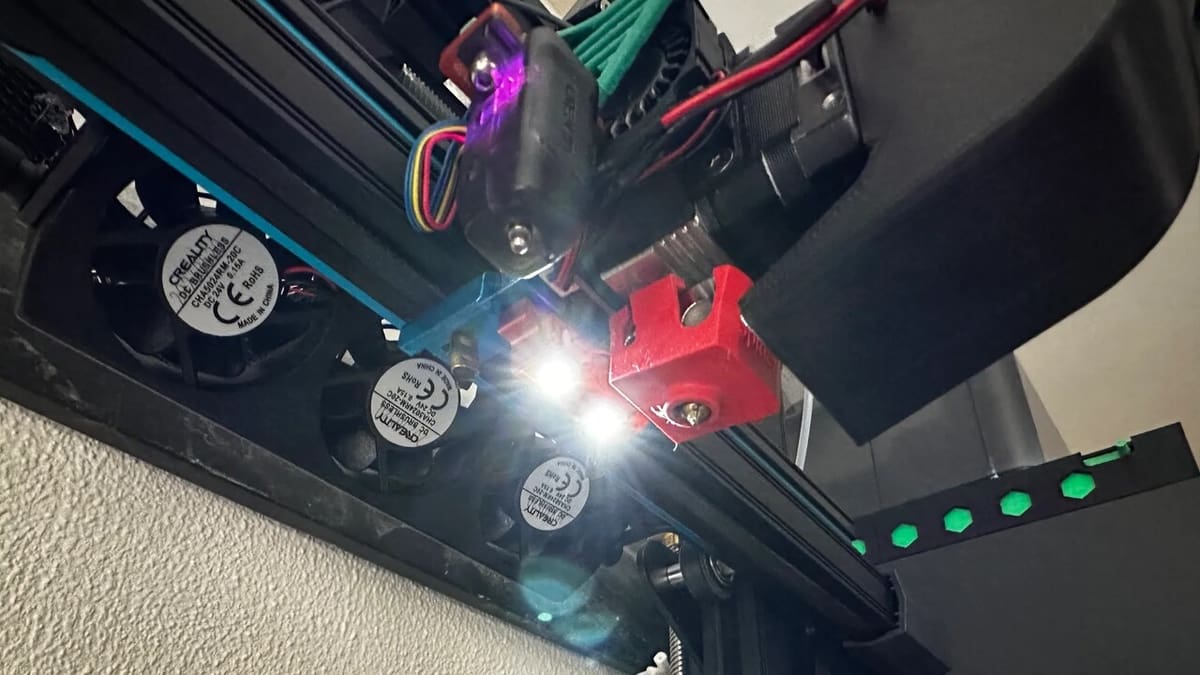
If you want to see exactly what your machine is printing, you can add a light to the printhead. This method won’t illuminate your entire bed, as it will move with the position of your printhead. While you’ll get a better view of the layer being created, installing a large fixture can make it more likely that your prints will have ringing due to the extra weight on the printhead.
You can opt for a LED strip mounted around a 3D printed printhead accessory or individual LEDs. This video guide from Techeonics or this mod on Thingiverse from Schtimpy can be useful, although the details will depend on your printer model and your creativity. There are also specialized stores, like Fysetc, that sell kits that are compatible with 24-V sources, for example.
Although simple, installing an LED in the printhead requires taking into account several precautions regarding temperature, exposed wires, among others, which make it more delicate to implement. It’s also important to prioritize more heat-resistant materials such as ABS, PETG, or ASA for the printed parts. If you still prefer to experiment with PLA, it may be interesting to heat and deform the support a little to increase the pressure and prevent it from moving out of place, as suggested by DenoD.
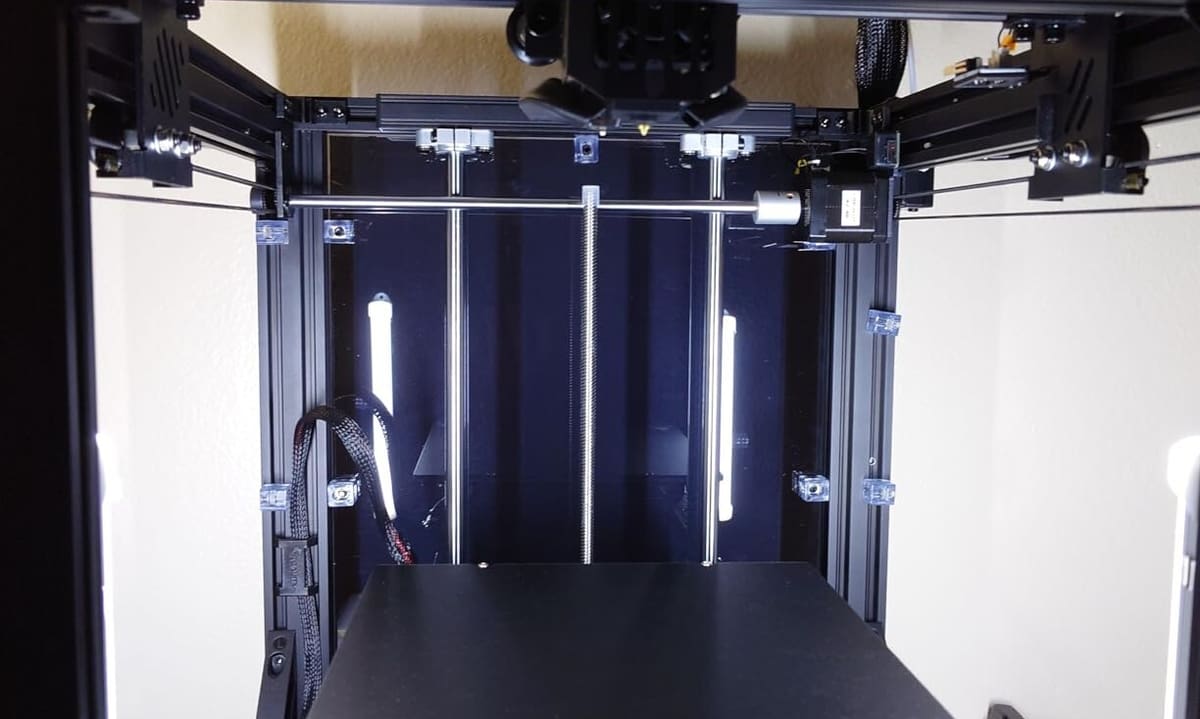
Enclosures
Enclosures are great for printing ABS and other difficult materials that might easily warp, and they reduce noise and odors – but they can also be quite dark. Some enclosures have transparent windows and even let in some light, but the amount of shadow they cast is already a major problem. There are options that include a lighting kit, and if you’ve already got the enclosure, you can purchase the fixture separately and use metal clamps to attach it to the piping of the structure.
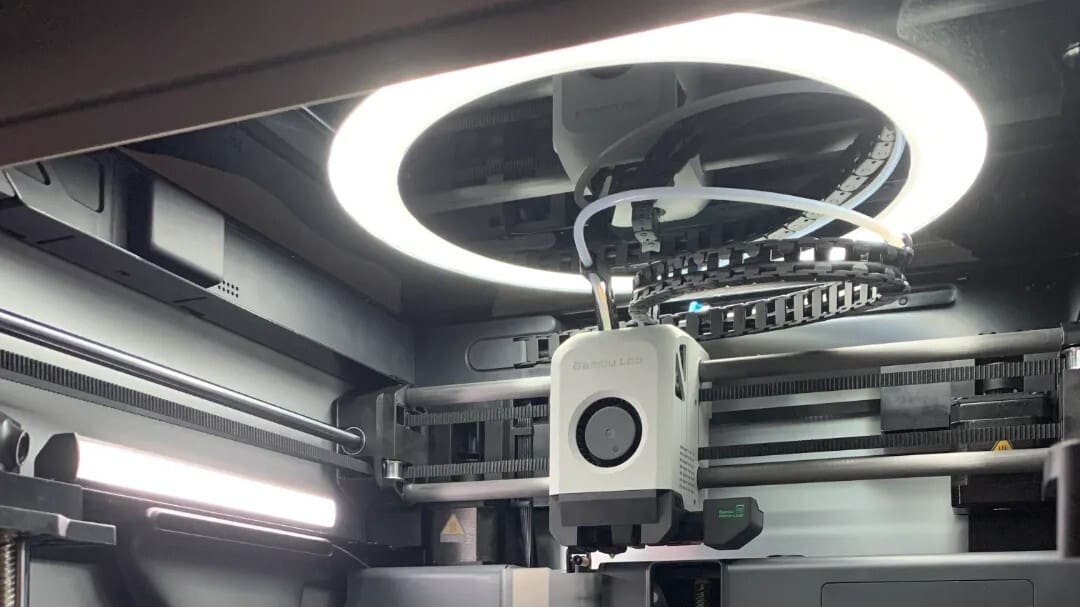
If your enclosure doesn’t have a tubular structure but does have a translucent window, as is the case with some Bambu Lab printers, it’s also possible to simply adapt a budget friendly LED light ring. The design shared by DatumCAD on MakerWorld perfectly demonstrates how simple it can be to add lights without disturbing or removing the AMS module. If your enclosure doesn’t have a tubular structure or translucent windows, your creativity and the particular structure will come into play to assemble something that suits your needs.
For those who have an Ikea Lack setup for their enclosure, it’s possible to try a DIY solution like this remix by Bad Appleseed that uses printed parts and LED strips screwed to the wooden structure.
Peripherals
When it comes to peripheral lighting, there are endless options, ranging from simple desk lamps to DIY 3D printed structures. If you’re more experienced with 3D printing, you’ll know that materials like PLA are more sensitive and can easily warp from heat from the sun or other sources. While LED lighting doesn’t generate as much heat as other sources, consider using more heat-resistant materials like ABS, PETG, or ASA to be on the safer side.
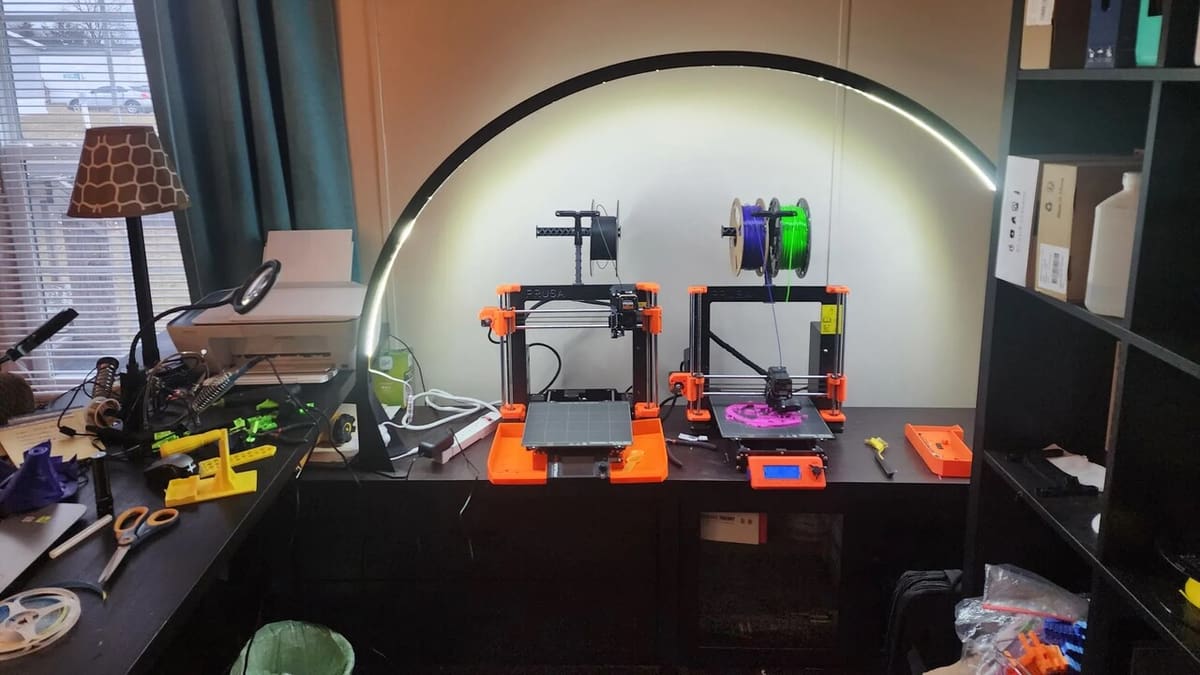
A great example of peripheral lighting for your 3D printer is the famous Arc Light from designer Opossums. Arc lights can be large enough to cover your entire workstation, makerspace, or even two small 3D printers like the one pictured above. A large light source like this can be useful for soldering and tinkering with small components because the light comes from nearly 180 degrees across a wide beam.
Arc lights are typically made with a large LED strip and a bunch of 3D printed parts. While this method is more of a DIY approach, almost 70 makes, more than 20 remixes, and over 105,000 downloads on Thingiverse provide plenty of inspiration to base your build on. You won’t be hard-pressed to find other variations, like Andy D’s on Printables, that aim to use less material without compromising on size, or a smaller half bow for the Ender 3 by orlowjb3.
If you still haven’t found anything that fits your plans, don’t be discouraged! The maker community never stops creating new solutions and competing with the market, so whether in a store or online repository, finding the perfect solution may be closer than you think.
License: The text of "3D Printer Light: Simple Solutions" by All3DP is licensed under a Creative Commons Attribution 4.0 International License.