We have less than a year until the scheduled release of Star Wars: Episode IX. For diehard fans of the iconic space opera, their inner force may be growing impatient as they wait for the new installment to hit the big screen.
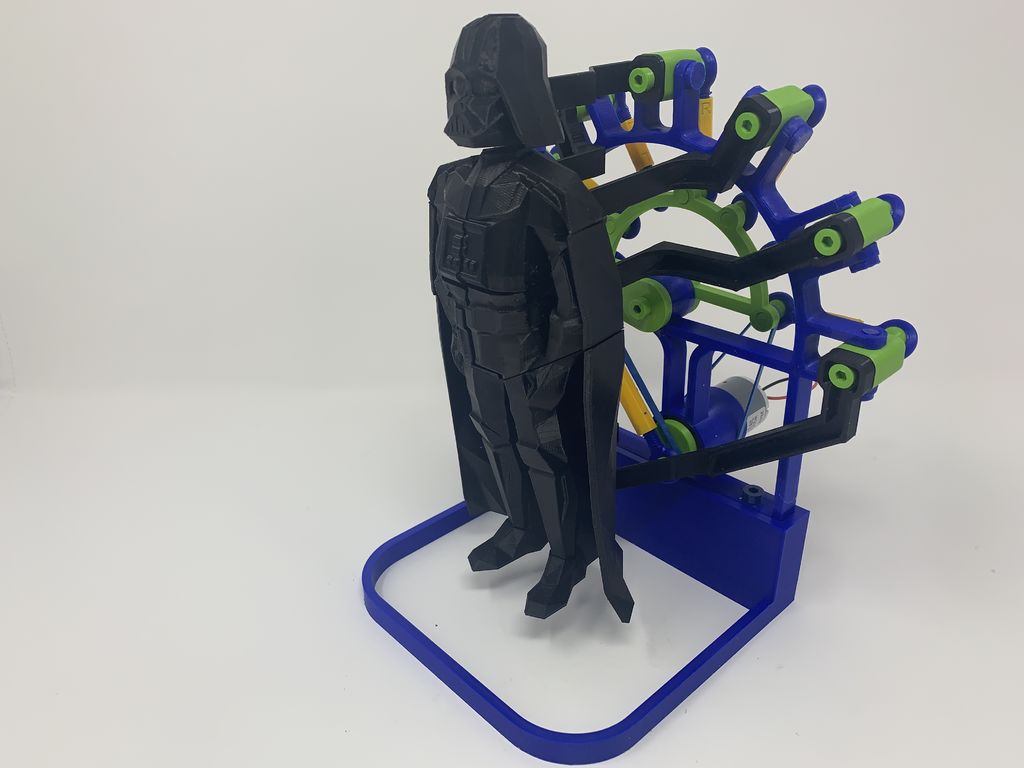
In the meantime, there are many Star Wars-related 3D printing projects that can help the time pass like lightspeed. One of the more interesting examples we’ve recently come across is the Darth Automata by Instructables user gzumwalt. This mechanical device depicts the film’s legendary Sith Lord, using a motor and frame to open up the black suit into multiple parts.
The maker became inspired to conjure up this dark side-themed automaton during a family trip to a museum that had an automata device on display. And so, egged on by his kids and grandchildren, gzumwalt decided to design and 3D print a version of the automata that features Darth Vader instead of a generic centerpiece.
Thankfully, the designer has shared the entire project with the Instructables community. Let’s take a look at what you need to build your own version!
What You Need & How to Build it
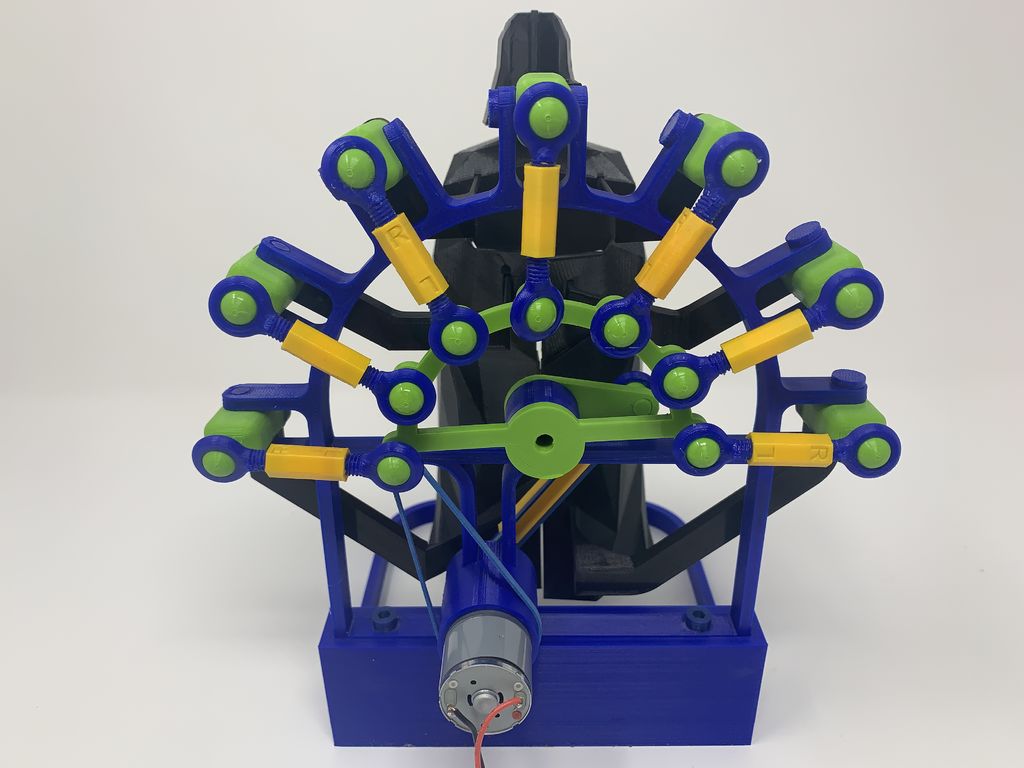
Now, be prepared to 3D print a fair amount of parts to build this 3D printed automata. There are a total of 26 unique 3D printed parts, and the project itself is comprised of 81 components and eight 3D printed turnbuckles.
You can find the STL files, along with a parts list in PDF form, available on the Instructables project page. All of the 3D models are already oriented in the optimal position and should be 3D printed with a .15mm layer height.
In the parts list, you’ll find which STL files require support structures. Since this Darth Vader Automata is made of numerous 3D printed parts, sanding and filing each one might be necessary for the assembly process.
Aside from the 3D printed parts, here are the other components and tools needed to cause a great mechanical disturbance in the force.
- uxcell 30RPM DC 6V 0.1A 25mm Diameter Gear Box Speed Reducer Motor
- 4.5vdc .1ma power adapter
- Tap Handle
- 6mm by 1 Right Hand Tap
- Die Handle
- 6mm by 1 Right Hand Die
- 6mm by 1 Left Hand Die
- 6mm by 1 Left Hand Tap
- Flat jewelers file
- Round jewelers file
- 3.5mm Allen wrench
- Modeling Knife
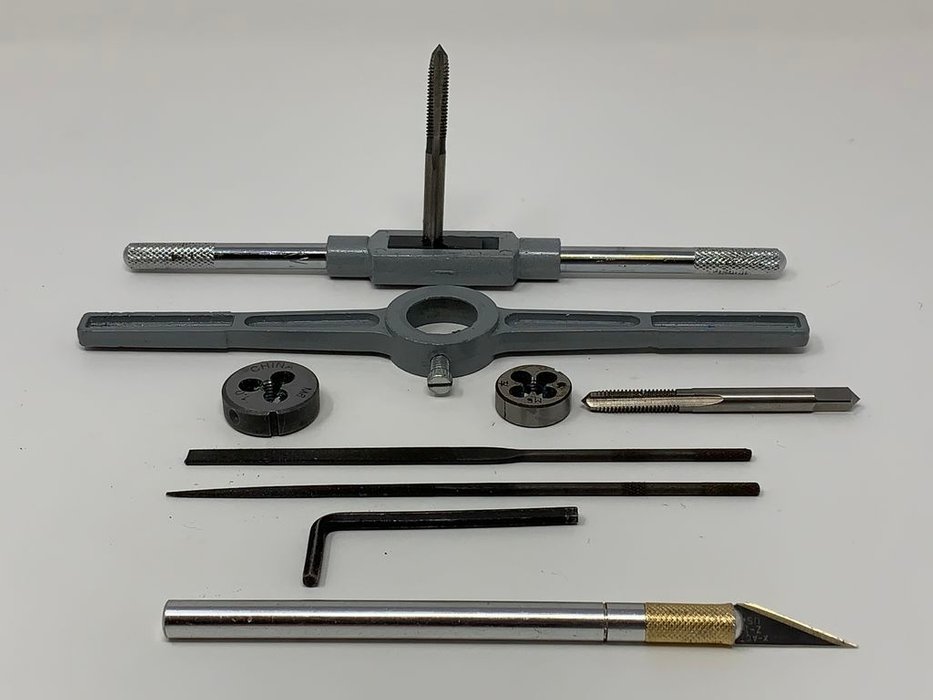
If you need a reference for the listed tools, take a look at the photo above.
After all of the 3D printed parts, non-printed components, and tools are gathered, it’s time to move onto the assembly stage. The maker has separated the instructions into three different sections.
The first focuses on the motor drive, followed by the assembly of the turnbuckles and mounts, and finally how to attach the Darth Vadar to the frame. From what we’ve gathered, it shouldn’t be too difficult putting this project together, but it will require some meticulous post-processing and careful assembly.
You can find the step-by-step instructions on the Instructables page. To catch a glimpse of the final product of the Darth Vader Automata, check out with the demonstrative video in the introduction!
License: The text of " Use the Force to 3D Print a Darth Vader Automata" by All3DP is licensed under a Creative Commons Attribution 4.0 International License.