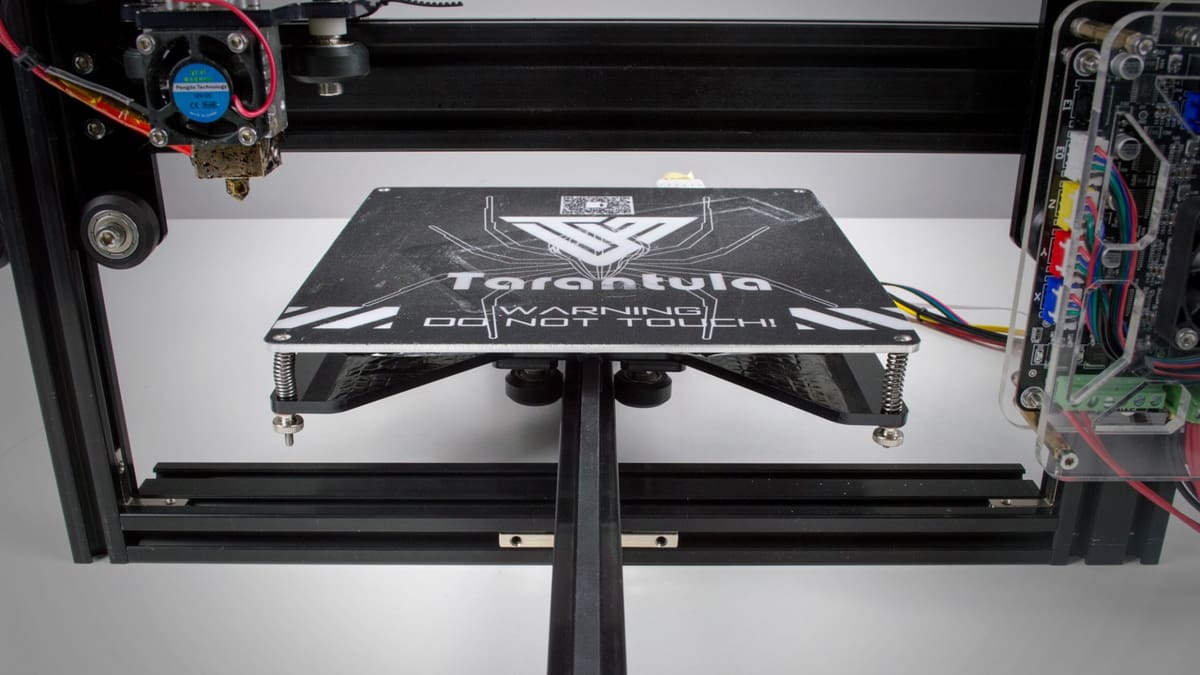
26 Must-Have Tevo Tarantula Upgrades & Mods

Do you want to pimp your Tevo Tarantula 3D printer? Check out the 26 best Tevo Tarantula upgrades, mods, and improvements.
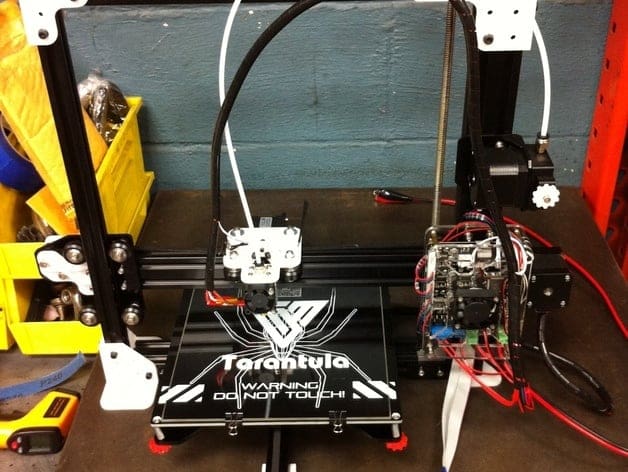
Tevo’s budget 3D printer kit has amassed a huge following, with some finding it the ultimate fixer-upper — an act we felt was entirely necessary for the Tevo Tarantula to operate anywhere near acceptable levels.
Read the review: TEVO Tarantula Review - A 3D Printing Fixer Upper?
With this in mind, we’ve trawled all corners of the web to find the most printed and bought Tevo Tarantula upgrades, accessories and improvements, bundling them into one handy to browse guide.
Below you’ll find two sections: upgrades to buy and upgrades to 3D print. If you’re feeling particular, hit the links to jump to a specific section.
MOSFET
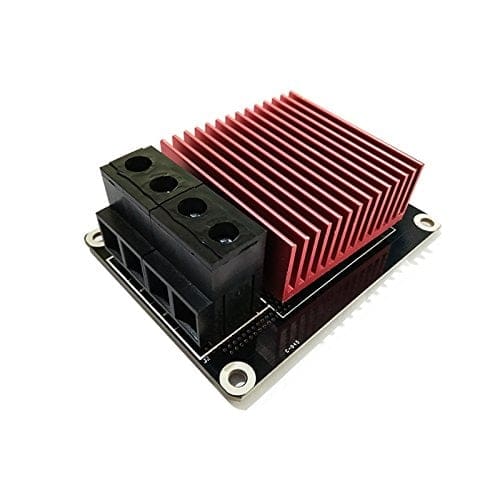
A MOSFET is arguably one of the most important modifications you can make to the stock Tevo Tarantula.
Inexpensive kit 3D printers have something of a reputation for improper electrical engineering behind some of their systems. This most commonly manifests when a heated bed is involved.
A heated bed requires a significant current from the power supply, passing through the main board and on to the heated bed itself. Oftentimes, this load (in addition to that of all the other powered parts of the printer) can be too much for the cheap and insecure connections on the board, resulting in cables running hot and, in the worst case scenario, sparks and melted terminals. Such extreme issues can even cause fires.
But it needn’t be this way. One simple and cheap way to fix this is to install a MOSFET. To give it its long name, the Metal Oxide Semiconductor Field Effect Transistor removes this current from the mainboard, controlling the heat bed’s power directly from its source, the power supply unit (PSU).
Tevo even produces its own separate MOSFET unit.

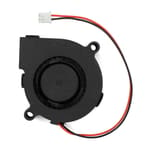
Print Fan
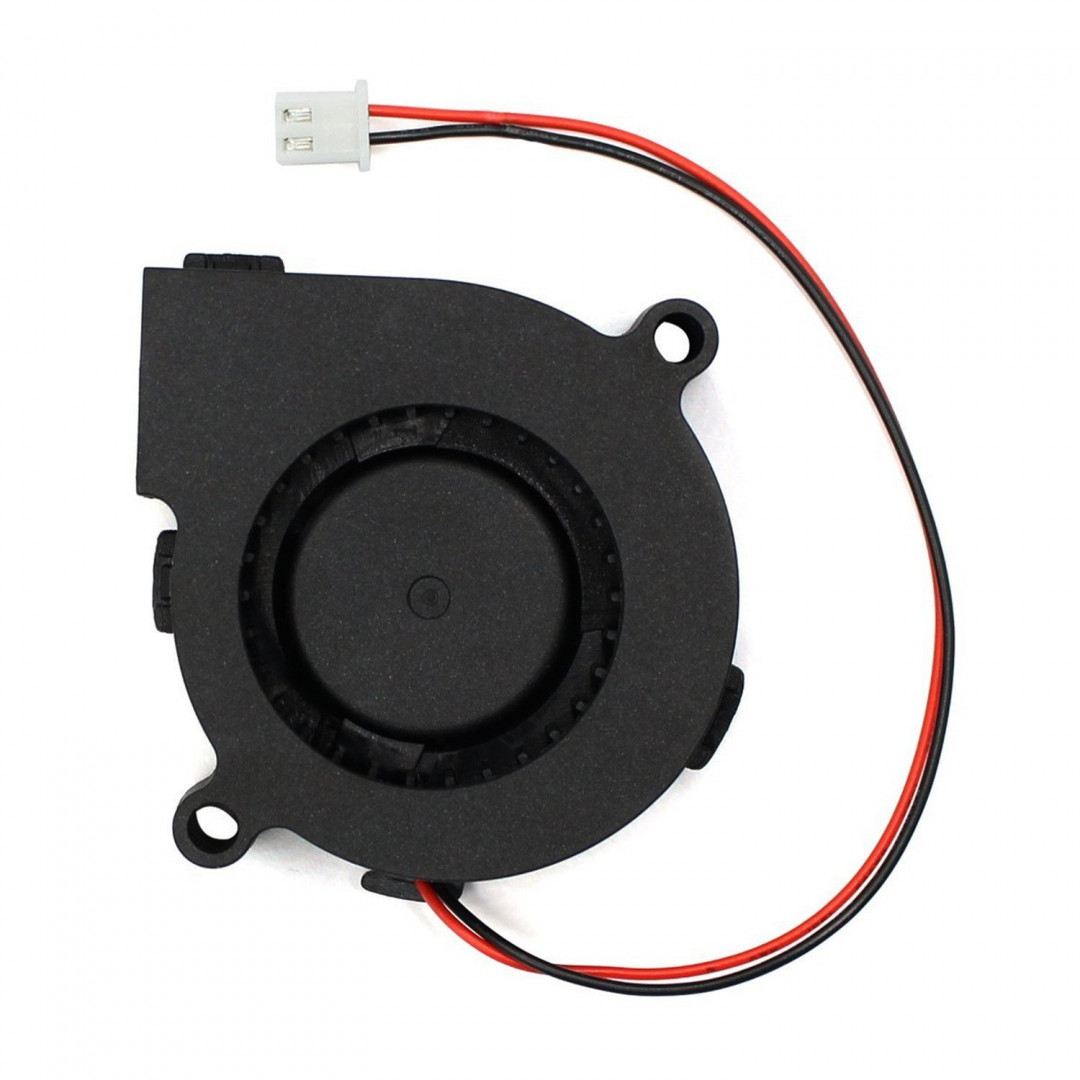
Inexplicably, the Tevo Tarantula ships without a print fan. Allowing you to quickly cool the molten plastic as it leaves your nozzle, a dedicated fan for the printing parts is essential to improve print quality and better manage the trickier temperature sensitive filaments.
Handily, adding one to the Tarantula is a piece of cake. For this you need two parts: the fan itself, and a 3D printed mount. The stock Tevo Tarantula operates at 12v, meaning you will need to source 12v fans.
There are a number of ways and styles you can go about mounting fans to the Tevo Tarantula, so how you do it is down to personal preference.
When looking at fan types, radial blowers are often lauded for their powerful delivery of air flow. It’s also possible to supercharge your print cooling with a dual fan arrangement, taking the fans’ cables and combining them into the mainboard’s port.
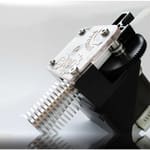
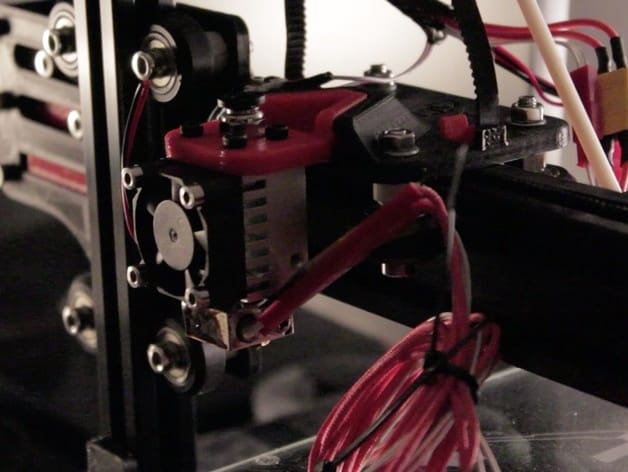
Hot End
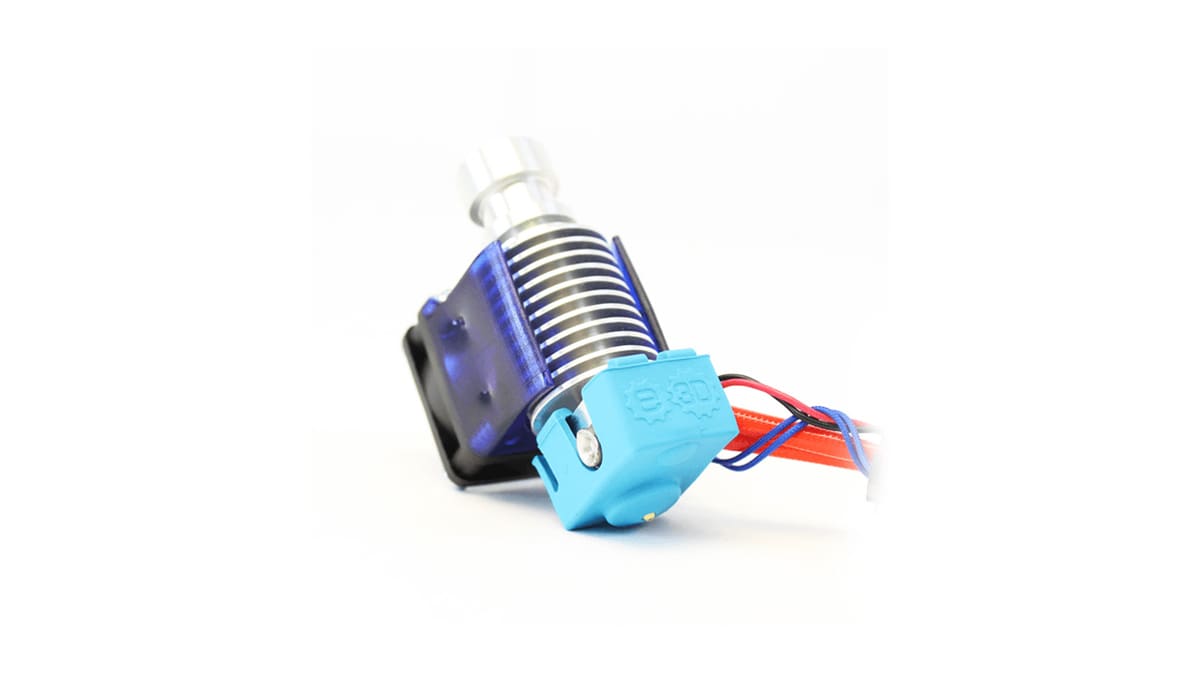
The Tevo Tarantula’s stock hot end is no doubt acceptable for the majority of basic printing purposes. But if you’re interested in improving the printer’s performance, reliability and repeatability, upgrading the hot end should be one of your considerations.
As ever, E3D’s V6 hot end is an evergreen recommendation. Well engineered and boasting superior machined parts, there’s a reason it’s mentioned as frequently as it is. The Tevo Tarantula’s stock X-axis carriage does not accommodate the V6, so you’ll need to print an adapter to have it fit.
Alternatively, replace the stock X-axis carriage completely and add on some of the other upgrades we detail later.
With this said, the Tevo Tarantula is a budget 3D printer kit, which suggests to us that the upgrades should also err on the side of affordability. And while the E3D V6 is a piece of quality engineering, it is by no means a cheap extra (but after all, you get what you pay for).
There are alternatives that don’t necessarily sever the purse strings, but your mileage may vary in terms of the quality of said hot ends and whether they perform as well over time.
Then there’s also the ethical quandary of whether imitation parts are worth supporting at the expense of the original creator…
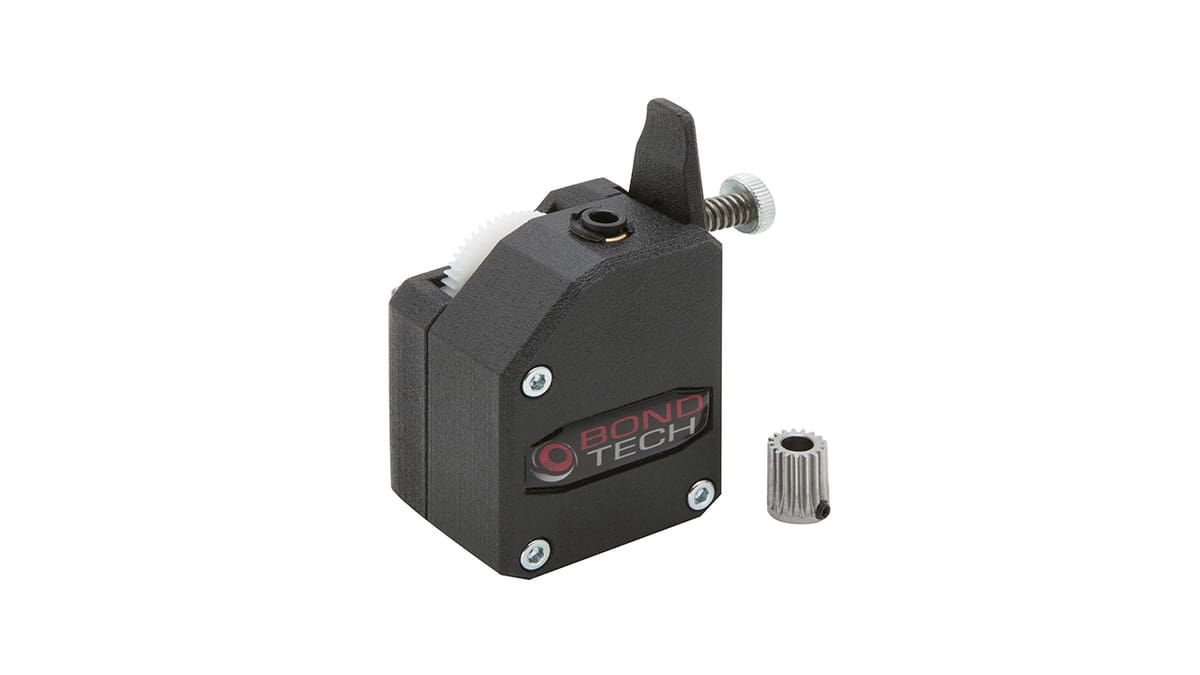
Extruder
Like with the hot end included with the Tevo Tarantula, upgrading to a different extruder can be a good way to improve your print quality. Additionally, you may find greater success printing more exotic filaments that might otherwise get chewed up by the included stock extruder.
Some users of the Tevo Tarantula report a clicking from the extruder, no doubt an issue with the filament path being blocked or insufficient torque coming from the stepper motor. Luckily, there is a simple solution to the latter issue, in that some of the shipped mainboards of the Tevo Tarantula come with the voltage incorrectly configured for the steppers they are driving.
The quick and easy fix? Adjusting the board’s potentiometers. We won’t go into more detail here (YouTubers have that covered), but it might be a solid starting point before trashing the extruder for a new one.
With that said, upgrading specifically to an extruder fit for your intentions will likely outperform the stock Tevo Tarantula extruder in every which way.
We’re going to be boring and recommend the usual suspects once again here. Bondtech (a-ah — you thought we were going to say E3D, didn’t you?) currently produces the bee’s knees of 3D printer extruders, with its dual drive system offering insane grip that will climb the filament before skipping or stripping it.
Of course, such performance comes at a price. As does E3D’s Titan extruder (we couldn’t resist). Lighter, smaller and almost as capable, it also boasts the precision machining that the company is renowned for.
As with hot ends, if you’re looking to save the pennies, clones of the aforementioned extruders are likely your only choice. And again, your mileage with vary as to the quality and longevity of them.
Regardless of which aftermarket extruder you end up with, don’t forget to recalibrate your e-steps to accommodate the new hardware.
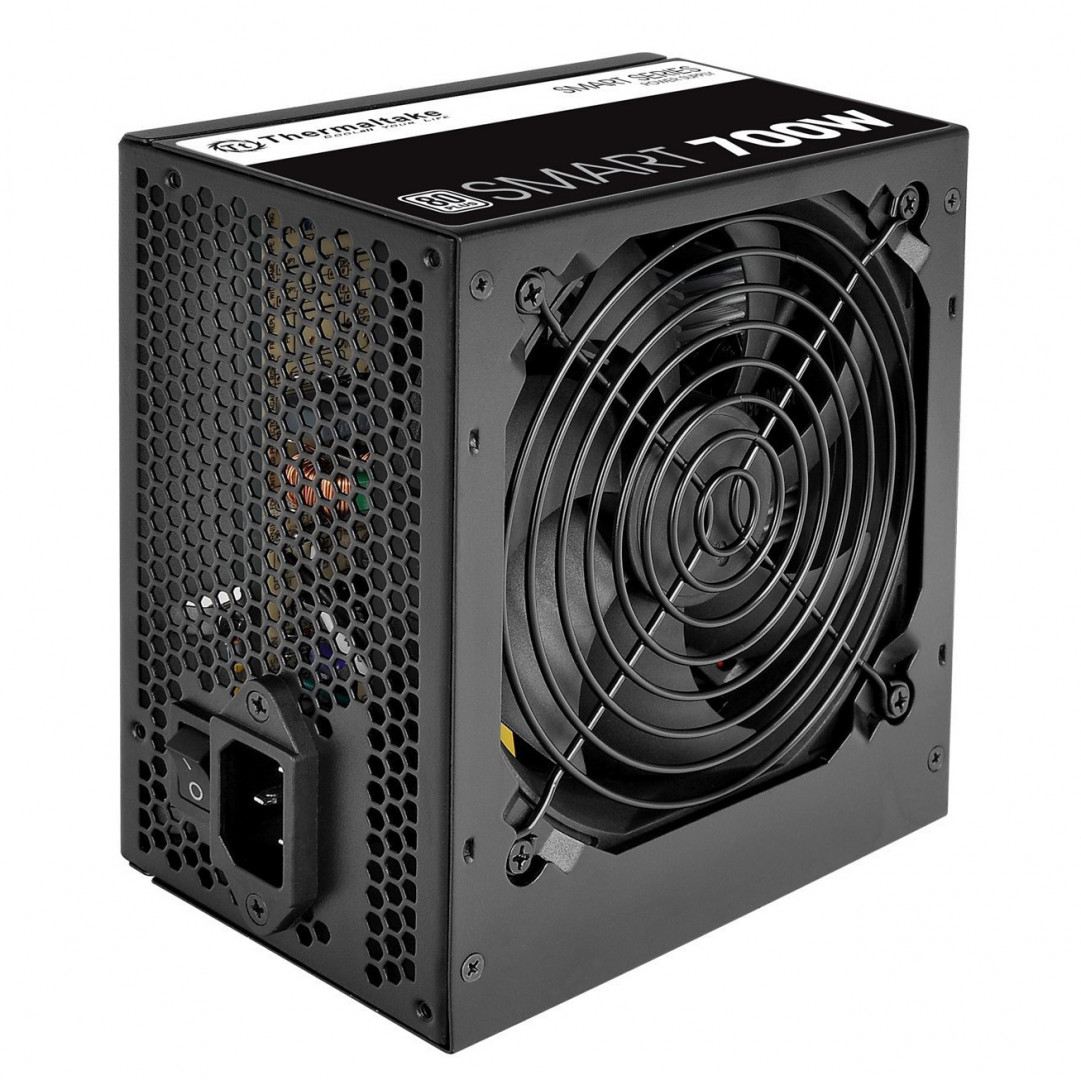
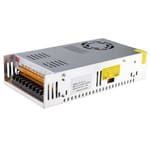
Power Supply Unit (PSU)
There are a couple of considerations for improving the Tevo Tarantula and its power situation.
For one, it appears that not all Tevo Tarantulas are supplied with a power cable that includes ground, despite the PSU’s provision for ground fault. If you find yourself without, the solution is swap out the supplied cable for a 3 core cable as you would get for a computer (or a number of other 3D printers, even). That’s an easy and cheap purchase.
But while you’re at it, why not add the convenience of a fused switch? There are a number of suitable switches on the likes of Amazon. Taking this route of upgrading your PSU and how it you hook it up to the mains may require printing out a whole new control box solution. We detail a few options below in the printable section of this guide.
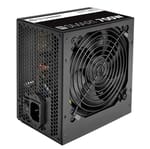
Complicating matters further is the choice to switch to an ATX PSU. The standardized power supply units of computers over the years, ATX PSUs are seen as a safer option due to their published standards and more tightly controlled manufacture (for discerning PC builders).
Likewise, server power supply units are often used as an alternative to the stock Tevo Tarantula PSU, which is itself manufactured for use with LED lighting systems (many kit 3D printers repurpose these LED power supply units).
Such an upgrade may require wiring beyond that required to build the printer in the first place, including stripping wires and possibly even soldering.
The benefits won’t be apparent in your prints themselves, but the upgrade could pay dividends in peace of mind, ease of use and safety. Bear in mind though that for all the safety and convenience they add, ATX PSUs can cost considerably more than LED PSUs.
Dual Z-Axis Motor
Some people take issue with the Tevo Tarantula’s stock arrangement of its sole Z-axis stepper. Inverted and mounted on top of the printer with a piece of acrylic, while functional it seems like something that could be better.
The solution could be as simple as relocating the Z-axis motor to the base of the Tevo Tarantula and bracing it on the frame. Alternatively, one could add an additional Z-axis motor with threaded rod on the opposite side of the print bed.
Driving the X-axis rail from both sides can have the benefit of stabilizing prints in the Z-axis. If driving your Z-axis from both sides is a must, this is perhaps the simplest solution, since it does not require the addition of extra belts and pulley that a single motor-driven dual Z-axis would.
Tevo itself sells a dual Z-axis upgrade kit should you wish to remain on brand with the rest of the printer’s parts, but it’s simple enough to source and print the individual parts you would need.

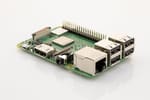
Raspberry Pi/Octoprint
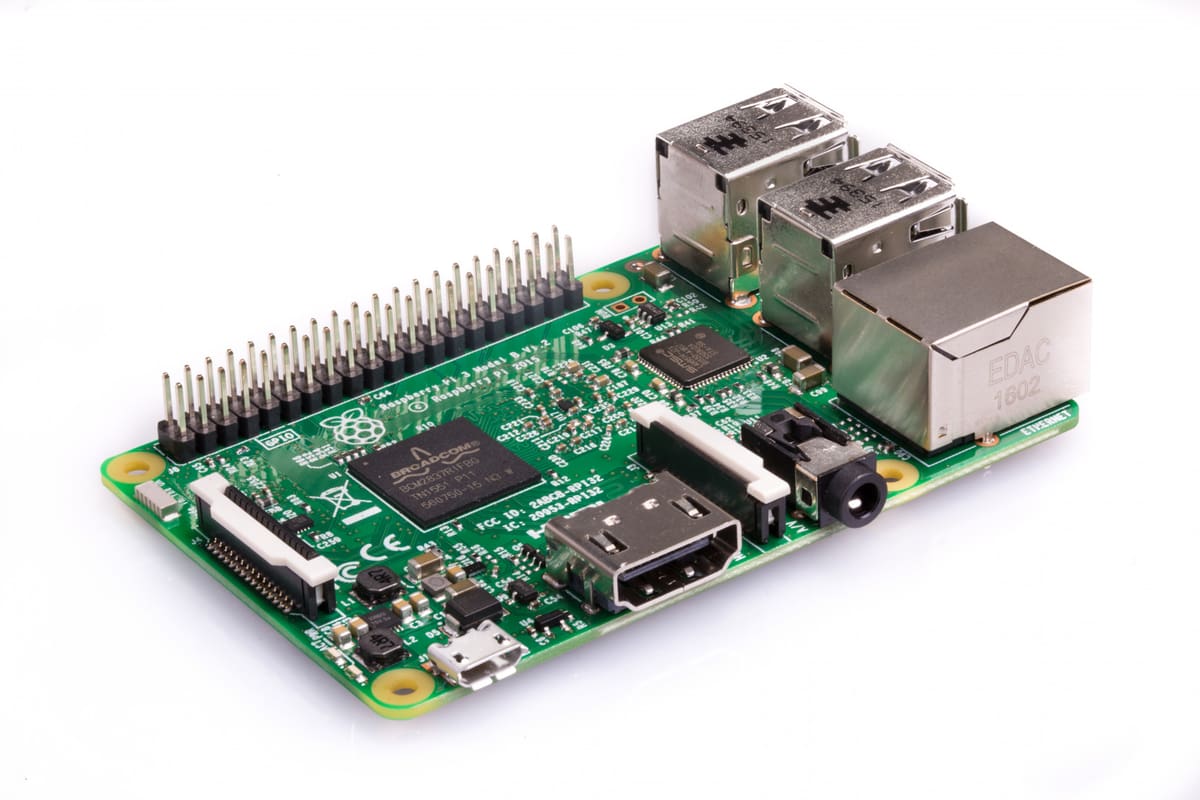
If you’re looking to learn your Tevo Tarantula some smarts, then adding a Raspberry Pi loaded with Octoprint is the way to go.
In addition to giving WiFi connectivity, by adding a RaspPi with Octoprint you’ll be adding web-based monitoring and control of the Tevo Tarantula plus (depending on the Pi used and getting a compatible camera) monitor prints and take advantage of Octoprint’s advanced slicing engine.
The real effort involved here is setting up the Rapberry Pi itself, and while you could 3D print a case dedicated to the board, a neater option that avoids cluttering up the Tevo Tarantula’s already crowded frame is integrating it into an all-in-one PSU/control box. We list a couple below in the printables section that accommodate a Rapberry Pi/Octoprint setup.
Auto Bed Level Sensor

A major gripe with the Tevo Tarantula is its easily unleveled print bed. Running along one central aluminum extrusion, it takes little force when removing a stubborn print to force the need to relevel before printing again.
There are two ways to go about remedying this: rebuild the Y-axis, Y-axis carriage and frame to run on dual rails instead (thus stabilizing the print bed), or say to heck with it all and install an automatic bed level probe.
We know which we’d prefer of the two, since it completely removes the tedium of bed leveling: the probe.
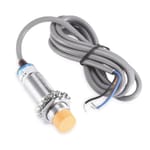
Currently, there are a few different technologies behind the aftermarket probes that’ll work with the Tevo Tarantula. These probes operate in a variety of ways, with some suited to specific print bed materials more than others.
The addition of any will require some manipulation of your Tevo Tarantula’s stock Marlin firmware and replacing the Z-axis endstop to enable them. All require 3D printing a mount of some kind to be able to add them to your print head.
Inductive: A non-contact sensor that detects changes in magnetic fields to tell its proximity to metal objects. In this case, the metal of your Tevo Tarantula print bed.
There’s some question as to whether such a probe retains its usefulness if you’ve swapped out your generic Tevo print base for a sheet of glass. The probe should still be able to pick up the metal beneath depending on the thickness of the glass, but only a perfectly flat sheet of glass atop perfectly a flat metal bed base would work without further modification (variances in the metal are picked up by the probe, but not translated to the actual print surface – the glass).
Some point out the use of thick aluminum foil applied to the glass to remedy this and make inductive sensors viable for glass.

Capacitive: Unlike inductive sensors that rely solely on metallic materials to trigger, capacitive sensors can detect any conductive material plus a litany of other non-conductive materials. A capacitive sensor measures the capacitance (hence the name) between two conductive objects — in this case, the print bed and itself. The capacitance is also affected by non-conductive materials between itself and a conductive material.
Microswitch: This method for adding auto bed-leveling on the Tevo Tarantula requires a little ingenuity to get working. Repurposing the spare endstop microswitch included in the Tevo Tarantula kit, you can level it at nozzle height and use its trigger to gather the bed leveling data. Only problem is is that the switch cannot retract itself out of the way for printing to commence. We’ve seen solutions include rigging an arm mounted on a servo to swing the switch in place, and a rack gear.
Technically also a microswitch, antclabs’ BLTouch is a hugely popular auto bed-leveling upgrade. Utilizing a self-retracting push pin, the BLTouch remains fixed alongside the hot end, with the push pin jumping up into the BLTouch’s housing upon contact with the print bed.

Optical: There are also sensors that work by projecting infrared light on to the print bed from two adjacent diodes. Calibrated for the light from these diodes meet at a certain distance from the unit itself, only when these sensors detect the light aligning on your print bed is the switch triggered. While operable on glass beds, this introduces imprecision that perhaps makes them not worthwhile.
While all of the above can be somewhat mind boggling, introducing all these sensing technologies to 3D printing, in practise it shouldn’t present too much effort to add one to your Tevo Tarantula. We advice researching the probes that have worked well for others and their specific print bed arrangements before pulling the trigger on buying one.
Glass Print Bed
Everyone has their preference for getting prints to stick, but the one constant found across all forums far and wide is the prowess of a perfectly flat sheet of glass. Borosilicate, to be specific, although others have found equal success with cheap alternatives like mirrors from IKEA.
In addition to a glass-like flatness and sheen to your bottom layers, prints stick well to glass with just a light spritz of hairspray, and given their add-on nature, can just be unclipped for print removal and cleaning. Super handy.
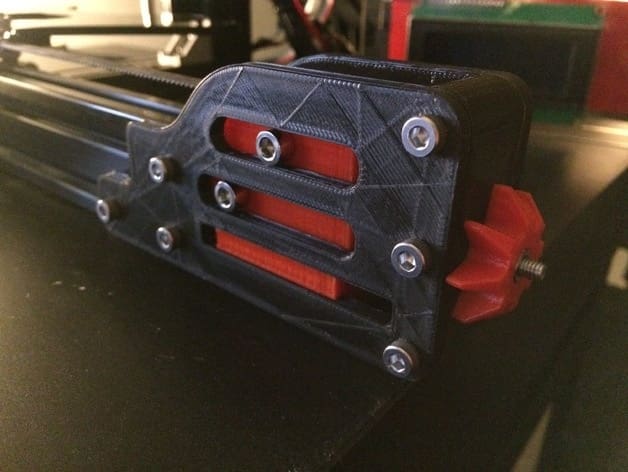
Adjustable Belt Tensioner

What is this Tevo Tarantula upgrade? We’ve all suffered from a loose belt from time to time, and this elegantly simple belt tensioner should put paid to the problem for good.
Why should I tension my belts you ask? Loose belts can cause all kinds of print issues, from benerally sloppy surface artefacts like banding and drastic innaccuracy in your prints (think lopsided circles).
This printable Tevo Tarantula upgrade needs only an M3 screw, with its tight fit holding everything together and allowing you to adjust the screw to tighten the belt.
Who made this? supasorn
Get this Tevo Tarantula upgrade: Thingiverse
Belt Tensioner Pulley for Tevo Tarantula
What is this Tevo Tarantula upgrade? Alternatively, if you like a more tactile feel to your belt tightening, this belt tensioner affixes to the pulley end of the belt, adding an easily adjustable printed thumbscrew.
Unlike the tensioner above, this modification requires that you disassemble your Tevo Tarantula somewhat and source a number of M4 nuts, screws and washers. The benefits of an always taut belt are probably worth the effort.
Who made this? Banholm
Get this Tevo Tarantula upgrade: Thingiverse
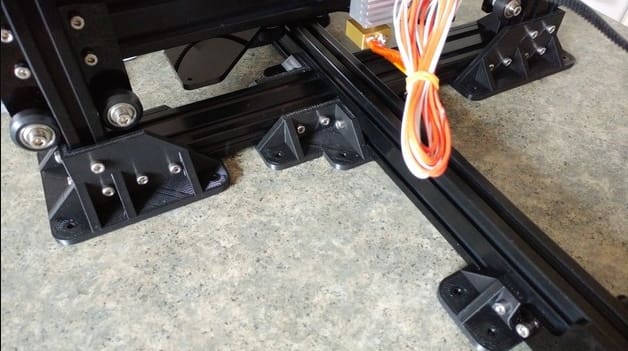
Tevo Tarantula Brackets
What is this Tevo Tarantula upgrade? A core criticism of the Tevo Tarantula is how easily the frame can loosen and become unstable. As is ever the case, the community is on hand with simple and effective fixes for the issue.
This design by Thingiverse user thingirob tackles all of the frame junctures, plus a few extras like pulley stiffeners and Z-axis rod mount. In the designer’s words, “Just some brackets to firm up the little spider“.
Who made this? Thingirob
Get this Tevo Tarantula upgrade: Thingiverse
Tevo Tarantula HD Brackets
What is this Tevo Tarantula upgrade? If you’re wanting to go overboard and physically nail down your Tevo Tarantula, then this is perhaps the set of printable brackets for you. With a wider spread of points to screw the printer down, we’re sure it’ll give peace of mind for those overly conscious about knocking their machine while it prints.
Slotting over the aluminum extrusions at their various junctures and ends, these designs are also easy to print.
Who made this? Rogerquin
Get this Tevo Tarantula upgrade: Thingiverse
Oldham Coupler for Tevo Tarantula
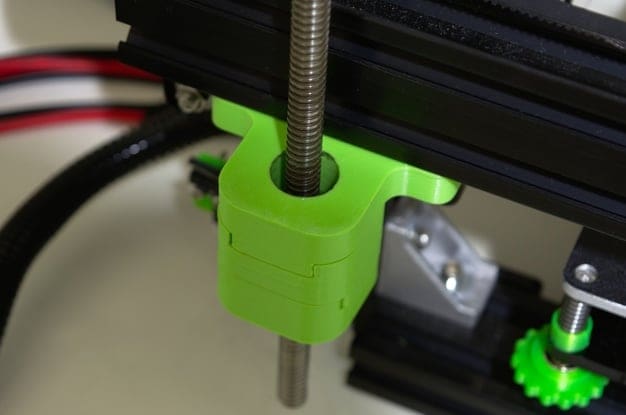
What is this Tevo Tarantula upgrade? Few 3D printable parts for your Tevo Tarantula will have as much impact on print quality as this.
Originally designed by Doron Shelev and improved for wider distribution on Thingiverse by a number of dedicated Tevo Tarantula modders, this Oldham Coupler eliminates Z-banding in your prints. It does this by compensating for wobbles in the X- and Y-axis between your leadscrew (or leadscrews, if you’ve gone for a dual Z-axis upgrade) and the X-axis rail it is driving.
The Oldham Coupler has the added benefit of disengaging the leadscrew from the X-axis rail should it crash into the print bed.
Who made this? Elzariant
Get this Tevo Tarantula upgrade: Thingiverse
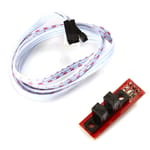
Tevo Tarantula Filament Runout Sensor Enclosure
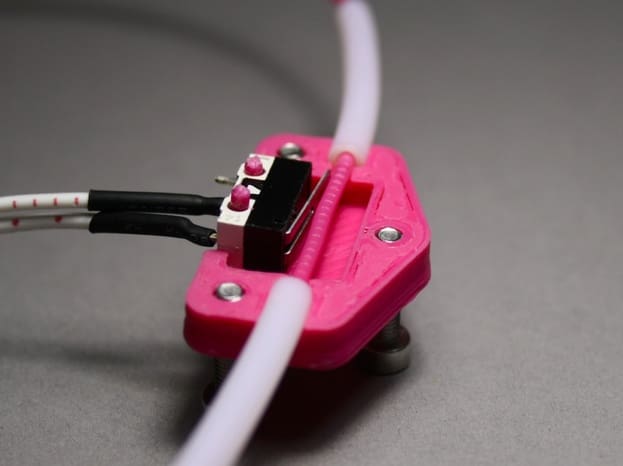
What is this Tevo Tarantula upgrade? It’s possible to give your Tevo Tarantula a little smarts by way of a homemade filament runout sensor. Repurposing the spare endstop microswitch that comes with your Tevo Tarantula, as far as building goes all you need to do is print a housing such as the one we highlight here and source some 12mm M3 screws to hold it all together.
The microswitch routes to the Z+ port on the mainboard. Thingiverse user stylesuxx, designer of this upgrade, points to the Marlin configuration here for more detail, but gives a rundown on the thing’s page itself.
Who made this? Stylesuxx
Get this Tevo Tarantula upgrade: Thingiverse
Dual Blower/Radial Fan Duct Mount (Tevo Tarantula)
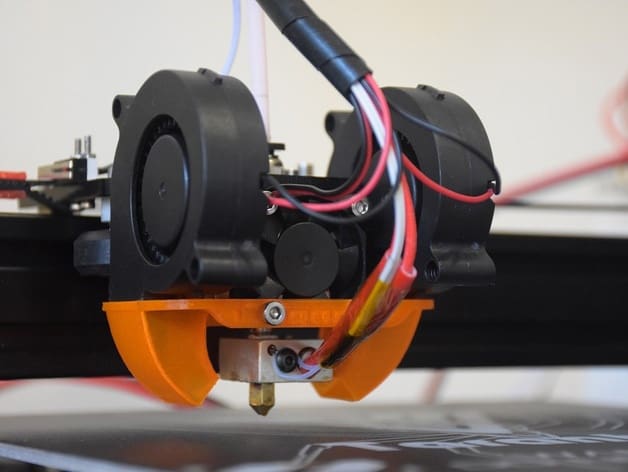
What is this Tevo Tarantula upgrade? As we explained previously, the Tevo Tarantula does not come with a print cooling fan out of the box, necessitating the most of us who would like one to add our own. Radial fans are preferred for their powerful directed airflow.
This Tevo Tarantula upgrade printable accommodates two radial fans, one mounted on each side of the hot end. Directing both airflows through fang-shaped channels to surround parts as they are printed, this should provide more than adequate cooling for your parts.
Who made this? Supasorn
Get this Tevo Tarantula upgrade: Thingiverse
LPA Fanduct v5
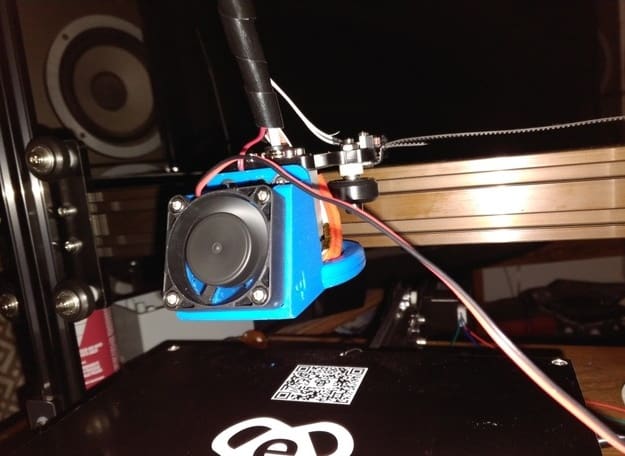
What is this Tevo Tarantula upgrade? For those looking for a print cooling solution that doesn’t take up much space, Thingiverse user Elzariant’s LPA Fanduct v5 should fit the bill. Available in a variety of of mount styles for the stock Tevo Tarantula carriage, E3D’s V6 hotends plus different auto bed-leveling sensors.
Elzariant also has a newer version (v6) of this fan duct, designed to accommodate Chimera-style hot ends.
Who made this? Elzariant
Get this Tevo Tarantula upgrade: Thingiverse
Magnetic X Carriage
What is this Tevo Tarantula upgrade? This printable upgrade is not specific to the Tevo Tarantula, but will work with the Tarantula’s aluminum rails and looks pretty rad all the same. Designed to allow for agile changes to the printer’s hot end without necessarily having to get up close with a hex wrench, the magnetic carriage allows the hot end to be plucked right off the rail, no fuss. A boon for busy printers experimenting with different nozzles and extrusion setups.
Such a modification requires precision, meaning that the tolerances for it to work are tight. It could be a chicken-egg situation if your Tevo Tarantula is not quite at the point of being precision perfect yet. Chalk this one up as a down-the-road upgrade.
In addition to your typical M nuts and screws, you will need neodymium magnets.
Who made this? Banholm
Get this Tevo Tarantula upgrade: Thingiverse
Modular Carriage (4020 rails)

What is this Tevo Tarantula upgrade? If you’re less concerned about being able to snap hot ends in place with magnets, this modular carriage system uses is more or less the exact same thing.
Holding the breakaway hot end piece sin place with nuts and screws, the result is same, if a little slower.
Distinguishing it however, is the system for tightening up the V-wheels against the aluminum extrusion, eschewing eccentric nuts for a screw to tension the top wheel against the rail. Simple and accessible, versus the awkward eccentrics of the stock Tevo Tarantula carriage.
Who made this? _MSA_
Get this Tevo Tarantula upgrade: Thingiverse
Tevo Tarantula Extended Case
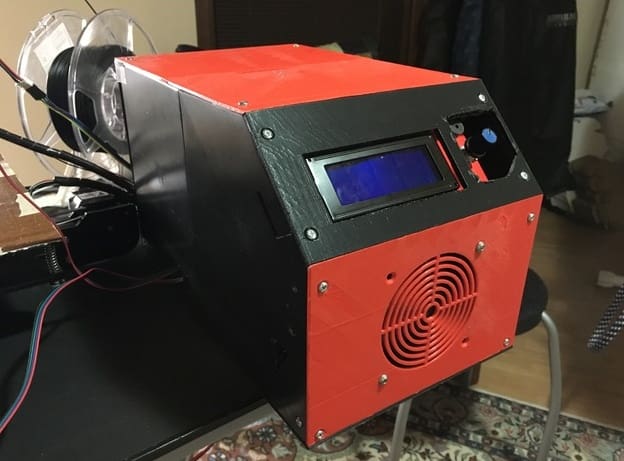
What is this Tevo Tarantula upgrade? An all-in-one case to mount the Tevo Tarantula mainboard, PSU and all manned of other goodies, should you happen to have augmented your printer with the likes of a MOSFET or Raspberry Pi.
Comprising several parts (and available in many size variations, depending on your particular setup) that you must assemble, the result is comprehensive and tidy box that de-clutters the Tevo Tarantula into a neat looking machine. The only downside is it increases the overall footprint of the printer.
Who made this? Logansgraphicd
Get this Tevo Tarantula upgrade: Thingiverse
Tevo Tarantula Electronics Enclosure Case
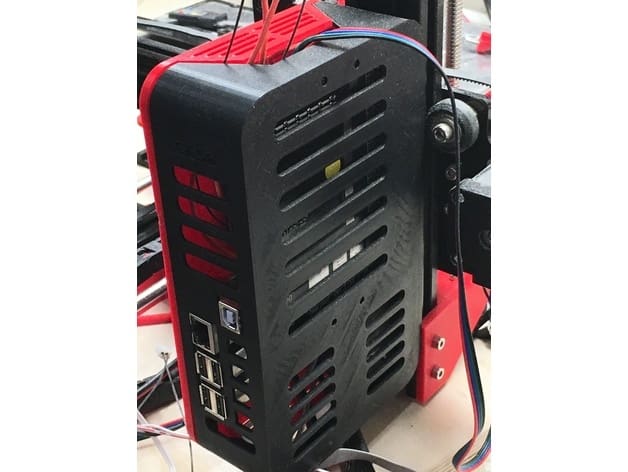
What is this Tevo Tarantula upgrade? A remix of the original Tevo Tarantula Electronics Enclosure by Aynareth, this tidy all-in-one case mounts to the frame of the Tevo Tarantula and makes for a neat and unassuming electronics housing. Best of all though, is the provision inside for a Raspberry Pi, including USB ports and Ethernet, should you desire such connectivity.
Who made this? Stage_Monkey
Get this Tevo Tarantula upgrade: Thingiverse
Tevo Tarantula Bed Support
What is this Tevo Tarantula upgrade? The stock Tevo Tarantula print bed carriage is made from acrylic, a material that’s widely considered to be pretty poor as a frame for any machine that involves lots of vibrations and moving parts (so… 3D printing). It’s one part of the Tevo Tarantula some see as fodder for replacement.
This design by RobFlip over on Thingiverse takes a modular approach, printing in five pieces to assemble into a rigid and sturdy print bed carriage alternative. Best of all, customizable files are provided for it, meaning should you wish to add a larger bed to the machine, you can print a larger carriage to accommodate it.
It’s worth noting that if you plan on high bed temperatures for extended periods of time, some of that heat will transfer to the carriage.
You should consider printing it from a material that fares well with higher temperatures (than you typical PLA, for example). PETG would be a safe bet.
If you wanted to go further and upgrade your Tevo Tarantula Y-axis to a dual rod supported version, RobFlip also has you covered with this evolution.
Who made this? RobFlip
Get this Tevo Tarantula upgrade: Thingiverse
Tevo Tarantula Display Clamps/LCD Bracket
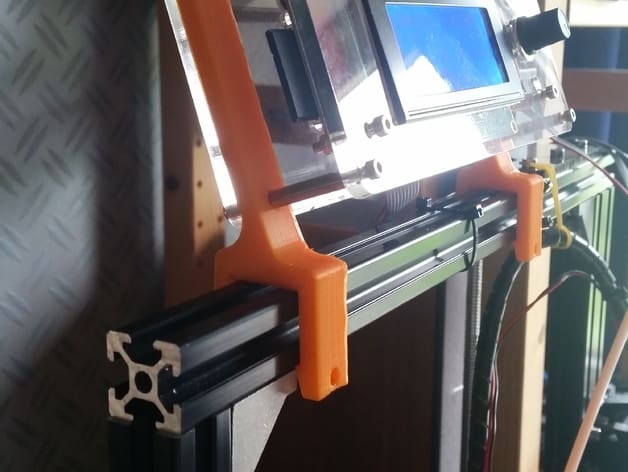
What is this Tevo Tarantula upgrade? Unfailingly simple, this display clamp does just that: clamp the display. Print two out and mount them on the inside of the backplate of the stock Tevo Tarantula LCD assembly. Then clamp on the aluminum extrusion running along the top of the printer and you’re set.
Who made this? BOERE
Get this Tevo Tarantula upgrade: Thingiverse
Tevo Tarantula Adjustable Z End Stop
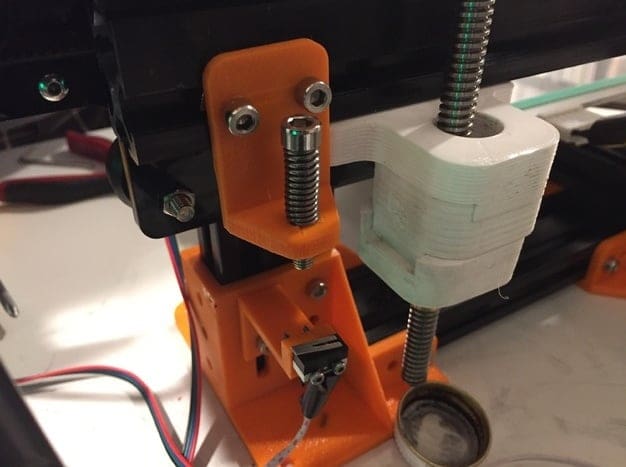
What is this Tevo Tarantula upgrade? A quick and easy mod for the Tevo Tarantula that allows for on-the-fly adjustment of the Z-axis endstop without having to completely re-level the bed.
It works by having a screw under tension attached to the Z-axis rail. Directly beneath this and level with the print bed is the mechanical endstop. By adjusting the screw higher of lower, you trigger the endstop earlier or later — gaining a fine level of control over the nozzle height over the print bed.
Who made this? thingirob
Get this Tevo Tarantula upgrade: Thingiverse
Mega Anti Tangle Spool Holder
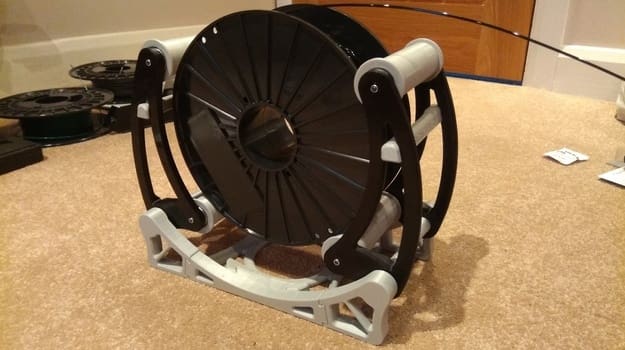
What is this Tevo Tarantula upgrade? Not a Tevo Tarantula mod per se, but something useful for most 3D printer owners all the same.
Thingiverse user graham01 has designed the holy grail of printer accessories — the anti-tangle spool holder. Held upright by the weight of the spool inserted into it, the Mega Anti Tangle Spool Holder features four rollers that prevent wild loops of filament from creating knots.
Who made this? graham01
Get this Tevo Tarantula upgrade: Thingiverse
Tevo Tarantula Power Supply Mount

What is this Tevo Tarantula upgrade? If you’ve made it this far into the list and don’t plan on creating an all-in-one PSU control box, then this PSU frame mount might be of interest.
Taking the stock Tevo Tarantula PSU and standing it on its end, this printable mod allows you to mount the PSU to the printer’s frame (adding some steadying mass in the process) and integrates a fused power switch for safety.
In addition to stowing the open-air terminals of the PSU out of reach, the power switch is a nice quality of life upgrade.
Who made this? Stage_Monkey
Get this Tevo Tarantula upgrade: Thingiverse
If this list has tickled that itch, but left you hankering for more Tevo Tarantula mods and upgrades, check out the active communities over on Facebook and Reddit, and for general printer modification and building, the RepRap wiki and forum — all valuable sources of information.
License: The text of "26 Must-Have Tevo Tarantula Upgrades & Mods" by All3DP is licensed under a Creative Commons Attribution 4.0 International License.
CERTAIN CONTENT THAT APPEARS ON THIS SITE COMES FROM AMAZON. THIS CONTENT IS PROVIDED ‘AS IS’ AND IS SUBJECT TO CHANGE OR REMOVAL AT ANY TIME.