Ortur Laser Master 2 Review: Big Laser, Little Power
Rating

Ortur’s Laser Master 2 is a simple and affordable laser engraver and cutter that won’t blow a large hole in your bank balance. Or the planet. Check out our review.
Lasers are cool, aren’t they? Even today, there’s still something just a little bit Sci-Fi about them, and it’s easy to think of them as being a technology that’s confined to a lab or factory or mounted to some sort of sexy space gun. But, that’s simply not the case.
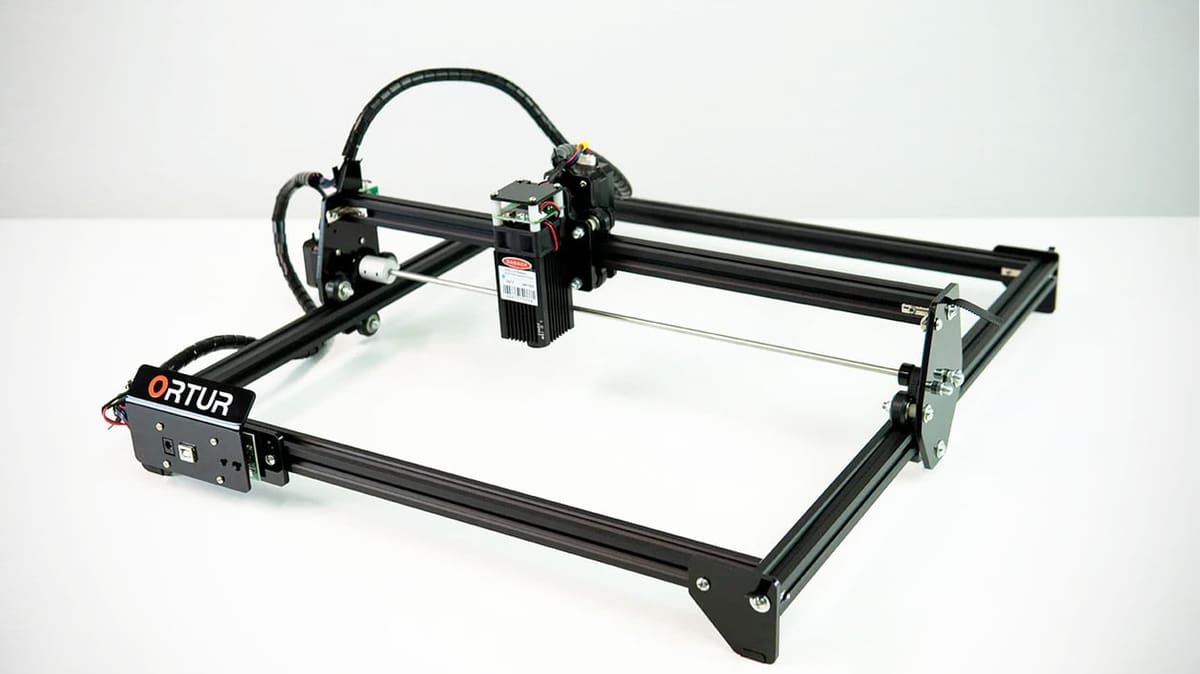
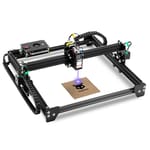
Take the Ortur Laser Master 2, for example. A simple and obtainable laser cutter and engraver, albeit one with the benefit of bigness. With its 400 x 430 mm work area, it houses more than enough room for your creativity to unfold and truly large projects to be realized.
Available in three different power options, 7 W, 15 W, or 20 W, and starting with a sub-$200 price tag (and topping out around $400 for the 20 W module), it’s easy to see why it’s become a blip on the radar of all kinds of makers.
We’ve reviewed the 15 W version, which provides a good middle-ground between capability and price, but we also touch on the other versions, their benefits, and which one you should go for depending on your needs.
As one of the more popular budget laser engravers currently available, we focused on the task of finding out if it’s any good. Read on to see how the Ortur got on.
Verdict
Pros
- Exceptional value
- Massive work area
- Beginner-friendly assembly
Cons
- Misleading wattage info
- Limited cutting ability
- Trial and error approach
The Ortur Laser Master 2 can be a powerful addition to your workbench once you get the settings right.
This large budget laser engraver has become one of the most popular DIY hobbyist laser kits for ambitious tinkerers and laser lovers worldwide. The base frame can be ordered either with a 7 W, 10 W, or 20 W diode laser head.
For a budget laser engraver, 400 x 430 mm is a pretty large work area that allows for plenty of possibilities, but the Ortur is held back by the relatively low laser power output, regardless of which version you go for. The actual output is only around 5 W (for the 15 W and 20 W version and only 1.5 W for the 7 W laser head), which can be limiting if cutting is your number one agenda.
Engraving and etching is where the Laser Master 2 shines, but you will have to resort to a trial and error approach until you find the right setting for each material. However, with its low price and large work area, the Ortur Laser Master 2 makes laser engraving more accessible, even if it misses key features that accompany higher-priced machines, such as an air-filtration, an enclosure, and remote control.

The Tech
Who hasn’t been fascinated by lasers since they saw the many Pew Pew’s in Star Wars as a child? While we are still a few parsecs away from holstering laser blasters or destroying planets, lasers have become quite popular in recent years amongst tinkerers and makers.
We are talking about laser cutters and engravers, of course. In terms of this technology, there are generally three types of laser in use: diode, CO2, and fiber.
Diode laser
The Ortur Laser Maser 2 is a diode laser, which means the laser beam is generated by converting electrical energy into photons (light) via a laser diode. It’s similar to an LED, just wayyyy more focused. This is the most commonly used tech amongst budget laser engravers these days for a number of reasons: It is by far the cheapest, has long durability, compact size, is easy to ship, and is easily mountable on many different setups, making it ideal for DIY or 3-in-1 3D printer machines.

Just like its fiber or CO2 relatives, diode lasers are classified according to wattage, with the rule of thumb being more wattage equals more cutting power. However, the wattage that manufacturers of diode laser machines often advertise is misleading. Take the Ortur Laser Master 2, for example. It’s available with a 7, 15, or 20 W option. Unbeknownst to most, though, this actually refers only to the power going into the laser head, not the actual output.
Generating photons also creates a lot of excess heat, which translates as power loss. Long story short, the actual output of a diode laser is but a fraction of the advertised power. The maximum physical output of a single laser diode is roughly 10 W, which means any diode laser, no matter what it is advertised as, will have less than 10 W.
For clarity, CO2 lasers do actually engrave with the acclaimed wattage power. If you take a deeper look at the manufacturer’s website, you will find that the output for the Laser Master 2 is actually ~1.5 W, 4.5 W, and 5.5 W depending on the version.

This is probably a lot less than you would have expected, but is important to know when looking at purchasing one of these machines. The power is enough to do some fine engraving and even cutting if you set it up correctly, though. We’ll get more into its capabilities below.
Besides the power output, it is pixel accuracy that constitutes a capable laser engraver. With a default accuracy of 300 dpi (~0.81 um), the Ortur can cut and engrave with high accuracy; it is just up to you to manually focus the diode.
The Frame
While you might feel limited by the wattage power on the Ortur, you most certainly will not harbor the same feelings in regards to its workspace. With a 400 x 430 mm engraving area, it gives you plenty of room to work with, which isn’t too common among budget laser engravers, though some rivals do offer a similar workspace.
The engraving area is set within the aluminum frame, which consists of 20 x 20 mm aluminum rails topped with a bit of acrylic for its feet, mounts, and control panel. To align the frame, four sturdy metal brackets are placed in each corner. The gantry, also consisting of a 20 x 20 mm extrusion, moves up and down the Y-axis via a stepper motor and timing belts. As with every belt-driven gantry system, proper tightening of the belts is key to yielding good results.

To counter any possible asynchronous movement of the belts and carriages, the Ortur comes with a metal connecting rod for both bearings, providing a synchronized Y-axis shaft and keeping it aligned even at high speed.
If you come from 3D printing or CNC carving, you might look at Ortur’s setup critically in regards to rigidity and robustness, but as there is no material drag, the only stress on the frame is the actual motion of the gantry. As long as you have it set up on a solid surface, this little square holds up fine even at top speeds of 3000 mm/min. if you do have a 3D printer at hand, you could also print some screw-down feet for the Laser Master 2 for that extra bit of stability.
The Electronics
It’s not only the Ortur’s skeleton that is cable of withstanding high speeds. The Laser Master 2 also packs enough brainpower to do so.
Its brain comes in the form of an inbuilt 32-bit STM32 mainboard capable of 921600 Baud (the rate at which data is transferred in bits per second). This allows it to operate with fine accuracy even at dizzying speeds, and the controller also comes with a bunch of inbuilt safety technology to help reduce the risk of accidents.
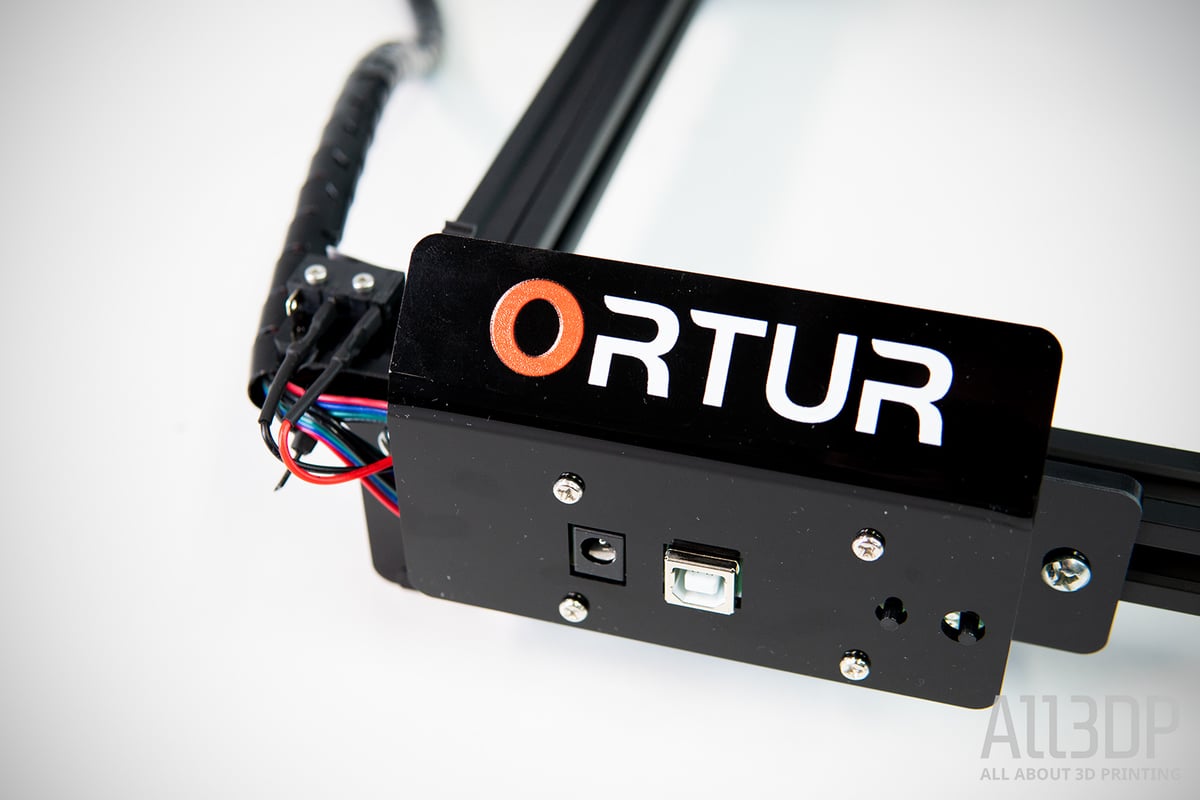
For a start, the board houses a built-in G-sensor, which will automatically shut down the laser if the machine is moved, knocked over, or interfered with it in any way. The Ortur will also automatically shut down if inactive for too long, or if the USB connection cable should be unplugged.
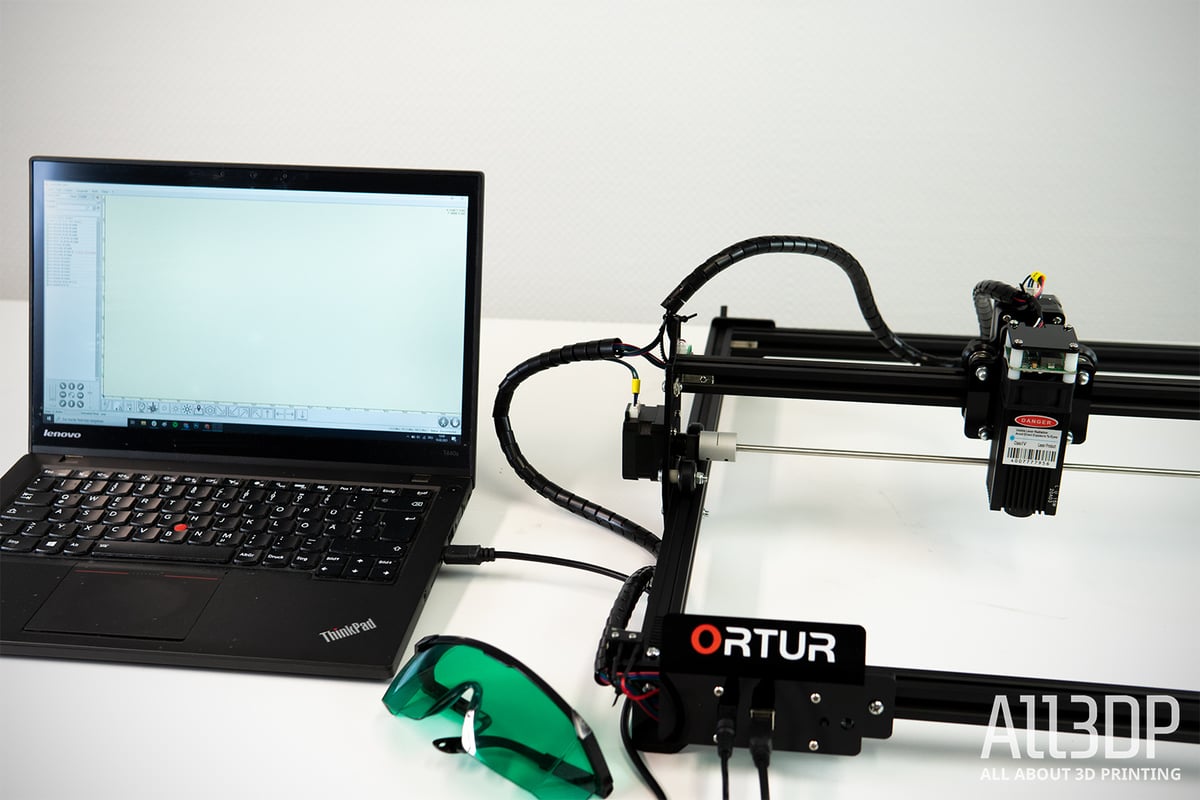
While all these features are great from a security point of view, the latter can be annoying as it requires you to constantly have your computer hooked up to the Ortur during operation. Given its massive work area, engraving jobs lasting tens of hours can easily find their way onto the Ortur, causing your computer to be rendered somewhat useless in the meantime (you should not be sitting for hours next to burning materials). There are some advanced DIY workarounds though, such as using a Raspberry Pi and Octoprint, and you can even equip it with a camera mount to monitor your job remotely.
Software
The Laser Master 2 does not come with proprietary laser software. Instead, Ortur recommends using either the popular, free, and open-source laser cutter software, LaserGRBL (WIN), or the premium laser cutting software LightBurn (WIN, Mac OS, Linux). Both can be downloaded online, and you can try out LightBurn with a 30-day free trial or cough up $40 for unlimited access on up to two computers.
We gave both pieces of software a try, but since it is free (we are reviewing a budget laser engraver after all) and it provides all the vital functions, we decided to go with LaserGRBL for the most part.
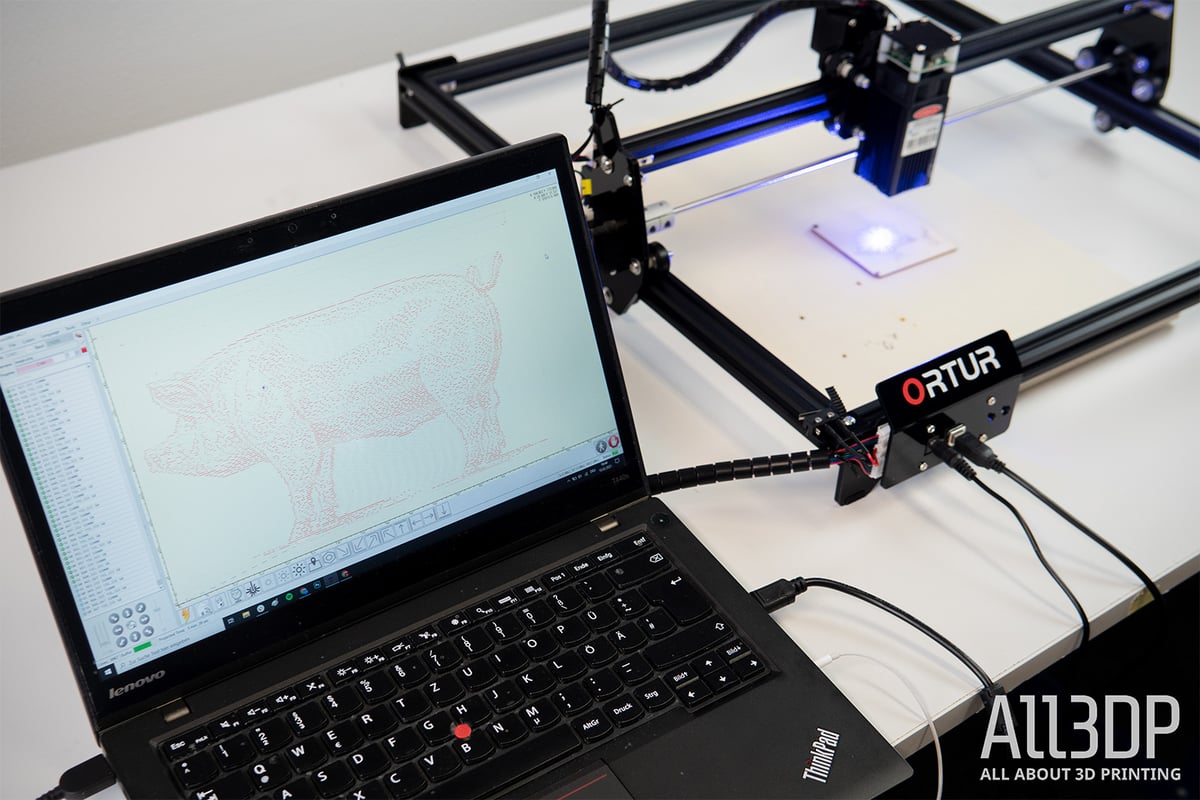
With LaserGRBL, you can load an image, make some adjustments to the lights, contrast, and whitening of the image and select from the five different engraving options – Dithering, Vercorizing, and the lesser-used Centerline, Passthrough, and Line to Line Tracing. However, unlike LightBurn, it does not feature an in-built editor, so you will have to switch to a photo editing program such as Inkscape (also freeware) if you want to create your own text templates or vectorize images.
When it comes to setting the laser power and speed according to the material, Ortur provides a sheet with some reference numbers, and the Ortur LaserGRBL profile also features a bunch of preset options for different surfaces. Unfortunately, we found most of the provided settings to be too fast or too lacking in power. In other words, you will have to experiment around a fair bit to come up with custom settings based on the material you are working on. But, all in all, the open-source LaserGRBL software is pretty straightforward, does everything you need, and provides the base functions you want when engraving or cutting.

If you want a bit more versatility and finesse, a more concise interface, the possibility to add upgrades such as a monitoring cam, and have a bit of cash to spare, we would recommend using LightBurn. In the long run, it makes some of the procedures easier and gives greater control, but the choice between the two is ultimately down to personal preference.
Assembly and Safety
Setting it up
Before you slide on the slick-looking shades and fire up the laser, you need to assemble the frame. While the laser head gantry comes in one piece, it’s the frame and especially the belts for the Y-axis that need proper alignment and are vital for successful and precise lasering.

The frame is assembled via four corner brackets, providing the rigidity the gantry needs to travel with speeds up to 3000 mm/min across the work area, and the belts have to be tightened manually and screwed tight with a nut and washer. A little prior knowledge never hurt anyone, but whatever your skill level is, you should have next to no problem setting up the Ortur within the 30-minute mark. If you are encountering some issues, there are many tutorials and build guides to be found online that should help you through.
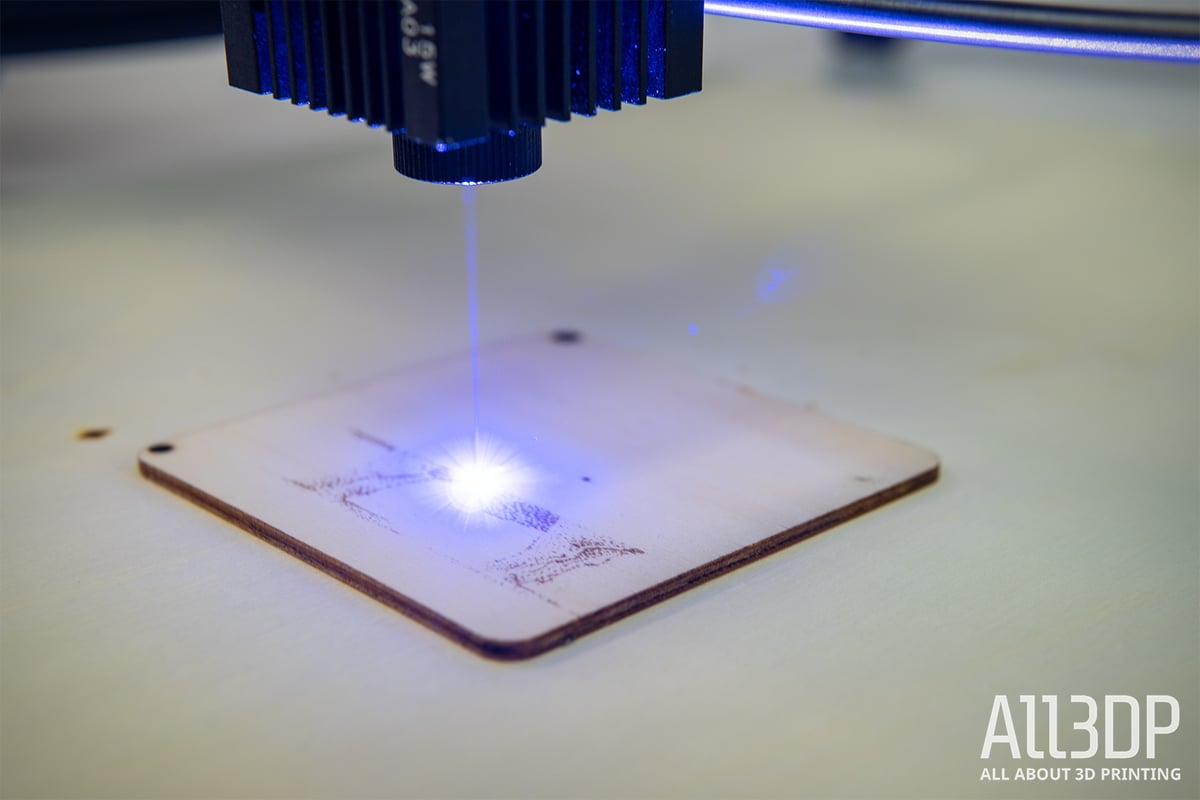
Once the frame is all square and ready to go, you need to focus the laser diode. Time to put the glasses on. Again, there are countless extensive how-to guides online, the short version is: turn the lens knob back and forth until you find the tiniest spot. You can also adjust the height by mounting the laser head in different positions on its fixture to achieve the right focal length, depending on your laser module and object height. We reviewed the 15 W version which has a focal length of about 55 mm.
The environment
In this day and age, it is all about the environment. For a change, we are not talking about global warming and melting polar ice caps, but an environment for your laser to do its work. First of all, make sure the surface you put your laser on doesn’t mind a few laser marks left on it and, more importantly, set up the laser in a well-ventilated place as the Laser Master 2 has no ventilation, enclosure, or air filtration.
Unfortunately, the smoke and smell of burned material will accompany you whenever you fire it up, and while you might get some scents reminiscent of a campfire when working with wood, you should try to minimize exposure, especially when handling toxic fume-emitting materials such as leather, acrylic, and more.
Thankfully, most of us probably now have an FFP2/K95 mask lying around somewhere (thank you, Covid), which we would advise using when you are in the room with the running laser over a longer period of time. If you want to take it to the next level, there are DIY ventilation setups for the Ortur Laser Maser 2 you can outfit it with. Depending on your setup, we would even recommend using some sort of enclosure in the long run.

Last but not least, ALWAYS wear the provided glasses when working with the laser. Even if you are not looking directly into the light source. Ideally, leave the room while cutting or engraving any materials, and definitely keep the active machine away from any colleagues, friends, or family.
Fire the Laser
The Engraving

Working with the Ortur Laser Master 2 requires a bit of a trial and error approach. While the manufacturer provides a table listing different materials and the respective laser power and speed, we found most recommendations to be off.
Take engraving wood, for example, probably one of its most common theaters. For engraving solid wood, Ortur recommends using 3000 mm/min speed settings and the laser at 100% power, which, at least from our experience, is way too fast and leaves the surfaces barely touched. This is where you need to develop your own learning curve for the settings and experiment with different combinations.
Unfortunately, this will mean you (quite literally) burn through a bunch of test runs and materials before you can get the actual job going to a satisfactory level. If it’s cheap plywood, that’s one thing. If it’s expensive leather, clothes, fancy wood, or in general anything you hold dear, this can be quite frustrating, let alone expensive.

As a rule of thumb, we found wood engravings to work best with 1000-1500 mm/s, and we mostly used the laser at full force and only altered the speed settings to find the sweet spot for each material.
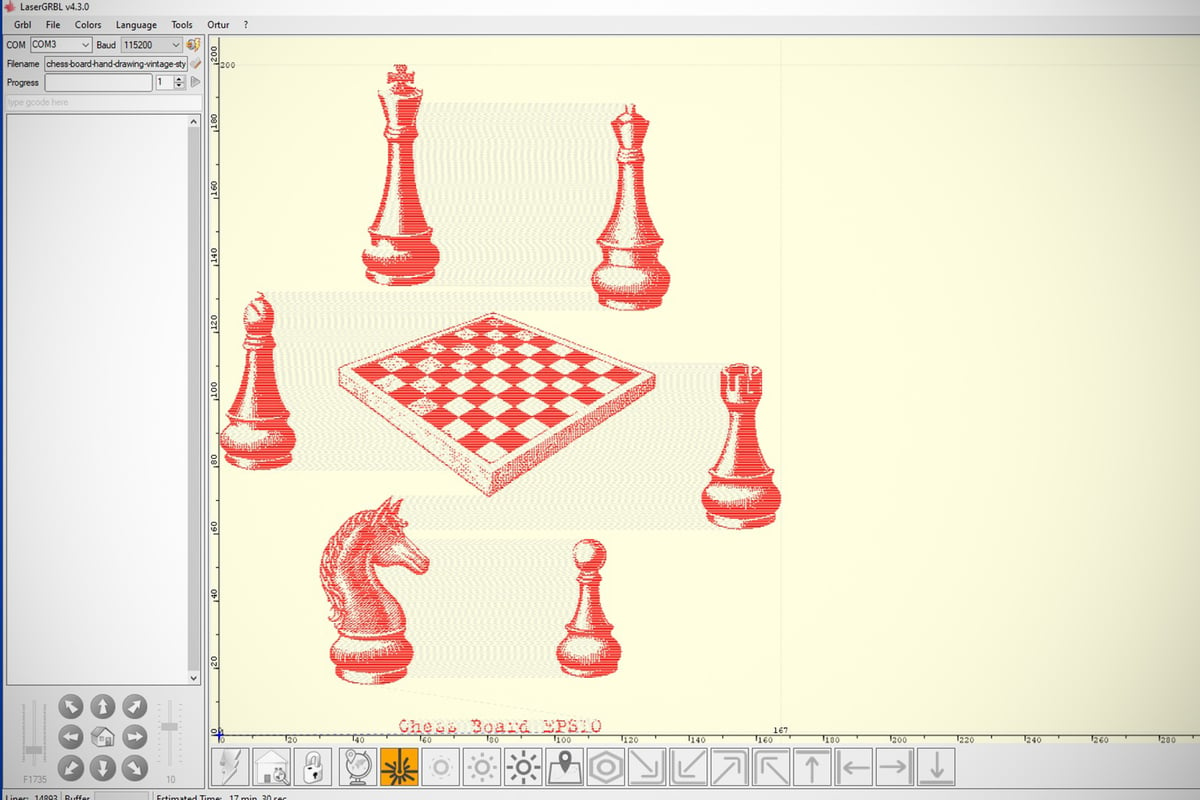
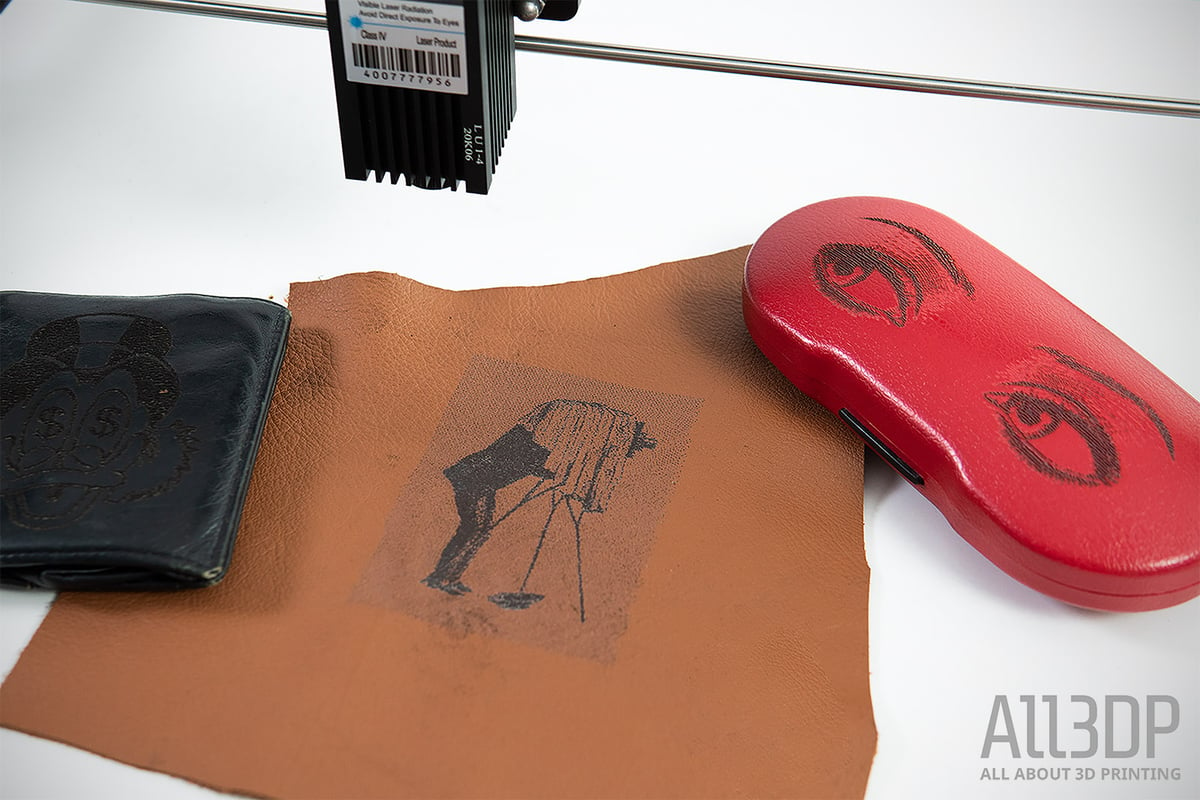
Once you have the right settings figured out, the Laser Master 2 can produce excellent work. In general, the diode laser can engrave a bunch of materials, except transparent or metallic surfaces. During our review, we pointed our laser at a bunch of wood, linen, cartons, leather, leatherette, and anodized metal in the form of an iPhone’s rear. Keep in mind that some materials need a bit of tweaking, such as using a thin layer of mustard (yes, mustard) as a chemical reactor to etch coated metal. After experimenting, we got repeatable and satisfactory results for most materials.
The Cutting
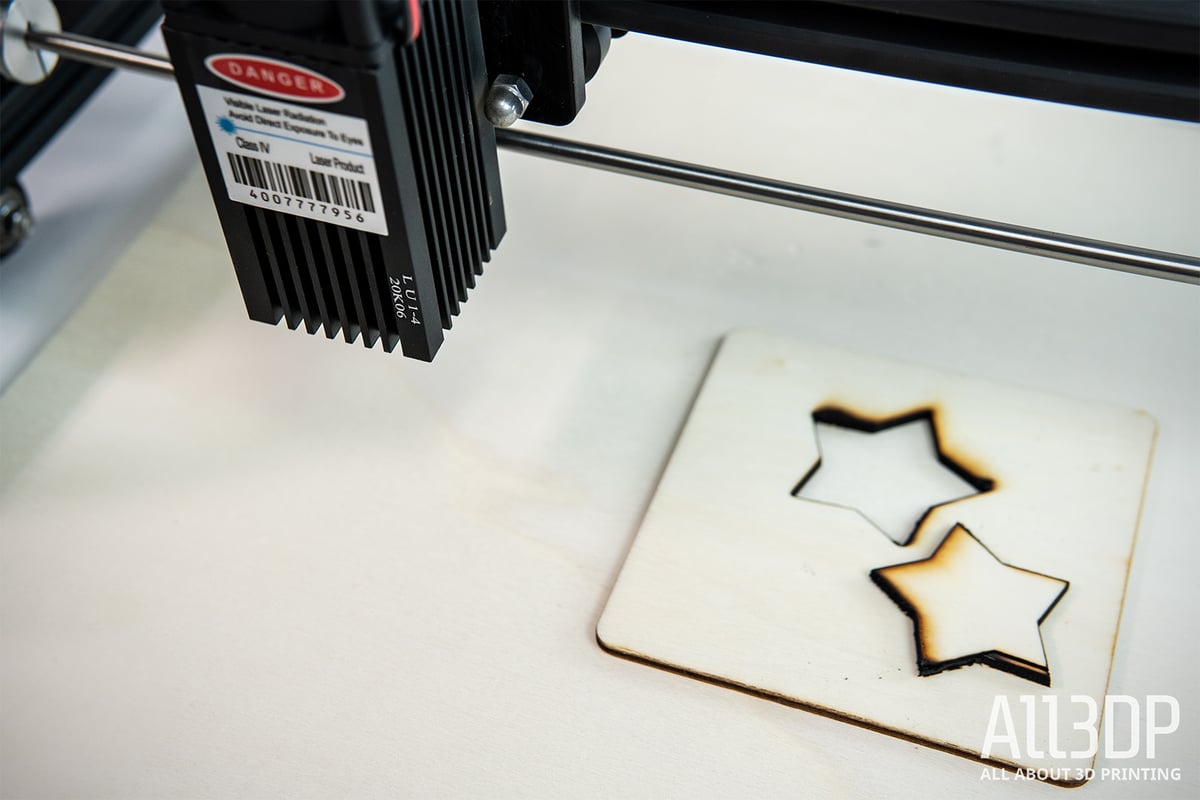
The Laser Master 2 can etch away all day, but what about its cutting abilities? Typically, a strong laser cutter features a CO2 laser and an output of at least 30 W. Unfortunately, the lack of laser power with the Laser Master 2 becomes apparent when cutting materials of anything north of cardboard.
By refocusing the lens as accurately as possible, and with several passes, you can cut through a fair few materials, such as thin plywood and acrylic, leather, and linen. Still, the results will be less accurate than on a K40 CO2 laser, and it’s clear this task isn’t suited to the Ortur here.
If you primarily plan on using the Laser Master 2 for cutting, we would recommend hooking it up with an air assist. This is a simple DIY build, and you can find 3D printable nozzles online and hook it up with tubing and an air pump. This will improve your cutting abilities and accuracy as it will blow away the burnt particles, theoretically allowing the laser to cut faster, finer, and keep the fringes from smoldering.
Is It Worth It?
If you are looking to get into the world of lasers on the cheap, this is a great entry point. While diode lasers aren’t nearly as powerful as other lasers (and even less than advertised), they open up a world of possibilities, especially if you are looking to engrave.
With its large 400 x 430 mm work area, easy build and operation, and the quality of engravings it produces, it is suited for laser tinkerers and enthusiasts of all skill levels. Its simplistic build houses a capable and versatile machine, but don’t go into this expecting your first few days of using the machine to kick out flawless engravings; it requires a lot of trial and error. Despite Ortur providing a full list of settings to try with various materials that can be used on the Laser Master 2, you’re going to need to experiment a fair bit to get things right.
Depending on which version you go for, cutting on the Ortur Laser Master 2 is possible but limited to a list of thin materials such as paper, cardboard, thin plywood, and the likes. If you are planning on primarily cutting up stuff, we would recommend going for the 20W version and equipping it with a DIY air pump, or better still, go for a more powerful CO2 laser cutter.
For everyone else, the Ortur is a great addition to your workshop and should help you realize plenty of project ideas.
Features
Choose Your Weapon
There are three different laser modules to pick from when purchasing your Laser Master 2 – 7, 15, and 20 W. Naturally, the strongest is going to be the most expensive, but you might not necessarily want to spend that much if you don’t need the extra oomph in your lasering.
None of the lasers here are going to destroy a city or even get close to what an industrial cutter can do, and it is worth pointing out that the wattage referenced is the input amount and doesn’t reflect on the output. Diode lasers generate a lot of excess heat, resulting in the actual output being around 1.5, 4.5, and 5.5 W, depending on the version.
With a few hacks, the 20 W (aka 5.5 W) version is capable of engraving metal, but if you just need to engrave some simple images onto paper or cardboard, though, the 7 W should do the trick. So really, it’s a good idea to know what you want to do before you go ahead and pull the trigger on a purchase here.
Additionally, the focal length of lasers can be adjusted via the modules, giving extra room for experimentation and flexibility with regard to your applications.
Large Workspace
At 400 x 430 mm, the room that the Ortur Laser Master 2 has to work within is substantial, much more than what you’d usually expect to get at this price point. This makes it suitable for working on a wider variety of objects, giving makers the opportunity to create far more varied bits and pieces. For that reason alone, it can’t be understated how important this feature is.
Lightweight, Simple Construction
Consisting of a simple square aluminum frame, the Laser Master 2 is constructed in a refreshingly simplistic manner. This approach reaps two major benefits; a sizable workspace and a low weight. At under 4 kg, the entire machine can be carried around, moved, and stored with relative ease, and it is straightforward to build when you’re setting it up. It doesn’t look special, but you can’t deny its practicality.
Safety Controls
Jokes about melting continents aside, obviously, operating a laser is something to be taken very seriously. The Laser Master 2 has some inbuilt safety technologies to help reduce the risk of accidents. For a start, there’s a G-meter that senses any unnatural movement from the frame and automatically turns the laser off should some occur. Also, if the laser head should stop moving due to disconnection from a computer or USB cable, then the laser will also switch off, which helps reduce the chances of a fire breaking out.
Software Compatibility
Software isn’t provided for free with the Ortur Laser Master 2 here, but running on GRBL firmware, it will be compatible with free tools such as LaserGRBL. If you do want to pay for your software (and some users suggest this will be more than necessary if you want quality results), then the machine is also compatible with LightBurn.
32-bit Motherboard
With a powerful 32-bit board found in the Laser Master 2, it makes things quicker, easier, and smoother when operating on your chosen material.
Tech Specs
GENERAL
- Year: 2020
- Assembly: Semi-assembled
- Manufacturer: Ortur
LASER ENGRAVING SPECIFICATIONS
- Work area: 400 x 430 mm
- Work area depth: Not applicable
- Borderless work area: N/A
- Laser type: Diode
- Wattage input: 7 W, 15 W, 20 W
- Wattage output: 1.5 W, 4.5 W, 5.5 W
- Variable focus: Yes
- Focal Length: 55 mm for 15 W & 20 W Laser Module; 58 mm for 7 W Laser Module
- Max. moving Speed: 3000 mm/m
- Max. material height: N/A
- Camera: No
MATERIALS
- Cutting and Engraving: (Laser module dependant) Paper, cardboard, linen, plywood, leather, etc.
- Engraving Only: (Laser module dependant) Solid-wood, anodized/coated metal, tiles, etc.
SOFTWARE
- Recommended control software: LaserGRBL (WIN), LightBurn (WIN / Mac OS / Linux)
- File types: NC, BMP, JPG, PNG, DXF, etc.
- Connectivity: USB
DIMENSIONS AND WEIGHT
- Frame dimensions: 595 x 220 x 130 mm
- Weight: ~4 kg
Similar Machines
For more budget-friendly laser engravers and cutters, check out our extensive guide.
FoxAlien LE-4040
The FoxAlien LE-4040 is another open frame diode laser engraver, similar to the Ortur Laser Master 2. It features a 400 x 400 mm work area, runs on GRBL firmware, and you can pick one of these up for around $350.
Its laser module is a 5 W diode, but it can be switched out for a more powerful diode as an upgrade if you found that the extra power was needed further down the road. Long story short, for softer materials like leather, paper, cardboard, and wood, engraving should be a doddle.
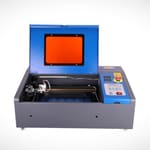
OMTech 40 W Laser Engraver
The OMTech K40 is an affordable CO2 laser engraver and cutter.
This 40 W CO2 laser cutter is a compact machine with a 300 x 200 mm work area, a resolution ratio of 4500 dpi, and a maximum speed of 80 mm/s when cutting. Coming in at under $400, this is a great entry model into the world of lasers that will elevate your cutting experience to the next level thanks to its powerful laser.
It’s also popular to upgrade and modify these machines to create a more personal, well-rounded product with upgrades such as a better exhaust fan, water pump, or laser tube.
License: The text of "Ortur Laser Master 2 Review: Big Laser, Little Power" by All3DP is licensed under a Creative Commons Attribution 4.0 International License.
CERTAIN CONTENT THAT APPEARS ON THIS SITE COMES FROM AMAZON. THIS CONTENT IS PROVIDED ‘AS IS’ AND IS SUBJECT TO CHANGE OR REMOVAL AT ANY TIME.