Monoprice Delta Pro Review: A First-Rate 3D Printer
Rating

The Monoprice Delta Pro is a large-format delta 3D printer that offers great print quality, especially when its dialed in. Check out our review to find out if it is worth choosing it over the rest?
Despite being seen as the less popular option, Delta-styled 3D printers offer a handful of advantages over their Cartesian counterparts. The circular bed design presents a more efficient use of the overall build volume and typically enables users to print taller objects. Another benefit is that Delta printers are capable of reaching higher print speeds, which is especially useful for makers who have the need for speed.
Of course, as with anything in life, there are also some downsides to go along with these pros. For instance, the increased print speed of Delta 3D printers usually leads to a decrease in print resolution. Additionally, the Bowden-styled extrusion mechanism can limit the types of filaments that can be utilized.
Nonetheless, we’ve noticed a steadily growing number of Delta-styled 3D printers popping up on the budget end of the desktop FDM spectrum.
Monoprice, the California-based electronics manufacturer that helped usher in a new age of affordability for Cartesian-style 3D printers, came to the market two years ago with the Monoprice MP Mini Delta. Priced at $159, this compact Delta 3D printer quickly became one of the (if not the) cheapest Delta-styled 3D printer on the market.
Unfortunately, being a “Mini” 3D printer, this petite machine was severely lacking build volume, a feature that typically gives Delta 3D printers an upper hand. But, soon after, Monoprice emerged with a bigger and bolder attempt at this style with the Monoprice Delta Pro.
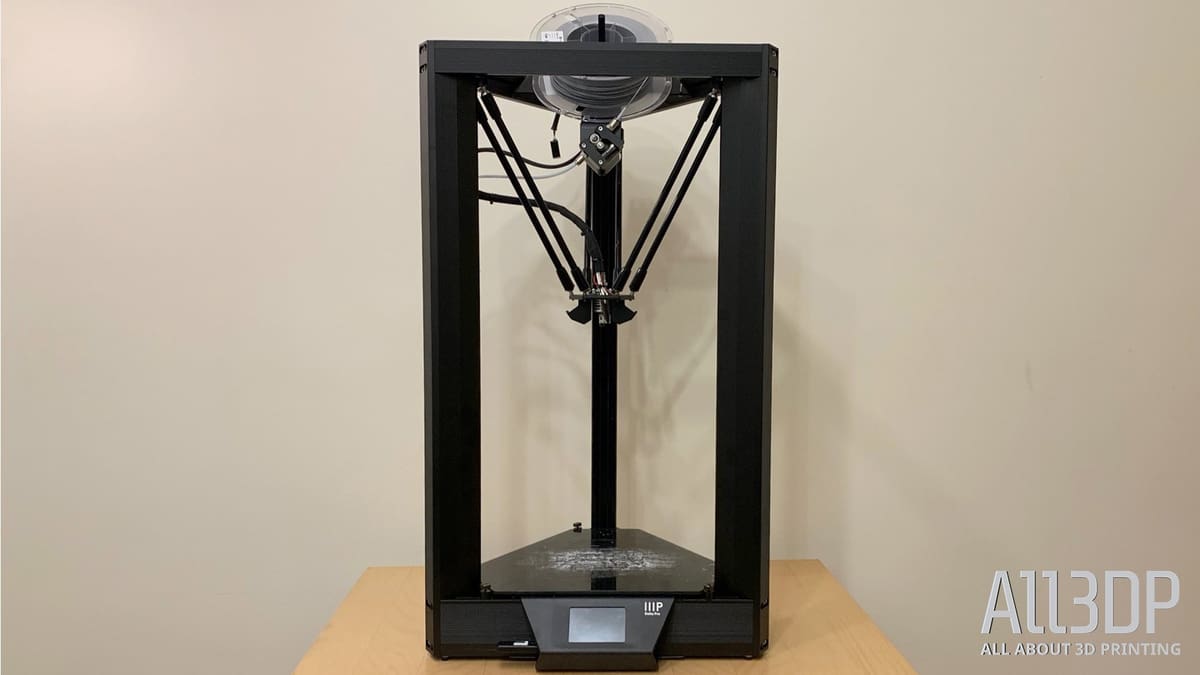
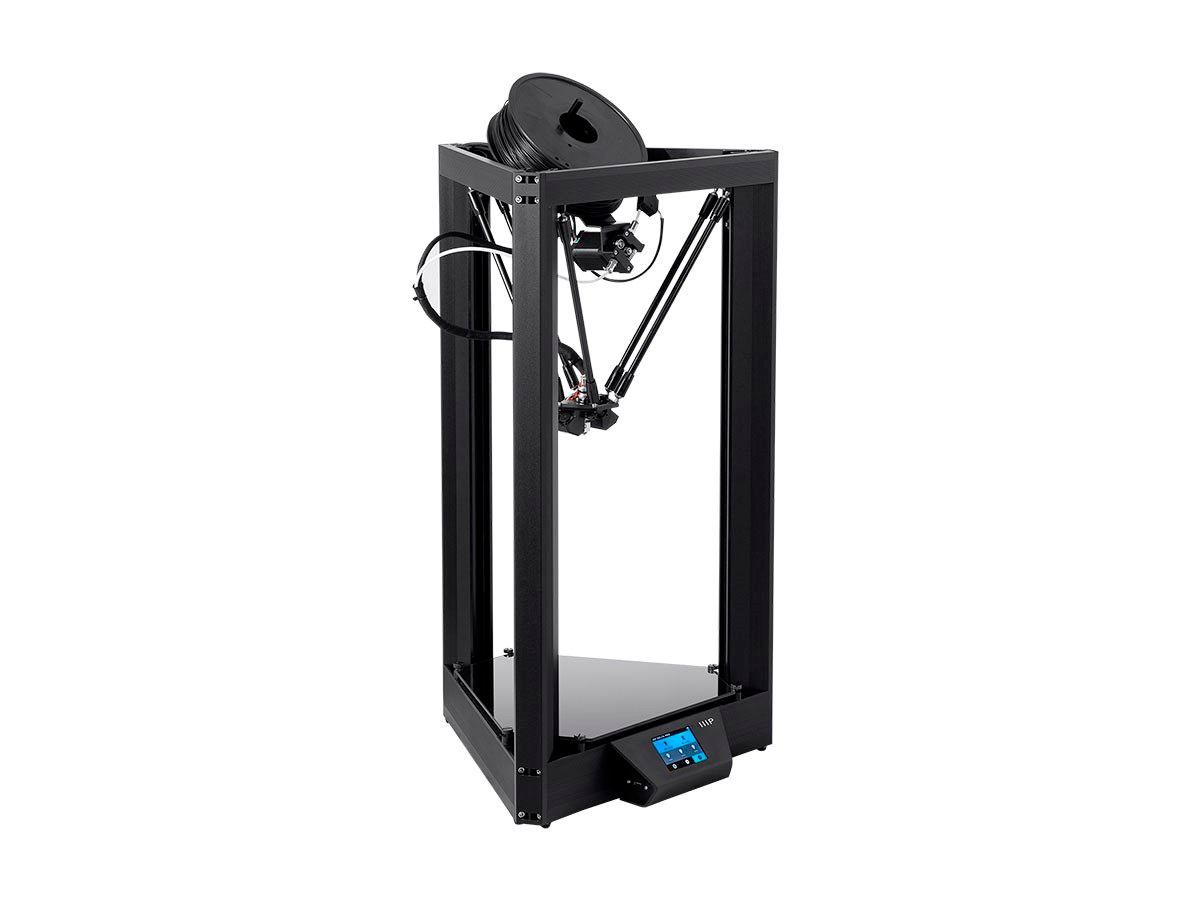
Equipped with a circular ø270 x 300 mm build volume, a glass print bed, auto-calibration, and other hallmark features, we were definitely interested to give the Pro model a test drive. Still, these professional-grade attributes and increased print area come with a major uptick in price.
At $1,199, the Monoprice Delta Pro is clearly marketed toward professionals and makers who want to purchase a versatile and sizable Delta printer without breaking the bank. But is it worth it? Let’s find out.
Pros & Cons
Pros
- Sizable ø270 x 300 mm build volume
- Easy assembly and setup
- Good print quality with large objects (once optimal settings are sorted and properly dialed in)
- Features include auto-calibration, glass print bed, and power recovery
- Fast print speed
- Intuitive UI
Cons
- Some struggles with smaller parts
- A noticeable dropoff in quality between PLA and other filaments like PETG
- Lackluster/non-existant slicer settings outside of KISSlicer
- Issues with filament sensor
Verdict
Is it worth selecting the Monoprice Delta Pro over Cartesian-style 3D printers? The answer, as you might expect, is wholly dependant on your 3D printing wants and needs.
Despite being seen as the less popular option, Delta-styled 3D printers offer a handful of advantages over their Cartesian counterparts. The circular bed design presents a more efficient use of the overall build volume and typically enables users to print taller objects. Another benefit is that Delta printers are capable of reaching higher print speeds, which is especially useful for makers who have the need for speed.
Of course, as with anything in life, there are also some downsides to go along with these pros. For instance, the increased print speed of Delta 3D printers usually leads to a decrease in overall print resolution. Additionally, the Bowden-styled extrusion mechanism can limit the types of filaments that can be utilized.
Looking at the Monoprice Delta Pro, we found these generalizations about Delta-style machines to ring true. Once we had it up and running, our first impression of this 3D printer was that it was definitely a speed demon.
As you’ll see in our following sections on printing, we had to address a few issues before we were able to achieve optimal print quality. However, once the proper adjustments were made, we were greeted with high-resolution prints with very few flaws.
Aside from the immaculate speed and decent print quality, we also found immense value in the usability of the Monoprice Delta Pro. From the four-step assembly process to the effective auto-leveling feature, this lofty machine was incredibly easy to use.
However, we also experienced some problems with the Monoprice Delta Pro that brought our overall score down a few notches. At first, there were some pretty glaring issues with layer shifting, which we discovered was due to one of the Z-carriages being loose. Once we fixed that, there was definitely a noticeable improvement in print quality.
Another negative experience we had was with the filament sensor, which seemed to hinder the filament flow for a few of our materials, ultimately leading to under-extrusion. It’s also relatively loud during operation, and despite offering a heated glass bed, we found that adhesive solutions were required for more ambitious projects.
Finally, we also had trouble finding the proper slicer settings for any program outside of KISSlicer, which could be deterrent to diehard users of Cura or Simplify3D.
Still, when compared to other Delta-style 3D printers in the same size range, the Monoprice Delta Pro can be considered as a modestly priced option, situating itself somewhere in the middle of the pack price-wise.
Generally speaking, if you want faster print speeds and more space to work on the Z-axis, a machine like the Monoprice Delta Pro might be worth your consideration. It manages to print high-quality parts better than some other Delta machines, helping to quell one of the criticisms that are typically raised when this 3D printer style is being discussed.
At the time of this review, the Monoprice Delta Pro cost $1,199, reduced from its original price tag of $1,499. Although its been made more affordable, and you can still find Cartesian machines that offer a similar build volume at a significantly lower cost. For beginners that want an introduction to Delta 3D printing, you may want to start with a cheaper, entry-level option like the Monoprice Delta Mini.
But for those looking for relentless print speed, a hefty build volume, and a sturdy Delta frame, it might just be worth investing in the Monoprice Delta Pro. While it does have a few downsides, the overall usability and print quality that this 3D printer provides definitely makes it worth a look.
Unboxing/Assembly
When the box containing the Monoprice Delta Pro arrived at the All3DP office, there was some initial surprise as to how substantial the packaging was. We had toyed around with the dainty Monoprice Mini Delta in the past, but the increase in dimensions instantly put the large-format Delta Pro in a class of its own.
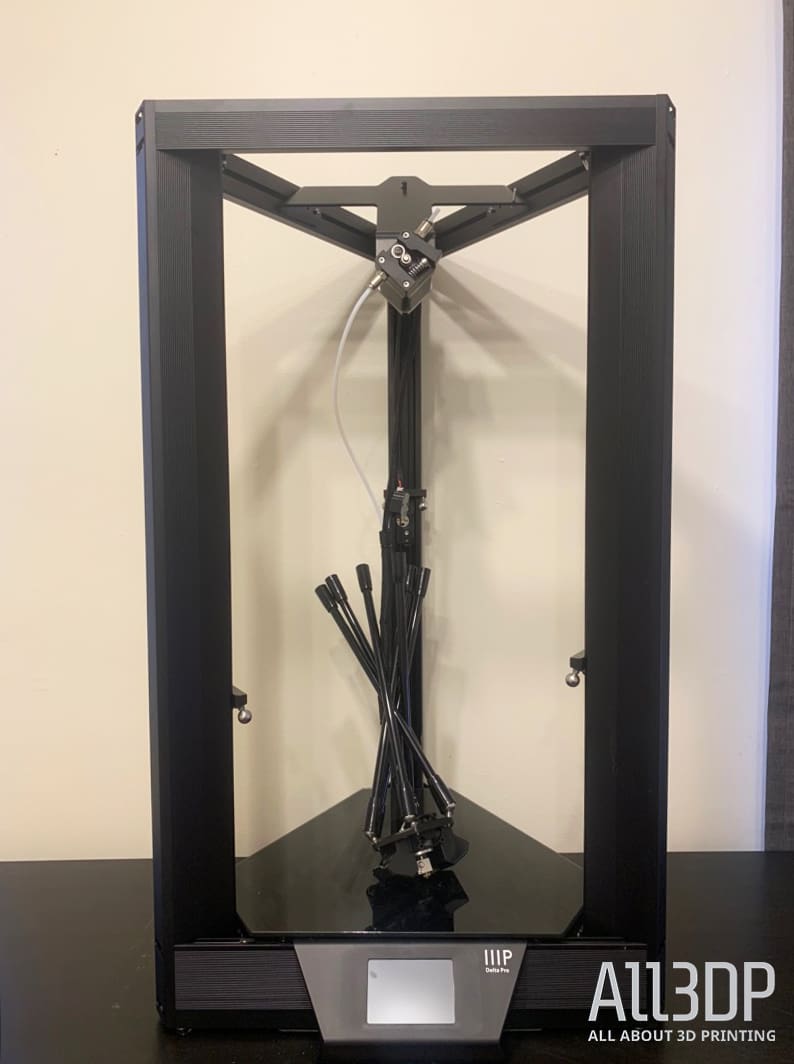
After cutting through the tape and opening up the cardboard flaps, we were greeted with an enormous all-metal frame that was mostly assembled already. Unearthing this sturdy black frame from its home, we noticed that only a few components needed to be put together by the user.
The extruder, which comes unmounted and dangling from the top of the frame, was kept safe by protective plastic packaging. Other parts that came separately from the frame of the printer included the effector and control arms, the filament spool holder, and the glass print bed.
Alongside the main components, the Monoprice Delta Pro as comes with an assortment of useful tools, an additional extruder and hotend, and a compact set of instructions to help the user get their printer up and running. The documentation is split into three essential sections: unpacking and printer setup, auto-leveling, and first prints.
For the assembly, the instructions are as easy as 1,2,3,4 (seriously, there are essentially only four steps). Step one is to remove the printer for the packaging and place it on a flat surface in a well-ventilated area. Next, you have to attach the six effector and control arms that help navigate the extruder around the build area.
These arms are extremely easy to put together, as they snap into place with via magnets. All you have to do is situate the extruder and the z-carriages so that all six arms can be properly attached to their respective magnetic balls. Once the arms are connected, the third step is to assemble the filament bar, a simple action that involves screwing the spool holder onto the top of the frame.
Finally, we plugged in the printer and hit the power switch, leading to a bright welcome from the high-definition touchscreen. Following the quick assembly, which only took us around 10 minutes, we then moved onto the convenient auto-leveling process.
In order to prepare for auto-calibration, you first need to check and make sure the hotend is at room temperature. That’s because you’re going to need to attach the auto-level sensor, which snaps directly to the connector that is bundled with the Bowden extruder and filament sensor. After connecting the auto-level sensor, snugly fit the circular cavity over the nozzle.
Scrolling through the touchscreen menu, we then had to tap the control icon and then the leveling icon. This led us to the auto-leveling button, which uses the sensor to sort out the nozzle place in relation to the print bed. Once that process was completed, we removed the sensor and used a sheet of copy paper to adjust Z-offset.
While we can’t quite consider the calibration mechanism as fully automated, the manual adjustments that needed to be made were still simple and as user-friendly as possible. However, it was during the auto-leveling process that we discovered a missing step not listed in the manual: the heated bed wasn’t mounted.
After realizing that the print bed wasn’t really mounted onto the base of the printer, we began to wonder if Monoprice intended to have it loosely sit there. We then recalled seeing a number of loose screws and plastic stoppers at the bottom of the box. It turns out that these components are supposed to be situated on each corner of the bed to keep the glass plate in place.
To be fair, we’re unsure whether it was just our review unit that came with these pieces scattered across the packaging, but nonetheless, the instructions made no mention of the bed mounting mechanism. Eventually, we figured it out and got the bed securely mounted to the printer, but wasted a considerable amount of time attempting to sort it out on our own.
The final section shows us how to feed the filament into the sensor and extruder. After threading the filament into the Bowden tube, we preheated the printer for PLA and hit the “Load” icon, which pushed the material until it began to extrude out of the hot end.
Last but not least, the only thing left to do was to start a print. Unfortunately, our Monoprice Delta Pro unit didn’t come with any sample prints or a USB, so we had to find the optimal slicer settings and prepare a model before we were able to get printing.
Design
The first thing you’ll notice about this Delta-styled machine is it’s ø270 x 300 mm build volume, a noticeable upgrade over the rather uninspiring ø110 x 120 mm print area found on the Delta Mini offers. While most Delta-style 3D printers have a truly circular print bed, the Monoprice Delta Pro has a uniquely shaped platform that isn’t quite as rotund as you might expect.
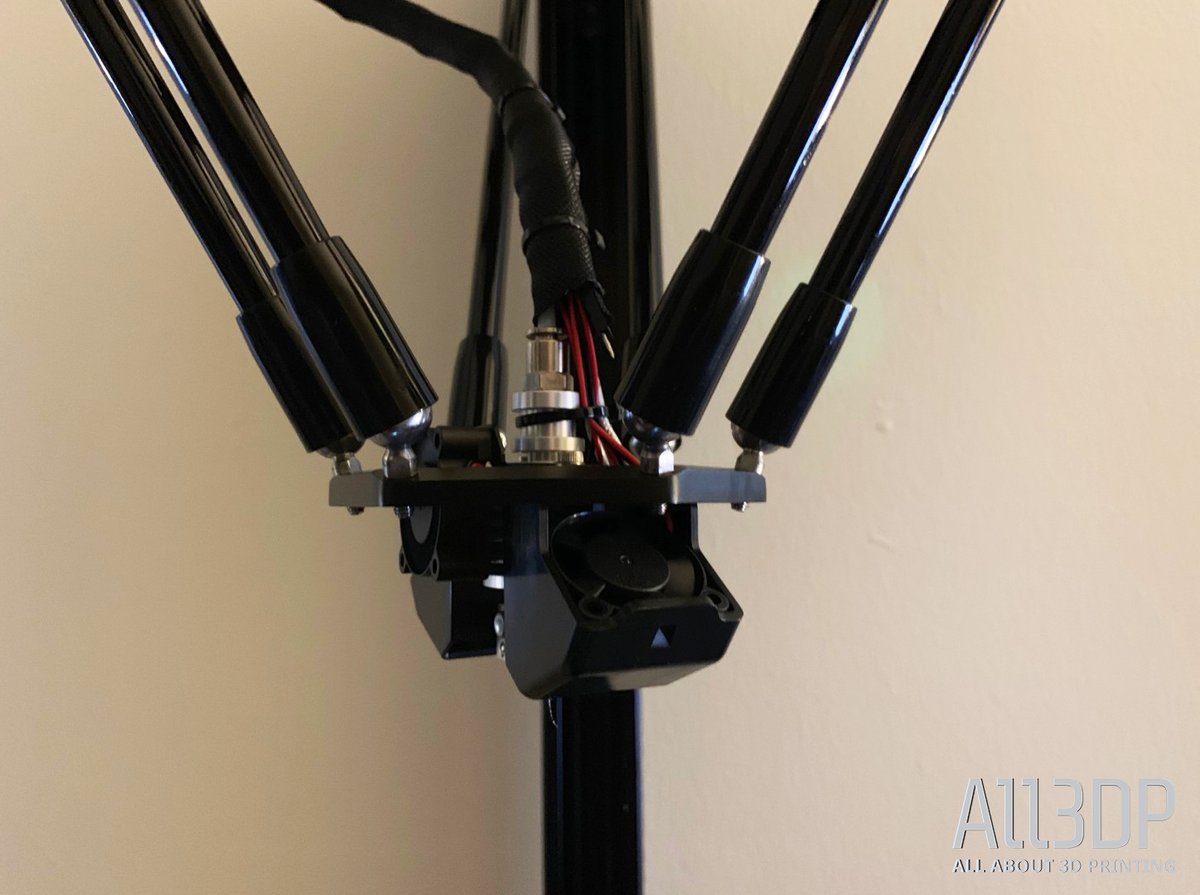
Looking at the all-metal frame of the Monoprice Delta Pro, we found it to offer a respectable amount of stability and sturdiness. The magnetic arms that link the extruder to the Z-carriages keep themselves in place throughout the printing process, ensuring that the printer can properly guide itself around the build platform.
Some of the other noteworthy design features include a heated glass bed that improves adhesion and makes it easier to remove finished prints, a filament sensor to keep track of material usage and power recovery to keep the print job intact during a power outage.
In our experience, we still needed to use a glue stick to keep larger-scale print jobs on the bed. Meanwhile, while it was certainly a well-intended feature, the filament sensor seemed to hinder filament feeding and cause under-extrusion for certain materials.
The glass print bed is secured into place with six screws and stoppers, which isn’t the most stable mechanism, but it still does the trick. By securing these screws, they prevent the platform from moving around during the printing process.
Another noteworthy attribute found on the Monoprice Delta Pro is the 3.5″ full-color touchscreen, which acts as a gateway to a vast range of 3D printing settings, allowing the user to adjust parameters the way they see fit. This user interface is jam-packed with various settings that are easy to adjust and navigate around.
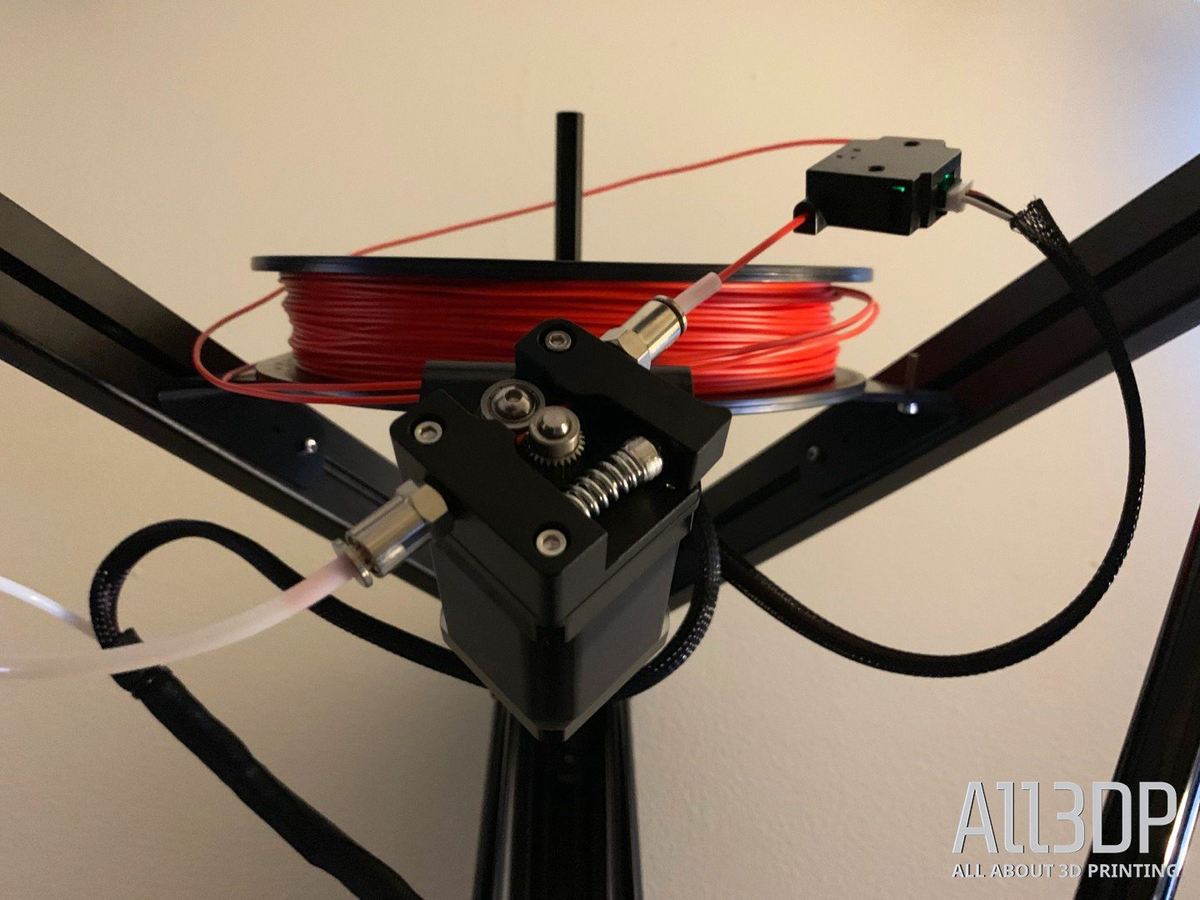
Surrounding the extruder is a triple-fan cooling system. One fan is solely dedicated to maintaining a stable nozzle temperature, while the other two accelerate the filament extruding process, effectively reducing the potential for overhangs and bridging.
The filament spool holder is situated at the top of the printer and feeds directly into the Bowden extruder without much distance in between the two. We actually found this to be a problem when loading filament, as the lack of space between the spool holder and filament tubing made it difficult to insert the material at the proper angle.
The Monoprice Delta Pro is also equipped with a PID tuning mechanism that the manufacturer claims will help sustain consistent temperatures by compensating for the external environment.
The 3D printer comes packaged with a total of three simple-swap hotends. With the ability to switch hotends in a quick and modular fashion, users can easily exchange different nozzle sizes and types.
Test Prints
After finishing up the auto-calibration process and loading some filament into the extruder, it was finally time for the fun part: 3D printing! Since the reviewer was unfamiliar with KISSlicer, we opted to use Cura for our 3D slicing needs (find out how we got the right settings in the forthcoming Software section).
As with all of our 3D printer reviews, we kicked off the testing process with the one and only 3DBenchy, a popular torture test that is designed to test the accuracy and capabilities of a 3D printer. We decided to keep it in the family at first, utilizing the Monoprice-branded Red PLA that came packaged with the Monoprice Delta Pro.
We uploaded the STL file via a USB stick and hit the print button, sending heat to the print bed and extruder. Once we reached the preset settings, the magnetic arms that hold the extruder began to lower itself, finally starting our highly anticipated first test print.
Test Print 1 – 3D Benchy
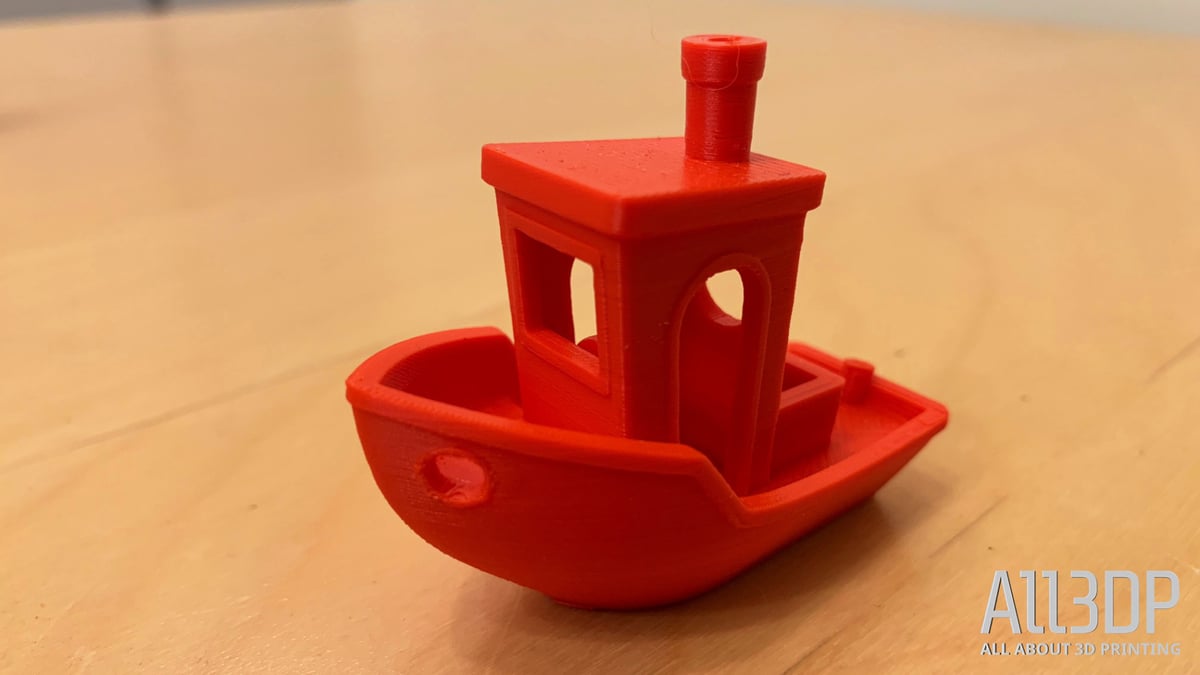
Despite having a heated glass bed, we found that the Monoprice Delta Pro struggled with getting the first layer to stick. To fix this issue, we applied a glue stick to help improve adhesion. On the second Benchy run, we had much more success with the first layers. We were also extremely impressed with the nearly layer-less surface of our little tugboat.
Unfortunately, toward the end of the print, we experienced a sudden layer shift in the model, completely ruining what would have been one of the finest Benchy models to sail the seven seas. Another attempt resulted in the same frustrating problem. However, after taking a look at the frame of the Monoprice Delta Pro, we found that one of the Z-carriages was slightly looser than the others.
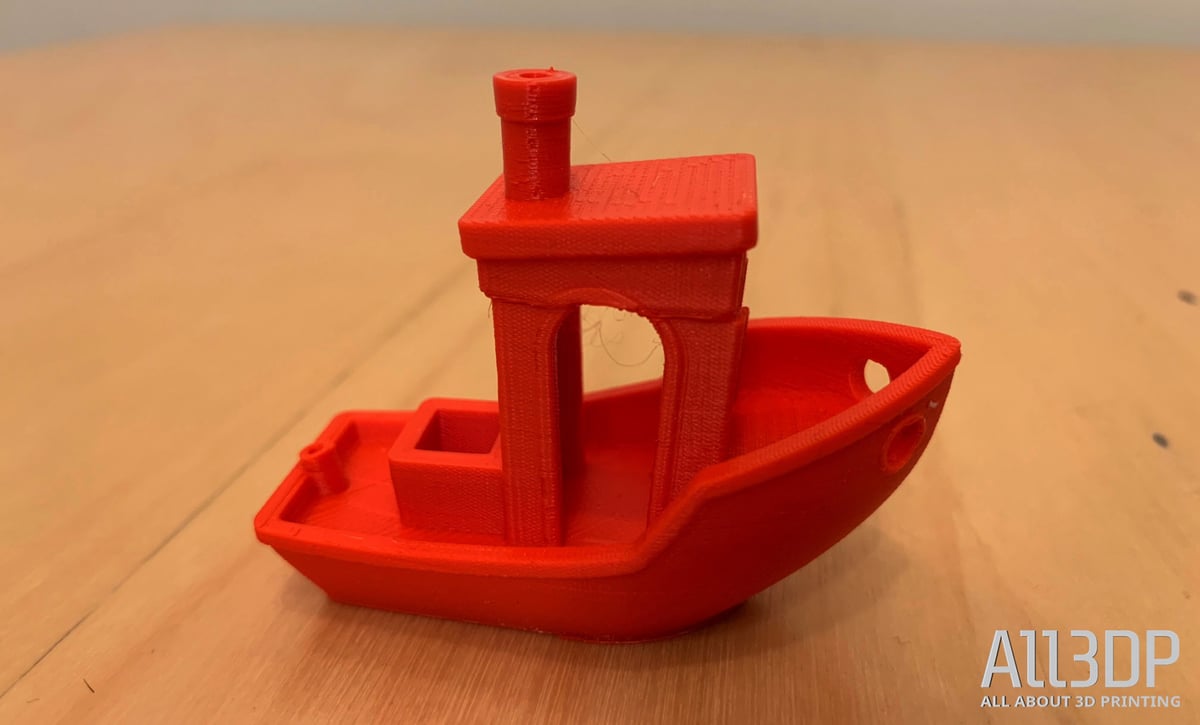
Once this issue was addressed, we were able to 3D print a Benchy with flawless layering. The surface resolution of our first successful Benchy was simply incredible. From the hull to the cylindrical chimney, the Monoprice Delta Pro handled the tricky features of the Benchy with ease. The only place where it experienced trouble was with the bridging at the top of the ship, which is recognized as one of the most difficult sections of the model.
We were also fortunate enough to receive a sneak preview spool of Monoprice’s new High Gloss Blue PLA, a specialty material that has a sleek shine. With this material, we also ended up with pretty decent Benchy, but the bridging problem was a little bit more noticeable this time around. Nonetheless, the surface quality was once again impeccable, and we felt satisfied with our shipyard of Benchy models.
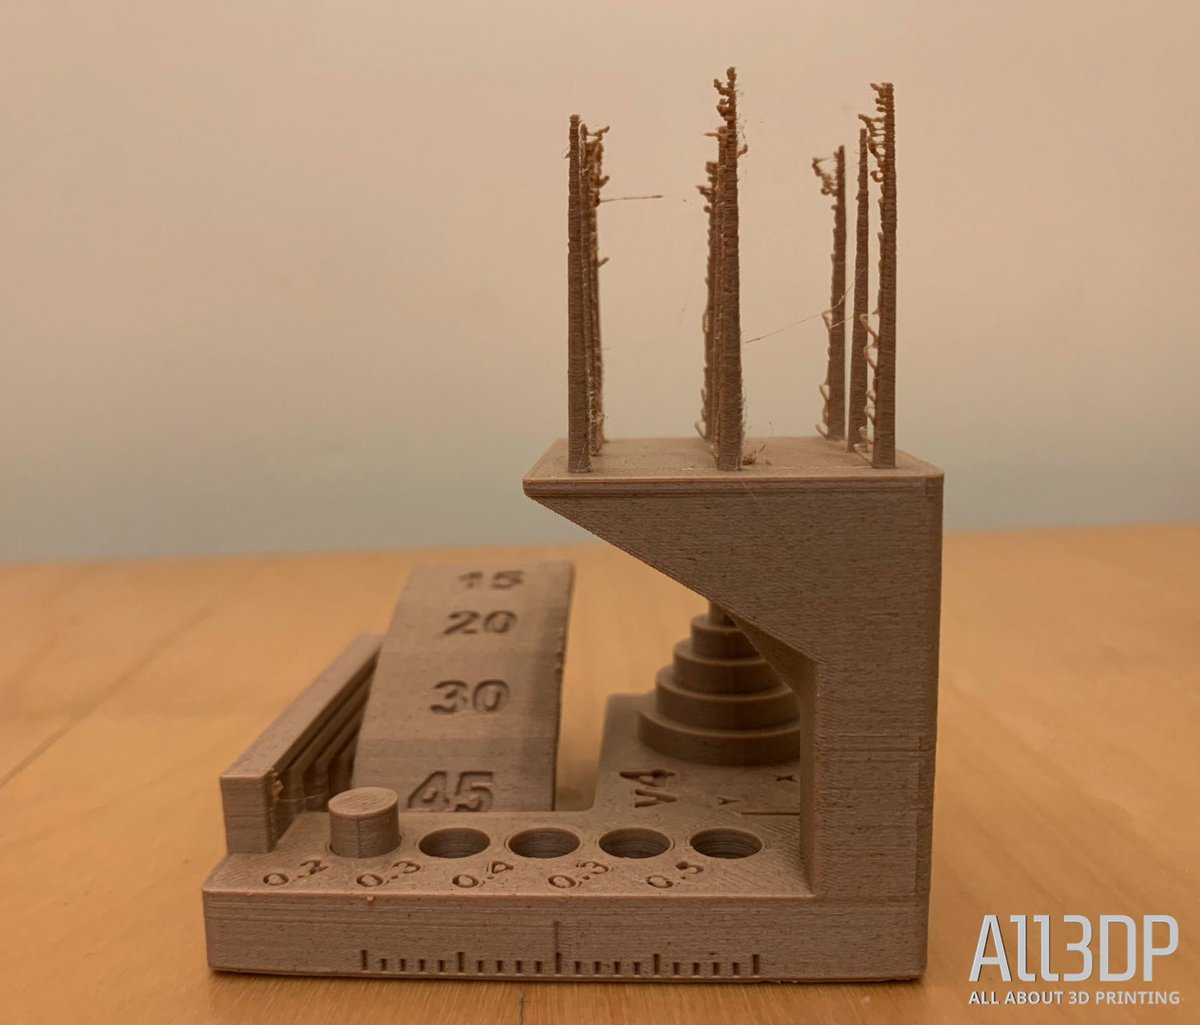
Test Print 2 – Autodesk/Kickstarter Test
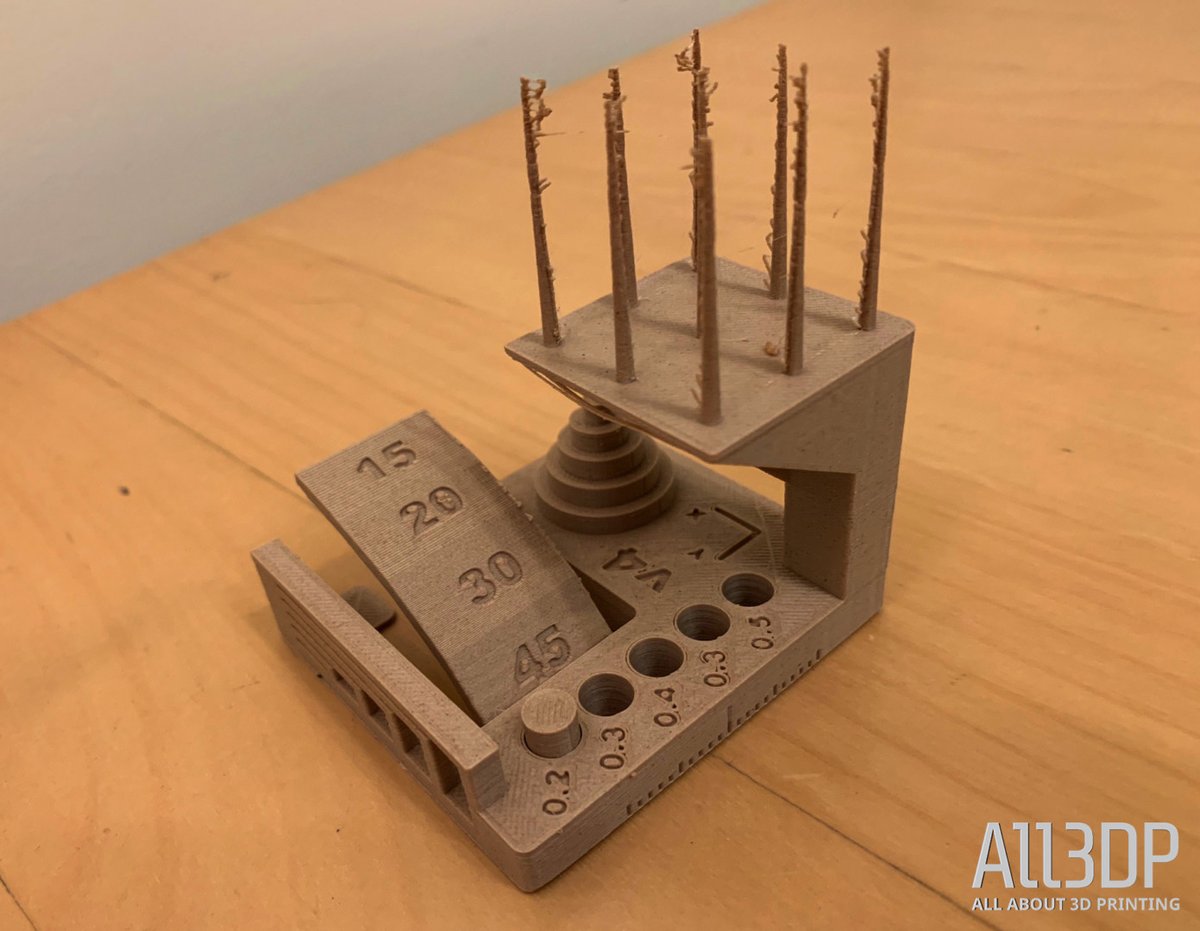
And so, we decided to move onto our next phase of testing, which involves the robust 3D printer test recently developed in collaboration by Kickstarter and Autodesk. This test model can be used to test a variety of features, including dimensional accuracy, positive/negative feature resolution, overhangs, bridging, XY ringing, and Z-axis alignment. You can learn more about the model here.
Each feature of this model can be scored according to the criteria laid out by Kickstarter and Autodesk. This allows us to make a more accurate judgment about how the Monoprice Delta Pro performs. But, eager to see how this Delta printer would work with third-party materials, we decided to use Wood filament from CCTree.
Here were our results:
- Dimensional Accuracy: 5/5
- Fine Flow Control: 2.5/5
- Fine Negative Features: 4/5
- Overhangs: 4/5
- Bridging: 5/5
- XY Resonance: 2.5/2.5
- Z-axis alignment: 2.5/2.5
The final score for the Monoprice Delta Pro was: 25.5 out of 30 points. This suggested that, once the layer shifting issues were addressed, the Monoprice Delta Pro was exceptionally well-tuned and calibrated.
We also attempted to print the Autodesk/Kickstarter Test using PETG filament from Amazon. Unfortunately, the Monoprice Delta Pro struggled with this material, and after a few failed prints, we decided to throw in the towel. While we’re uncertain whether these lackluster results stemmed from the filament or the printer itself, we deemed it necessary to raise this potential red flag.
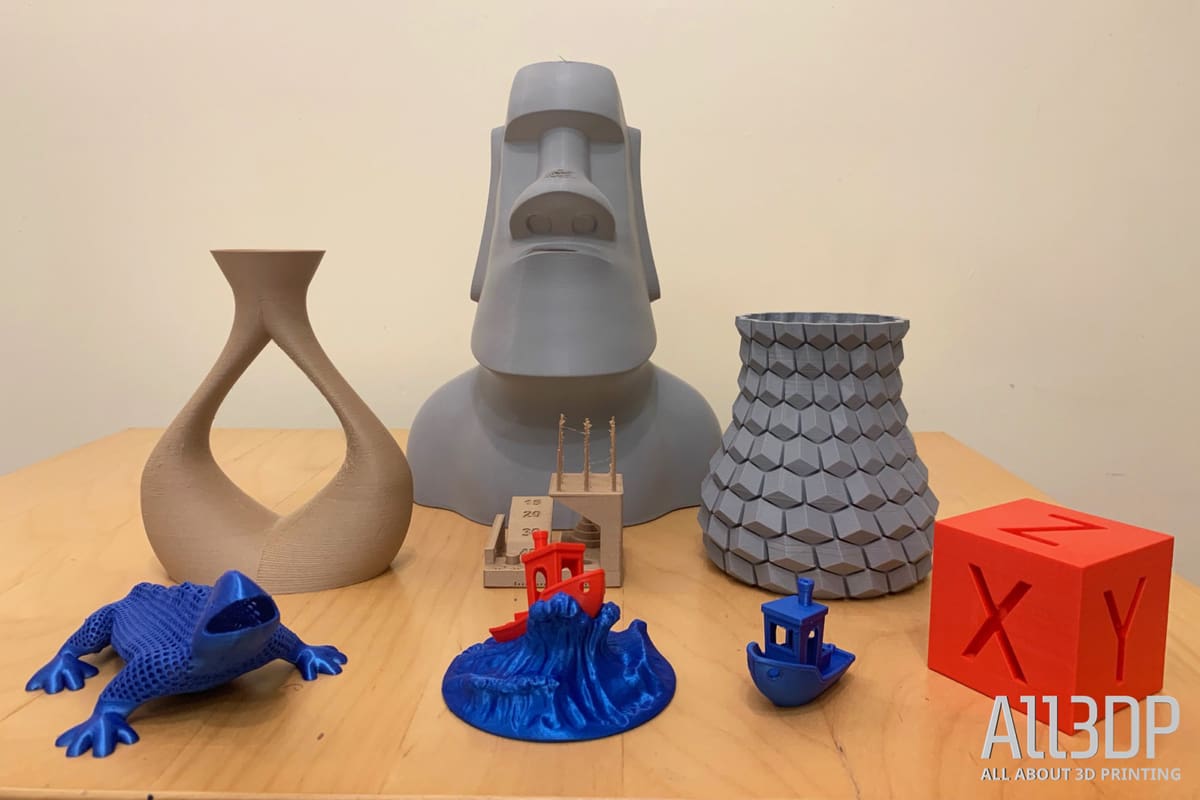
Fun Prints
Once we got the test prints out of the way, it was time to have some fun. After scouring through the depths of Thingiverse, we found a number of more leisurely 3D models for the Monoprice Delta Pro to tackle. With the Monoprice Hi Gloss filament reloaded, we figured it would be the perfect color for a Benchy Wave.
Test Print 3 – Glossy Wave for 3D Benchy
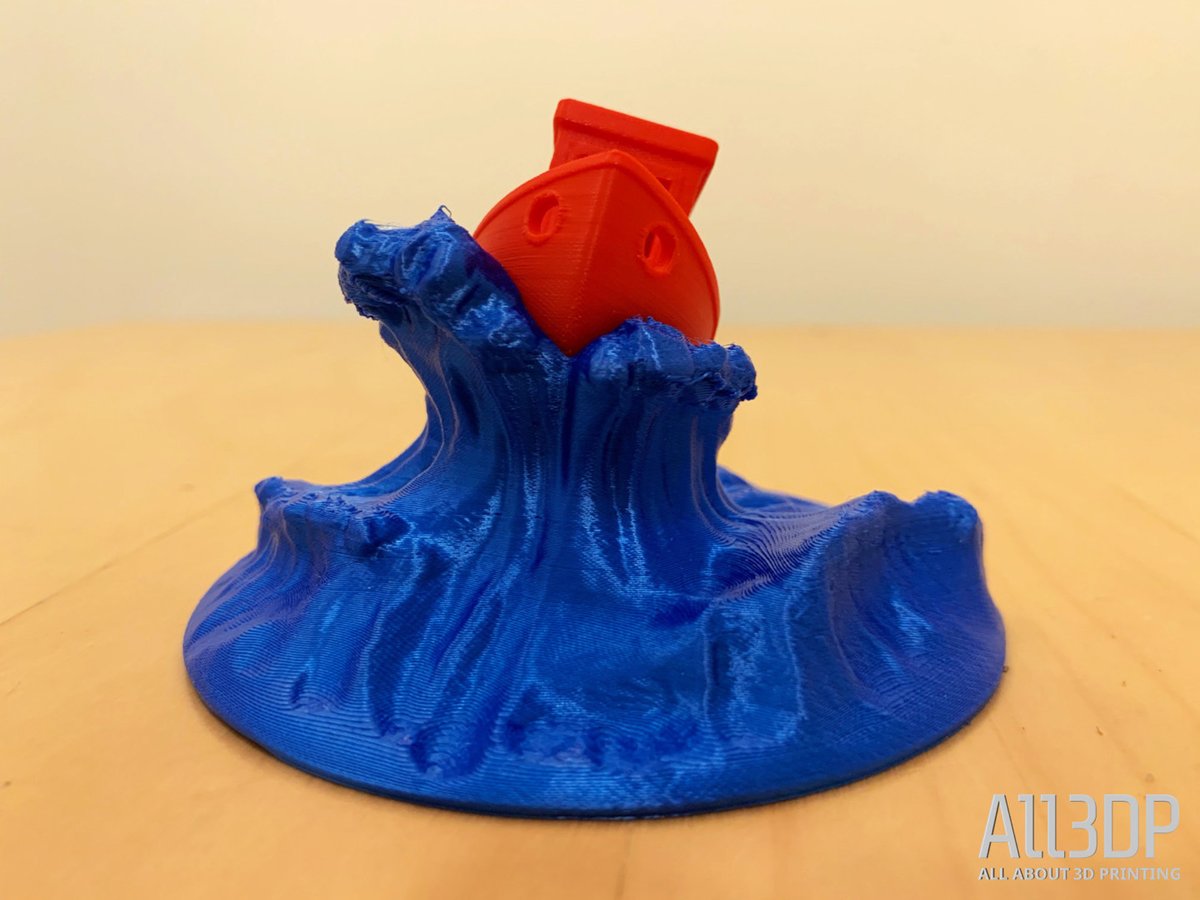
Having received a freshly released spool of Monoprice’s Hi Gloss filament in blue, we figured this would be the perfect material to 3D print the popular Benchy at Sea model on Thingiverse. Not only can this wavy 3D printed stand prop your torture test tugboat on a rising wave, but it also provided us with the opportunity to see how the Monoprice Delta Pro could handle complex and intricate geometries without any support structures.
The resulting print was one of the best we obtained, boasting a smooth surface and almost zero flaws. Plus, the shimmering blue filament created an incredible effect when contrasted with our red 3DBenchy.
Test Print 4 – Hollow Draudi
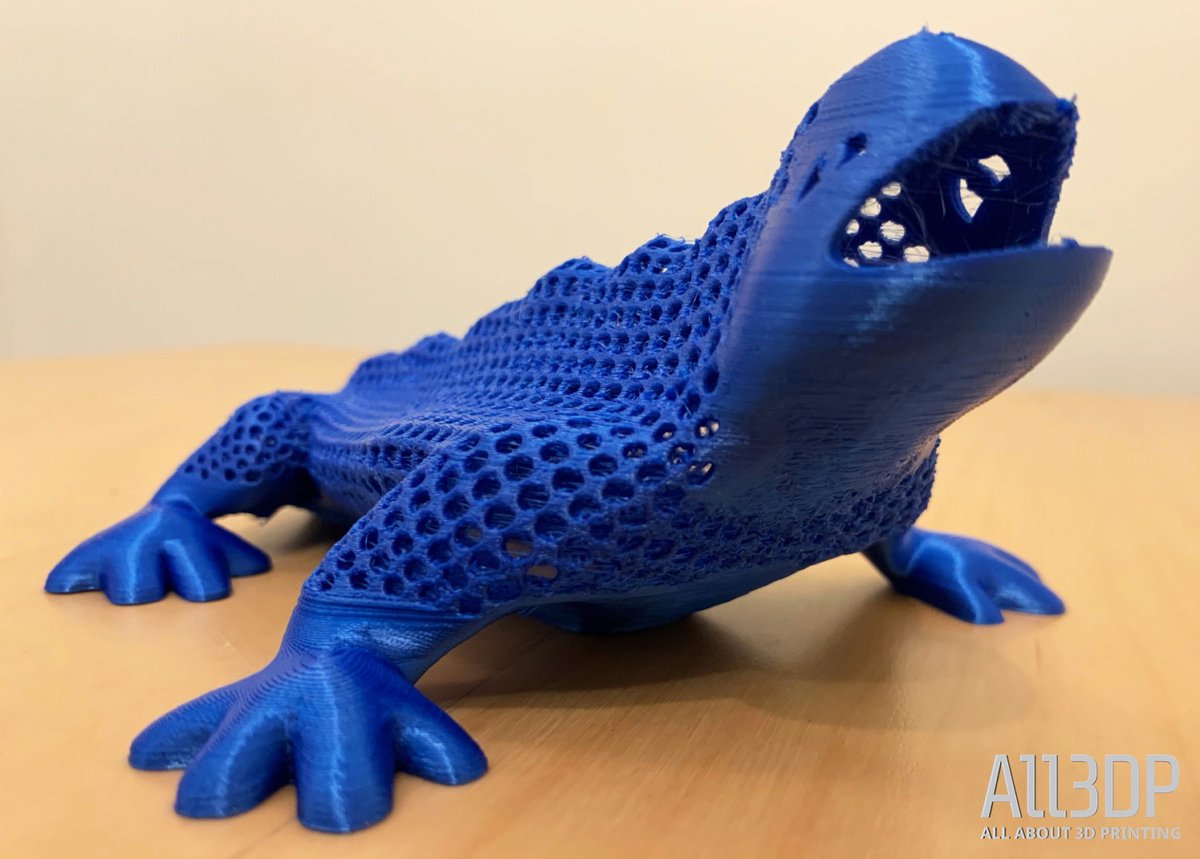
Using the Hi-Gloss filament from Monoprice again, the next model we printed was the Hollow Draudi created by the 3D printer manufactured BCN3D Technologies. This was one of the more difficult models we attempted, as this hollow lizard is equipped with tons of tiny holes throughout its body. After adjusting our retraction settings to handle these gaps, we started printing this challenging creature.
The finished item was less desirable than our incredible Benchy at Sea, showing a fair amount of stringing in between the holes and experiencing some trouble with the overhangs around the mouth area. It wasn’t a terrible print per se, but it was definitely one of the weaker examples from our test print bunch.
Test Print 5 – Curved Honeycomb Vase

Aiming to increase the size of our next test prints, we moved onto the tremendously sleek Curved Honeycomb Vase by Thingiverse user eggnot. This complicated model is comprised of protruding cubic shapes that encompass the entire vase. Another test to see how the Monoprice Delta Pro would handle more complex geometries and layering. We decided to load up Polymaker Polylite PLA in grey, looking once again to see how the print would deal with a material that was not manufactured in-house.
Despite some slight blemishes with layering toward the bottom of the vase, we were impressed overall by the finished product. However, we were fully satisfied, and so we decided to give one more intricate vase a go.
Test Print 6 – Vase
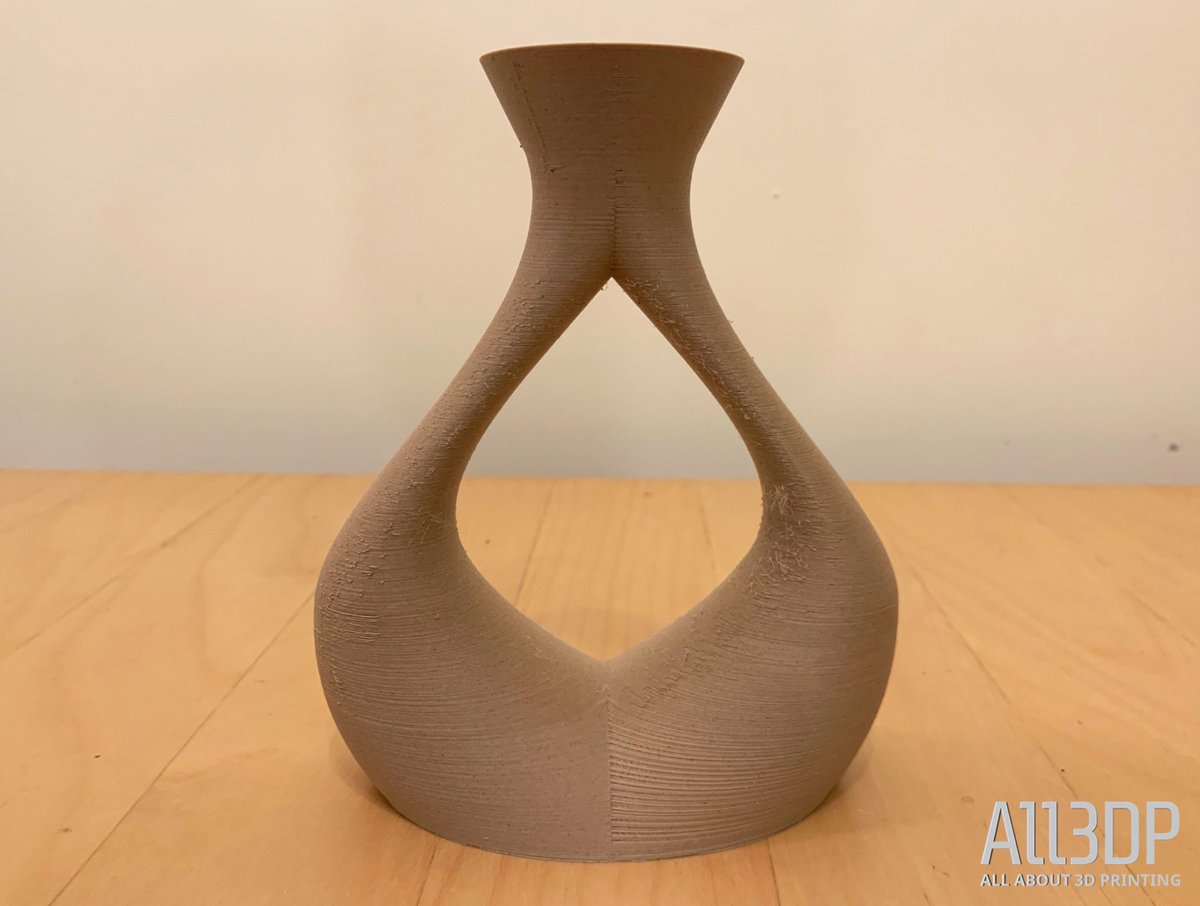
After browsing for some of the latest models to earn the attention of the maker community, we came across the Special Vase by 3diyn. This model is exceptionally curvy, featuring two stems that meet at both the top and bottom of the vase, but separate directly in the middle to create a teardrop shape. For this model, we reloaded the Wood PLA from CCTree into the Monoprice Delta Pro. With no supports required, we were able to print this voluptuous vase with incredible surface quality. There appeared to be some minor layering issues on the right half of the vase’s base, but otherwise, the 3D printer did a decent job with a rather complicated model.
Test Print 7 – Big Moai
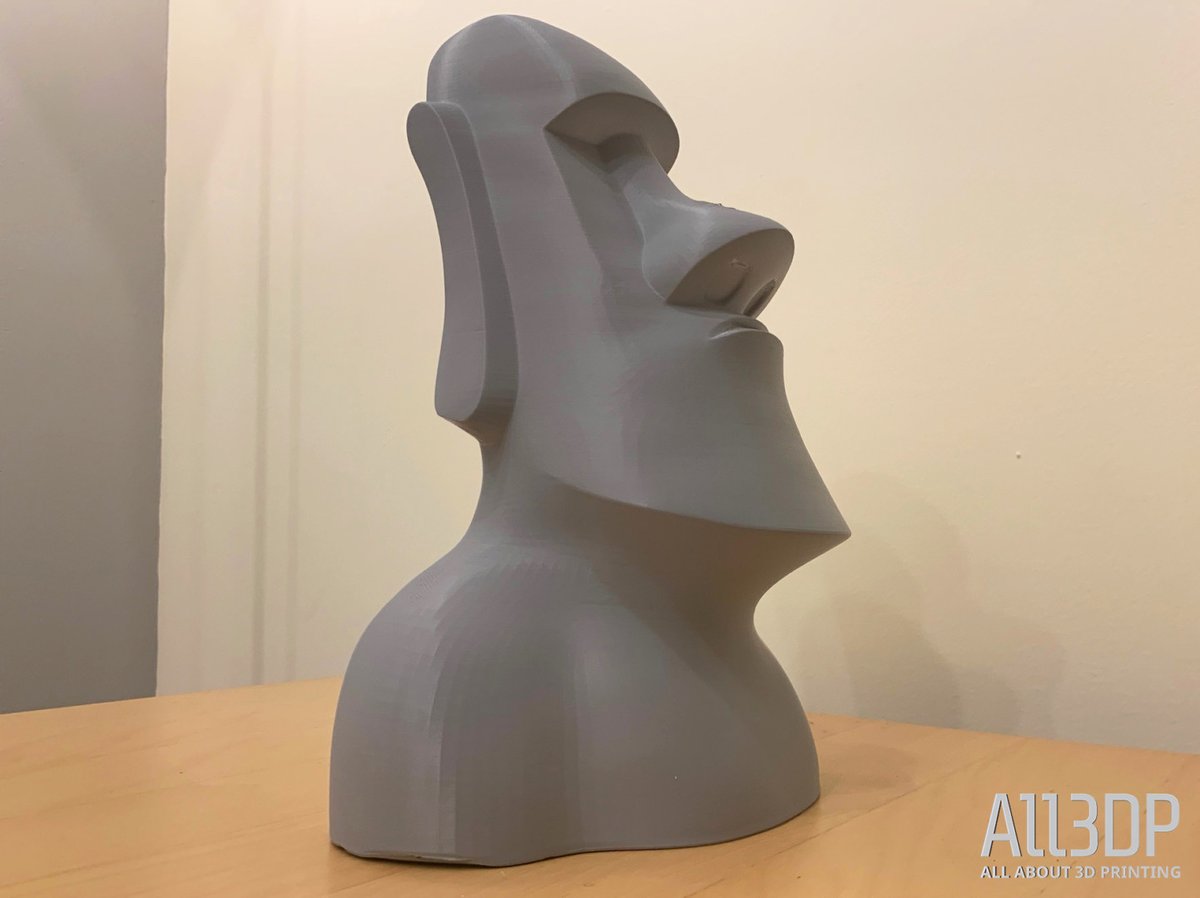
Last but not least, we wanted to test out the build volume capabilities of the Monoprice Delta Pro, and so we settled on a scaled-up version of the Moai by Thingiverse user ET-Huang. After increasing the dimensions by over 300 percent, nearly maximizing the build area across the X-axis, we wanted a way to decrease the time of this print and also give the 3D printer a more grueling test. Therefore, at the suggestion of the designer, we opted to print the Moai with the “Spiralize” setting in Cura, which ultimately sets the printer in vase mode.
In other words, our print was completely hollow, and at such a large-scale, this was bound to cause some problems at certain points of this curvy print. While most of the 3D printed statue demonstrated impeccably smooth surface quality, our final impression was dampened by under-extruded gaps on top of the nose and under its ears. Nonetheless, we expected that these flaws would be a possibility, and so, we ultimately remained impressed by the final product.
Software
There’s not much to cover as far as software goes, but we did run into some problems with slicing software that we felt should be mentioned.
Without much of a community behind it, we failed to find proper Cura settings. On the product page for the Monoprice Delta Pro, the manufacturer shares KISSlicer pre version 1.6.4 for Windows only. This means that those who are used to utilizing a different slicer will have to either switch to an unknown software or tinker around to find the perfect settings.
While we’ve recognized KISSlicer as one of the best 3D printing slicers, this interface is a bit convoluted and difficult to grasp for those who have never used it. It presents a different approach to slicing than popular alternatives like Cura and Simplify3D.
Nevertheless, taking the Cura print settings from the similarly designed Atom 2.5 Delta 3D printer, we were eventually able to utilize Cura (the reviewer’s personal favorite as for as slicers are concerned).
Using these settings, we were able to start printing successfully with the Monoprice Delta Pro. However, there were times when the hotend temperature wouldn’t register with the machine, meaning that we had to input the temperature manually using the touchscreen interface.
Tech Specs
Here are the technical specifications for the Monorprice Delta Pro:
- Manufacturer: Monoprice
- Model: Delta Pro
- Maximum Build Area: ø270 x 300 mm
- Software: Cura, KISSlicer, and Simplify 3D
- Filament Diameter: 1.75mm
- Materials: PLA, ABS, PETG, Nylon
- Vertical Print Speed: Up to 150mm/sec
- Layer Thickness: 50-300 microns
- Build Platform: Heated glass
- Auto Bed Leveling: Supported
- Input Power: 110~220 VAC, 50/60 Hz
- Dimensions: 20.7″ x 20.7″ x 37.0″ (525 x 525 x 940 mm)
- Weight: 26.5 lbs. (12.0 kg)
Where to Buy
You can purchase the Monoprice Delta Pro from the manufacturer or following online retailers.
License: The text of "Monoprice Delta Pro Review: A First-Rate 3D Printer" by All3DP is licensed under a Creative Commons Attribution 4.0 International License.
CERTAIN CONTENT THAT APPEARS ON THIS SITE COMES FROM AMAZON. THIS CONTENT IS PROVIDED ‘AS IS’ AND IS SUBJECT TO CHANGE OR REMOVAL AT ANY TIME.