JGAurora A5 Review: Underrated or Underwhelming?
Rating

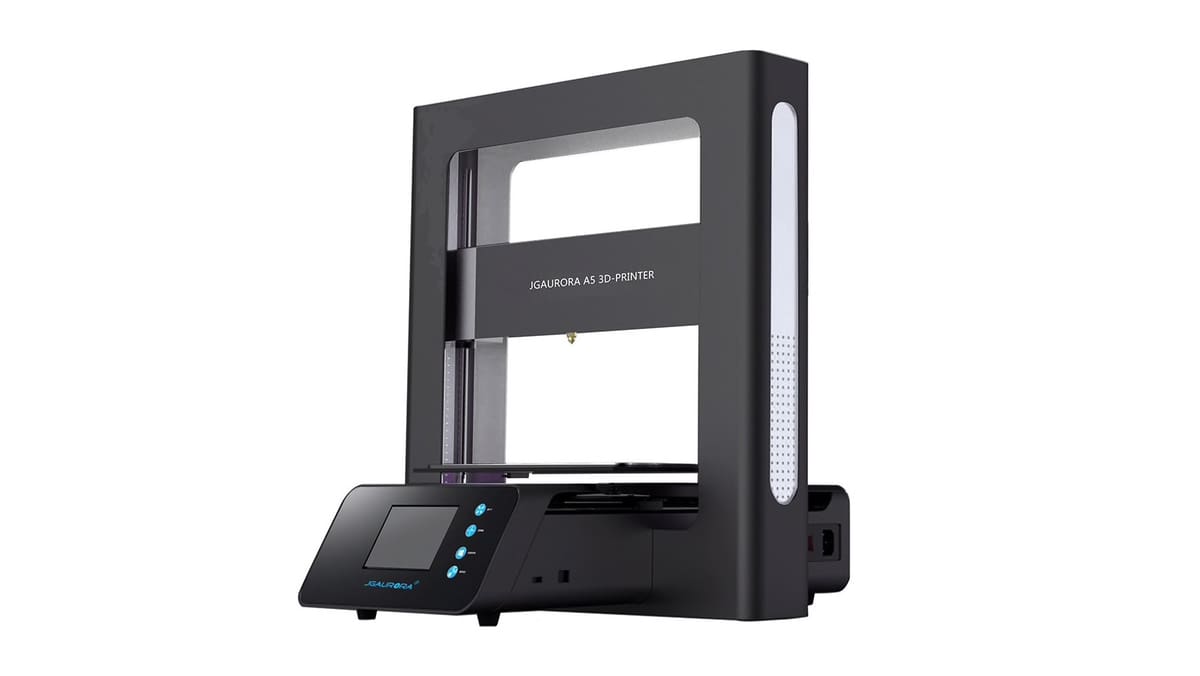
The JGAurora A5 is a 3D printer with a size similar to the CR-10 at a lower price. Check out our review to find out if it's worth buying.
The JGAurora A5 offers a totally new design and even different features from the smaller and cheaper counterpart the JGAurora A3. The machine is one of the many medium-sized FDM 3D printers that are growing popular for those on a budget – and it comes equipped with some interesting twists.
Compared to its predecessor, the JGAurora A5 has a large build volume, new features like power recovery and a high definition and full-color touchscreen. Sounds intriguing, so we decided to give the JGAurora A5 a test drive. After spending a week setting up and printing away with this trending 3D printer, we’ve gotten better acquainted with this machine. Here’s our first impression of the JGAurora A5.
Don’t miss: The Best DIY 3D Printer Kits
Features
Let’s get straight to it, shall we? The JGAurora A5 is a big machine, so if you want to add it to your workshop, you’ll definitely need to clear some space. The printer itself is capable of producing prints as big as 305 x 305 x 320 mm, which puts it in the size range of the popular Creality CR-10 (which has a slightly superior 300 x 300 x 400 mm).
Outside of the generous build volume, there are two other interesting features integrated into the JGAurora A5 3D printer that you don‘t find with most budget printers:
- Filament out detection: Every time the filament runs out, the printer stops and emits a loud warning signal.
- Power recovery: Not only does the Prusa i3 MK3 offers this great feature, the JGAurora A5 3D printer can also handle power outages. When reconnected to a power line, the printer heats up the hotend and continues your print without any problems.
The JGAurora A5 3D printer comes partially assembled, and the construction process is quite simple. The base and frame of the printer can be connected with just a few twists of some screws and nuts. In fact, we had this machine put together and powered up in just about 15-20 minutes.
The printer’s hotend is an E3D V6 hotend clone that has a custom heatsink. The heat bed (the manufacturer calls it a “Black Diamond Glass Heated platform”) is a glass plate with some additional coating, comparable to the Anycubic Ultrabase.
Before we started the first prints on the JGAurora A5 3D printer, we had to manually calibrate the bed. The printer assists this process by moving the nozzle to the bed’s edges, but we still had to calibrate the bed by turning small screw caps underneath the corners of the print platform.
Even when factoring in calibration and the loading of the filament, the whole setup process shouldn’t take any longer than 1 hour.
Test models are already loaded via a USB stick that comes with the printer. Alternatively, you can hook up the machine to a computer and print directly from there. Even though there’s a Wifi option in the printer menu, it is clearly not working and also not advertised to be included.
When it comes to slicing, the manufacturer recommends using Ultimaker Cura. For the right settings, we followed this informative thread on Thingiverse.
Unboxing
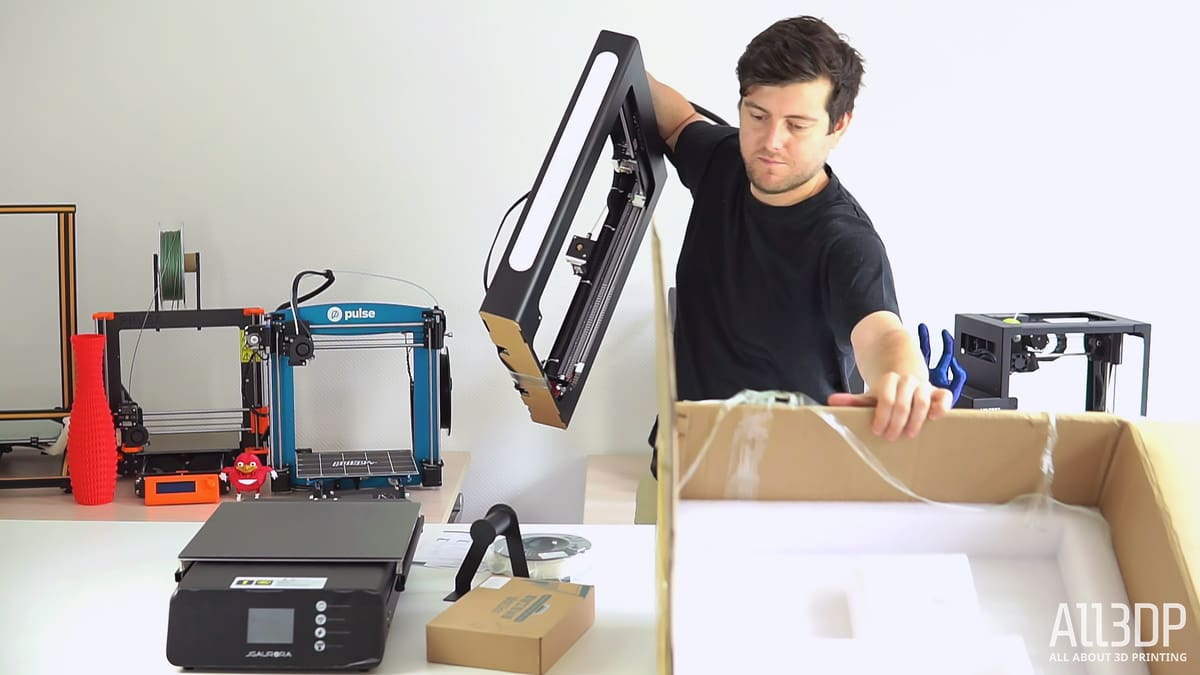
Taking note of the 305 x 305 x 320 mm print area, we definitely expected that the JGAurora A5 would come in a modestly sizable box. But this packaging was gigantic, which we soon realized was necessary as the entire printer’s frame is split into just two large sections.
The printer base is the first part to unearth from the styrofoam-laden packaging. This included the large build platform, along with a high-definition touchscreen LCD screen, USB and SD card slots, as well as three wire ports where you’ll eventually connect the electronics.
Perpendicular to the base of JGAurora A5 is the frame, which of course is equipped with the extruder, transom board and Z-axis motor.
Outside of these two main frame components, there’s also an assortment of tools and accessories included with the JGAurora A5’s packaging. There’s a spool of PLA and filament holder that will need to be attached to the back-left side of the frame.
A cardboard tool box has everything you’ll need for the easy assembly process. This included hex keys, an extra nozzle, screws and washers, a sheet for calibration and a USB stick loaded with instructions, slicing software and test models.
There was also a surprisingly small sheet with brief instructions on how to assemble the JGAurora A5, load filament and level the platform. We knew this 3D printer was semi-assembled, but had no idea that the process would only consist of three steps…
The JGAurora A5 is a Chinese low-cost 3D printer is capable of handling nearly all materials and offers a big print bed.
Assembly

The JGAurora A5 is marketed as a semi-assembled 3D printer, but the build process really could not have been much easier. In fact, the printer assembly instructions list only three steps to putting it together.
The first step was to pull all of the machine parts out of the box, which we had already done. The printer comes in the just three parts: the sheet metal frame, printer base and filament holder. So, in reality, there were really only two steps to complete before we had our towering JGAurora A5 constructed and ready to go.
To assemble the frame and base, all you have to do is pass the printer base through the frame, fixing it between the slot. After you ensure that the JGAurora A5 base and frame are both facing the right direction, which you can do my checking whether the screen is pointed in the same direction as the front of the frame, use the large screw and attach the two main components together.
The other side of the frame is where the filament holder is installed, which is connected with a smaller screw. The final step is to connect the electronics into the connectors. This is another task that has been made simple for the JGAurora A5, as the wiring is neatly grouped and placed next to the connectors. After those are plugged into the correct slots, you’re already finished with the assembly process.
However, there was still some work to be done before we could get the JGAurora A5 to start printing. For starters, the bed platform had to be leveled manually, but even this sometimes difficult process was made easy by the Chinese 3D printer manufacturer.
With the JGAurora A5 plugged in and powered on, we navigated to the “LEVEL” button on the touchscreen display. This setting brought us to a page with five leveling point, one for each corner and another in the center of the print bed. Going one by one, activating these leveling points will automatically set the extruder and nozzle to the pre-determined spot.
Using a single sheet of A4 paper, we slid it under the nozzle to check the distance from the print bed. The small knobs underneath each corner of the bed are then twisted to move the bed up or down. This is adjusted until the paper encounters slight resistance from being in between the nozzle and JGAurora A5’s print platform.
We had to repeat this step for every corner until reaching the fifth leveling point, which is located in the center. If the calibration is done accurately on the four corners, this final point should be nice and level.
After we got the bed calibraated, there was still one more task at hand: loading in the filament. The JGAurora A5 came with a small spool of white PLA, so that’s what we decided to start things off with. To load the filament, we had to go into the setting to preheat the extruder. The filament is inserted into the Bowden filament feeding system that is located on the back of the frame.
Pushing the button to unlock the path, we slowly fed the PLA into the tubing, which extended above the JGAurora A5’s frame and back down into the extruder. The touchscreen provided the ability to automatically insert or remove filament at three speeds (slow, normal, fast) and three lengths (1mm, 5mm, 10mm). All we had to do was press the “Insert”. We actually experienced some issues with the filament feeder, but we’ll dig into that in the following section.
All in all, the JGAurora A5 impressed us with the intuitive and user friendly setup. In just around 30 minutes, we had the 3D printer assembled, the bed leveled and the filament loaded. Although we had a great first impression of the JGAurora A5, but did encounter a few problems with the design of the printer as our review went on.
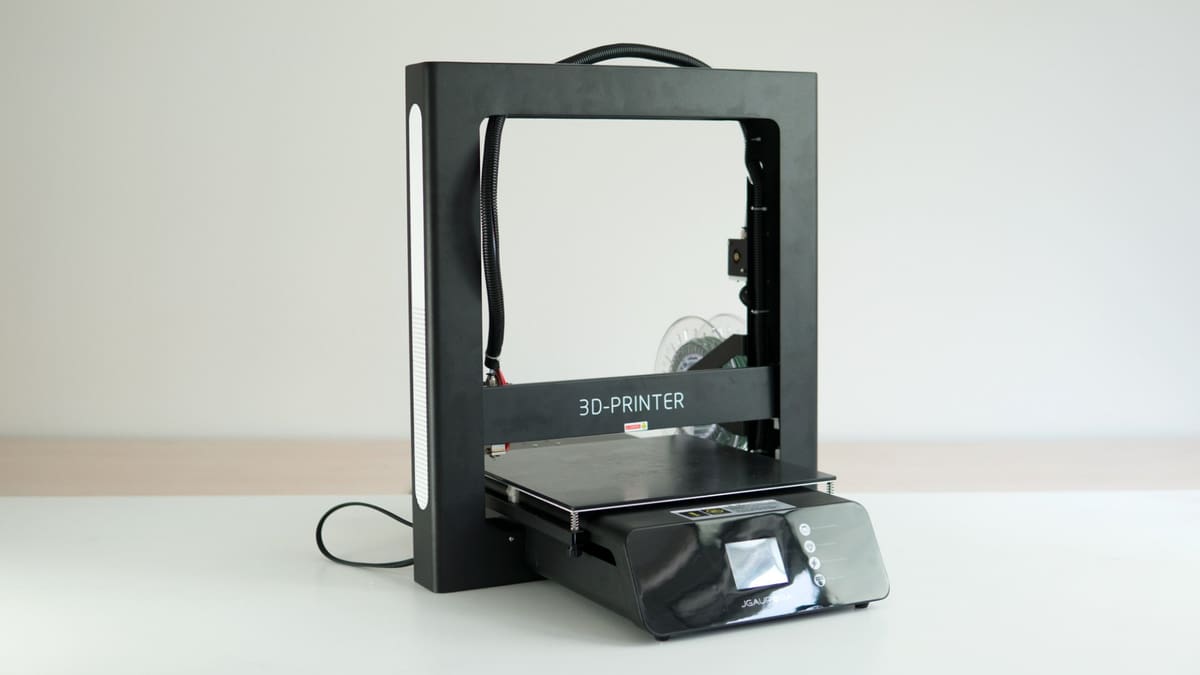
Design
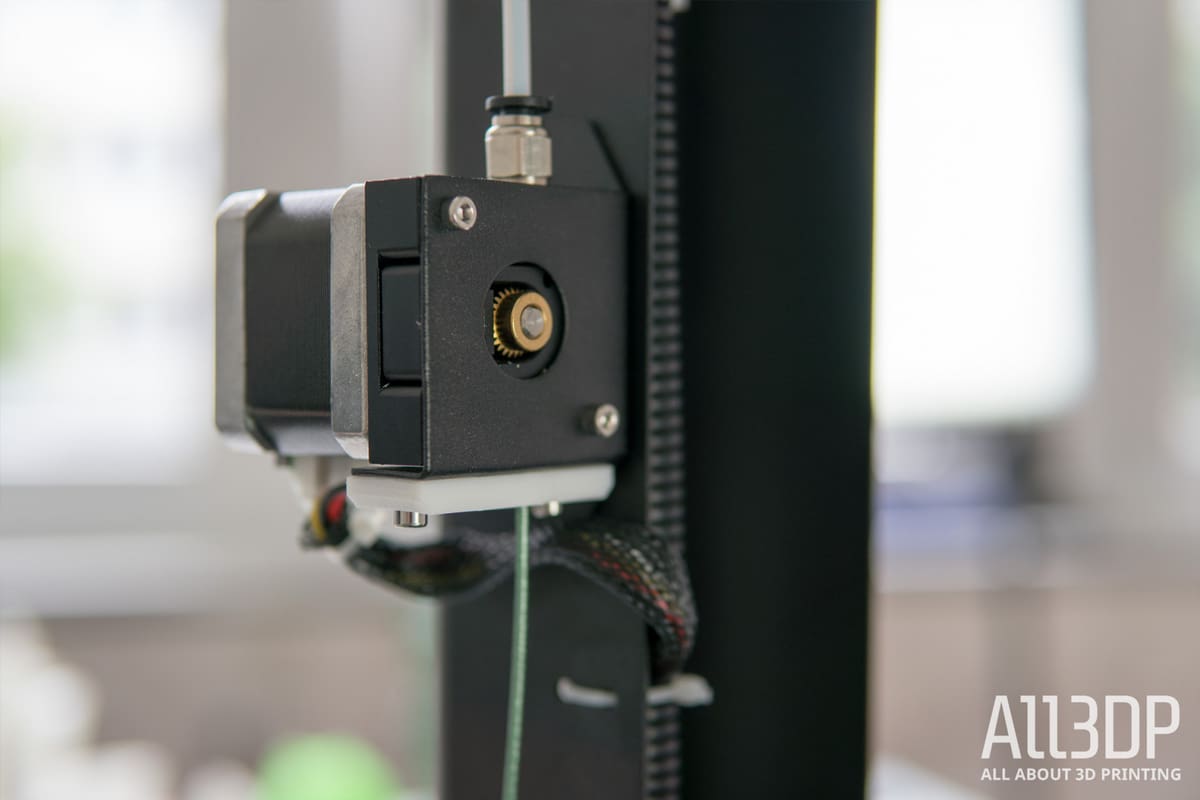
The JGAurora A5 has a simple and sleek design. Right out of the box, you instantly get a feel for this printer’s sizable build volume. The extensive metal frame is extremely lightweight, but to the point where it actually feels a bit flimsy at times. In fact, when pushing the unlock button on the extruder clip to load filament (which actually offers a surprising amount resistance), you can feel the thin frame bending as you exert force.
In case you didn’t know what the JGAurora A5 actually was, the machine has the word “3D-PRINTER” labeled across the X-axis railing of the frame in white. A bit redundant, but that’s beside the point.
The sides of the printer’s frame have white plastic coverings sandwiched in between the aluminum, which seems to have been added for aesthetic purposes. The very top of the frame has an oval-shaped gap where the extruder wiring and filament tubing are directed back down into the extruder.
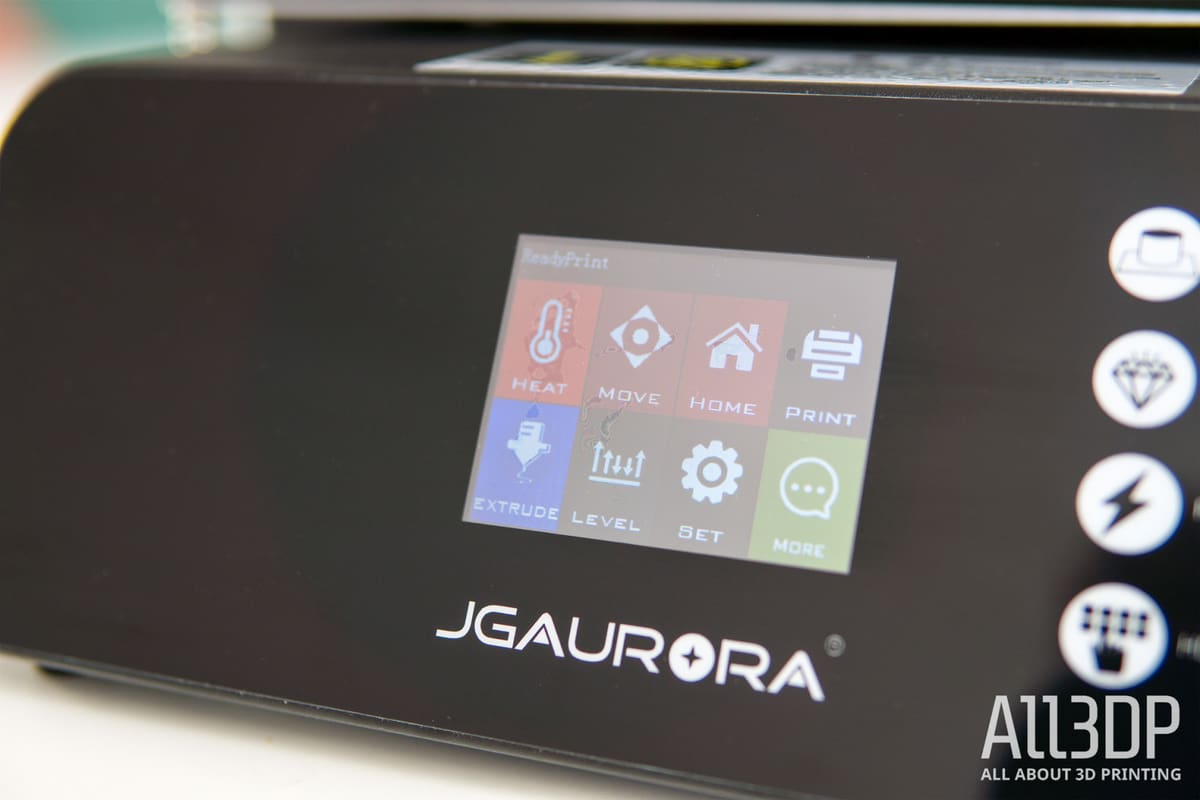
Moving on from the frame, the front of the printer’s base is centered around the colorful and high-definition LCD touchscreen, an impressive feature considering the low price point of the JGAurora A5.
There are a number of settings that you can access from this display. HEAT will allow you to pre-heat the extruder or print bed, which can come in handy when loading filament or speeding up setup time while you prepare a 3D model for printing. MOVE allows you to direct the extruder to different sections of the print area. The HOME button is pretty self-explanatory, as is the PRINT button.
Other than that, the JGAurora A5 has an EXTRUDE setting for filament loading and unloading, FAN for adjusting the fan speed, SET for in-depth control of printer settings, and MORE for, well, even more settings.
Loading up filament on the JGAurora A5 seems like it should be pretty easy, but it proved to be a more trying task than we initially presumed. For starters, the filament button was quite hard to push, and as mentioned before, causes the thin metal frame to flex a bit.
There also seemed to be a small issue with the automated filament feeding mechanism. When loading filament, the part would sometimes make a clicking sound and not take in the material. This happened at time when the filament guide tubing resting at a natural position. When we adjusted it a bit, this clicking stopped and the filament was properly fed into the extruder.
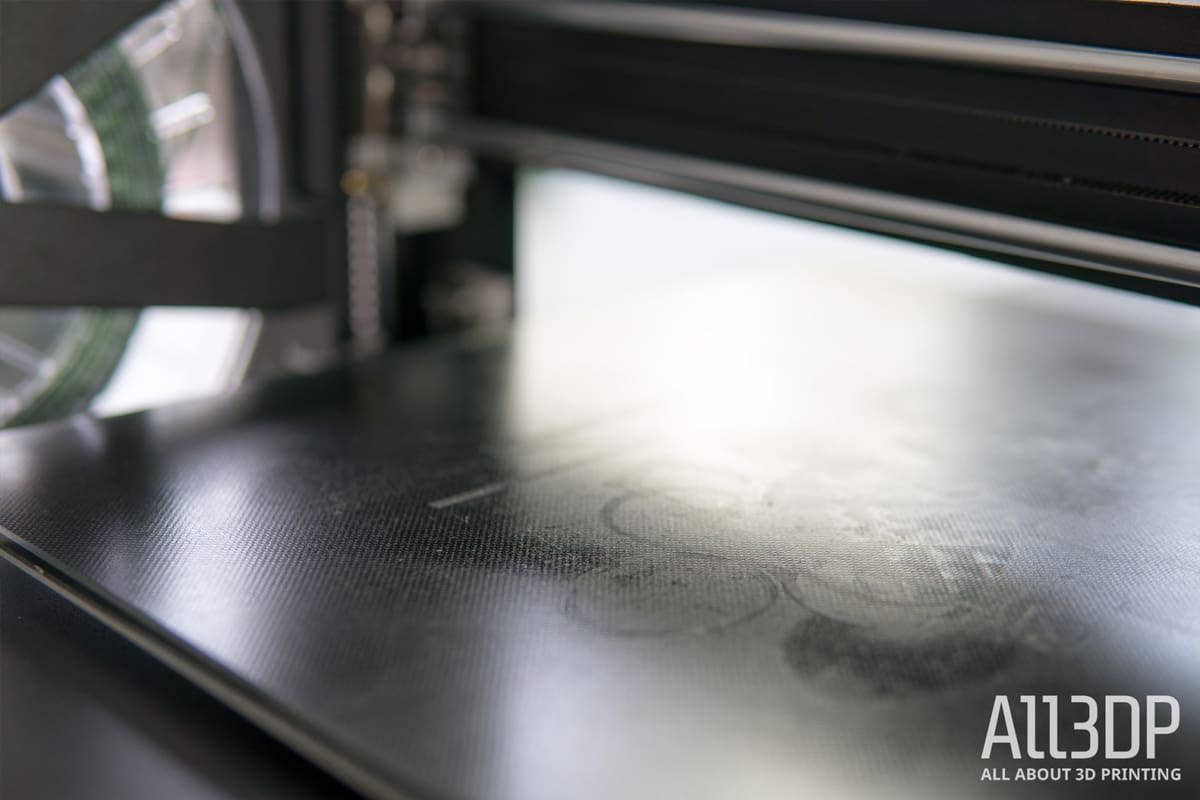
The black diamond glass heated platform that is mounted on the JGAurora A5 looks similar to the increasingly popular Anycubic Ultrabase. This type of glass bed is supposed to improve adhesion and make it easier to remove your 3D prints cleanly, but we did personally experience some trouble with the first layer sticking a bit too well (more on that in the following section on printing).
In regard to the design, the JGAurora A5 ultimately seems to place value in aesthetics over anything. The Y-axis components is hidden away underneath the base.
This is a nice visual feature, however, there have been some reported issues with the accuracy of the Z-axis homing. Cheap components like the bed springs and the Z-axis limit switch makes the Z-axis home position inaccurate, causing prints to stick to the glass build with no hope of removing it in one piece (we experienced this problem ourselves, which we’ll discuss in the “First Prints” section).
Another glaring pitfall of the JGAurora A5, at least with our review unit, was that some functions were incredibly buggy at times. For instance, after setting the extruder and bed temperature in Cura, the 3D printer would sometimes not acknowledge the predetermined settings, keeping the extruder and bed cool. To overcome this, we had to go into the HEAT settings of the JGAurora A5 and manually adjust the temperature. It’s wasn’t the end of the world, but it’s definitely an inconvenience that grew more frustrating as our testing went on.
First Prints
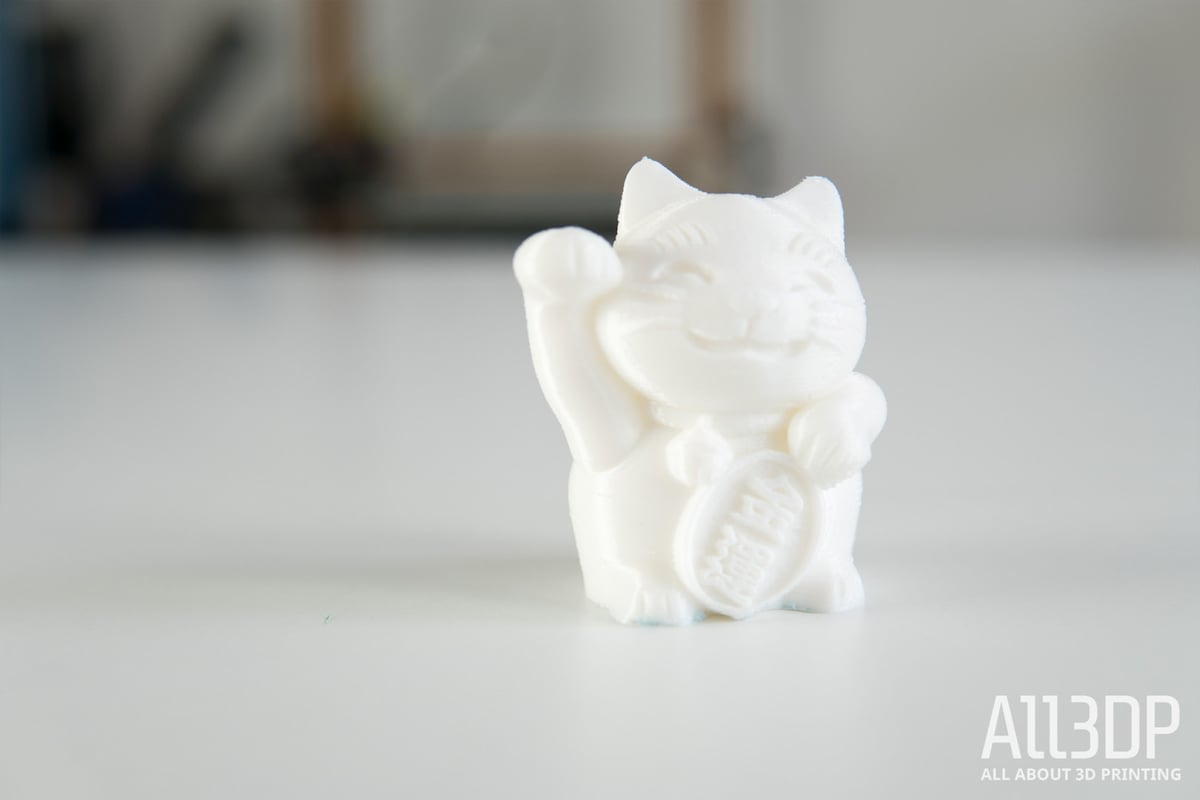
We decided to kick off the printing party with the Money Cat, a test model provided on the SD card that came with the JGAurora A5. After calibrating the print bed and loading the “White PLA” that came with the printer, we started printing right away.
This first print turned out quite decently as far as surface quality goes. For some reason, there was some blue filament remaining in the extruder, so there was a bit of discoloration in the first couple of layers. Otherwise, the layering look magnificent, and some difficult overhangs were conquered without flaws. However, this was a small test model, and doesn’t really showcase the capabilities of the JGAurora A5 3D printer.
Next, we needed something challenging, something universally accepted as a 3D printer torture test. And so we printed 3DBenchy.
After setting up a custom 3D printer profile on the slicing software Cura, we loaded up the Benchy model and prepared it for printing. Using the same unbranded White PLA, we watched as a standard sized Benchy came to fruition.
Unfortunately, this print was much less impressive than the Money Cat. There was a fair amount of stringiness and noticeably poor bridging, not to mention an elephant foot at the bottom of the print surface.
Despite the mediocre Benchy, our first impression of the JGAurora A5 hadn’t sunk just yet. In fact, since it offers a 305 x 305 x 320mm print volume, we decided to pull a line from the classic film Jaws.
We’re gonna need a bigger boat!
And so, we set off to attempt a bigger, more ambitious Benchy. Scaling the model at 300 percent its orginal size, the larger-sized Benchy actually turned out much better than our first attempt. Mind you, we did adjust some settings like fan speed and bed temperature, but nonetheless our sinking opinion of the JGAurora A5 suddenly became buoyant again.
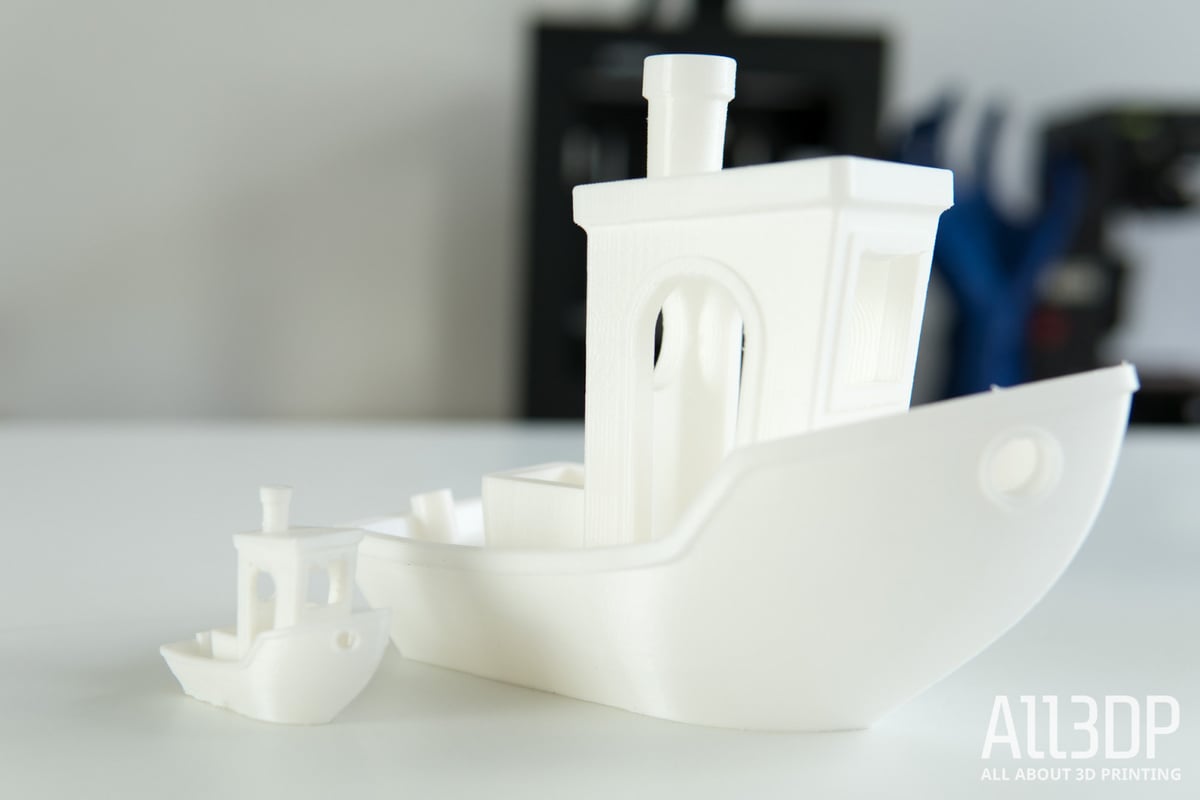
The titanic Benchy still had some issues with bridging in the rectangular front window, as well as the circular window in the back. But this was to be expected, as the increased size of the model was sure to cause some trouble. Other than that, the super-sized Benchy actually came out exceptionally well, showcasing smooth surfaces, no overhangs and clear text on the bottom and back of the ship.
Although the white PLA that came with the JGAurora A5 performed better than expected, we wanted to try out some other brands and material types for our following prints.
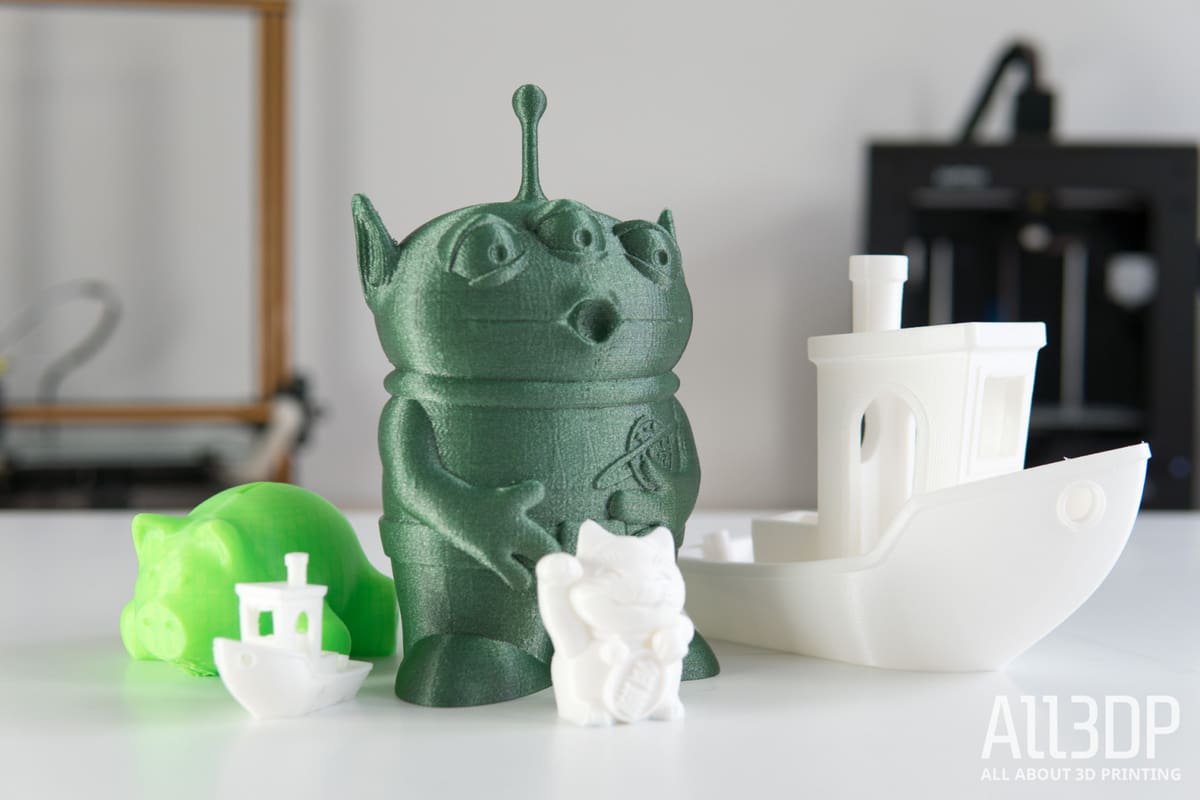
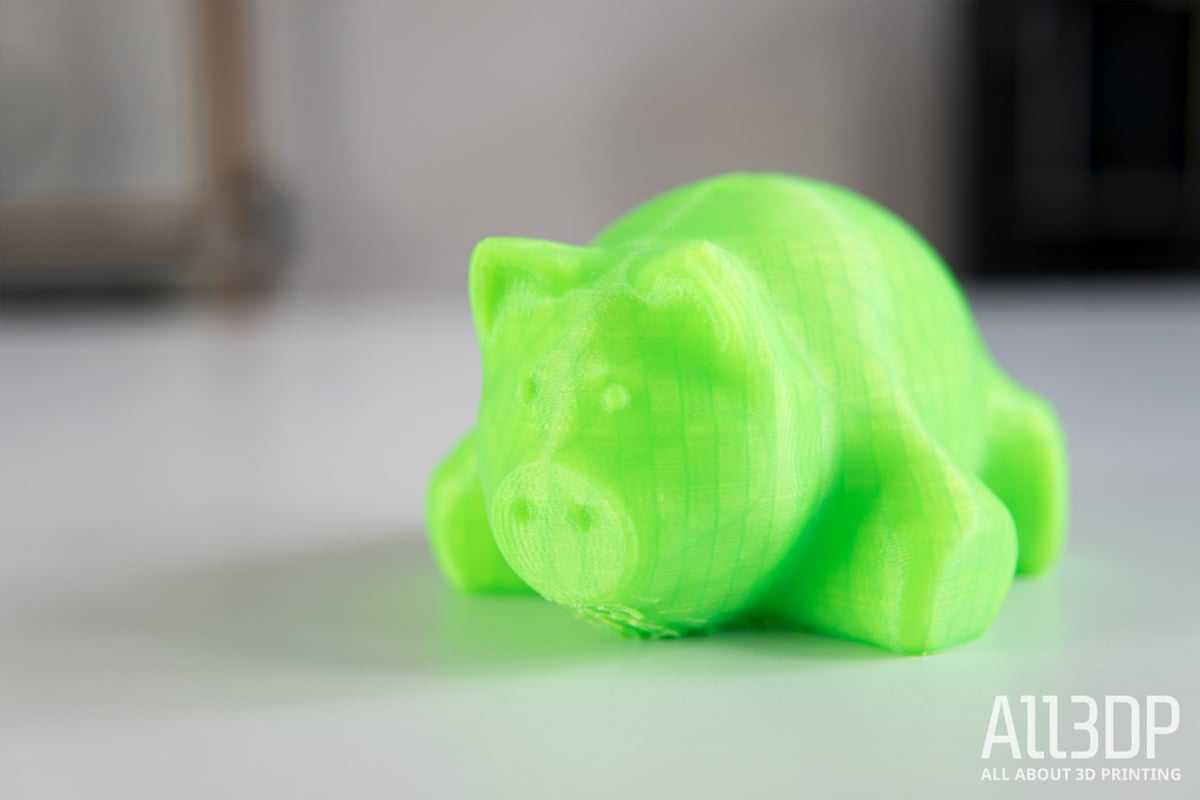
So we used some green PLA from the filament producer CCTREE, we decided to brighten things up with the cute coin-holding Mr. Piggy model. The JGAurora A5 handled this material and design very well, but we did face a challenge in removing the support material from the surface of the print. (However, a little bit of sanding goes a long way).
Although the print looked nice, it did raise some questions about accuracy. The locking mechanism at the bottom of Mr. Piggy didn’t quite fit, rendering the model unable to keep hold of any loose change.
We also loaded up some economy-sized colorFabb PLA in white that we had lying around. For this print, we settled on the popular Predator Action Pliers design, which is a set of pliers that uses a gear mechanism to operate. What makes this model special is that it can be printed in one piece. Unfortunately, while the print came out nicely, it didn’t quite make it off the JGAurora A5’s glass print bed in one piece.
We attributed this to reported inaccuracies with the Z-axis homing, as the print was almost glued onto the bed. Since this model is delicate and is equipped with moving parts and gears, having to exert force to get it off the bed ended up breaking it into multiple pieces.
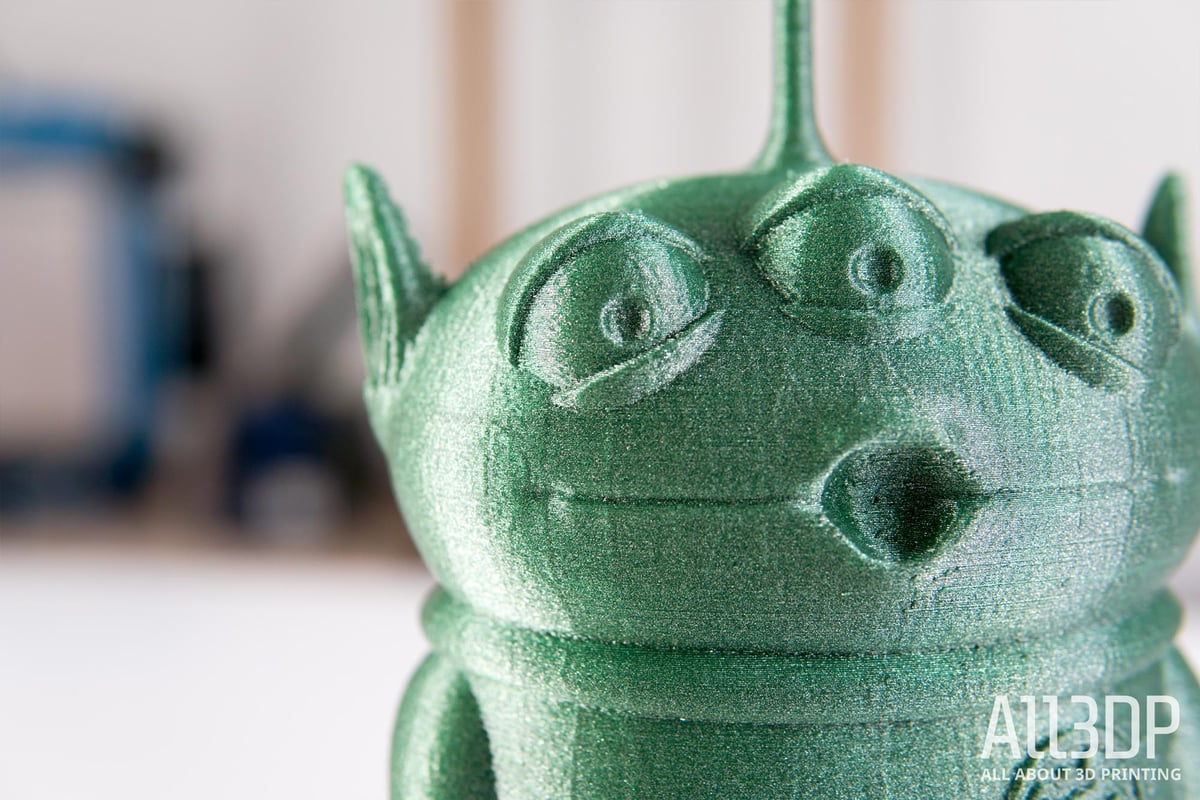
Wanting to try out some specialty filament, the last round of prints we did on the JGAurora A5 was with colorFabb nGen LUX in Nature Green. This sparkly material was released by the Dutch filament producer not too long ago, and we’d been itching to test it out.
Being that the filament color was green, what better object to print than an alien, particularly the Toy Story Alien that lived inside the claw crane game in Pizza Planet. Since the JGAurora A5 provides a sizable build volume to work with, we decided to scale this model up 300 percent before printing.
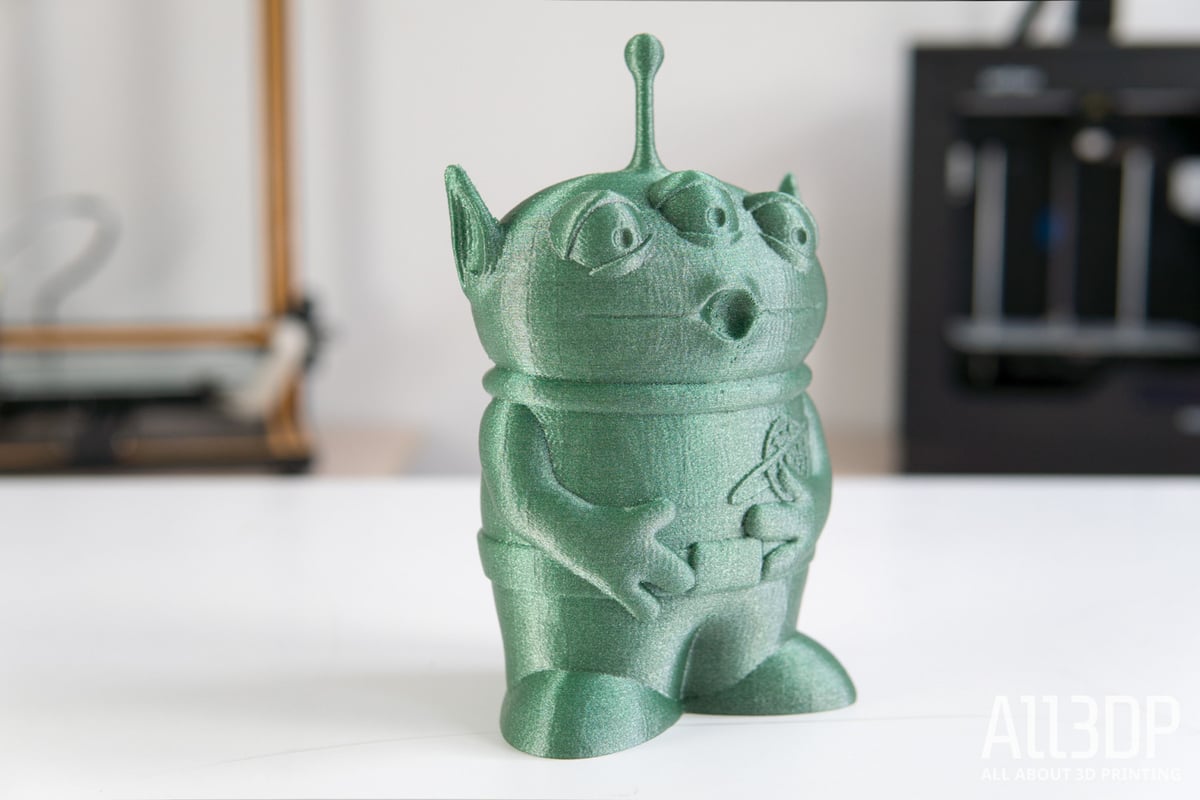
The resulting print was by far the best we achieved on the JGAurora A5 thus far. This was probably a mixture between the vibrant material from colorFabb and constant tweaking of the printer as we went along. Whatever the reason, this alien looked flawless. There were no issues with overhangs or layering, despite being a challenging model that was printed no support structures.
The JGAurora A5 is a Chinese low-cost 3D printer is capable of handling nearly all materials and offers a big print bed.
Specs
In many ways, the specifications of the JGAurora A5 3D printer are similar to most other low-cost 3D printers. However, it does have a generous build volume and layer resolution.
Here are the specs for the JGAurora A5 3D printer:
- Technology: FDM (Fused Deposition Modeling), single extruder
- Build Volume: 305 x 305 x 320 mm
- Layer Resolution: 0.1-0.3 mm
- Connectivity: USB
- Printing Speed: up to 150 mm/s (80 mm/s recommended)
- Filament diameter: 1.75 (Bowden drive)
- Nozzle/Filament Diameter: 0.4 mm / 1.75 mm
- Operational Extruder Temperature: max 260C
- Operational Heatbed Temperature: max 100C
- Heated Bed: Yes
- Supported Filaments: PLA, ABS, PETG, HIPS, Wood
- Input rating: 110V/220V AC, 50/60Hz
- Printer Dimensions: 536 x 480 x 235 mm
The Final Say
As you can probably tell, our initial experience with the JGAurora A5 was a roller coaster with ups and downs. Despite the problems we faced with the design of the printer, it’s difficult to berate the print quality and build volume offered at such a low price point.
However, at the end of the day, the JGAurora A5 presents itself as a cheaper knock-off version of the Creality CR-10. It has the ability to take on some monstrous prints, but glaring design flaws seem to be causing our opinion to waver.
Still, the JGAurora A5 deserves some praise for its low price point, surprisingly robust and advanced features (such as calibration assistance, power recovery mode, etc), and monstrous build volume.
We could even say that our view on the JGAurora A5 feels a bit inconsistent because…well…the 3D printer itself is inconsistent too. When things went smoothly, the prints looked amazing. But there were also times when the prints just didn’t look up to par.
As a first impressions review, we’re confidant that more time playing around with the JGAurora A5 would help yield a better overall view. We will continue to try out new filaments and prints to push this 3D printer to the limit, so stay tuned if you want to learn more about the JGAurora A5.
Where to Buy?
You can order the JGAurora A5 3D Printer from most popular online stores. Currently, the price range for the JGAurora usually rests right around $320 -350.
The JGAurora A5 is a Chinese low-cost 3D printer is capable of handling nearly all materials and offers a big print bed.
CERTAIN CONTENT THAT APPEARS ON THIS SITE COMES FROM AMAZON. THIS CONTENT IS PROVIDED ‘AS IS’ AND IS SUBJECT TO CHANGE OR REMOVAL AT ANY TIME.