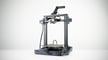
Elegoo Neptune 3 Review: Premium on a Budget
Rating

Elegoo is giving FDM printers another swing with its Elegoo Neptune 3, a mid-sized printer that has an ocean of potential. Read on for our review.
Elegoo’s new Neptune 3 offers some exciting features at a price that will entice the bargain hunter in you. It includes automatic bed leveling, a large 4.3-inch touchscreen interface, and a heated bed with a flexible PEI-coated magnetic sheet.
While Elegoo’s resin printers — the Mars, Saturn, and behemoth Jupiter lineups — have been reasonably successful, its FDM printers have been rather hit and miss. The company bombed with the Neptune 2 but came back with the Neptune 2s, which solved many of the previous model’s problems.
With the Neptune 3, it looks like Elegoo wants a share of the Creality market by offering a low-cost Ender-style alternative with some great-sounding features. Whether it succeeds in ending the Ender is altogether another story.
Our review of the Elegoo Neptune 2 showed that low prices and great specs on paper aren’t always all they’re cracked up to be. We were disappointed with the overall package. Can the Neptune 3 redeem the series and crack the code of premium for little price?
Verdict
Pros
- Great print quality out of the box
- Value for money
- Fairly quiet printer
Cons
- Software error shoves nozzle into the bed
- Uneven bed heating
- PEI sheet doesn’t adhere to PLA very well
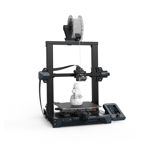
The Elegoo Neptune 3 has a few eye-catching features like its 16-point resistance strain gauge (RSG) auto bed leveling, dual-geared metal Bowden extruder, 4.3-inch touchscreen, and flexible PEI-coated spring steel magnetic print sheet. For this, the official price is a reasonable $300, but you can easily find the printer for a little over $200 — including from Elegoo itself.
During our time with the Neptune 3, it managed to dish out some excellent prints, and we loved all the bells and whistles. The RSG system worked as well as any touch probe, though it ideally should have set the nozzle perfectly. We had to offset the nozzle to get a print that didn’t eat into the bed. However, that small complaint aside, its features worked as well as we would expect.
3D printing on this machine wasn’t effortless. We found its overhang performance was a constant problem, meaning most prints needed support, and needed to auto-level the bed before every print for a more consistent first layer. The PEI bed worked great with ABS and TPU but wasn’t the best at bonding with PLA. The nozzle also scrapped the bed from time to time due to a software flaw.
Overall, Elegoo has built an affordable FDM printer with features you wouldn’t typically see in this price range. These features have made the Neptune 3 easy to use, but as mentioned, it has a few eccentricities that users must consider before buying it, even at this asking price.

The Tech
Heat and Volume
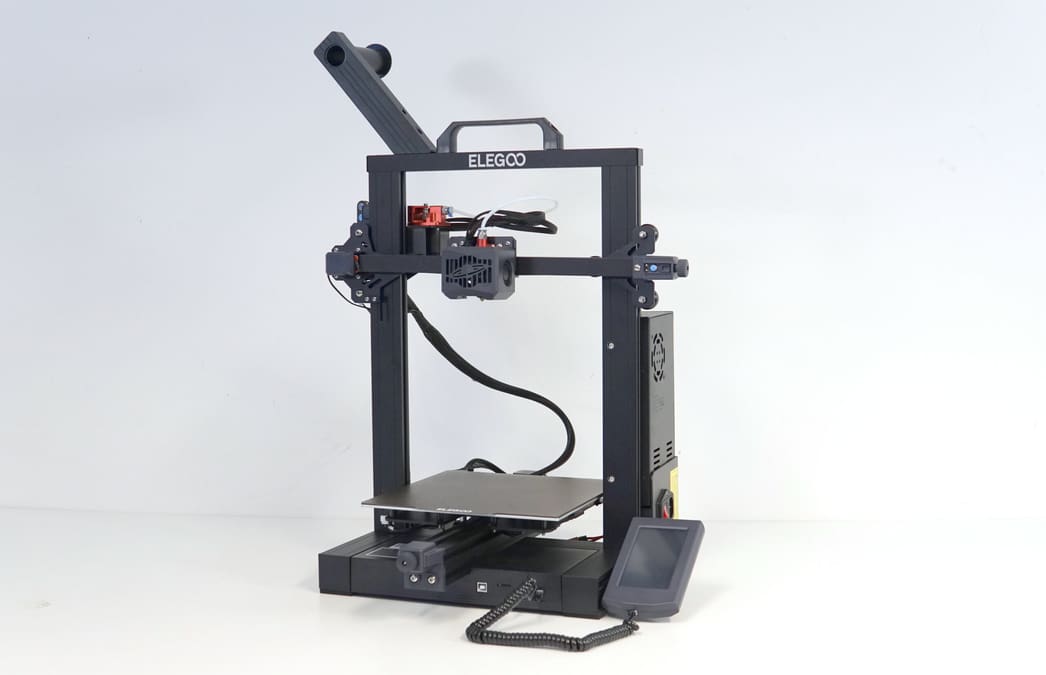
The Neptune 3 offers a build volume of 220 x 220 x 280 mm within its extruded aluminum frame. The volume is a little larger than its predecessor on the Z-axis, lending itself to some taller prints, but is around the “standard” volume of a budget printer.
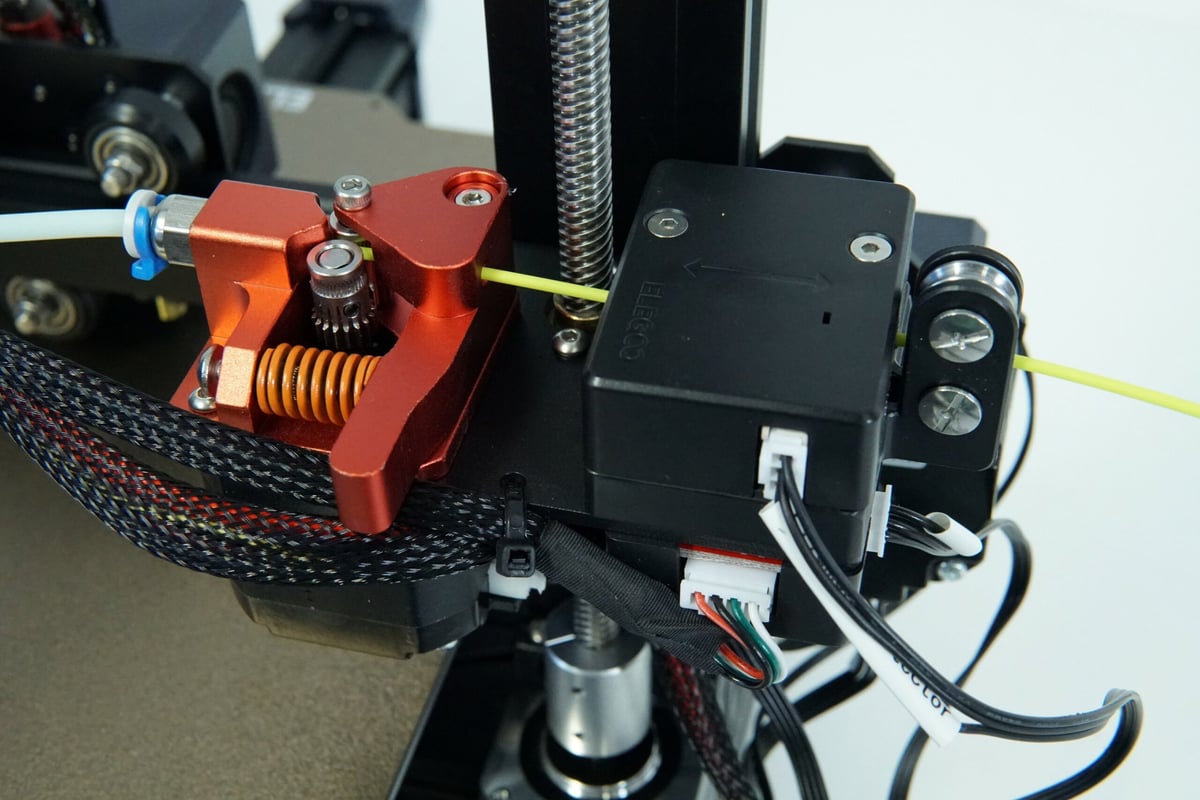
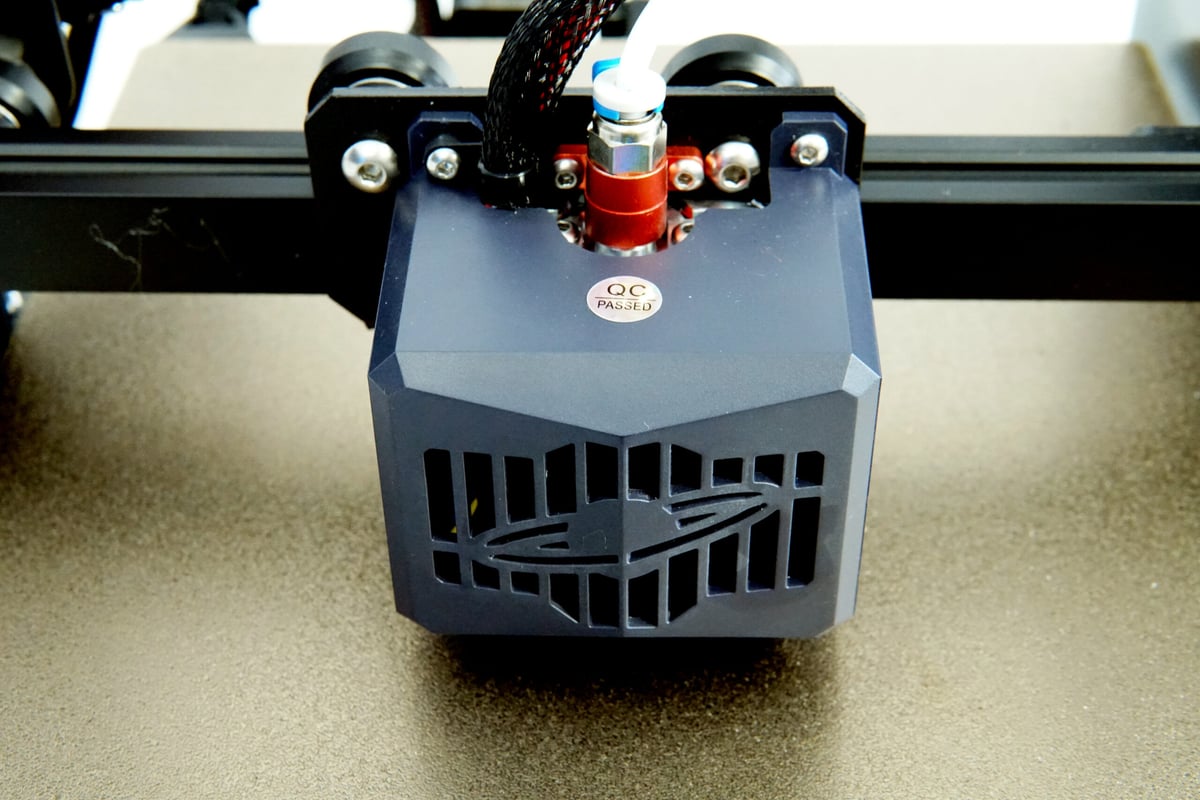
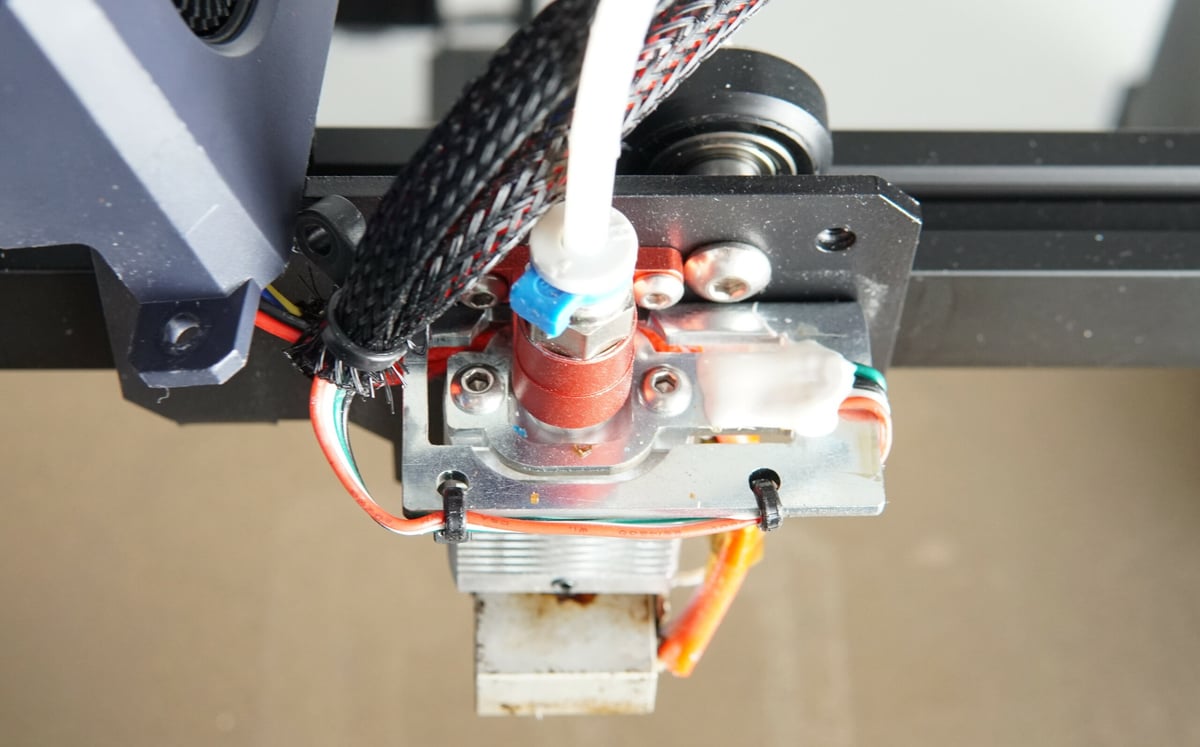
Both the hot end and full-metal Bowden extruder are MK-8 style and pretty capable. The hot end is able to reach up to 260 °C, so is limited to low-temperature materials, but the extruder is dual gear, making it great for applying controlled force to flexible filaments like TPU.
However, the filament sensor, sitting just before the extruder, can be a bit sticky. While it typically works well, a friend of the TPU it isn’t. During our TPU test, the filament wouldn’t go through, and we had to jam a piece of PLA through the other side and push the TPU just right to get through. From there on, the extruder did a great job of pushing it through to the hot end. If you’d rather skip the sensor altogether you can turn it off from the touch panel interface.
RSG Auto-Bed Leveling
The resistance strain gauge, or RSG, is probably the most unique feature the Neptune 3 offers. Unlike a BLTouch or CR Touch, RSGs don’t have a little stick that triggers a switch against the bed. Instead, the whole printhead connects to a tiny piece of metal attached to the RSG sensor. The nozzle touches the bed, and the sensor measures the strain inflicted on the metal. This procedure happens on 16 points on the bed, and then the machine calculates the offsets it needs to create a bed mesh and get that uniform first layer.
It would be ideal if the sensor were tuned from the factory to achieve the perfect first layer but, in practice, the nozzle was a little too close to the printbed causing initial prints to scrape the it. We had to add an offset ourselves, which solved the issue.
Using the Elegoo bed leveling system is no different than any other printer: just select it from the touchscreen’s menu and watch it work. We found the Neptune 3 printed better first layers with a diligent selection of auto bed leveling just before a print.
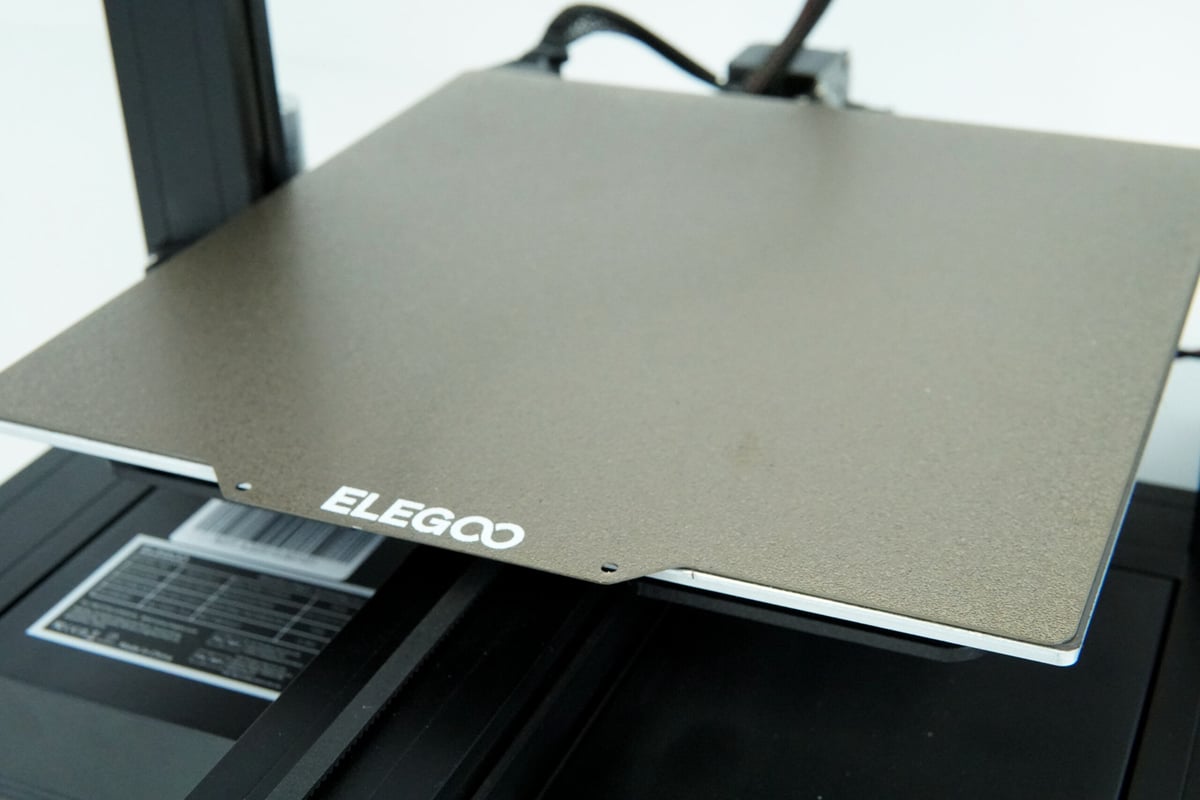
PEI-Coated Magnetic Print Bed
A removable PEI-coated flexible magnetic sheet sits on top of the bed, which can reach a maximum of 100 °C. The PEI sheet works well with ABS and TPU.
PLA gave us the most problems. Prints that outside the bed’s center would warp and get ruined when they eventually stuck to the hot nozzle. The issue arose from a combination of uneven cooling and the PLA not sticking well enough to the PEI coating.
The heating issues meant that larger prints that filled the bed volume were nearly impossible without curling issues appearing on the first layer.
32-bit Mainboard
The printer’s mainboard, a 32-bit Robin Nano V 2.0, is located at the bottom of the machine, hidden behind an easily removable metal plate.
The board is fitted with TMC2225 stepper drivers, resulting in a very quiet printer. Though, we must mention that the three fans on the printhead can get very loud. You can also hear the motors squeal around large curved corners, which isn’t especially annoying.
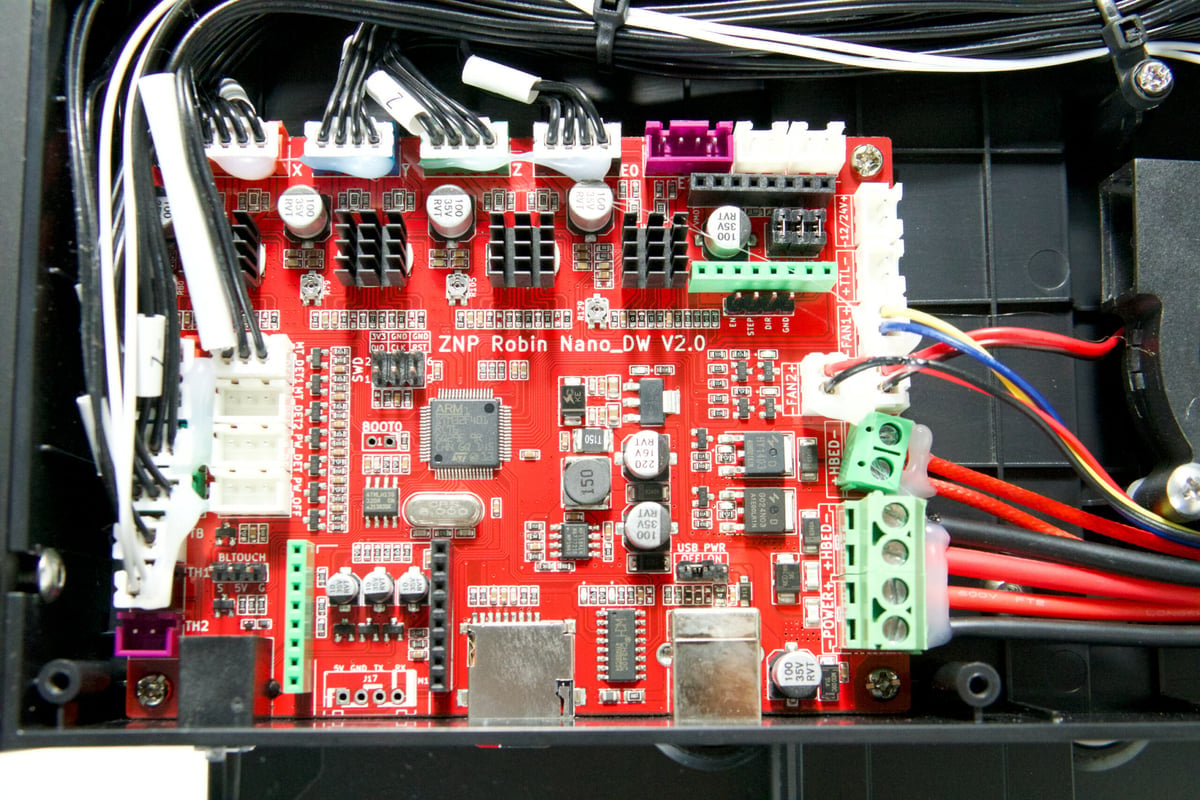
The printer’s wiring was good overall. Most wires were secured with hot glue so they remain in place during transport and the cable management was neat, with almost no stray wires flapping around.
Odd Power Supply
The power supply on the Elegoo looks fairly standard at first glance. However, oddly, there is a power adapter port in addition to the three-pin plug on the PSU. We tried using a standard resin printer adapter on the port and the printer turned on, despite its switch being in the “off” position.
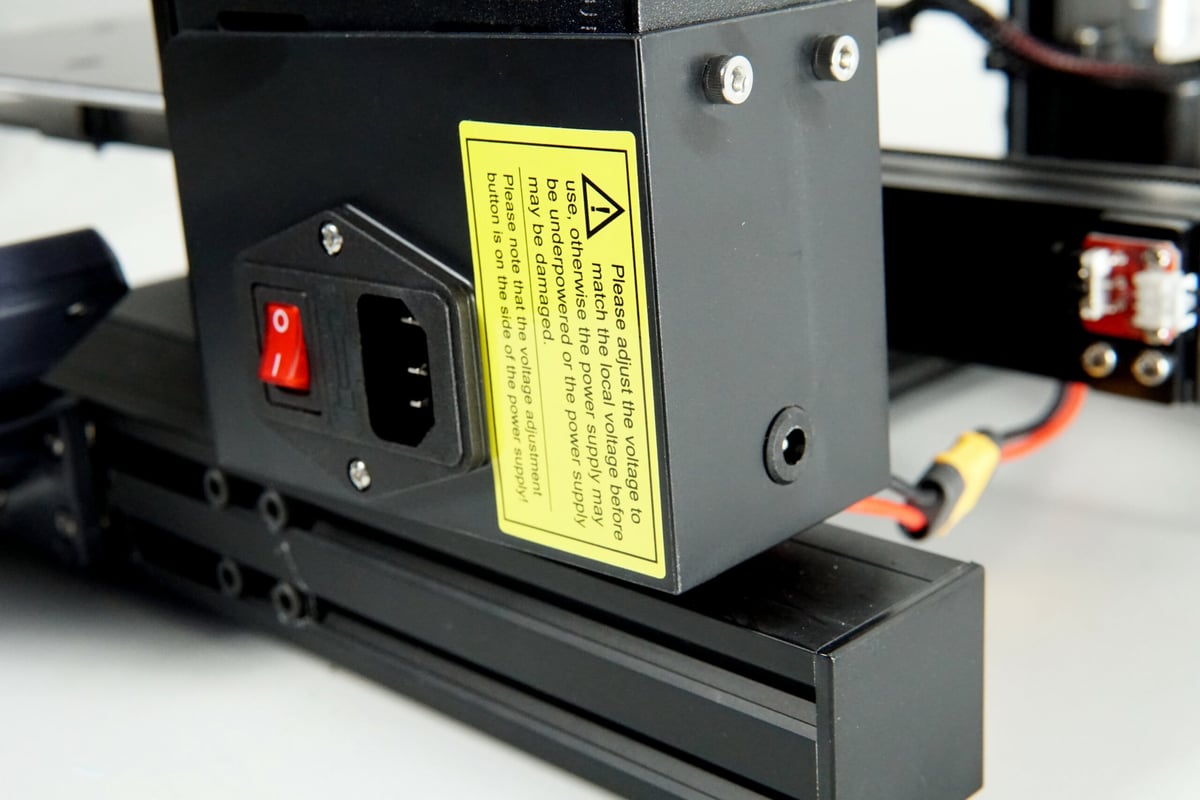
While the Neptune 3 did turn on, its fans were not running at full speed. We tried starting a print but only received an error that said the printer could not be heated to the right temperature. We reached out to Elegoo about this additional power port at the back and they said it could be used to power the machine, but they do not recommend it. Why does it exist? Your guess is as good as ours.
Printing and Usability
Setting Up
The Elegoo Neptune 3 was an easy assembly that took less than 20 minutes. It was mostly pre-assembled out of the box and, after attaching the gantry and power supply, it was ready to go. In the box were tools to build the printer, a USB card reader, a microSD card, a scraper, a few spare nozzles, a few Teflon tubes, and a bit of white PLA.
If you do run into trouble with assembly, Elegoo has conveniently made a video that tells first-time users what to do and even helps troubleshoot some minor problems. The video is available on the included MicroSD and on YouTube.
Unfortunately, we ran into a snag ourselves pretty quickly. The Mac version of Elegoo Cura, Elegoo’s custom Cura variant offered on its website, was corrupt. At the time of writing, the software is still not fixed.
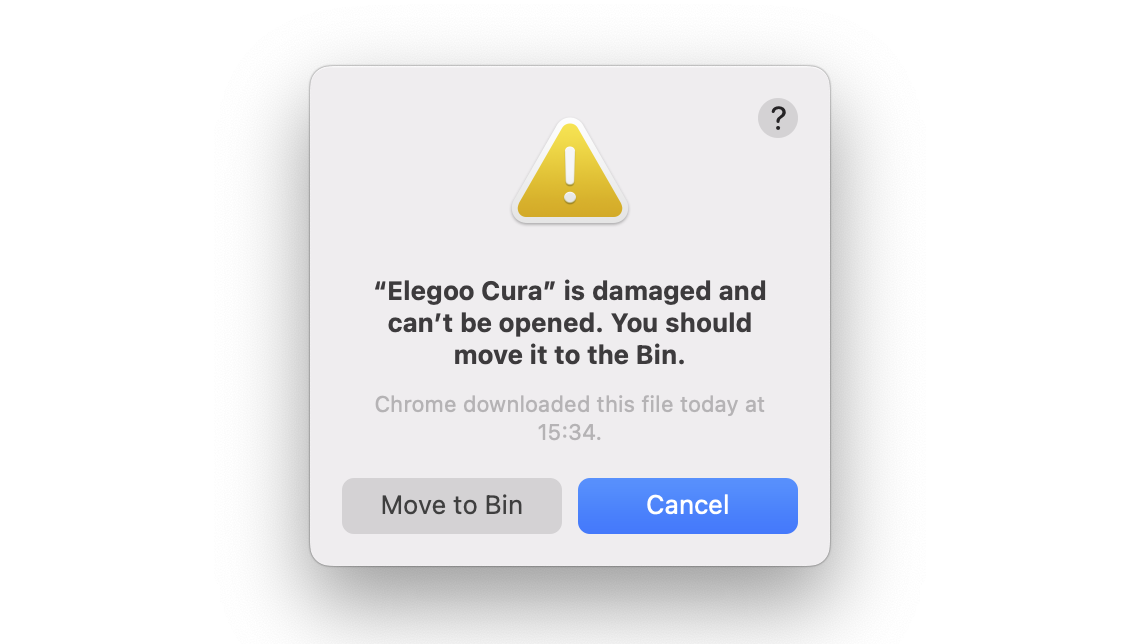
The Windows version works fine, though. We had to copy the print profile from Windows into Ultimaker Cura for Mac. It was inconvenient and a significant problem for anyone with just an Apple system. The profiles for the printer are built into their software and are not available as a separate file. So, if you can’t access the software, you’ll have to make your own.
The Experience
Once the profiles were set up, the printer was easy to use. Adhesion to the PEI-coated print bed was a little inconsistent with PLA, but performed well with ABS and TPU. Removing prints was a breeze. With PLA we could simply yank them off, both ABS and TPU just needed a little bend of the print sheet.
The touchscreen has everything you need to run the printer. There are commands to load and unload filament, but also to change the speed at which that happens. But, speeds here are reasonably limited. Punching in a speed of 200 mm/s just brings it back down 10 mm/s, and the filament length is capped to a maximum of 50 mm at a time.
While selecting a print job, the screen did sometimes refuse to let us touch the first item on the list of available files. However, the issue was inconsistent and hard to reproduce. We couldn’t figure out what was causing the problem, so starting making an extra copy of our intended print job to go under the top item on the screen.
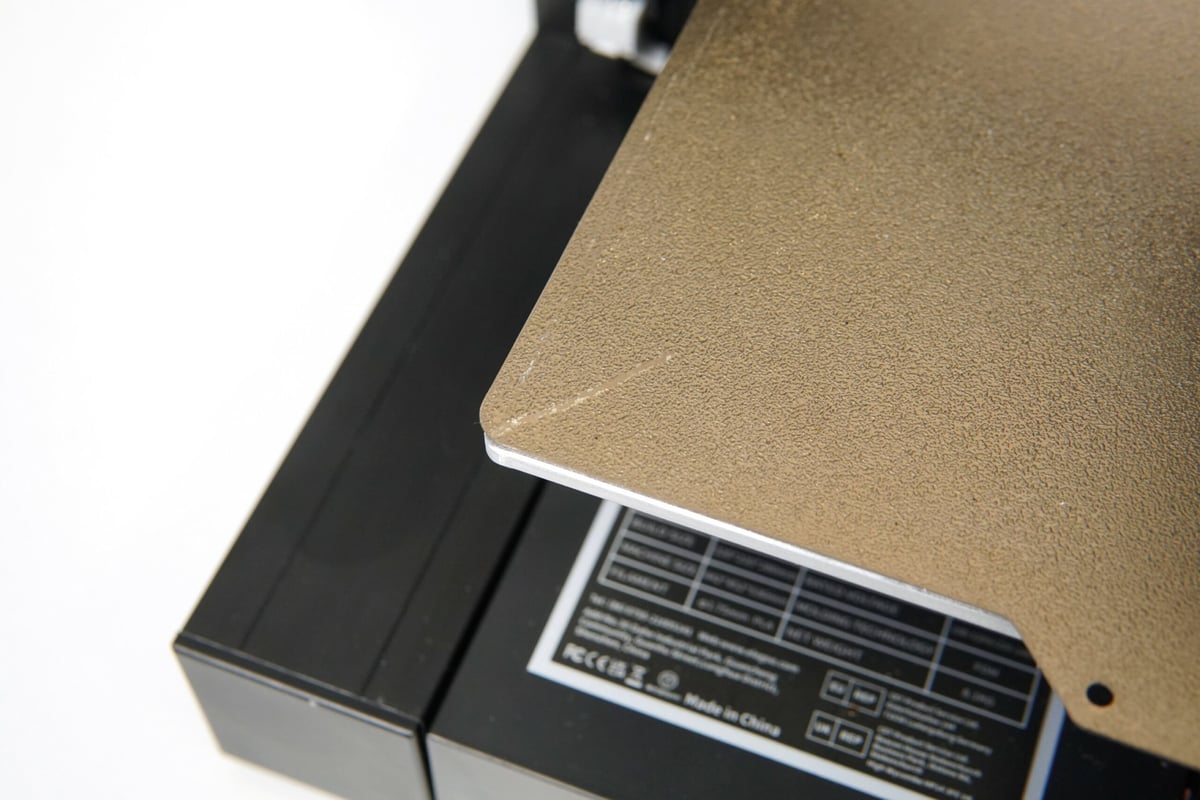
A more serious error is the machine’s failure to detect when the printhead goes past the Z-axis’s bottom sensor. This error happens most frequently when the printhead tries to center itself before another job, or when you try to auto-level immediately after a print. The nozzle violently scrapes against the bed, causing deep gashes in the bottom left corner. The only way to stop this is to turn it off from the main switch. By the time you reach the main switch, your sheet would have already sustained some damage. The damage seen in the picture above is from the printhead scrapping the bed for approximately 5 seconds.
The Prints
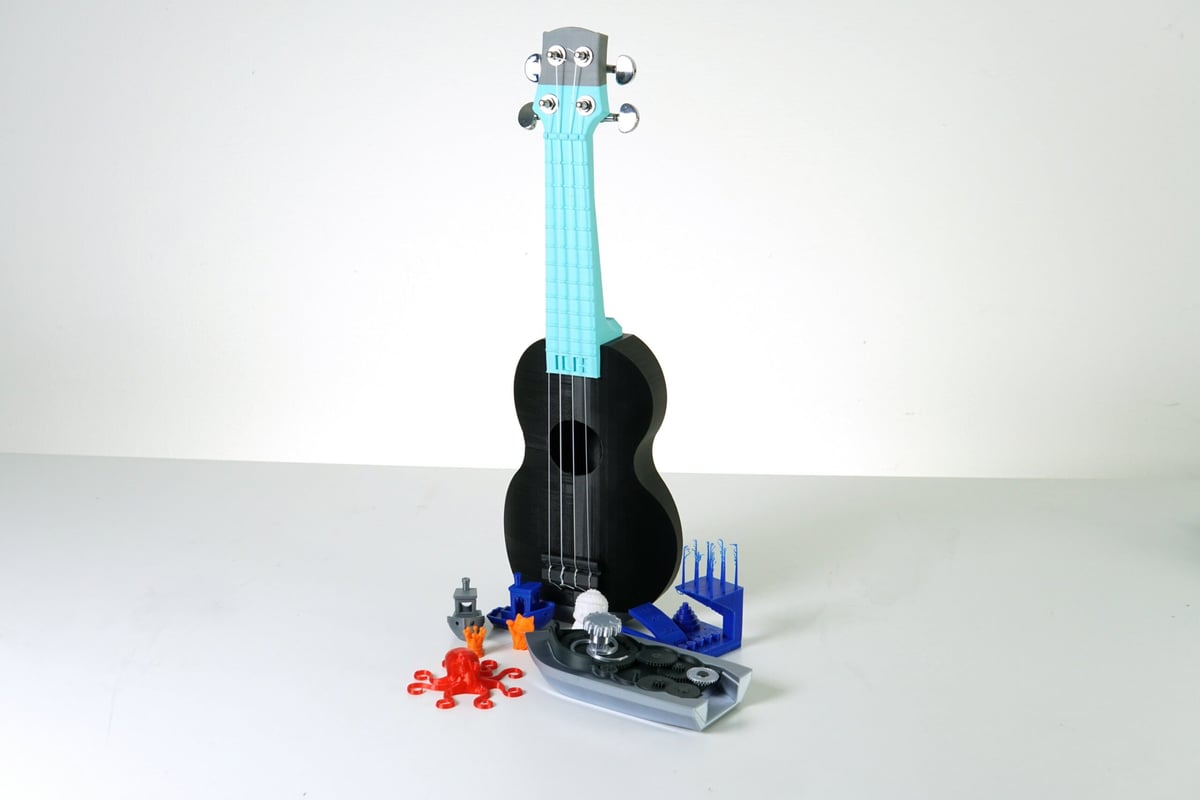
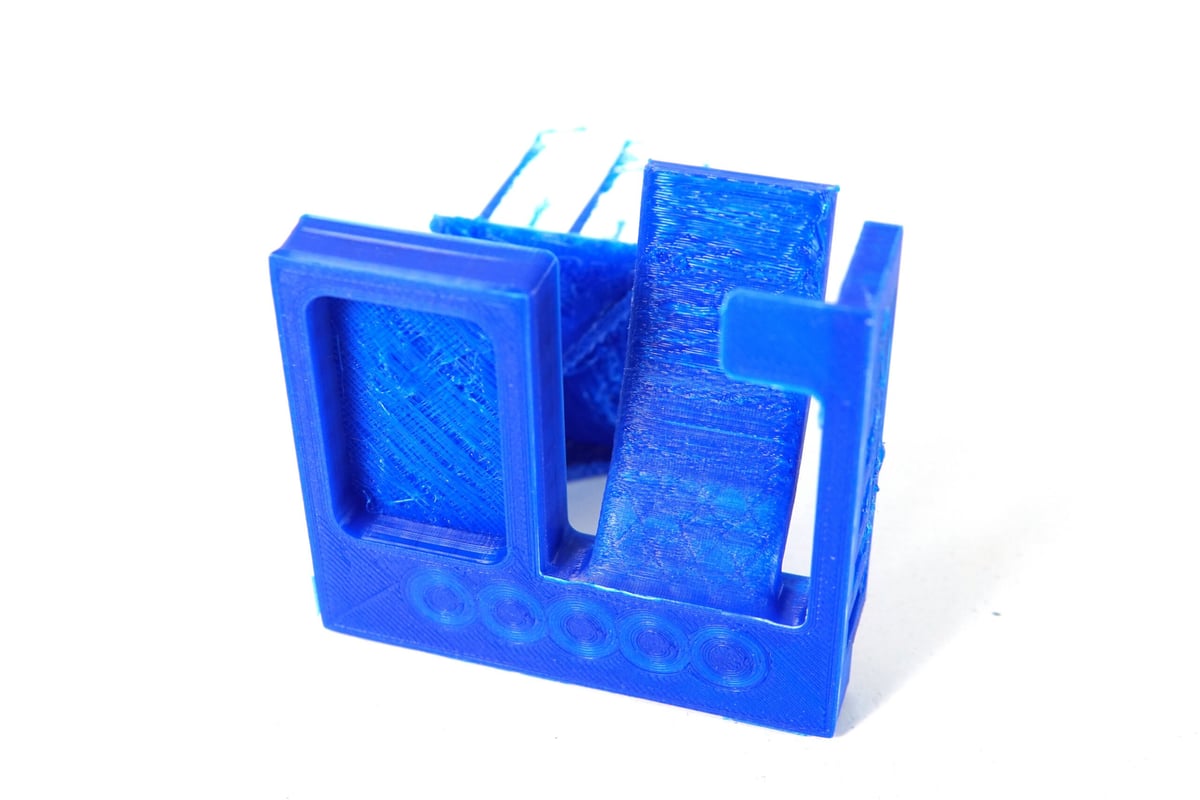
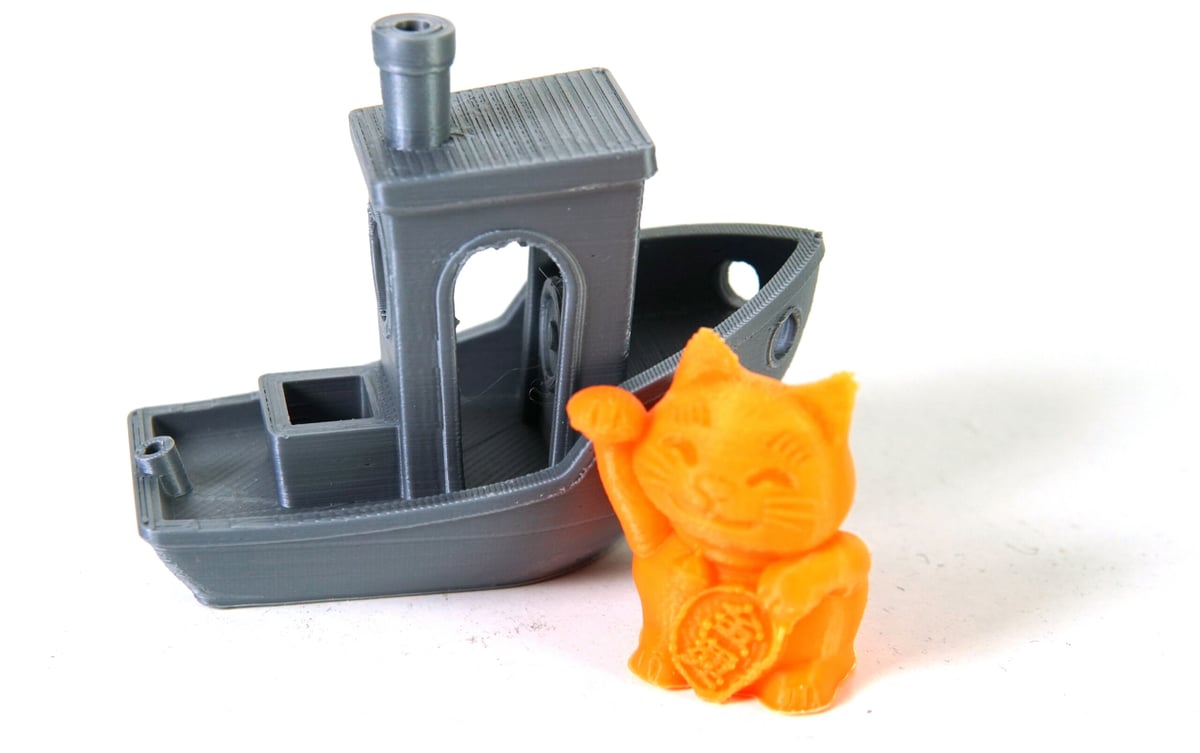
Despite its problems, most prints off the Neptune 3 were gorgeous. There were a few blemishes here and there, but we managed to pull off some spectacular prints including a working ukelele and a mechanical boat featured in our 50 Cool Things to 3D Print article.
Our first print was the Little Buddha included on the SD card, printed with the included white PLA and without any calibration out of the box. The print turned out great, but the printhead slightly scraped the bed with the nozzle scratching out the outline of the print into the bed.
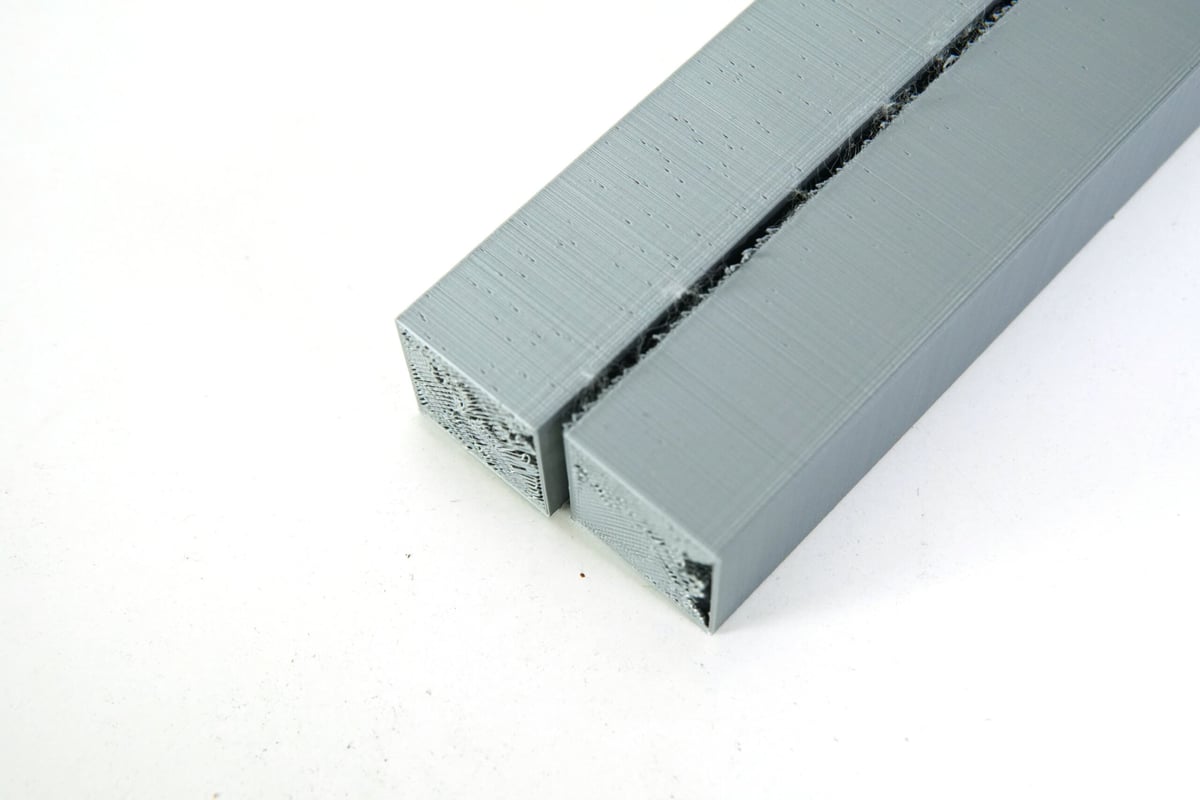
Next was a Benchy. We printed two, one immediately after the Buddha before any adjustments and one after we adjusted the printer’s nozzle. Both prints had issues with cooling — demonstrated in bridging and overhangs.
In fact, this printer has a consistent problem with printing overhangs neatly. In multiple tests, the overhang performance was not up to scratch. The printer works best with some printed support elements.
A tower test also showed a slight height discrepancy in the far right corner of the bed, but we attribute this to sagging caused by the single lead screw. It wasn’t an issue for prints that didn’t use the entire range of the printer. Maybe the next version of the Neptune could feature dual lead screws.
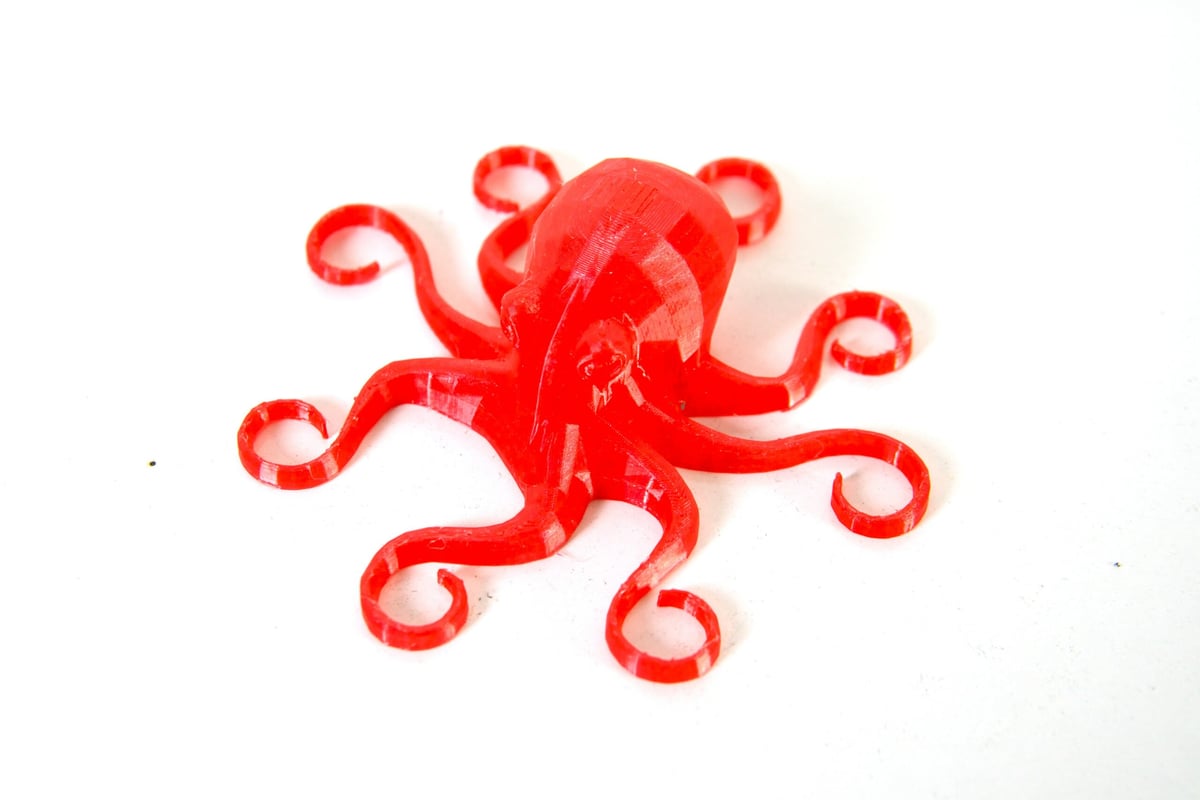
TPU was very easy to print once we got past the tricky filament sensor. The print output was clean and very detailed, even at the sharp end of the tentacles on our squishy octopus.
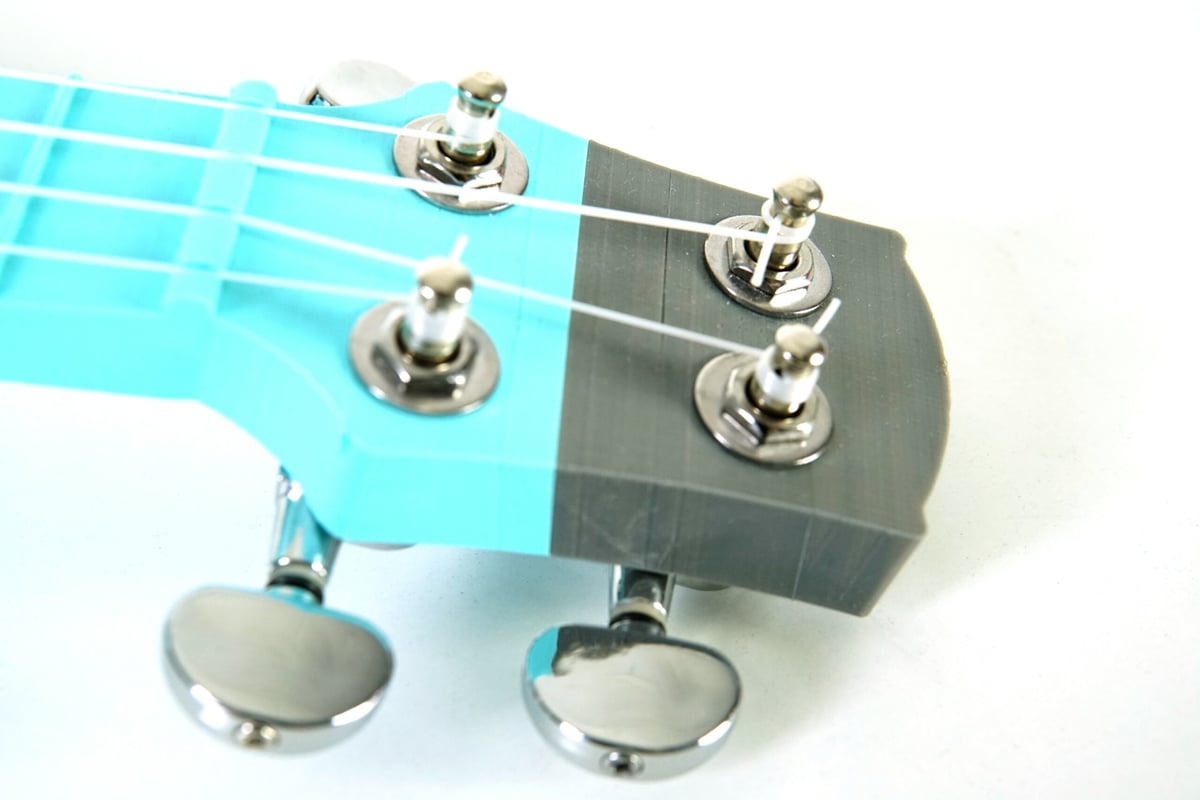
The ukelele was printed in two pieces: the body and the neck. We switched filaments in both these prints and the printer did a great job of continuing where it left off and keeping the print’s mechanical strength intact despite the pause.
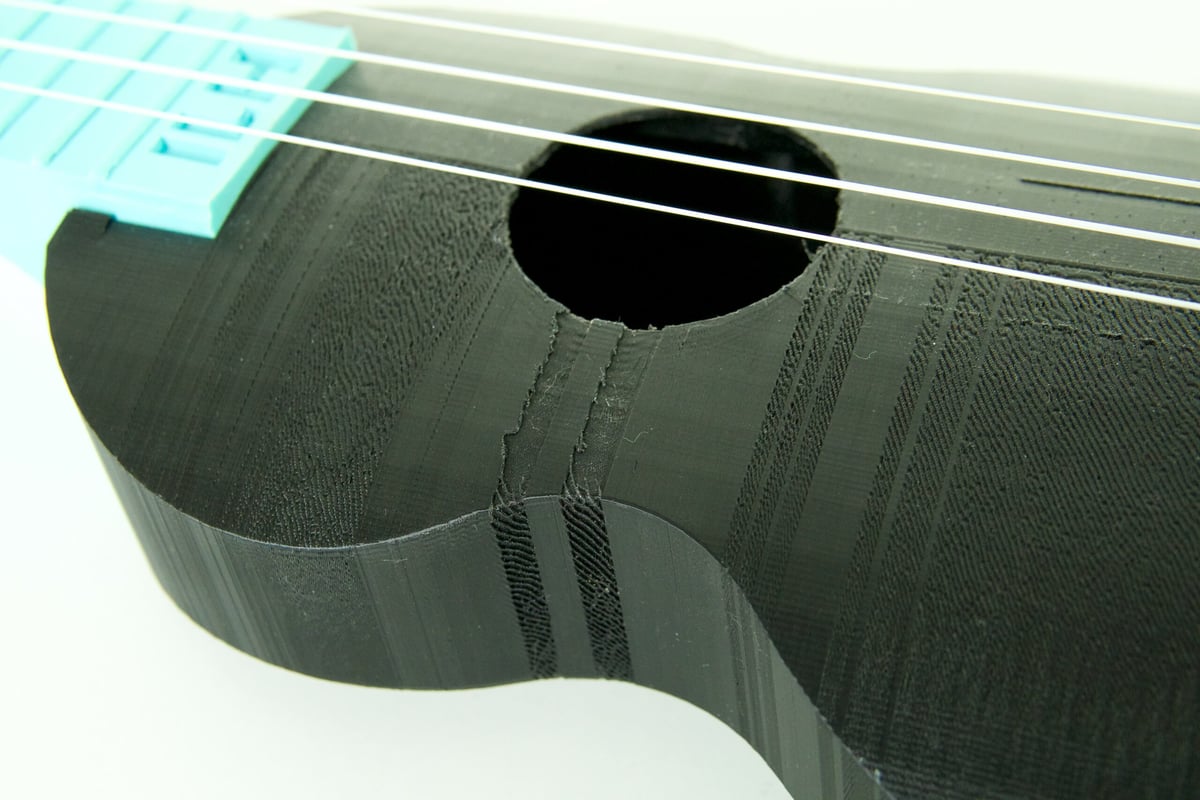
There were a few areas where the printer under extruded, which could again be attributed to its cooling issues, and one of the supports for the ukelele neck was destroyed mid-print. However, the final output was better than expected.
Is It Worth It?
The Elegoo Neptune 3 is not expensive. At the time of writing this review, its price is just a little over $200 at most places that have it in stock. Its official price is ~$300, but Elegoo is also currently offering it for about $200.
Despite its flaws, the Elegoo Neptune 3 manages to churn out beautiful prints. It offers great value for money and is a good printer if you are willing to navigate around its problems.
We can only hope Elegoo fixes the issue with the Mac version of the software on its website and maybe releases new firmware to address the other software issues in the future. As it stands, potential owners of the Neptune 3 should take its caveats into consideration before investing.
Features
Build Volume
At 220 x 220 x 280 mm, the Neptune 3 has a slightly taller build volume compared to the 220 x 220 x 250 mm of previous models. It’s a similar volume to models such as Creality’s Ender 3 V2. As it’s an Ender 3 clone, that isn’t going to leave any jaws on the floor.
It’s a small increase in build height, but an extra 30 mm is always appreciated, though most people aren’t likely to use that full height often. It’s one of those things that’s just nice to know is there.

Dual-Gear Metal Bowden Extruder
It looks like the extruder is unchanged from that found on the Neptune 2S. This extruder was advertised as being “stable and precise” by Elegoo. It is a pretty solid unit that offers good filament control. Insofar as the hot end, it can reach temperatures of 260 °C, making it compatible with the usual consumer filaments – PLA, ABS, TPU, and PETG.
RSG Auto-Bed Leveling
Elegoo puts its automatic bed leveling system for the Neptune 3 right at the top of the feature list on its product page, and it’s right to do so. Automatic bed leveling is a feature most 3D printer users appreciate, and using a strain gauge is less common than simple touch sensors.
The system for auto-leveling the new Neptune 3 uses the nozzle as a probing system that, much like a touch sensor, pokes 16 points across the print bed and accounts for any unevenness by automatically adjusting the Z offset for you.
The two big wheels for manual leveling on the 2S are gone entirely, leaving a fixed bed to further simplify the leveling process. If the bed is somehow too far out of level, users will need to use the provided wrench to adjust the nuts under the bed. The instruction video provided on the MicroSD walks you through it.
PEI Magnetic Spring steel Sheet
The PEI-coated magnetic sheet was already present on the Neptune 2S, and it makes sense Elegoo would keep this for the Neptune 3. These sheets are pretty popular at the moment, appearing on quite a few new FDM 3D printers. They’re often (but not always) preferred to a glass surface.
PLA prints don’t adhere easily, but all other prints stick well and are a piece of cake to remove. You can simply flex the plate and they pop off. It’ll heat up to 100 °C, plenty enough to handle the consumer filaments.
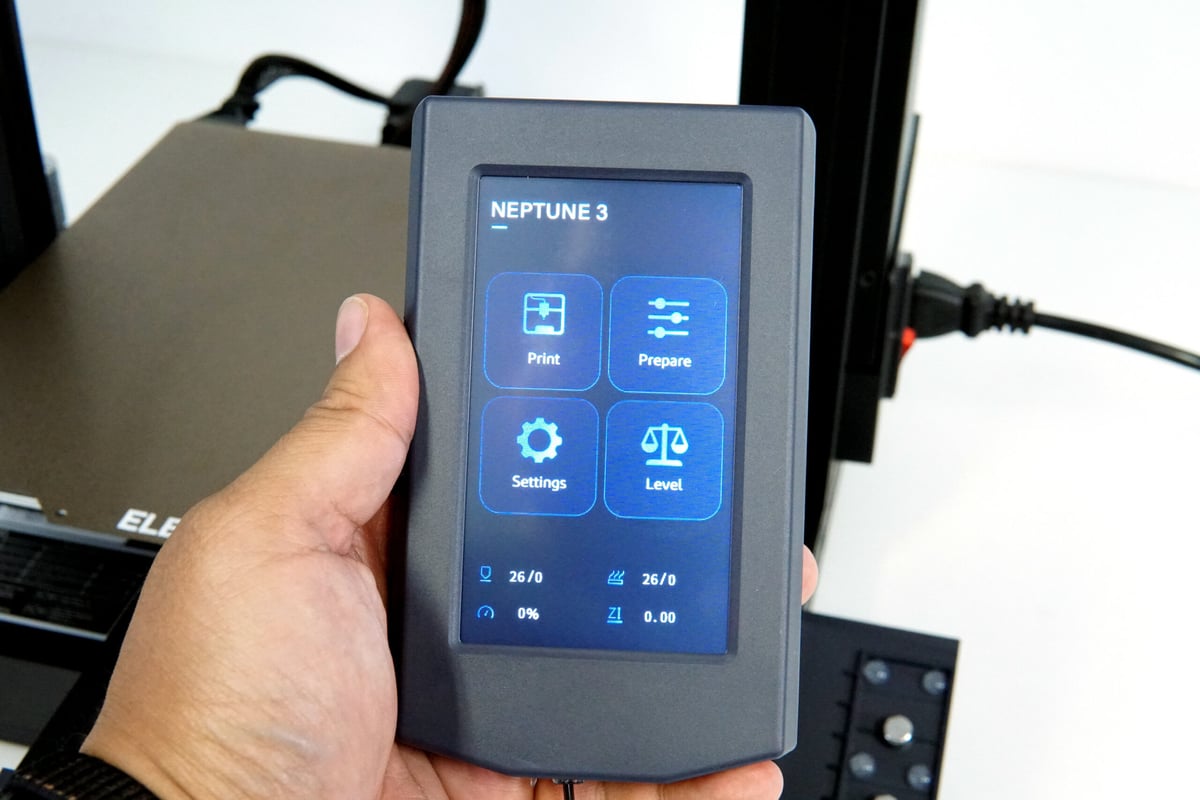
4.3-inch Removable Touchscreen
Though certainly not life-changing, some may see this as a nice touch. The touchscreen is removable from the printer’s body and is attached by the sort of cord you’d see on your grandma’s phone. It’s a whole new UI that comes with the larger screen and includes some changes to the presentation and graphics.
Further Features
- Silent operation: The Neptune 3 is advertised as “ultra-quiet” and “whisper-quiet” with noise levels below 50dB. While the printer’s stepper drivers are undoubtedly quiet, the fans on both the printhead and body make a fair bit of noise. It also squeals a bit when printing large curves. So, calling it whisper-quiet is not accurate.
- Filament sensor: Printing gets paused when you run out of filament, and the printer notifies you. After the filament has been replaced, printing resumes. It can also detect blockages. However, loading it with TPU is a bit tricky.
- Easy assembly: One common criticism of the Neptune 2S was that it could take some time to put together, which is annoying for some. The Neptune 3 comes mostly assembled and is ready to print rather quickly. However, a bit of calibration is required to get it running well.
Featured Prints
Like what you see? Here’s a list of the 3D models we printed over the course of the review, as well as who designed them.
- Playable Ukulele by Solstie, via Thingiverse
- Mini Wind-Up Boat Dual Drive by Mike, via Printables
- Money Cat Valve Cap Schrader by Tater_Zoid, via Thingiverse
- Crown Valve Cap Schrader by Tater_Zoid, via Thingiverse
- Flexible Octopus by DiabaseEngineer, via Thingiverse
- Kickstarter Autodesk 3D Printer Evaluation by Kickstarter and Autodesk, via GitHub
- 3DBenchy by CreativeTools, via Thingiverse
Tech Specs
General Specifications
- Technology: Fused deposition modeling (FDM)
- Year: 2022
- Assembly: Partially assembled
- Mechanical arrangement: Cartesian-XZ-head
- Manufacturer: Elegoo
3D Printer Properties
- Build volume: 220 x 220 x 280 mm
- Feeder system: Bowden
- Print head: Single nozzle
- Nozzle size: 0.4 mm
- Max. hot end temperature: 260 °C
- Max. heated bed temperature: 100 °C
- Print bed material: PEI magnetic sheet
- Frame: Aluminum
- Bed leveling: Automatic
- Connectivity: SD card
- Print recovery: Yes
- Filament sensor: Yes
- Camera: No
Materials
- Filament diameter: 1.75 mm
- Third-party filament: Yes
- Filament materials: Consumer materials (PLA, ABS, PETG, TPU, wood)
Software
- Recommended slicer: Cura
- Operating system: Windows, macOS, Linux
- File types: STL, OBJ, AMF
Dimensions & Weight
- Frame dimensions: 442 x 452 x 530 mm
- Weight: 8.1 kg
Similar Printers
3D printers are great, aren’t they? But, it’s always good to get the best bang for your buck. If you’re still looking, save yourself some time and head on over to our guide, Best Budget 3D Printers 2025: Our Top Picks in 4 Categories. There you’ll find all the best value 3D printers we’ve encountered in one handy place.
To check out three more similar machines though, simply keep reading.
Anycubic Kobra
At the time of writing, the Anycubic Kobra is the reigning champion of 3D printers under $300. This printer offers a great bang-for-buck price/performance ratio, quality 3D printing, reliable auto-leveling, and the flexy PEI print sheet that the Neptune 3 has. A really, really good printer. Even if it feels a bit cheap.
Creality Ender 3 S1
Currently the best 3D printer under $500, the Creality Ender 3 S1 is pretty impressive as a 3D printer. The first truly comprehensive Ender 3 overhaul in quite some time, the S1 provides you with a platform to get great prints with very little effort. It has a great direct extruder too.
Mingda Magician X
A bit of a wild card, as Mingda is a lesser-known 3D printing brand than the two names above, but we’ve had the Magician X in the All3DP print lab recently and so far, it’s actually quite impressed us. Auto-leveling and a direct extruder as well as a similarly-sized print volume make it a rival for the Neptune 3.

CERTAIN CONTENT THAT APPEARS ON THIS SITE COMES FROM AMAZON. THIS CONTENT IS PROVIDED ‘AS IS’ AND IS SUBJECT TO CHANGE OR REMOVAL AT ANY TIME.