Creality Ender 5 Review: Great 3D Printer Under $500
Rating

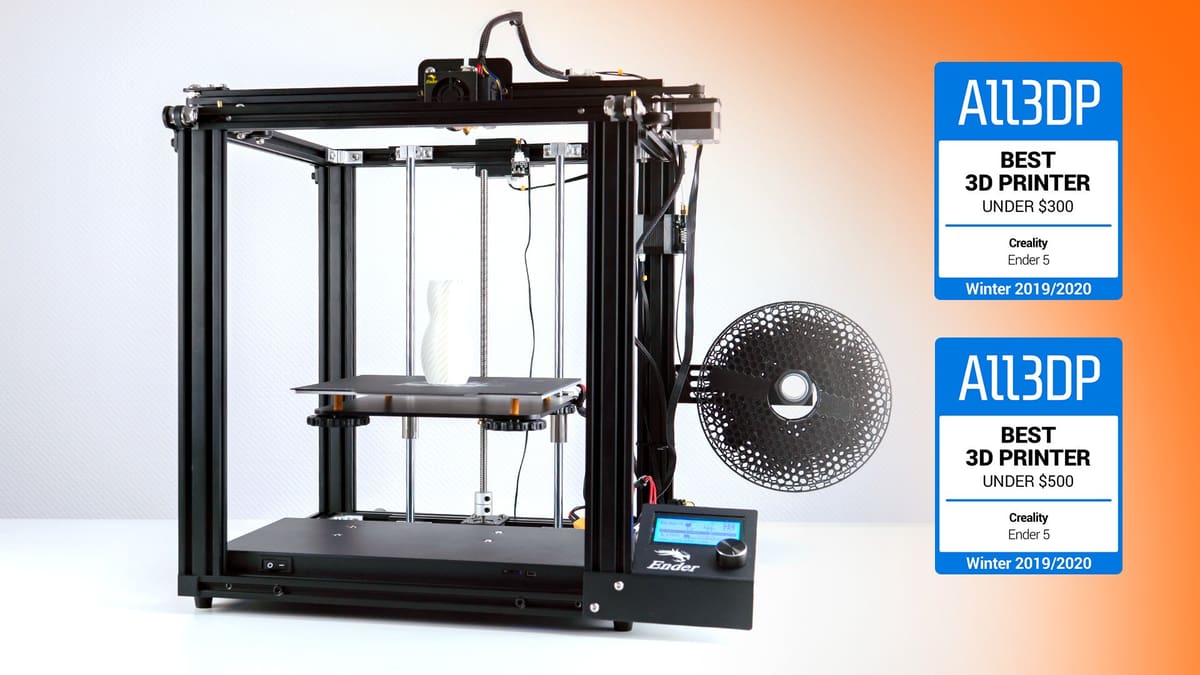
The Creality Ender 5 packs the best bits from the Ender 3 Pro into a bigger, box-like frame. Check out our Ender 5 review to find out if it is worth the extra price.
Tagged at under $200, the Ender 3 quickly rose through the ranks by offering surprisingly high print quality at an unheralded price. Now, after releasing a Pro model of its flagship machine, Creality is looking to sustain its hot streak with the Creality Ender 5.
This latest machine features a large box-shaped aluminum metal frame that expands upon the limited build volume of its predecessors. Mimicking other similarly styled printers like the Tronxy X5S, the Creality Ender 5 packs the beloved features of the Ender 3 into a large-format box-shaped machine for $280 – $330.
But is that enough to convince? Let’s find out.
Pros and Cons
Pros
- Easy to assemble
- Can deliver high-quality prints
- Can achieve higher print speeds (80mm/s without quality problems)
- Magnetic bed lets you easily remove the prints
- Hackable and upgradable
Cons
- Magnetic bed is flimsy and not very durable
- Filament loading can be tricky
- Printer menu lacks some functions
- Manual print bed leveling
Verdict
The Ender 5 is the Ender 3 Pro we wished for: It’s not perfect, but with a little care, you’ll get great prints out of it. Overall, Ender 5 is an interesting and affordable tool for makers, hobbyists, tinkerers, who are willing to spend some time with it.
Design
Creality has become a major force when it comes to disruptive consumer 3D printer models. With the CR-10, they established a new category of large-format, yet affordable printers in 2016 (review here). In 2017, they launched the Ender 3, which, at the time of writing, is the world’s most popular 3D printer. In 2018, they added some extra punch to its printer line with the Ender 3 Pro.
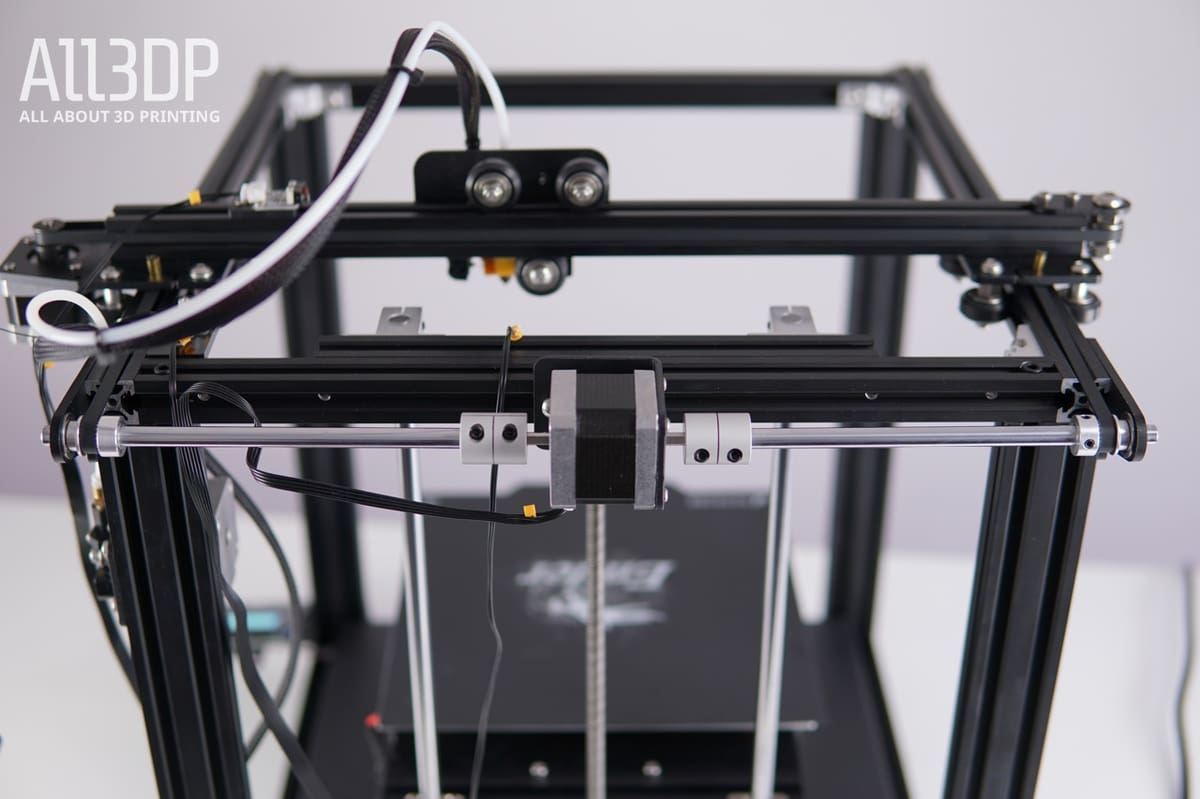
Creality’s Ender 5 takes a clear departure from the compact frame used for the Ender 3. The box-like printer has outer dimensions of 440 x 410 x 465 mm and build volume of 220 x 220 x 300 mm – so better make some room on your workbench. While the X and Y-axis measurements are the same as the Ender 3, the new version provides more room for the Z-axis. Each of the axes has a dedicated stepper motor. In a quite unusual way, the Y-axis motor drives both sides of the gantry at the same time so you get an overall smoother movement. The Z-axis is mounted in the middle of the bed with a big 8-mm-rod.
Overall, the printer makes a sturdy impression. A Meanwell 350W / 24 V power supply (also to be found in the Ender 3 Pro) lets you heat the bed up to 100 degrees faster. The cable management is good – no loose ends here, so to speak. The printer runs a modified Marlin firmware.
At the time of writing, the price for the Ender 5 oscillates around $330. So let’s compare it to two other interesting printers in the price range between $250 and $350.
Ender 5 compared to Anycubic i3 Mega
At the time of writing, Anycubic’s i3 Mega is All3DP’s “Best 3D Printer under $300” (review here). We were impressed with the quality of its PLA prints – which are a bit better and more consistent than the ones we got out of the Ender 5.
Both machines share a similar build volume (210 x 210 x 205 mm for the Anycubic versus 220 x 220 x 300 mm for the Creality Ender 5), a heated bed and a similar extruder system. The Ender 5 did handle exotic filament better – it even ventured into the territory of ASA, where the Anycubic i3 Mega wouldn‘t dare to tread. On the other hand, we‘d prefer the Anycubic’s Ultrabase to the floppy magnetic bed of the Ender 5.
Ender 5 compared to Ender 3 Pro
The Ender 5 takes the extrusion system and the print bed from the Ender 3 Pro and puts it in a new frame. The X and Y dimensions are the same, but the Z-axis allows for taller prints. Also, the machine sports a wider cartesian frame, with the print head moving along the X and Y axes. The assembly was quick and painless. If you happen to have a Windows-PC, you can start printing right away. Mac and Linux owners have to set the 3D slicer profiles by hand, unfortunately.
Thankfully, one of the most annoying design flaws of the Ender 3 has been eliminated. As the Ender 5 offers an open frame design, your magnetic bed won’t collide with the frame anymore.
We continued to have a love-hate relationship with the magnetic bed of the Ender 5. Brims and first layer lines tend to bake into the sheet, so they are extremely hard to remove. After just some prints, the bed of the Ender 5 looked like it had been in use for years – so prepare to order some during the lifespan of the machine.
Compared to the Ender 3 Pro, the Ender 5 can deliver better prints straight out of the box. One of the reasons is the Ender 3 Pro’s print bed, which is notoriously difficult to calibrate.
Also, there is a slight, but important difference regarding the printing axes. Whereas the print head of the Ender 3 moves is mounted on the Z-axis, the Ender 5’s moves freely in the X and Y direction. This results in overall better performance and better printing speed. Overall, we found the Ender 5 to deliver better printing results.
Unboxing & Assembly
Building an Ender 5 is even easier than building an Ender 3 or Ender 3 Pro. The axes come pre-assembled, so all you have to do is to mount the Z-axis to the base and wire up the printer. This can be done in half an hour.
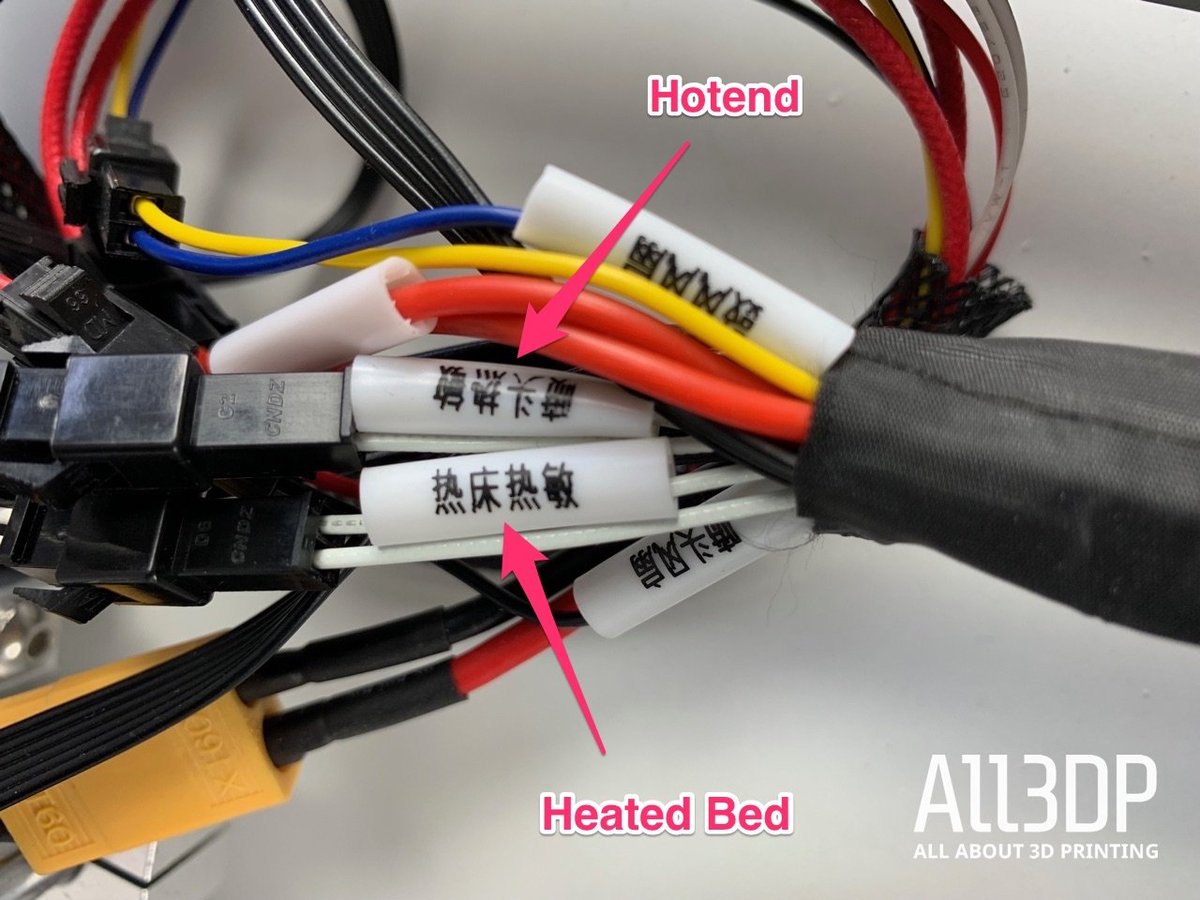
You’ll find a printed documentation booklet in the box. We found it to be quite useful but ran into one problem: The thermistor cables for the hot-end and the heated bed look totally alike. We’ve sorted out the Chinese lettering for you (see below in the image). Creality could easily solve this by using different colors for the connectors.
Creality also throws in some tools. In the box, you’ll find a wrench and a screwdriver, an SD card plus SD card reader, a spatula, some pliers, a 4mm nozzle cleaner, and a USB cable (don’t we all have plenty already?). Creality also provides in 200 gram of PLA filament for your first test prints and a spare nozzle.
As with all Ender models, feeding the filament through the transport mechanism into the Bowden tube isn’t an easy task. As the material is slightly bent, it resists feeding into the very small entry of the Bowden tube. Our tip: Cut filament in a steep angle, so you can feed the material more quickly.
Test Prints
Of course, what would any Ender 5 review be without some test prints? Let’s have a look:
Ender 5 Test Prints: PLA Benchys
We started our series of Ender 5 test prints with a Benchy, the jolly 3D printer torture test. We used the 200-gram spool of white PLA that came with the printer. To slice the model, we used the exact Cura setting provided by Creality.
The Benchy turned out to be okay, but definitely not great. We encountered no stringing, but observed some blobs in the walls. The text at the base was readable, but the plaque at the stern had totally vanished. Also, the top layer of the floor showed some gaps; and the inside of the roof had “spaghetti” hanging down because of the concentric infill, that was set as a standard in Cura. Also, the layers of the bow were poorly aligned.
So there was room for improvement. We switched to white eSun PLA+ for the next iteration and changed the infill patterns to lines.
As you can see, we still got the same blobs as in the first model, but at least the gaps in the top layers were now closed.
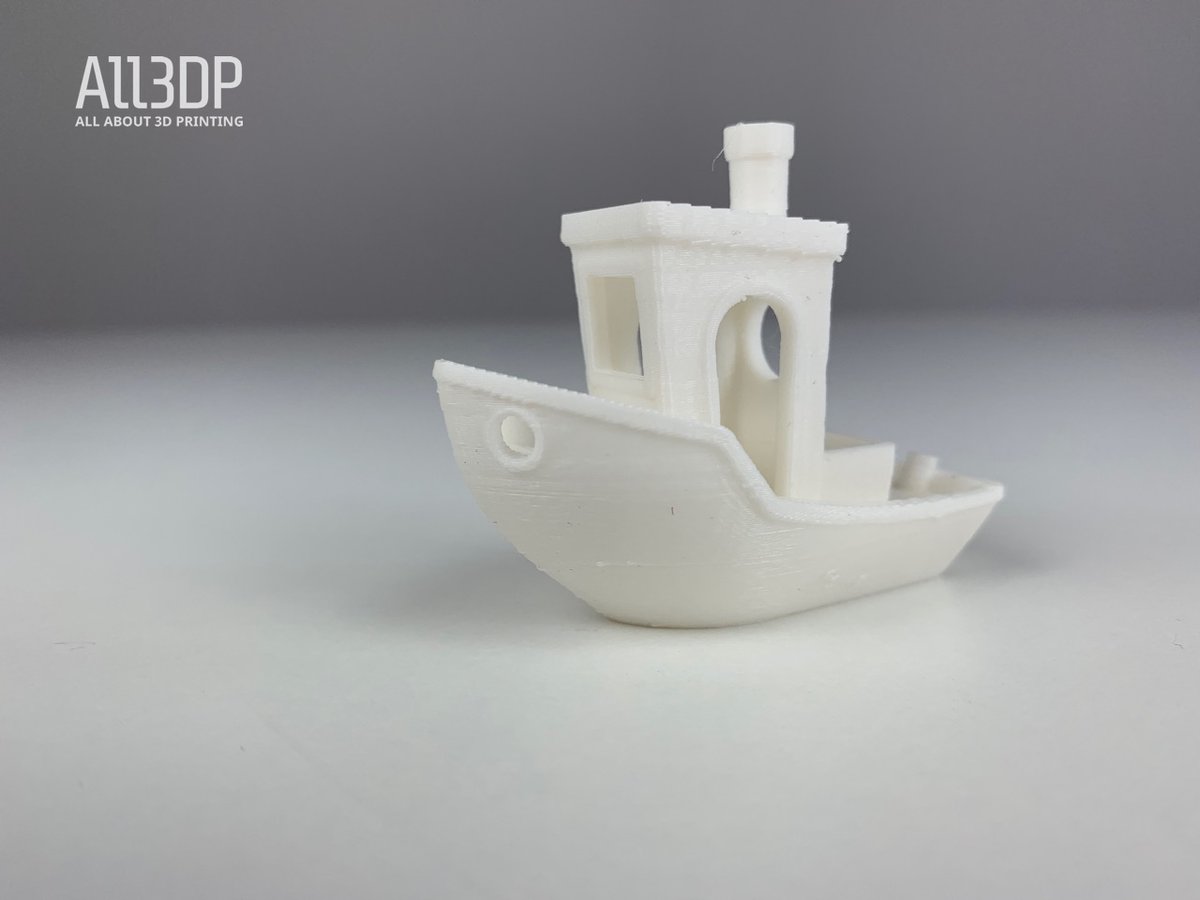
After changing the layer height to 0.15, we finally got a decent result with the eSun PLA+.
Ender 5: PLA Polypearl Tower
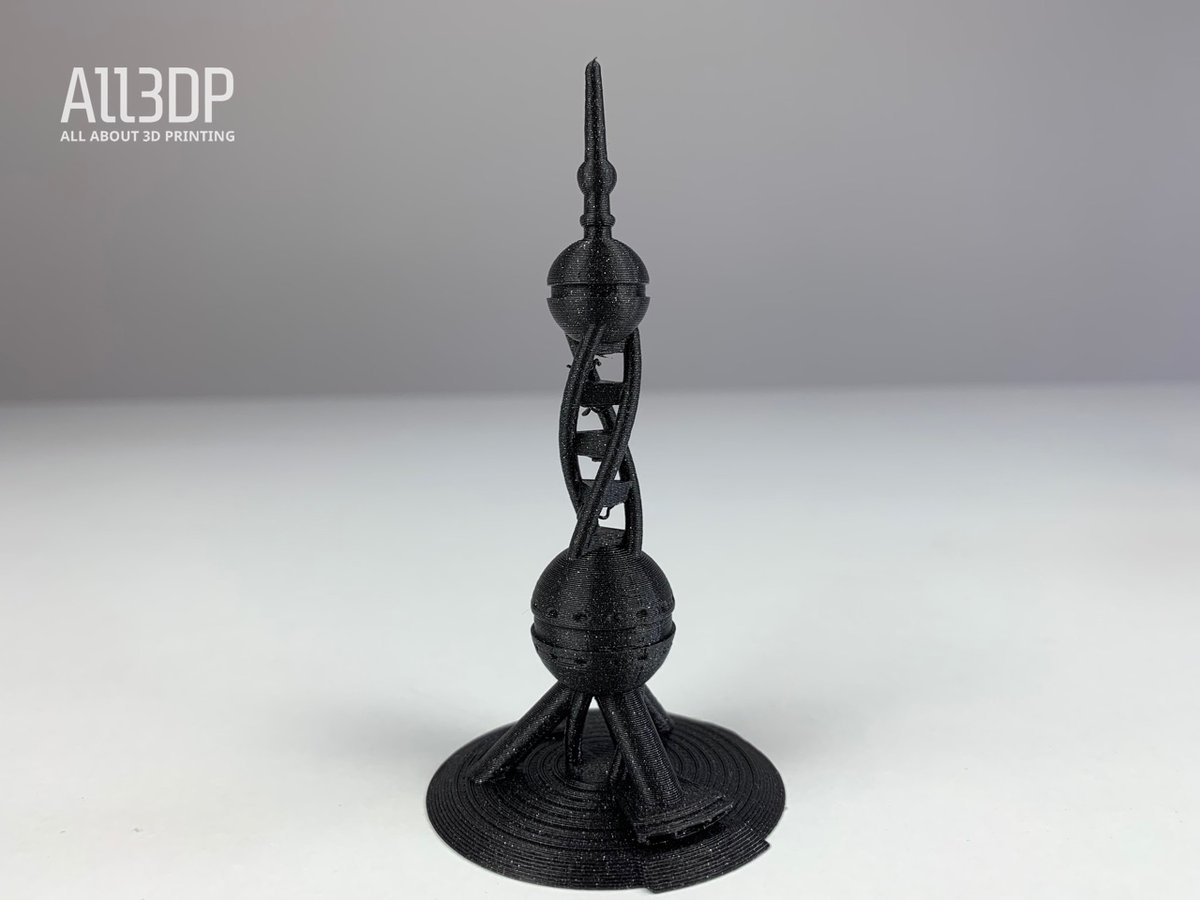
The PLA test prints were concluded with the Polypearl Tower, a torture test by Polymaker, a well-known filament brand. For this, we used Prusament PLA Galaxy Black. Although there were some dropped loops beneath the bridges, the print turned out fine.
Thanks to a more powerful power supply, you can heat up the print bed up to 100 degrees Celsius. There’s one problem, though. If you crank up the heat to 90 degrees and hotter, you will run into problems with the floppy magnetic bed, which simply isn’t made to withstand these temperatures for a long time. The consistent heat will ruin the magnet; also, we experienced air enclosures between the heater plate and the bed at 80 degrees already (think of what happens to pancakes in a frying pan).
That aside, the PLA test prints turned out to be surprisingly good, so we extended our efforts to even more demanding materials like PET-G and TPU.
Ender 5: PET-G Benchy
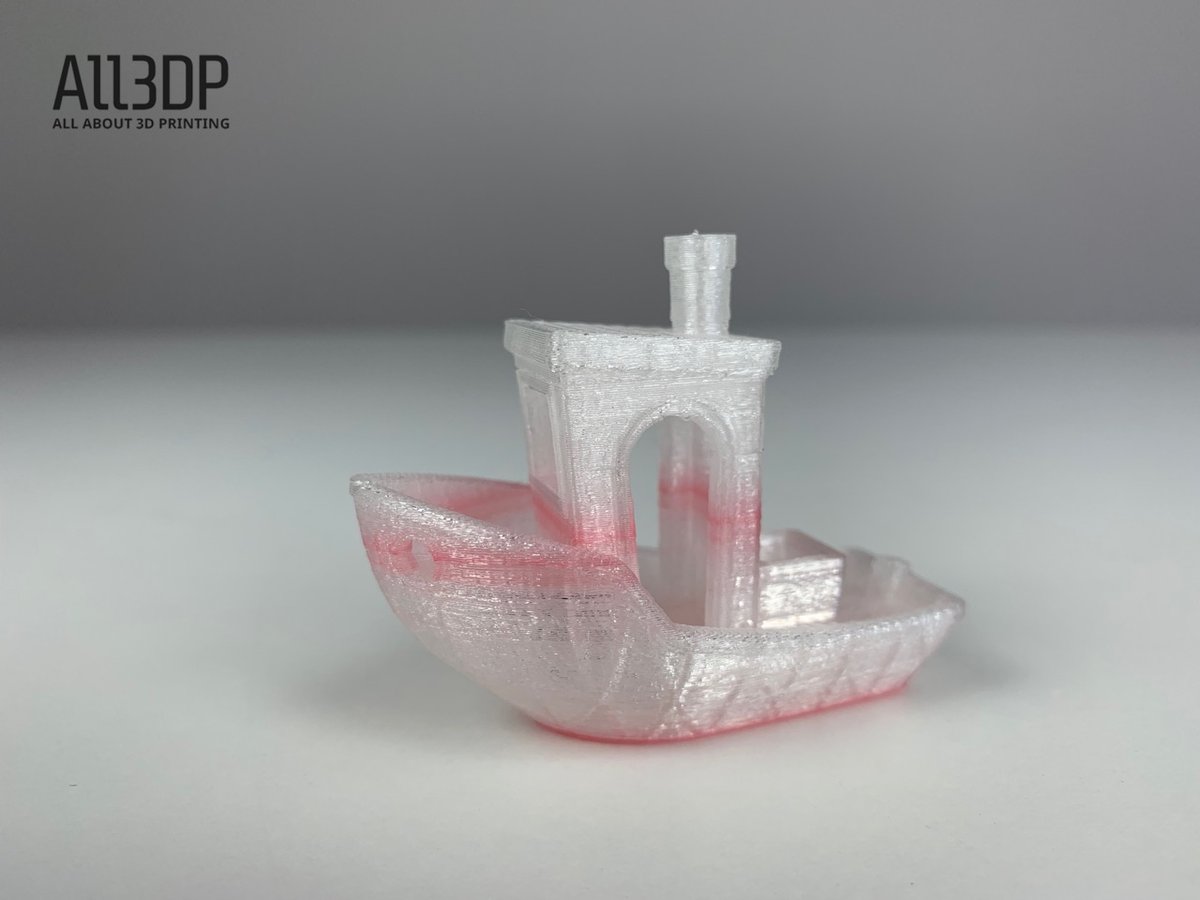
Printing a benchy with PET-G (Verbatim Clear). The Ender 5 didn’t run into bigger problems. It’s quite common to see some stringing, but there was some visible warping and also slight underextrusion.
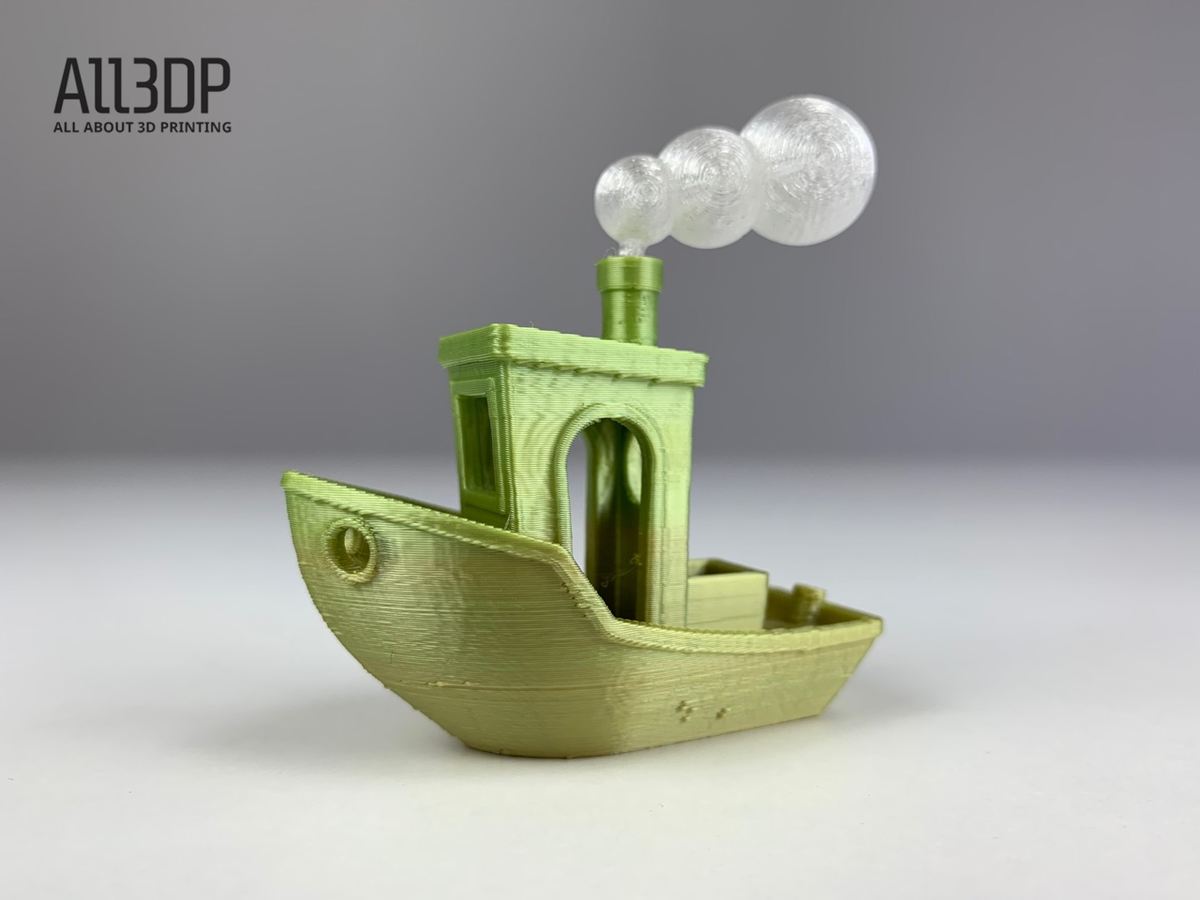
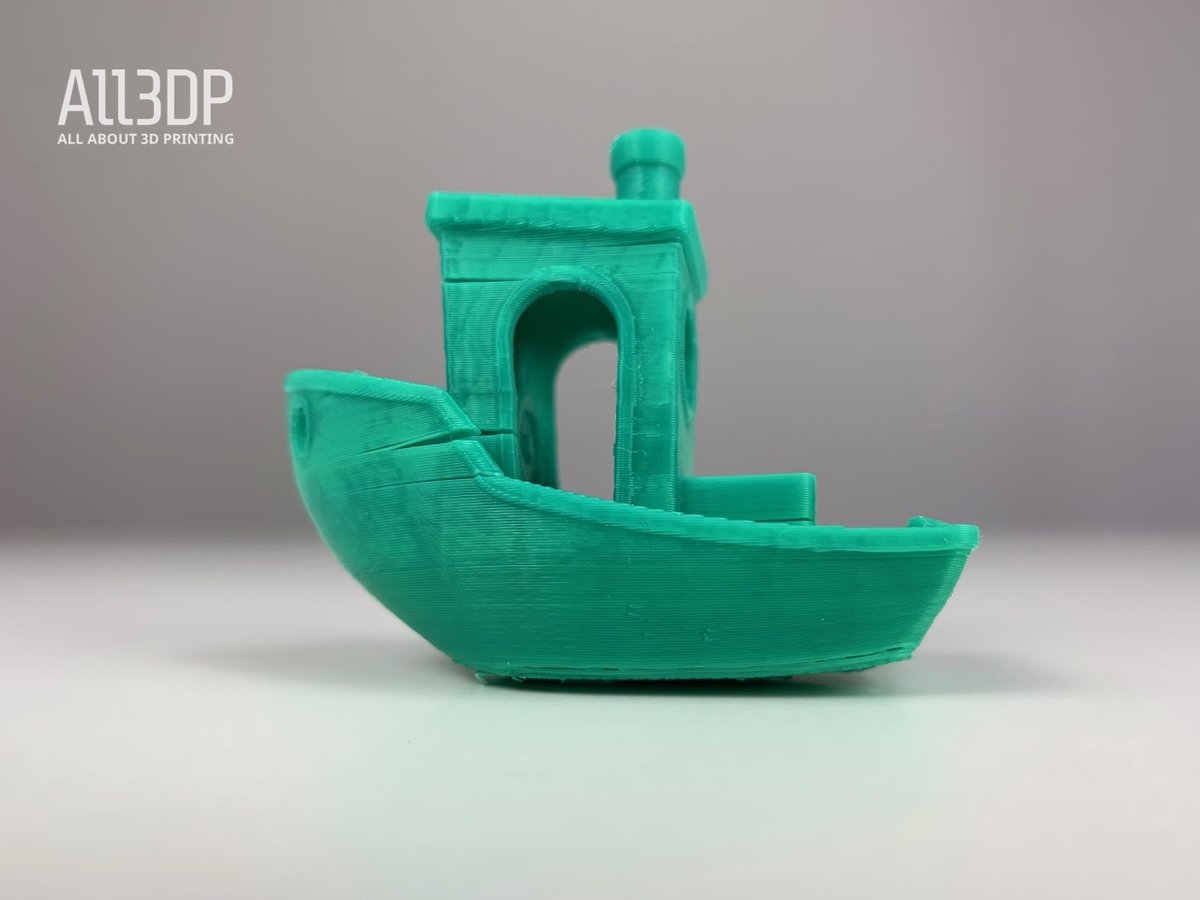
Ender 5: TPU Benchy
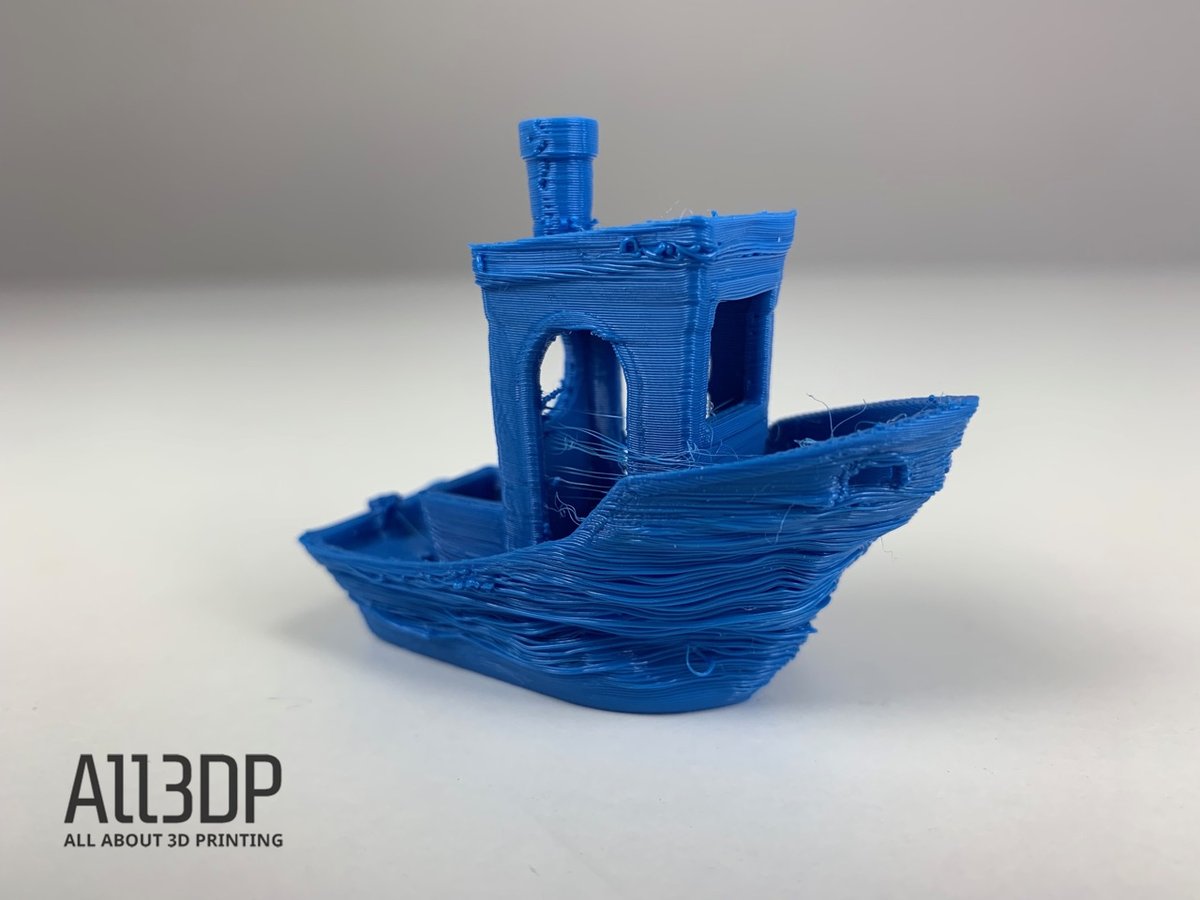
This ghostship probably wouldn‘t swim: The experiment of printing with TPU material (Filamentum Flexfil 98A blue) ended in a ship’s catastrophe.
Ender 5 Test Print: ASA
To print ABS or ASA without a proper enclosure will result in failure in 99 percent of the time. Still, the Ender 5 was able to finish both Benchys, which is a remarkable feat for a printer that costs under $350.
As expected, we encountered cracks and warping.
Ender 5 Test Print: Surprise Eggs
Next stop was the Surprise Egg #7 – Tiny Car Carrier, a 4-part print. This is a demanding task for the printer and the material, as there are tiny hinges that can easily be baked together while printing. Even harder: The wheels of the cars have to be printed accurately or they simply won’t turn.
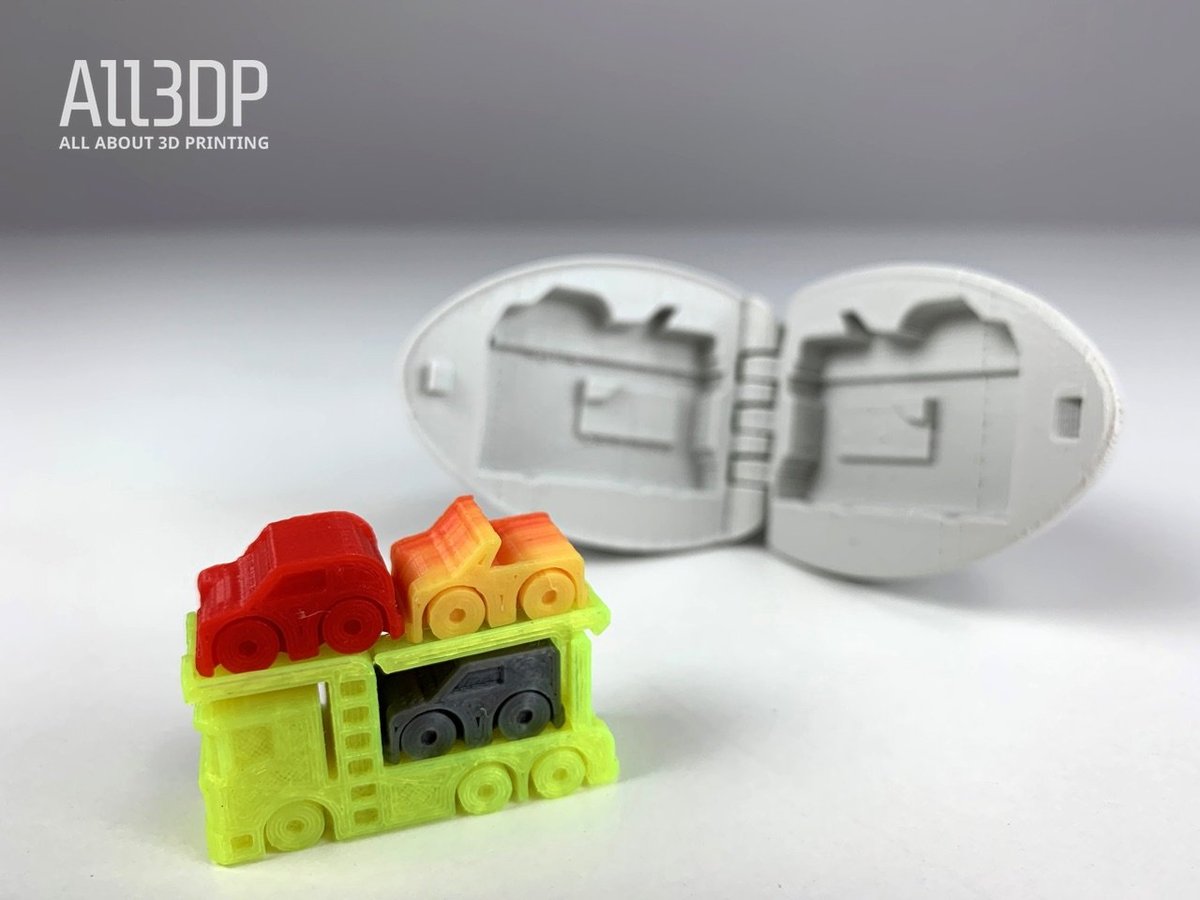
For the egg, we chose Verbatim’s Light Grey PLA. For the cars, some random samples of 3D printing filament samples we collected from tradeshows. Though some layers were underextruded, the egg printed nicely and the hinge was working nicely. The wheels of the cars were rotating freely (who needs Hot Wheels, anyway?) – very impressive, indeed.
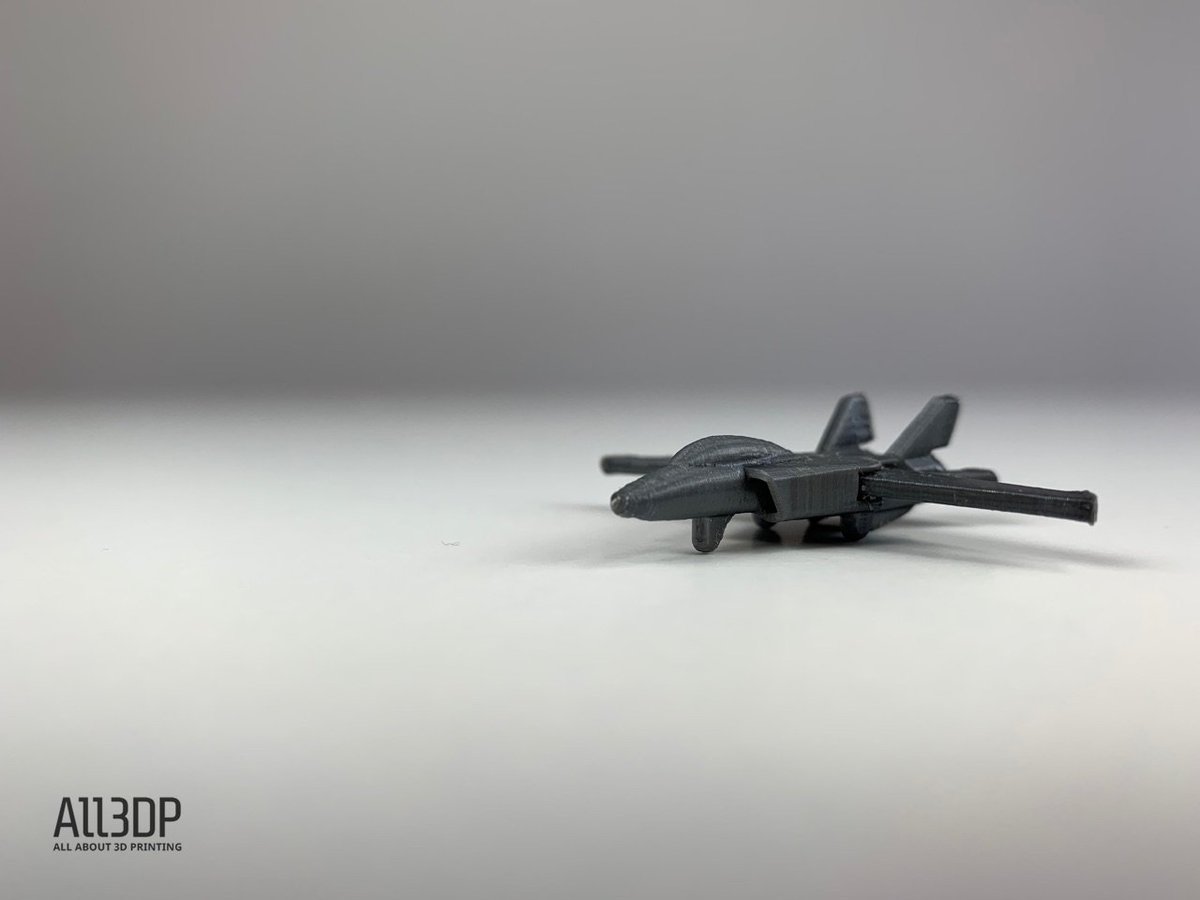
Also, we printed the Jet from Surprise Egg #6 – Tiny Jet Fighter. This model is printed in just one go and it contains a tiny mechanism that lets you unfold the wings. Again, the hinges worked perfectly.
AUTODESK KICKSTARTER TEST
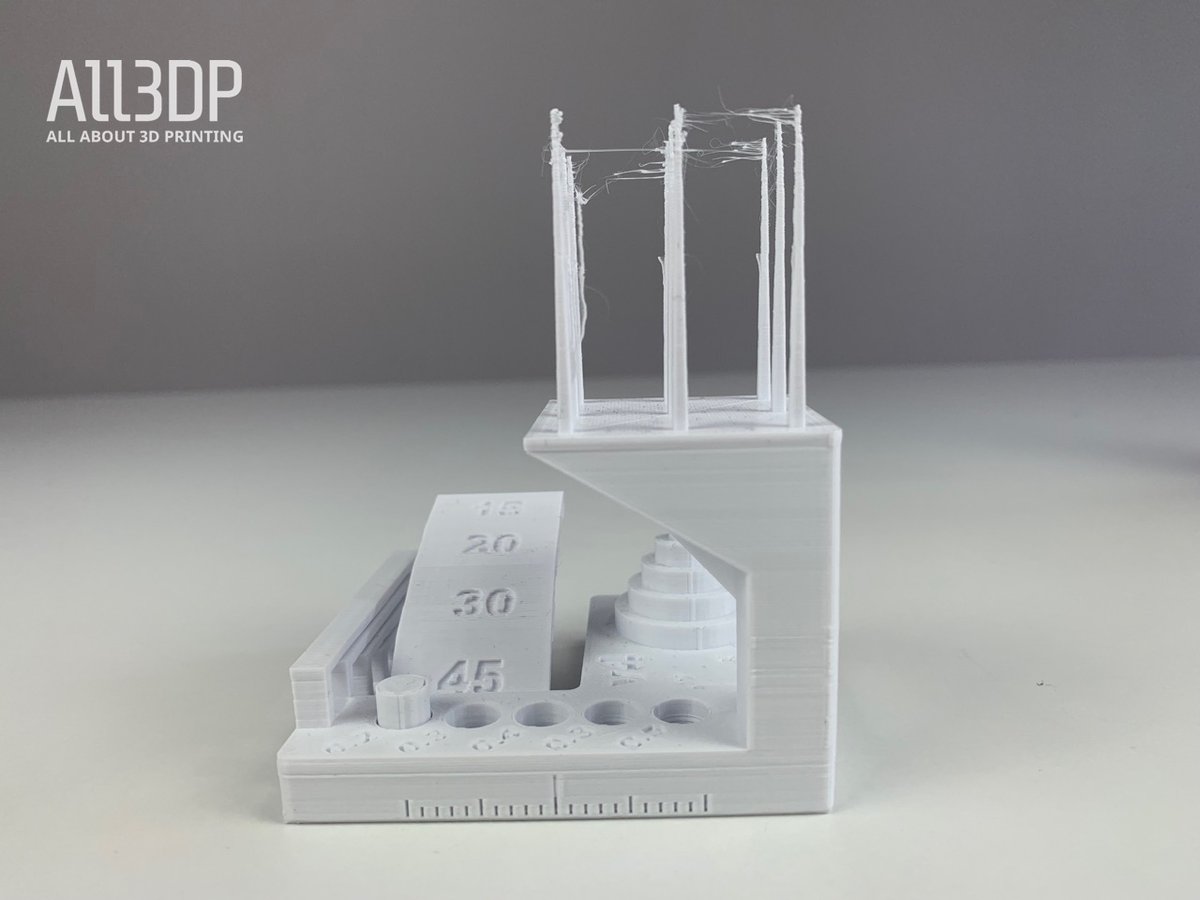
Our final print, the Autodesk Kickstarter test, looks at an FDM printer’s precision – read more about it here. The Ender 5 achieved the following results:
- Dimensional Accuracy: 5 of 5 points (24.92 / 20.05 / 15.03 / 10.05 / 4.93)
- Fine Flow Control: 2.5 of 5 points (the pylons were printed to their full height, but we encountered some stringing)
- Fine Negative Features: 4 of 5 points (the 0.2mm gap pin wasn’t removable)
- Overhangs: 2 of 5 points (30° and 15° overhangs showed some irregularities)
- Bridging: 5 of 5 points (no bridge contacted the surface beneath it)
- XY Resonance: 2.5 of 2.5 points (no ringing detectable)
- Z-Axis Alignment: 2.5 of 2.5 points (no layer registration effect visible)
Overall, the Ender 5 scored with 23.5 out of 30 points. This puts the Ender 5 even above the Prusa i3 Mk3.
Software
Before we wrap up our impressions of the Creality Ender 5, we wanted to touch on the topic of 3D slicing software.
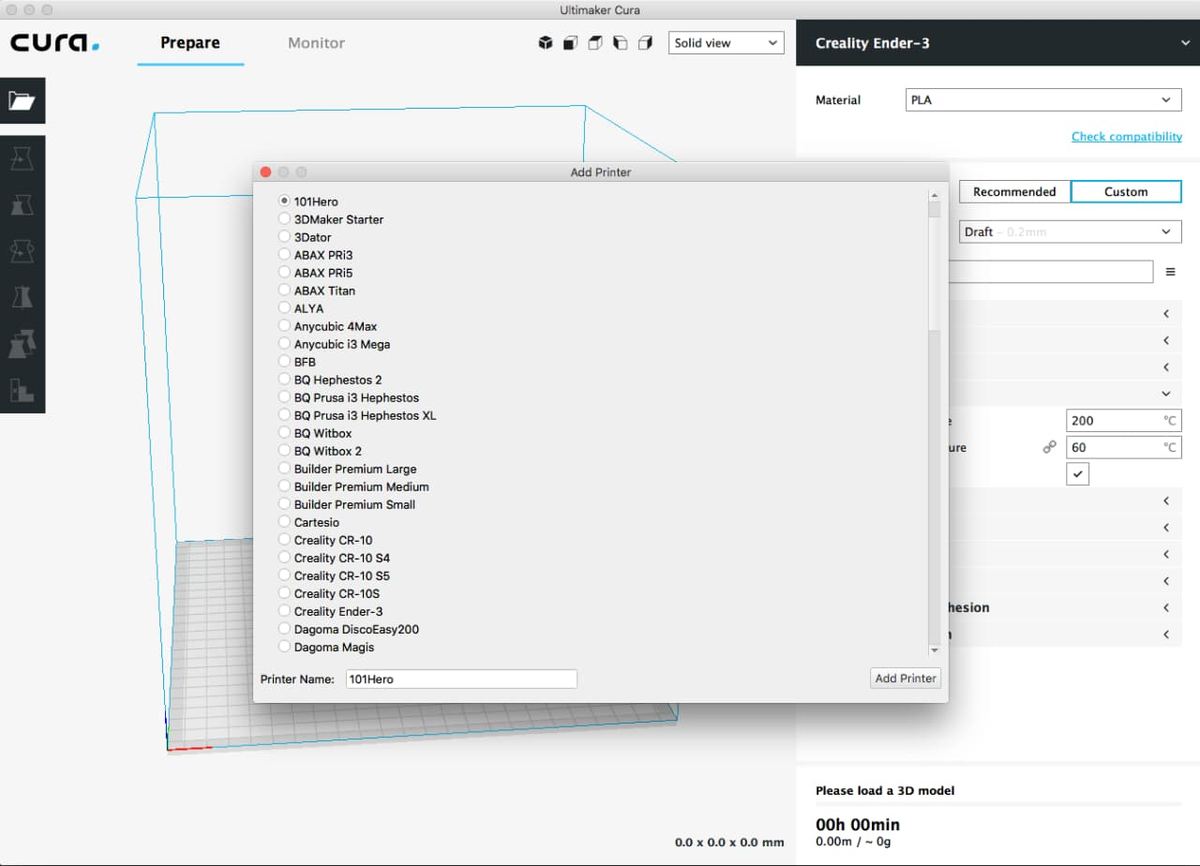
Creality provides you with an SD card that holds a Cura 15 or Cura 3.4.1 version – Windows only. On a Windows PC, we found that the Cura settings worked well, although the Cura version is pretty outdated.
Unfortunately, there are no Mac or Linux profiles. So, what can you do? First of all, you can download Cura directly from the Ultimaker website for free – and it will be even more actual than the one that Creality provides. Still, you’ll have to enter all the measurements and profile data from hand. This isn’t exactly what a 3D printing beginner wants to do.
What about the popular (but expensive) Simplify3D slicing software? At the time of writing, they offer no profile for the Ender 5. Again, you can add the data by hand if you know what you’re doing (which you probably do, as you’ve invested half the money of an Ender 5 in a slicing software). That said, we expect Simplify to add a profile soon.
Tech Specs
GENERAL SPECIFICATIONS
- Brand: Creality
- Model: Ender 5
- Assembly: pre-assembled
PRINTING PROPERTIES
- Build volume: 220 x 220 x 300 mm
- Min. Layer Height: 0.05 mm
- Frame: Aluminum
- Nozzle Quantity: One
- Nozzle diameter: 0.4 mm
- Max. print temperature: 260℃
- Nozzle diameter: 1.75 mm
- Connectivity: SD Card, USB
- XY-axis positioning accuracy: n/a
- Z-axis positioning accuracy: n/a
- Voltage: 100-240V
PHYSICAL DIMENSIONS & WEIGHT
- Product weight: 11 kg
- Package weight: 12 kg
- Product size: 400 x 380 x 400 mm
- Package size: 500 x 500 x 420 mm
Where to Buy
At the moment, the Creality Ender 5 is available on the manufacturer’s online store, as well as shops like Amazon, Aliexpress, etc. The prices fluctuate within the usual boundaries.
License: The text of "Creality Ender 5 Review: Great 3D Printer Under $500" by All3DP is licensed under a Creative Commons Attribution 4.0 International License.