![Featured image of [Project] 3D Printed Candy Dispenser](https://i.all3dp.com/workers/images/fit=scale-down,w=1200,h=675,quality=79,gravity=0.5x0.5,format=auto/wp-content/uploads/2018/03/26160529/colorfabb_candy-0056-1024x683-1.jpg)
[Project] 3D Printed Candy Dispenser

Get your sweet tooth ready for Easter’s endless barrage of chocolate bunnies and Cadbury Eggs with a 3D printed candy dispenser. This project was originally designed by HelioxLab, and recently presented by the Dutch 3D printing filament producer colorFabb.
The Easter holiday is here, and what better way to hop into celebration mode than with 3D printing technology and candy! On this Weekend Project, we’re sharing a 3D printed Candy Dispenser to help keep all of your chocolate eggs in one basket.
Originally designed and shared on Thingiverse by HelioxLab, colorFabb has recently promoted the project in order to showcase its flashy new nGen_LUX filament line. But even if you don’t have the sparkly new material on hand, you can still create your own 3D printed candy dispenser with less of a sheen. The model is fully 3D printed (except for the candy, of course), and is a great way to show your family just how sweet 3D printing technology really is.
If you’re a pet owner, you can even use this 3D printed contraption as a pet feeder. Either way, this project is a great way to use your 3D printer to produce something functional and fun!
3D Printed Candy Dispenser: What Do You Need?
All you need for this project is a modestly sized 3D printer, some small round candy (M&M’s), and a range of filament if you want your Candy Dispenser to be colorful. ColorFabb took the opportunity to promote its nGen_LUX filament line, which is a high-quality material made with Eastman Amphora AM3300 3d Polymer. This material range is especially sparkly and makes layering nearly unnoticeable to the human eye. There are currently five different colors available.
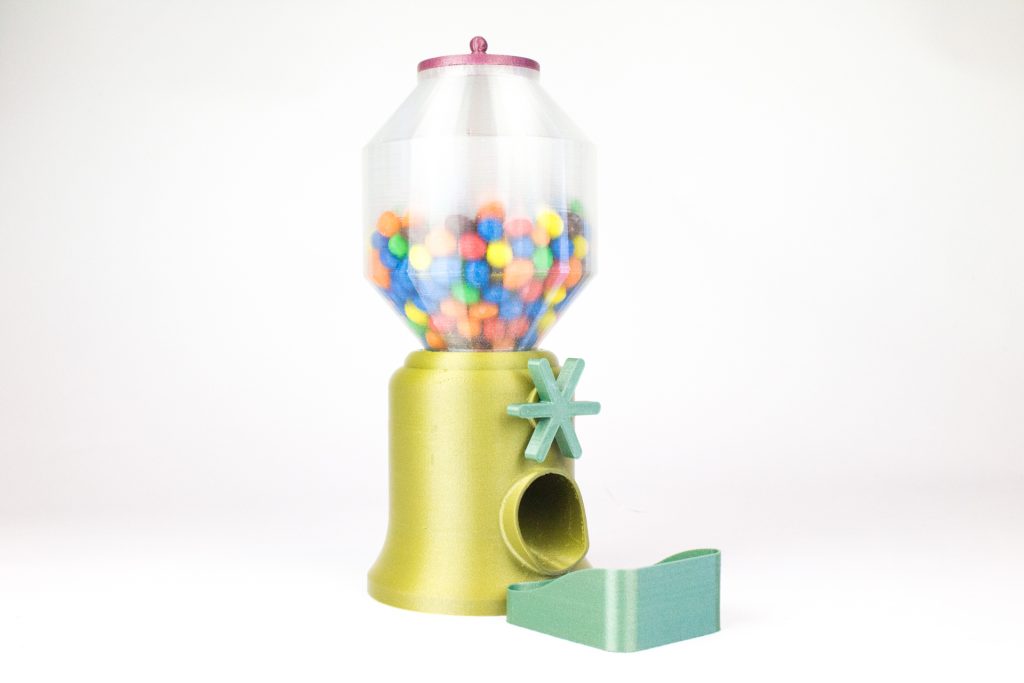
But feel free to use any filament you want. However, the reservoir should probably be 3D printed in a transparent filament, that way you can keep stock of how much candy you have left. There are eight different parts that make up the 3D printed Candy Dispenser, so be sure to get creative with filament colors!
3D Printed Candy Dispenser: Putting it all Together
The assembly process for the 3D printed Candy Dispenser is extremely simple, as each 3D printed part is designed to fit without needing any screws or other components. The French designer Heliox shared the design and assembly project on her YouTube channel. Once the different parts are finished 3D printing, it’s as simple as snapping everything together.
Although the video is in French, it’s still easy to follow along with Heliox and assemble the Candy Dispenser.
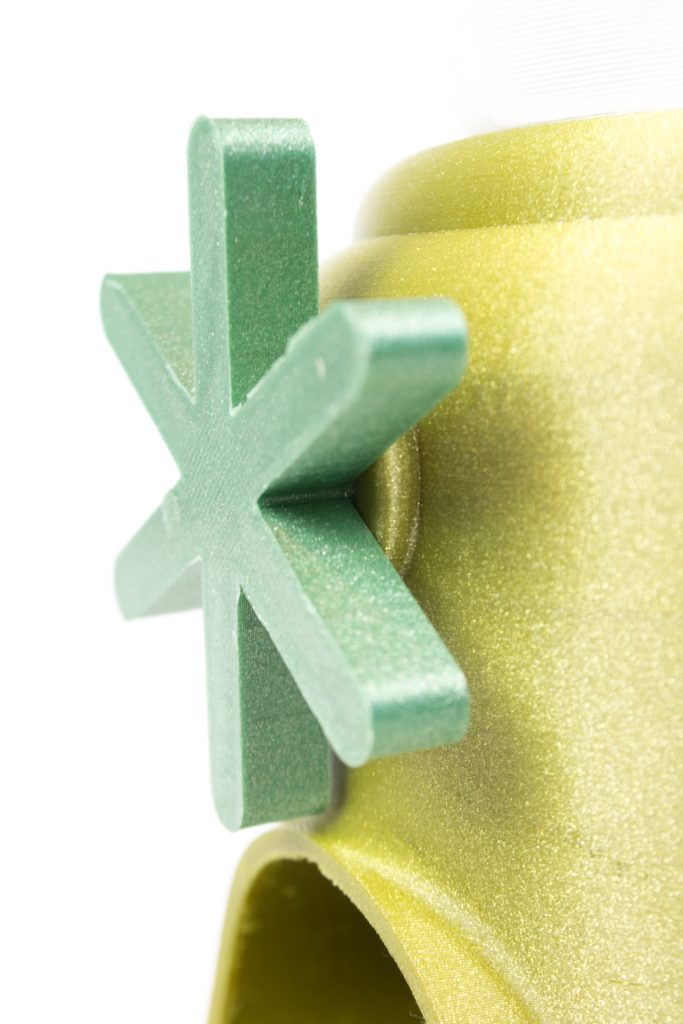
Start with the base of the dispenser and attach the knob and dispensing mechanism. When you turn the handle, the mechanism should turn with it, controlling the flow of candy. There’s also a 3D printed clip that you need to insert to hold the inner mechanics in place.
Next, mount the reservoir and lid on top of the base. And what do you know, now you have your very own 3D printed Candy Dispenser! The last step is to fill up the reservoir with candy and start turning.
License: The text of "[Project] 3D Printed Candy Dispenser" by All3DP is licensed under a Creative Commons Attribution 4.0 International License.