How to Color 3D Printed Prototypes and Models With Crayons

Formlabs mechanical engineer Christian Reed develops method to color his 3D printed parts by melting crayons.
Most of us can probably recall the times when we were younger, sprawled out on the floor with an imaginative coloring book and a 64-pack of Crayola crayons. Whether you were trying to stay inside the lines or scribbling furiously across the page, crayons gave many children their first taste (hopefully not literally) of artistic expression.
But who would have thought that these colorful wax sticks could someday be used to give vibrance to your 3D printed objects? Formlabs mechanical engineer Christian Reed came up with an innovative method to bring color to his prototypes, using melted crayons.
The Massachusetts 3D printer manufacturer recently shared their employee’s bright and nostalgic post-processing technique. Aside from the 3D printed part, here’s what else you’ll need for this project:
- Crayola Crayons
- Heat gun (or lighter if not available)
- Masking tape
- Scraper tool
- Sandpaper (assorted grit pack)
- Microfiber cloth
Additionally, Formlabs recommends placing a cutting board or newspaper underneath in order to avoid a mess. 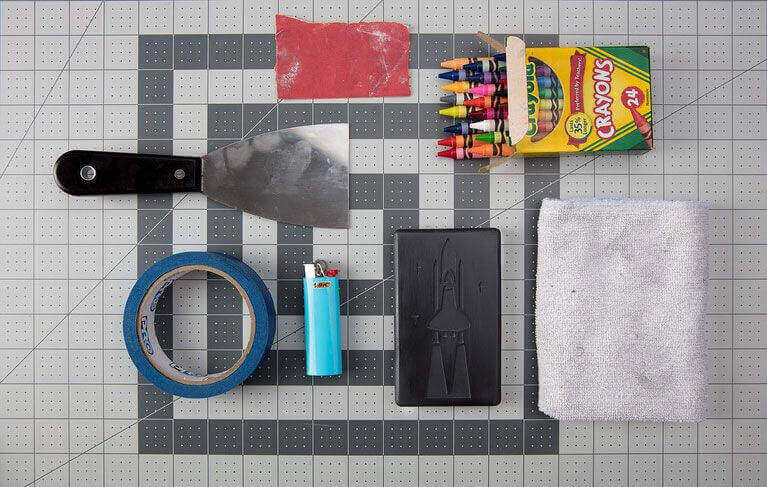
Turning Melted Crayons to Colorful 3D Prints
Reed came up with this idea while he was looking to color the logo for his GRIPsher, a multitool product that he recently had fully funded on Kickstarter. There are quite a few things you’ll need to undertake this project, all of which are relatively inexpensive and easy to access.
First off, there should be a slight recess of 0.5 – 1 mm in the 3D model, as this is the area that will be emphasized by color. If you’re not CAD-savvy or want to test out the process, Formlabs has uploaded a number of compatible designs to Pinshape.
After the print is complete, you must sand the part (from rough grit to fine grit) until the surface finish is to your liking. This step is important because otherwise, the melted paraffin wax material will seep in between the layer lines.
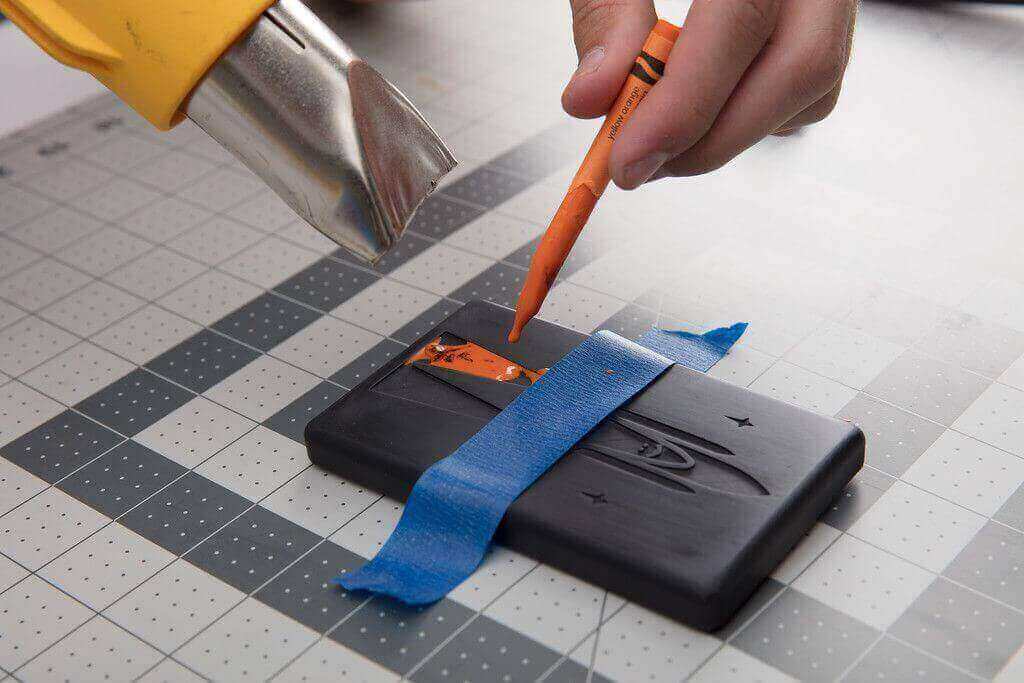
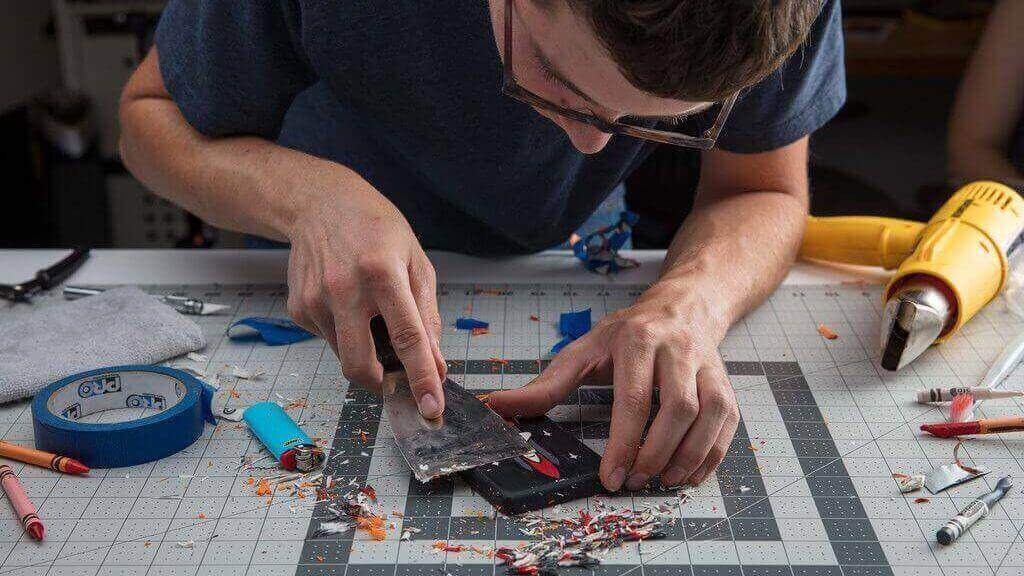
Finally, it’s time to get creative with your Crayola crayons. First, you must strip away the paper wrapper with a knife or scraper tool. After that, take a heat gun (set to low pressure) or lighter and melt the crayon away from your 3D printed part. Once it starts dripping, hold it over your prototype or model and apply the colorful wax. Be sure not to hold the heat source to close to the crayon, as it may end it burning the wax.
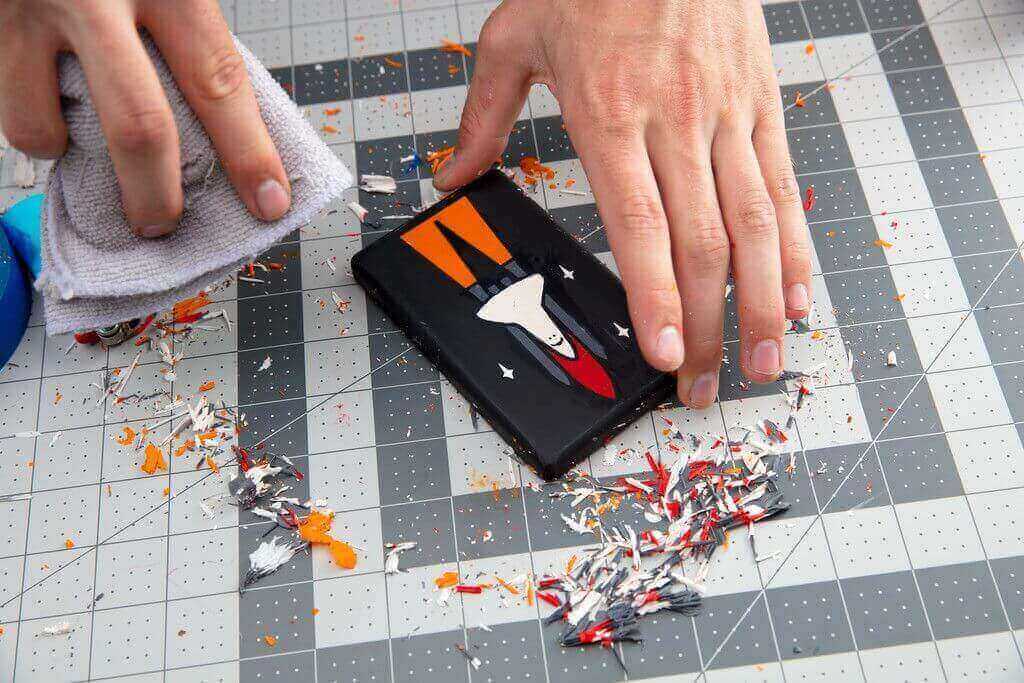
Masking tape can be utilized to block certain areas from being colored in, but it’s important to wait ten minutes for the wax to dry before removing the tape. Last but not least, take a scraper tool and gently smooth out the wax across the 3D printed part. The microfiber cloth can then be used to remove excess wax, while an actual crayon could touch up small areas if needed.
With the demand for multicolor 3D printing continuing to grow, Reed has developed a creative method fusing an emerging technology with a beloved childhood past-time. If you end up trying out this crayon-based post-processing method, be sure to share your final results on the Formlabs Forum.
License: The text of "How to Color 3D Printed Prototypes and Models With Crayons" by All3DP is licensed under a Creative Commons Attribution 4.0 International License.