Build a Cheap DIY 3D Printer Kit for $99: The iMakr STARTT

A DIY 3D printer kit for beginners, the STARTT stands apart for good reason: it costs just $99. Read on for our guide on how to build this cheap DIY 3D printer kit.
Indeed, for a mere 9,900 cents or pennies you can pick up this neat little package from iMakr, a UK-based 3D printer retailer, and owner of 3D printing outlets such as MyMiniFactory and 3D Printing Industry. For an affordable DIY 3D printer kit, it’s an easy introduction — literally — to the nuts and bolts of 3d printing.
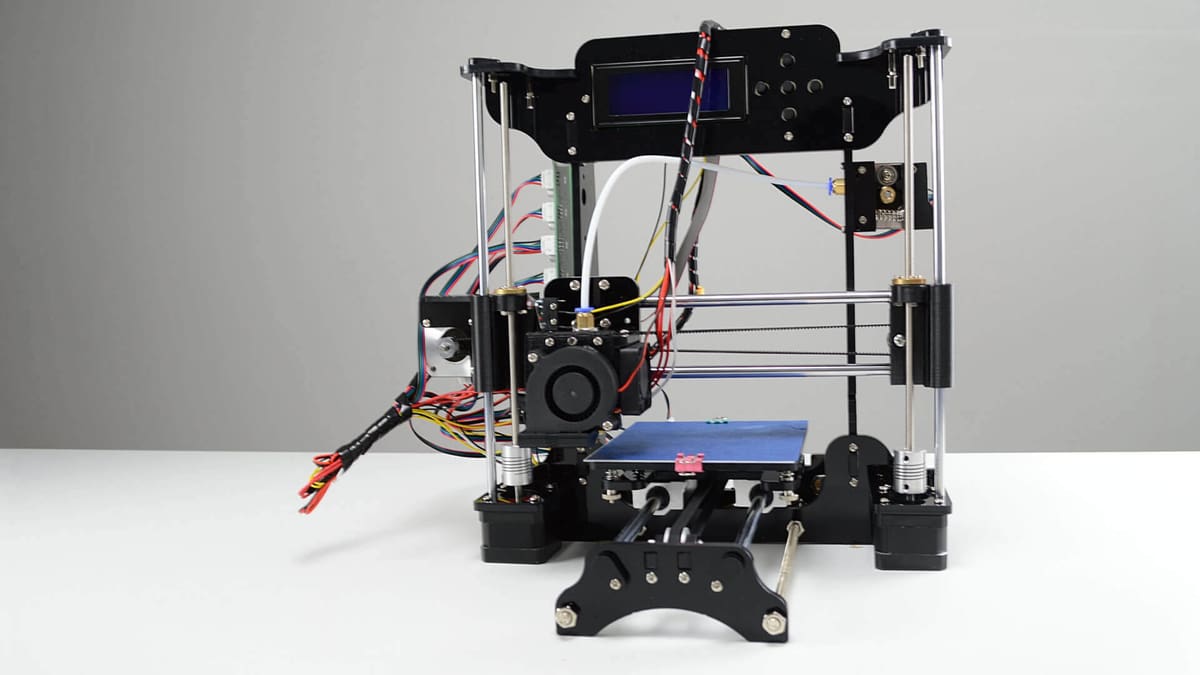
To anyone somewhat familiar with the world of desktop 3D printing, a fully assembled STARTT cuts a recognizable figure. In all but name and size, it’s a
But digging a little deeper into this DIY 3D printer kit reveals that it is actually a re-badged TronXY XY100. If you were to seek one out online now, you’ll be paying more than $99. So the STARTT presents a pretty good value proposition from the outset.
As a reseller of numerous other 3D printers, iMakr positions the STARTT as the most basic of all DIY 3D printer kits, purely for beginners. Leveraging MyMiniFactory to provide 3D models and resources, in conjunction with their own detailed assembly guide, the STARTT certainly hits its mark.
A word of caution though. Even with a set of clear instructions and the parts for a no-frills machine strewn before you, building a 3D printer from scratch is a pretty involved process, and the end results may frustrate you. Start with an open mind and the expectation that something will be wrong by the time you’re setting up your first print.
This writer has never assembled a DIY 3D printer kit before, so we thought what better place to dive on in and piece together a little guide.
iMakr claims a build time of 4-5 hours. And it took us slap bang in the middle of that estimate, at 4.5 hours.
But how easy is it to build a cheap DIY 3D printer kit? And just how well does one perform? To find out, read on for our experiences with the STARTT.
How to Build a Cheap DIY 3D Printer Kit
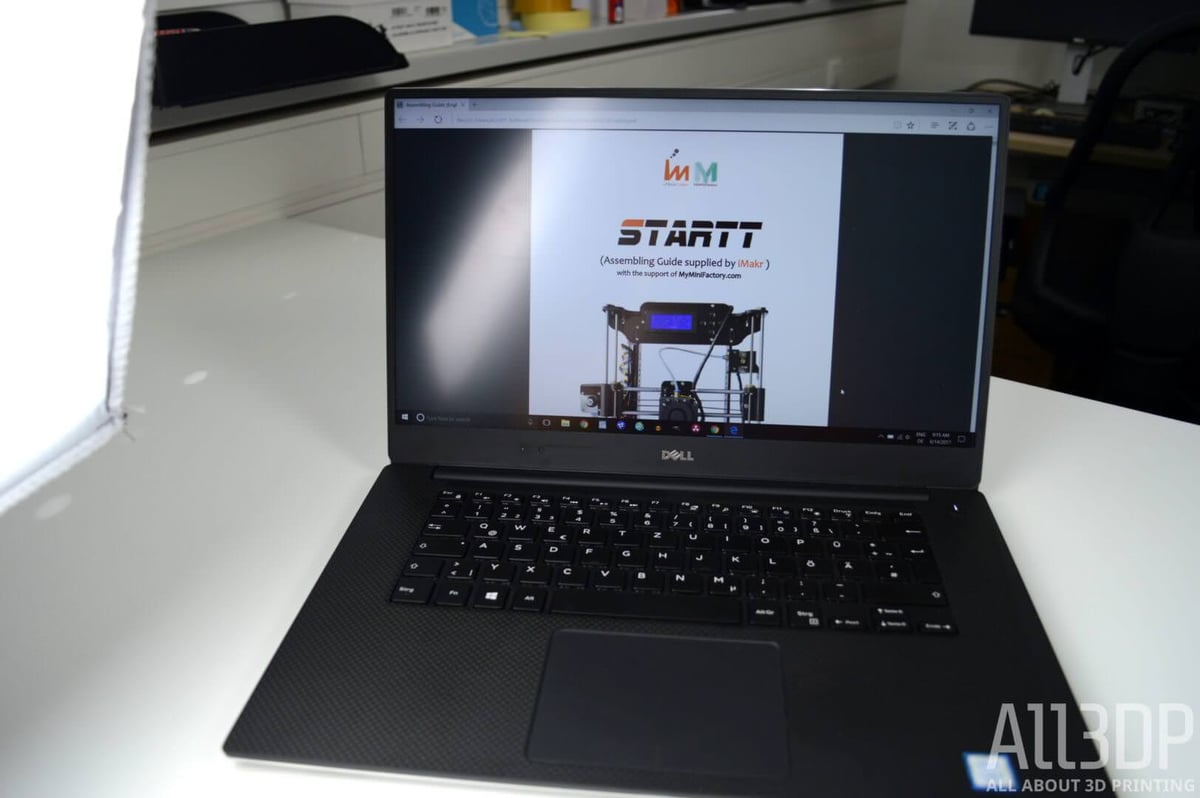
iMakr has created extensive text instructions for assembling the STARTT. You can find them here.
We followed these for our build, and have jotted down our own notes and thoughts for the experience. These are collected below in a step-by-step companion to the official instructions. You’ll find our own tips, plus all the steps necessary to build this cheap DIY 3D printer kit.
STARTT Cheap DIY 3D Printer Kit Step #1: Unboxing
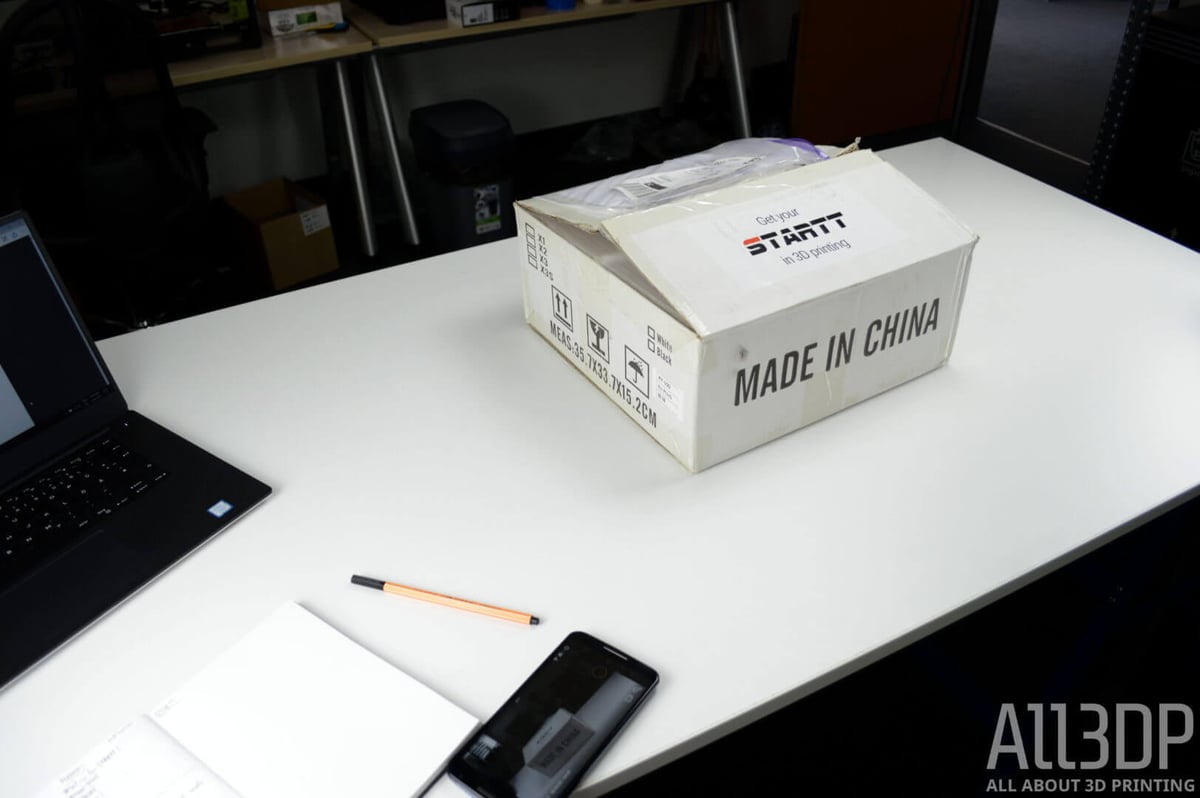
So what do you physically get for dropping your hard-earned cheese on a STARTT.
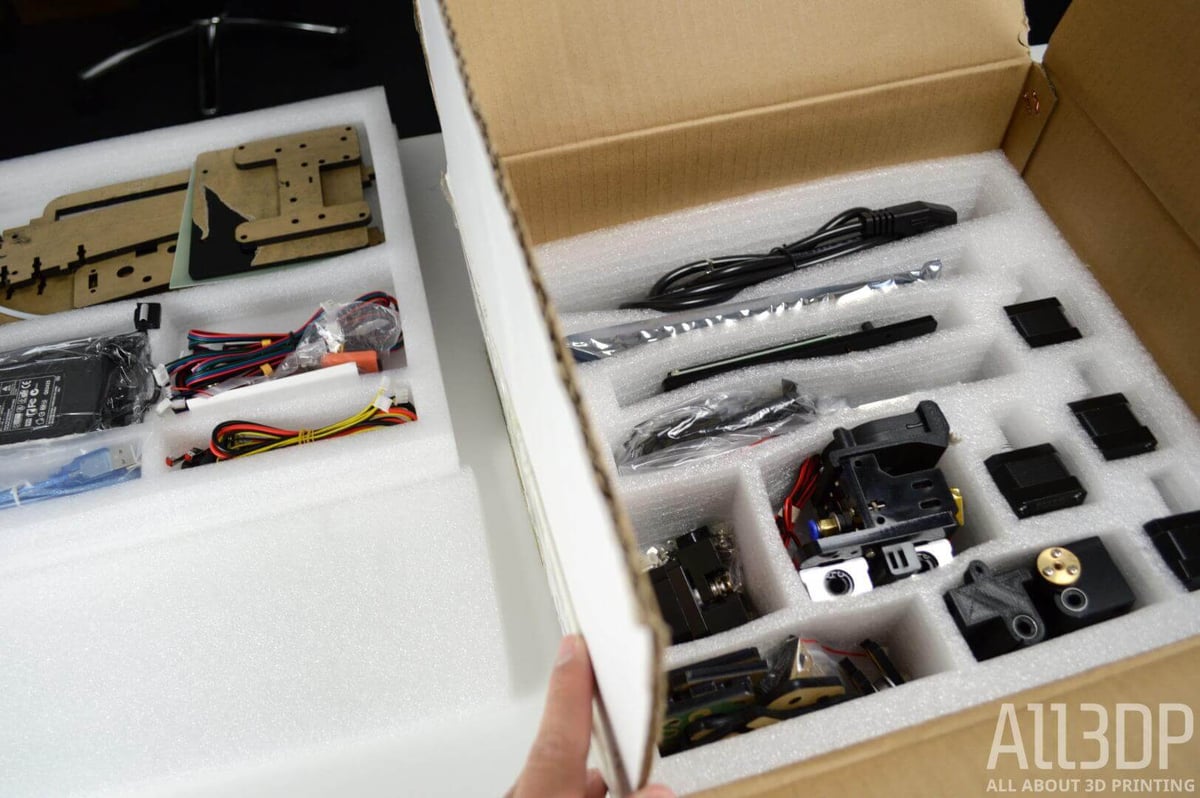
Basically, the box pictured below – a compact package unlikely to trouble your postman. Prying it open reveals two tiers of neatly arranged components safely shrouded with padding and separated into compartments.
Atop this is a handy checklist with hand-scrawled ticks indicating that someone has checked you have all you need to build this DIY 3D printer kit.
Well… almost. The instructions iMakr have produced for the kit reference a 3D printed spanner that was missing from our kit. We notice there’s no inclusion for it on the checklist, so the error there probably lies in the instructions rather than packing.
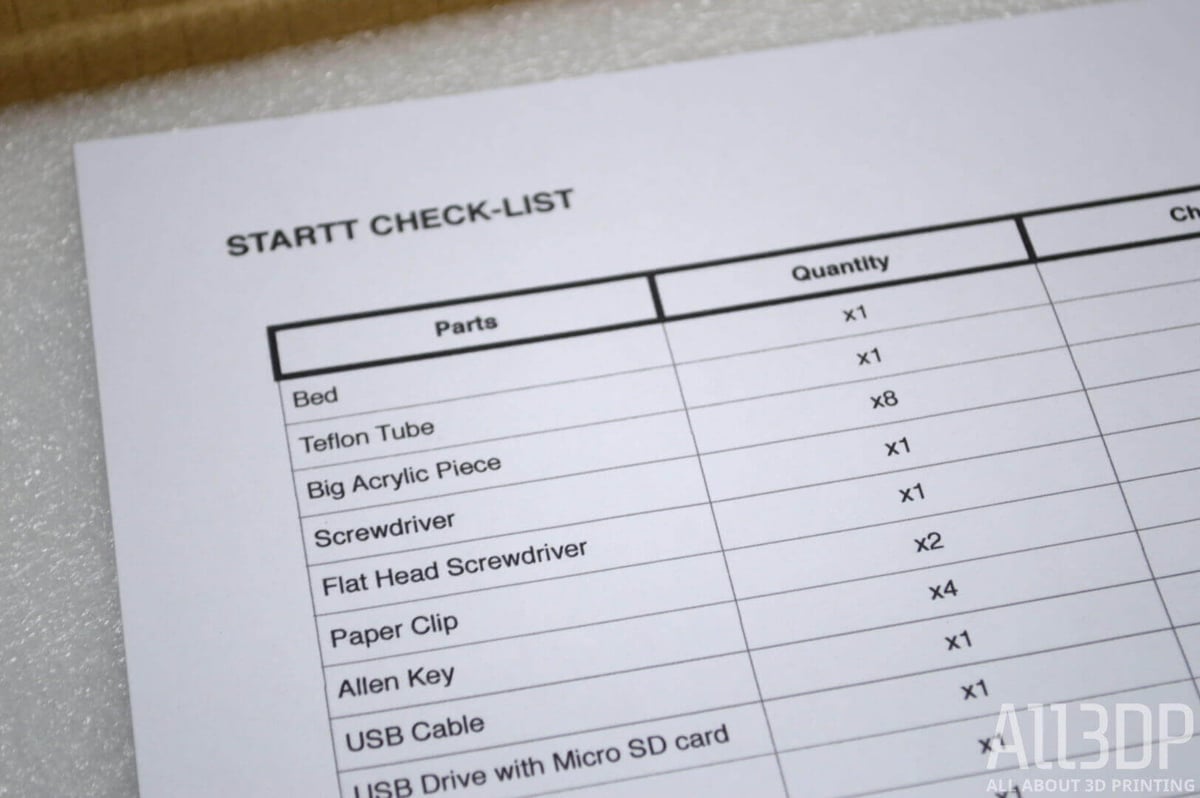
Spanner pedantry aside, this cheap DIY 3D printer kit claims to include all the tools you need. It includes a Philips and small flathead screwdrivers and requires no electrical wizardry like soldering, which is reassuringly simple. We did, however, find a couple of steps in the build that were made easier with extra tools from our workshop.
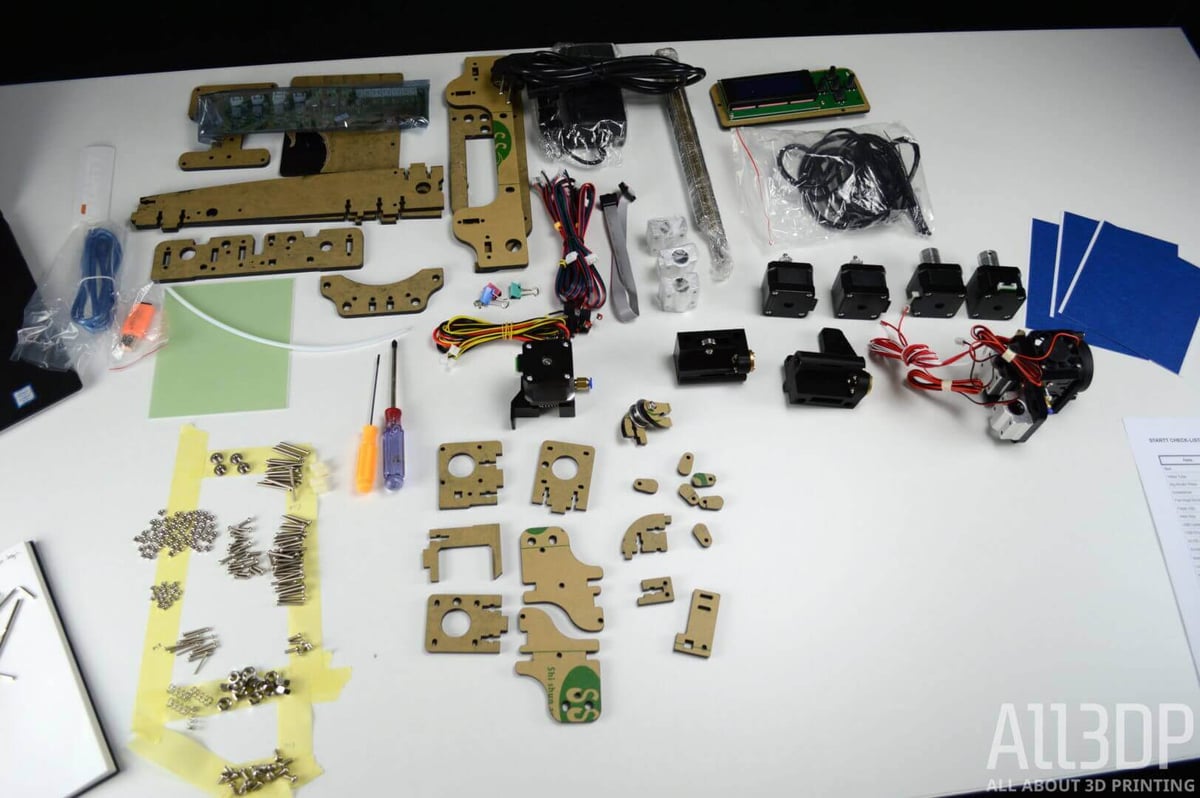
We found it useful to remove all the pieces and arrange them on the workbench for easy access. This applies most of all to the generous helping of M2, 3, 4 & 5 nuts and bolts the kit contains.
There are few things more frustrating than foraging for a teeny tiny M2 nut with one hand while holding parts in place with the other. Do yourself the favor and get organized.
On the flip side of this, we neglected to remove the protective stickers from the pieces of black acrylic frame. This meant half of every single step was spent fighting to remove fiddly sticky nonsense. That’s another top tip from us. Remove it all at the start.
STARTT Cheap DIY 3D Printer Kit Step #2: Assemble Y-Axis motor
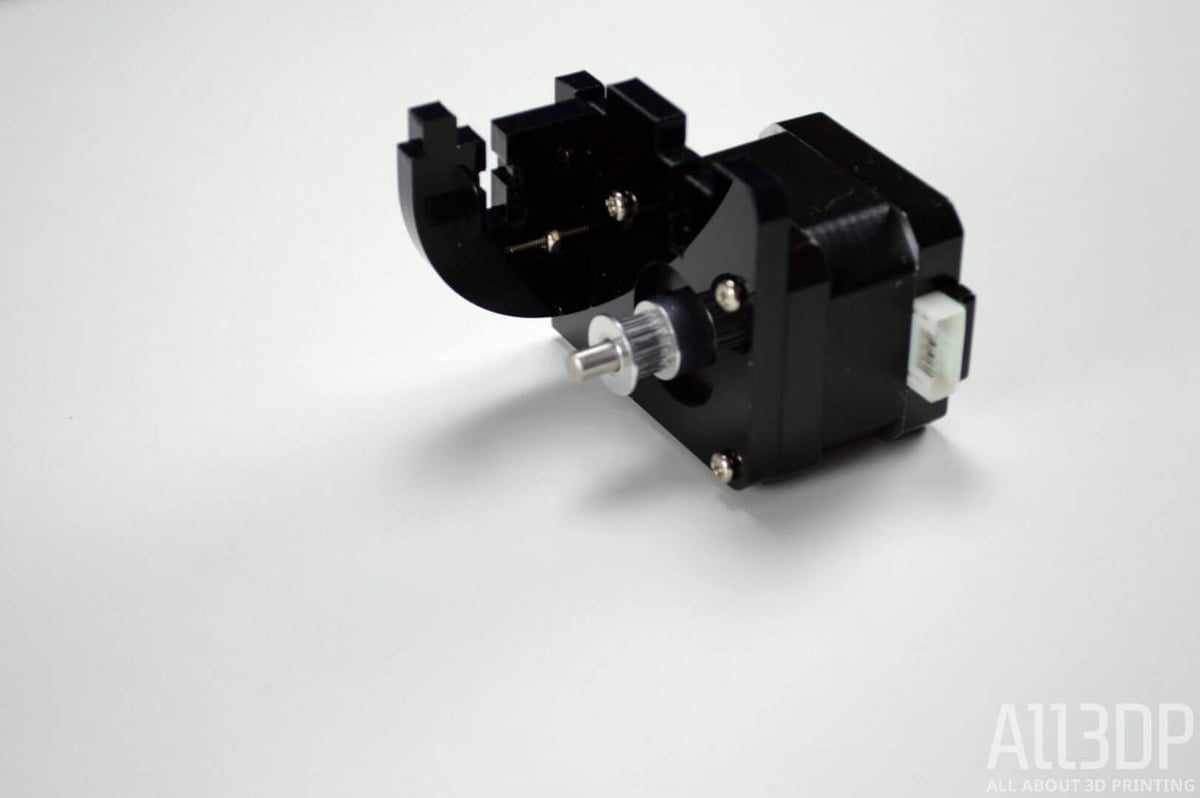
An easy pace, to begin with, simply screwing together acrylic motor housing for one of the stepper motors. You’ll become intimately familiar with the M2 nut from this step forth, as the vast majority of acrylic fixing is by positioning the teeny tiny M2 nuts into small holes and threading them with their partner bolts.
Also, an important lesson is learned here. Check twice, tighten once. Be sure of the orientation of the acrylic parts you are tightening.
For anyone following along without a STARTT in front of them… good on you. Thanks for sticking with us through the intro. A lot of what’s covered here — the main printer parts and general constructs required — are universal across all
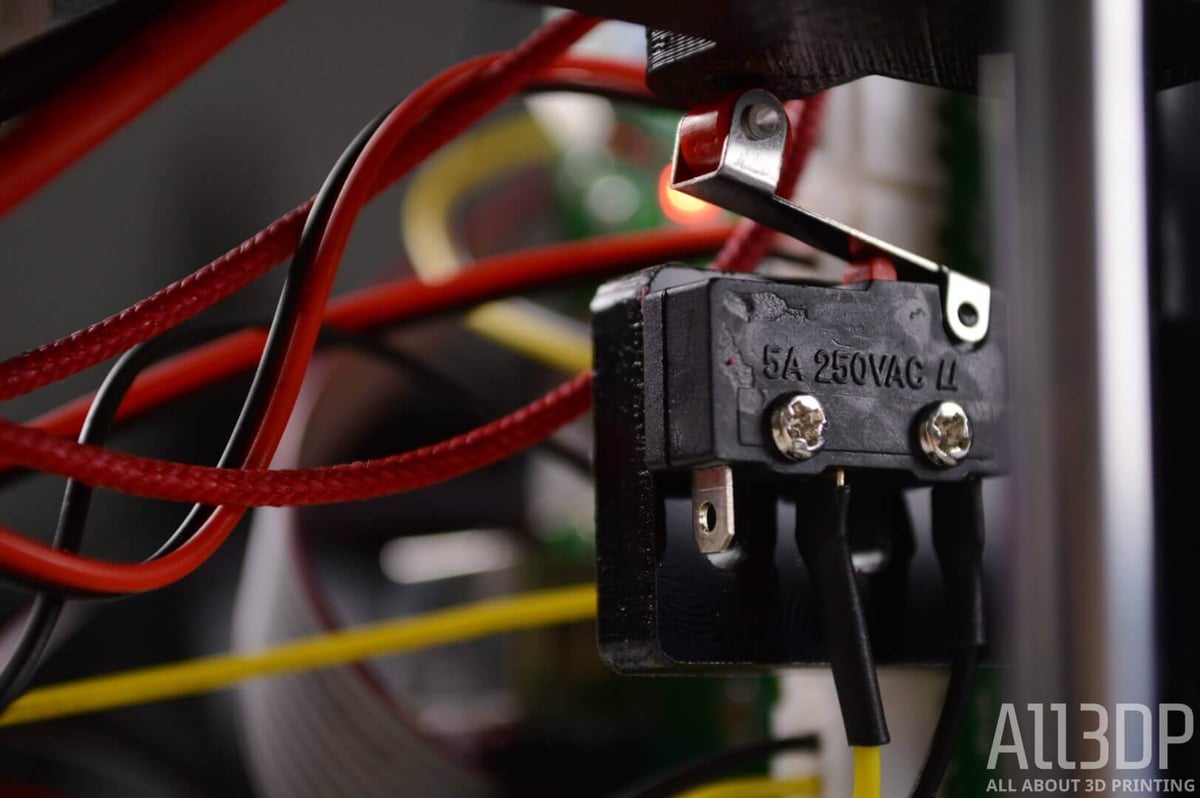
STARTT Cheap DIY 3D Printer Kit Step #3: Assemble Y-limit Switch
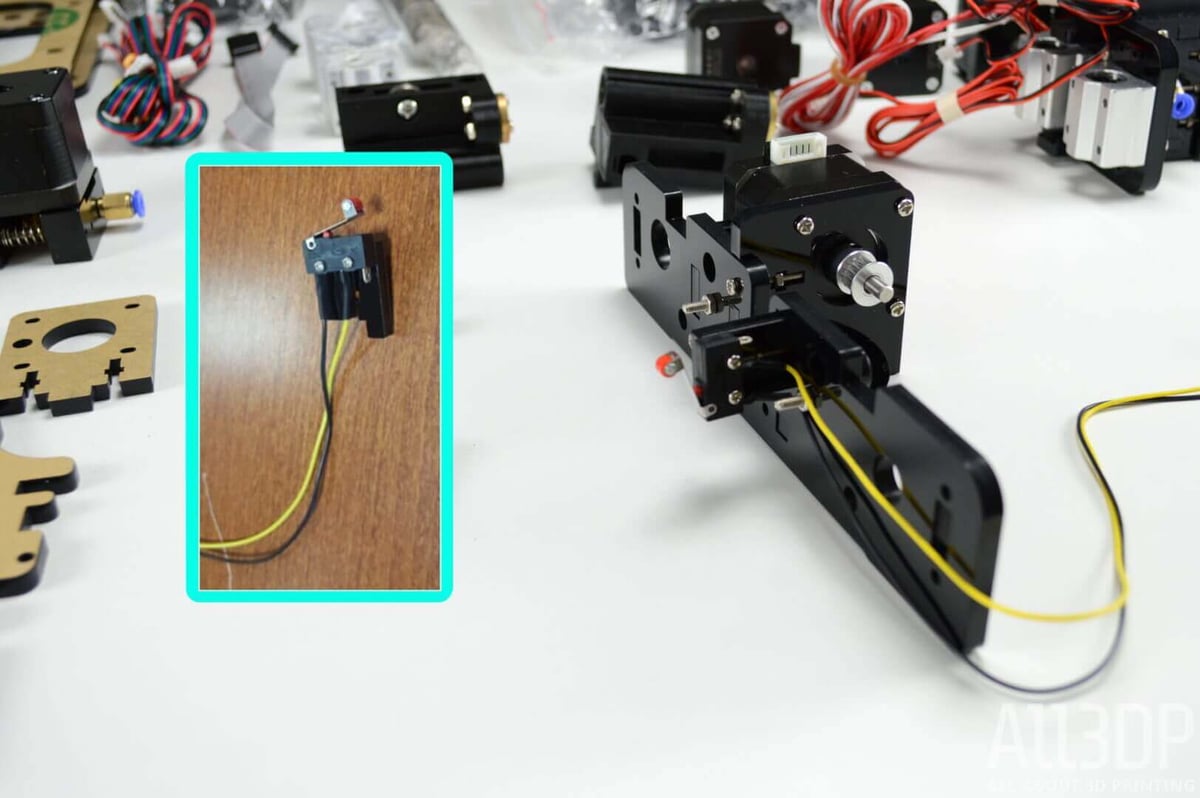
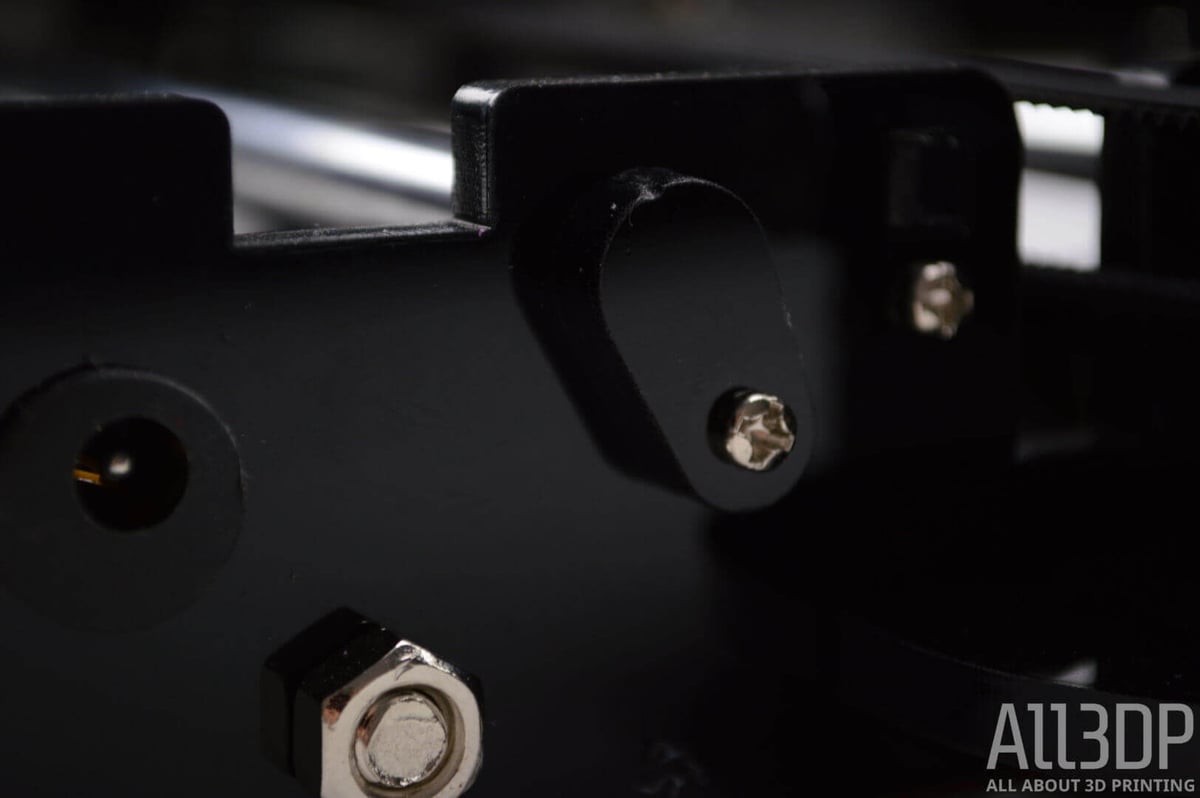
And an even simpler second step, as you attach one of the limit switches to a small acrylic piece. Important to note here is that the yellow wire is on the side of the acrylic piece with the longer prong (inset picture).
The construction you see above on the right is a few steps advanced from here, so no need to panic. We’ll get to it shortly.
STARTT Cheap DIY 3D Printer Kit Step #4: Install Rod Caps
Here you install the rod caps — small oblong-ish pieces of acrylic — to the back base plate. These prevent the rods that the print bed slides along from jostling about and coming out of place.
Take careful note of the back plate’s asymmetry. We were reminded the hard way of the lesson learned from step #2. You do yourself no favors rushing through tightening nuts, only to later find pieces in the wrong position.
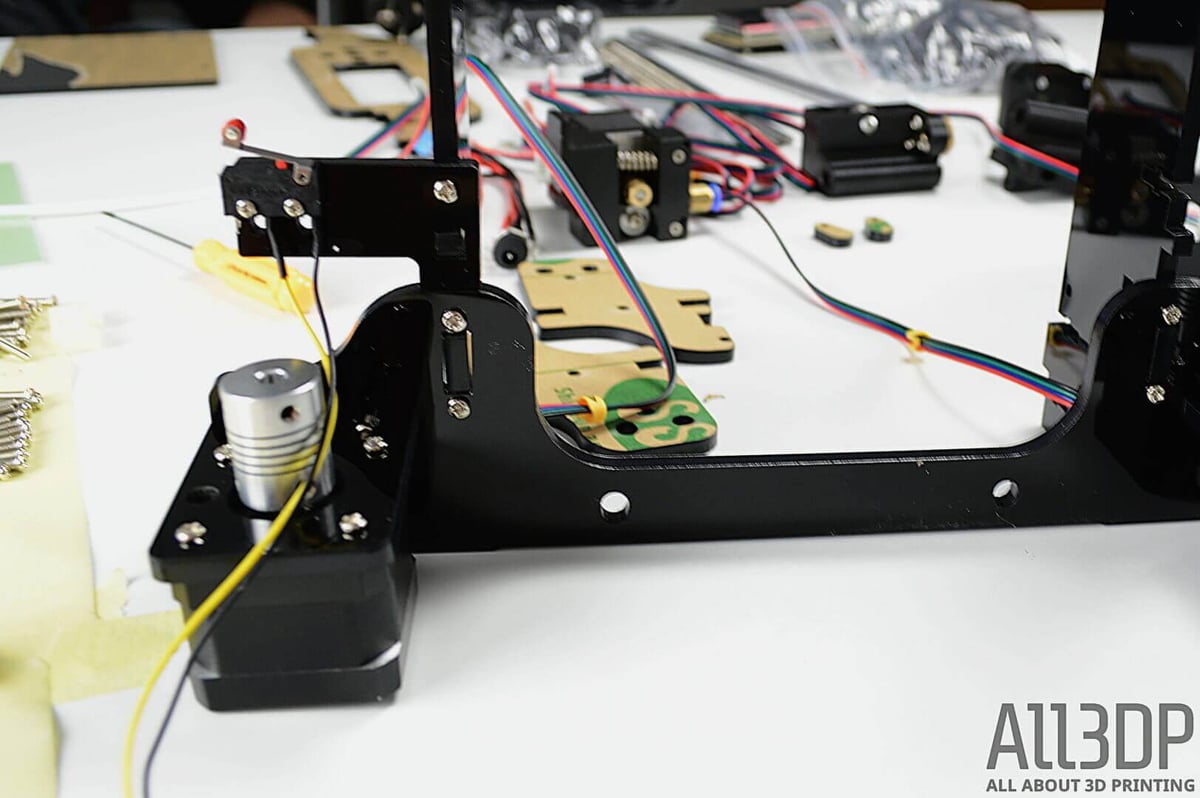
STARTT Cheap DIY 3D Printer Kit Step #5: Assemble Back Base Frame
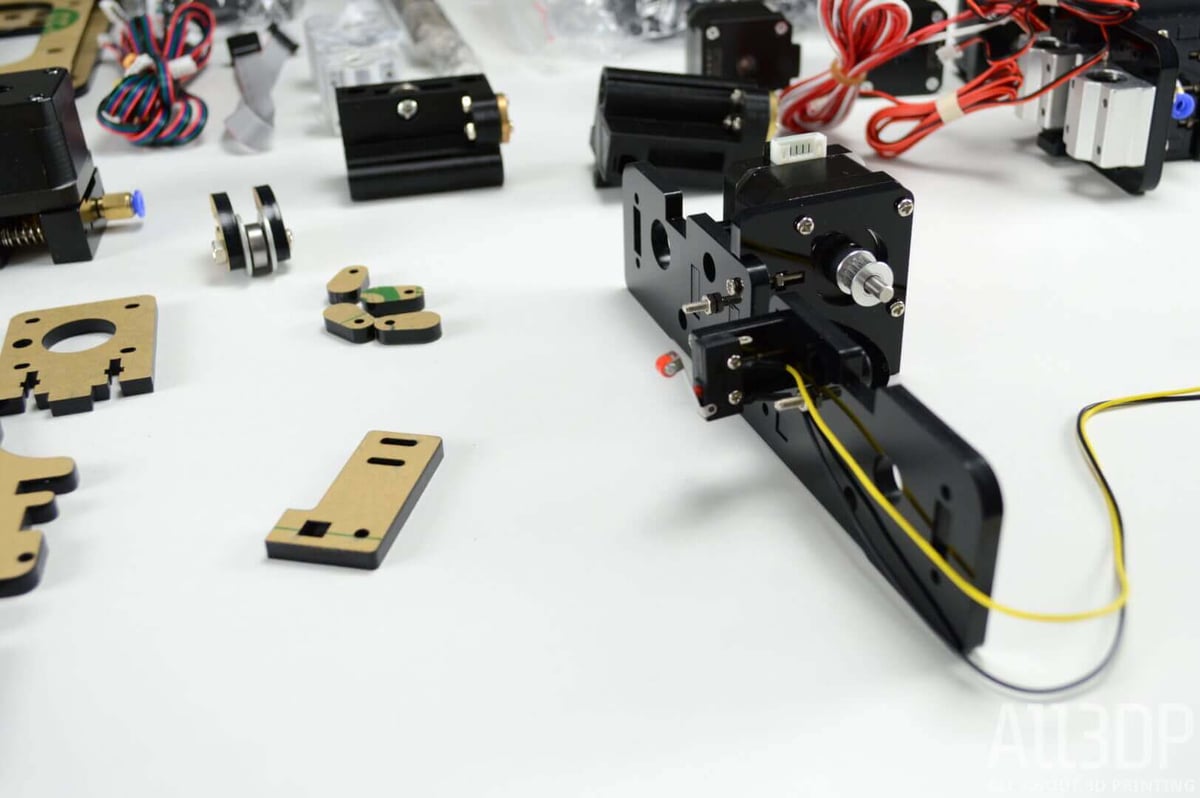
Remember this pic, from way back in Step #3. Good times.
For this step you attach the Y-axis motor and Y-limit switch to the back base plate.
STARTT Cheap DIY 3D Printer Kit Step #6: Assemble Y-axis Idler
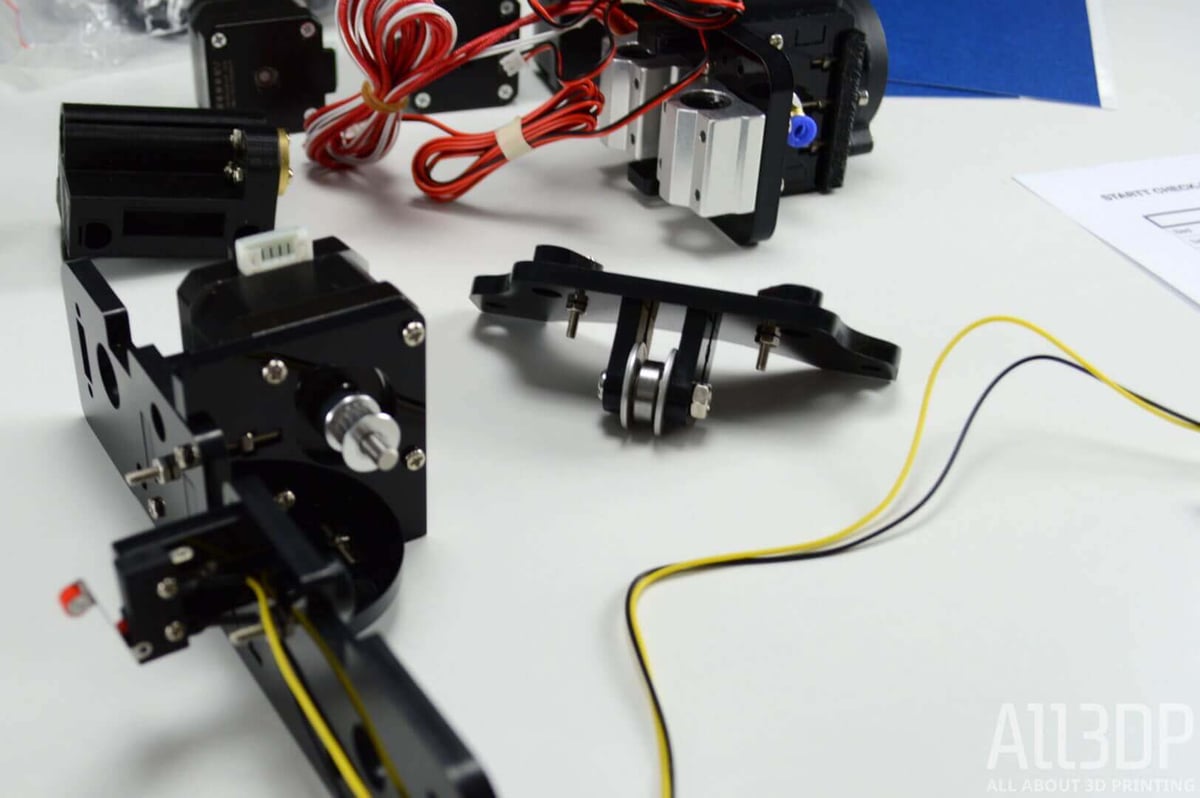
Time for rod caps again (similar to those assembled in step #4), but here they are for the front-reaching feet and framework for the Y-axis rods. In addition to these caps, you add the Y-axis belt bearing. In its entirety, this construct looks a little like a toy hang glider, in our distracted opinion.
STARTT Cheap DIY 3D Printer Kit Step #7: Assemble Y-Carriage
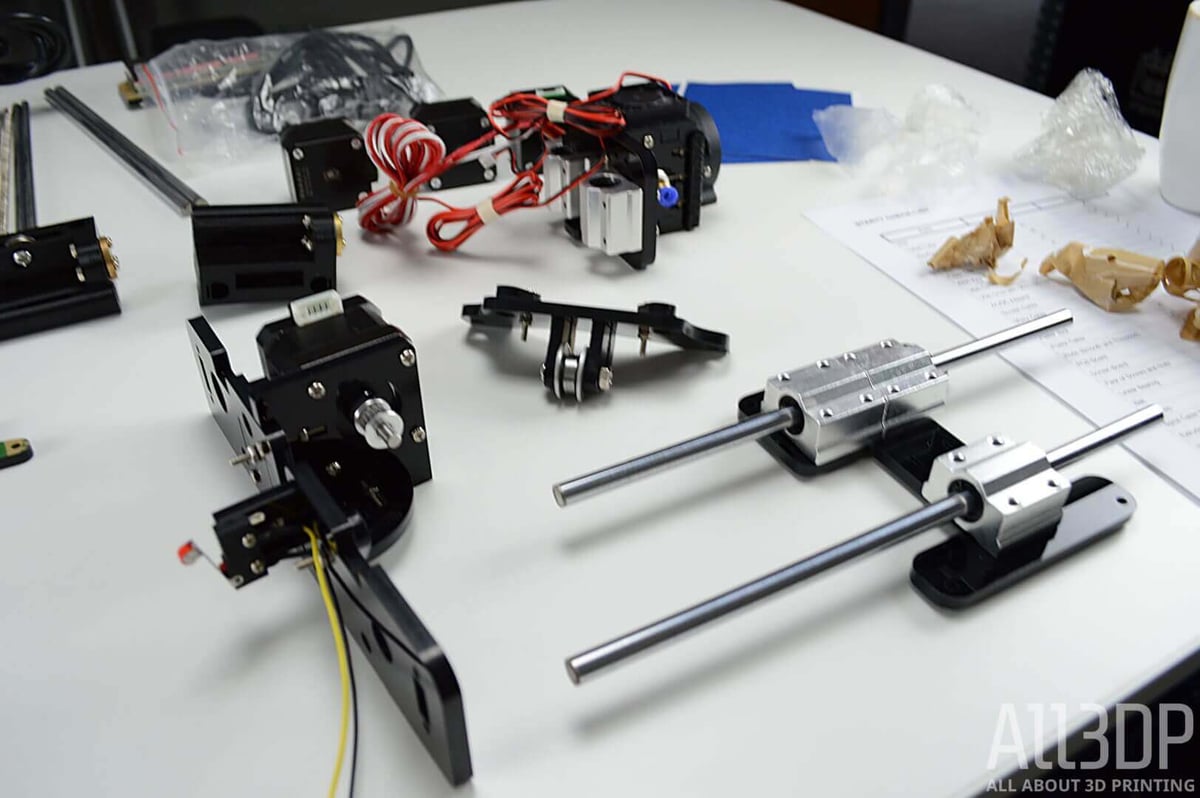
More assembling here, as you line up bearings for the Y-axis carriage. This step requires two of the four smooth rods provided in the STARTT’s kit. Check the ones you pick out against the others — they should be the shortest and thickest.
STARTT Cheap DIY 3D Printer Kit Step #8: Assemble Z-Axis Motors
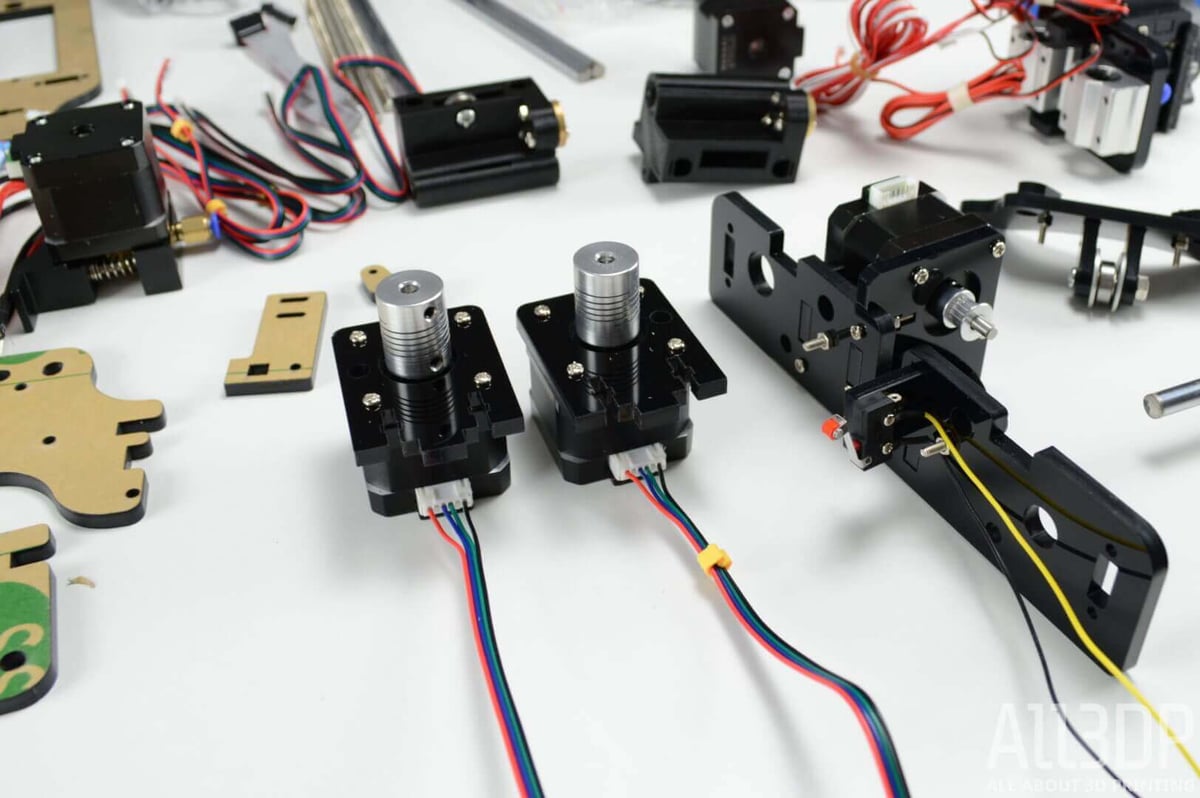
Now you assemble the two stepper motors which will be driving your print head up and down the Z-axis. Mirror images of each other assembly-wise, the acrylic pieces used here are distinctive for the holes (on the left and right respectively) offset from their axles.
Attach the short cable (labeled “A”) to the left, and long cable (“B”) to the right motors.
STARTT Cheap DIY 3D Printer Kit Step #9: Assemble Front Bottom Plate

The just-assembled Z-axis motors serve as feet for this cheap DIY 3D printer kit, so they require mounting to the front plate. A simple step of just securing them with the M2 nuts and bolts.
STARTT Cheap DIY 3D Printer Kit Step #10: Assemble X-Limit Switch
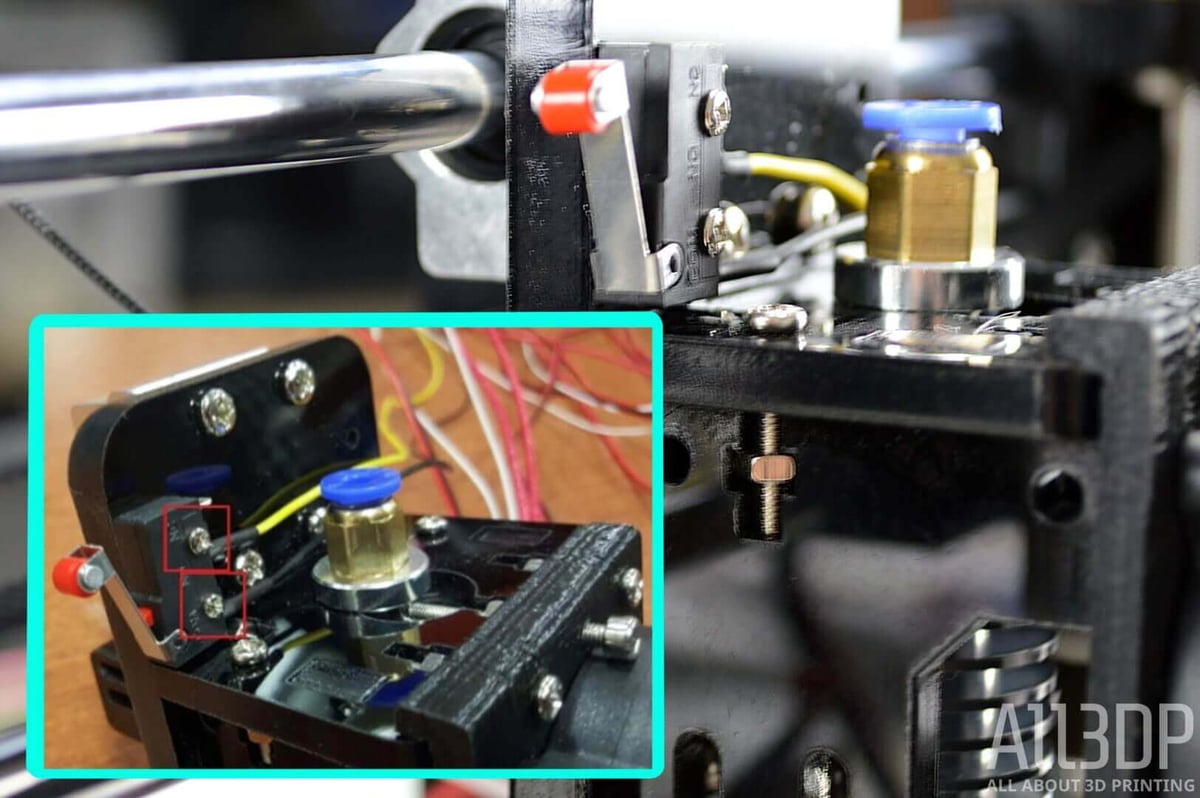
Taking one of the untouched limit switches, mount it on the filament entry side of the hotend. The switch’s roller should be jutting up from the left edge of the hotend, as you look at it head-on. Hand tighten these screws, otherwise you’ll risk crushing some electronics (and the hopes and dreams of cheap 3D printing).
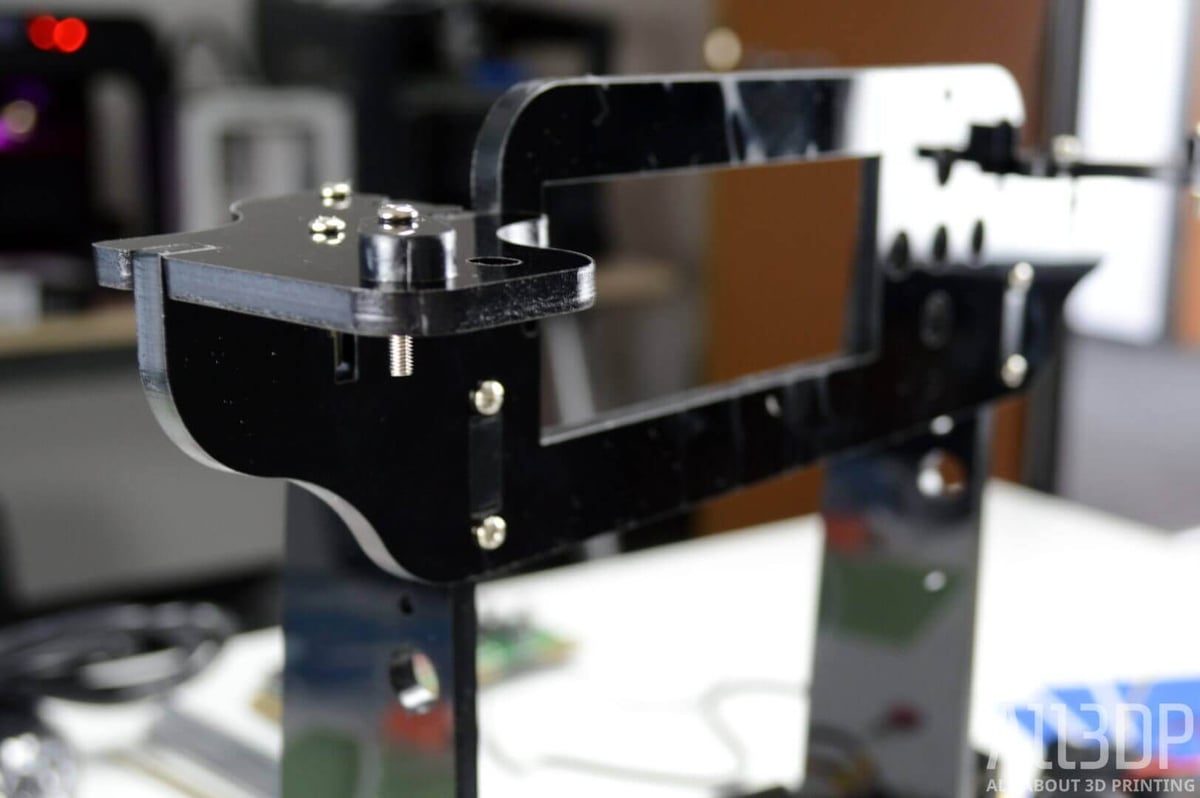
STARTT Cheap DIY 3D Printer Kit Step #11: Assemble Side Plates

Things are shaping up more now as you mount the side plates to the front bottom plate assembled in step #9. It’s not a huge issue at this point, since nothing is enclosed yet, but beginning to neaten your cables will make looming and beautifying this cheap DIY 3D printer kit a little easier later on. Thread them from the outside in to the center of your assembly.
STARTT Cheap DIY 3D Printer Kit Step #12: Install Z-Limit Switch
Attaching this next limit switch to its appropriate piece of acrylic, be mindful not to over tighten the screws. You’ll need to reposition the switch, so treat it more as a temporary guide position, rather than final placement.
You now attach this assembled switch to the left side plate (as you look head on at the printer — the z-axis stepper motors should be on your side of the frame).
STARTT Cheap DIY 3D Printer Kit Step #13: Assemble the Body
Attaching the back base frame to your already assembled frame, the only special thing to note here is to keep your cables tidy. Feeding them all through the left rear hole in the now-assembled frame will make cable tidying easier later on.
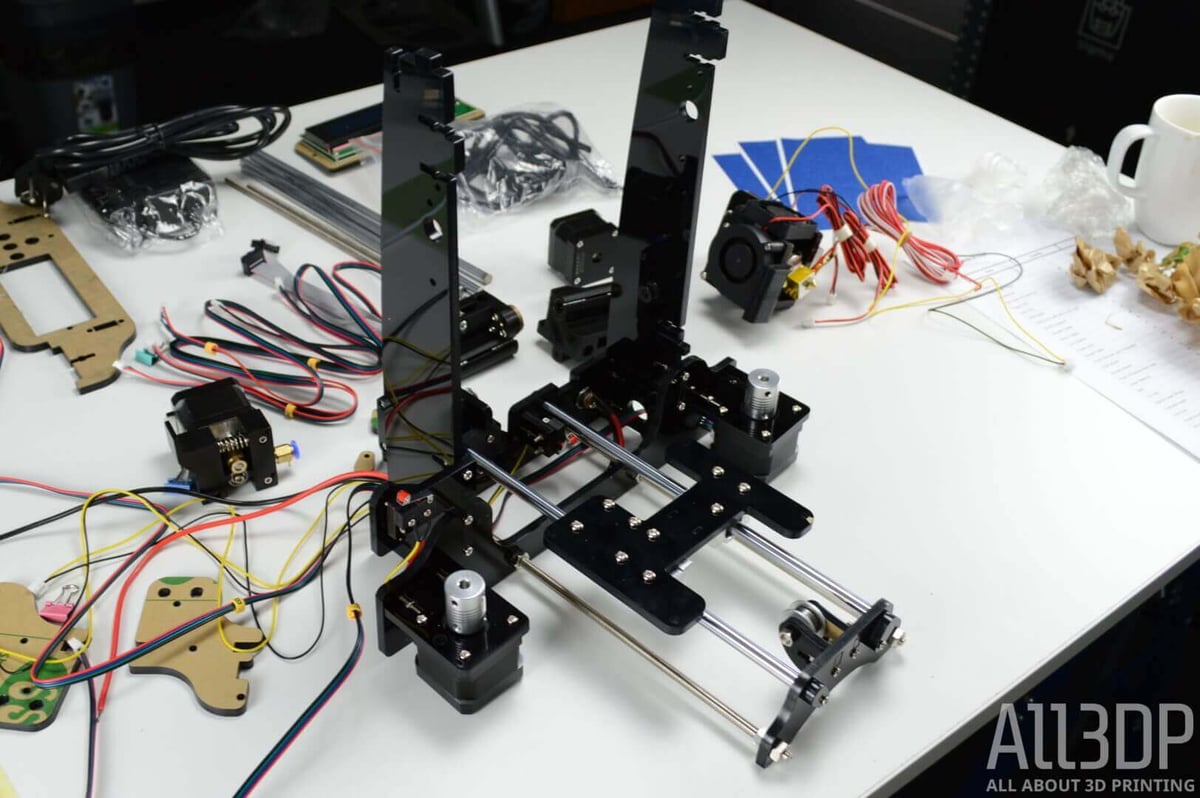
Though we’re only halfway through the assembly, this cheap DIY 3D printer kit is beginning to look like it might actually be able to print something, someday.
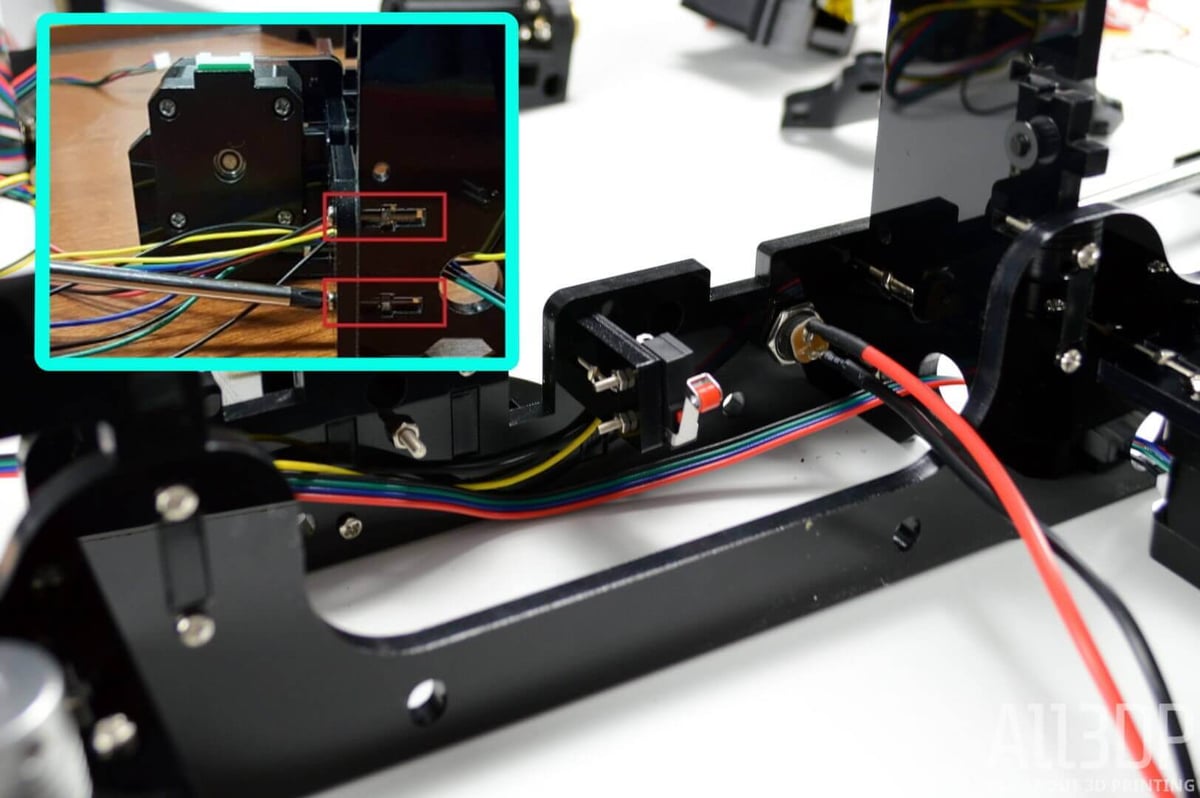
STARTT Cheap DIY 3D Printer Kit Step #14: Installing the DC Power Jack
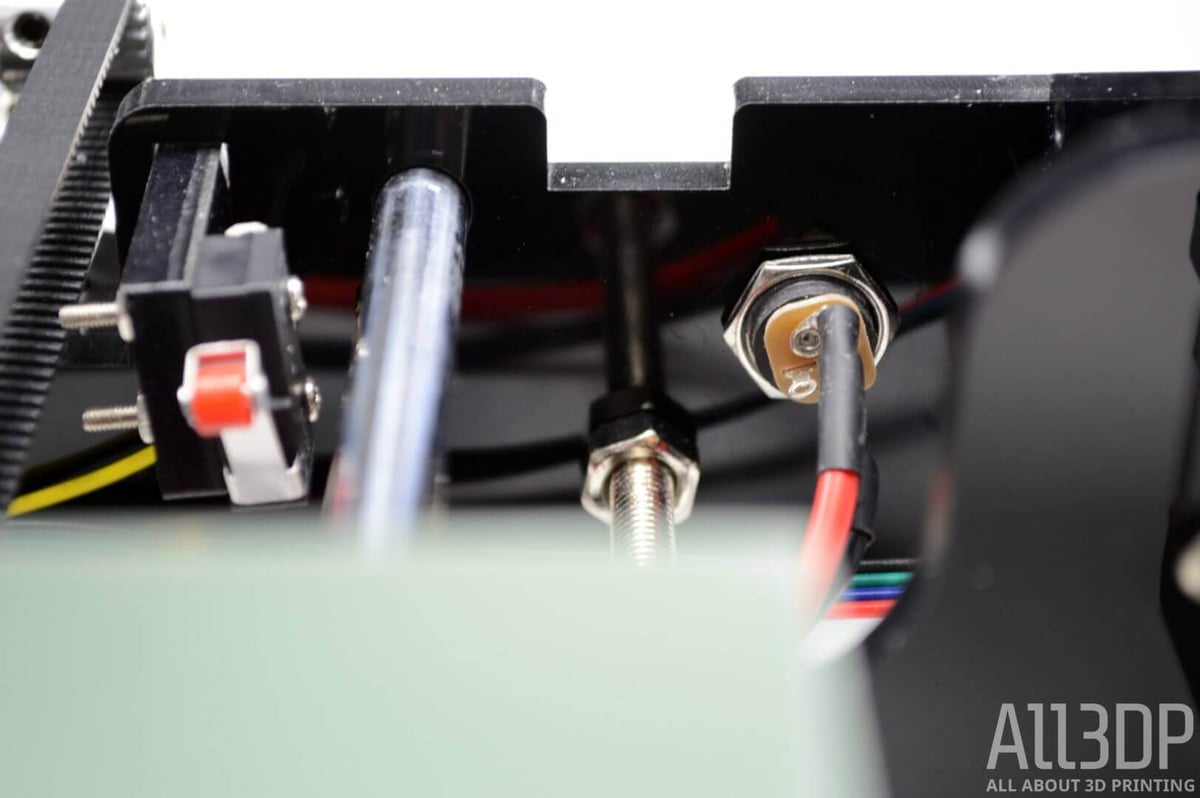
In our experience, this step is a royal pain in the posterior. Feeding the threaded power jack through its appropriate hole in the back base frame is simple enough, but the thin metal ring for securing it into place has barely enough thread of its own to get purchase on the jack.
We suspect this is where the 3D printed spanner missing from our kit may have come in handy.
After several minutes fruitlessly trying to screw the ring on by hand, we dug around the workshop for a suitable spanner to finish the job. But even then, it requires some finesse to find the point at which the ring will go on with little resistance.
Feed the cables through the same hole as all the others, and add it to your tidy arrangement.
STARTT Cheap DIY 3D Printer Kit Step #15: Threaded Rod Install
This step provides the backbone on which you secure the front legs of the printer.
It requires two of the four rods left in your pile of parts (you should have two pairs of two). It’s important to note the distinction — the thickness of their threads — between them. You need the two thinner, more screw-like rods.
You use the provided M5 nuts on these rods to secure them in place. This means a nut abutting every piece of acrylic the rods touch, after feeding them through the designated holes in the front and back base plates.
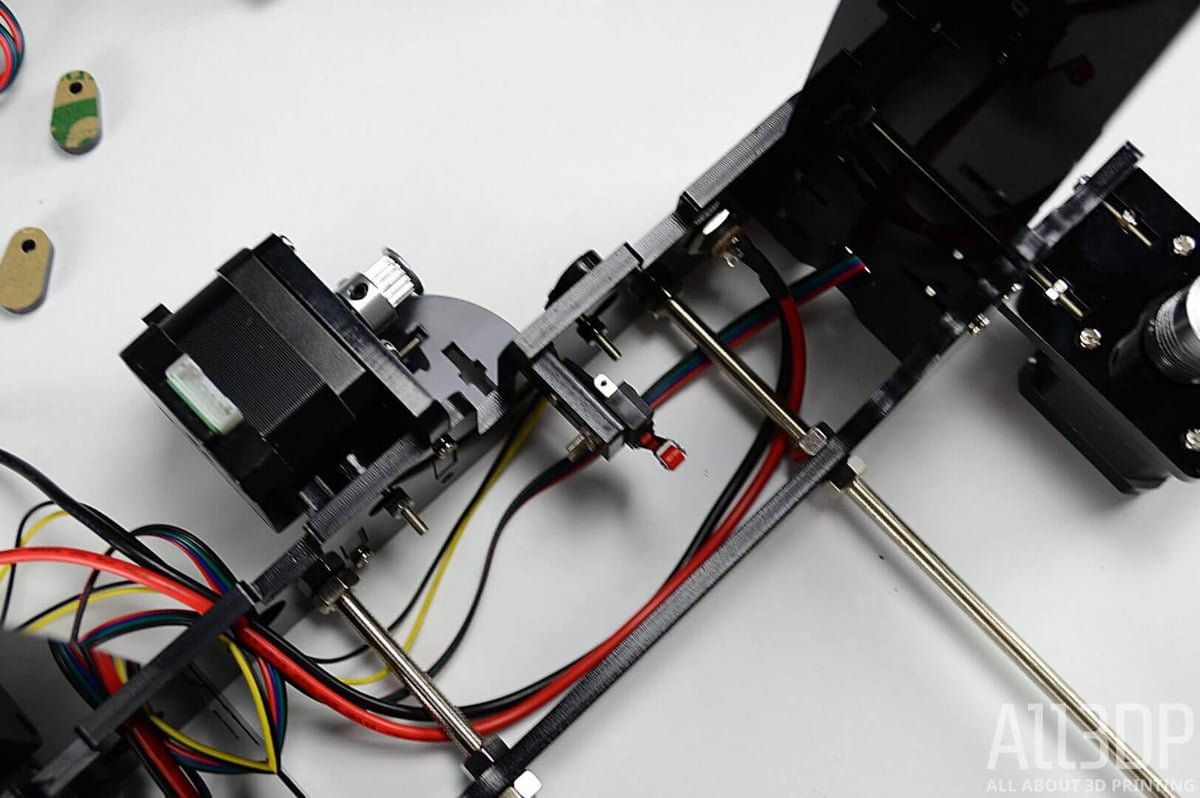
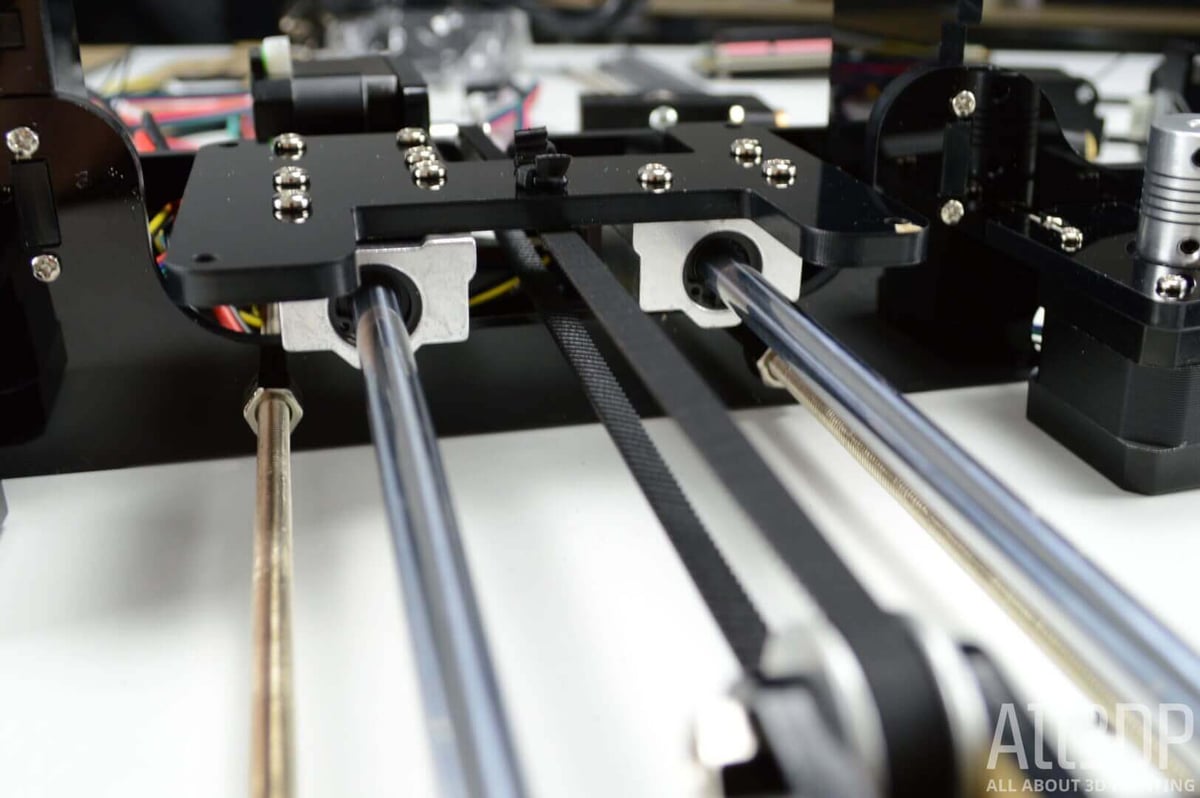
STARTT Cheap DIY 3D Printer Kit Step #16: Install Y-Carriage to Body
Here you take the assembled y-axis carriage (the distorted “H” looking piece with smooth rods running through the bearings underneath) and fix it in place perpendicular to the printer’s body.
To do so, simultaneously affix the idler, which also happens to serve as the printer’s front legs. Feeding this onto the threaded rods from the last step, while positioning the smooth rods of the y-axis carriage against the rod caps in both the idler and back base plate, you fix it in place with the remaining M5 nuts. This part is a bit of a mouthful, but the process is simple enough.
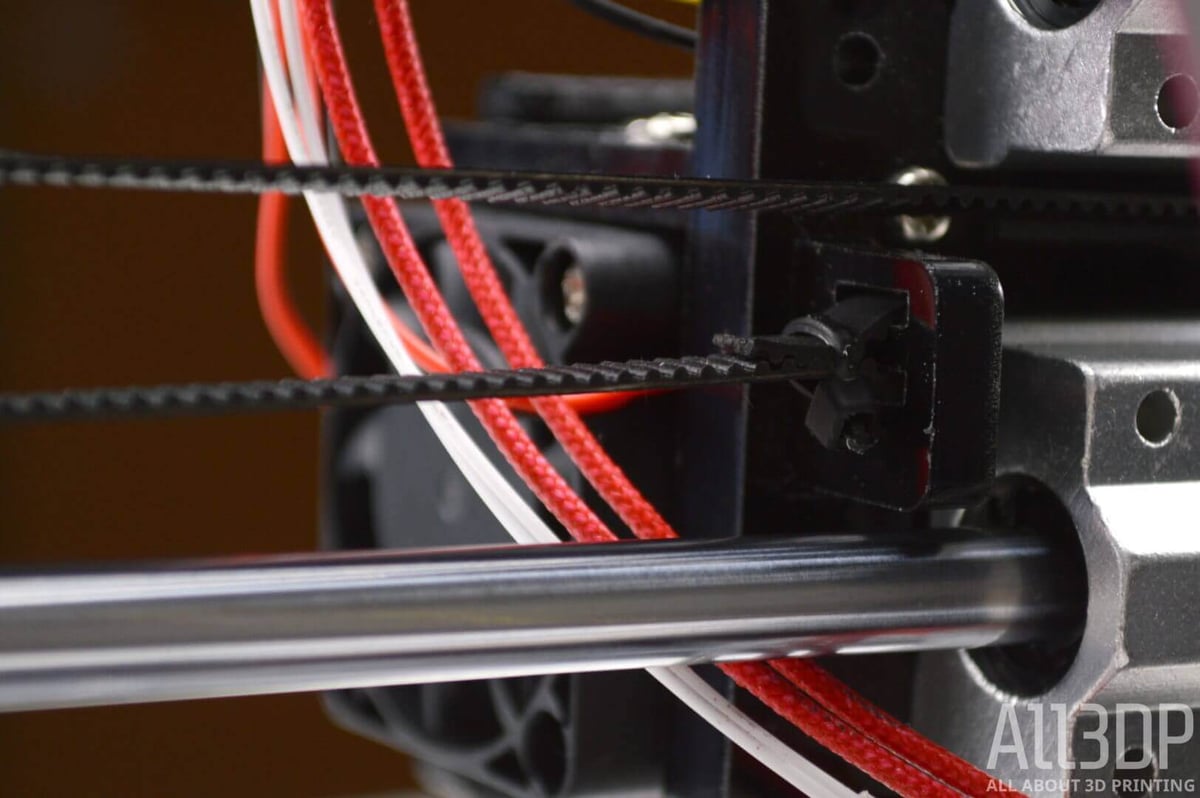
STARTT Cheap DIY 3D Printer Kit Step #17: Install Y-Axis Belt
Time to take a better look at the locomotion behind the printer. Appropriately for a cheap 3D printer kit such as this, now you get to tighten your belt.
Taking one of the provided belts, secure one end into the front slit in the center of the y-axis carriage with a zip-tie. Ensure that the teeth of the belt are face down.
Looping the loose belt around the idler — the loose metal ring attached to the front legs — and back underneath the print carriage to the back of the machine and around the stepper motor behind. It is here you tighten the gear onto the stepper motor.
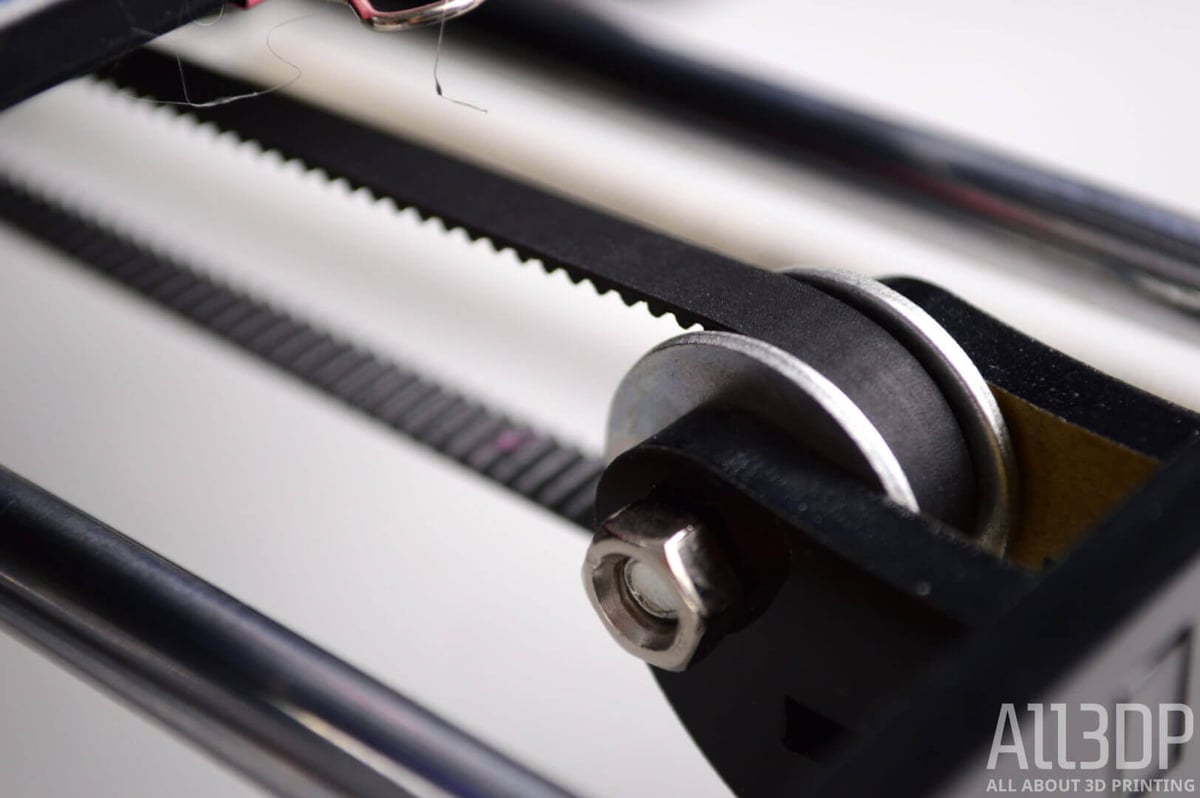
The still-free end of the belt can then be fed through the rear slit in the Y-axis carriage. Pulling it as tight as possible, secure it with another zip-tie. You will have a lot of excess belt jutting out the top of your setup. You can trim this away with scissors, but leave yourself a little extra above the zip-tie so you have the room to tighten it further if necessary later on.
STARTT Cheap DIY 3D Printer Kit Step #18: Top and Junction Plate
Just some simple screwing of acrylic here, as you attach the top plate which will hold the LCD display later on. That, and the rod caps for the z-axis rods.
STARTT Cheap DIY 3D Printer Kit Step #19: X-Motor Assembly
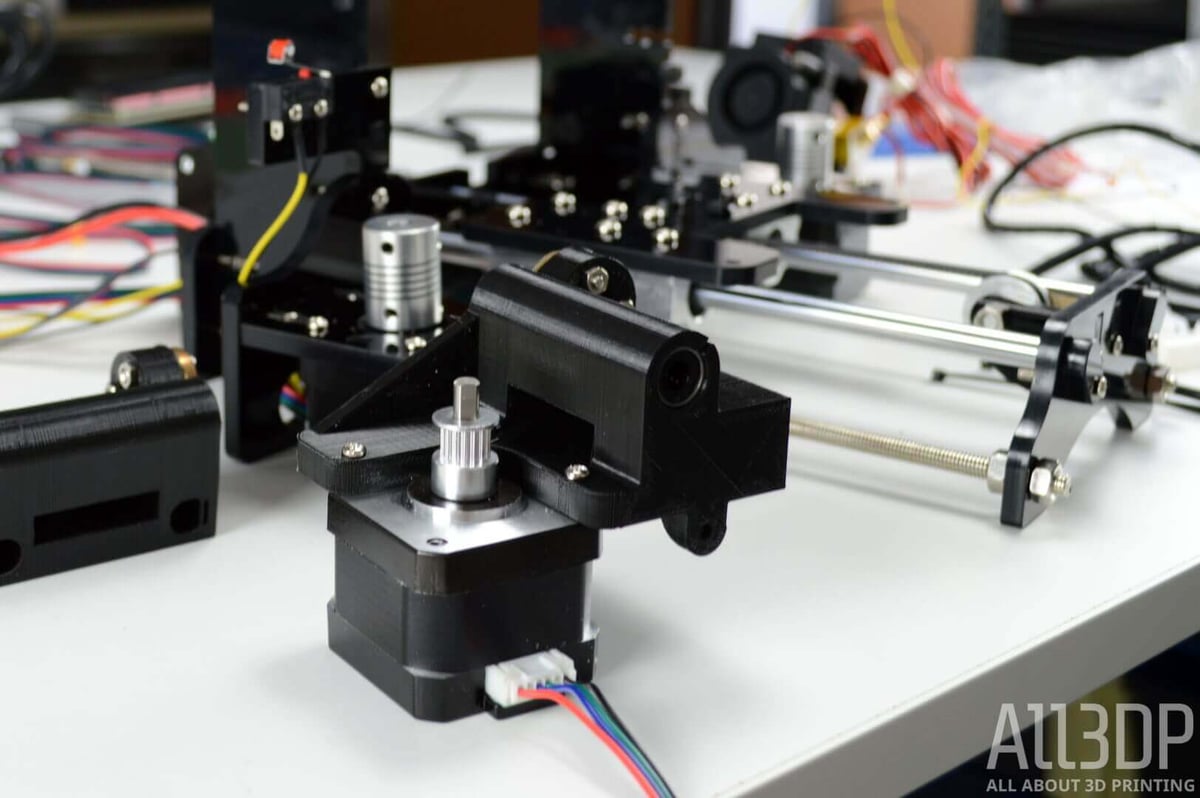
Attaching the remaining stepper motor to the 3D printed guide mount, be mindful to take the correct cable — labeled “x”. Another thing to watch for is the orientation of the motor. The cable connection should stick out downwards, parallel to the direction of the smooth rod and threaded rod guides.
STARTT Cheap DIY 3D Printer Kit Step #20: X-Axis Assembly
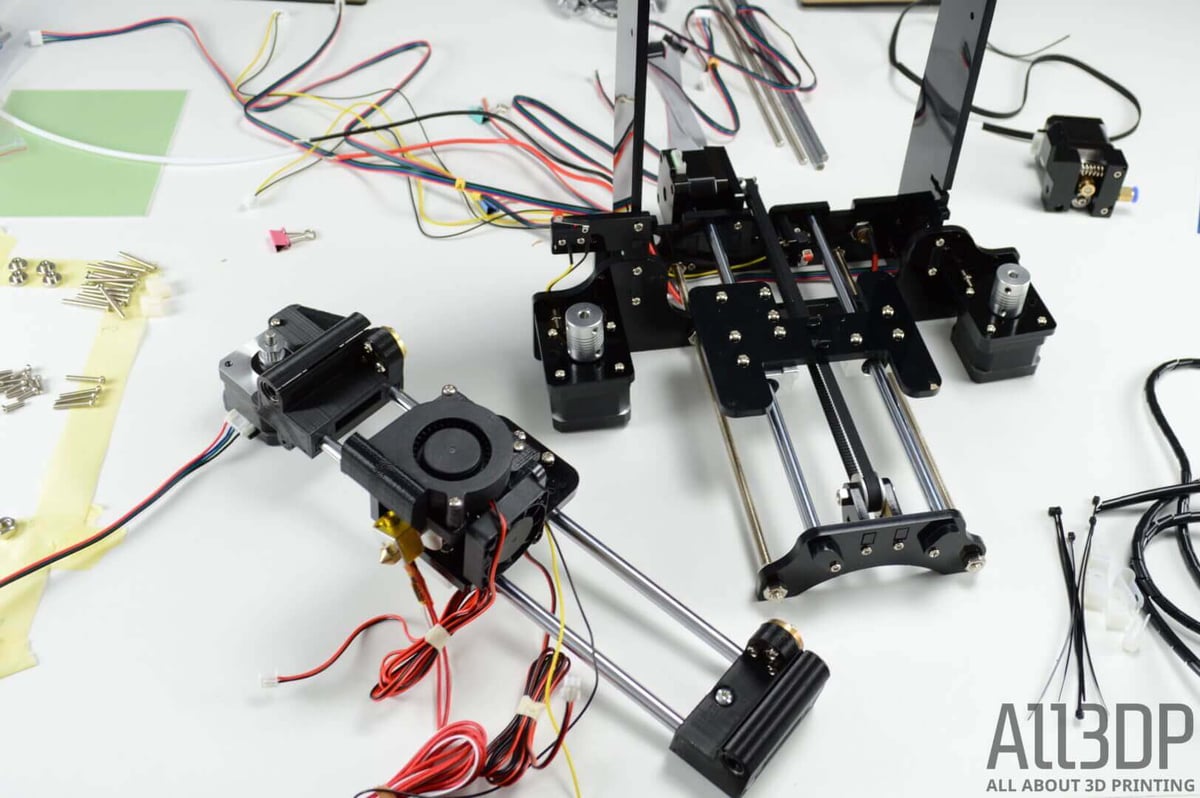
Using two of the remaining smooth rods (you should still have four free), the x-axis stepper motor you just assembled and the pre-assembled hot end, you construct your printer’s x-axis. A simple step of inserting rods into holes. The instructions say you can file the holes wider if the fit is too tight — a problem that seems to have plagued early adopters of the STARTT, but we didn’t have an issue with this.
STARTT Cheap DIY 3D Printer Kit Step #21: Attach X-Axis to Body

Hate. So much hate for this step.
Here the 3D printer gets its groove with the attaching of the hot end. A momentous step, marred by awkward, difficult parts with a fit too stubborn to merit any kind of enjoyment for the aforementioned pomp.
After slotting the remaining smooth rods through the bearings on the x-axis assembly, you’ll move on to what is in our opinion the most frustrating part of the build.
Taking the leadscrews that remain, you then need to twist them into place in through the bronze metal pieces at each end of the X-axis rail. In our experience, the fit is poor. This leads to what felt like a fruitless 20 minutes mustering all the strength in our fingers to try and force them through. Pliers, for a tighter grip, were considered, but for fear of damaging the thread and the Z-axis travel it facilitates, we refrained.
Even with these damned leadscrews in place, a good deal of twisting was required to loosen them enough for the X-axis rail to comfortably move up and down.
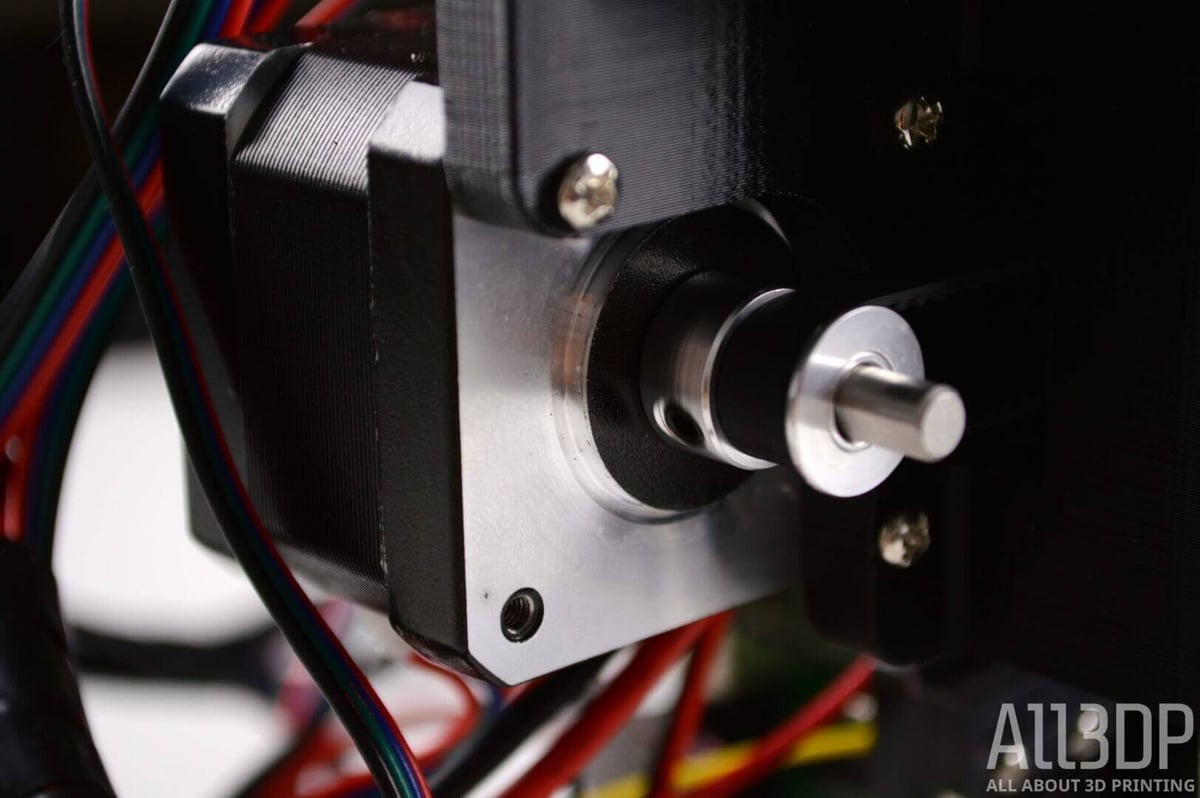
With this part complete, you need to ensure the leadscrew sits inside its respective stepper motor’s coupler. Leaving a small gap between motor shaft and leadscrew, tighten the scrub screws to secure them all in place.
STARTT Cheap DIY 3D Printer Kit Step #22: X-Axis Belt
Now it’s time to lock the print head in place.
Feed your remaining belt — teeth facing inwards, when you complete the loop — through the slit in the plastic rail mount with the stepper motor. We’re only dealing with the lower length of the loop for now, so don’t worry about it being slack.
Take the end now loose inside the print area and feed it into the lower of the two slits in the acrylic, just to the side of the print head assembly’s bearing, on the side you’re working on. Loop it up and back out, and secure the loose end to the longer length with a zip tie (pictured above).
Feed the till-now slack length of belt outside the machine over the hobbed motor shaft, back through the slit (over where we just secured the first end with a zip-tie), out over the opposite side of the X-axis assembly and back under. At this point, you’ve made a loop, which is now to be secured in exactly the same manner as before. Remember to pull it tight, and leave enough on the trimmed belt end so you have something to grip if you need to tighten it further.
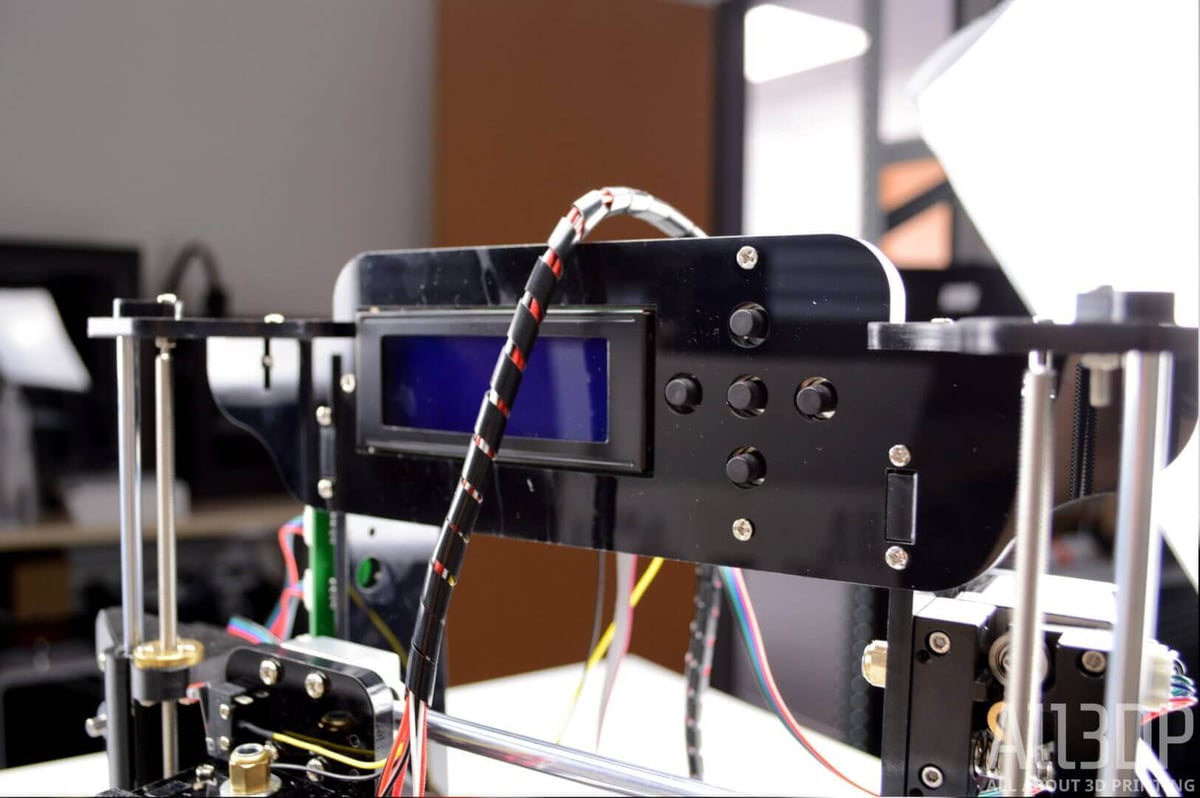
STARTT Cheap DIY 3D Printer Kit Step #23: Install LCD Screen
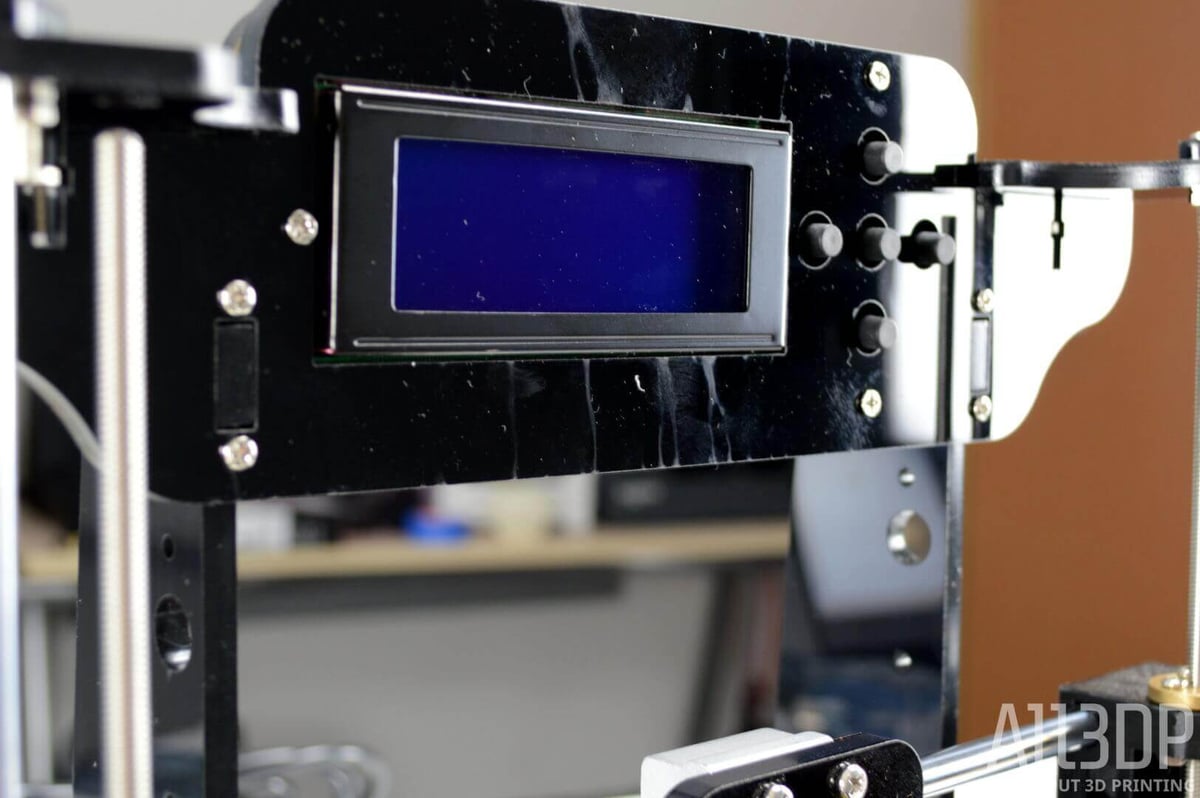
For such an integral part of the machine, there’s little that needs be done here. The LCD display comes in a complete assembly, buttons and all. Just screw it onto the acrylic top base plate and it’s done.
STARTT Cheap DIY 3D Printer Kit Step #24: Install Extruder

Our provided kit varied from the official instructions here, coming with the metal tub screw (for the Bowden tube) already inserted into the extruder motor, and an incorrectly labeled wire — which is required for this step — loose, rather than connected to the extruder motor.
The instructions here call for a cable labeled “E”, but all we had in our kit was cable “C”. Scanning ahead through the instructions, there’s no mention of a “C”, so we used it for lack of an “E”. Connect your “E” (or “C”) to the connector on the extruder motor.
For us, the remaining steps to enact here were to attach the extruder motor to the acrylic frame with some M3 screws. The instructions call for inserting the provided Teflon tube into both the extruder’s tub and the hot end, but we recommend leaving this off for now. This is because when you first load filament into the printer, it requires that you remove the tube. Might as well save yourself the hassle then, and leave it off for now.
Your mileage here may vary, depending on how put-together your extruder is. It’s not a stretch to fill in the blanks and improvise this step if your STARTT kit comes in a slightly different state to ours or that of the instructions.
STARTT Cheap DIY 3D Printer Kit Step #25: Install PCB Board
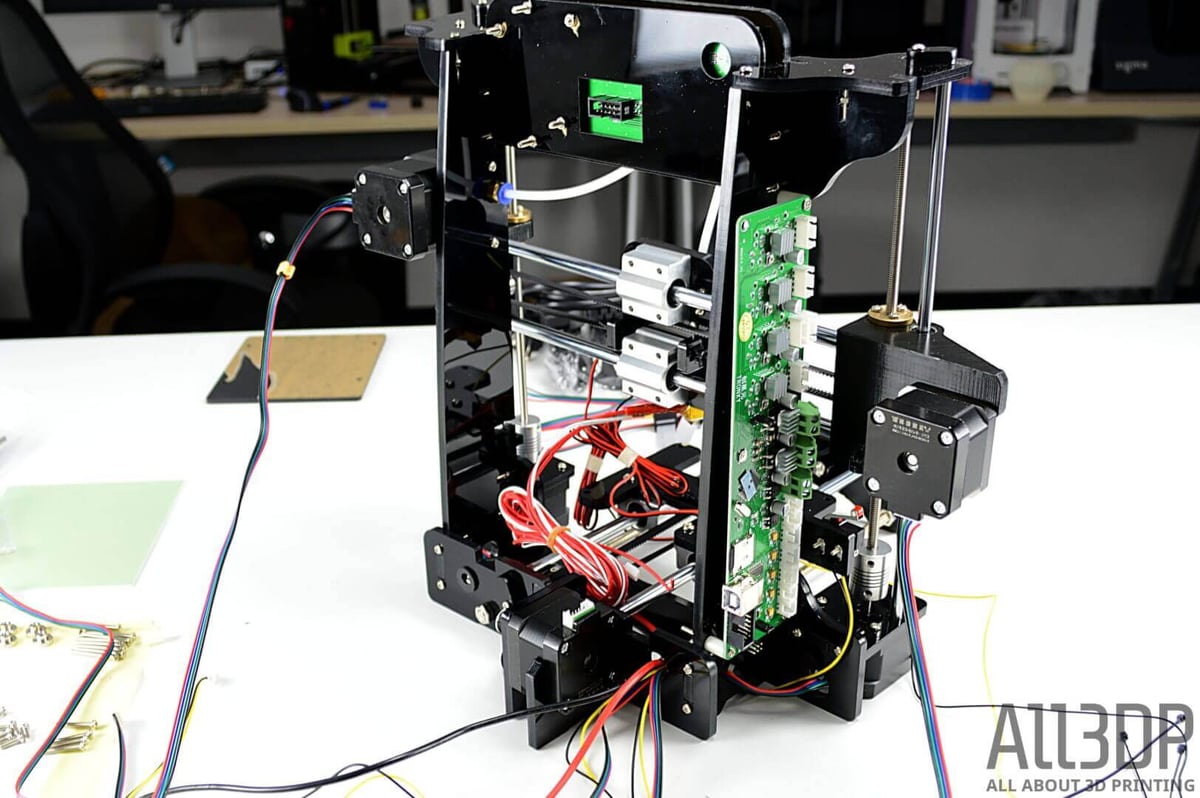
Here we attach the brains of this wee machine to the side of the frame that isn’t home to the extruder motor. Though there are four screw holes on the PCB, you only use three. Using the plastic spacers provided to hold it apart from the acrylic, screw the PCB into place. The USB and SD card ports should be facing the rear of the machine. If they don’t, you’ve mounted it upside down.
Bring steady hands — it’s a bit fiddly to keep the spacers in place, invert the board and position the teeny tiny M3 nuts in place without dropping something.
With that done though, it’s on to the home stretch — just the bed and wiring to go!
STARTT Cheap DIY 3D Printer Kit Step #26: Assemble bed

Taking four M3 25mm screws, place them in into the countersunk holes in the acrylic bed plate. Secure them with M3 nuts.
If the hot end is restricting your access to the bed area, you’ll need to jack it up out of the way. This is easily done by twisting the Z-axis motors’ couplers in unison, which will, in turn, raise the hot end assembly.
With free and easy (freesy?) access to the Y-axis carriage, place the four provided springs over the holes in each corner of the carriage. Then you can lower the just-screwed build bed onto the springs, securing it in place with the four thumb nuts on the underside of the carriage.
Take note! The build bed is not symmetrical, so it will matter which way round you mount it. The side with an extended overhang should be at the rear of the build bed.
STARTT Cheap DIY 3D Printer Kit Step #27: Plug in Wire for Y-Motor and Screen
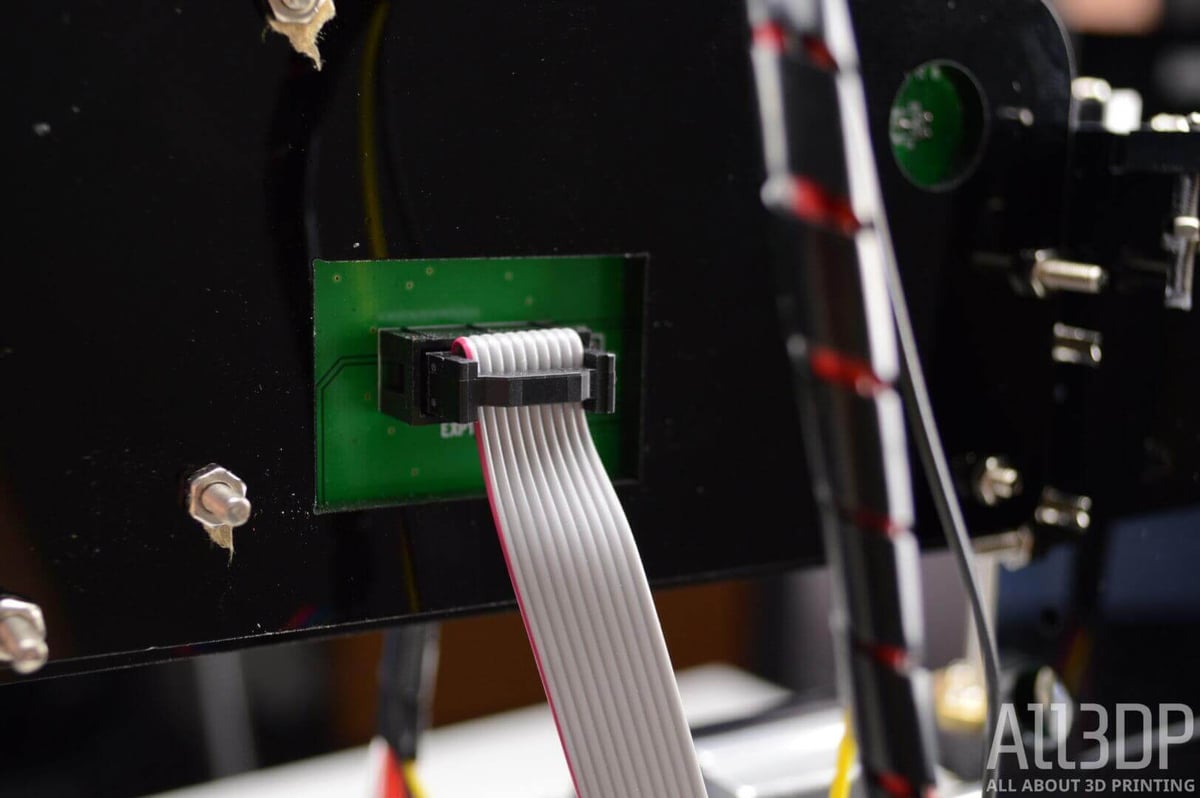
Now comes the joyous task of cable management. Luckily the kit eases you into it with the simplest of wires — the ribbon cable. The sole one provided runs between the screen and the lower left-most (as viewed mounted on the frame) port on the PCB. Looking at the connected ribbon cable, ensure that the red edge of the ribbon cable sits on top (looking at the PCB side).
Next is the cable labelled “Y”. This should be your last remaining unattached cable. If you have more than “Y” remaining, it’s no biggie. No part of this printer is wildly inaccessible, it just may take some awkward maneuvering to feed them to the right spot now. But nothing is impossible. We’ll continue here assuming you’re in the same boat as we are, with a “Y” cable in hand looking for a home.
Surprise, surprise, the answer is the Y-axis motor, at the rear of the machine. Plug this in, and then we move on to the main wiring.
STARTT Cheap DIY 3D Printer Kit Step #28: Connecting Wires to the PCB
There’s no difficulty in hooking up the pile of spaghetti sitting in front of you at this point. Just follow our simple order plugging the labeled cables into the corresponding connectors on the PCB.
In order from top to bottom, looking at the PCB as mounted on the printer, your cables should be plugged in thusly:
- 1st slot (white port): “X”
- 2nd slot (white port): “Y”
- 3rd slot, left (white port): “A”
- 3rd slot, right (white port): “B”
- 4th slot (white port): “C”, the cable formerly known as “E”.
- 5th slot (green port): Red, Black power cables
- 6th slot (green port): SKIP
- 7th slot (green port): Two red fabric cables from hot end
- 8th slot (white port): Red/black wires from large fan on hot end
- 9th slot (white port): Red/black wires from hot end itself
- 10th slot (white port): Yellow/black wires from x-axis limit switch (on hot end assembly)
- 11th slot (white port): Yellow/black wires from y-axis limit switch (on base backplate)
- 12th slot (white port): Yellow/black wires from z-axis limit switch (close to PCB on frame)
- 13th slot (white port): SKIP
- 14th slot (white port): White wires from hot end thermistor
To keep the cables from your print head catching on the exposed screws on the frame, you should take some of the provided spiral wrap and shroud them, making sure it’s in a free moving loop over the top of the frame and LCD.
If you’re so inclined, you can use the rest of the wrap to tidy the other remaining cables. We tried, and failed, creating an uglier mess than the cables lying free and spaghetti-like.
Hey, guess what. That’s it.
You’ve just turned a cheap DIY 3D printer kit into something that looks like a 3D printer.
Sure it’s a cheapo mini
But that’s only half the story here. We want to know how it prints, but before we can do that we need to calibrate it.
STARTT Cheap DIY 3D Printer Kit Step #30: Calibration
Oddly, iMakr’s text instructions that we followed for our build of the STARTT stop short of giving you calibration instructions. And so we have to turn to a dedicated page of their website filled with YouTube videos.
We’ll summarize the contents of their calibration video here, so you don’t need to go off in search of it.
Firstly, you need to check your two belts for tension. They need to be firm and tight, pinging back into shape from any plucking or pushing. Tight belts are an essential component for good print results.

Next, we need to level the x-axis rail. Handily the STARTT kit comes with an impromptu leveling tool in the shape of its (currently unattached) print bed sheet. Standing it beneath the smooth rods on each side of the hot end, twist the two motor couplers anti-clockwise to lower the rail. Try to get it so that the rail rests on the upright sheet at both ends.
Rotating the thumbscrews on the four corners of the bed to lower it as much as possible is next. Push down on the bed platform if it’s a little too tight to turn the thumbscrews.
Now comes the next momentous part (to see if all that wiring is correct). Connect the STARTT to the power.
After a quick bootup screen you’ll see a menu. Using the five-button interface next to the LCD screen, navigate to the printer’s quick settings and select the “Home All” option.
This will kick the STARTT into action, with all axes in motion and the print head (hopefully) coming to rest about an inch or so above the front left side of the print bed.
STARTT TROUBLESHOOTING
Full disclosure — for the first few tries of the “Home All” command in our build, we encountered an awful grinding sound coming from the right Z-axis stepper motor. The coupler was spinning, but there was no movement in the leadscrew above. You could tell just by looking at it that something was not working right between the motor shaft, coupler, and leadscrew.
To fix it, we first unplugged the printer from its power supply. Supporting the weight of our x-axis rail, we loosened the grub screw in the coupler, and repositioned the rod and motor shaft inside. There is a flat surface of the motor shaft (meaning it’s not quite cylindrical) — which we hadn’t quite secured against with the grub screw.
In the process of repositioning things to fix this issue, we moved the leadscrew. This meant repeating the X-axis rail leveling step from above.
With this done, we could continue with the calibration.
With the hot end resting at its home position, you now need to attach the provided print bed sheet (which we used to level the X-axis rail). But before we fix it to the print bed, stick one of the STARTT’s provided blue tape sheets to it as neatly as possible. You want to avoid air gaps and creases, as these will give an uneven surface and higher risk of print failure.
This textured tape gives a better surface for prints to stick to, and should be affixed now so that when calibrating the bed level its thickness is taken into account.
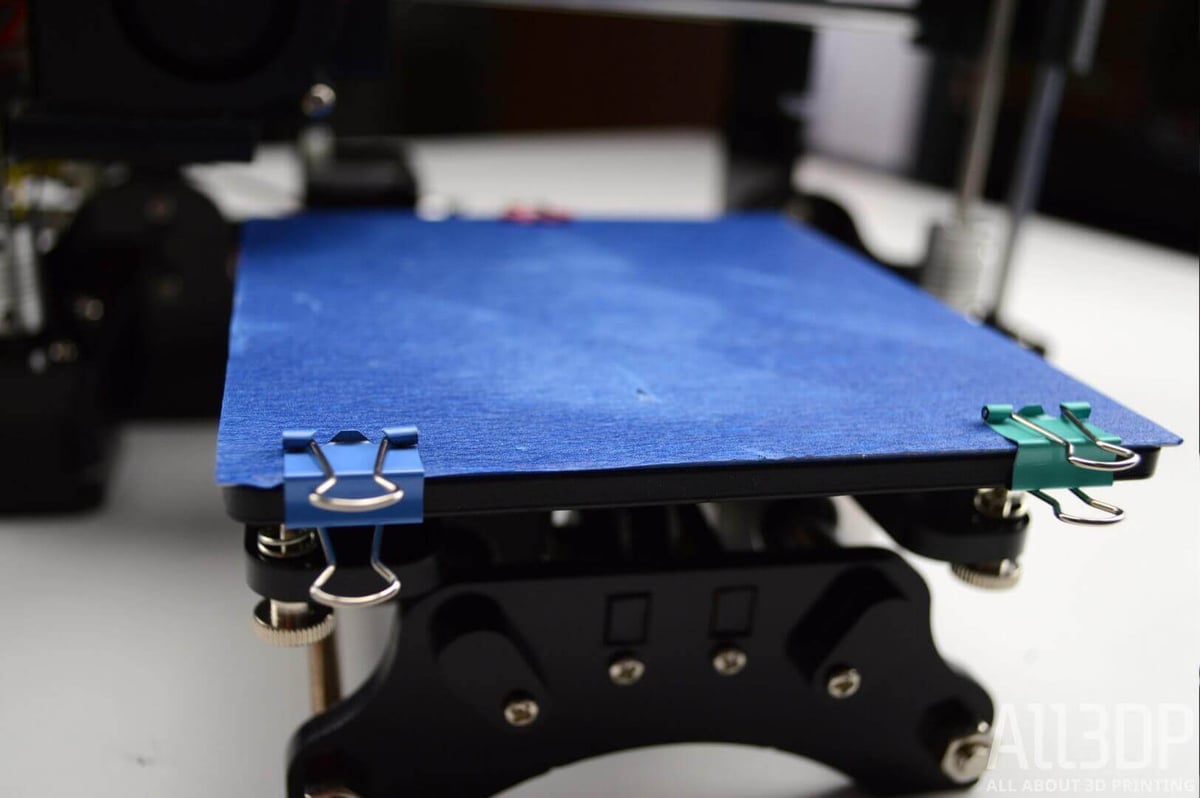
Using the paper clips included in the kit, place a couple on the front, and one on the rear edge to secure it in place.
The next step requires lowering the Z-axis limited switch, located on the left vertical frame, just to the left of the hot end. This is why this piece was only loosely attached before, to allow easy repositioning now.
Jostle the switch down a few millimeters, and tighten its screws (but not too tight!). Then select “Home All” again.
The print head does its thing, gently lowering down to the print bed’s level. For the next step, we need to be able to move the print head by hand. This means disabling the stepper motors. This can be done in the STARTT’s menu. On the same page as “Home All”, look for “Disable Motors” and select it.
With the motors disabled, you can now freely slide print head and bed about on their axes. We’re now going to level the print bed’s four corners.
Slide the hot end over the nearest corner, and then adjust the corresponding thumbscrew beneath the bed. Loosening this screw, you will notice the bed rising to meet the nozzle. You need it to be close enough that you can slide a sheet of paper between the two, but that there is noticeable resistance, with the nozzle dragging on the paper.
Repeat this process of raising the print bed to the nozzle for each corner, ensuring there’s the same free movement with little friction on the paper. Slide the paper about to get a feel for if it’s the same across the whole print bed.
That’s it. All set up and calibrated. Just one challenge remains — feeding the printer some filament.
STARTT Cheap DIY 3D Printer Kit Step #31: First Print
Sadly the STARTT doesn’t ship with any filament, so you’ll need to source your own 1.75mm PLA.
Before 3D printing, you’ll need to wrestle with the STARTT’s rather irritating Bowden extruder setup. First things first though, first head to the STARTT’s quick Settings and hit “Preheat PLA”. This will heat up the hot end while we deal with the extruder.
What’s a Bowden?
Every filament-based 3D printer requires a motor to push/pull the filament into the hot end for melting. Some setups have this mounted inline above the hot end, directly pulling the filament into the chamber for melting. These are known as direct drive extrusion systems. Others mount the extruder motor on the printer’s frame, separate from the print head. These push the filament into the hot end from afar, and are known as Bowden extruders.
Each have their advantages and disadvantages. On the STARTT, we can understand the reasoning for making it a Bowden. It reduces the weight on the print head and inertia to overcome during prints. But, in our experience the Bowden tubing doesn’t secure very well, and the positioning of the extruder motor means a severe bend in the tube is present at all times. This is important to not, because it can cause additional friction, leading to the tube coming unstuck and ruining prints.
A simple repositioning of the extruder motor could overcome this, we feel. Somewhere on the top of the frame, straightening the tube out perhaps (something we’ll explore in a further guide).
Press the lever on the extruder motor, which opens a path for you to feed filament through. Feed enough filament in that it sticks out through the frame and brass part. With that done, you can feed your nylon tube over the protruding filament, pushing it firmly into the blue plastic stopper until it secures.
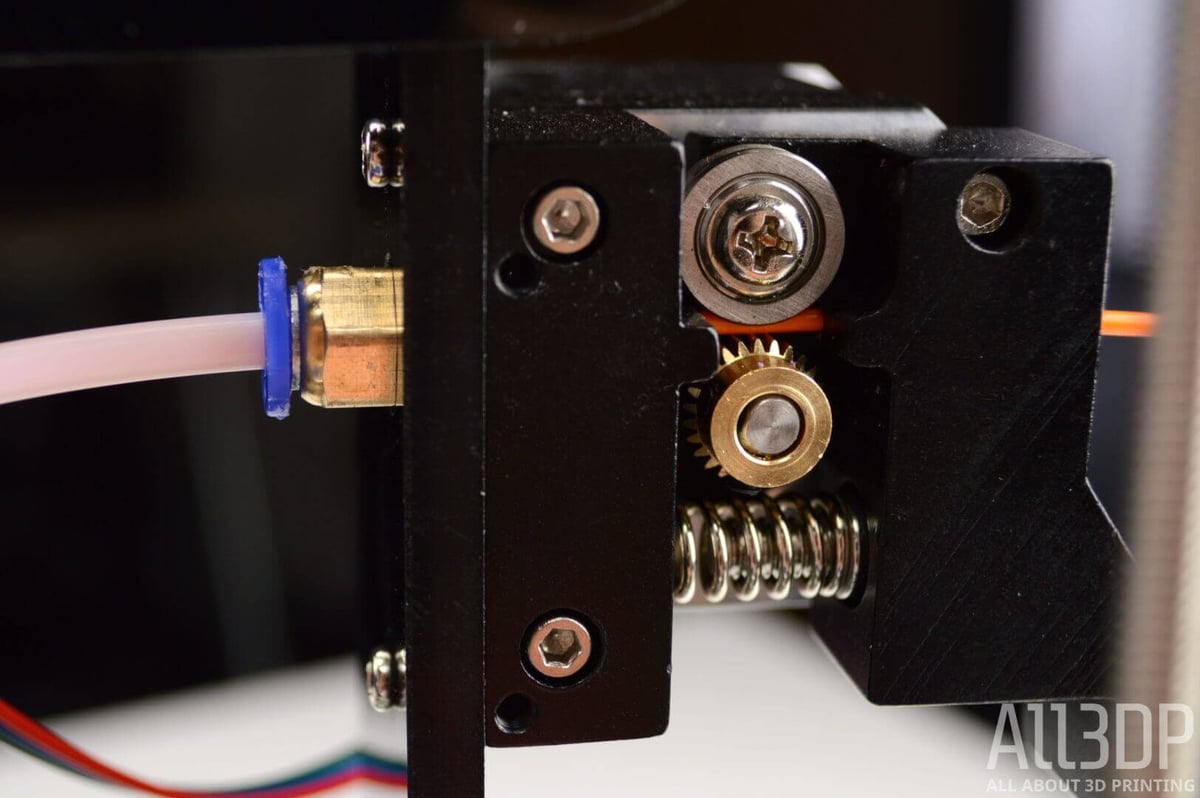
With the lever still pressed, feed more filament through the tube until you have a length at least equivalent to the height of the print head sticking out of the end. Feed it into the brass part on the print head and gently push it in until you see molten plastic extruding from the nozzle.
Take the other end of your nylon tubing and push it firmly into the hot end’s brass and blue stopper. These should remain secure now, and resist the push-pull friction of the extruder feeding and retracting filament when printing.
The printer is all set up now. And as a result, all that’s left to do is load a prepared g-code file onto a micro SD card and insert it into the card reader on the PCB.
Select your file from the STARTT’s “Quick Settings” menu. The STARTT should heat up and spring to life.
And that’s it, except for when it’s not.
What Next for this Cheap DIY 3D Printer Kit?
As a cheap DIY 3D Printer kit, most likely assembled by inexperienced hands, something will be wrong with your STARTT. Heck, there’s a lot wrong with ours, but it’s built, and it performs an action somewhat resembling 3D printing. The point is, there will be flaws with your build and with the STARTT itself. And they will translate to your prints as imperfections and ugly nastiness.
Thankfully, these are solvable. In a follow-up guide, we’ll detail the various ways you can pimp the STARTT with aftermarket and 3D printable upgrades, all without breaking the bank.
See you then.
Have you built the STARTT? How was it? Any tips and tricks you picked up along the way? Let us know in the comments below!