YouTuber Marco Reps makes a few DIY modifications to his Cetus 3D printer, turning it into a laser engraver that can etch 0.2-mm PCB traces.
It all started when YouTuber Marco Reps began preparing his Cetus 3D printer for the addition of a heated bed. That’s when he noticed an extra transistor on the motherboard…
A few DIY modifications later and he had turned his budget 3D printer into a PCB etching machine. The biggest change was the addition of a laser module to the print head.
Aimed at a pre-sensitized photoresist board, the laser exposes the topmost layer to the circuit’s pattern. The board is then developed to wash away all but the desired traces and footprints. Using this method, little power is needed.
In order to fix the laser module to the print head, Marco designed and 3D printed a custom holder. With a hint of humor in his voice, he adds:
“Had I used double-sided adhesive tape instead of printing the holder, this would have been no more than five minutes of work…”
How to Create a PCB Etching Machine
After discovering the extra transistor on the Cetus’ motherboard, Marco soon learned it was attached to a spare connector on the print head. Controllable with G-code, its purpose is to accommodate manually added accessories, like a laser engraver!
It just so happened that Marco had already purchased a laser module for an upcoming video. It contains a 400-nm 300-mW laser diode — perfect for exposing pre-sensitized photoresist.
Unfortunately the module came equipped with a non-ideal power supply. The original constant current source would have required time to switch on and off, and Marco needed the laser to do so instantly.
The solution? A 10-Ohm resistor!
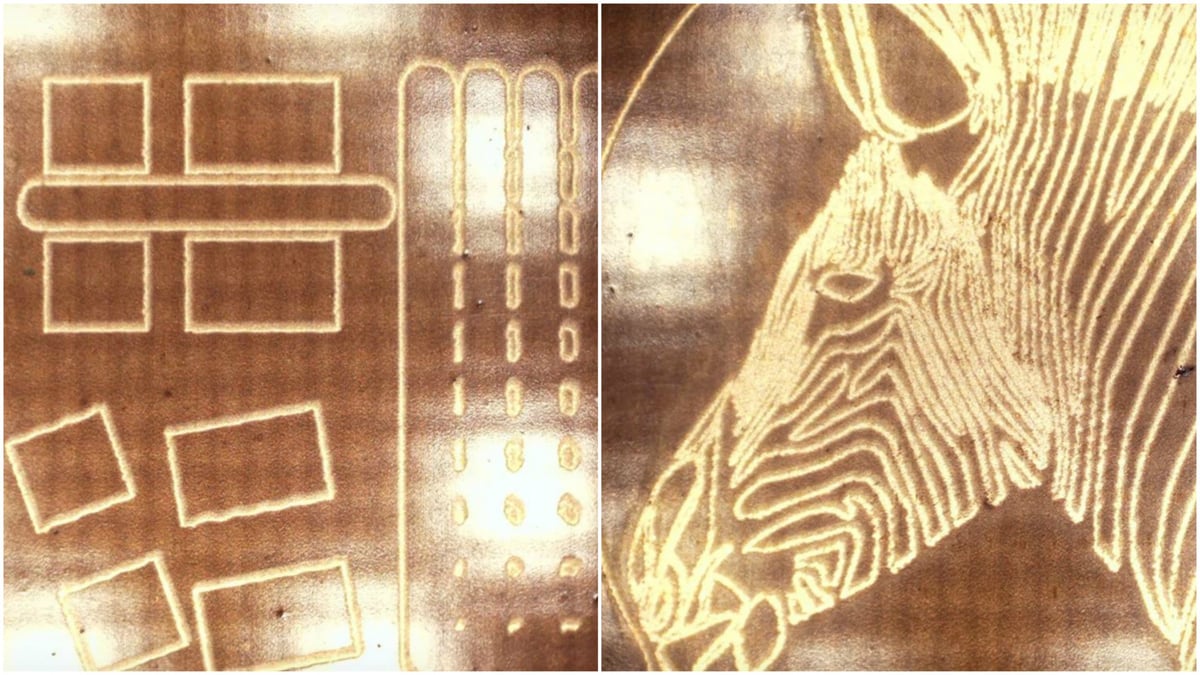
Once all necessary modifications were made and the machine was ready, Marco decided to ”jump in at the deep end”. His initial trial was a breakout board with .2-mm traces.
Although the traces and footprints turned out well, the lines appeared not to be straight. This he attributed to vibrations caused by high print speed and heavy mass in the print head.
In the engraver’s second run, Marco quantified its performance with a test layout. The results were nearly perfect SMT footprints down to 0402 and reliable traces down to 0.2 mm.
Marco remarks on the altered machine with its added component:
“In my experience, warning labels are indicators of good tools, so this printer is getting better and better.”
Marco Reps is a YouTuber from northern Germany. In his high-quality videos, which feature a refreshing brand of humor, he explores, modifies, and repairs new and old electronic equipment.
Source: Hackaday
License: The text of "Budget 3D Printer Becomes PCB Etching Machine" by All3DP is licensed under a Creative Commons Attribution 4.0 International License.