
Creality’s Sonic Pad Makes Klipper Installation Super Easy

Creality's Sonic Pad brings Klipper to its array of 3D printers with sleek hardware and an intuitive, open-source touchscreen OS. We tried it out on an Ender 3 V2.
This past year bore witness to the rise of Klipper in 3D printing, with the increasingly popular firmware finding its way to mass production after a small number of notable manufacturers launched 3D printers with Klipper as the stock firmware. The year also saw the launch of a couple of Klipper “screen” accessories that bypass the trouble of manually installing the firmware. Creality sits in this latter camp with its Creality Sonic Pad.

Creality’s tried-and-true 3D printers, such as the ubiquitous Ender 3, have always made excellent companions to Klipper. With such a large user base, these printers benefit from a wealth of community experience, liable to cover anything you want to do with the machine.
Community resources don’t make delving into unfamiliar territory any less daunting, however, and compiling a new firmware can be one of those things that inexperienced hobbyists simply avoid. So, Creality has launched the Sonic Pad: a Klipper screen that makes getting Klipper up and running on the company’s many 3D printers easy for everyone – and at a compelling price.
What is Klipper?
If you’re not already familiar with Klipper, it’s a firmware that came about as an alternative to Marlin when the limited processing capabilities of 8-bit mainboards started bottlenecking print speeds. Instead of using the 3D printer’s primary mainboard as the main processing powerhouse, Klipper is installed on a secondary Linux-based computer – usually a single-board computer (SBC) like a Raspberry Pi – which takes over the heavy G-code processing, relegating the printer’s mainboard to simple execution with a lightweight firmware.
32-bit mainboards and Marlin 2 helped to catch up a bit, but when you see people talking about printing faster by installing Klipper, that added processing power is still a big part of why. The other reasons can be primarily attributed to two features: input shaping and pressure advance. The latter is Klipper’s version of Marlin’s linear advance that improves quality by ensuring consistent pressure in the nozzle, the former a method to eliminate ringing by accounting for vibrations during prints.
Installing Klipper is fairly straightforward if you’re familiar with SBCs or software in general, but it can be a little intimidating if you’re not. That’s one reason recent releases like Creality’s Sonic Pad are so exciting – they dramatically simplify the tricky installation process.
Another reason to note plug-and-play solutions like the Sonic Pad is they save you the hassle of sourcing an SBC, touchscreen interface, and casing. Getting your hands on a suitable Raspberry Pi is still difficult, and these products sidestep the problem.

What is the Sonic Pad?
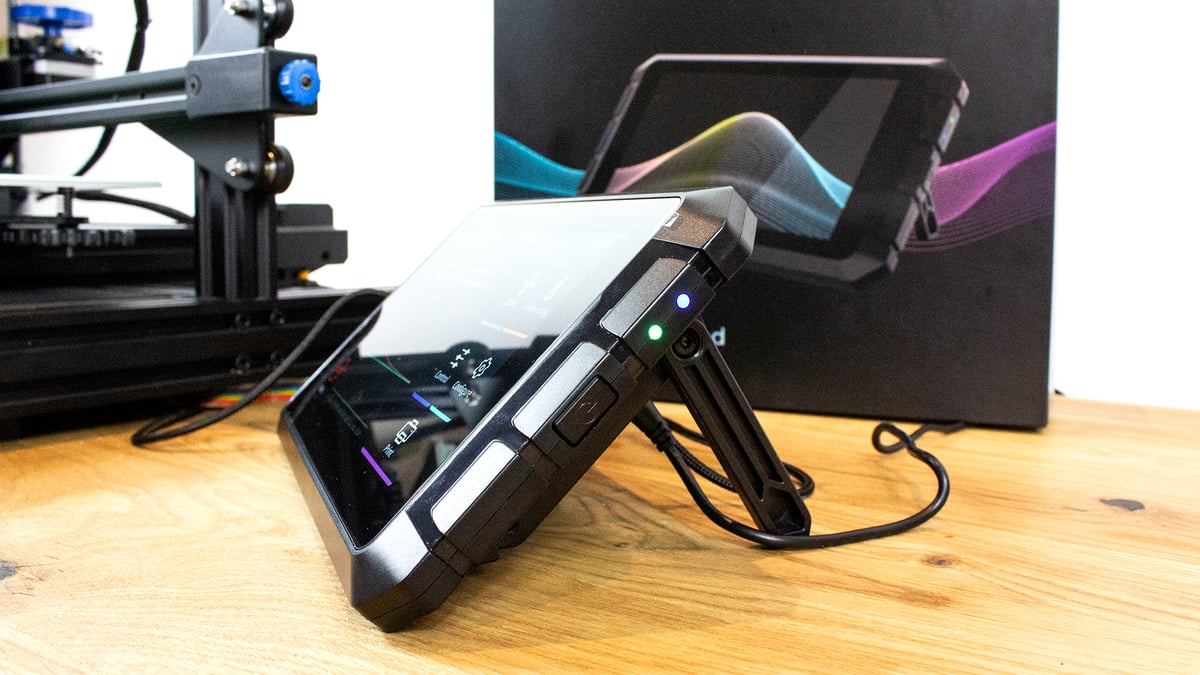
Creality’s Sonic Pad is a system on module (SoM) behind a 7-inch 1024 x 600 IPS touchscreen running a pre-installed version of Klipper with the Fluidd user interface and a custom, open-source touchscreen OS Creality calls Sonic Pad OS. The board hosts a Creality T800 SoC with 2 GB of RAM and 8 GB of ROM. It has ample connectivity, with 4 USB-A ports, 802.11b/g/n Wi-Fi, 100 Mbps LAN, and a PS/2 port for the included ADXL345 accelerometer (which we’ll explain the use of below).
The Sonic Pad walks users through the installation process for Creality’s popular 3D printers with an easy menu that allows you to simply select your machine and automatically generate a bin file to flash to your 3D printer’s mainboard. The process offers clear, easy-to-follow steps and avoids the hassle of trying to figure out how to get Klipper loaded onto an independently-sourced SBC. It’s about as close to plug-and-play as you can get for anything involving firmware installation.
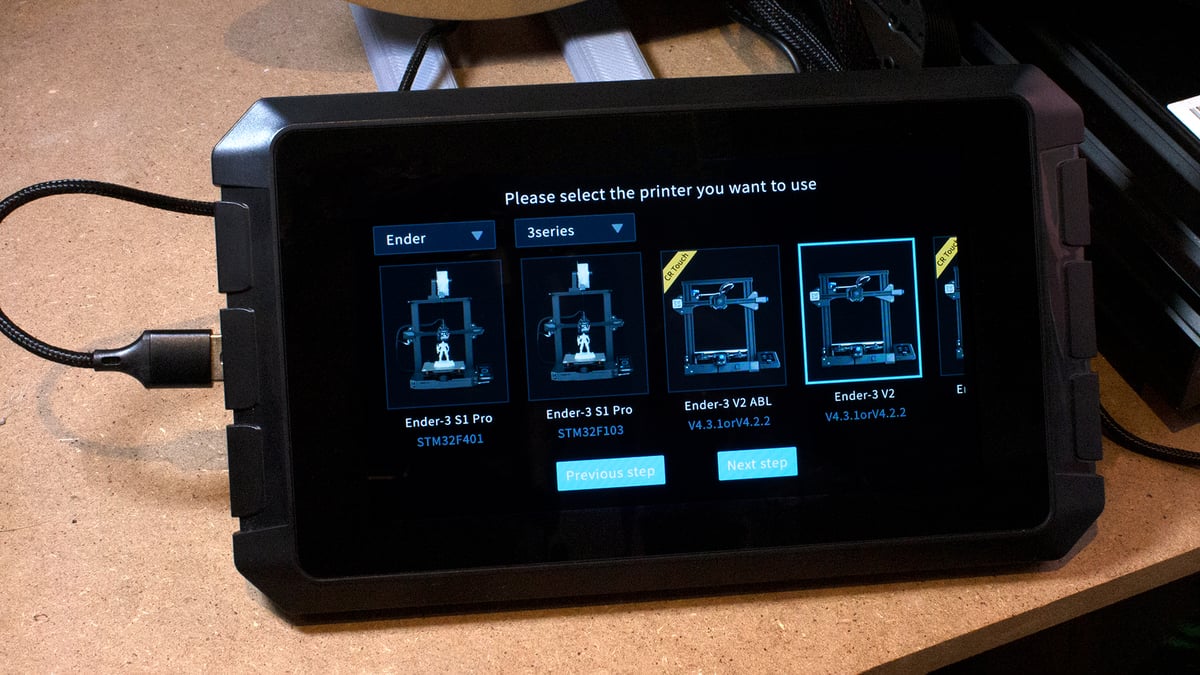
When Creality launched the Sonic Pad, it only supported Ender 3 3D printers, accompanied by a pinky promise that more printers would be supported in the future. The company has made good on that promise, with updates quickly following the device’s release that adds support for all Creality 3D printers, plus user-definable third-party machines.
In a regular Klipper installation process, you need some information about your printer that won’t be obvious if you’re not familiar with tech at the board level – things like pinout are essential to know. Most of Creality’s 3D printers have profiles created by the community that save less familiar users the trouble of sourcing these details, but it’s reassuring to use something straight from the manufacturer.
Though the simplified Klipper installation process is the Sonic Pad’s major selling feature, it also offers good hardware value at $159 and includes a mix of other simplified processes that make the user experience with Klipper a little more straightforward – that’s what we’ll dive into below.
First Impressions
We have to give Creality credit for the Sonic Pad’s surrounding experience as much as the product itself; right down to the packaging, we’ve felt like we’re dealing with a premium product. On receipt, the screen is neatly packaged in a quality box that we’d expect to receive a fully-fledged tablet in. It comes with various outlet adaptors so you can choose the connection suitable to your region, plus a braided micro-USB cable, a plastic-cased ADXL345 accelerometer with its axes clearly labeled for orientation, and an ethernet cable should you prefer a direct network connection over Wi-Fi. We opted for a wireless setup and installed the system on our Ender 3 V2.
We were pleased to see the tablet pull over-the-air updates on boot-up – no need to watch for new versions of Sonic Pad OS on Creality’s downloads page. Instead, you get a notification that an update is available when you turn the Sonic Pad on, which gives the option to download and install it immediately or skip it for now.
Aside from simplifying the Klipper installation process, the Sonic Pad makes some day-to-day 3D printer tasks and maintenance easier with pre-defined macros and a well-organized interface. Bed leveling comes quickly to mind here as an easily accessible configuration menu that feels modern and takes advantage of the large, tappable tablet interface. Nothing groundbreaking, but very convenient.
Though it didn’t impact our time with the Sonic Pad, we’re glad Creality has published the Sonic Pad’s SSH information. This should help advanced users customize the hardware.
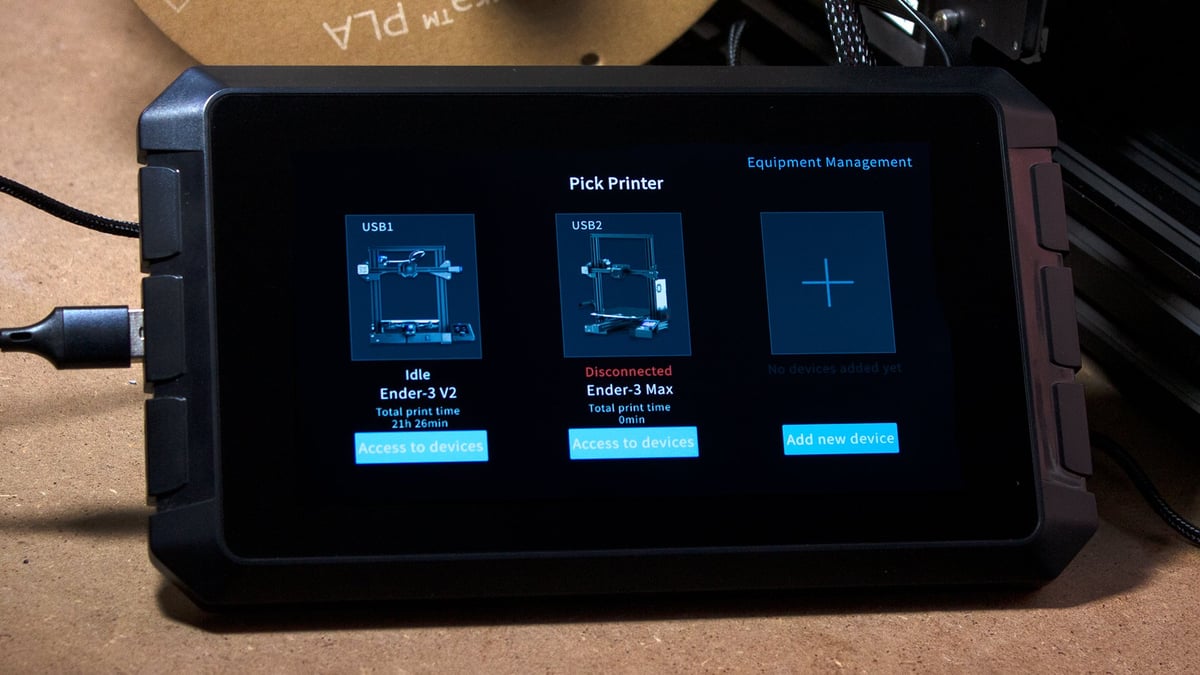
Since the Sonic Pad’s launch, updates have added multi-printer support for up to four machines – one for every USB port – and non-Creality 3D printer compatibility that makes the device much more useful if you have systems from a variety of manufacturers. The installation process for non-Creality printers is a bit more involved, requiring users to fill out details about their 3D printer to generate the correct firmware. Regardless, the option greatly extends the Sonic Pad’s value to many users.
Like the initial installation process, adding multiple machines to the Sonic Pad is simplified compared to a DIY Klipper host. Typically, when adding a 3D printer to a Klipper host, you install additional instances of the firmware and connect each instance to their OS by specifying an IP address. You can then easily switch between printers with a few clicks. For the Sonic Pad, those instances already exist, and you need only select “Pick Printer” in the screen’s top right corner. The Sonic Pad prompts you to add a device with an empty space, where you then repeat the initial installation process for that instance. Once installed, you can quickly switch printers through the same “Pick Printer” option on the tablet or via the right-side collapsible menu via Fluidd in your web browser.
Advanced Functions
So, Creality’s Sonic Pad makes the installation of and day-to-day interactions with Klipper a little more straightforward, but what about those extra features that help Klipper to print faster and in better quality?
The Sonic Pad makes an effort to simplify some of Klipper’s more advanced settings under the “advanced options” menu and implements them in an accessible way. Unfortunately, these features are held back by a lack of clear explanation and general oversights that will leave unfamiliar users unaware of what these important settings accomplish.
Input Shaping
Input shaping, or resonance compensation, is already a pretty simple process with an ADXL345 accelerometer. The menu options in Creality’s Sonic Pad simplify it further with the setup reduced to a couple of taps instead of entering commands in the console.
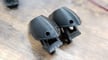
That’s not to say it eliminates all preparation, though. You’ll need to print a mount for the accelerometer. For some reason, Creality only provides a file for the X-axis mount but not the Y-axis. The company has added new mount files for its 3D printers on the Sonic Pad download page, but seemingly half of the required files are missing.
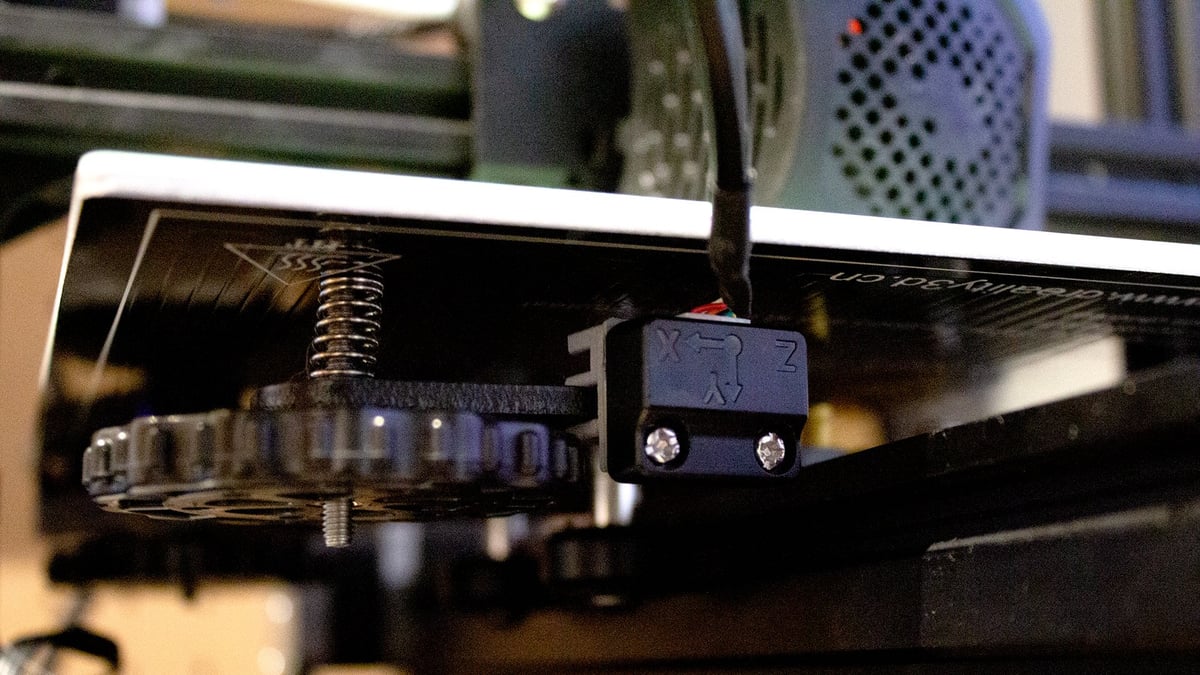
For our testing on the Ender 3 V2, we opted to use a two-in-one bracket design by Callum MacArthur that easily clips to the print head and Y-axis. After this, the automated test was a breeze to run for both axes.
Creality botches things a little, with incomplete instructions that could cause beginners to mess up their input shaping configuration. For one, there’s no mention of accelerometer orientation in the steps – something vital for an accurate reading. If you’re using Creality’s mount design for the X-axis, you can’t go wrong, but users won’t be in the know while sourcing their Y-axis designs.
Also frustrating is the lack of benchmark guidance. For a piece of hardware designed to make things easy, Creality missed an opportunity to give users clearly observable results from input shaping with their device. This lack of instruction also leaves you hanging when reigning in inappropriate values for settings, such as the Sonic Pad’s default acceleration being maxed out at an excessive 5000 mm/s. The Ender 3 V2 profile in the Klipper repository caps acceleration at 3000 mm/s.
Printing a ringing tower is a straightforward benchmark that can also help to show users where to limit acceleration. Users would do well to print a ringing tower by following steps one to six on Klipper’s resonance compensation page to get an idea of how the max acceleration should be tuned on a given machine.
Pressure Advance
Pressure advance is a calculation that accounts for differences in extrusion (under or over) at the acceleration and deceleration of the print head during an extrude movement. It makes extrusion more consistent, makes corners sharper, and is an important part of increasing print speed without a loss of quality.
The extent of pressure advance in Creality’s Sonic Pad OS is a single option under “extrusion configurations” in the advanced options menu. Again, the Sonic Pad simplified the process – eliminating the need to manually edit the printer config file with a simple setting – but it leaves it up to the user to figure out the feature’s value and how to go about finding the correct setting.
We won’t go into detail about calculating pressure advance here but be sure to read our guide: Klipper: Pressure Advance – Simply Explained.
Is it Worth it?
The Creality Sonic Pad presents good value at $159 for its hardware and succeeds at simplifying the installation and daily use of Klipper. For us, it’s the best way to experience 3D printing with Klipper that we’ve experienced so far – without all the fuss of sourcing our own hardware and installing everything manually.
However, Creality’s marketing of dramatically increased print speed with the Sonic Pad and the sloppy implementation and guidance around crucial features to achieve that speed (like input shaping) leave a sour taste in the mouth.
Without a more thoughtful implementation of input shaping and pressure advance with full, clear instruction on the process that leaves users understanding what they’ve accomplished, the Sonic Pad can’t achieve the two-to-five times faster print speeds that Creality has claimed for the product. Not to mention the excessive acceleration that could hinder print quality if left unchanged. If inexperienced users – arguably the primary target of the Sonic Pad – experience poor print quality with a default Klipper installation with the Sonic Pad, they need to be told what to change.
Still, the product value is high and eliminates the bulk of learning curves in getting Klipper up and running. Though Creality’s oversights have stopped the product short of being perfect for complete newcomers, it does simplify enough to make it very worthwhile. The well-designed Sonic Pad OS makes it easy to change advanced options on the fly – just be sure to read up on input shaping and pressure advance. For more experienced users, it’s a thoroughly enjoyable slab of Klipper-enabling hardware that you can actually get your hands on.
Correction – January 17, 2024: A previous version of this article erroneously referred to Klipper’s MCU component by the host component’s name “Klippy.”
License: The text of "Creality’s Sonic Pad Makes Klipper Installation Super Easy" by All3DP is licensed under a Creative Commons Attribution 4.0 International License.
CERTAIN CONTENT THAT APPEARS ON THIS SITE COMES FROM AMAZON. THIS CONTENT IS PROVIDED ‘AS IS’ AND IS SUBJECT TO CHANGE OR REMOVAL AT ANY TIME.