This article is free for you and free from outside influence. To keep things this way, we finance it through advertising, ad-free subscriptions, and shopping links. If you purchase using a shopping link, we may earn a commission. Learn more
Blender tutorial
3D Printed Maps: How to Make a Topo Map to 3D Print

Advertisement
Have you ever been hiking or to a wonderful landscape and just taken pictures of what you saw? In this tutorial on you will learn how to create a 3D printable map of the mountain you conquered.
For this project you will need the following free software tools. Please download and install them:
- The 3D mesh editing program Blender
- You will need a picture editing tool. You can use your personal favorite, but if you do not have one, you can use The Gimp 2.
- A software to unpack .zip files. If you do not have one, use the 30 day trial version of WinRAR that is also available for Mac OS X and Linux. You will not be charged after the trial expires.
Step 1: Find, download and crop your landscape
- Download the topographic data of the landscape you want to print for free from the SRTM Tile Grabber. Our earth is pretty big, so you will need something like another map as a reference to locate the corresponding quadrant.
- Unpack the .zip folder you downloaded and open srtm_**_**.TIFF with your favorite picture editing program.
- You will see a black and white topographic map. Use a map again to reference the area you want to print and cut out a quadratic area. Export your piece of the map to a .jpg file.
Step 2: Create a 2D map
- Open Blender and delete the cube by right-clicking on it in the Scene menu found in the upper right hand corner and selecting Delete or simply pressing X followed by Enter.
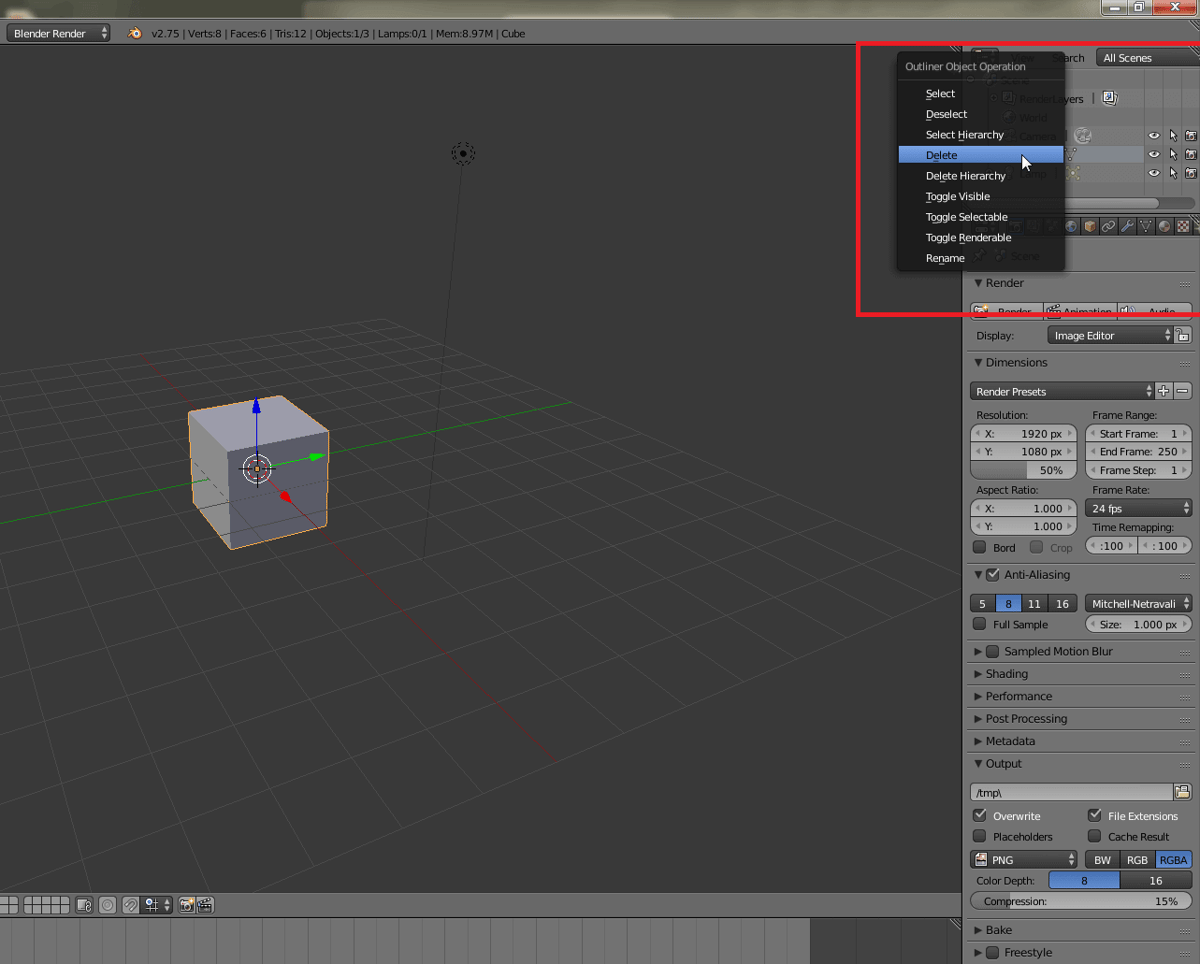
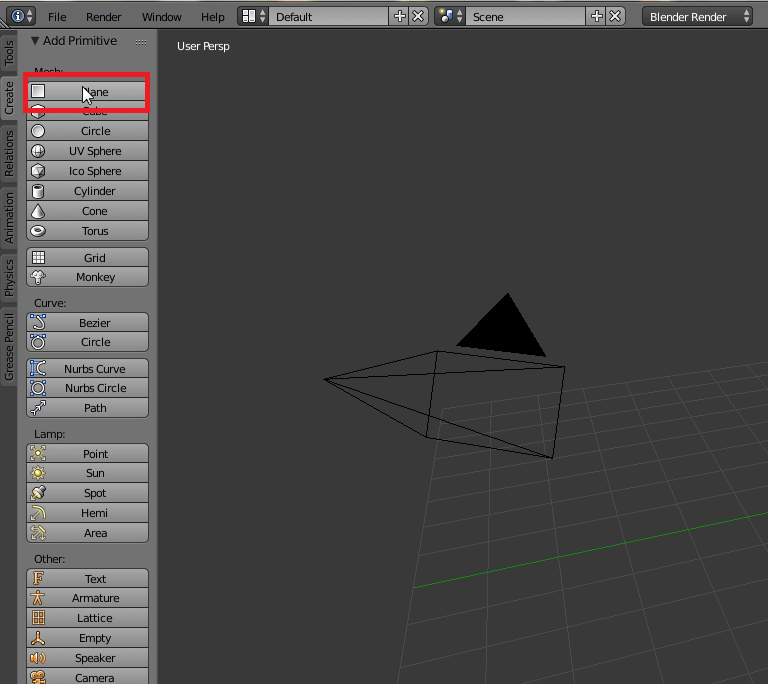
Delete the cube in the Scene Menu. You can also press X while hovering over the cube to delete it. - Click on Create on the left side, then select Plane.
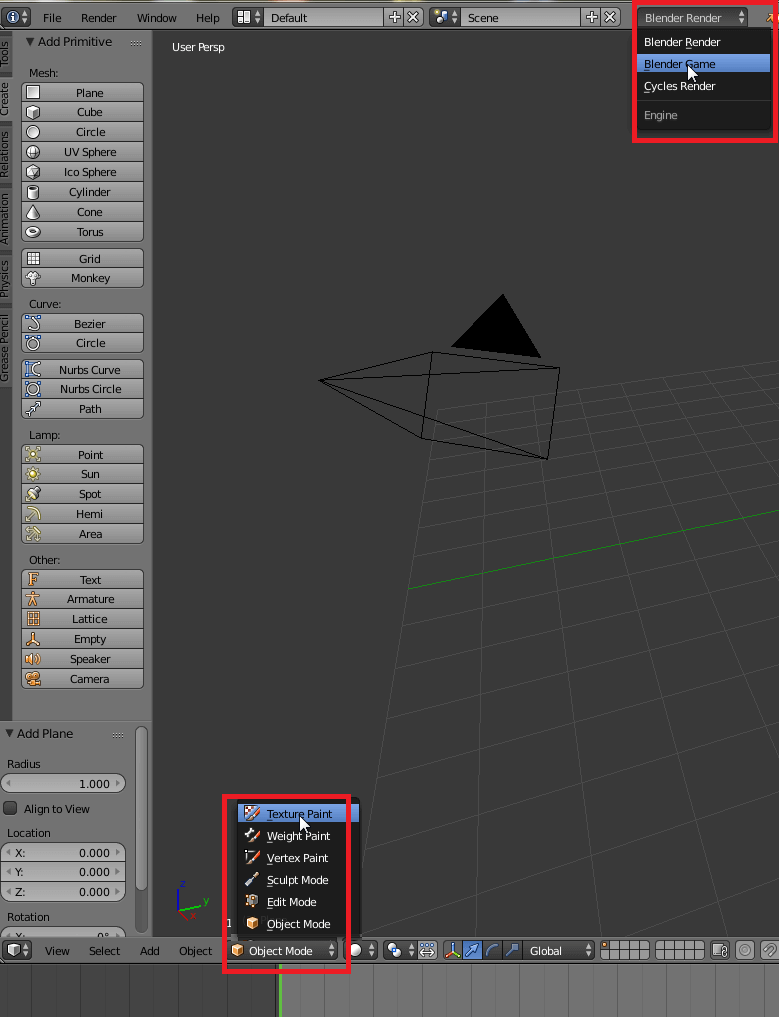
- Change the engine from Blender Render to Blender Game. Also switch from Object Mode to Texture Paint.
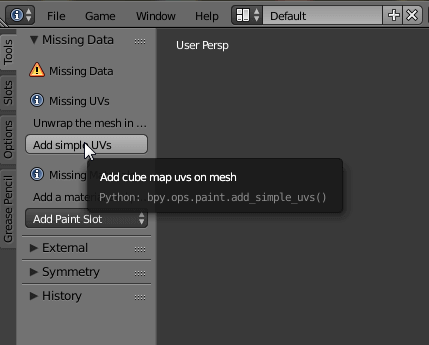
- Blender now requires some data, so add a simple UV by clicking on Add simple UV’s on the left side.
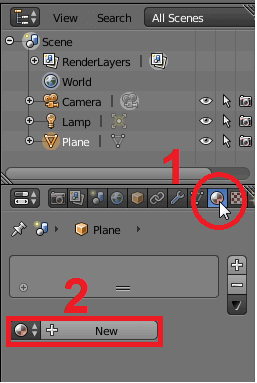
UV mapping is the technique used to “wrap” a 2D image texture onto a 3D mesh. U and V are the names of the axes of a plane, since X, Y and Z are used for the coordinates in the 3D space. - Now select the plane in the Scene menu, click on Add Material in the Editing window and select + New.
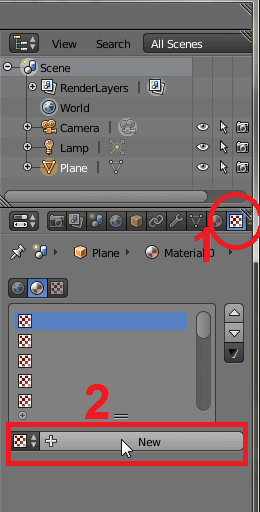
- Switch to Add Texture in the Editing window and also click on + New.
- Click Open and select the .jpg file of the landscape.

Step 3: Make it 3D
- Switch back to Edit Mode.
- Switch your Workbench to Tools and click on Subdivide. This will divide your plane into many equal sized rectangles. You can either click a few times on Subdivide until you recognize a drop in performance or set the number of cuts to 100 then 200… until you notice a drop of frames per second. If your performance is affected too much, simply press CTRL + Z to rewind one step.
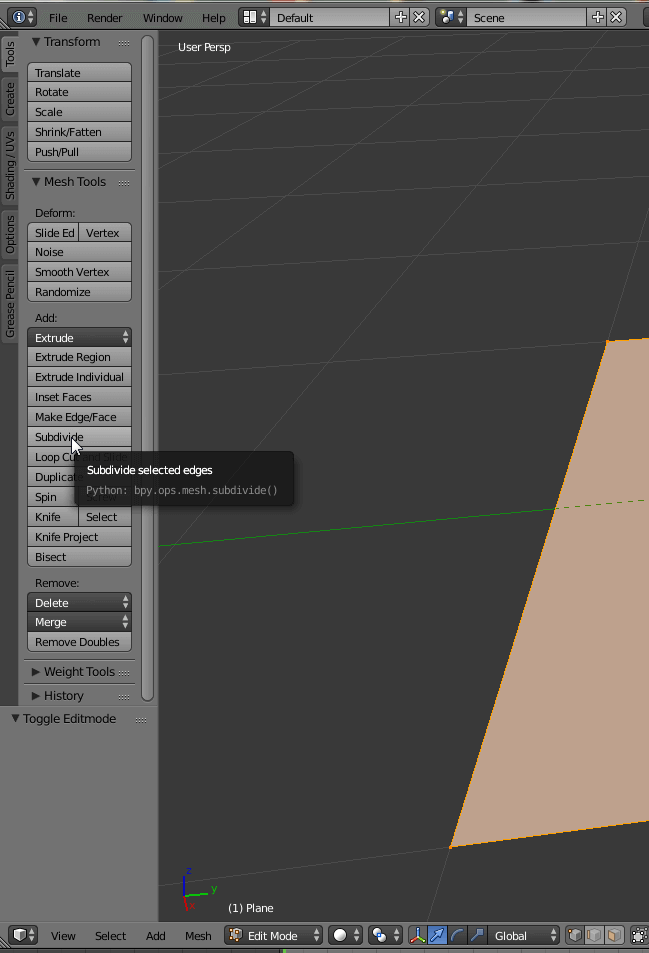
Subdivide the plane into many little quadrants. 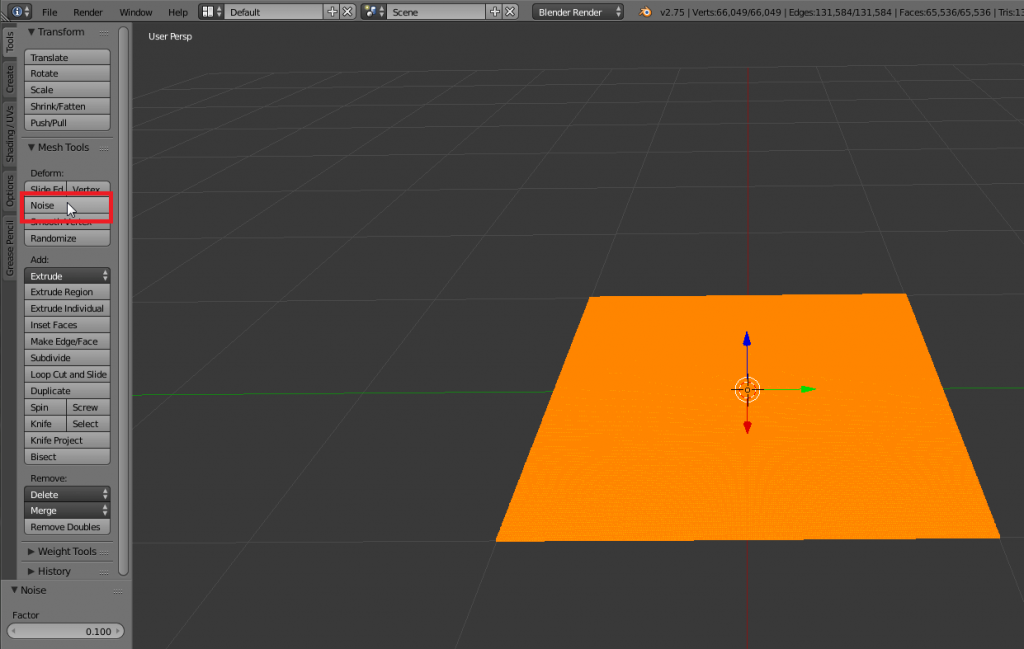
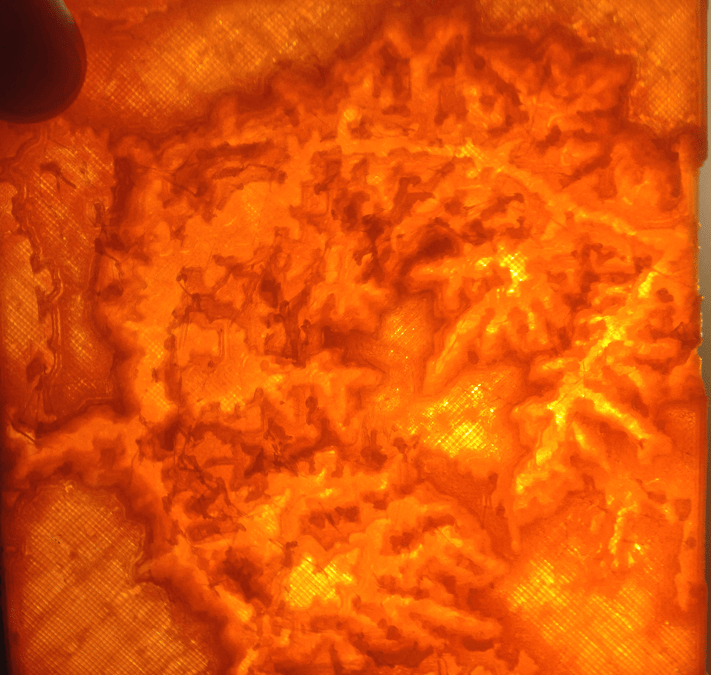
Interpret the black and white pattern with the Noise Tool. 
Select the landscape. 
- Now click on Noise. This will interpret your texture using an algorithm. Click on it a few times, then switch to Object Mode and check whether you are satisfoed with the height of the landscape.
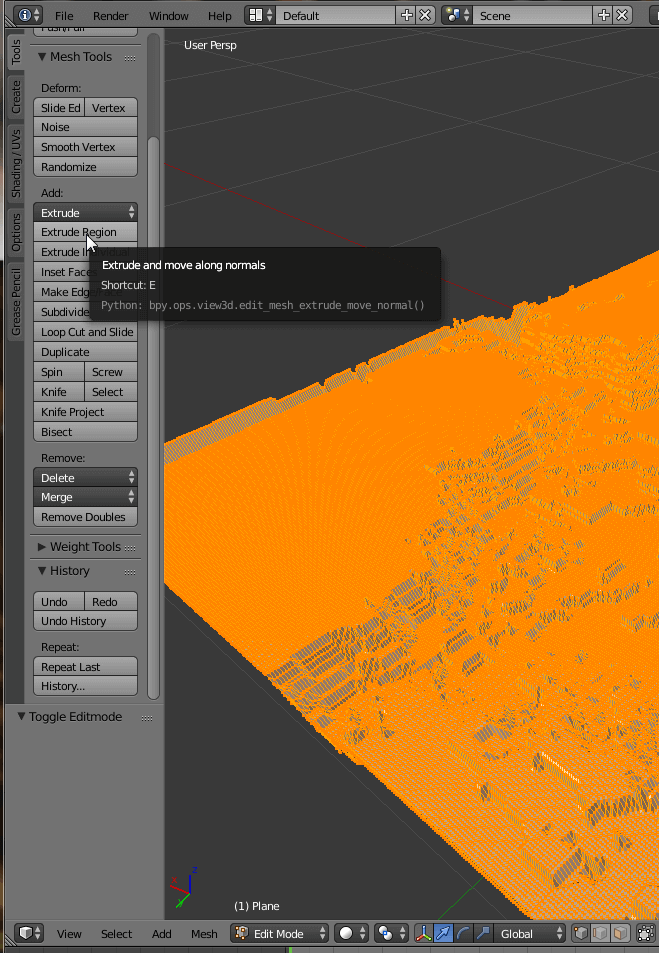
- Take a look onto your object from above and switch to Edit Mode. The map should shine orange, if not press, the A key to select everything. Then click on Extrude Region. Now move your mouse to make the map thicker. You will change the direction and thickness of the extrude later, so simply left-click somewhere.
- In the Operator window you can change the parameters of the Extrude: Change the X and Y Vector of the Extrude to 0 and the Z Vector to -0.2.
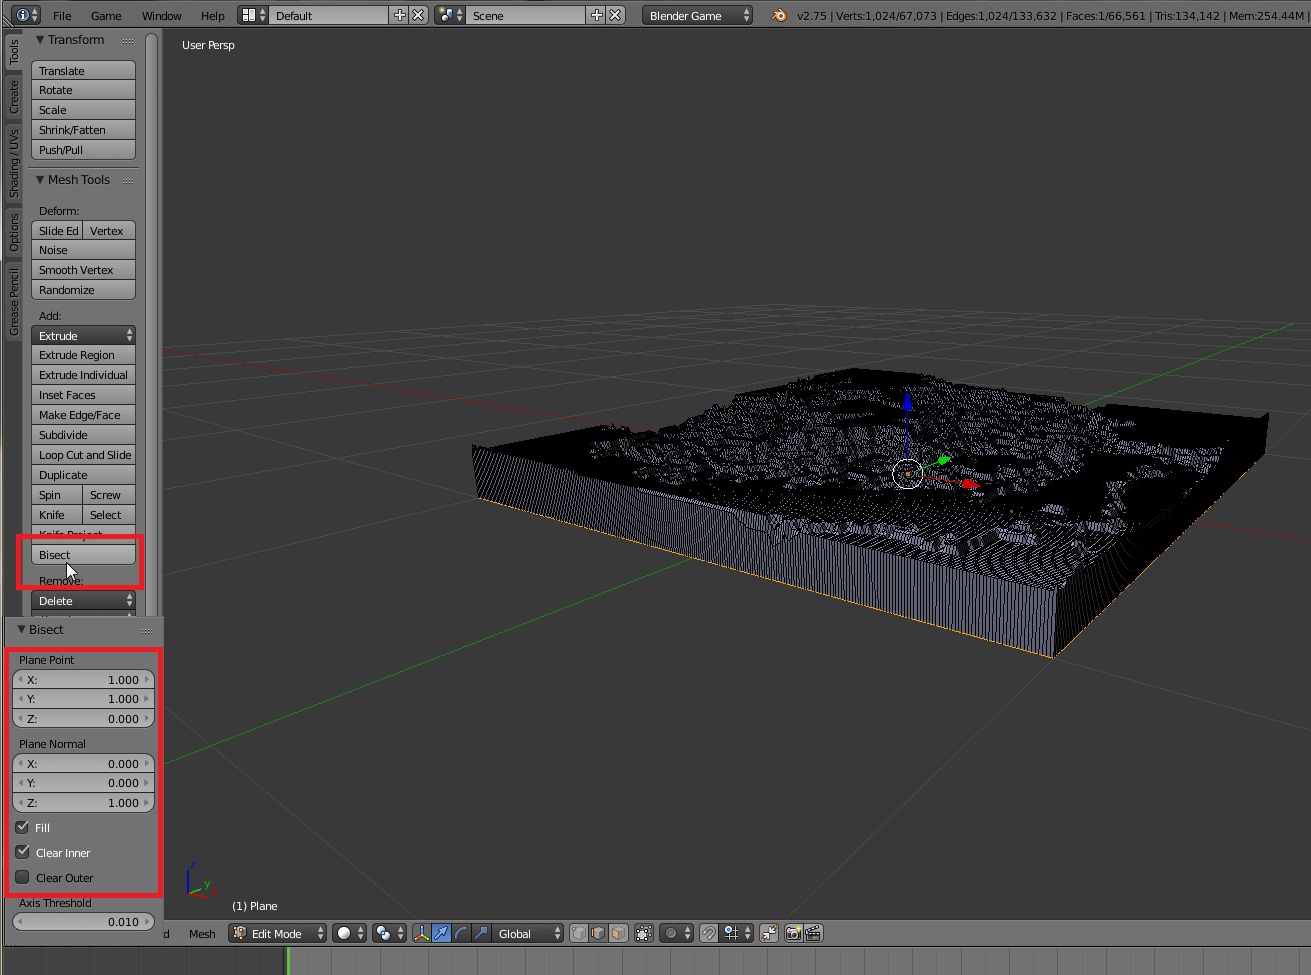
- Press A again to select all components of your map. Then click on Bisect and click and drag with your left mouse button. It does not matter, if the cut plane is not horizontal.
- Set the Plane Point values of the Cut plane to X = 1, Y = 1 and Z = 0.
- Set the Plane Normal values to X = 0, Y = 0 and Y = 1.
- Now your topographic map is ready to be exported and 3D printed! To export click on File > Export and select the file type you need.


You will need to scale the map in your slicer program. Right now the map is about 1x1mm big. Now you can 3D print your map. Have fun!
Advertisement
License: The text of "3D Printed Maps: How to Make a Topo Map to 3D Print" by All3DP is licensed under a Creative Commons Attribution 4.0 International License.